USB 7335 - DJ Equipment US Blaster - Free user manual and instructions
Find the device manual for free USB 7335 US Blaster in PDF.
| Product Type | Professional DJ CD Player |
| Power Supply | Mains, voltage selector (110-230 V) |
| Main Functions | Jog & Shuttle, Pitch Control, Looping (IN/OUT/RELOOP), Repeat, Programming (20 tracks), Search, Single/Continue, Time display |
| Looping System | IN, OUT, RELOOP buttons with indicator lights |
| Pitch Control | Pitch Control (fader), Pitch Bend +/-, Automatic Reset |
| Playback Modes | Single (stop after each track) or Continue (continuous playback) |
| Display | LCD display with Elapsed Time, Remaining Time, Total Remaining Time modes |
| Remote Control | Built-in infrared sensor, do not obstruct |
| Outputs | Line output (RCA) for mixer |
| Controller Connectivity | DIN connector for controller connection (mini-DIN cable included) |
| Safety | Do not open, contact dealer if faulty, use correct power cord |
| Maintenance | Dry or slightly damp cloth, no chemicals |
| Fuses | Spare fuse (values in specifications), replace when off |
| Warranty | 1 year parts and labor (crossfader 90 days), repair by US Blaster authorized service |
| Operating Temperature | 5 °C to 35 °C |
Frequently Asked Questions - USB 7335 US Blaster
User questions about USB 7335 US Blaster
0 question about this device. Answer the ones you know or ask your own.
Ask a new question about this device
Download the instructions for your DJ Equipment in PDF format for free! Find your manual USB 7335 - US Blaster and take your electronic device back in hand. On this page are published all the documents necessary for the use of your device. USB 7335 by US Blaster.
USER MANUAL USB 7335 US Blaster
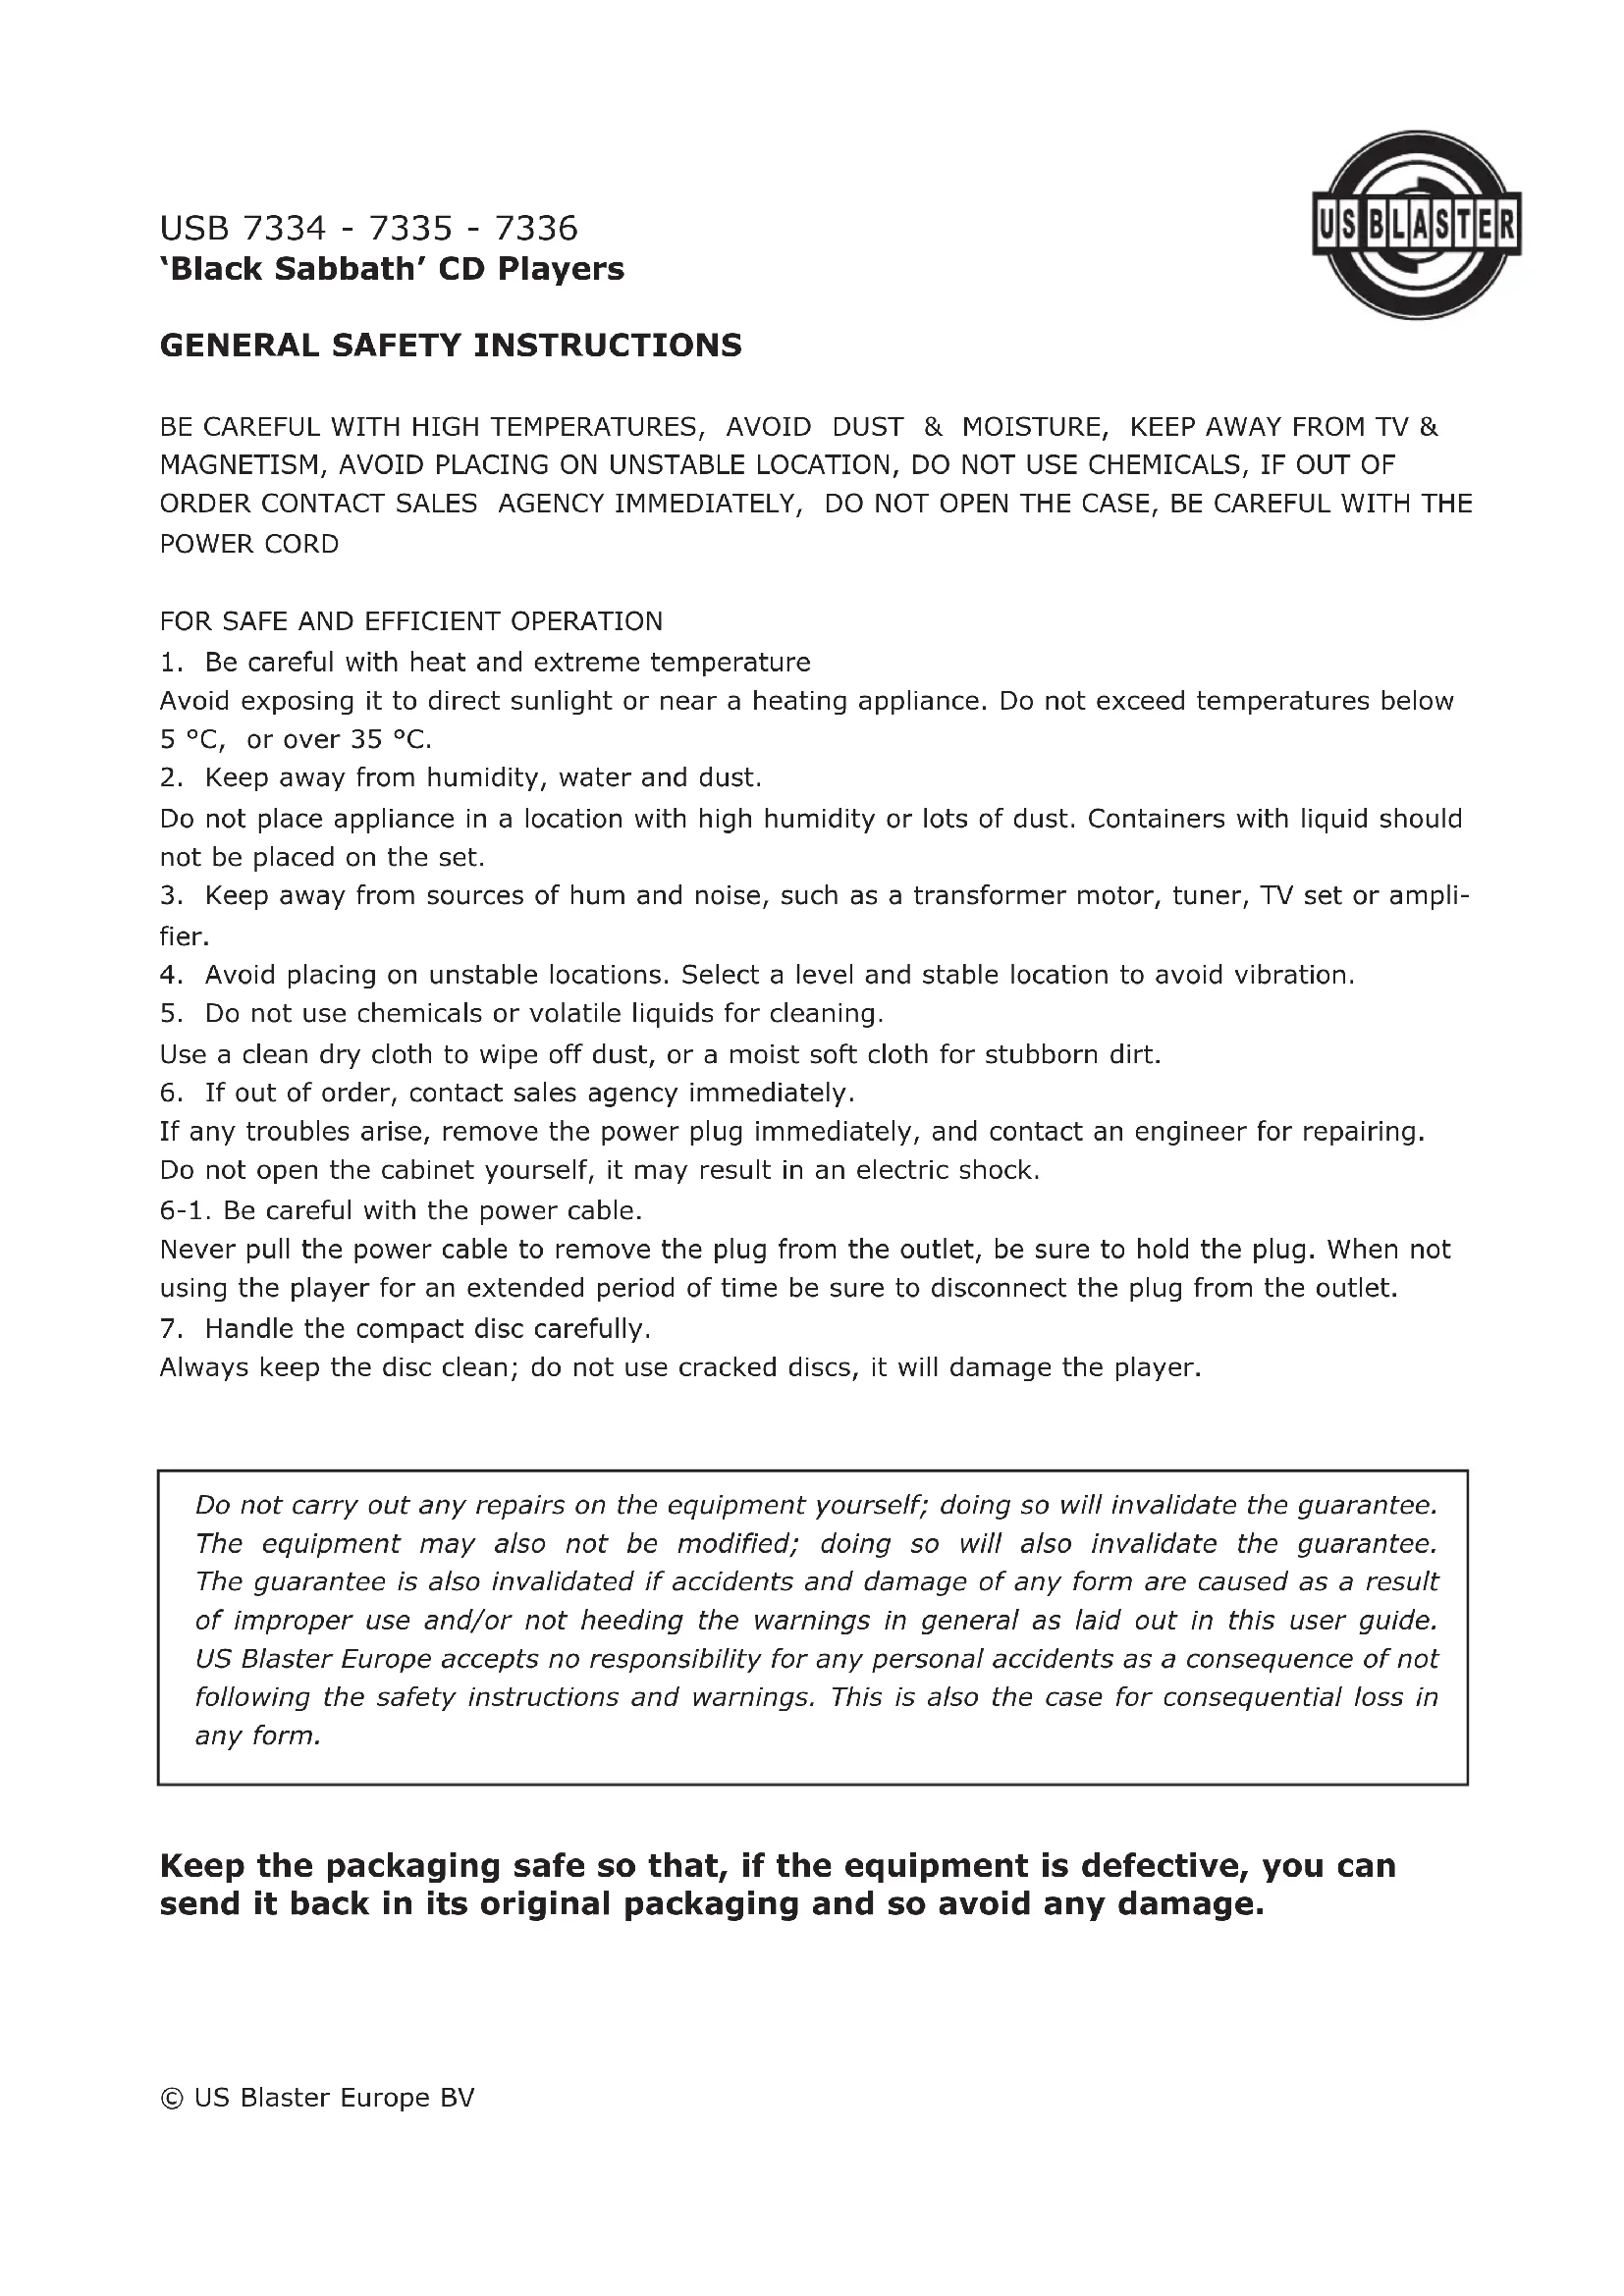
GENERAL SAFETY INSTRUCTIONS
BE CAREFUL WITH HIGH TEMPERATURES, AVOID DUST & MOISTURE, KEEP AWAY FROM TV & MAGNETISM, AVOID PLACING ON UNSTABLE LOCATION, DO NOT USE CHEMICALS, IF OUT OF ORDER CONTACT SALES AGENCY IMMEDIATELY, DO NOT OPEN THE CASE, BE CAREFUL WITH THE POWER CORD
- Be careful with heat and extreme temperature
Avoid exposing it to direct sunlight or near a heating appliance. Do not exceed temperatures below 5^ , or over 35^ .
- Keep away from humidity, water and dust.
Do not place appliance in a location with high humidity or lots of dust. Containers with liquid should not be placed on the set.
-
Keep away from sources of hum and noise, such as a transformer motor, tuner, TV set or amplifier.
-
Avoid placing on unstable locations. Select a level and stable location to avoid vibration.
-
Do not use chemicals or volatile liquids for cleaning.
Use a clean dry cloth to wipe off dust, or a moist soft cloth for stubborn dirt.
- If out of order, contact sales agency immediately.
If any troubles arise, remove the power plug immediately, and contact an engineer for repairing. Do not open the cabinet yourself, it may result in an electric shock.
6-1. Be careful with the power cable.
Never pull the power cable to remove the plug from the outlet, be sure to hold the plug. When not using the player for an extended period of time be sure to disconnect the plug from the outlet.
- Handle the compact disc carefully.
Always keep the disc clean; do not use cracked discs, it will damage the player.
Do not carry out any repairs on the equipment yourself; doing so will invalidate the guarantee. The equipment may also not be modified; doing so will also invalidate the guarantee. The guarantee is also invalidated if accidents and damage of any form are caused as a result of improper use and/or not heeding the warnings in general as laid out in this user guide. US Blaster Europe accepts no responsibility for any personal accidents as a consequence of not following the safety instructions and warnings. This is also the case for consequential loss in any form.
Keep the packaging safe so that, if the equipment is defective, you can send it back in its original packaging and so avoid any damage.
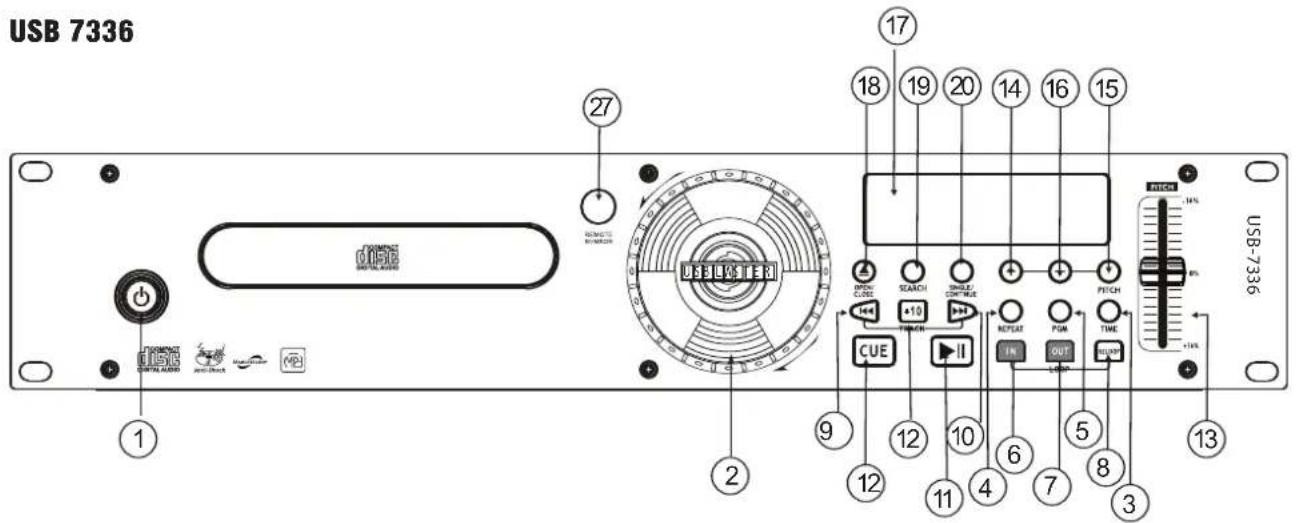
- POWER BUTTON Press the power switch to turn the unit on. To switch the POWER off press the POWER switch again.
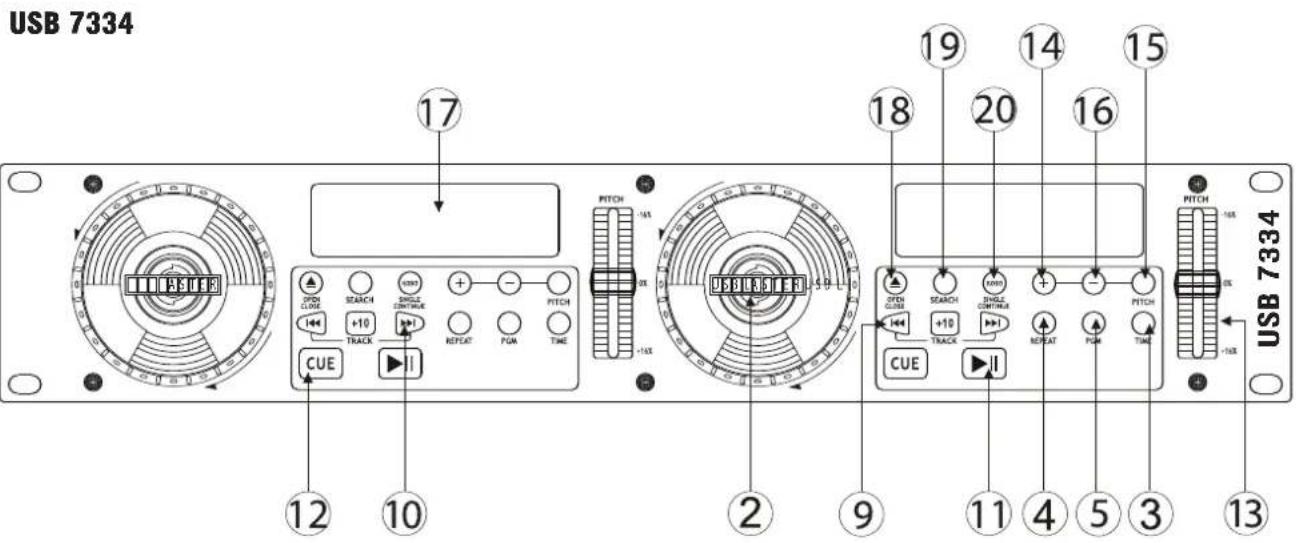
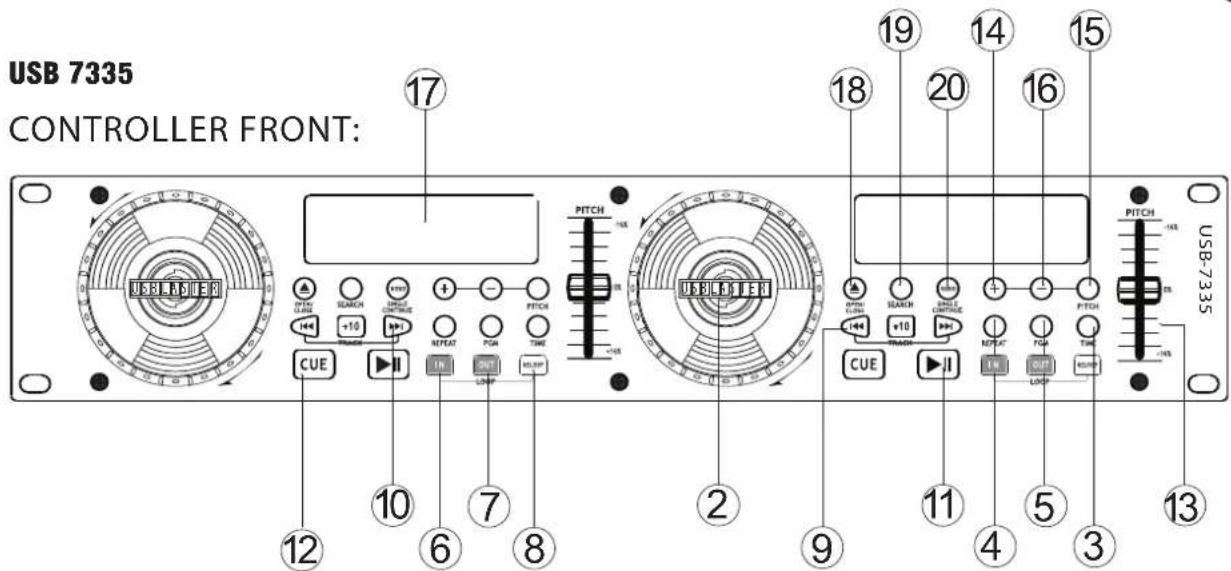
2. JOG & SHUTTLE WHEELS
Shuttle: Use the dial to select the scanning direction and speed. The disc is scanned in forward direction when the shuttle dial is turned clockwise from the neutral position and in the reverse direction when the shuttle dial is turned counter-clockwise. The scanning speeds up when the shuttle dial is turned faster.
Jog: In pause mode, if you turn the jog, the point at which the sound is being produced moves by a number of frames corresponding to the number of clicks. Clockwise moves the point forward, counterclockwise moves the point backward.
In play mode, the jog increases or decreases the speed of the song. (clockwise: increase, counter-clockwise: decrease).
3. TIME BUTTON
Use this button to choose the time mode: Elapsed time, remaining time or total remaining time.
4. REPEAT BUTTON
Use this button to repeat one track or all the tracks of the CD.
5.PGM BUTTON
You can program several tracks (20 tracks max.):
- Press the PGM button to enter the program mode.
- Use the skip track buttons to choose the track you want, then press the PGM button.
- Repeat the operation to select all the tracks you want.
- Press the play / pause button to start the playback.
6. IN BUTTON (LOOP SYSTEM)
This button sets the beginning of the loop. The loop indicator flashes on the display.
7. OUT BUTTON (LOOP SYSTEM)
When you press this button, you set the end point of the seamless loop and you start the loop. To finish the loop, press this button again.
8. RELOOP BUTTON (LOOP SYSTEM)
Use this button to start the last saved loop.
9. SKIP I<< BUTTON
Use this button to re-start the track or to select the previous track.
10. SKIP >> BUTTON
Use this button to select the next track.
11. PLAY/PAUSE BUTTON
Each time you press the PLAY/PAUSE button, the operation changes from play to pause or from pause to play.
12. CUE BUTTON
Pressing the CUE button during play provides a return to the position at which play was started.
13. PITCH CONTROL
Use this fader to increase or decrease the speed of the track.
14. PITCH BEND + BUTTON
The pitch will automatically rise when the + button is pressed and return to the original pitch when it is released.
15. PITCH BUTTON
If you push this button, the adjustment of the pitch potentiometer is available.
16. PITCH BEND - BUTTON
The pitch will drop while the button is pressed and returns to the original pitch when it is released.
17. DISPLAY
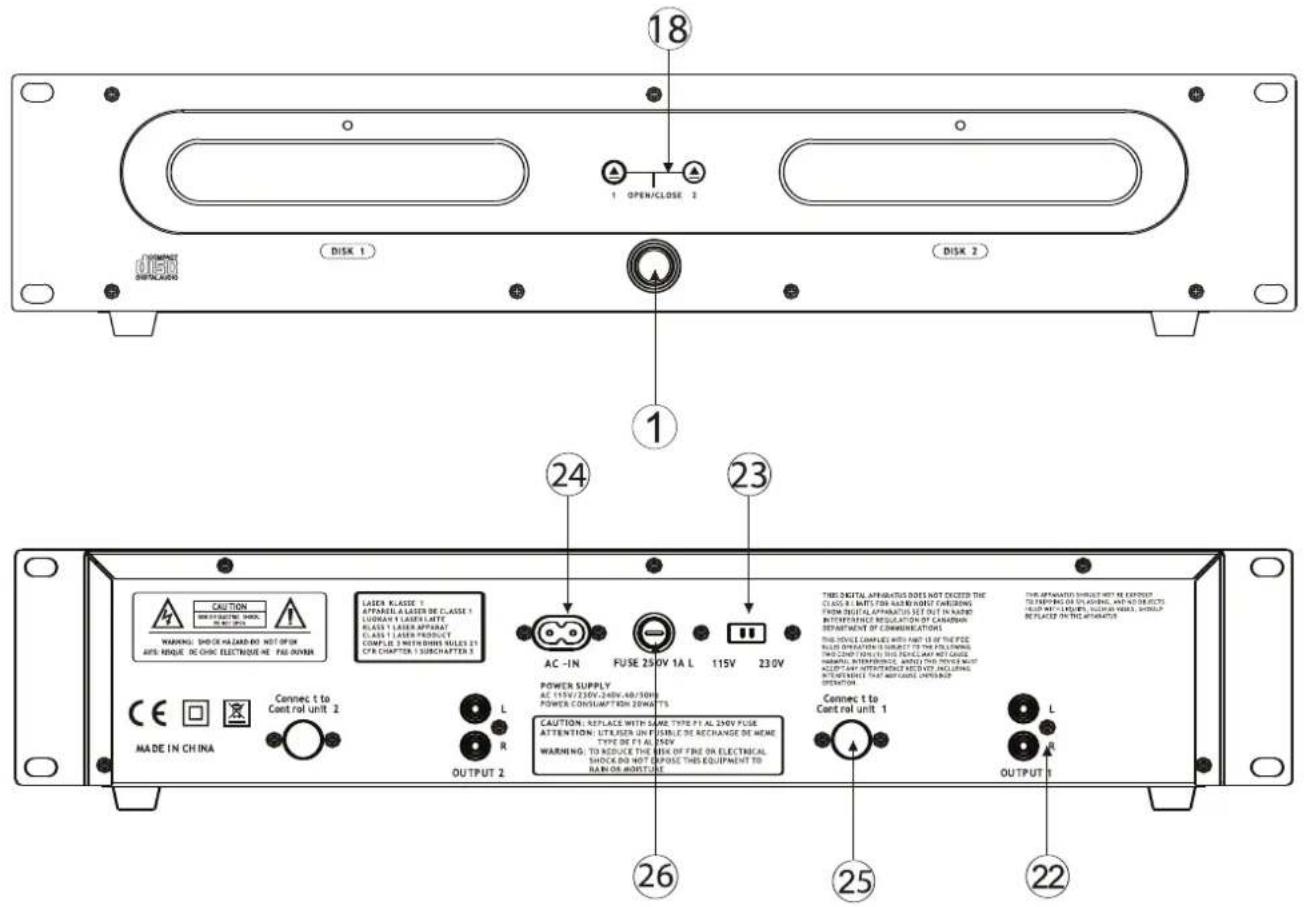
18.EJECT BUTTON
Press to load or eject disk.
NOTE: disc holder will not open unless stop or pause button has been pushed first.
19.SEARCH BUTTON
When the indicator LED is lit, dial the jog for quick search forward and backward, when the jog is unmoved for 8 seconds, the indicator turns off.
20. ROBO: SINGLE/CONTINUE
Press these to switch between the SINGLE and CONTINUOUS play mode. The selected mode is indicated on the LCD screen. In SINGLE mode the unit stops after each track. In CONTINUE mode, the unit reads all track and stops.
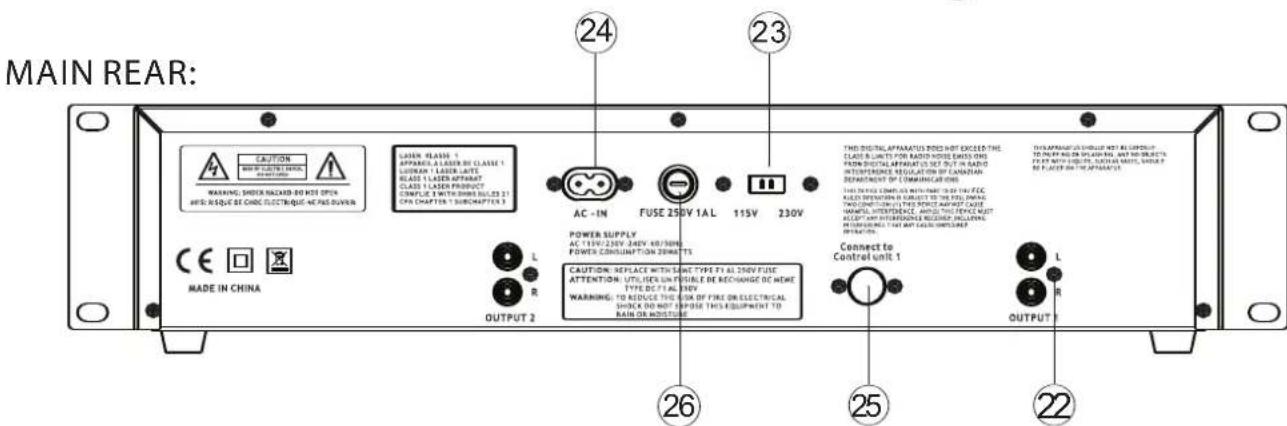
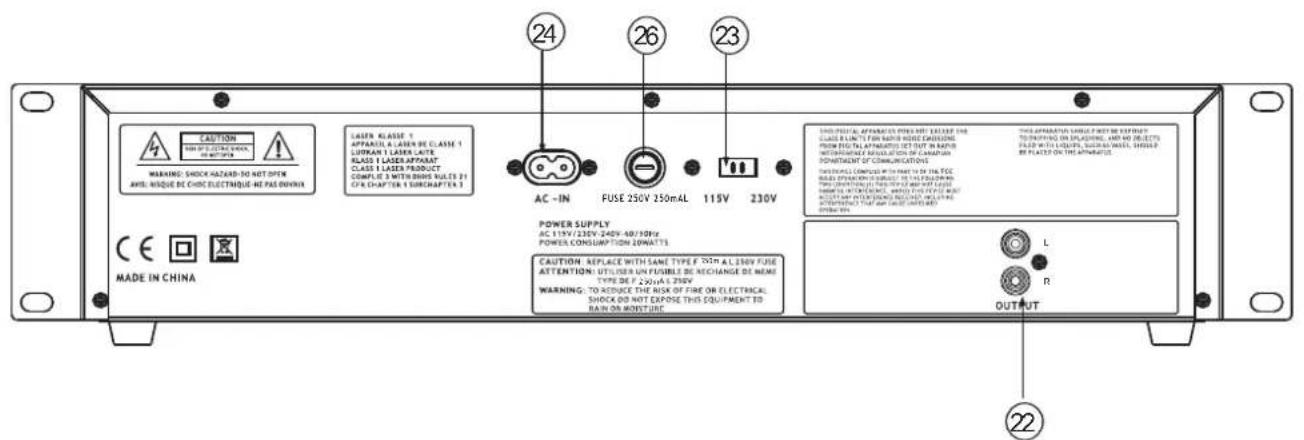
22. LINE OUT
Connect to the line input of a mixer.
23. POWER SUPPLY SWITCH
Used this selector to choose the correct power supply.
24. AC CORD
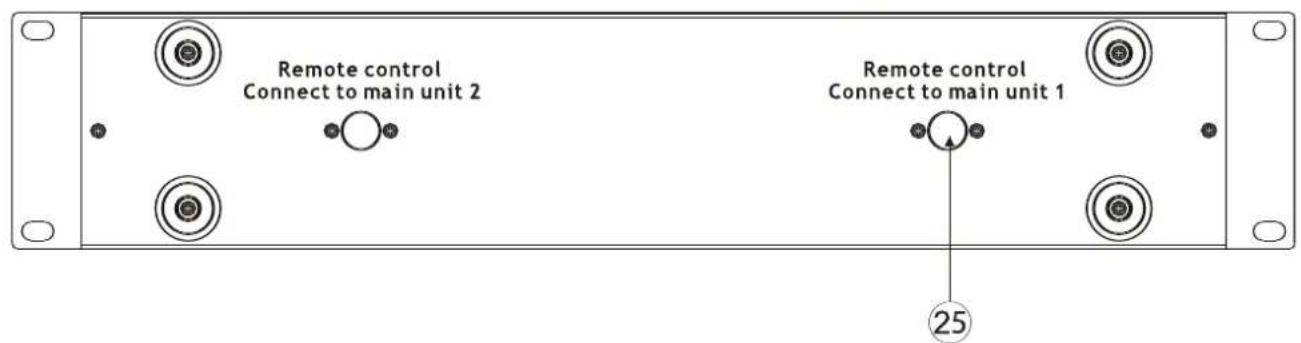
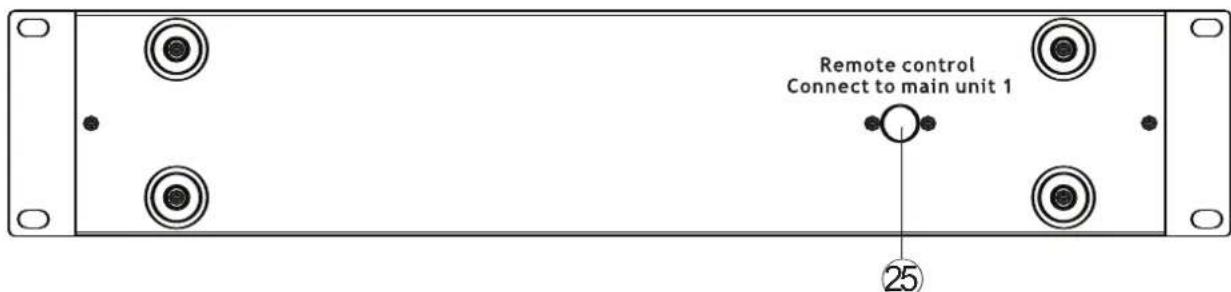
25. DIN SOCKET
Connect on all this sockets the mini-din cable provide with the cd player. Connect the player 1 with part 1 of the controller and player 2 with part 2 of the controller.
26. FUSES
Under normal operation the fuses should not blow. A blown fuse usually indicates an overload or faulty condition. To change the fuse, remove the power cord, pry off the fuse block with a small flathead screwdriver and change the blown fuse. Refer to the specifications page for fuse current ratings. If the fuses blow immediately upon power up, this indicates a faulty condition and the CD player should be returned to your US Blaster dealer for repair.
27. REMOTE SENSOR
This sensor receives the information of the remote control. Don't place any object or sticker in front of the sensor.
WARRANTY CONDITIONS
US Blaster equipment is covered by a 1-year warranty on parts and labor except for Crossfaders (90 days).
The following rules apply from the day the equipment leaves the factory:
The date on the invoice is considered to be the date the warranty begins. Only companies approved by US Blaster are allowed to work on the equipment. Warranty becomes void when other service technicians open the equipment. During the warranty period, defective equipment must be sent by pre-paid mail in the original box. US Blaster will return the goods by pre-paid mail during the first year of warranty; thereafter the mailing cost is to be paid by the recipient. Potentiometers have a limited lifetime and are not covered by the manufacturer for more than normal use. For all service enquiries, refer to your local distributor, as he is best able to help you.

CONTROLLER REAR:
ALGEMENE VOORSCHRIFTEN
WEEES VOORZICTIG MET HOGE TEMPERATUREEN, VERMIJD STOF EN VOCHT, HOUD WEG BIJ TV EN MAGNETISME, PLAATS HET TOESTEL OP EEN STABIELE ONDERGROND, GEBRUIK GEEN CHEMICALIEN, INDIEN DEFECT DIRECT CONTACT OPNEMEN MET FABRIKANT, MAAK DE KAST NIET OPEN, VOORZICTIG MET HET NETSNOER