
FRI2400PW1 - Refrigerator PROLINE - Free user manual and instructions
Find the device manual for free FRI2400PW1 PROLINE in PDF.
| Product type | Built-in fridge-freezer |
| Brand | Proline |
| Model | FRI2400PW1 |
| Dimensions (W x D x H) | 540 x 545 x 1225 mm |
| Gross weight | 37.5 kg |
| Net refrigerator volume | 175 L |
| Net freezer volume | 17 L |
| Freezing capacity | 2 kg/24h |
| Energy consumption | 220 kWh/year |
| Rated voltage | 220-240 V ~ 50 Hz |
| Rated current | 0.7 A |
| Refrigerant | R600a (42 g) |
| Climate class | N (16 °C – 32 °C) |
| Freezer star rating | **** (4 stars) |
| Lamp power | 15 W |
| Insulation gas | Cyclopentane |
| Temperature control | Rotary thermostat from 1 to 5 |
| Open door indicator | Yes (red indicator) |
| Temperature indicator | Yes (OK logo) |
| Refrigerator defrost | Automatic |
| Freezer defrost | Manual (when frost > 3-5 mm) |
| Cleaning | Diluted baking soda, annual condenser cleaning |
| Door reversal | Possible (follow instructions) |
| Child safety | Supervision recommended |
Frequently Asked Questions - FRI2400PW1 PROLINE
User questions about FRI2400PW1 PROLINE
0 question about this device. Answer the ones you know or ask your own.
Ask a new question about this device
Download the instructions for your Refrigerator in PDF format for free! Find your manual FRI2400PW1 - PROLINE and take your electronic device back in hand. On this page are published all the documents necessary for the use of your device. FRI2400PW1 by PROLINE.
USER MANUAL FRI2400PW1 PROLINE
natural_image
Abstract graphic with three asterisk-like symbols inside a rounded rectangle (no text or labels)Downloaded from www.vandenborre.be
Sommaire
INSTRUCTIONS PREALABLES 2
Recommendations....3
TRANSPORT ET DEPLACEMENT 12
AVANT D'APPELER LE SERVICE APRES VENTE 12
ELEMENTS ET COMPARTIMENTS DE L'APPAREIL....14
natural_image
Pure diagram of a trash bin with diagonal lines crossing it, no text or symbols presentnatural_image
Illustration showing three different techniques for using a tool to interact with hands (no text or symbols present)natural_image
Cartoon illustration of a charging plug with an angry face and lightning bolt (no text or symbols)
natural_image
Cartoon illustration of a character with arms and legs emerging from a door (no text or symbols)
natural_image
Illustration of a hand holding a prohibition sign, a smiling face icon, and a crossed-out hand (no text or symbols)

natural_image
Cartoon illustration of a refrigerator with a 'KG' on top and a smiling refrigerator with a grid door and mortar (no text or symbols)natural_image
Technical line drawing of a cylindrical device with internal components and mounting holes (no text or symbols)natural_image
Illustration showing three steps of dental tool manipulation: opening a tooth into an abutary, moving a tray with circular indentations, and removing the tooth with a black X (no text or symbols)Accessoires
natural_image
Warning symbol with exclamation mark inside a shield shape (no text or numbers)natural_image
Technical line drawing of a mechanical assembly with no visible text or symbolsnatural_image
Cartoon illustration of a smiling rectangular character and two small figurines (no text or symbols)
natural_image
Cartoon illustration of a smiling refrigerator with hands cleaning it, accompanied by a small bottle and a cup (no text or symbols)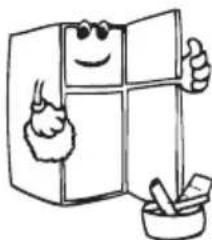
natural_image
Cartoon illustration of a smiling refrigerator with a toothbrush and a mortar, giving thumbs up (no text or symbols)natural_image
Line drawing of a mechanical tool or device with internal components and no visible text or symbolsTRANSPORT ET DEPLACEMENT
natural_image
Simple line drawing of two children holding a large rectangular object (no text or symbols)AVANT D'APPELER LE SERVICE APRES VENTE
FigFigureAA
![550 40 min min. 200 cm² 560-570 max. 2100 B 540 90° min. 200 cm² A [mm] A B 875 875-895 1020 1020-1040 1225 1225-1245](/content/2026/02/394791/images/1a130f72613c1ccb7426e6da5f0848b053fc47b3a6d171218b18086e02cdb7a2.jpg)
FigFigure.C
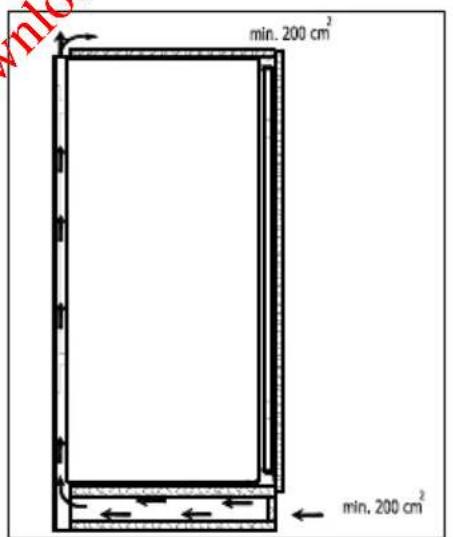
Figure B
FigFigure.D
FiguFegEre.E

FiguFegEre.F
FigFigure.G

FigFigure.H
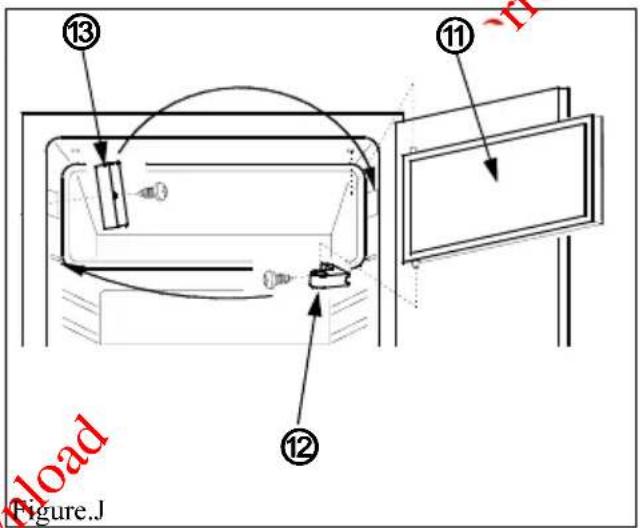
Figure J

Figure K
PARTS OF THE APPLIANCE AND THE COMPARTMENTS ...... 21
Installation instructions 22
Door reversing 25
SAFETY INFORMATION....26
IMPORTANT INFORMATION 27
DISPOSAL....27
SWITCHING ON THE APPLIANCE....28
HOW TO OPERATE THE APPLIANCE....28
Thermostat Setting 28
"Door Open" Indicator 29
emperature indicator....30
FOOD STORAGE IN THE APPLIANCE....31
Refrigerator Compartment 31
Freezer Compartment 32
CLEANING AND MAINTENANCE 33
Defrosting 33
Replacing the Light Bulb....34
BEFORE CALLING THE AFTER SALES SERVICE....34
TECHNICAL DATA 36
Before using this appliance please read these instructions carefully and retain for future use.
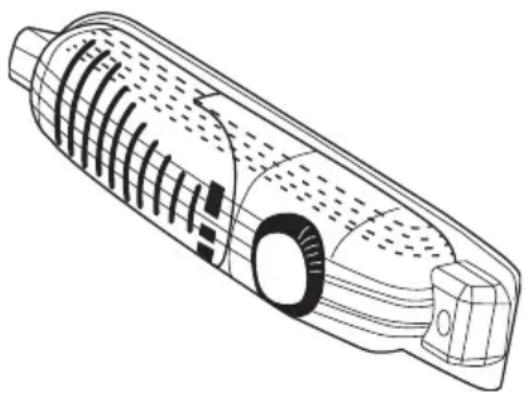
PART- 1. PARTS OF THE APPLIANCE AND THE COMPARTMENTS
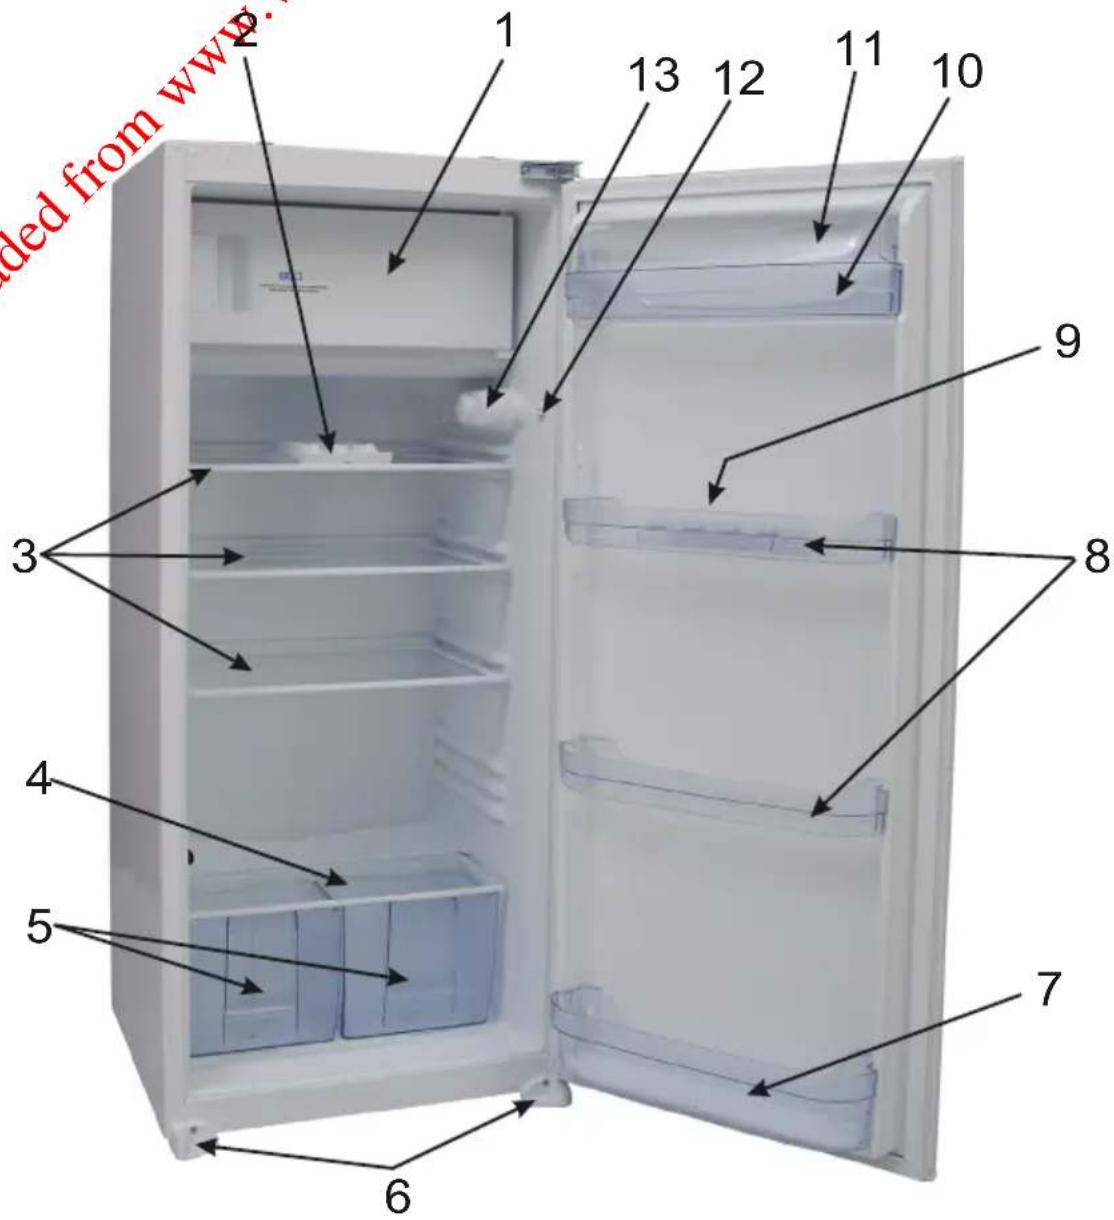
This presentation is only for information about the parts of the appliance. Parts may vary according to the appliance model.
1) Freezer compartment
2) Ice tray
3) Refrigerator shelves
4) Crisper cover (safety glass)
5) Crisper
6) Left & right feet
7) Bottle shelf
8) Door middle shelves
9) Egg holder
10) Butter shelf
11) Butter shelf cover
12) Light button
13) Thermostat box
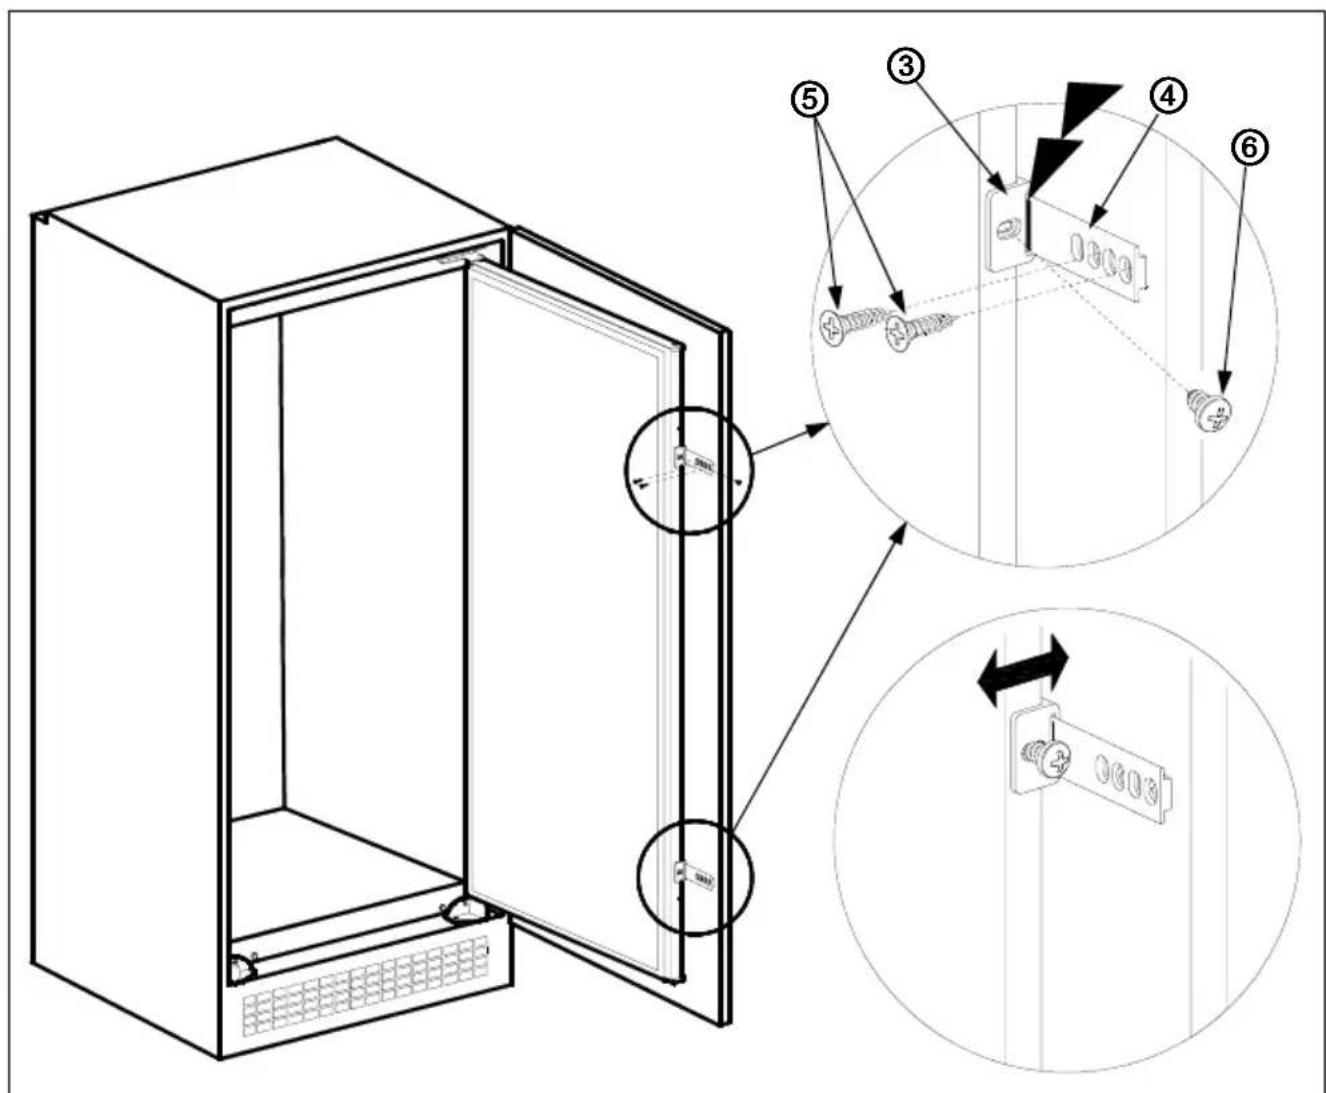
Installation instructions
! Before installation, read the instructions carefully.
! Fit the refrigerator/freezer in stable kitchen units only.
! If necessary, reverse the door according to instructions.
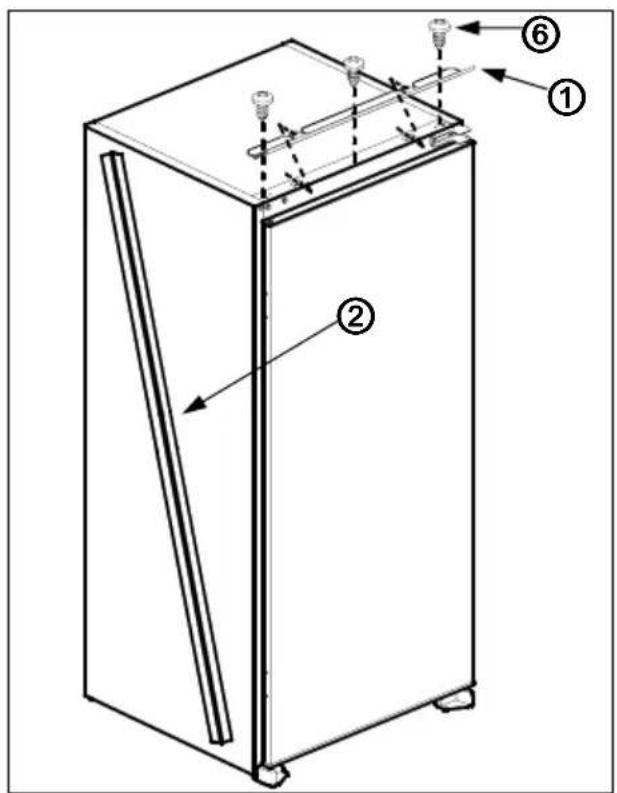
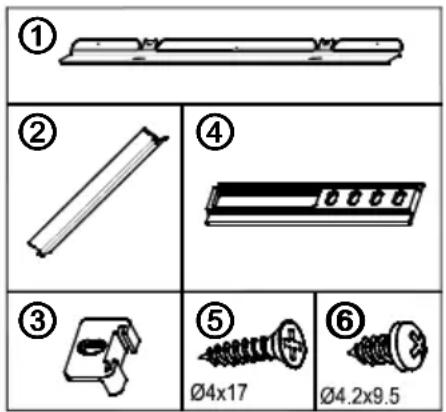
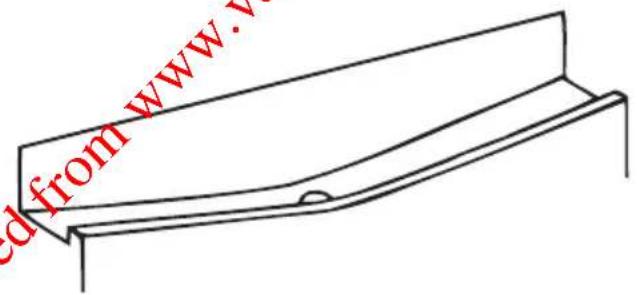
- See fig.A for the necessary attachment components.
2 Insert trim flap into slot and screw by screws ^6 . (fig.D)
-
Pass the power cord through ventilation shaft and position it so that the appliance could be easily plugged in once it has been installed. (fig.B - fig.C)
-
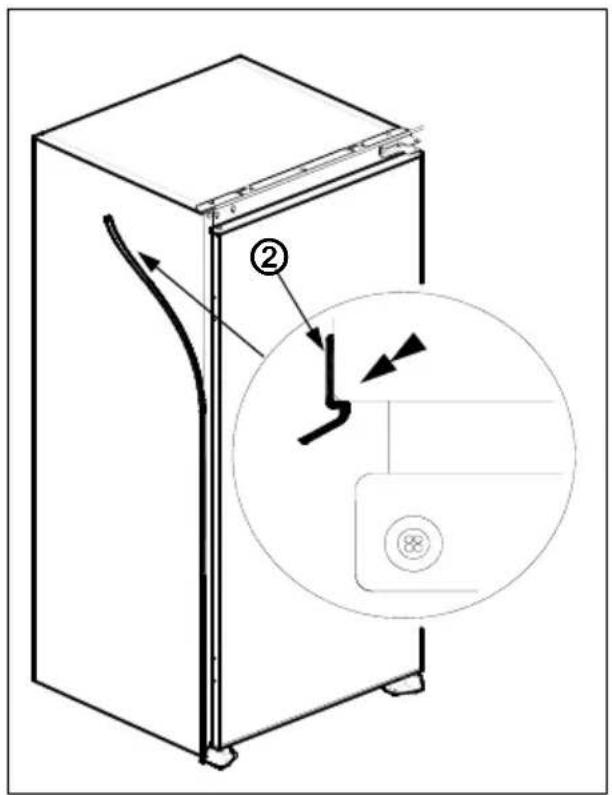
Take out the trim gasket located on the side panel of the appliance and stick it on reverse side of the door hinges of the appliance. (fig.D - fig.E)
-
Raise the appliance and slide into the kitchen unit.
-
Push the appliance to the reverse side of the door hinges providing that the trim gasket ^2 covers the space between the appliance and the kitchen unit.
-
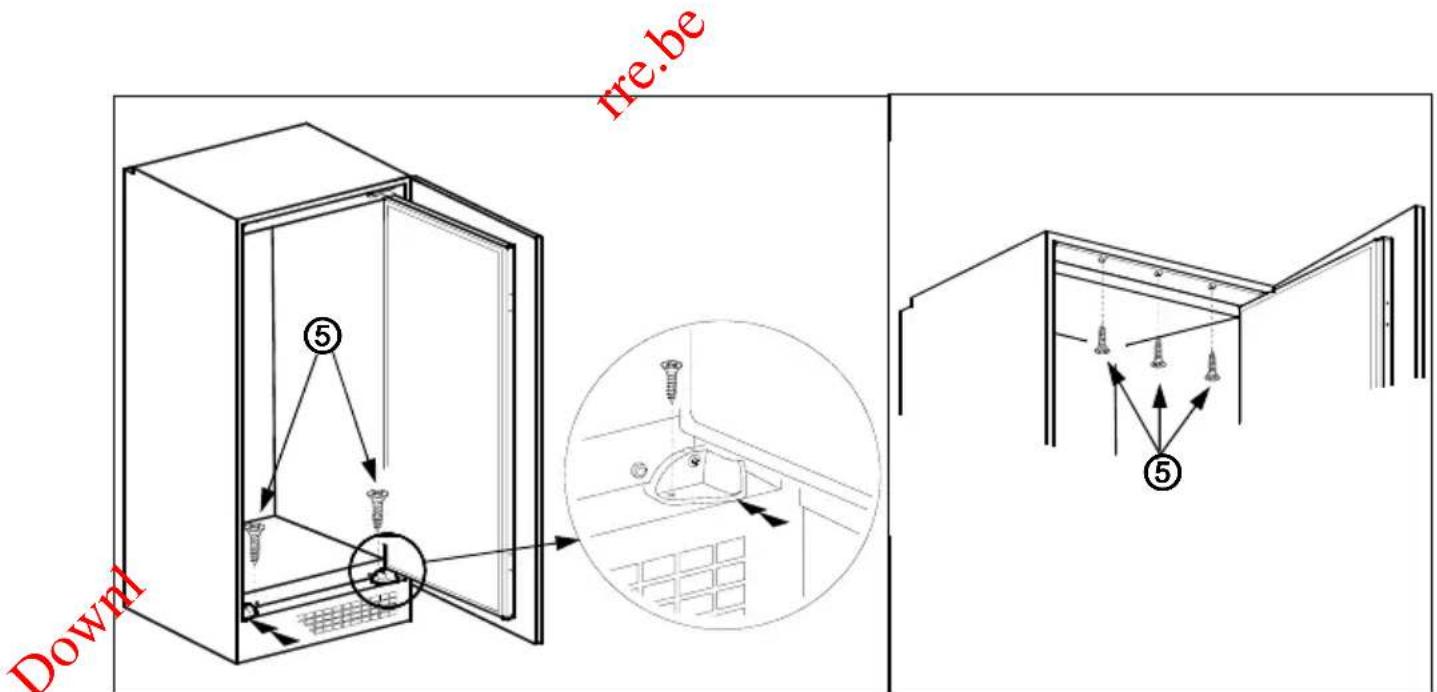
Align the front feet with front surface of the kitchen unit. (fig.F)
-
Screw the front feet by using screws ^5 . (fig.F)
-
Screw trim flap to kitchen unit using screws ^5 . (fig.G)
-
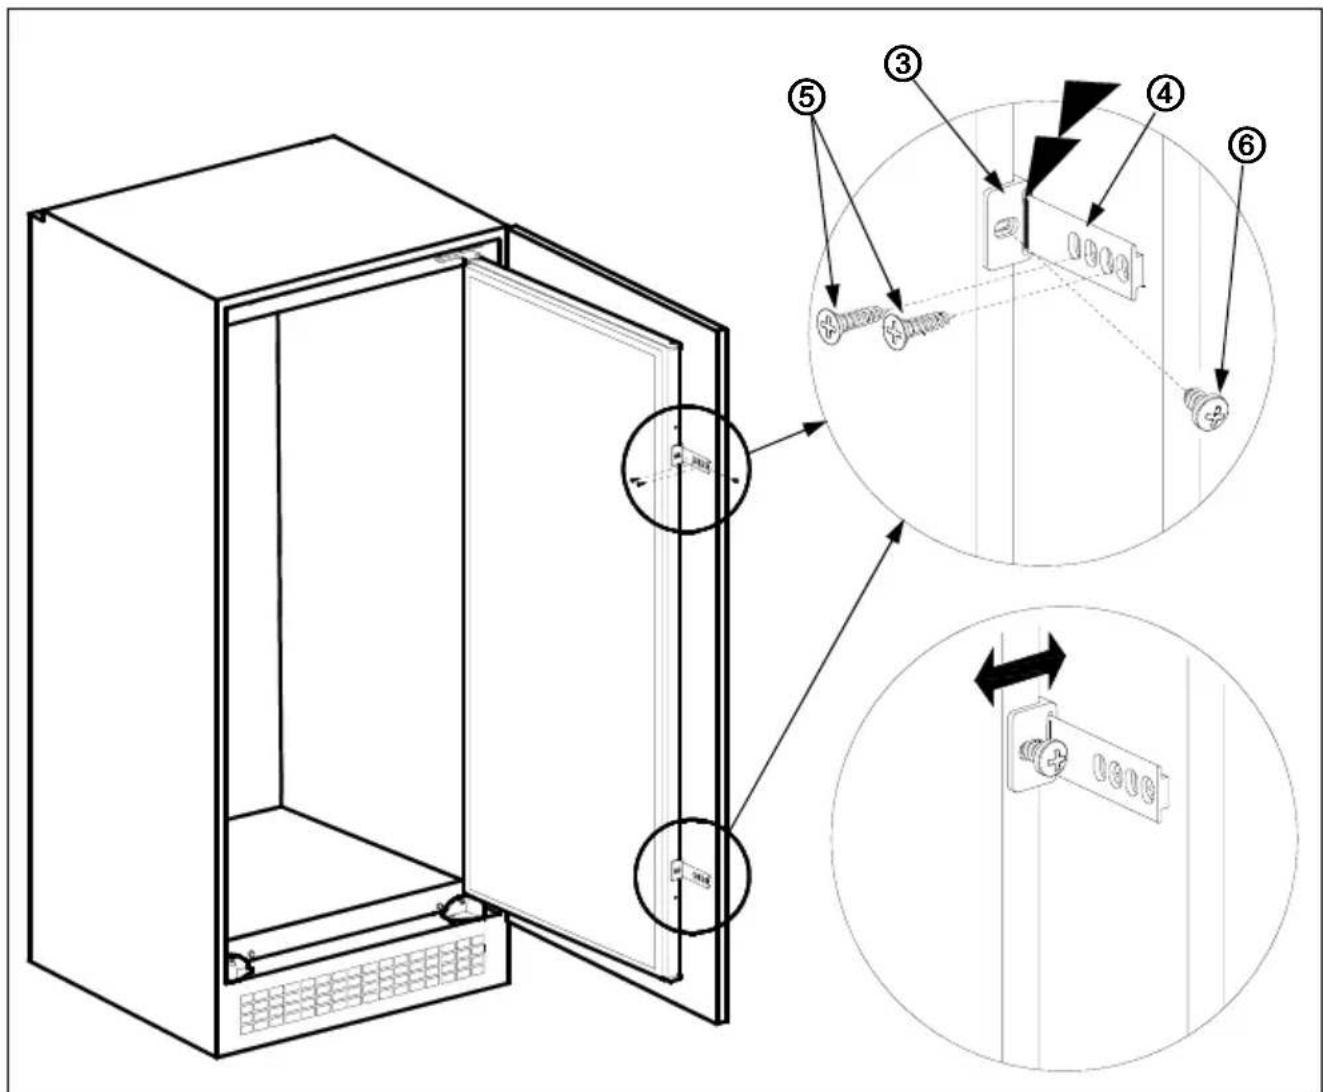
Screw guides ^3 to appliance door with screws ^6 . (fig.H)
-
Lean appliance door to unit door as it is opened at right angle.
-
Slide rails ^4 into guides ^3 aligning the groove. (fig.H)
-
Screw the rails ^4 to the unit door with screws ^5 . (fig.H)
-
Set 1\~2 mm gap on handle side between unit itself and unit door by adjusting guides ^3 . That is vital for appliance performance. (fig.H)
FFigureA
FFigure B
![550 min. 200 cm² 90 min. 560-570 max. 2100 B 540 90° min. 200 cm² A [mm] A B 875 875-895 1020 1020-1040 1225 1225-1245](/content/2026/02/394791/images/f2d00c17eab83c190d3d8bb2443e4e1f1c9d6309c1dc549bc7d98c085c17a8e1.jpg)
Figure C
FigureD
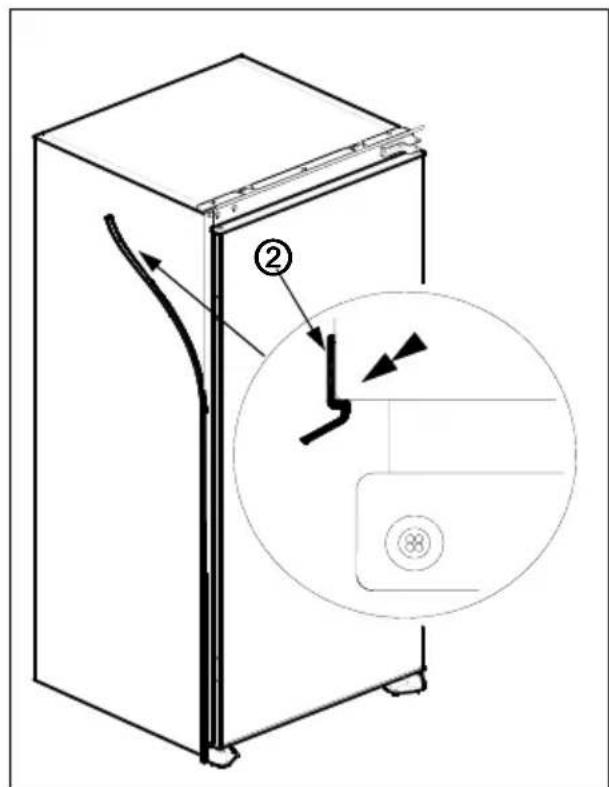
Figure E
FiguFögfre.F
FigFigure.G
FigFigure.H

Figure J

Figure K
Door reversing
- Open appliance door ^14 and freezer door ^11 . (fig.J)
- Disassemble freezer door hinge ^12 and take freezer door ^11 to safe place. (fig.J)
- Disassemble freezer door lock ^15 and assemble it to opposite side.(fig.J)
- Position freezer door ^11 to keep handle close to freezer door lock ^13 and insert its upper axes into cabinet hole / lower axes into freezer door hinge ^12 and then assemble freezer door hinge ^12 to opposite side of original position. (fig.J)
- Disassemble door hinge ^15 and take appliance door ^14 to safe place. (fig.K)
- Unscrew door hinge pin ^16 and screw it to opposite side firmly and take to safe place. (fig.K.a)
- Take door lower pin ^18 to opposite side. (fig.K.b)
- Take hole plugs ^17 to opposite side. (fig.K.c)
- Place appliance door ^14 over door lower pin18 and insert door hinge pin ^16 into hinge hole on appliance door ^14 and then screw door hinge ^15 firmly into place.
SAFETY INFORMATION
- This appliance is designed to operate at a voltage between 220 - 240 volts. Please check that the voltage matches that of your local supply. Failure to use the correct voltage will render the warranty void and may damage the appliance.
- This appliance must only be used for its intended purpose i.e. the freezing or storage of domestic edible foodstuffs and should not be used for any other purpose.
- This appliance is intended for domestic household use only and should not be used for any other purpose or in any other application, such as for none domestic use or in a commercial environment.
- Do not operate this appliance with a damaged supply cord or plug, if the appliance malfunctions or as been damaged in any way contact the store from where you purchased your appliance for further information.
- Extreme caution must be used when moving an appliance as it is heavy and may have sharp edges under the base.
- This appliance is intended for indoor use only. Do not use or store outdoors (this appliance shall not be exposed to rain).
- Disconnect from the mains supply by removing the plug from the mains outlet socket before any maintenance or if the appliance is not going to be use for a long period of time.
- Do not position this appliance near hot surfaces, or in direct sunlight.
- This appliance is used for the storage of fresh food and for making and storing pre frozen food.
- If you are discarding an old refrigerating appliance with a lock or catch fitted to the door or lid, ensure that it is left in a disabled condition to avoid the entrapment of children when they are playing.
- This appliance might not operate consistently (possibility of defrosting of the contents or the temperature becoming too warm in the frozen food compartment) when sited for an extended period below the cold end of the range of temperatures for which the appliance is designed.
- Food to be frozen is not to be placed in direct contact with food already in storage.
WARNINGS:
- If the supply cord is damaged, it must be replaced by the manufacturer, its service agent or similarly qualified person in order to avoid a hazard.
- This appliance is not intended for use by persons (including children) with reduced physical, sensory or mental capabilities, or lack of experience and knowledge, unless they have been given supervision or instruction concerning use of the appliance by a person responsible for their safety.
- Children should be supervised to ensure that they do not play with the appliance.
- WARNING: Keep ventilation openings, in the appliance enclosure or in the built-in structure, clear of obstruction.
-
WARNING: Do not use mechanical devices or other means to accelerate the defrosting process, other than those recommended by the manufacturer.
-
WARNING: Do not use electrical appliances inside the food storage compartment of the appliance, unless they are of the type recommended by the manufacturer.
- Do not store explosive substances such as aerosols cans with a flammable propellant in this appliance.
- WARNING: Do not damage the refrigerant circuit.
- WARNING: To avoid a hazard due to instability of the appliance, it must be fixed in accordance with the instructions.
IMPORTANT INFORMATION
- This appliance is designed to operate in ambient temperatures (surrounding air temperature) between 16 and 32 oC. If these temperatures are exceeded i.e., colder or warmer, the appliance will not operate correctly. Should the ambient temperatures be exceeded for long periods, the temperature in the freezer section will rise above -18 and food spoilage may occur.
- Remove all packaging materials from the appliance. Wash the inside of the cabinet with lukewarm water and bicarbonate of soda (5ml to 0.5 litre of water). Dry the appliance thoroughly.
- When using the freezer for the first time or after defrosting, turn the thermostat control to the maximum position for at least 2 hours before introducing food to be stored, and then readjust to the normal position.
- If there is a power failure, do not open the door. Frozen food should not be affected if the failure lasts for less than 12 hrs. If the failure is longer, then the food should be checked and either eaten immediately or cooked and then re-frozen.
DISPOSAL
As old refrigeration appliances may contain CFC's which will damage the ozone layer, when disposing of any refrigeration appliance please contact your local waste disposal department for advice on the correct method of disposal.
The refrigerating gas contained in the circuit of this appliance is Isobutene (R600a); it causes a low level of pollution but is inflammable. please contact your local disposal department for advice on the correct method of disposal.
SWITCHING ON THE APPLIANCE
- Before switching on, place the appliance in an upright position and wait at least 3 hours without moving the appliance. This will give the refrigeration circuit time to settle and operate efficiently.
- Clean the appliance thoroughly, especially the interior, before use (See cleaning and maintenance).
- Installation of the appliance and electrical connections must be carried out by a qualified technician, in accordance with the Installation instructions and local regulations.
- Use the installation procedure shown in the front of this instruction booklet. This product is intended to be used in proper kitchen units only.
- The appliance must be connected to a properly installed fused socket. The power supply (AC) and voltage must match with the details on the rating plate (located inside of the appliance to the left of the salad crisper).
- Insert the plug into a socket with an efficient ground connection. If the socket has no ground contact or the plug does not match, we suggest you call an authorized electrician for assistance.
- The Manufacturer is not responsible for failure to complete the ground connection as described in this booklet.
- There could be an odour when you first switch on the appliance. It will disappear after the appliance starts to cool.
HOW TO OPERATE THE APPLIANCE
Thermostat Setting
natural_image
Technical line drawing of a mechanical component with internal channels and mounting features (no text or symbols)- The thermostat automatically regulates the inside temperature of the refrigerator compartment and freezer compartment. By rotating the knob from position 1 to 5 colder temperatures can be obtained.
- The "0" position shows the thermostat is closed and no cooling is available.
- For short-term storage of food in the freezer compartment, set the knob between minimum and medium position (1-3).
- For long-term storage of food in the freezer compartment, you can set the knob to medium position (3-4).
-
NOTE: The ambient temperature, temperature of the freshly stored food and how often the door is opened affects the temperature in the refrigerator and freezer compartments, if necessary adjust the thermostat.
-
When you first switch on the appliance you should ideally try to run it without any food in for 24 hours and not open the door. If you need to use it straight away, try not to put too much food inside.
- If the unit is switched off or unplugged, you must allow at least 5 minutes before restarting in order not to damage the compressor.
- The freezer compartment of the appliance cools down to -18^ and less.
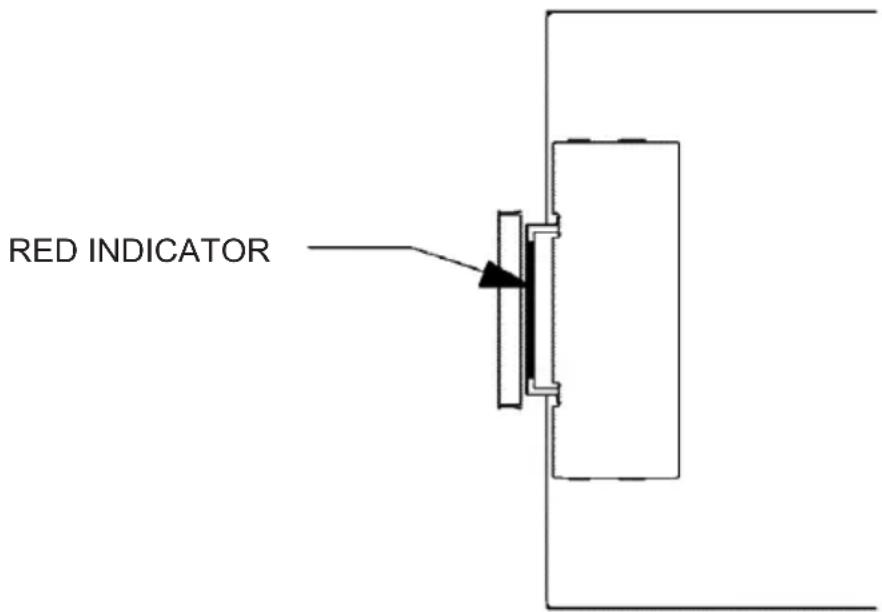
"Door Open" Indicator
- The "Door Open" indicator on the lock slide indicates whether the door is closed correctly or not.
If the red indicator is visible the door is still open.
- If the red indicator is invisible, the door is closed correctly.
- Observe that the freezer door should always be kept closed correctly; this will prevent food inside the freezer from defrosting and avoid heavy ice and frost build-up inside the freezer and an unnecessary increase in energy consumption.
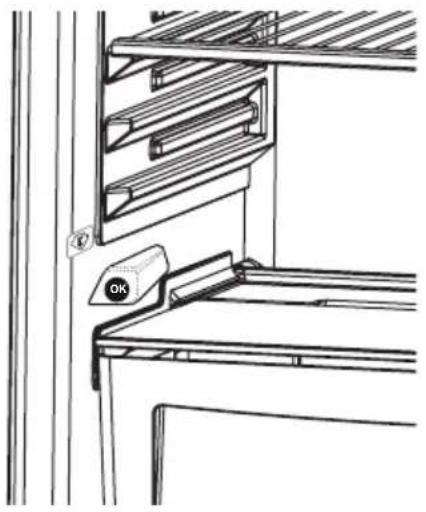
Temperature indicator
In order to help you better set your refrigerator, we have equipped it with a temperature indicator located in the coldest area.
To better store the food in your refrigerator, especially in the coldest area, make sure the message "OK" appears on the temperature indicator. If « OK » does not appear, this means that the temperature setting has not been done properly.
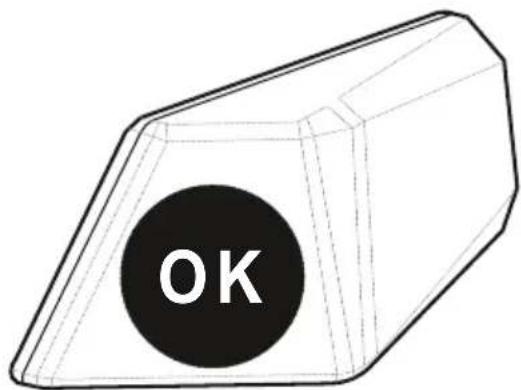
Since "OK" appears in black, it will be difficult to see this indication if the temperature indicator is badly lit. To be able to see this indication properly, there should be enough light.
Each time the temperature setting device is changed, wait for the stabilisation of the temperature inside the appliance before proceeding, if necessary, with a new temperature setting. Please change the position of the temperature setting device progressively and wait at least 12 hours before starting a new check and potential change.
NOTE: Following repeated openings (or prolonged opening) of the door or after putting fresh food into the appliance, it is normal for the indication “OK” not to appear in the temperature setting indicator. If there is an abnormal ice crystals build up (bottom wall of the appliance) on the refrigerator compartment evaporator (overloaded appliance, high room temperature, frequent door openings), put the temperature setting device on a lower position until compressor off periods are obtained again.
Putting food in the coldest area of the refrigerator
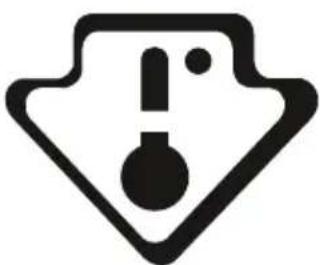
natural_image
Warning symbol with exclamation mark inside a shield shape (no text or numbers)Your foods will be better stored if you put them in the most appropriate cooling area. The coldest area is just above the crisper. The following symbol indicates the coldest area of your refrigerator. To be sure to have a low temperature in this area, make sure the shelf is located at the level of this symbol, as shown in the illustration.
The upper limit of the coldest area is indicated by the lower side of the sticker (head of the arrow). The coldest area upper shelf must be at the same level with the arrow head. The coldest area is below this level.
As these shelves are removable, make sure they are always at the same level with these zone limits described on the stickers, in order to guarantee temperatures in this area.
Each type of food has an ideal conservation temperature and consequently a particular location to follow.
natural_image
Technical line drawing of a mechanical assembly with no visible text or symbols| Locations Products | |
| Upper shelves Cooked foods, desserts and all foods to be eaten fast enough | |
| Coldest area Meat, poultry, game and raw fishMaximum conservation time: 1 to 2 days.Fresh fruits, cooked pork meat. | |
| Crisper Fresh vegetables and fruits. | |
| Door-liner | Door trays shall contain bottles at the bottom side and, in their upper parts, low volume and currently used products like yoghurt, fresh cream, etc. |
| Butter, cooked cheese and eggs shall be introduced in appropriate holders. | |
FOOD STORAGE IN THE APPLIANCE
Refrigerator Compartment
The refrigerator compartment is used for storing fresh food for a few days.
- Do not place food in direct contact with the rear wall of the refrigerator compartment. Leave some space around food to allow circulation of air.
- Do not place hot food or evaporating liquid in the refrigerator.
• Always store food in containers or wrapped.
- To reduce humidity and avoid formation of frost, never place liquids in unsealed containers in the refrigerator.
- Store raw meat and poultry in clean, sealed containers on the bottom shelf of the fridge, so they can't touch or drip onto other food.
- Keep cooked meat separate from raw meat.
- Fruit and vegetables can be put onto the crisper without packaging.
- To avoid the cold air escaping, try not to open the door too often and do not leave the door open for long periods.
Freezer Compartment
The freezer compartment is used for freezing fresh foods and for storing frozen foods for the period of time indicated on the packaging, and for making ice cube.
- For freezing fresh food; wrap and seal fresh food properly, the packaging should be air tight and should not leak. Special freezer bags, aluminium foil (heavy grade, in doubt double wrap), polythene bags and plastic containers are ideal.
- Do not allow the fresh food to be frozen come into contact with the existing frozen food.
- Always mark the date and content on the pack and do not exceed the stated storage time.
- In case of a power failure or malfunction, the freezer compartment will maintain a sufficiently low temperature for food storage. However, avoid opening the freezer door to slow down the temperature rise within the freezer compartment.
- The maximum amount of fresh foods that can be loaded in the freezer within 24 hours is indicated on the rating plate (see Freezing Capacity).
- Never place warm food in the freezer compartment.
- When purchasing and storing frozen food ensure that the packaging is not damaged.
- The storage time and the recommended temperature for storing frozen foods are indicated on the packaging. For storing and using follow the manufacturer's instructions, if no information is provided food should not be stored for more than 3 months.
- Place the frozen food in the freezer compartment as soon as possible after buying it.
- Once the food is thawed, it must not be refrozen; the food must be cooked as quickly as possible in order to consume or freeze again.
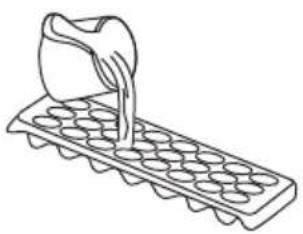
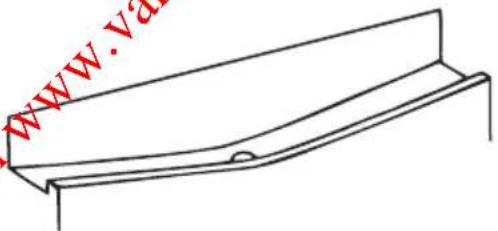
- Making ice cubes: fill the tray with water and place in the freezer compartment. After the water has completely turned to ice the tray can be twisted (as shown below) to remove the ice.
natural_image
Line drawing of a container being poured into a tray of circular wells (no text or symbols)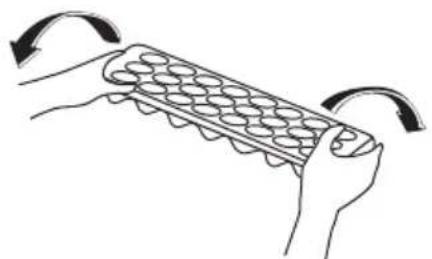
natural_image
Illustration of hands holding a tray with egg-like shapes, showing rotation arrows (no text or symbols)
natural_image
Illustration of two hands holding a tooth with a black X symbol indicating a crossed-out condition (no text or labels)CLEANING AND MAINTENANCE
- Disconnect the appliance from the power supply before cleaning.
- Do not pour water over the appliance.
- The refrigerator compartment should be cleaned periodically using a solution of bicarbonate of soda and lukewarm water.
- Clean the accessories separately with soap and water. Do not put them in the dishwasher.
- Do not use abrasive cleaners, detergents or soaps. After washing rinse with clean water and dry carefully. When the cleaning process has been completed, reconnect the plug with dry hands.
Defrosting
Defrosting the Refrigerator Compartment
natural_image
Simple line drawing of a structural beam or support with a notch (no text or symbols)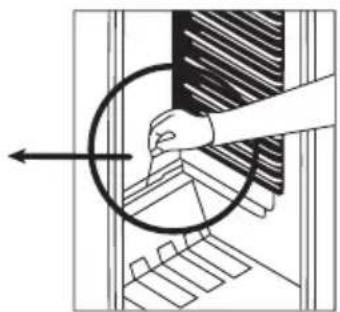
natural_image
Diagram showing a hand holding a circular object with an arrow, no text or symbols present- Defrosting occurs automatically in the refrigerator compartment during operation; the defrost water is collected in the evaporator tray and evaporates automatically.
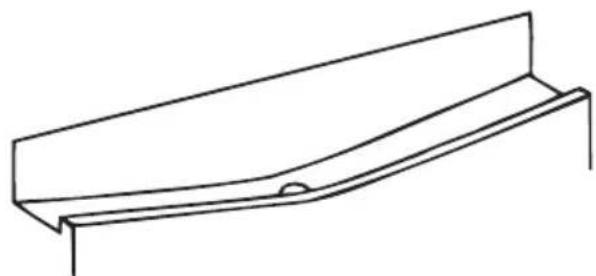
- The evaporator tray and the defrost water drain should be cleaned periodically with the defrost drain cleaning tool to prevent blockage and water collection on the bottom of the refrigerator.
- You can also pour 12 a glass of water into the drain hole to clean inside.
Defrosting the Freezer Compartment (if available)
WARNING: Never use sharp metal tools (unless recommended by the manufacturer) for this operation as they can damage the refrigeration circuit.
After a period of time frost will build up in certain areas in the freezer compartment, this should be removed periodically (use the scraper if available).
Complete defrosting will become necessary if the frost layer exceeds 3-5mm to maintain efficiency of the freezer.
- The day before defrost set the thermostat Knob to position "5" to freeze the foods completely.
- During defrosting frozen foods should be wrapped in several layers of paper and kept in a cool place. The inevitable rise in temperature will shorten its storage life.
- Remember to use these foods in a relatively short period of time.
- Set the thermostat knob to position "0" and switch off the appliance.
- Leave the door open to accelerate defrosting. Remove the defrost water from the compartment.
- Clean the interior by hand with lukewarm water and a little detergent.
- Never use abrasive products or aggressive cleaning agents.
- Dry the inside of the unit, plug in to the mains and set the thermostat knob to position "5". After 24 hours reset the thermostat to the desired position.
Replacing the Light Bulb
natural_image
Line drawing of a mechanical tool with internal components (no text or symbols)When replacing the bulb of the refrigerator compartment;
- Unplug the unit from the power supply.
- Press the hooks on the sides of the light cover to remove.
- Replace the old bulb with a new one of not more than 15W.
- Replace the light cover, wait five minutes and plug in the unit.
BEFORE CALLING THE AFTER SALES SERVICE
If your refrigerator is not working correctly it may be a minor problem, therefore read the following:
The appliance does not operate.
Check if:
• There is a power failure.
• The mains plug is unplugged.
- The thermostat setting is "0".
- The wall socket is defective. To check this plug another appliance you know is working into the socket.
The appliance performs poorly.
Check if:
- You have overloaded the appliance.
• The doors are closed correctly.
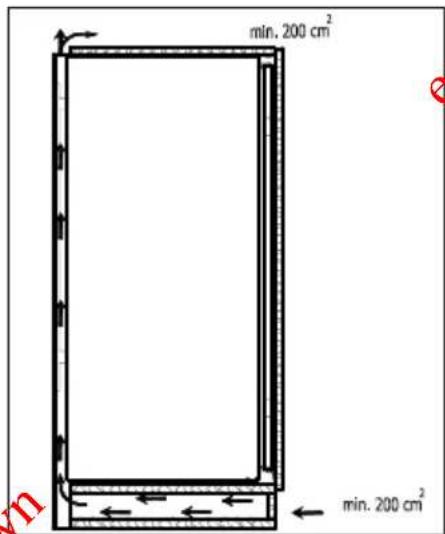
- There is adequate ventilation as show in the installation diagram (fig.B).
Noises from the appliance.
The cooling gas which circulates in the refrigerator circuit may make a slight noise (a bubbling sound) even when the compressor in not running. Do not worry, this is quite normal. If the sounds are different.
Check if;
- The appliance is installed firmly as described in the installation information.
- For vibrating objects on the appliance.
If there is water in the lower part of the refrigerator.
Check if:
The drain hole for defrost water is not blocked (use the defrost drain cleaning tool to clean the drain hole).
the fridge is not cooling enough
The fridge is designed to operate in ambient temperature intervals stated in the standards and according to the climate class stated on the rating label. We do not recommend operating the refrigerator out of the stated temperature value in terms of cooling effectiveness.
| Climate class Ambient temperature ( °C) | |
| T Between 16 and 43 ( °C) | |
| ST Between 16 and 38 ( °C) | |
| N Between 16 and 32 ( °C) | |
| SN Between 10 and 32 ( °C) |
- Tropical Climate Class is described as between 16°C and 43°C of ambient temperatures according to EN ISO15502 standards.
- The appliance complies with EN15502, IEC60335-1/ IEC60335-2-24, 2004/108/EC standards.
Recommendations
- In order to increase space and improve the appearance the “cooling section” of refrigerators is positioned inside the back wall of the refrigerator compartment. When the compressor is working this wall is covered with frost and water droplets. Do not worry this is quite normal. The appliance should be defrosted only if an excessively thick ice layer forms on the back wall.
- If the appliance is not used for a long time (for example during the summer holidays) set the thermostat knob to position "0". Defrost and clean the refrigerator leaving the door open to prevent the formation of mildew and smell.
natural_image
Cartoon illustration of an electric plug with a sad face and plug, emitting exhaust smoke (no text or symbols)
natural_image
Cartoon illustration of a character inside a door, showing arms and legs (no text or symbols)
natural_image
Illustration of a hand holding a prohibition sign, a smiling face icon, and a crossed-out hand (no text or symbols)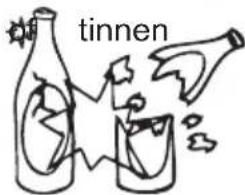

natural_image
Simple line drawing of a hand holding a smiling square emoji (no text or symbols)natural_image
Cartoon illustration of a distressed container character holding a box labeled 'KG', with no readable text or symbols.
natural_image
Cartoon illustration of a smiling refrigerator with sunglasses and a mortar, giving thumbs up (no text or symbols)natural_image
Technical line drawing of a mechanical component with internal gear-like structure (no text or symbols)Temperatuurindicator
natural_image
Line drawing of a cabinet or storage unit with shelves and a lock, no text or symbols presentnatural_image
Illustration of hands holding a grid-like object with curved arrows indicating rotation (no text or symbols)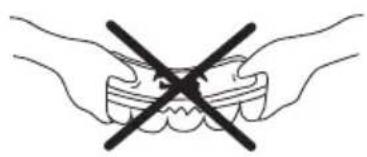
natural_image
Illustration of two hands holding a tooth with a black X symbol crossed out (no text or labels)REINIGING EN ONDERHOUD
natural_image
Illustration of three cartoon kitchen appliances: a refrigerator, a smiling refrigerator with food, and a door with utensils (no text or symbols)Ontdooien
Koelingscompartiment

natural_image
Diagram showing a hand pressing down on a mechanical component with an arrow indicating direction (no text or symbols present)natural_image
Line drawing of a mechanical tool with no visible text or symbolsnatural_image
Simple line drawing of two children playing a game with a long block (no text or symbols)DEEL 6. VOORDAT U EEN BEROEP DOET OP DE KLANTENSERVICE
natural_image
Symbolic illustration of a trash bin with crossed lines indicating no waste or discharge (no text or labels)FFigureA
FigureD

Figure E

FiguFegEre.F
FigFigure.G

FigFigure.H

Figure J
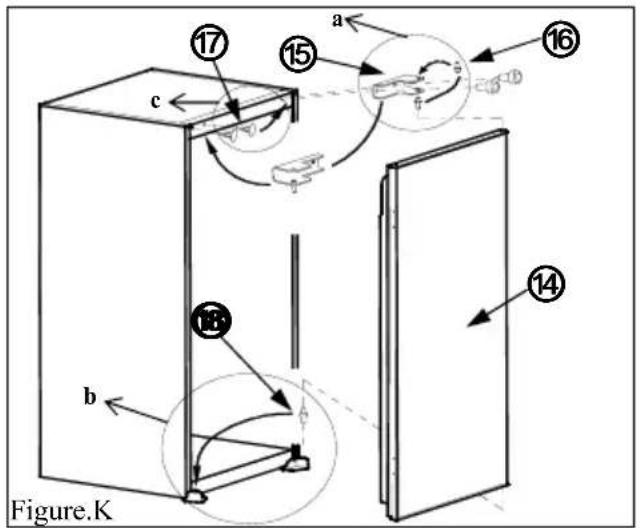
Figure K
natural_image
Symbol of a trash bin with crossed lines indicating no waste or discharge (no text or labels)natural_image
Cartoon illustration of a character inside a door, holding hands with arms outstretched (no text or symbols)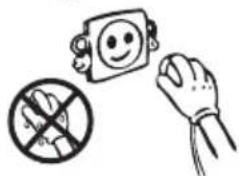
natural_image
Simple line drawing of a hand holding a smiling face, a crossed-out hand, and a prohibition symbol (no text or labels)

natural_image
Simple line drawing of a hand holding a smiling emoji-shaped object (no text or symbols)natural_image
Cartoon illustration of a distressed container with arms and legs, holding a box labeled 'KG' (no text or symbols beyond the label)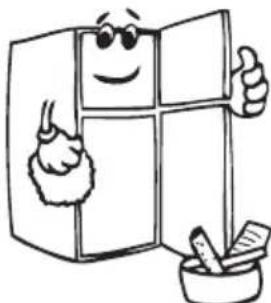
natural_image
Cartoon illustration of a smiling refrigerator with glasses and thumbs up, next to a bowl of cleaning tools (no text or symbols)natural_image
Technical line drawing of a mechanical device with internal components (no text or symbols)natural_image
Hand holding a tool interacting with a device (no text or symbols visible)natural_image
Cartoon illustration of a smiling refrigerator with a hand brushing it, accompanied by a small bottle and a cup (no text or symbols)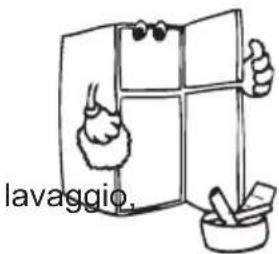
natural_image
Cartoon illustration of a smiling book character with arms and legs, accompanied by two smaller pighing shoes (no text or symbols)Sbrinamento
Scomparto frigo:
natural_image
Pure technical line drawing of a structural component (no text or symbols)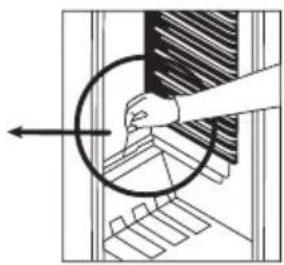
natural_image
Diagram showing a hand holding a circular object over a grid-like structure, with no visible text or symbols.natural_image
Line drawing of a mechanical tool with internal components (no text or symbols)PARTE 5.
TRASPORTO E SPOSTAMENTO DELL'APPARECCHIO
natural_image
Simple line drawing of two children playing a game with a large block (no text or symbols)PRIMA DI CHIAMARE IL SERVIZIO ASSISTENZA
FigureD

Figure E

FiguFegEre.F
FigFigure.G
FigFigure.H

Figure J

Figure K
natural_image
Cartoon illustration of an electric plug with a sad face and a lightning bolt (no text or symbols)
natural_image
Cartoon illustration of a person inside a refrigerator with arms and legs (no text or symbols)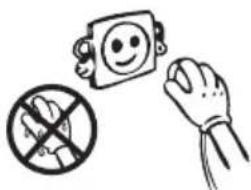
natural_image
Illustration of a hand holding a smiling face, a crossed-out hand, and a prohibition symbol (no text or labels)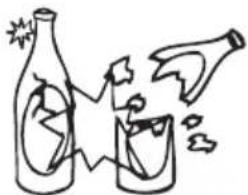
natural_image
Simple line drawing of two bottles and a glass with bubbles, no text or symbols present
natural_image
Cartoon illustration of a distressed container with arms and legs, holding a paper labeled 'KG' (no text or symbols beyond the label)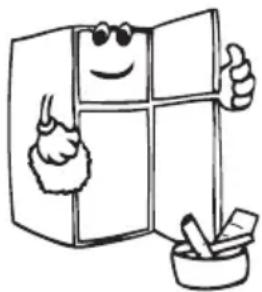
natural_image
Cartoon illustration of a smiling refrigerator with sunglasses and a mortar, giving thumbs up (no text or symbols)
natural_image
Simple line drawing of a hand holding a smiling square emoji (no text or symbols)LAS DISTINTAS FUNCIONES Y POSIBILIDADES
natural_image
Technical line drawing of a cylindrical device with internal components and mounting features (no text or symbols)natural_image
Warning symbol with exclamation mark inside a shield shape (no text or numbers)natural_image
Line drawing of a refrigerator interior with shelves, door, and a hanging clip (no text or symbols)natural_image
Three-step illustration showing hand positioning: pressing a piece, moving a tray with arrows, and holding a tool with a black X (no text or symbols)LIMPIEZA Y MANTENIMIENTO
natural_image
Cartoon illustration of a smiling rectangular character with arms raised, accompanied by two small pears (no text or symbols)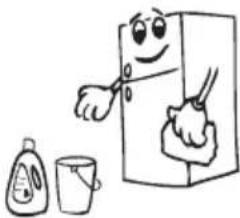
natural_image
Cartoon illustration of a refrigerator with a smiling face and two smaller objects beside it (no text or symbols)
natural_image
Cartoon illustration of a smiling refrigerator with sunglasses and a bowl of food (no text or symbols)LA CORRIENTE DEBE ESTAR DESCONECTADA.
natural_image
Simple line drawing of a structural beam or support with a small circular end (no text or symbols)
natural_image
Diagram showing a hand pressing down on a mechanical component with a circular arrow indicating direction (no text or symbols present)natural_image
Line drawing of a mechanical tool with internal components (no text or symbols)natural_image
Simple line drawing of two children playing a game with a long rectangular block (no text or symbols)ANTES DE LLAMAR A SU SERVICIO POSTVENTA
natural_image
Pure diagram of a trash bin with diagonal lines crossing it, no text or symbols presentFigure.A

FFigure B
![550 min. 200 cm² 90 min. 560-570 max. 2100 B 540 90° min. 200 cm² A [mm] A B 875 875-895 1020 1020-1040 1225 1225-1245](/content/2026/02/394791/images/b5a5a496861c4778a11af9d3943c31c21e0e937d7cd35ef8d3390200d9986e27.jpg)
Figure C

FigureD

Figure E
FiguFegEre.F
FigFigure.G

FigFigure.H

Figure J

Figure K
Downloaded from www.vandenborre.be

- Sommaire
- INSTRUCTIONS PREALABLES 2
- TRANSPORT ET DEPLACEMENT 12
- AVANT D'APPELER LE SERVICE APRES VENTE 12
- ELEMENTS ET COMPARTIMENTS DE L'APPAREIL....14
- Accessoires
- TRANSPORT ET DEPLACEMENT
- AVANT D'APPELER LE SERVICE APRES VENTE
- PARTS OF THE APPLIANCE AND THE COMPARTMENTS ...... 21
- HOW TO OPERATE THE APPLIANCE....28
- FOOD STORAGE IN THE APPLIANCE....31
- CLEANING AND MAINTENANCE 33
- BEFORE CALLING THE AFTER SALES SERVICE....34
- TECHNICAL DATA 36
- Installation instructions
- Door reversing
- SAFETY INFORMATION
- WARNINGS:
- IMPORTANT INFORMATION
- DISPOSAL
- SWITCHING ON THE APPLIANCE
- HOW TO OPERATE THE APPLIANCE
- Thermostat Setting
- "Door Open" Indicator
- Temperature indicator
- Putting food in the coldest area of the refrigerator
- FOOD STORAGE IN THE APPLIANCE
- Refrigerator Compartment
- Freezer Compartment
- CLEANING AND MAINTENANCE
- Defrosting
- Defrosting the Refrigerator Compartment
- Defrosting the Freezer Compartment (if available)
- Replacing the Light Bulb
- BEFORE CALLING THE AFTER SALES SERVICE
- The appliance does not operate.
- Check if:
- The appliance performs poorly.
- Noises from the appliance.
- Recommendations
- Temperatuurindicator
- REINIGING EN ONDERHOUD
- Ontdooien
- Koelingscompartiment
- DEEL 6. VOORDAT U EEN BEROEP DOET OP DE KLANTENSERVICE
- Sbrinamento
- Scomparto frigo:
- PARTE 5.
- TRASPORTO E SPOSTAMENTO DELL'APPARECCHIO
- PRIMA DI CHIAMARE IL SERVIZIO ASSISTENZA
- LAS DISTINTAS FUNCIONES Y POSIBILIDADES
- LIMPIEZA Y MANTENIMIENTO
- LA CORRIENTE DEBE ESTAR DESCONECTADA.
- ANTES DE LLAMAR A SU SERVICIO POSTVENTA
Brand : PROLINE
Model : FRI2400PW1
Category : Refrigerator