
WSPT1 - Thermometer VELLEMAN - Free user manual and instructions
Find the device manual for free WSPT1 VELLEMAN in PDF.
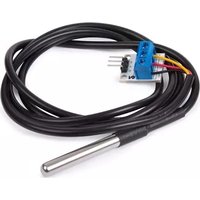
| Product type | Wireless water thermometer (pool, spa, pond) |
| Brand | Velleman |
| Model | WSPT1 |
| Station dimensions | 72 x 24 x 121 mm |
| External sensor dimensions | ∅ 100 x 155 mm |
| Station weight | ± 100 g |
| External sensor weight | ± 205 g |
| Station power supply | 2 AAA (LR03) 1.5 V batteries (included) |
| External sensor power supply | 2 AA (LR6) 1.5 V batteries (included) |
| Transmission frequency | 433 MHz |
| Transmission range | ≤ 30 m (in open space) |
| Measurement range | -40°C to +60°C (± 0.1°C) |
| Display | °C or °F (selectable) |
| Main functions | Simultaneous indoor/water measurement, min/max memory, synchronization |
| Sensor waterproofing | Submersible, UV and chemical resistant |
| Intended use | Pools, jacuzzis, basins, ponds |
| Installation | Station indoors, sensor in water (in the shade) |
| Maintenance | Clean with a soft cloth; avoid corrosive products |
| Safety instructions | Keep out of reach of children; do not expose to rain |
| Warranty | 24 months (according to conditions) |
| Included accessories | Station, external sensor (WSPT1/TX), batteries |
Frequently Asked Questions - WSPT1 VELLEMAN
User questions about WSPT1 VELLEMAN
0 question about this device. Answer the ones you know or ask your own.
Ask a new question about this device
Download the instructions for your Thermometer in PDF format for free! Find your manual WSPT1 - VELLEMAN and take your electronic device back in hand. On this page are published all the documents necessary for the use of your device. WSPT1 by VELLEMAN.
USER MANUAL WSPT1 VELLEMAN
WIRELESS POOL AND POND THERMOMETER
DRAADLOZE THERMOMETER VOOR ZWEMBAD/ VI JVER
THERMOMETRE SANS FIL POUR PISCINE/ BA SSIN DE JARDIN
TERMÓMETRO INALÁMBRICO PARAPISCINA/ ESTANQUE
DRAHTLOSES THERMOMETER FUR SCHWIMMBAD/TEICH
TERMOMETRO SEM FIO PARA PISCINA/ TANQUE
natural_image
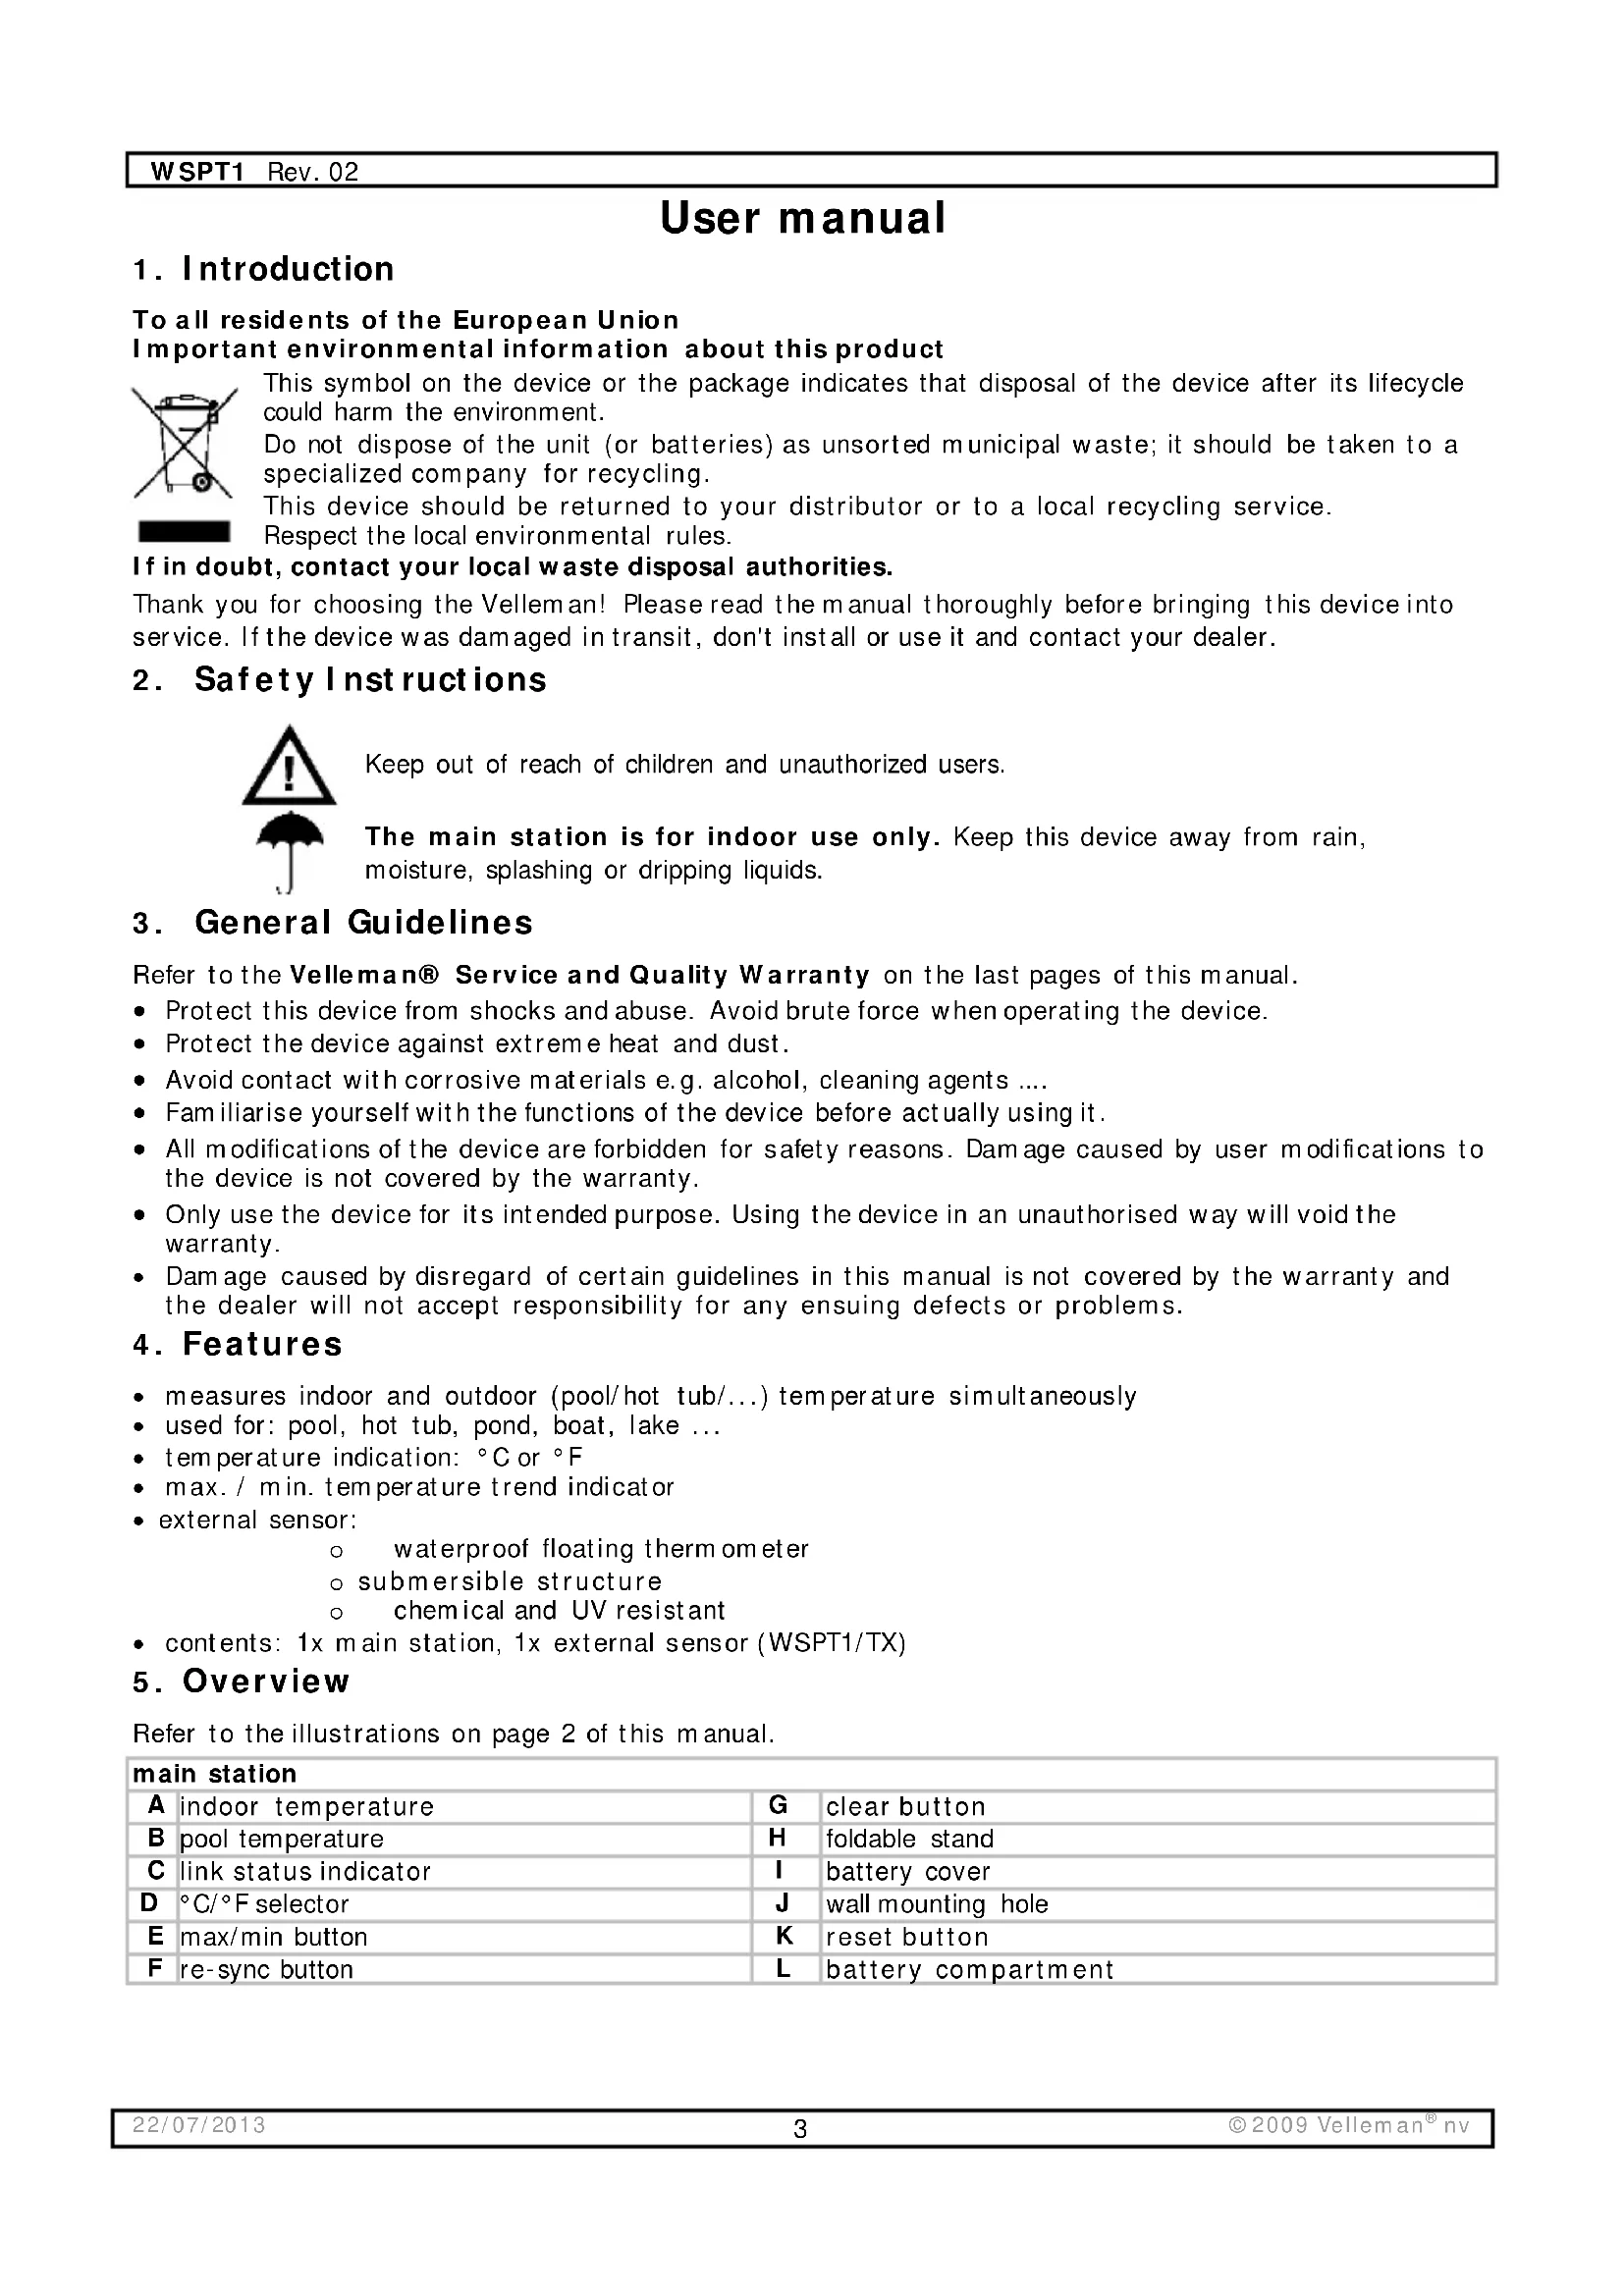
Two white laboratory temperature measurement devices: a digital thermometer displaying 8.0°C and a digital thermometer showing 23.4°C with a water level indicator (no text or symbols on the devices themselves)USER MANUAL 3
GEBRUIKERSHANDLEIDING 7
NOTICE D'EMPLOI 11
MANUAL DEL USUARIO 15
Main station – Basisstation – Station principale – Unidad principal
– Haupteinheit – Estação principal
External sensor – Externe sensor – capteur externe – Sensor externo – Externer Sensor – Sensor externo
User manual
1. Introduction
To all residents of the European Union
Important environmental information about this product
This symbol on the device or the package indicates that disposal of the device after its lifecycle could harm the environment.
Do not dispose of the unit (or batteries) as unsorted municipal waste; it should be taken to a specialized company for recycling.
This device should be returned to your distributor or to a local recycling service.
Respect the local environmental rules.
If in doubt, contact your local waste disposal authorities.
Thank you for choosing the Velleman! Please read the manual thoroughly before bringing this device into service. If the device was damaged in transit, don't install or use it and contact your dealer.
2. Safety Instructions

Keep out of reach of children and unauthorized users.
The main station is for indoor use only. Keep this device away from rain, moisture, splashing or dripping liquids.
3. General Guidelines
Refer to the Velleman® Service and Quality Warranty on the last pages of this manual.
- Protect this device from shocks and abuse. Avoid brute force when operating the device.
- Protect the device against extreme heat and dust.
- Avoid contact with corrosive materials e.g. alcohol, cleaning agents ....
- Familiarise yourself with the functions of the device before actually using it.
- All modifications of the device are forbidden for safety reasons. Damage caused by user modifications to the device is not covered by the warranty.
- Only use the device for its intended purpose. Using the device in an unauthorised way will void the warranty.
- Damage caused by disregard of certain guidelines in this manual is not covered by the warranty and the dealer will not accept responsibility for any ensuing defects or problems.
4. Features
- measures indoor and outdoor (pool/hot tub/...) temperature simultaneously
• used for: pool, hot tub, pond, boat, lake ...
• temperature indication: °C or °F - max. / min. temperature trend indicator
- external sensor:
o waterproof floating thermometer
o submersible structure
o chemical and UV resistant
- contents: 1x main station, 1x external sensor (WSPT1/TX)
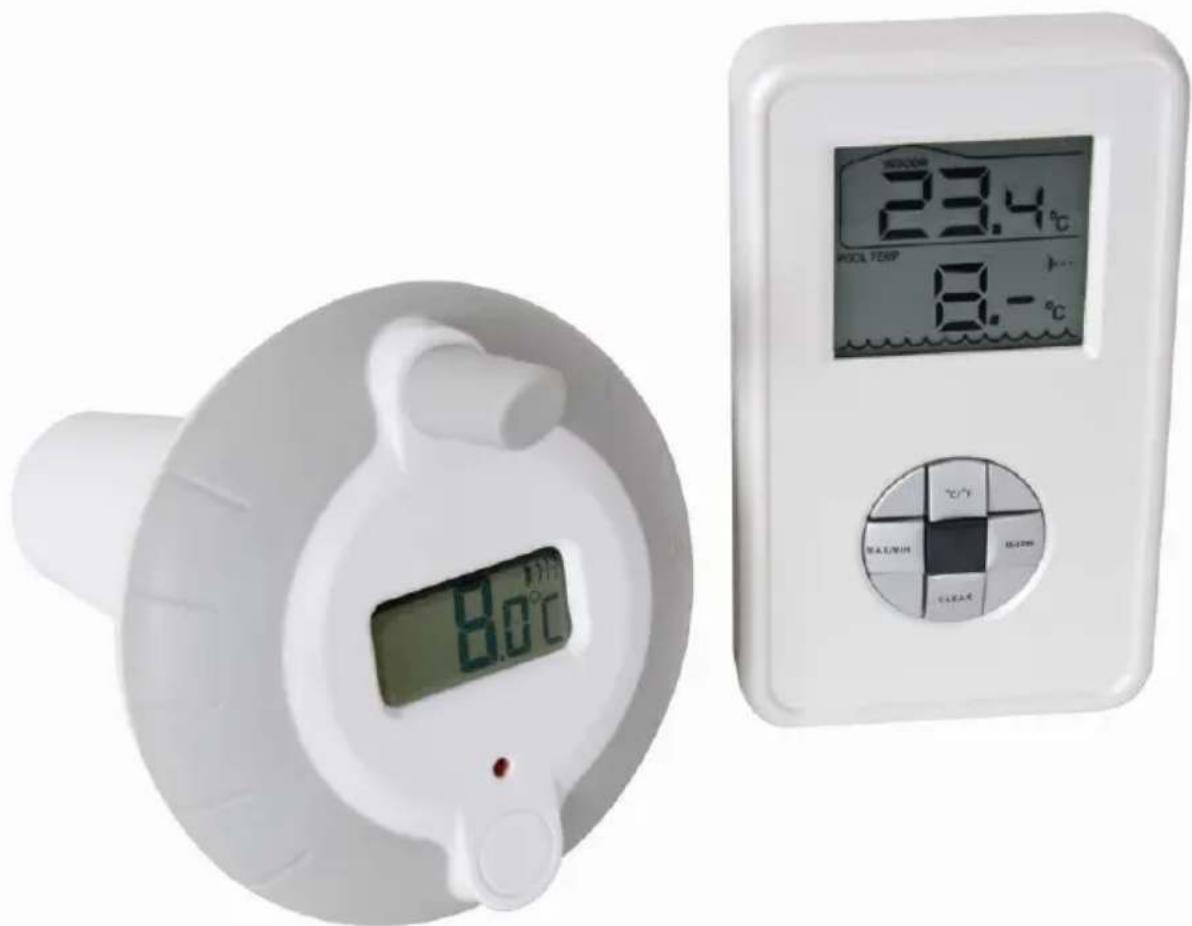
5. Overview
Refer to the illustrations on page 2 of this manual.
| main station | |||
| A | indoor temperature | G | clear button |
| B | pool temperature | H | foldable stand |
| C | link status indicator | I | battery cover |
| D | °C/°F selector | J | wall mounting hole |
| E | max/min button | K | reset button |
| F | re-sync button | L | battery compartment |
WSPT1 Rev. 02
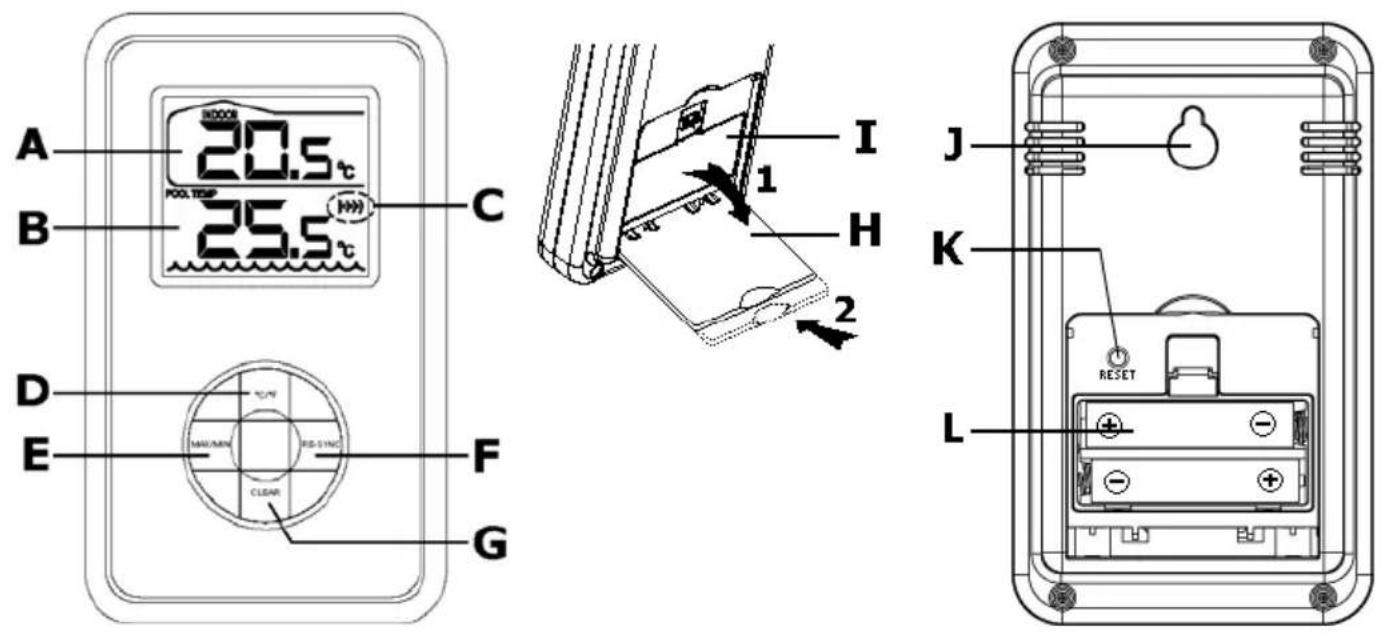
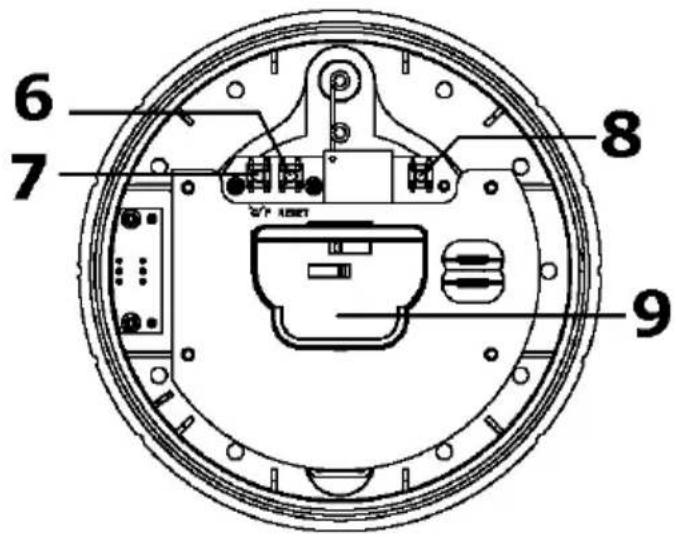
external sensor
| 1 | pool temperature | interior view 1 - bottom | |
| 2 | link status indicator | 6 | reset button |
| 3 | power on/off button | 7 | °C/°F selector |
| 4 | antenna | 8 | not used |
| 5 | status LED | 9 | battery compartment |
^1 to open: turn the top part (with antenna) counter clockwise
6. Use
- Make sure batteries are present inside main station and external sensor (refer to §8).
- When batteries are present, the main unit will display the indoor temperature [A]. To toggle between °C or °F display, press the °C/°F selector [D].
- Hold the external sensor ± 1m ( ± 3ft ) from the main station and press the power on/off button [3].
- The local temperature is shown on the display [1]. To toggle between °C or °F display, open the external sensor by turning the top (with antenna) counter clockwise. Press the °C/°F selector [7]. Verify that the rubber seal is in place and in good condition. Place the top back and secure it by turning clockwise until you hear a click.
Note: when the external sensor is open, no temperature is measured or displayed.
- The external sensor will now attempt to connect to the main station. The status of the link between the main unit and external sensor is indicated by the link status indicators on the main unit [C] and on the external sensor [2]:
| )... | steady no signal detection | |
 | blinking | sending/receiving signal |
| ...] | steady | main and external sensor synchronized |
- When the main station does not receive a (valid) signal, the outdoor temperature indication [B] remains blank (--.-). Press the re-sync button [F] to try again.
- The external sensor will send temperature data to the main station every 3 minutes, indicated by a blinking status LED [5] and blinking link status indicators [2] and [C].
Note: Working frequency is 433MHz. Signal transmission/reception may be interfered by other devices using the same frequency. If this interference is temporarily, normal operation will resume once the source of interference disappears.
- Place the main unit indoors, preferably in line-of-sight of the external sensor, but keep at least 1m (3ft) distance from metal window frames or sources of interference e.g. computer monitors, TV-sets.... Mount the unit on the wall using the wall mounting hole [J] or flip down the foldable stand [H] and secure it by pushing it inside the housing (see the illustration on page 2).
- Place the external sensor in a pool/hot tub/pond/..., protected from direct sunlight and (heavy) rain. The maximum distance from the main unit is ±30m (100ft), but distance is reduced depending on the number, size and type of obstacles between main station and external sensor.
- The maximum and minimum measured temperatures are stored in memory. To recall the memory, press the max/min button [E] once to see the maximum [A] and minimum [B] indoor temperature. Press the max/min button [E] again to see the maximum [A] and minimum [B] outdoor temperature. Press again or simply wait ± 10s to return to normal display.
- Press the clear button [G] to clear the maximum and minimum temperature memory.
- To reset the main station, press the reset button [K] which is located under the foldable stand [H] at the back of the device. This will also clear the stations' memory and re-initiates the wireless communication link.
- When the low battery indication 📋 appears in the indoor temperature display area [A] or pool temperature display area [B], replace the batteries of the main station respectively the external sensor (see §8).
7. Troubleshooting
- No outdoor temperature is displayed.
- Verify whether the external sensor is on. Make sure the batteries of the external sensor are still sufficiently charged.
- Press the re-sync button [F] and wait ±6 minutes. If this doesn't help, verify whether the distance between main station and external sensor is within limits and no interference is present.
WSPT1 Rev. 02
- Outdoor temperature reading is (much) higher than water temperature.
- The external sensor is probably in direct sunlight. Move it to a shady area.
8. Batteries
main station
- Flip down the foldable stand [H] to see the battery cover [I].
- Remove the battery cover [I] and insert 2 new identical 1.5V size AAA batteries in accordance with the polarity markings inside the battery compartment [L].
- Close the battery compartment and press the reset button [K].
- The indoor temperature is shown and the link status indicator [C] flashes.
external sensor
- Open the external sensor by turning the head counter clockwise. Slide the top part out of the housing. The battery compartment becomes visible. Be careful not to touch the electronic circuitry.
- Slide the battery compartment cover downward to open it. Insert 2 new identical 1.5V size AA batteries in accordance with the polarity markings inside the battery compartment.
- Press the reset button [6].
- Make sure the rubber seal sits correctly in its place. Put the top back and turn it clockwise until it closes finger tight.
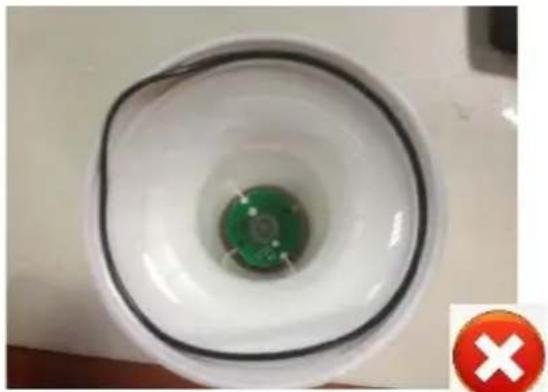
natural_image
Top-down view of a white circular device with a green internal component and a red 'X' symbol at the bottom (no text or symbols on the device itself)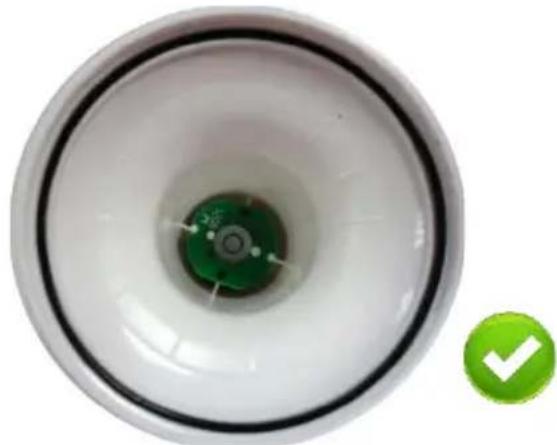
natural_image
Top-down view of a white circular device with a green internal component and a green checkmark icon (no text or symbols on the device itself)General
- Do not attempt to recharge non-rechargeable batteries, do not puncture or do not throw batteries in fire as they might explode.

WARNING:
Handle batteries with care, observe warnings on battery casing.
Dispose of batteries in accordance with local regulations.
Keep the batteries away from children.
9. Technical specifications
| transmission frequency | 433 MHz | |
| transmission range <= 30m (<=100ft) | ||
| measuring range | -40°C ~ +60°C (-40°F ~ 140°F) ± 0.1°C (0.2°F) | |
| main station | ||
| LCD size | 41 x 36mm | |
| power supply | 2x 1.5V AAA (LR03C, incl.) | |
| dimensions | 72 x 24 x 121mm | |
| weight | ±100g | |
| external sensor | ||
| LCD size | 34 x 15mm | |
| storage temperature | -50°C ~ +70 °C (-58°F ~ 158°F), non-condensing | |
| power supply | 2x 1.5V AA (LR6C, incl.) | |
| dimensions | ∅100 x 155mm | |
WSPT1 Rev. 02
weight ±205g
Use this device with original accessories only. Velleman nv cannot be held responsible in the event of damage or injury resulted from (incorrect) use of this device. For more info concerning this product and the latest version of this manual, please visit our website www.velleman.eu. The information in this manual is subject to change without prior notice.
© COPYRIGHT NOTICE
The copyright to this manual is owned by Velleman nv. All worldwide rights reserved.
No part of this manual or may be copied, reproduced, translated or reduced to any electronic medium or otherwise without the prior written consent of the copyright holder.
natural_image
Close-up of a green electronic component inside a white circular device, with a red 'X' symbol in the corner (no readable text or symbols on the component itself)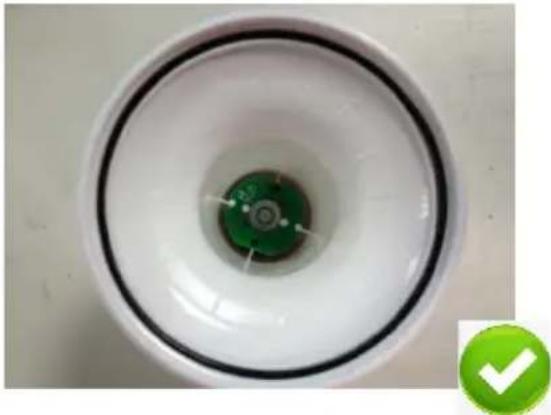
natural_image
Top-down view of a white circular device with a green internal component and a black ring, marked with a green checkmark (no text or symbols on the device itself)algemeen
natural_image
Top-down view of a white electronic device with a green circuit board and a red 'X' symbol (no readable text or symbols on the device itself)
natural_image
Top-down view of a white circular device with a green internal component and a green checkmark icon (no text or symbols on the device itself)en général
natural_image
Top-down view of a white electronic device with a green internal component and a red 'X' symbol (no text or symbols on the device itself)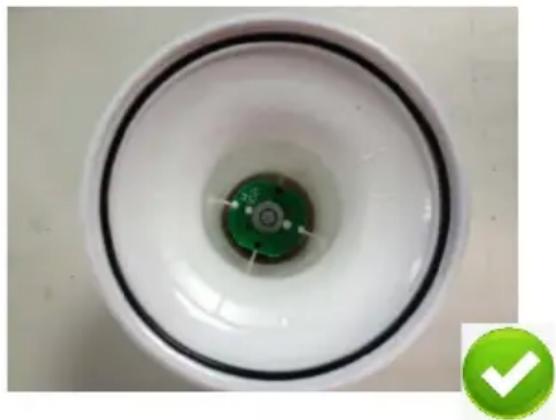
natural_image
Top-down view of a white circular device with a green internal component and a green checkmark icon (no text or symbols on the device itself)En general
natural_image
Close-up of a green electronic component inside a white circular device, with a red 'X' symbol in the corner (no readable text or symbols on the component itself)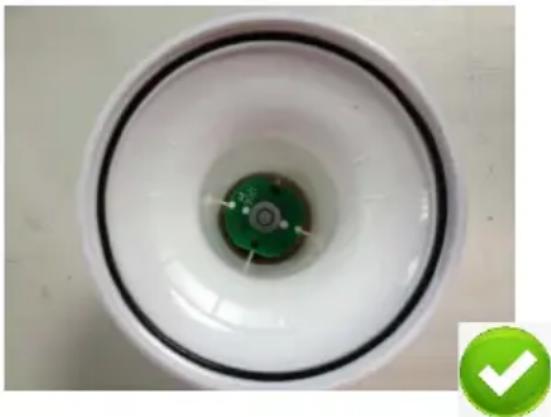
natural_image
Top-down view of a white circular device with a green internal component and a green checkmark icon (no text or symbols on the device itself)Allgemein
natural_image
Top-down view of a white circular device with a green internal component, marked with a red 'X' symbol (no text or symbols on the device itself)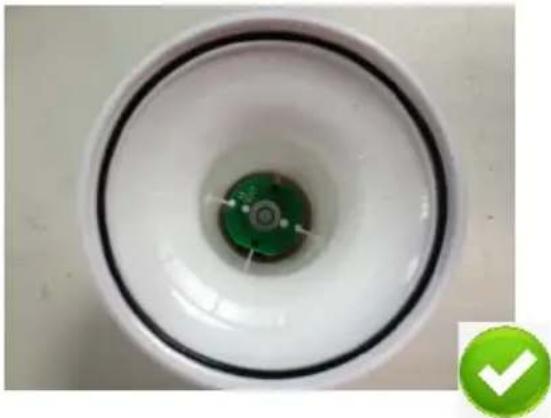
natural_image
Top-down view of a white circular device with a green internal component and a black ring, marked with a green checkmark (no text or symbols on the device itself)Em geral
Declare on our own responsibility that the finished product(s):
WIRELESS POOL AND POND THERMOMETER
Type or model / type of model / type ou modèle / Typ oder Modell / tipo o modelo:
WSPT1 (SPARE SENSOR WSPT1/TX)
constituting the subject of this declaration, conforms with the essential requirements and other relevant stipulations of the R&TTE Directive (1999/5/EC).
The product conforms to the following norm(s) and/or one or several other normative documents:
Technical data are available and can be obtained from:
Velleman® Service and Quality Warranty
Since its foundation in 1972, Velleman® acquired extensive experience in the electronics world and currently distributes its products in over 85 countries.
All our products fulfil strict quality requirements and legal stipulations in the EU. In order to ensure the quality, our products regularly go through an extra quality check, both by an internal quality department and by specialized external organisations. If, all precautionary measures notwithstanding, problems should occur, please make appeal to our warranty (see guarantee conditions).
General Warranty Conditions Concerning Consumer Products (for EU):
- All consumer products are subject to a 24-month warranty on production flaws and defective material as from the original date of purchase.
- Velleman® can decide to replace an article with an equivalent article, or to refund the retail value totally or partially when the complaint is valid and a free repair or replacement of the article is impossible, or if the expenses are out of proportion.
You will be delivered a replacing article or a refund at the value of 100% of the purchase price in case of a flaw occurred in the first year after the date of purchase and delivery, or a replacing article at 50% of the purchase price or a refund at the value of 50% of the retail value in case of a flaw occurred in the second year after the date of purchase and delivery.
• Not covered by warranty:
- all direct or indirect damage caused after delivery to the article (e.g. by oxidation, shocks, falls, dust, dirt, humidity...), and by the article, as well as its contents (e.g. data loss), compensation for loss of profits;
- consumable goods, parts or accessories that are subject to an aging process during normal use, such as batteries (rechargeable, non-rechargeable, built-in or replaceable), lamps, rubber parts, drive belts... (unlimited list);
- flaws resulting from fire, water damage, lightning, accident, natural disaster, etc....;
- flaws caused deliberately, negligently or resulting from improper handling, negligent maintenance, abusive use or use contrary to the manufacturer's instructions;
- damage caused by a commercial, professional or collective use of the article (the warranty validity will be reduced to six (6) months when the article is used professionally);
- damage resulting from an inappropriate packing and shipping of the article:
- all damage caused by modification, repair or alteration performed by a third party without written permission by Velleman®.
- Articles to be repaired must be delivered to your Velleman® dealer, solidly packed (preferably in the original packaging), and be completed with the original receipt of purchase and a clear flaw description.
- Hint: In order to save on cost and time, please reread the manual and check if the flaw is caused by obvious causes prior to presenting the article for repair. Note that returning a non-defective article can also involve handling costs.
• Repairs occurring after warranty expiration are subject to shipping costs.
- The above conditions are without prejudice to all commercial warranties.
The above enumeration is subject to modification according to the article (see article's manual).
NL


- User manual
- Introduction
- To all residents of the European Union
- Important environmental information about this product
- If in doubt, contact your local waste disposal authorities.
- Safety Instructions
- General Guidelines
- Features
- Overview
- WSPT1 Rev. 02
- Use
- Troubleshooting
- Batteries
- main station
- external sensor
- General
- WARNING:
- Technical specifications
- © COPYRIGHT NOTICE
- algemeen
- en général
- En general
- Allgemein
- Em geral
- WIRELESS POOL AND POND THERMOMETER
- WSPT1 (SPARE SENSOR WSPT1/TX)
- Velleman® Service and Quality Warranty
- General Warranty Conditions Concerning Consumer Products (for EU):
- • Not covered by warranty:
- NL
Brand : VELLEMAN
Model : WSPT1
Category : Thermometer