ADD20 - Humidifier DAITSU - Free user manual and instructions
Find the device manual for free ADD20 DAITSU in PDF.



| Product Type | Dehumidifier |
| Brand | Daitsu |
| Model | ADD20 |
| Power Supply | 220-230 V ~ 50 Hz |
| Dehumidification Capacity | 20 L/day (at 30°C, 80% RH) |
| Power Consumption | 360 W |
| Drain Tank Capacity | 6.0 L (auto shut-off at approx. 5.5 L) |
| Weight | 14 kg |
| Dimensions (H x W x D) | 545 mm x 380 mm x 261.5 mm |
| Operating Modes | Continuous Dehumidification, Laundry (Fast Drying), Silent |
| Adjustable Humidity Levels | 50%, 60%, 70% or continuous mode |
| Refrigerant Type | CFC-free, environmentally friendly |
| Operating Temperature Range | 2°C to 38°C |
| Additional Features | Continuous drainage possible (hose inner diameter 15 mm), auto shut-off when tank full, indicator lights |
| Air Filter Maintenance | Clean every 2 weeks with vacuum or warm water |
| Tank Maintenance | Clean with cold or warm water, no harsh detergents |
| Safety Precautions | Do not use near water, heat or flammable objects. Unplug before cleaning. Do not insert objects into the vents. |
| Repairability Index | Not specified; contact an authorized service center for repairs |
| Included Accessories | User manual, drain tank (built-in) |
Frequently Asked Questions - ADD20 DAITSU
User questions about ADD20 DAITSU
0 question about this device. Answer the ones you know or ask your own.
Ask a new question about this device
Download the instructions for your Humidifier in PDF format for free! Find your manual ADD20 - DAITSU and take your electronic device back in hand. On this page are published all the documents necessary for the use of your device. ADD20 by DAITSU.
USER MANUAL ADD20 DAITSU
Please read rules for safe operation and instructions carefully.
PRESTACIONES
\section*{3}
Especillas 3
Structure and Principle
Structure and Principle
Press the switch once to start operation, press it again to stop operation.
- touche"O
When use the unit, please observe the following safety precautions:
How dehumidifying works 37
Structure of dehumidifier 37
OPERATION
Operation panel 38
Switch function 39
Operation steps 39-40
Draining the water 40-41
MAINTENANCE
Caring for the dehumidifier 42
Storing the dehumidifier 42
Notation for safe operation 43
Removing breakdowns 43-44
APENDIX
Electric Schematic Diagram 45
Structure and Principle
Features
| SPECIFICATIONS | |
| Powerful dehumidifying capability | Excellent drying laundry function |
| ● Taking advantage of refrigeration principle, the dehumidifier powerfully removes partial moisture from air to drop the humidity of the room and keep indoor air dry and comfortable. | ● The dehumidifier dries laundry quickly. This can prevent laundry and furniture from becoming damp and musty in a rainy season. |
| Quiet operation | Drainage tank with a large capacity |
| ● When the dehumidifier operates in QUIET mode, the value of its noise is so low and makes your room quiet. | ● The drainage tank capacity is large to 6 liters; this will reduce the times of your discarding water. |
| Using refrigerant for protecting environment | Saving energy |
| ● The dehumidifier uses the no CFC refrigerant for protecting environment to reduce to pollute environment. | ● The power consumption is low. |
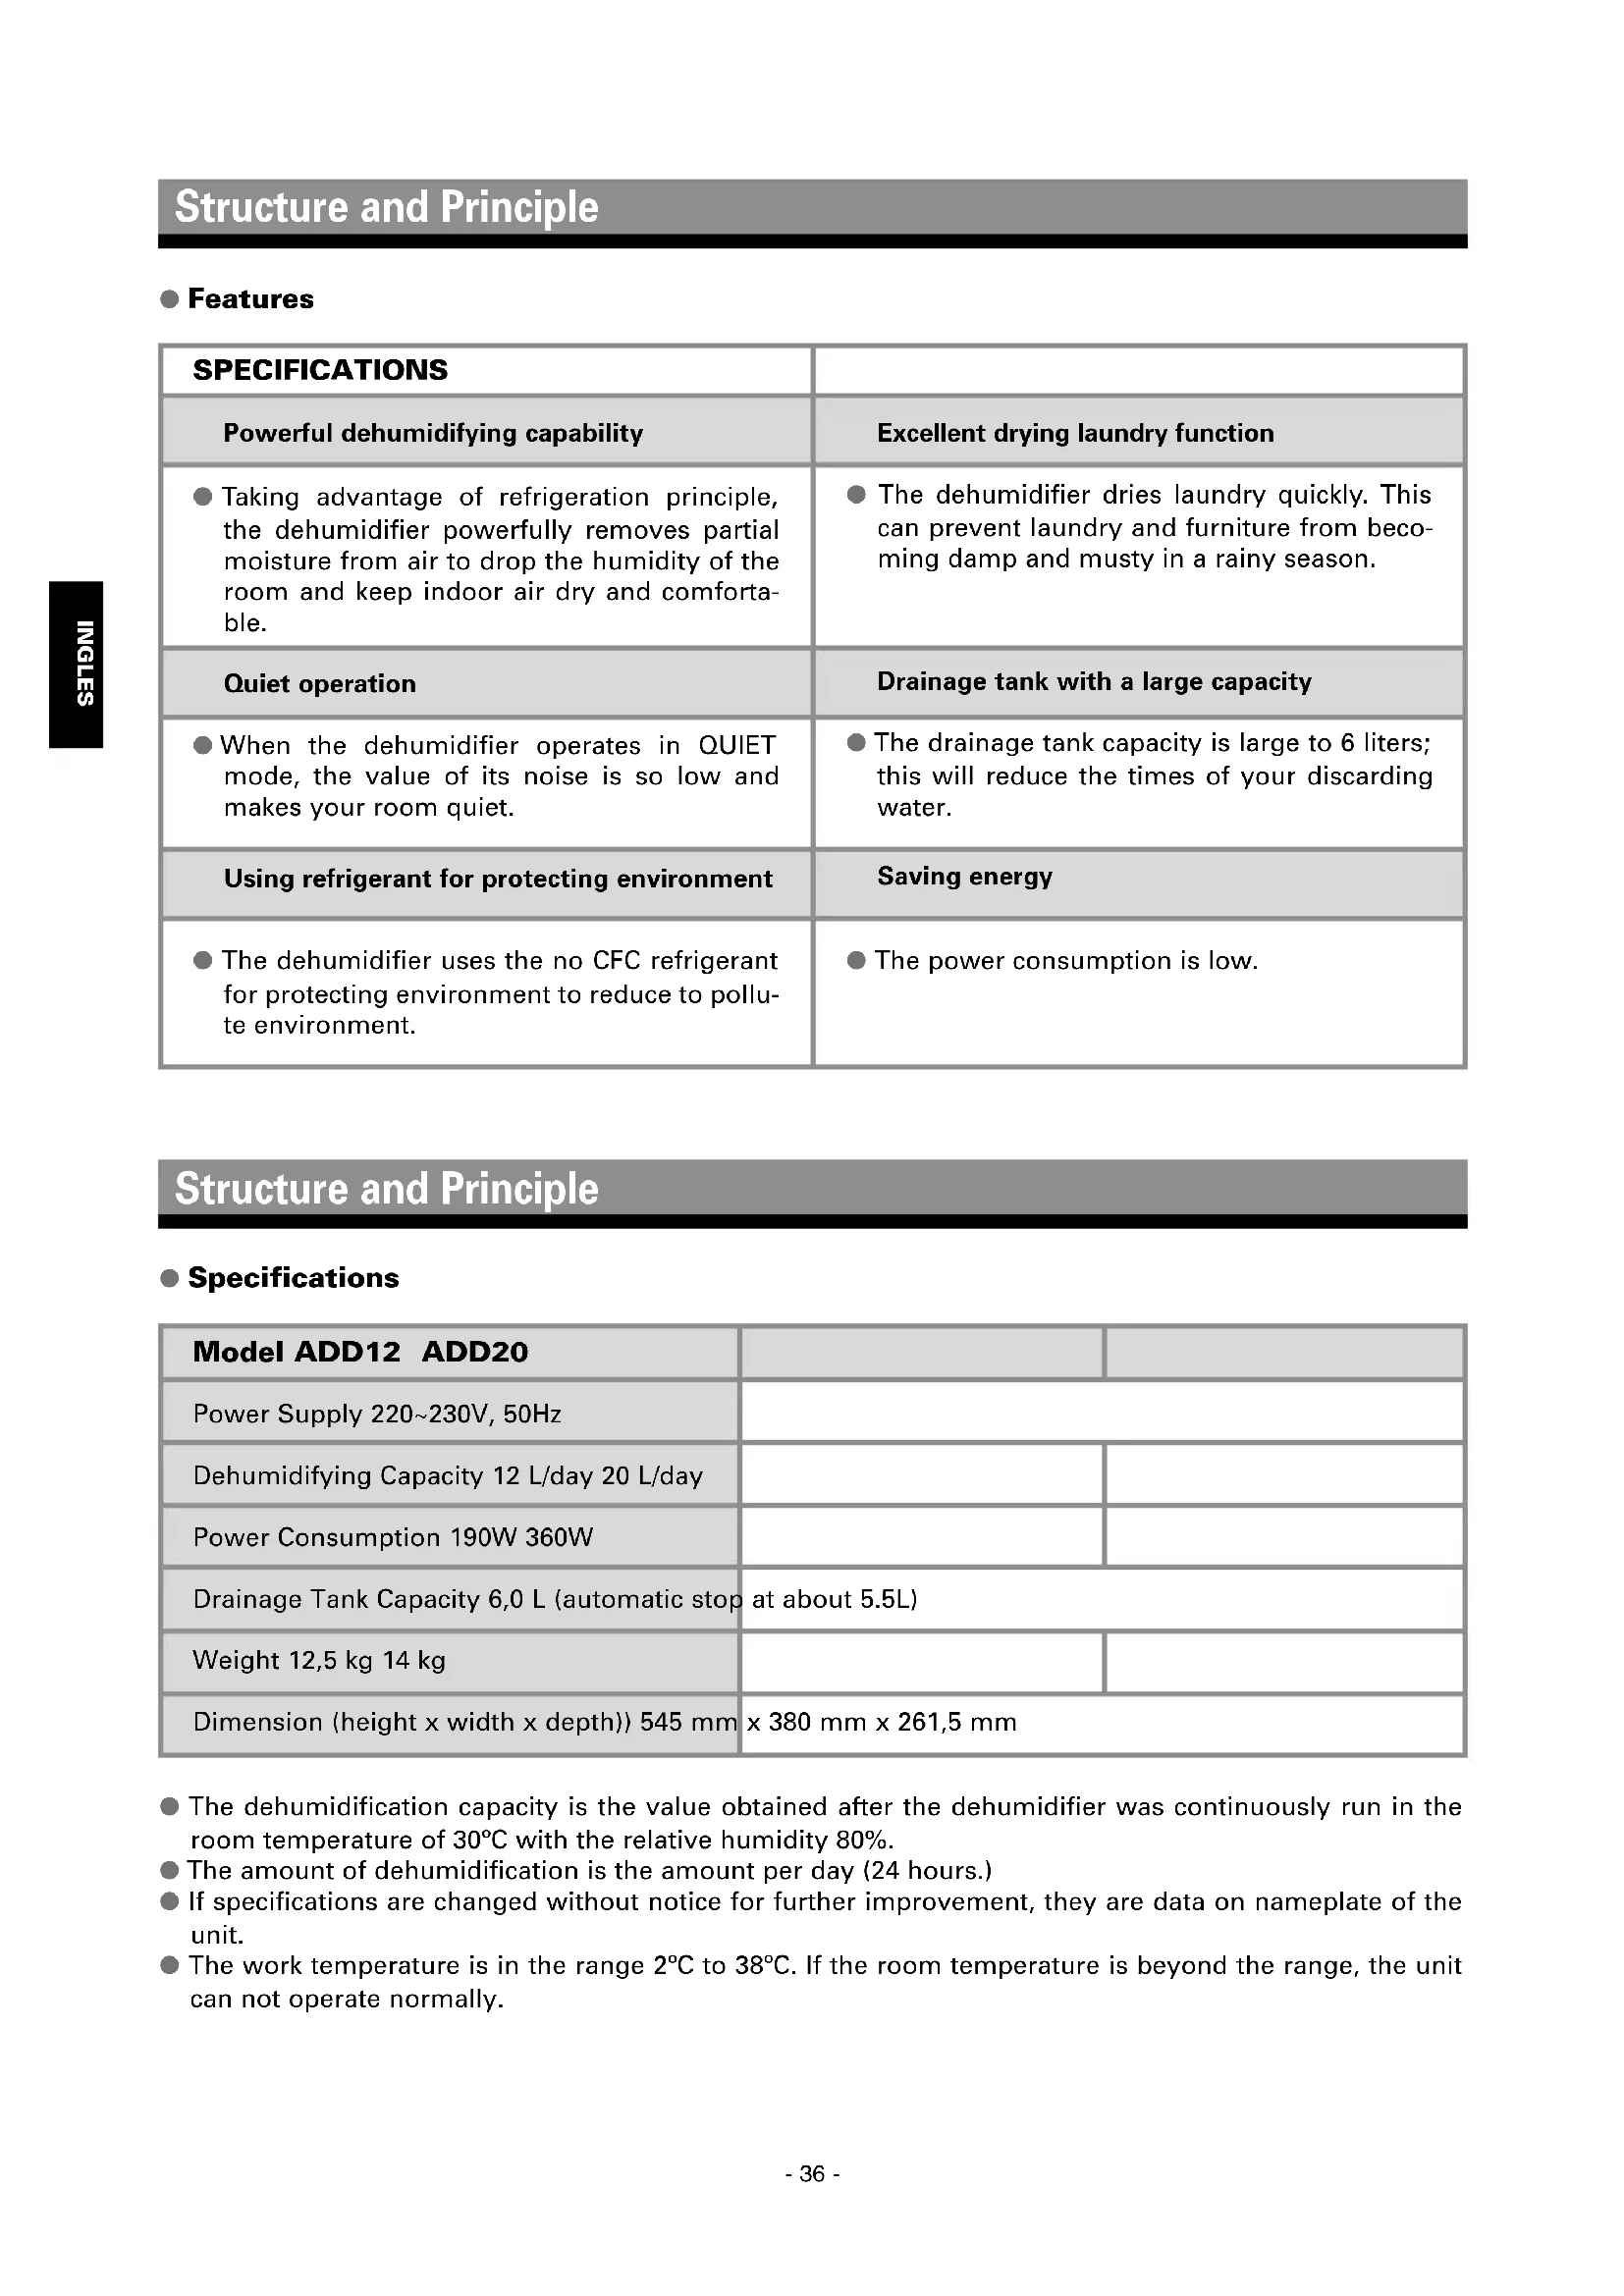
Structure and Principle
Specifications
| Model ADD12 ADD20 | ||
| Power Supply 220~230V, 50Hz | ||
| Dehumidifying Capacity 12 L/day 20 L/day | ||
| Power Consumption 190W 360W | ||
| Drainage Tank Capacity 6,0 L (automatic stop at about 5.5L) | ||
| Weight 12,5 kg 14 kg | ||
| Dimension (height x width x depth)) 545 mm | x 380 mm x 261,5 mm | |
The dehumidification capacity is the value obtained after the dehumidifier was continuously run in the room temperature of 30^ with the relative humidity 80% .
The amount of dehumidification is the amount per day (24 hours.)
- If specifications are changed without notice for further improvement, they are data on nameplate of the unit.
- The work temperature is in the range 2^ to 38^ . If the room temperature is beyond the range, the unit can not operate normally.
- How dehumidifying works
If you pour cold water into a cup, the air around the cup is cooled, and drops of water form on the surface of the cup. The dehumidifier takes advantage of this phenomenon to remove moisture.
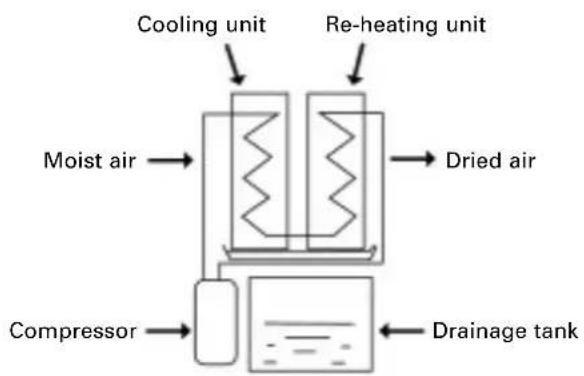
It draws in room air, cools it with a cooling unit, and changes the humidity to drops of water.
The drops of water fall into a drainage tank.
③ The dehumidified air is re-heated by a heating unit and discharged.
Steps ①,② and ③ are repeated to remove humidity from the room.
After the air passes through the re-heating unit, its temperature will rise a little, so that the temperature of the room will rise appreciably. This is normal phenomenon.
Structure and Principle
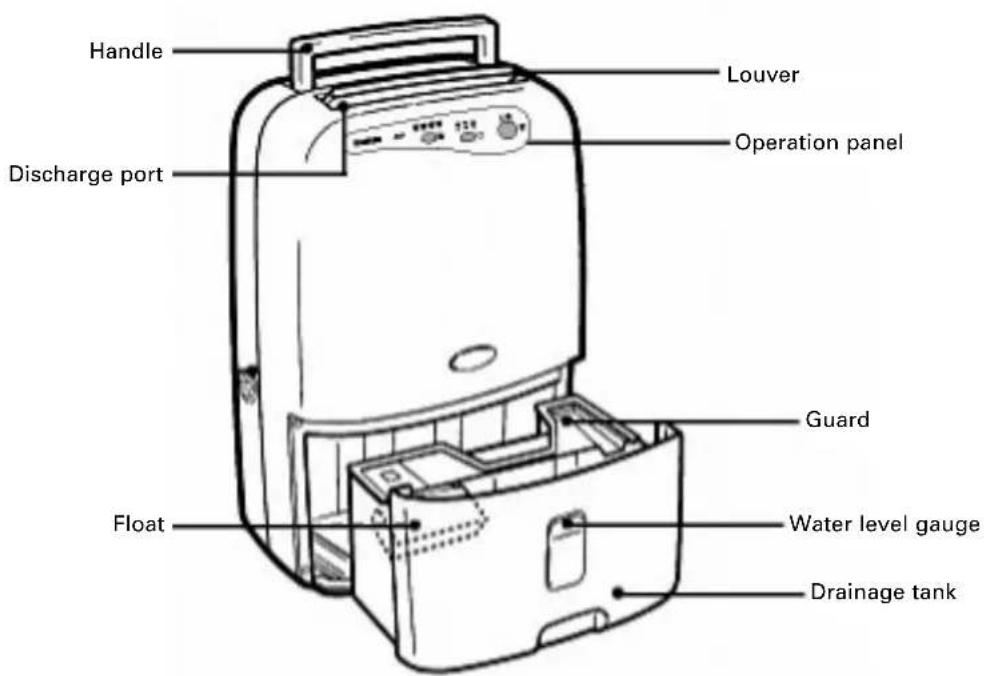
Structure of dehumidifier
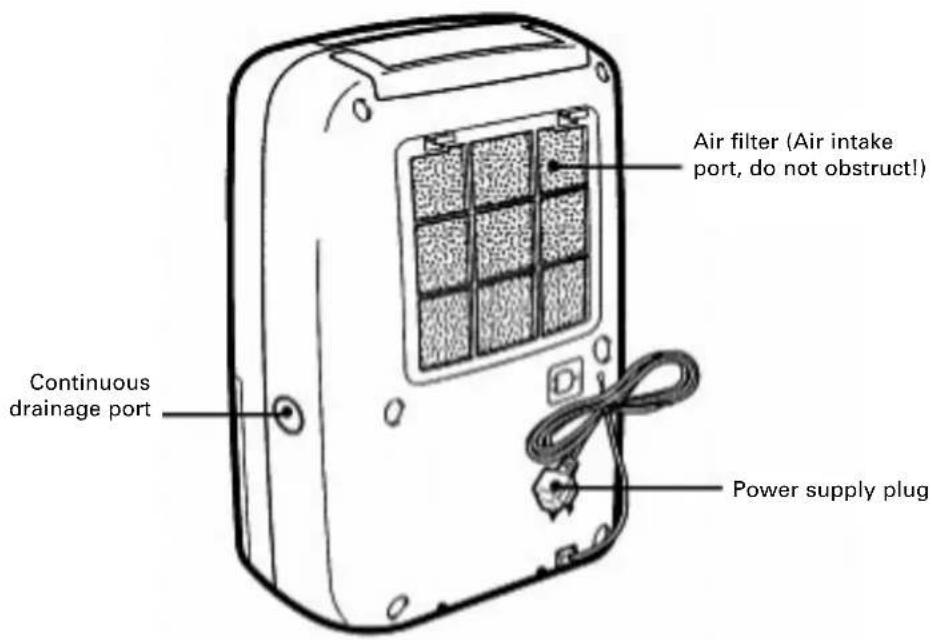
Operation
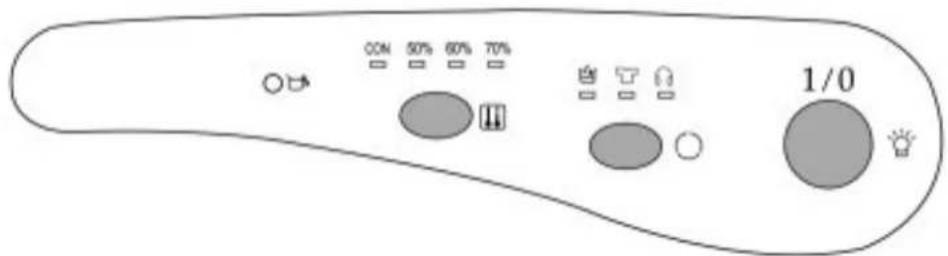
Operation panel
Indicator lamp
- "Tank full indicator lamp
It will light when the drainage tank is full or positioned incorrectly. Empty the water out of the drainage tank, and make sure the tank is positioned properly.
- "": Power indicator lamp
It will light when the unit is plugged in.
- " ", " ", "": mode indicator lamp
When "lamp or "lamp or "lamp is lighted, it respectively indicates that operation is in DEHU-MIDIFY, LAUNDRY or QUIET mode.
- "50%", "60%", "70%": Humidity indicator lamp
When "50%" lamp, "60%" lamp or "70%" lamp is lighted, it respectively indicates that the current setting humidity is "50%, "60% or "70%.
- "CON": Continuously dehumidity indicator lamp
When "CON" lamp is lighted, it indicates that the operation is in CONTINUOUS mode.
- Switch function
- "1/0" switch
Press the switch once to start operation, press it again to stop operation.
- "O"switch
Each time the switch is pressed, the operation mode changes in the order of "DEHUMIDIFY", "LAUNDRY" and "QUIET" and the corresponding mode indicator lamp will change with the operation mode.
- "switch
Press the switch to set the humidity of the room, which can be set in order of "50%", "60%" "70%" and "continuous", and the corresponding humidity indicator lamp will lights to display your setting humidity. When the relative humidity of the room is lower than your setting humidity, the operation will stop automatically. After the operation is started, the default operation mode is the continuous mode, the operation is continuous in the continuous mode until the unit is stopped or automatically stopped for the drainage tank is full.
Operation
Operation steps
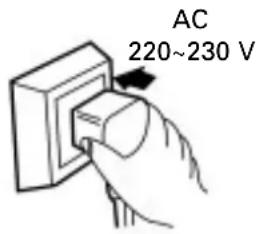
1. Plug the power supply plug into the outlet and press the "1/0" switch
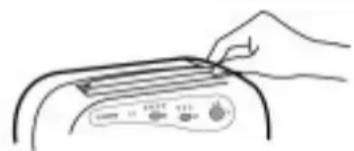
2. Open the louver by hand
- Use single phase 220~230V AC power supply.
- Wipe dust off of the power supply plug and insert the plug firmly, all the way to the rubber section, if there is a dust on the plug, or the plug is not fully inserted in the outlet, electrical shock and/or fire may result.
-
Never scratch, cut, or damage the power supply cord.
After the power supply plug is plugged into the outlet, " lamp will light. -
Before operation runs, please check and make sure the louver has been opened, or it will result in the temperature of the unit too high and cause accident. (There are 6 levels to be chosen.)
Operation
3. Switch the operation mode
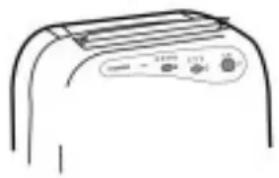
- Press the "1/0" switch, the unit operates in CONTINUOUS mode automatically.
- DEHUMIDIFY mode: Press "O" switch until the "B" lamp lights. Operation is continue with the amount of discharged air at the middle level.
- Modo SECAR COLADA: Press "O" switch until the "F". lamps lights, Operation is continue with the amount of discharged air at the high level. This is appropriate for enhanced dehumidifying, drying clothes or other items (when the indoor temperature is below 15^ or above 35^ , the protection device is actuated, the unit only can operate in LAUNDRY mode and pressing "O" switch is ineffective.
- QUIET mode: Press "O" switch until the "63" lamp lights. Operation is continue with the amount of discharged air at the low level. This suppresses operation noise when dehumidifying (Under the condition of high temperature and high humidity, please avoid operating the unit in QUIET mode, as this can decrease the life of the unit.)
4. Stop operation
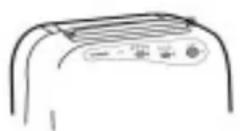
When the "1/0" switch is pressed during the unit runs:
- Dehumidifying stops.
- Never stop the unit by unplugging the power supply cord.
Operation
Draining the water
The drainage tank is full
If the drainage tank becomes full (approx. 5.5 liters), the "Lamp lights to alert the user, operation stops automatically. Empty the water from the drainage tank and discard it.
Drainage steps
- Remove the drainage tank Lightly pressing on the sides of the tank with both hands, pull it gently out.
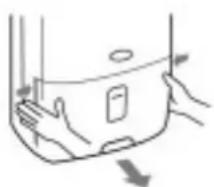
Take hold of the handle, and then remove the tank.
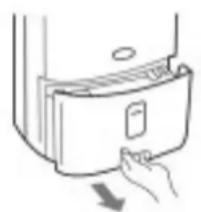
Notation for drainage
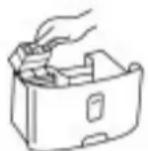
- Do not remove the bubble packing from the float on the unit. The float on the unit will no longer be able to detect without the bubble packing when the water level is full, and water may leak from the water tank onto household furniture. This can cause electrical shock and/or short-circuiting.
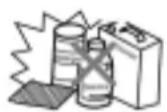
- If the drainage tank is dirty, wash it with cold or lukewarm water. Do not use detergent, scouring pads, chemically treated dustcloths, gasoline, benzene, thinner, or other solvents to clean it, as these can scratch and damage the tank and cause water to leak.
Operation
| Drainage steps | Notation for drainage |
| 2. Discard the water Guard Drain water from this point 3. Place back the drainage tank | ● When place back the drainage tank, press the tank firmly into place with both hands. If the tank is not positioned properly, the “Tank Full” sensor will be activated, and the dehumidifier will not operate. Check to make sure the guards are firmly attached to the tank. If they are not, the drainage tank will be harder to remove. ● If the drainage tank is removed while the unit is in operation, or immediately after operation has stopped, water which is still in the cooling unit may drip out on the base plate. Wait at least 30 minutes before removing the drainage tank. (If water has dripped, wipe it up.) |
Operation
Draining the water
Continuous drainage of water
The unit has a continuous drainage port. Using a commercial hose (with an inner diameter of 15mm ), the water in the drainage tank can be continuously drained out of the continuous port of the unit. When setting up the equipment for continuous drainage, always stop operation first and unplug the power supply plug.
| 1. Disconnect the drainage tank and open the continuous drainage port. Use nippers or a similar tool to cut away the continuous drainage port in the side of the main unit. | |
| 2. Push the hose into the continuous drainage port. Pass a commercial hose (with an inner diameter of 15mm) through the continuous drainage port, and press it firmly into the drainage port in the main unit, make sure water does not leak. The level height of drain piping should always be not higher than the one of the drainage port, also drain piping should always be not plugged up, so the condensed water can be drained out successfully. | |
| 3. Return the drainage tank to its original position. Check the hose periodically to make sure it is still connected and has not been obstructed. |
Caring for the dehumidifier
Clean the main unitl
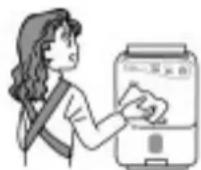
Wipe it with a soft cloth
Gasoline, benzene, thinners, scouring powder, chemically treated dustcloths, and detergents may damage the main unit and should not be used.
Clean the air filter
The air filter should be cleaned approximately once two week.
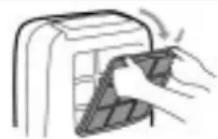
1. Remove the air filter.
Press downward on the tabs on the air filter to remove it.
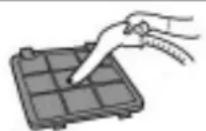
2. Clean the air filter.
Run a vacuum cleaner lightly over the surface of the air filter to remove dirt. If the air filter is very dirty, wash it with warm water and a neutral cleaning solvent and dry it thoroughly.
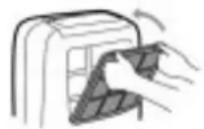
3. Attach the air filter.
Insert the lower tabs of the air filter into the main unit and press the air filter until you hear the tabs click into place.
Maintenance
- Storing the dehumidifier
When the unit is not to be used for a long period of time
- Fold up the power supply cord and secure it to the holder.
- Discard any water left in the drainage tank and wipe away any remaining drops with a cloth.
- Clean the air filter.
- Store the unit.
Package the unit to keep it free of dust, and keep it upstanding and store it at a cool and dry place.
Notation for safe operation
When use the unit, please observe the following safety precautions:
| 1. When the unit works in LAUNDRY mode, keep it an appropriate distance away from the clothings, and prevent the water from dropping onto it. |
| 2. Before clean the unit or when do not use it for along period of time, unplug the power supply cord. |
| 3. Do not wash the unit with water also put the unit close to water, explosive or flammable things. |
| 4. Do not set the unit close to heat-generating devices or near inflammable and dangerous article. |
| 5. Never put your fingers or objects into the intake or discharge ports. |
| 6. Do not sit or stand on the unit. |
| 7. Discard water that has collected in the tank timely. |
| 8. Do not run the dehumidifier in an closed area such as inside closets, or fire can take place. |
| 9. Do not use the unit for special purposes such as edible items, objects of art or scientific materials are stored. |
| 10. Install drain piping in a downhill grade to make sure that condensed water can be drained continuously. |
| 11. If the supply cord is damaged, it must be replaced by the manufacture or its service agent or a similarly qualified person in order to avoid a hazard. |
Maintenance
- Removing breakdowns
If a condition listed below occurs, please check the following items to help you to save your time and cost.
| Condition Cause | What to do |
| The unit does not operate. | Has the power supply cord been disconnected? Plug the power supply cord into the outlet. Is the “☐” lamp blin-king?(The tank is full or in a wrong position.) Discard the water in the drainage tank, and then reposition the tank. The protection device is actuated and the unit can not be started in case operation is under the bad environment (in that case, please do not use the dehu-midifier). |
| Is the temperature of the room above 38°C or below 2°C. |
Maintenance
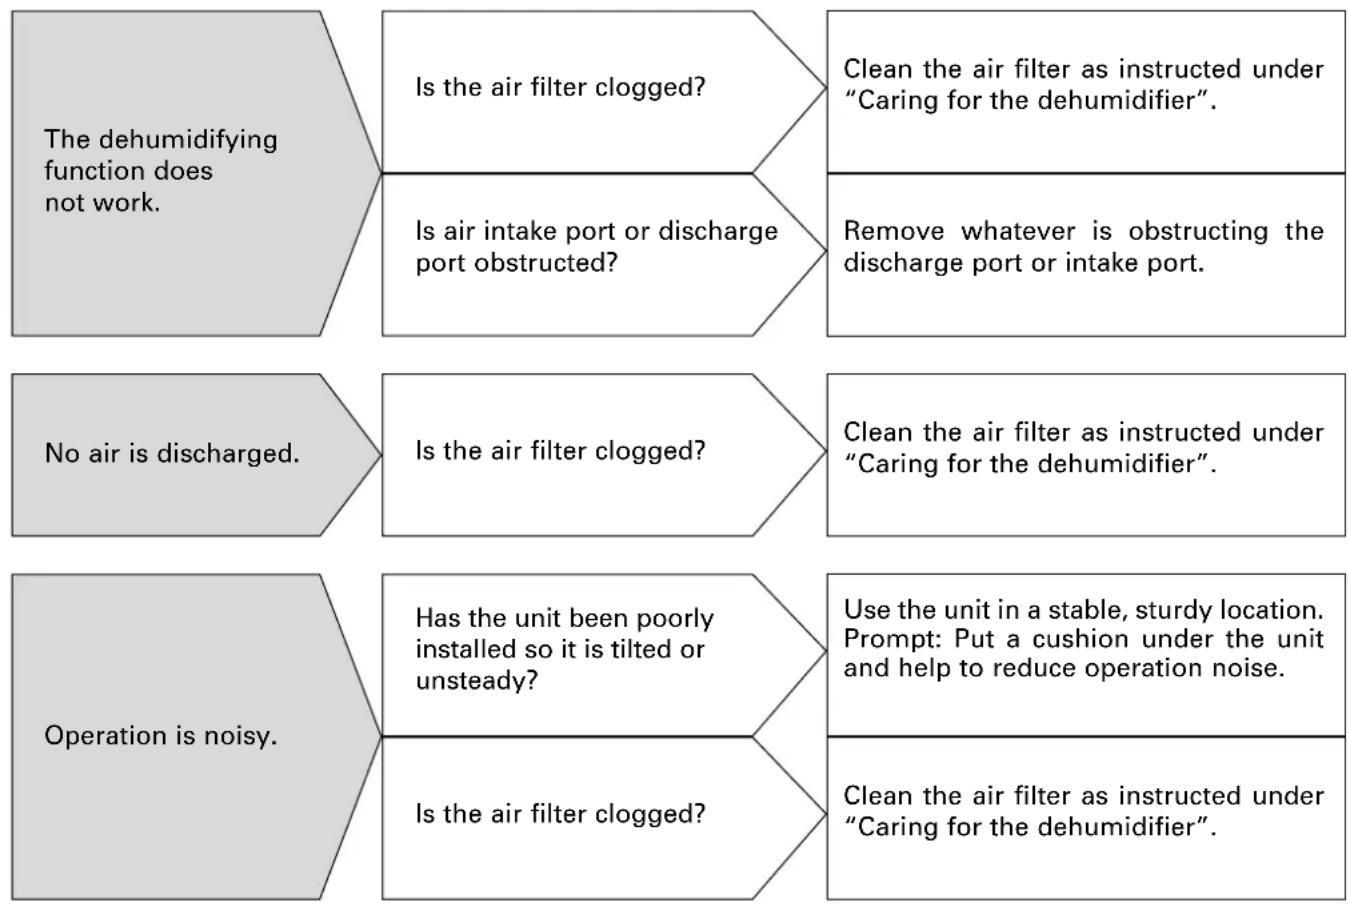
- After the above condition has occurred and corresponding step is used but the breakdown can not be removed or other breakdown occurs, please contact the authorized service centers.
Maintenance
- Removing breakdowns
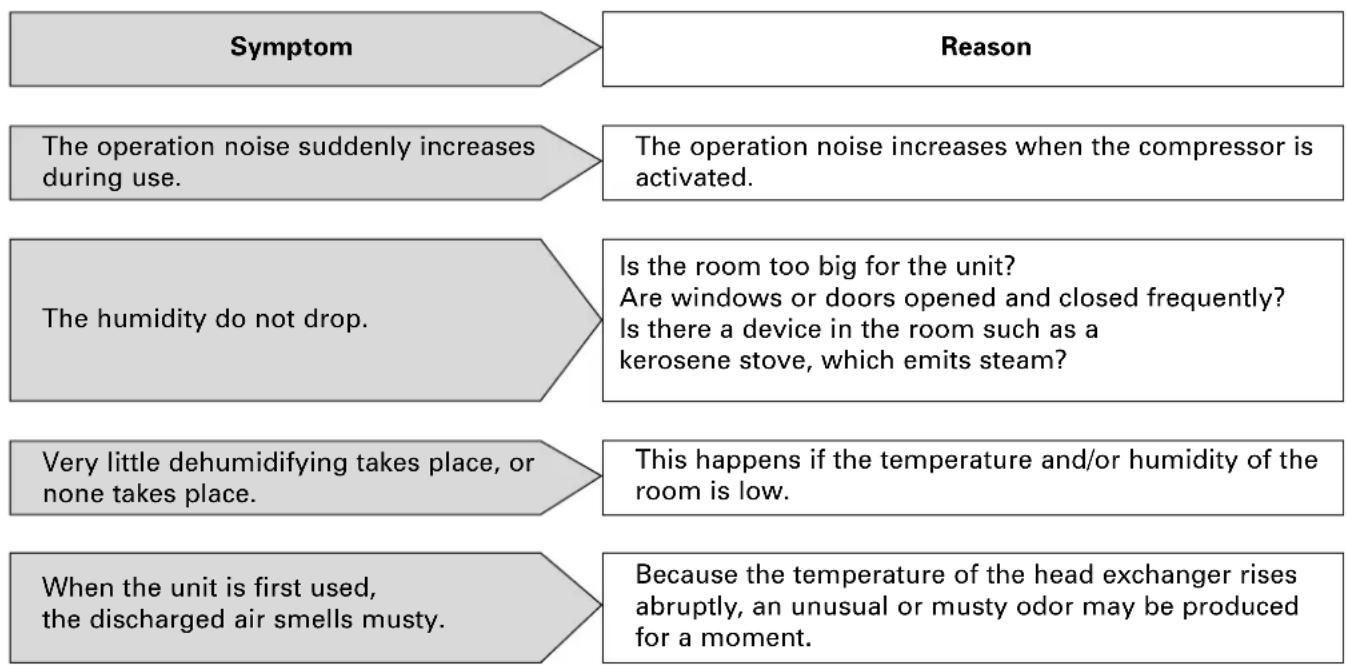
The following symptoms do not indicate a breakdown.
Maintenance
The unit echoes.
If the unit is used in a room with wood flooring or in a small room, it may echo.
When operation is started or the operation mode is changed, an unusual noise is heard in main unit.
The refrigerant may take some sound until circulation stabilizes.
There are some stains left in the drainage tank.
This is water left from the dehumidifying test conducted at the factory, it does not indicate a problem.
The unit only can run in laundry mode and it is ineffective to press mode switch.
When the temperature of the room is above 35^ or below 15^ the protection device is actuated, so that the unit only can run in LAUNDRY mode (the fan speed is high).
The fan is running and the compressor does not work.
If the unit is started within 3 minutes after the unit stops, the protection device is actuated, so that the compressor is started automatically after a delay of 3 minutes; or the automatic defrosting operation is activated and the compressor stops.
APENDIX
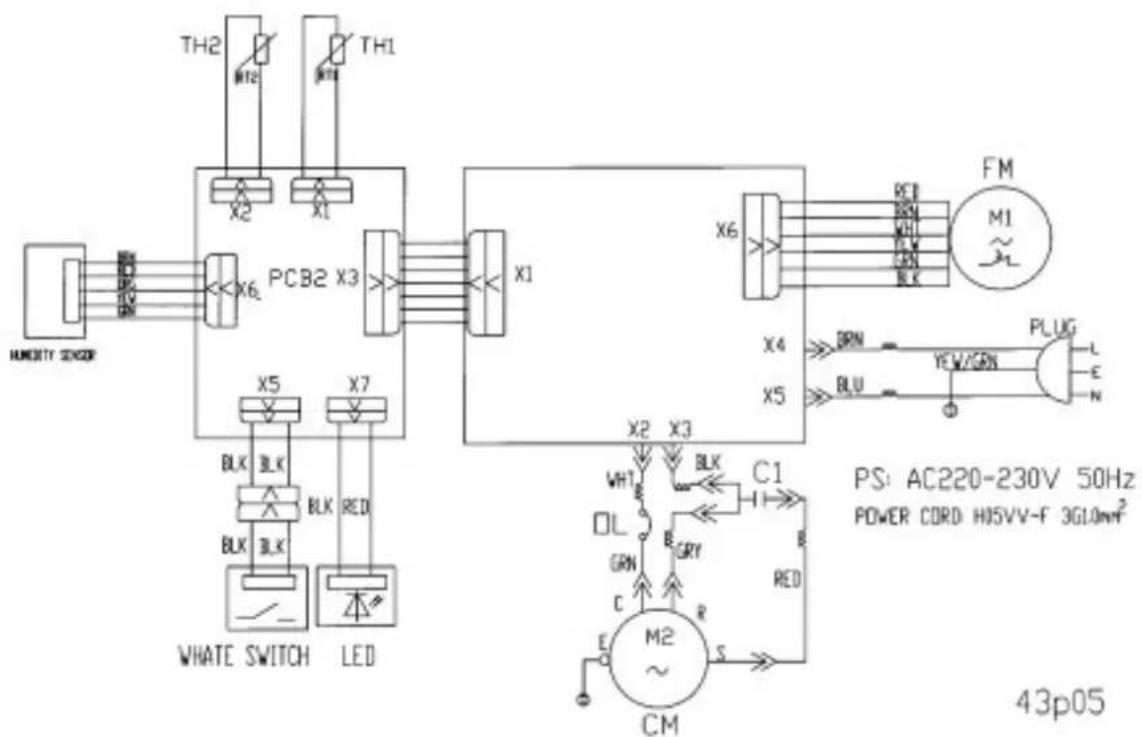
Electric Schematic Diagram
daitsu
- PRESTACIONES
- Structure and Principle
- OPERATION
- MAINTENANCE
- APENDIX
- Features
- Specifications
- - How dehumidifying works
- Structure of dehumidifier
- Indicator lamp
- - Switch function
- Operation steps
- Plug the power supply plug into the outlet and press the "1/0" switch
- Open the louver by hand
- Switch the operation mode
- Stop operation
- Draining the water
- The drainage tank is full
- Drainage steps
- Notation for drainage
- Continuous drainage of water
- Caring for the dehumidifier
- Wipe it with a soft cloth
- Clean the air filter
- Remove the air filter.
- Clean the air filter.
- Attach the air filter.
- - Storing the dehumidifier
- Notation for safe operation
- - Removing breakdowns
Brand : DAITSU
Model : ADD20
Category : Humidifier