AZ4100 - Alarm system ABUS - Free user manual and instructions
Find the device manual for free AZ4100 ABUS in PDF.
Download the instructions for your Alarm system in PDF format for free! Find your manual AZ4100 - ABUS and take your electronic device back in hand. On this page are published all the documents necessary for the use of your device. AZ4100 by ABUS.
USER MANUAL AZ4100 ABUS
(BAT F-2A / 12VAUX F-
SIAI1 Scancom SIA Level I
TD (Time and Day) RESET JT 625
Perfect Security for the home and the office
These installation instructions are an important product accessory. They contain important installation and operation information. Bear this in mind if you pass the product on to others. Store these installation instructions in a safe place for future reference. For a list of contents with page numbers, see page 3.UK UK 1 Introduction Dear Customer, Thank you for purchasing the Burglar Alarm Panel Terxon MX. You have purchased a product that has been designed and constructed according to the state-of-the- art, which complies with the current standards of domestic and European regulations. The CE has been proven and all related certifications are available from the manufacturer upon request (www.abus-sc.eu). To maintain this status and to guarantee safe operation, it is your obligation to observe these installation instructions. In the event of questions, please contact your local specialist dealer. ABUS Security-Center GmbH & Co. KG 86444 Affing GERMANY www.abus-sc.eu info@abus-sc.eu 2 Usage in accordance with regulations This burglar alarm panel uses detectors and transmitters to secure your property. You can use it to protect your company, house, garage, garden house, weekend cottage, etc. The alarm centre registers unauthorised break-ins by switching output contacts to which you can connect visual, acoustic or silent alarm transmitters. The alarm centre contacts and connected components must be kept free of moisture (bathrooms and similar surroundings are to be strictly avoided). Use of this product for other than the described purpose may lead to damage of the product. Other hazards such as short-circuiting, fire, electric shock, etc., are also possible. The power unit is designed for operation with mains electricity at 230 Volt AC / 50 Hz. No part of the product may changed or modified in any way. Connection to the public power network is subject to country-specific regulations. Please be aware of applicable regulations in advance.3
To avoid fire and injury, please observe the following:
- Securely fasten the device at a dry location in the building.
- Ensure sufficient air circulation for the alarm centre.
- Do not expose the device to temperatures less than -10°C or more than 55°C.
- The device is designed for indoor use only.
- Humidity must not exceed 90% (non-condensed).
- Make sure that no metal objects can be pushed into the equipment from outside.
- Ensure that the voltage is disconnected when performing work on the device.
Please observe the following regulations to ensure trouble-free operation of your device.
- The alarm centre is supplied with 12V DC power by means of the internal transformer.
- The transformer is connected to the 230VAC building mains by means of a separate, electrically protected line.
- Connection work to the building mains is subject to country-specific regulations.
- A 7Ah rechargeable battery supplies emergency standby power.
- The maximum power consumption of connected components must never exceed 1A.
- Always replace fuses with fuses of the same rating, never higher.
!IMPORTANT INFO! Burglar alarm panels in general: If the equipment is not correctly installed, signals may be misinterpreted and result in false alarms.The costs resulting from the deployment of rescue organisations, e.g.:fire or police, are borne by the operator of the equipment. Therefore please read the instructions very carefully and follow the installation instructions for lines and components precisely.6
5 Scope of delivery and accessories required Scope of delivery
- Installation Instructions
- Operating instructions
You also need: Alarm detector Signal transmitter 12V/7Ah rechargeable battery Distributor Cables
Required tools: Flat screwdriver (small) Philips screwdriver Drill 6mm drill bit 4mm drill bit 6mm screws 4mm screws Wallplugs, filler, etc. Soldering iron and solder Insulation tape or shrink-on tubing Voltmeter, ohmmeter (or multimeter) Cable channel Screw-clamps7
6 Notes on connection and extension options The burglar alarm panel is the basic device of an electronic security system for protecting your property (e.g.: apartment, house, garage, shops, etc.). In combination with other components such as detectors and signal transmitters, it secures the areas to be monitored. The alarm is triggered by unauthorised break-in attempts. The alarm centre is operated by means of the connected control unit. This enables the alarm centre to be installed at a hidden location. Up to 4 control units can be connected. Furthermore, the alarm centre can be operated via a so-called key switch. Due to the built-in telephone dialler, the burglar alarm panel is able to transmit an alarm via the telephone network to selected subscribers. The burglar alarm panel has 9 separately evaluated alarm zones. The alarm centre monitors whether a (minimal) quiescent current is flowing or not between the two contacts (CCT) of each alarm zone. If you make a contact between the alarm zone contacts, this is treated as closed and a current flow is possible. If no contact exists, no current flow is possible and the alarm zone is open. Any changes trigger an alarm, depending on the programming. Differential monitoring of the alarm zones is also possible (DEOL). The alarm centre also has a built-in PC interface. Properties of the alarm centre:
- 8 freely programmable alarm zones, all of which can be programmed as follows: Immediate, delayed, access, panic, 24 hour, fire, technical or time
- Expandable to a maximum of 32 zones via optional expansion modules
- 1 tamper zone for connected detectors
- 1 tamper zone for connected signal transmitters
- 1 transistor output and 2 relay outputs that can be configured for a specific event (alarm, fire, panic,…)
- Integrated transformer (230V AC / 12V DC) for supplying the alarm centre and connected detectors and for recharging the battery
- Standby power supply via a 12V/7Ah battery
- Simple programming and operation via 1–4 control units
- The state of the alarm zones and the alarm centre is displayed on a plain-text display.
- Zone blocking as a way of temporarily removing individual alarm zones from surveillance
- Access authorisation for operating and programming using a 4-digit or 6-digit code.
- Tamper contacts for the alarm centre and the control units
- Alarm and event memory
- Integrated telephone dialler
- Partitioning of the alarm centre for simulation of 4 separate alarm centres8
7 Notes on security system The Terxon MX burglar alarm panel enables you to configure each of the 8 (max. 32) alarm zones optimally to suit your operating conditions. Recommendations:
- Distribute the external detectors in as small groups as possible to the zones (e.g., ground-floor detector to zone 1, etc.); activate detectors singly; if possible, use all zones of the alarm centre.
- The acoustic signal (siren) of the signal transmitter should be shorter than the visual signal (flashlight). Alarm times must be set according to local regulations. (E.g., in Germany, the acoustic alarm must be limited to 3 minutes.)
- The delay time should not be finally set until a practical test has been conducted.
- Choose a random 4-digit or 6-digit combination for the user and program code.
- Only persons of trust should be given the code.
- When operating the alarm centre, enter the code in such a way that it is concealed from persons standing nearby.
- The cable recommended for connecting the components (minimum diameter: 0.6 mm/wire) is normally colour-coded. The user and program codes must be different. For reasons of clear layout, use the following colour coding: Red: +12V voltage supply Black: 0V ground Yellow: Alarm contact Green: Alarm contact Brown: Tamper contact White: Tamper contact
- Use distributors when connecting more than one detector to an alarm zone. Cable extensions can be soldered or screwed together. Ensure good insulation (insulating tape, shrink-on tubing) to avoid short- circuiting and false alarms. See the illustration on the next page.
1. Read the operating instructions carefully.
2. Draw up a plan of the object that includes the
installation location of the detectors and the alarm centre and all cables required.
3. Lay the cables as required.
4. Install the detectors and the alarm centre.
5. Connect the cables to the detectors and the alarm
6. Connect the power supply (battery, mains).
The diagram below shows the correct usage of soldered distributors when connecting more than one detector to an alarm zone:
As mentioned above, the alarm centre evaluates the alarm zones via the existing current flow. Most alarm detectors are normally closed, which means that the detectors interrupt the alarm zone in the event of an alarm. The detectors are called NC (normally closed) detectors and are connected as follows (the CCT jumper must be removed):
Sometimes it is necessary to combine several alarm contacts in a zone. Connect the contacts serially.
NO (normally open) contacts (e.g., for panic buttons) cannot be connected to this alarm centre.
8 Overview of housing components
Connection of 230V mains supply with primary fuse (T 250V 250mA). 230V AC / 12V DC transformer Connector strip for siren, flashlight, programmable outputs, loudspeakers, 12VDC power supply and alarm zones. Connection of tamper contacts of the housing of the alarm centre. Terminal connector strip for standby battery. Terminal connector strip for control units. Terminal connector strip for extra transistor outputs or the optional relay module. Room for 12V standby battery (7Ah) and cabling. 9 Connection for PC data cable Connections for telephone line
Note for 230 V connection Do not switch on the mains power yet! Connect the mains power to the terminal connector strip as follows:
neutral (blue) Phase (black) ground (green/yellow)
9 Notes on installation
Fix the alarm centre to a flat, dry, vibration-free and heat- resistant surface. The cables for the power supply of the alarm centre, the alarm zones and the signalling equipment (siren, flashlight, any external loudspeakers, etc.) should be inconspicuous, if possible below the surface or in a cable channel.
- Open the alarm centre housing (loosen the screws with a Philips screwdriver and remove the cover).
- The alarm centre’s PCB is fixed in the housing with three screws. Loosen these screws and remove the PCB. The transformer plug can be disconnected from the PCB.
- Use the housing as a template to make drill-marks for the fixing-screws.
- At the marked positions, drill three holes (min. 4mm Ø, 4.5cm long).
- Fix the alarm centre housing and feed the cables into the housing.
- Do not tighten the fixing screws until you have connected all the cables. Replace the PCB and close the housing by replacing the cover.
The control units should also be mounted on a flat, dry, vibration-free surface. The mounting height is important. The units should be positioned so that all users can easily read the display and operate the buttons.
- Open the cover of the control unit and loosen the screws on the base.
- Use the housing as a template to make drill-marks for the fixing-screws.
- At the marked positions, drill three holes (min. 4mm Ø, 3cm long).
- Connect the control unit to the alarm centre (see next page).
- Connect the control unit to the external components.
- Make any settings necessary in the control unit.
- Mount the control unit housing on the wall. Replace the front plate containing the control unit PCB and tighten the fixing screws.13
Terminal connector strip for tamper and alarm zones. COM A/T: Connections for detector tampering CCT 1…8: Connections for alarm zones 1–8 Terminal connector strip for 12V DC power supply of external equipment (e.g., detectors) AUX: +12V permanent voltage for detectors 0V: 0V ground Terminal connector strip for loudspeaker, progr. outputs and siren tampering. TR: Sabotage inputs + / LS: Contact for optional 16 Ohm loudspeaker OP3: Contact for Open Collector Transistor output (e.g. as trigger signal of dialler) RELAY OUTPUTS:Connections for 2 relays NC/NO Terminal strip for control units 12V: 12V+ permanent voltage 0V: 0V ground Data: Databus Clock: Databus 5 Connection for PC data cable 6 Connections for telephone line
The burglar alarm panel can operate with up to four control units connected via a BUS. The control units can be connected as a ring or star to the alarm centre. Connect the control unit as follows: To next control unit / alarm centre Terminal connector strip: 0V To next control unit / alarm centre Terminal connector strip: 12V To next control unit / alarm centre Terminal connector strip: CLK (Clock) To next control unit / alarm centre Terminal connector strip: DATA (Data) The length of the databus must not exceed 200m. For connecting the control units, use a cable with a wire diameter of min. 0.6mm. Other devices that can be connected to the control units: ET: A switch for manual ending of exit delay time. The contact is normally open (NO) and must be closed to activate. Ext. Tamper: Additional input on control unit to which an external tamper contact (NC) can be connected. The contact must be opened to trigger a tamper alarm. PANIC I/P (from panel version 2.04.0151): There you can connect a panic button.
NOTE: The connection cables must be inserted in the clamps from above
Coding of control units Control unit 1: Jumper not connected Control units 2–4: Jumper connected accordingly to the pin numbers 2, 3, or 4. Background lighting Background lighting on: Jumper connected. coding of control units background lighting volume beeper tamper contact beeper
Connection Meaning AC mains supply unit (AC IN) Contact for 230V main supply unit Kick Start jumper (KS) Connect the two contacts of this jumper to start the alarm centre without a 230V mains power supply. Battery contact (+ -) Connecting plug from standby power supply COMMS interface Contact for additional transistor outputs Reset jumper (NVM RST) Connect the two contacts of this jumper to reset the alarm centre. Fuses (BAT F-2A / 12VAUX F-1A) Always use fuses of the same type. To avoid problems, make sure there is always a good contact between the fuse holder and the fuse. Siren sabotage input (TR) For sirens with their own power supply, connect this input direct to the tamper output of the siren. Otherwise, connect the tamper contact of the siren to the loop between the TR input and 0V. If no siren is used, connect the TR input direct to the 0V output. Optional loudspeaker (LS) Connect a 16 Ohm loudspeaker for internal alerts. Local download connection (SK1) You can connect a local PC here. The alarm centre can be configured using the downloader program. Connection for the telephone connection (RJ11 + A/B / A1/B1) RJ11 connection/screw connections for the telephone line Programmable transistor output (OP). Max. power consumption of all transistor outputs 0.5A. 12V power supply for components (e.g. Tamper input for ext. components
8 for NC aöarm contact (e.g. IR detector). No NO contacts can be connected. Make sure alarm zones are terminated with correct resistors. Two different resistors, or no resistor, must be used depending on the programming. If the zone is used then the wire bridge should be removed.
Sir.tamper input Optional speaker control unit 1A AUX fuse for the power supply 2A BAT fuse for the battery charging
Star Battery connectio COM interface NVM EEPROM tamper cover contact Local Download
connectio Connection for telephone connection
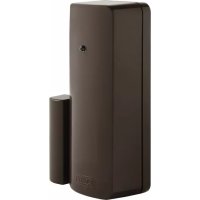
Door and window contacts monitor the opening of doors and windows. To activate the entry/exit delay time, at least one contact should be mounted on the main entrance door on which a control unit is also mounted. For transparency reasons, no more than ten door/window contacts should be used per alarm zone. If the magnet of the reed contact of the detector is removed, the switch contact is opened and the alarm zone is interrupted. Please read the instructions for your door/window contacts. Connection example:
Infrared sensitivity detectors detect the infrared heat movement of living creatures and must not be used indoors. For transparency reasons, avoid using motion sensors with door/window contacts in a zone. Connection example:
This burglar alarm panel allows the connection of smoke detectors. For these, program zone type “fire” or “smoke detector”, depending on the function of the smoke detector. This programming result in a special acoustic warning for persons present (pulsed alarm tone).
10.3.4 Acoustic glass breakage sensor:
These glass breakage sensors evaluate acoustic signals resulting from glass breakage. Connection example:
10.3.5 Passive glass breakage sensor:
Passive glass breakage sensors are fixed direct to the glass pane to be monitored. Only passive glass breakage sensors can be used that require no line feed but offer a potential-free alarm contact. Connection example:
Passive glass breakage sensor18
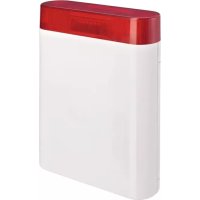
10.4 Outdoor siren and flashlight
To deter burglars and alert the neighbourhood, we recommend connecting a siren and a flashlight to the alarm centre. Note that these alarm devices should be mounted as high as possible (e.g. at roof height) and the cables should not be visible. Outdoor acoustic alarms can be a disturbance to the neighbourhood. Observe country-specific regulations. We recommend a maximum alarm duration of three minutes. A visual alarm (flashlight) remains active until it is acknowledged manually. In addition to a siren and flashlight, we recommend connecting the tamper contact of the combination signalling device to the tamper input of the alarm centre. If the siren housing is opened or the connection broken, the interrupted tamper contact triggers a tamper alarm. Connection example: Connecting a signalling device with its own power supply The functioning principle of this alarm signalling combination is based on a permanent power supply of the siren and a rechargeable battery integrated in the siren housing. At a transistor output of the alarm centre, either a bias for the siren is applied that is removed in the event of an alarm (or is cut in the event of tampering), or the alarm centre issues a trigger signal on alarm via the transistor output that activates the siren and the flashlight. The alarm duration of the siren is set on the signalling equipment direct. Here too, the flashlight remains active until it is acknowledged manually. For correct installation, please read the installation instructions of the signalling device with own power supply. Connection example:
The built-in telephone dialler of the alarm centre allows the most varied system messages to be transmitted to various numbers. Important: If you are using a DSL splitter as part of your telephone connection then make sure that this is installed before the alarm centre. The high-frequency DSL signal can disturb the transmission. We recommend the use of the additional alarm outputs for connecting the optional telephone dialling device to the alarm centre. You can now connect the outputs with the alarm inputs of your dialler. Make sure that the polarity of the alarm input at the dialler is set to -12V (trigger polarity neg.). Additionally, please read the instructions of your dialler.
Note the information about additional alarm outputs on the following page.
If programmed accordingly, each zone permits the connection of a key switch for activating or deactivating the alarm centre. You can use key switches with pulse contact or permanent contact. For key switches with permanent contact, note that the control units are still active and misinterpretations can occur if a key switch is still active but the alarm centre has already been deactivated via the control unit. We therefore recommend the use of key switches with pulse contact. When the key switch is activated, the exit delay time for the respective area is activated, following which the alarm centre is activated. In the case of internal areas, immediate activation is possible. At reactivation, the alarm centre is deactivated. Some key switches have additional LED displays that can be externally activated. If necessary, these can be connected to the programmed outputs (OP1).20
10.7 Fitting and connecting a
loudspeaker An optional 16Ohm loudspeaker is connected to the contacts LS and +. The loudspeaker can be integrated directly in the housing of the alarm centre. Alternatively, the loudspeaker can be mounted as an additional internal alarm away from the alarm centre. The distance from the alarm centre should not exceed 20m. Additional alarm outputs At the top of the PCB, the alarm centre has contacts for additional transistor outputs. The cable supplied is connected to these contacts. The cable pin connection is described in the following. Note that the colour code of the cable is not always the same as described below. Colour Function Red (1) +12V permanent power supply (500mA max.) Black (2) Ground 0V permanent Orange/white (3) Not used Brown/white (4) Fault input of telephone in the case of line loss (+12V if faulty) Grey (5) Additional output 8 White (6) Additional output 7 Violet (7) Additional output 6 Blue (8) Additional output 5 Green (9) Additional output 4 Yellow (10) Additional output 3 Orange (11) Additional output 2 Brown (12) Additional output 1
Instead of using the additional transistor outputs, you can connect an optional relay module with eight changer relays. Note the information in the relay module.
The alarm system can monitor the zones in two ways. A: Zone closed NC (no resistor inserted) B: Zone closed 2.2 kOhm (two resistors inserted) In Variant A, the system can only detect whether the zone is opened and it always registers an opening as an alarm in this zone. The tamper contacts of the individual detectors must be connected separately to the tamper zone of the alarm centre. The connection examples described in these instructions refer to Variant A (without resistors). In Variant B, the tamper contact and alarm contact are monitored in one zone. In the event of a change of resistance, the alarm centre can distinguish whether it is a case of alarm or tampering. Note that there are two different resistance values: A: 2.2 kOhm (red, red, red, gold) B: 4.7 kOhm (yellow, violet, red, gold) Note the two variants built in to the detector: A: B:
The 8-zone wire expansion modules and the 8-zone radio expansion modules are connected to the 4-wire bus as follows.
Make sure when connecting the 8-zone wire expansion module that the zone terminations (CC / DEOL) from the alarm centre and the expansion module are identical.
10.11 Addressing of expansion modules:
A determined range of zones must be assigned to each expansion module. Two modules must not occupy the same zone range. The zone ranges are addressed via the jumpers on the expansion modules.
The OP3 output must be appropriately programmed for the walk test (function 83, option 5). If the user activates the walk test function then the LED for motion detection is activated at the detector.
For the alarm memory function, e.g. for motion detectors, the OP3 output must be appropriately programmed (function 83, option 3). The first detector in the line that triggers the event can store and signalise this.
11 Single system or partitioned system The alarm centre can be operated as a single system or as a partitioned system. In the single system, all locations, and 3 sections of the locations, are simultaneously activated or deactivated. All control units, zones and outputs work for the entire system. If the alarm centre is functioning as a partitioned system then it provides 4 smaller, independent alarm centres. In a partitioned system: every partition can be activated/deactivated independently in case of an alarm. various control units can be assigned to one or more partitions. the control units can only activate/deactivate partitions that are assigned to them. every partition can have a separate signal transmitter. zones can be assigned to several partitions, e.g. an entry door zone can be used by several companies inside a building. A selection can be made between single systems or partitioned systems the first time the alarm centre is put into operation. If you want to change this later then use command “98 Reset Factory Settings”. For additional information, please read „Programming Partitions“.23
12 Term declaration Before starting to program the alarm centre, you should understand the terms used. To start with, here is an explanation of possible zone types and their properties.
A zone to which nothing is connected and therefore not used should be closed with a jumper and set to Not Used.
This zone always triggers an alarm, irrespective of whether the burglar alarm panel is activated or deactivated. A panic alarm can also be transmitted silently (e.g.: via an optional telephone dialler). The program menu can be exited only when this zone is closed.
This zone always triggers an alarm, irrespective of whether the burglar alarm panel is activated or deactivated. The alarm tone is effected via the buzzer in the control unit and the external siren as a pulsed alarm tone. The program menu can be exited only when this zone is closed. Connect to this zone only fire alarms with an automatic reset, since otherwise a new alarm is triggered during any manual reset. NA – Normal Alarm If the burglar alarm panel is active, this zone immediately triggers an alarm if the state of the alarm zone changes (e.g., opening the NC alarm contact). This zone can be opened when you exit the program menu. 24 Hours This zone always triggers an immediate alarm. If the burglar alarm panel is deactivated, the alarm tone is heard via the buzzer in the control unit and the loudspeaker of the alarm centre. In an active state, the siren output is also activated. If a 24-hour zone is locked, this applies to the deactivated state only. The program menu can be exited only when this zone is closed.
If the burglar alarm panel is active, this zone first triggers an alarm following a specified delay time (entry delay). This zone type can be used for the door contact of your entrance. When you leave the premises, closing this zone can be used for ending the exit delay. This zone can be opened when you exit the program menu.
ER – INPUT TO FOLLOW
This zone triggers no alarm if an entry/exit zone has previously activated the entry delay time. An immediate alarm is triggered if no entry delay is first activated. You can use this zone type for a motion sensor in the entrance hall pointing to the entry door (fitted with a door contact). This detector can be used as an entry/exit detector for internal activation. This zone can be opened when you exit the program menu.
This zone is used for older generations of shock sensors. Contact our technical hotline for more information.
In deactivated state, a technical zone triggers an alarm via the control unit and an optional dialler. In activated state, no alarm is triggered. If an alarm occurs in this zone in activated state, this is displayed when the alarm centre is deactivated. You can use this zone type for flood sensors. The program menu can be exited only when this zone is closed. KB – KEYBOX If this zone is opened, this event is stored in the memory of the burglar alarm panel. The event can also be transmitted via the optional telephone dialler. No alarm is triggered.24
This zone works just like a fire zone. In contrast to a fire zone, the connected fire alarms can be reset by briefly switching off the power supply and no alarm is triggered. However, the reset must be made via a switch output. The program menu can be exited only when this zone is closed.
KM – KEY SWITCH PULSE
A key switch (pulsed) can be connected to the burglar alarm panel. Any change to this zone changes the state of the alarm centre from active to inactive or from inactive to active (following a timeout of the delay time).
A key switch (permanent) can be connected to the burglar alarm panel. Any change to this zone changes the state of the alarm centre from active to inactive or from inactive to active (following a timeout of the delay time). Note that you can operate the alarm centre only via the key switch. If the state is unclear, e.g.: the key switch is closed, and deactivated at the control unit, the alarm centre can return to active state. AM – ANTI-MASK The anti-mask function is supported by some motion sensors and works as a cover (tamper) protector. The alarm centre is informed by a separate output on the sensor that the sensor is covered. This problem is then reported to the appropriate alarm zone. FB – FORBIKOBLER This zone is connected to an external code lock or an access control device. This zone works like a regular entry/exit zone. If this zone is triggered during the exit time, the exit time is ended immediately and the burglar alarm panel is activated. If this zone is triggered when the burglar alarm panel is active, it starts the entry delay. 13 General terms ZONE A zone consists of one or more detectors connected to the burglar alarm panel via an input CCT. A zone is considered to be opened or triggered if the electric circuit within CCT is interrupted by a detector (motion sensor, magnetic contact,…) (for NC), or if the resistance value changes (for DEOL). A zone is considered as closed or at rest is the electric circuit is closed within CCT (for NC), or if the line voltage from the alarm centre is within the right parameters (for DEOL).
BURGLAR ALARM PANEL ACTIVATED
When the burglar alarm panel is active, it monitors all zones for changes to the line voltage and triggers a local alarm and optionally an external alarm.
BURGLAR ALARM PANEL DEACTIVATED
When the burglar alarm is active, it monitors only zones that are always active, such as 24-hour zones, technical zones, and burglar and fire alarms. An alarm triggered by one of these zones usually results in an internal alarm.
INTERNALLY/EXTERNALLY ACTIVATED
In addition to the complete activation of the burglar alarm panel, you can also activate individual areas (B, C, D). This means that areas can be activated and protected even if you are at home. This type of activation is known as internal. INTERNAL ALARM In the case of an internal alarm, only the buzzers of the control units and the optional loudspeakers are activated. LOCAL ALARM In the case of a local alarm, the connected combination signalling devices (flashlight and siren) are also activated. EXTERNAL ALARM In the case of an external alarm, not only the acoustic and visual signalling devices are activated: the alarm is also transmitted via telephone.25
14 Specimen Installation This specimen installation is intended to explain the use of Terxon MX. Here we use a system with two users. One user (de)activates the alarm system using code input, the other with a chip key. Furthermore, two sensors, a motion sensor (XEVOX ECO) and door/window contacts (FU7350W) are connected to the system. The complete system is armed using the key-switch (SE1000). The SG1650 signalling device (siren+flashlight) is used for visual and acoustic signalling of an intrusion or panic alarm. We also wish to explain in detail the programming of the sensor types and of the transistor outputs for the external alarm signalling equipment. Do not connect the equipment yet to the mains power supply or the battery! We start with the wiring of the alarm lines of the motion sensor and door contacts. This is followed by an explanation of the wiring of the tamper line. Please use the 8-core alarm cable AZ6360 or AZ6361 for connecting up. The following diagram shows how the sensors are connected to the alarm centre:
Note that you need two extra lines for connected the tamper line. In the next step, we connect the control unit to the system. Note that the jumper is not connected if only one control unit is used (see page 13). Connect the control unit to the alarm centre as shown.
Now connect the key switch (SE1000) to the system. Then connect the cable supplied in the scope of delivery to the connecting strip for the additional switching outputs. These outputs are required for controlling the LEDs.26
Please read the operating instructions of the SE1000. Please take care that you use the pulse setting for the keyswitch.The circuit shown above enables you to activate/deactivate the alarm system by turning the key in either direction. Here too, the tamper line is not yet connected to the system. The setting of the relais outputs and additional switch outputs is shown later. In the following, we show you the wiring of the tamper line. Make sure that you connect all tamper contacts of the individual components in series. The siren and flashlight are an exception here since a special tamper connection is provided on the equipment. The following diagram of the motion sensor and key switch shows the connection of the tamper contacts. The door contact sensor has no tamper connections!
If you just want to use sensors without a tamper contact, insert a jumper between COM and A/T on the alarm system. Before programming the equipment, read the following description of how to connect the siren and flashlight to the Terxon MX. For this purpose, we use the SG1650. The tamper line of flashlight and siren is connected via a separate tamper contact to the equipment. If you do not want to use an external signalling device, place a jumper between TR and GND (0V) of the alarm centre. The following diagram shows the connection of the SG1650 to the Terxon MX:
This completes the connection of the equipment.
We now come to the programming of the alarm equipment. Make sure than the tamper contacts of all components are closed before you connect the equipment to the power supply. Proceed as follows:
1. Connect the 12V battery (7.0 Ah) to the contacts of
the alarm centre (note the colour code: red = +12V, black = 0V).
2. Using a screwdriver, short-circuit the two pins of the
kick-start jumper (see p. 14).
3. The green LED for the power supply (
) begins to flash and the buzzers of the control units can be activated. You can ignore the display messages.
4. Enter the factory-set user code.
This is: 1234. You can ignore the display messages.
5. First close the housing of the burglar alarm panel
securely before switching on the 230V voltage.
6. Switch on the 230V mains voltage to the burglar alarm
7. The green LED for the voltage (
) now lights constantly.27
8. Now enter via the control unit: 0 and then the factory-
set programming code
The following shows on the display: Mult Syst?
9. Press Key 1 to create a partitioned system.
Press Key 0 to create a single system like we do.
10. The display shows: PROGR. MODE
11. You are now in the program menu of the burglar
alarm panel and can start programming
First we program the two zones. On the keypad, enter 001 followed by to make settings to Zone 1 (motion sensor). You see the following display:
You can now change the zone name “Zone01” using the keypad of the control unit. The keys are similar in operation to those of a mobile phone. Press C to move one place forwards, and D one place back (see page 45). Now press the Enter key ; the following appears:
Define Zone 001 as “immediate” by entering 03. You see the following display:
By pressing keys A, B, C, D, you can change the assignment of the sensor to the individual areas. . In this programming example the detector works only when the hole system is activated.. Now confirm your input by pressing . You are returned to the start screen of the programming menu. Now enter 002 for programming Zone 2, followed by . You see the following:
Change the name of the zone according to your wishes and then press the Enter key .You see the following:
We will now change this to entry/exit. Enter 05. You see the following in the display:
Now press B to add area B to the sensor. Confirm your setting by pressing the Enter key
The “1” following the sub-areas stands for the time delay group (1 to 4). You can change this at any time in the programming menu (menu items 201 to 204, see page 82). You now have to program the key switch to Zone 3. Enter 003, change the zone name if required, and press the Enter key . The display shows the following:
Change the zone by entering 11 in the key switch, and the following appears:
Confirm your input with . Note that non-connected zones (004 to 008) are marked as “Not Used” (NU). You can set a zone by entering 00.
In the next step, we set the exit delay time. This is the time available for leaving the secure area before the alarm system is activated. In programming mode, enter 044 on the keypad, followed
Enter an exit delay time (1 for 10 sec. to 6 for 120 sec.) and confirm with
In this example, you have 45 seconds to deactivate the armed alarm system. You can choose values from 10 to 120 sec. 1 stands for 10 and 6 for 120 seconds. After your selection, press
Now we program additional transistor outputs for the LEDs of the key switch. The yellow LED should light in deactivated alarm state, and the red LED in activated alarm state of the alarm system. To program the first additional transistor output OP4 or the state of the red LED, enter 151 on the keypad. Confirm your input by pressing the Enter key
You see the following:
Enter 13 to change the setting to “Open”. The display changes to:
Confirm your input with
The transistor output OP5 – item 152 in the programming menu – has to be adjusted on “CLOSE” (14). Note that changes do not take effect until you exit the programm-ing menu. The yellow LED now lights permanently when the alarm system is deactivated, and switches off when it is activated. The red LED shows whether the system is activated.
The following describes the settings of relais outputs 1 and 2 for the siren and the flashlight of the SG1650. Enter 081 on the keypad and confirm with . The following display appears:
Please change the setting to Strobe. Enter 08 and press . This first resets the flashlight when you deactivate the alarm system. Relais output 2 must be set to “Bell”. To do this, select menu item 083 and verify with . Enter 00 and to set the exit to “Bell”. To change the siren delay, enter 041 in the programming menu and press the Enter key . The display shows:
You see the following display:
We recommend that you keep this value or reduce it to
1.5 minutes (in Germany, the siren duration must not
exceed 3 minutes). Before defining users, test the alarm system functions. Start by testing the relais/transistor outputs. Enter 091 in the programming menu and press
You now have a connection between NO1 and C1. If you now press again, the output is reset. Under menu items 092 and 093, you can test outputs 2 and OP3.
In the next step, check that the control unit buzzer is functioning properly. Select menu item 095 and press . You see the following display:
At the same time, you hear a constant buzzer tone. The buzzer is working. Confirm with
Finally, test the functionality of the sensors. Do this under menu item 097. After entering this item, press the Enter key . You see the following display:
Now open Zone 02. You hear a double tone and see the following display:
Close the zone and press again to end the sensor test. Run the same test for the other sensors.29
If you use a loudspeaker with the system, you can test it in the programming menu under item 094. You have now made all settings in the programming menu. Exit the programming menu by entering 099 and confirming with . You are now in the user menu. We now add two users to the system. The first user (BERND) is to activate and deactivate the system by entering a code, the second (ANNA) using a chip key. In the user menu, enter the administrator code 1234.
Enter the user number of User 2. This is: X002. Press . The display shows:
Now change the name on the keypad – in this case, BERND.
You are now asked to enter a new code in the system.
Enter 1111 (for example) and confirm with . This code is for activating and deactivating the alarm system. In the next step, we add User Anna, who is to activate and deactivate the alarm system using a chip key. In the user menu, enter the administrator code (1234) followed by 4. You see the following:
Enter the user number of User 3. This is: X003. Press . The display shows:
Hold the chip key in front of the control unit. You hear a double tone. The chip key has been successfully programmed. If required, you can also define a PIN for the user. In this case, the user can choose between code and chip key to activate/deactivate the alarm system. To activate the Terxon MX, enter the code or hold the chip key in front of the system. You see the following display:
By pressing “A” or , you can now activate the complete system. By pressing B, C or D, you can select individual sub-areas. In this specimen installation, you could for example activate sub-area B to arm the door contact and thus monitor the exit doors. The system is now fully installed and configured. If you use SG1710 or SG1900 instead of SG1650, see the following connection diagrams.30
Use the resistors provided to connect the SG1900 (1kOhm). Do not forget to change the connector of the internal battery from NC to Battery (–). Se also the operating instructions of the signalling equipment, which you should read carefully.31
15 First-time usage If you want to create your own configuration of the system and do not need the example of installation pay attention to the next steps. Please take notice of the important terms concerning the alarm panel. You can now put the alarm panel into operation.
1. Connect the 12V battery (7.0 Ah) to the
contacts of the alarm centre (note the colour code: red = +12V, black = 0V).
2. Using a screwdriver, short-circuit the two pins of
the kick-start jumper (see p. 14).
3. The green LED for the power supply (
begins to flash and the buzzers of the control units can be activated. You can ignore the display messages.
4. Enter the factory-set user code.
This is: 1234. You can ignore the display messages.
5. First close the housing of the burglar alarm
panel securely before switching on the 230V voltage.
6. Switch on the 230V mains voltage to the burglar
7. The green LED for the voltage (
) now lights constantly.
8. Now enter via the control unit:
0 and then the factory-set programming code
The following shows on the display: Mult Syst?
9. Press Key 1 to create a partitioned system.
Press Key 0 to create a single system.
10. The display shows: PROGR. MODE
11. You are now in the program menu of the burglar
alarm panel and can start programming
All input in program mode is made via the keypad. The LCD display gives you information about your input. For further information about the programming items, see page 30. Proceed as follows to change an item:
1. Via the keypad, enter the three-digit number of
the menu item (e.g., 001 for Zone 1) whose property you want to view or change. To confirm your input, press the Enter key
The selected menu item is shown on the LCD display.
You can see possible values in the programming table. The new property is displayed.
99 and confirm your entry by pressing the Enter key . The LCD display shows: Exit Eng. ?
3. Confirm your input by pressing the Enter key
4. After you confirm your input with the Enter key
, the alarm centre checks the current status of the system. If everything is correct, the alarm centre returns to normal operating state. You have exited the program menu. The alarm centre is now deactivated.
5. If there are any system faults, these are now
displayed. Possible faults are: - Tamper contact of the alarm centre or control unit open - No mains or battery power available - A zone is open that triggers immediate alarm even when the alarm centre is deactivated (24 hour, fire, tamper). If there is a system fault, the program mode is not exited. First clear all displayed system faults and repeat the steps listed above. Factory settings Program code/ Master code: 7890 User code 1/ Admin code: 1234 User codes 2–16: X002….X016 (not valid until setting) Threat code: x017 (not valid until setting)33
16.2 Overview of program menu
Country setting (000 n ) Important: If you change the country setting, all system settings are reset to the country settings of the new country. Menu item Setting (n) Meaning
0 UK – Great Britain 1 I – Italy 2 EE – Spain 3 P – Portugal 4 NL – Netherlands 5 FR – France 6 B – Belgium 7 D – Germany 8 CH – Switzerland 9 A – Austria X1 IRL – Ireland X2 OEM1 X3 OEM2 X4 FI – Finland X5 N – Norway X6 DK – Denmark X7 S – Sweden Zone setting (001 – 016, X17 - X32 nn
In zone programming, you first program the zone name and then the zone property. Menu item Setting (nn) Meaning
0 Local alarm following 1 Until deactivated Alarm on failed Activation (027 n ) Menu item Setting Meaning
Hide after 180 secs.
Hide 30 sec after code External alarm display on activated entry delay (029 n ) Menu item Setting Meaning
0 No program code necessary 1 Program code necessary Control units and partitions (032 nnnn
Assignment of control unit to partition A B Assignment of control unit to partition B C Assignment of control unit to partition C D Assignment of control unit to partition D System reset (033 n ) Menu item Setting Meaning
Sabotage report deactivated (037 n ) Menu item Setting Meaning
0 Only internally 1 Internally + central station System tamper reset (038 n ) Menu item Setting Meaning
0 User reset 1 Program reset Exit mode for overall area (039 n ) Menu item Setting Meaning
0 Exit time 1 Manual 2 Last door 3 Key switch In a partitioned system 1 Exit time 2 Manual 3 Immediate 4 Silent 5 Key switch35
0 No signal 1…9 1 = quiet – 9 = loud
Central station ID for remote reset
Date and time (051 ) See also the description of how to enter date and time. Menu item Setting Meaning
DnnMnnYnn Enter date HnnMnn Enter time Zone and tamper lock (052 n ) See also the description of how to enter date and time. Menu item Setting Meaning
0 Zone lock possible 1 Zone and tamper lock possible
0 Option as in item 33 1 Reset by user BVVO monitoring (054 n ) Menu item Setting Meaning
Length of access code (056 n ) Menu item Setting Meaning
0 Reset by user 1 Reset by installer Siren tamper (059 n ) Menu item Setting Meaning
0 Entry/exit zone remains entry/exit zone 1 Entry/exit zone becomes immediate zone
0 Following entry remains following entry 1 Following entry becomes entry/exit zone
0 Exit time + quiet tone 1 Immediate 2 Silent 3 As exit mode for overall activated In a partitioned system 0 Exit time + tone 1 Manual 2 Last door 3 Immediate 4 Silent 5 Lock Alarm behaviour at Internal B (063 n ) Menu item Setting Meaning
0 Only control unit 1 Loudspeaker and control unit 2 Local Alarm 3 External Alarm (siren and dialler) In a partitioned system 0 Only control unit tone 1 Control unit + speaker 2 Control unit + speaker + comms Exit time at Internal B (065 n ) Menu item Setting Meaning
0 Time lock 1 Pulse lock Zone behaviour at Internal C (070 n ) Menu item Setting Meaning
0 Entry/exit zone remains entry/exit zone 1 Entry/exit zone becomes immediate zone
Zone behaviour at Internal C (071 n ) Menu item Setting Meaning
0 Following entry remains following entry 1 Following entry becomes entry/exit zone
0 Exit time plus quiet tone 1 Immediate 2 Silent 3 As exit mode for overall activated In a partitioned system 0 Exit time 1 Manual 2 Last door 3 Immediate 4 Silent 5 Lock Alarm behaviour at Internal C (073 n ) Menu item Setting Meaning
1 10 sec 2 20 sec 3 30 sec 4 45 sec 5 60 sec 6 120 sec Exit mode for Internal D (076 n ) Menu item Setting Meaning
0 Exit time plus quiet tone 1 Immediate 2 Silent 3 As exit mode for overall activated In a partitioned system 0 Exit time 1 Manual 2 Last door 3 Immediate 4 Silent 5 Lock38
0 Stable to deactivated 1 Reactivate Additional Entry Delay (086 n ) Menu item Setting Meaning
0 Print memory 1 Page backwards 3 Page forwards
Toggle between date/time and event
N nn 00 OFF A nn Daily at hour 01-24 B nn Monthly at day 01-28 C nn Every 01-24 hours D nn Every 01-28 106 Line loss report (106 n ) Menu item Setting Meaning
0 Local PCS 1 Remote PC 112 Call until response - download (112 n ) Menu item Setting Meaning
0 OFF 1 ON 122 Comms Acknowledge (122 n ) Menu item Setting Meaning
0 OFF 1 ON Only in Ireland (command 0 on X1) 123 Reset report (123 n ) Menu item Setting Meaning
0 OFF 1 ON (switch channel 4) Only customary in France41
0 OFF 1 No signal „closed“ when more than 1 zone is blocked
0 Lang = English 1 Long = Italian 2 Lang. = Spanish 3 Lang = Port 4 Lang = Dutch 5 Lang = French 6 Lang = German 7 Lang=(NO) 8 Lang=(SV) 9 Lang=(DK) X1 Lang=(SF) 128 External alarm (128 n ) Menu item Setting Meaning
0 Standard 1 Summary 2 in between 3 Total
132 Transmit Sabo as burglary (132 n ) Menu item Setting Meaning
00 Not used 01 Fire to follow 02 Panic to follow 03 Burglary to follow 04 Active/inactive to follow 05 Alarm cancellation 06 Technical alarm 11 Network fault 12 Sabotage to follow 13 Active to follow 14 Inactive to follow 15 Zone locked 16 Emergency alarm to follow 17 Keybox 18 Anti-mask 19 Fire alarm 20 Comms message 21 Battery fault 22 Alarm system In a partitioned system 23 Alarm partition A 24 Alarm partition B42
See setting for switch output 1 Behaviour of Additional Switch Output 3 (153 nn ) Menu item Setting Meaning
See setting for switch output 1 Behaviour of Additional Switch Output 4 (154 nn ) Menu item Setting Meaning
See setting for switch output 1 Behaviour of Additional Switch Output 5 (155 nn ) Menu item Setting Meaning
See setting for switch output 1 Behaviour of Additional Switch Output 6 (156 nn ) Menu item Setting Meaning
See setting for switch output 1 Behaviour of Additional Switch Output 7 (157 nn ) Menu item Setting Meaning
Behaviour of Additional Switch Output 8 (158 nn ) Menu item Setting Meaning
0 Not inverted (+ve removed) 1 Inverted (+ve applied) 160-164 are only permissible when 089 is set to option 1 Time-confirmed alarm (160 nnn ) Menu item Setting Meaning
0 LS for unconfirmed alarm 1 LS for confirmed alarm Confirm external sirens (162 n ) Menu item Setting Meaning
0 Siren for unconfirmed alarm 1 Siren for confirmed alarm
Confirmed alarm during entry (163 n ) Menu item Setting Meaning
User reset after confirmed alarm (164 n ) Menu item Setting Meaning
0 User/Installer 1 User/User 2 Installer/Installer Duration of active pulse 1 2 3 4 (170 n n n n ) Menu item Setting Meaning
00 Latched output 01 – 12 Pulse duration in seconds
00 latched output 01 – 12 Pulse duration in seconds
00 Not used 01 Fire to follow 02 Panic to follow 03 Burglary to follow 04 Active/inactive to follow 05 Alarm cancellation 06 Technical alarm 11 Network fault 12 Sabotage to follow 13 Active to follow 14 Inactive to follow 15 Zone locked 16 Emergency alarm to follow 17 Keybox 18 Anti-mask 19 Fire alarm 20 Comms message 21 Batteriy fault 22 Alarm system In partitioned system 23 Alarm partition A 24 Alarm partition B 25 Alarm partition C 26 Alarm partition D 30 Active pulse 1 31 Active pulse 2 32 Active pulse 3 33 Active pulse 4 34 Inactive pulse 1 35 Inactive pulse 2 36 Inactive pulse 3 37 Inactive pulse 4 Fast format channel 2 (192 nn ) Menu item Setting Meaning
See setting for channel 1
See setting for channel 1 Display of zone resistance (199 ) Menu item Setting Meaning
Keys 1 + 3 zone selection
1 Entry delay group 1 2 Entry delay group 2 3 Entry delay group 3 4 Entry delay group 4 Entry delay group 1 (201 n ) Menu item Setting Meaning
16.3 Settings in program menu
000 Country Settings Use this setting to configure the burglar alarm centre for the local country. When you load the country settings, all user-defined settings are discarded. If you only want to set the language of the control unit display, use menu item 126 (language). At the user level, do the following:
1. On the control unit, enter: 0
2. Enter the program code:
8. The control unit acknowledges your input with a
double “beep” tone and shows Installer Mode You have now made the settings for Germany. Following this setting, the values mentioned of the program overview are different from the values set on the burglar alarm centre. 001 – 016, X17 – X32 Zone setting Under the zone setting menu item, set the zone name and property. From the program level, do the following:
3. The cursor flashes under the first letter.
4. Enter the zone name (max. 12 characters) via the
5. In the following, the zone name “EINGANG” is
entered. On the control unit, enter: - E - next position -> - I - next position -> - N - next position -> - G - next position -> - A - next position -> - N - next position -> - G
6. If you make a mistake, you can move the cursor
back by pressing the D key
7. You can delete a letter or digit by entering a blank
at the respective position with the 0 key
8. After entering a new zone name, confirm your
After entering the zone name, enter the zone property. Zone properties are explained on pages 19 and 20 of these instructions. Enter the zone property as follows:
1. Enter the zone property via the keypad as follows:
2. After entering the zone property, enter the area
for which this zone is to be monitored. For an explanation of areas, see page 20 of these instrauctinos. Enter the area via the keypad as follows:
This zone is monitored if area A is active. The LCD display shows:
This zone is monitored if area B is active. The LCD display shows:
This zone is monitored if area C is active. The LCD display shows:
This zone is monitored if area D is active. The LCD display shows:
3. Apart from the zone property and the area in
which the zone is to be monitored, there are also zone attributes. Via the keypad, enter the zone attributes as follows:
C – door chime The alarm centre always generates a tone on the control unit and the loudspeaker if a zone with this zone attribute is triggered. This applies only if the burglar alarm centre is deactivated. This zone is available for zones with the properties “immediate”, “entry/exit”, “entry”, “follow” and “shock sensor”.
S – Sensor test Zones with this zone attribute are in a test function. Use this test function if you think a sensor may trigger a false alarm. This zone starts a 14-day test. If this zone triggers an alarm within 14 days, no general alarm state is declared. The sensor is removed from monitoring and a message is displayed. If the zone triggers no alarm within 14 days, the zone test ends, the zone attribute is deleted and the zone works normally again. This zone is available for zones with the properties “immediate”, “entry to follow”, “technical” and “shock sensor”.
D – Zone link Zones with this zone attribute first trigger an alarm when a further zone triggers an alarm with 5 minutes or if a zone is open for at least 10 seconds (e.g.: magnetic contacts). This function reduces false alarms from individual sensors to a minimum, but a burglary may be detected too late or not at all. This zone is available for zones with the properties “immediate”, “entry to follow”.
O – Lock zone Zones with this zone attribute can be locked manually by the user and removed from monitoring.48
4. Apart from the zone properties and zone
attributes, you can make further settings for some zone properties. For example, for an “entry/exit” zone and an “entry to follow” zone, you have to define the entry delay time, and for a “shock sensor” zone, you have to define the sensitivity.. Enter the additional properties via the keypad as follows:
For zones with the zone property “entry/exit” or “entry to follow”, program the respective entry delay time group. Then press: 1 for delay group 1 2 for delay group 2 3 for delay group 3 4 for delay group 4
For zones with the zone property “shock sensor”, set the sensitivity. Then press: 1 insensitive 6 sensitive
IMPORTANT: The delay time for the entry/exit zone should be longer than the delay time for the entry to follow zone. Set the time for the entry delay time group in items 201 to 204. 020 Changing the program code To change the program code required to open the program menu. From the program level, do the following:
3. The cursor flashes at the end of the setting.
6. The control unit acknowledges your input with a
double “beep” tone and shows Installer Mode. 021 Changing the zone termination For changing the zone termination for the inputs of the burglar alarm centre. From the program level, do the following:
3. Via the keypad, select from the following items
CC+ComA/T For this zone termination, no resistor can be inserted in the alarm zone. An alarm is triggered if the zone is opened. The tamper contact of the sensor must be connected separately to the burglar alarm centre. See the connection diagrams for connecting with CC+ComA/T..
For this zone termination, two resistors with different values must be used. The burglar alarm centre triggers alarm or tampering, depending on which resistance value is changed. The tamper input at the alarm centre is out of action. See the connection diagrams for connecting with DEOL.
5. The control unit acknowledges your input with a
double “beep” tone and shows Installer Mode.49
022 Changing the volume for internal alarm For changing the zone termination for the inputs of the burglar alarm centre. From the program level, do the following:
3. Via the keypad, select from the following items
and press: 0-9 ChimeVol Specify the volume of the internal alarm issued via the control unit and the (optional) loudspeaker. Press: 0 off 1 quiet 9 loud
5. The control unit acknowledges your input with a
double “beep” tone and shows Installer Mode. 023 Remote reset This function allows a remote reset via the COM interface or the PC connection. IMPORTANT: System reset by installer must be activated (function 33 to 1) and CSID (function 50) must be set.
3. Via the keypad, select from the following items
5. The control unit acknowledges your input with a
double “beep” tone and shows Installer Mode. After the alarm, the user can switch off the alarm using the access code, although he can not reset the alarm centre. The user contacts the central station which identifies him and transmits a signal back to the alarm centre. The user can now carry out a reset. 024 Account name This function shows you the account name. From the program level, do the following:
3. Via the keypad, select from the following items
LS Timed The internal alarm follows the entered times for the external siren
LS Cont The internal alarm sounds until the alarm centre is deactivated.
5. The control unit acknowledges your input with a
double “beep” tone and shows Installer Mode.50
027 Alarm on failed activation To change the property of the alarm on failed activation, proceed as follows:
3. Via the keypad, select from the following items
Internal If activation fails, the alarm is issued via the internal signaller.
Local If activation fails, the alarm is also issued via the external siren.
5. The control unit acknowledges your input with a
double “beep” tone and shows Installer Mode. 028 Status display Proceed as follows to change the property of the status display:
3. Via the keypad, select from the following items
Status OFF The display is permanently on. The system always shows whether the alarm centre is activated or deactivated.
Status ON The status display of the alarm centre remains active for 180 seconds after entry of the user code, and then changes to date and time display.
Status Code 30 seconds after each event, the display changes back to date and time display. Note that the LEDs also light for 30 seconds.
5. The control unit acknowledges your input with a
double “beep” tone and shows Installer Mode. 029 Entry alarm delay Proceed as follows to change the property of the entry alarm delay:
3. Via the keypad, select from the following items
Delay OFF The alarm centre generates an immediate alarm if the user deviates from the specified entry route.
Delay ON The alarm centre extends the entry delay by 30 seconds if the user deviates from the specified entry route. An internal alarm is triggered to inform the user that he/she has made a mistake. If the user code is entered within the delay time, a local alarm is prevented and the alarm centre is reset.
5. The control unit acknowledges your input with a
double “beep” tone and shows Installer Mode.51
3. Via the keypad, select from the following items
PA audible When a panic alarm is triggered, the alarm centre generates a local alarm.
PA silent When a panic alarm is triggered, the alarm centre generates no local alarm. The alarm is issued only via the relay contacts and via the optional dialler.
5. The control unit acknowledges your input with a
double “beep” tone and shows Installer Mode. 031 Zone tamper Proceed as follows to change the property of zone tampering:
3. Via the keypad, select from the following items
EngTmpRstOFF No program code necessary (OFF). If a tamper alarm is triggered, you only have to enter the user code to acknowledge the tamper message.
EngTmpRstON Program code required (ON) If a tamper alarm is triggered, you have to enter the user code to deactivate the alarm and then the program code to delete the tamper alarm.
5. The control unit acknowledges your input with a
double “beep” tone and shows Installer Mode. 032 Control units and partitions If you have created a partitioned system then using this function, you can assign entry/exit zones, alarm zones and status displays of partitions to the control units. To change this feature, proceed as follows:
3. Via the keypad, select from the following items
Assignment of control unit 1 to partition
Assignment of control unit 1 to partition
Assignment of control unit 1 to partition
Assignment of control unit 1 to partition
5. The control unit acknowledges your input with a
double “beep” tone and shows Installer Mode. Repeat these steps for the remaining control units. (1. Basic setting: all control units belong to all partitions. 2. Key switches connected to control units can not be individually assigned to partitions. 3. Panic alarms apply to all partitions. 033 System Reset To change the property of the system reset:
3. Via the keypad, select from the following items
EngReset OFF If a system error is displayed, you only have to enter the user code to52
acknowledge the message.
EngReset OFF If a system error is displayed, you have to enter the program code to acknowledge the message.
Note: Some events always require you to enter the program code. These are: Failure/fault of a control unit Failure of 12V power supply Low battery in the alarm centre
5. The control unit acknowledges your input with a
double “beep” tone and shows Installer Mode. 034 Panic Reset Proceed as follows to change the property of the panic reset:
3. Via the keypad, select from the following items
PA Cust Rst To reset a panic alarm, you only have to enter a valid user code.
PA Eng Rst To reset a panic alarm, you have to enter the user code to deactivate the alarm and then the program code to delete the panic alarm.
5. The control unit acknowledges your input with a
double “beep” tone and shows Installer Mode.
035 First alarm reaction Proceed as follows to change the property of the first alarm reaction:
3. Via the keypad, select from the following items
Lock-out ON When the alarm time expires (alarm time of the local alarm of the external siren), the alarm centre is reactivated. The zone that triggered the alarm is no longer monitored.
Re-arm When the alarm time expires (alarm time of the local alarm of the external siren), the alarm centre is reactivated. The zone that triggered the alarm is monitored again.
5. The control unit acknowledges your input with a
double “beep” tone and shows Installer mode. 036 Alarm cancellation Sometimes users trigger a false alarm. To change the property of the alarm cancellation:
3. Via the keypad, select from the following items
Abort OFF Cancellation by the user is not allowed.
Abort ON Users are allowed to cancel an alarm.
5. The control unit acknowledges your input with a
double “beep” tone and shows Installer Mode.
037 Sabotage Report deactivated To change this feature, proceed as follows:
3. Via the keypad, select from the following items
Day Tamp OFF In case of tampering when the alarm centre is deactivated, this only issues an internal alarm.
Day Tamp ON In case of tampering when the alarm centre is deactivated, this issues an internal alarm and reports the tampering to the central station.
5. The control unit acknowledges your input with a
3. Via the keypad, select from the following items
EnSysTmp OFF In the event of a system sabotage, you can reset the alarm centre by entering the user code.
EnSysTmp ON In the event of a system sabotage, you can reset the alarm centre by entering the installer code.
5. The control unit acknowledges your input with a
double “beep” tone and shows Installer Mode. 039 Exit mode for overall activated (A) To change the property of the exit mode for overall activated:
3. Via the keypad, select from the following items
A=Timed After the alarm centre is activated, the programmed exit delay time starts. At the end of the delay time, the alarm centre is activated. If zones are open at this time, an alarm is triggered.
A=Terminated After the alarm centre is activated, the exit delay time starts. The delay time runs until a button connected to a control unit is pressed, which ends the exit delay time manually. The exit delay time ends seven seconds after the button is pressed.
A=Final Door After the alarm centre is activated, the exit delay time starts. The delay time runs until a zone with the entry/exit property is closed. The exit delay time ends seven seconds after the zone is closed.
A=Lock Set After the alarm centre is activated, the delay time starts. The delay time runs until a zone with the entry/exit property is closed and, after the zone has closed, a contact connected to the control unit is opened.
5. The control unit acknowledges your input with a
double “beep” tone and shows Installer Mode. 040 System Rearm To change the property of the siren duration:
3. Via the keypad, select from the following items
Rearm=Never If an alarm is triggered, the alarm is sounded until the defined alarm time of the external signaller. If a second sensor reports another alarm following expiry of the defined alarm time, no second alarm is triggered. 1-4 Rearm 1-4/Always If an alarm is triggered, the alarm is sounded until the defined alarm time of the external signaller. The alarm centre rearms itself once, twice, three times or always, depending on the value entered. A new alarm reports triggers a new alarm.
5. The control unit acknowledges your input with a
double “beep” tone and shows Installer Mode. 041 Siren delay Proceed as follows to change the property of the siren delay:
3. Via the keypad, select from the following items
Bell Dly=0 After an alarm is triggered, a local alarm is started without delay.
Bell Dly=1.5 After an alarm is triggered, a local alarm is activated after a delay of 1.5 minutes.
Bell Dly=3 After an alarm is triggered, a local alarm is activated after a delay of 3 minutes.
Bell Dly=5 After an alarm is triggered, a local alarm is activated after a delay of 5 minutes.
Bell Dly=10 After an alarm is triggered, a local alarm is activated after a delay of 10 minutes.
Bell Dly=15 After an alarm is triggered, a local alarm is activated after a delay of 15 minutes.
Bell Dly=20 After an alarm is triggered, a local alarm is activated after a delay of 20 minutes.
5. The control unit acknowledges your input with a
double “beep” tone and shows Installer Mode.55
042 Siren duration To change the property of the siren duration:
3. Via the keypad, select from the following items
Bell On=1.5 If an alarm is triggered, the local alarm is activated for 1.5 minutes.
Bell On =3 If an alarm is triggered, the local alarm is activated for 3 minutes.
Bell On =5 If an alarm is triggered, the local alarm is activated for 5 minutes.
Bell On =10 If an alarm is triggered, the local alarm is activated for 10 minutes.
Bell On =15 If an alarm is triggered, the local alarm is activated for 15 minutes.
Bell On =20 If an alarm is triggered, the local alarm is activated for 20 minutes.
5. The control unit acknowledges your input with a
double “beep” tone and shows Installer Mode. 044 Exit delay time A To change the property of the exit mode for overall active
3. Via the keypad, select from the following items
Exit A=10 Exit delay time for overall active is 10 seconds.
Exit A=20 Exit delay time for overall active is 20 seconds.
Exit A=30 Exit delay time for overall active is 30 seconds.
Exit A=45 Exit delay time for overall active is 45 seconds.
Exit A=60 Exit delay time for overall active is 60 seconds.
Exit A=120 Exit delay time for overall active is 120 seconds.
5. The control unit acknowledges your input with a
double “beep” tone and shows Installer mode.56
045 Entry/exit delay tone volume To change the property of the entry/exit delay tone volume:
3. Via the keypad, select from the following items
Entry/exit delay tone off 1-9 EE Vol=1 / 2 / 3 / 4 / 5 / 6 / 7 / 8 / 9 Entry/exit delay tone quiet (1) to loud (9)
5. The control unit acknowledges your input with a
double “beep” tone and shows Installer Mode. 046 Tamper alarm To change the property of the tamper alarm for a deactivated alarm centre:
3. Via the keypad, select from the following items
Internal Following a tamper alarm when the alarm centre is deactivated, only the intern alarm is triggered.
Keypad Following a tamper alarm when the alarm centre is deactivated, the control unit is triggered.
Int+RKP Following a tamper alarm when the alarm centre is deactivated, the control unit and the internal alarm are triggered.
5. The control unit acknowledges your input with a
double “beep” tone and shows Installer Mode. 047 Partition A alarm Reaction To change this feature, proceed as follows:
3. Via the keypad, select from the following items
A = Local Control unit + loudspeaker
5. The control unit acknowledges your input with a
double “beep” tone and shows Installer Mode. 048 Control unit lock If you want to allow the user to deactivate the system using a proximity chip key then the control unit must be locked (UF, FE, MD, code entry, false alarm cancellation, inactive on alarm once more active). To change the property of the control unit lock, proceed as follows:
3. Via the keypad, select from the following items
Code Lk OFF The system allows all users to use all control units during the entry.
Code Lk ON During entry, the system locks access to the control units from all users.57
5. The control unit acknowledges your input with a
double “beep” tone and shows Installer Mode. 050 CSID code To be able to use the remote reset function, you must set the alarm centres to installer reset (function 33 to 1) and assign the CSID code. To change the CSID code for a deactivated alarm centre:
5. The control unit acknowledges your input with a
double “beep” tone and shows Installer Mode. 051 Date and time Proceed as follows to change the date and time:
3. Via the keypad, select from the following items
4. Confirm your input with .
5. Enter the month via the keypad. (January to
September = 01 to 09)
6. Confirm your input with .
7. Enter the year via the keypad.
8. Confirm your input with .
10. Confirm your input with .
11. Enter the minute via the keypad.
12. Confirm your input with .
13. The control unit acknowledges your input with a
double “beep” tone and shows Installer Mode. 052 Block tamper Proceed as follows to change the property of the tamper alarm:
3. Via the keypad, select from the following items
Omit Alarm You can only block some zones; a tamper zone or a tamper alarm cannot be blocked.
Omit Al+Tamp You can block some zones and tamper zones or a tamper alarm from monitoring.
5. The control unit acknowledges your input with a
double “beep” tone and shows Installer Mode. 053 Cancel - Reset To change the property of the alarm reset:
3. Via the keypad, select from the following items
Abort=System Resetting after a cancelled alarm is as set in function 33.
Abort=User The user may make a reset after a cancelled alarm.58
5. The control unit acknowledges your input with a
double “beep” tone and shows Installer Mode. 054 BVVO monitoring To change the property of the BVVO monitoring:
3. Via the keypad, select from the following items
BVVO Sup OFF If a radio transmitter can no longer be reached by the alarm centre then this reports a monitoring error after 1 hour (see function 128).
BVVO Sup ON If a radio transmitter can not be reached for more than 15 minutes then a warning is displayed on the control unit if an attempt is made to activate it. If the transmitter can not be reached for more than 2 hours then the alarm centre reports: „detector tampering“, (when activated) external alram; „monitoring error“, (when deactivated) internal alarm.
5. The control unit acknowledges your input with a
double “beep” tone and shows Installer Mode. 056 Length of access code To change the property of the length of the access code:
3. Via the keypad, select from the following items
5. The control unit acknowledges your input with a
double “beep” tone and shows Installer Mode. IMPORTANT: Changing the length of the access code requires that all codes be reset to the factory settings. From the factory: 4 numbers (1234 for user, 7890 for installer); 6 numbers (123456 for user, 567890 for installer). 057 Battery test To change the property of the battery test:
3. Via the keypad, select from the following items
BattTest OFF No battery test is carried out.
BattTest ON A battery test is carried out if deactivated or 23 hours after the last test (neg.: display „battery fault“ in the control unit + short tone)
5. The control unit acknowledges your input with a
double “beep” tone and shows Installer Mode.59
058 BVVO Sabotage reset Proceed as follows to change the property of the BVVO sabotage reset:
3. Via the keypad, select from the following items
BVVOtamp OFF The user can carry out a reset in case of tampering when the alarm centre is deactivated.
BVVOtamp OFF If the alarm centre is deactivated in case of tampering then an installer reset is required.
5. The control unit acknowledges your input with a
double “beep” tone and shows Installer Mode. 059 Sabotage siren Proceed as follows to change the property of the sabotage siren:
3. Via the keypad, select from the following items
BellTamp=NEG There is no resistor in the sabotage loop (NC)
5. The control unit acknowledges your input with a
double “beep” tone and shows Installer Mode. 060 Entry/exit behaviour on internal active (B) To change the zone property of the entry/exit zone at internal active (B):
3. Via the keypad, select from the following items
B=FE =FE A zone programmed as entry/exit keeps this property even for internal activation and thus starts the entry delay time when the zone triggers and during active internal activation.
B=FE = NA A zone programmed as entry/exit changes its zone property during internal activation to immediate and triggers an alarm if the zone triggers and during active internal activation.
5. The control unit acknowledges your input with a
double “beep” tone and shows Installer Mode. 061 Entry to follow behaviour on internal active (B) To change the zone property for internal active (B):
3. Via the keypad, select from the following items
B=ER =ER A zone programmed as entry to follow keeps this property even during internal activation and permits entry to this zone during the entry delay period.
B=ER = FE A zone programmed as entry to follow60
changes its zone property during internal activation to entry/exit and starts the delay time if the zone triggers and during active internal activation.
5. The control unit acknowledges your input with a
double “beep” tone and shows Installer Mode. 062 Behaviour of exist mode internal active (B) To change the property of the exit mode for internal active (B):
3. Via the keypad, select from the following items
Low Tone The acoustic signal during the exit delay time is emitted at half volume.
Instant During internal activation, the alarm centre is internally activated immediately – i.e., without delay.
Silent No acoustic signal is emitted during the delay time. Following expiry of the delay time, the alarm centre emits a brief signal.
B=A The initial mode for internal active B is as for the initial mode of overall active A In a partitioned system
B=Timed Activation of partition B after exit time (command 65). A connected key switch at the control unit shortens the exit time when activated
B=Terminated Activated via key switch connected to the control unit. The exit time is unlimited.
B=Final Door Activation of the partition by closing the last door detector
B=Instant Active without delay time
B=Silent Use command 65 for the exit time. The control unit emits a double beep when the time has expired.
5. The control unit acknowledges your input with a
double “beep” tone and shows Installer Mode. 063 Alarm behaviour for internal active (B) To change the alarm property for internal active (B):
3. Via the keypad, select from the following items
B=Keypad Only the control units are activated.
B=Internal On alarm, the control units and the internal alarm are activated.
B=Local On alarm, the control units, the internal alarm and the external siren are activated.
B=Full On alarm, the control units, the internal signalling, the external sirens and the telephone dialler are activated. In a partitioned system
B=Keypad Only the control units are activated.
B=Local On alarm, the control units, the internal61
alarm and the external siren are activated.
B=Full On alarm, the control units, the internal signalling, the external sirens and the telephone dialler are activated.
5. The control unit acknowledges your input with a
double “beep” tone and shows Installer Mode. 065 Exit delay time internal B To change the property of the exit delay time for internal active B:
3. Via the keypad, select from the following items
Exit B=10 Exit delay time for internal active B is 10 seconds.
Exit B=20 Exit delay time for internal active B is 20 seconds.
Exit B=30 Exit delay time for internal active B is 30 seconds.
Exit B=45 Exit delay time for internal active B is 45 seconds.
Exit B=60 Exit delay time for internal active B is 60 seconds.
Exit B=120 Exit delay time for internal active B is 120 seconds.
5. The control unit acknowledges your input with a
double “beep” tone and shows Installer Mode. 066 Forbikobler partitions To change this property (only possible in partitioned systems):
3. Via the keypad, select from the following items
Assign control unit of partition A.
Assign control unit of partition B.
Assign control unit of partition C.
Assign control unit of partition D.
5. Repeat these steps for the remaining Forbikobler
6. The control unit acknowledges your input with a
double “beep” tone and shows Installer Mode. 067 Forbikobler correct Proceed as follows to change the property of the Forbikobler correct:
3. Via the keypad, select from the following items
Frb=Non-Appr Proximity code key and user codes are allowed for the access.
Frb=Approved Only user codes are allowed for the access (correct).
5. The control unit acknowledges your input with a
double “beep” tone and shows Installer mode. 068 Forbikobler entry time This function sets the time that the Forbikobler system allows for entry. An optional output for a door lock can be connected during this time. To change the property of the Forbikobler entry time:
3. Via the keypad, select from the following items
5. The control unit acknowledges your input with a
double “beep” tone and shows Installer Mode. 069 Forbikobler door lock Proceed as follows to change the property of the Forbikobler door lock:
3. Via the keypad, select from the following items
Lock Timed The door lock controlled by the Forbikobler system is only open for a certain time during the reset.
Lock Toggled The door lock controlled by the Forbikobler system is open during the reset.
5. The control unit acknowledges your input with a
double “beep” tone and shows Installer Mode. 070 Entry/exit behaviour on internal active (C) To change the zone property of the entry/exit zone at internal active (C):
3. Via the keypad, select from the following items
C=FE = FE A zone programmed as entry/exit keeps this property even for internal activation and thus starts the entry delay time when the zone triggers and during active internal activation.
C=FE = NA A zone programmed as entry/exit changes its zone property during internal activation to immediate and triggers an alarm if the zone triggers and during active internal activation.63
5. The control unit acknowledges your input with a
double “beep” tone and shows Installer Mode. 071 Entry to follow behaviour on internal active (C) To change the zone property of the entry to follow zone at internal active (C):
3. Via the keypad, select from the following items
C=ER =ER A zone programmed as entry to follow keeps this property even during internal activation and permits entry to this zone during the entry delay period.
C=FE = FE A zone programmed as entry to follow changes its zone property during internal activation to entry/exit and starts the delay time if the zone triggers and during active internal activation.
5. The control unit acknowledges your input with a
double “beep” tone and shows Installer Mode. 072 Behaviour of exit mode internal (C) To change the property of the exit mode for internal active (C):
3. Via the keypad, select from the following items
C=Low Tone The acoustic signal during the exit delay time is emitted at half volume.
C=Instant During internal activation, the alarm centre is internally activated immediately – i.e., without delay.
C=Silent No acoustic signal is emitted during the delay time. Following expiry of the delay time, the alarm centre emits a brief signal.
C=A The initial mode for internal active B is as for the initial mode of overall active A In a partitioned system
C=Timed Activation of partition C after exit time (command 75). A connected key switch at the control unit shortens the exit time when activated
C=Terminated Activated via key switch connected to the control unit. The exit time is unlimited.
C=Final Door Activation of the partition by closing a last door detector
C=Instant Active without delay time
C=Silent Use command 75 for the exit time. The control unit emits a double beep when the time has expired.
Key switch (see command)
5. The control unit acknowledges your input with a
double “beep” tone and shows Installer Mode. 073 Alarm behaviour for internal (C) To change the alarm property for internal active (C):
3. Via the keypad, select from the following items
C=Keypad Only the control units are activated.
C=Internal On alarm, the control units and the internal alarm are activated.
C=Local On alarm, the control units, the internal alarm and the external siren are activated.
C=Full On alarm, the control units, the internal signalling, the external sirens and the exits are activated. In a partitioned system
C=Keypad Only the control units are activated.
C=Local On alarm, the control units, the internal alarm and external sirens are activated.
5. The control unit acknowledges your input with a
double “beep” tone and shows Installer Mode. 075 Exit delay time internal C To change the property of the exit delay time for internal active C:
3. Via the keypad, select from the following items
Exit C=10 Exit delay time for internal active C is 10 seconds.
Exit C=20 Exit delay time for internal active C is 20 seconds.
Exit C=30 Exit delay time for internal active C is 30 seconds.
Exit C=45 Exit delay time for internal active C is 45 seconds.
Exit C=60 Exit delay time for internal active C is 60 seconds.
Exit C=120 Exit delay time for internal active C is 120 seconds.
5. The control unit acknowledges your input with a
double “beep” tone and shows Installer mode.65
076 Behaviour of exit mode internal (D) To change the property of the exit mode for internal active (D):
3. Via the keypad, select from the following items
D=Low Tone The acoustic signal during the exit delay time is emitted at half volume.
D=Instant During internal activation, the alarm centre is internally activated immediately – i.e., without delay.
D=Silent No acoustic signal is emitted during the delay time. Following expiry of the delay time, the alarm centre emits a brief signal.
D=A The initial mode for internal active B is as for the initial mode of overall active A In a partitioned system
D=Timed Activation of partition D after exit time (command 79). A connected key switch at the control unit shortens the exit time when activated
D=Terminated Activated via key switch connected to the control unit. The exit time is unlimited.
D=Final Door Activation of the partition by closing the last door detector
D=Instant Active without delay time
D=Silent Use command 79 for the exit time. The control unit emits a double beep when the time has expired.
5. The control unit acknowledges your input with a
double “beep” tone and shows Installer Mode. 077 Alarm behaviour for internal (D) To change the alarm property for internal active (D):
3. Via the keypad, select from the following items
D=Keypad Only the control units are activated.
D=Internal On alarm, the control units and the internal alarm are activated.
D=Local On alarm, the control units, the internal alarm and the external siren are activated.
D=Full On alarm, the control units, the internal signalling, the external sirens and the exits are activated. In a partitioned system
D=Keypad Only the control units are activated.
D=Local On alarm, the control units, the internal alarm and external sirens are activated.
5. The control unit acknowledges your input with a
double “beep” tone and shows Installer Mode.66
079 Exit delay time internal D To change the property of the exit delay time for internal active D:
3. Via the keypad, select from the following items
Exit D=10 Exit delay time for internal active D: 10 seconds.
Exit D=20 Exit delay time for internal active D: 20 seconds.
Exit D=30 Exit delay time for internal active D: 30 seconds.
Exit D=45 Exit delay time for internal active D: 45 seconds.
Exit D=60 Exit delay time for internal active D: 60 seconds.
Exit D=120 Exit delay time for internal active D: 120 seconds.
5. The control unit acknowledges your input with a
double “beep” tone and shows Installer Mode. 080 Forbikobler door bell Proceed as follows to change the property of the Forbikobler door bell:
3. Via the keypad, select from the following items
Chime OFF Pressing the Forbikobler door bell does not activate the loudspeaker of the alarm centre.
5. The control unit acknowledges your input with a
double “beep” tone and shows Installer Mode.67
3. Via the keypad, select from the following items
Bell This output is activated at local and external alarms. Set the siren delay and duration in menu items 41 and 42.
EE Follow This output is activated if the entry/exit delay is active. Note that this output is not activated if the exit mode “internal” is programmed to “silent” or “immediate”.
Armed Lamp This output is activated if the alarm centre is completely or internally activated.
Set Latch This output is activated if the alarm centre is completely or internally activated. The output is also activated if the alarm centre is reset or if a walk test is started.
Shock sensor reset This output is activated for 5 seconds at the start of the exit delay.
Walk Test This output is activated during the user and programmer walk test. The output is connected to the walk test input of the motion sensor.
Ready Lamp This output is activated if the alarm centre is ready for complete or internal activation. The alarm centre is ready even if the zones with the properties “entry/exit” or “entry to follow” are opened.
24 Hour This output is activated if a 24-hour zone triggers an alarm. The output is deactivated if the alarm centre is deactivated.
Strobe This output is activated if a local or external alarm is triggered. The output remains active until the alarm centre is deactivated.
Smoke Reset This output is used to reset smoke detectors. This output is activated for at least 3 seconds following every deactivation and reset of the alarm centre following an alarm.
Siren Test This output is activated following programming and during a siren test (command 91 in the program menu).
Strobe Set This output is activated for 10 seconds after the alarm centre is activated and the alarm centre is active. The output can be used to issue an active acknowledgement.
Set 1 This output is activated for a definable time period (command 170) if the alarm centre is activated completely (A) or internally (B), (C) or (D) (command 171).
Unset 1 This output is activated for a definable time period (command 172) if the alarm centre is deactivated completely (A) or internally (B), (C) or (D) (command 171).
Confirm This output is active during a confirmed alarm.68
Set Comp1 This output is active for 10 seconds after the system has been activated.
Unset Comp1 This output is active for 10 seconds after the system has been deactivated or after an alarm has been deactivated.
System Alarm This output is activated when the alarm centre has detected an alarm. In a partitioned system
Bell Partition A This output is active when an alarm has been detected in partition A.
Bell Partition B This output is active when an alarm has been detected in partition B.
Bell Partition C This output is active when an alarm has been detected in partition C.
Bell Partition D This output is active when an alarm has been detected in partition D.
Strobe Set Partition A This output is active for 10 seconds after partition A has been activated.
Strobe Set Partition B This output is active for 10 seconds after partition B has been activated.
Strobe Set Partition C This output is active for 10 seconds after partition C has been activated.
Strobe Set Partition D This output is active for 10 seconds after partition D has been activated.
Set 1 This output is activated for a definable time period (command 170) if the alarm centre is activated completely (A) or internally (B), (C) or (D) (command 171).
Set 2 This output is activated for a definable time period (command 170) if the alarm centre is activated completely (A) or internally (B), (C) or (D) (command 171).
Set 3 This output is activated for a definable time period (command 170) if the alarm centre is activated completely (A) or internally (B), (C) or (D) (command 171).
Set 4 This output is activated for a definable time period (command 170) if the alarm centre is activated completely (A) or internally (B), (C) or (D) (command 171). The output is also activated if a fire or panic alarm is triggered.
Unset 1 This output is activated for a definable time period (command 170) if the alarm centre is deactivated completely (A) or internally (B), (C) or (D) (command 171).
Unset 2 This output is activated for a definable time period (command 170) if the alarm centre is deactivated completely (A) or internally (B), (C) or (D) (command 171).
Unset 3 This output is activated for a definable time period (command 170) if the alarm centre is deactivated completely (A) or internally (B), (C) or (D) (command 171).69
Unset 4 This output is activated for a definable time period (command 170) if the alarm centre is deactivated completely (A) or internally (B), (C) or (D) (command 171).
Fire This output is activated if a fire alarm is triggered. The output remains active until the alarm is deactivated.
This output is activated if a fire alarm is triggered. The output remains active until the alarm is deactivated.
5. The control unit acknowledges your input with a
3. Via the keypad, select from the items described
3. Via the keypad, select from the items described
above and enter the function accordingly: 085 Burglary output To change the behaviour of the transistor output on burglar alarms:
3. Via the keypad, select from the following items
Burg=Latched The output remains activated until the user or programmer resets the alarm centre.
Burg=Rearm The output is reset following expiry of the defined siren duration. It can be reactivated in the event of a new alarm.
5. The control unit acknowledges your input with a
double “beep” tone and shows Installer Mode. 086 Additional entry delay To change the behaviour of the entry delay time:
3. Via the keypad, select from the following items
Dual Ply OFF An alarm is triggered following expiry of the entry delay time.
Dual Ply ON An internal alarm is triggered following expiry of the delay time. The user has another 30 seconds to enter the user code and deactivate the alarm centre.
5. The control unit acknowledges your input with a
double “beep” tone and shows Installer Mode.70
087 Control unit alarm To change the properties of the connected control units:
3. Via the keypad, select from the following items
Dual Key OFF If the function is deactivated, no alarm can be emitted by the control unit.
Dual Key ON If the function is activated, an alarm can be emitted by the control unit. To trigger an alarm, press the following keys: 1 & 3 for panic 4 & 6 for medical emergency 7 & 9 for fire alarm For further information, see the operating instructions of this product.
5. The control unit acknowledges your input with a
3. Via the keypad, select from the following items
Confirm OFF The alarm centre is not programmed for the signalling of confirmed alarms.
Confirm ON The alarm centre is programmed for the signalling of confirmed alarms.
5. The control unit acknowledges your input with a
double “beep” tone and shows Installer Mode.
098 Factory settings To restore the factory settings:
1. You must be in program mode.
5. To restore the factory settings, press the following
7. The control unit acknowledges your input with a
double “beep” tone and shows Installer Mode. 099 Exit program mode To exit program mode:
5. If no fault exists and zones with the properties 24
hour, fire, panic or technical open are closed, you exit the program menu.
6. If there is a fault, the alarm centre displays it.
Clear the fault and repeat steps 1–4. 101 Call mode TWG Proceed as follows to change the property of call mode telephone dialler (TWG):
1. You must be in program mode.
4. Via the keypad, select from the following items
Comms=OFF The alarm centre does not use any communication devices.
Comms=Single Single report. The alarm centre reports to a programmed telephone number (command 115) with an access number (command 117). The alarm centre dials the number and attempts to establish a connection to the central station (max. 15 attempts).
Comms=ALT The alarm centre dials one of two programmed numbers and attempts to establish a connection to the central station. If the attempt is unsuccessful then the alarm centre dials the second of the two numbers (max 15 attempts for each number). If the connection is successful and the alarm is confirmed then the connection is subsequently closed.
Comms=Dual Dual Report. As in item 2, 2 numbers are dialled and an attempt is made to establish a connection to the central stations. However, both central stations must have successfully confirmed the alarm (max. 15 attempts until both have successfully confirmed).
6. The control unit acknowledges your input with a
double “beep” tone and shows Installer Mode.
103 Format Report Proceed as follows to change the property of the format report:
3. Via the keypad, select from the following items
Format=SIA2 Scancom SIA Level 2 (transmits no time+date)
5. The control unit acknowledges your input with a
double “beep” tone and shows Installer Mode.72
105 Test call To change the properties of the test call:
3. Via the keypad, select from the following items
OFF A nn Day Hour Daily test call to the alarm centre at the required time 01-24. B nn Month Day Monthly test call to the alarm centre on the required day 01-28. C nn Freq Hour The alarm centre makes a test call every nn hours (e.g. every 12 hours). D nn Freq Days The alarm centre makes a test call every nn days.
7. The control unit acknowledges your input with a
double “beep” tone and shows Installer Mode. 106 Line loss report To change the settings of the line loss report:
3. Via the keypad, select from the following items
LF=Audible When deactivated, the alarm centre writes the loss in the event memory and emits a short tone every minute at the control unit. The tone is silenced on entering the access code and the control unit shows a line loss on the display. The system can still be activated, despite the loss. When activated, the alarm centre writes the loss in the event memory but no tone is emitted from the control unit and nothing is displayed. If there is an alarm during a line loss then all siren delays are switched off.
LF=Silent When deactivated, the alarm centre writes the loss in the event memory and shows the loss in the display of the control unit. When activated, the alarm centre writes the loss in the event memory but shows nothing on the display. If there is an alarm during a line loss then all siren delays are switched off.
5. The control unit acknowledges your input with a
double “beep” tone and shows Installer Mode. 108 Dynamic test call To change the properties of the dynamic test call:
3. Via the keypad, select from the following items
Dynamic OFF Dynamic test call is switched off.
Dynamic ON The alarm centre carries out a test call 24 hours after the last communication.
5. The control unit acknowledges your input with a
double “beep” tone and shows Installer Mode.73
109 Three way call – UK only To change the settings of the three way call:
3. Via the keypad, select from the following items
ThreeWayOFF Three way call is switched off.
ThreeWayON Three way call is switched on.
5. The control unit acknowledges your input with a
double “beep” tone and shows Installer Mode. 110 Download mode To change the settings of the download mode:
3. Via the keypad, select from the following items
Local PC The alarm centre is programmed via the connected data cable.
Remote PC The alarm centre is programmed via the telephone line. The alarm centre responds to a call from a remote PC (see commands 112, 113) The command 114-1 has no function with this command The alarm centre cancels this command if no call is made by the PC within 30 minutes.
5. The control unit acknowledges your input with a
double “beep” tone and shows Installer Mode. 112 Call until answer - download To change the settings:
3. Via the keypad, select from the following items
Rings=3 The alarm centre rings 3 times before answering.
Rings=5 The alarm centre rings 5 times before answering.
Rings=7 The alarm centre rings 7 times before answering.
Rings=10 The alarm centre rings 10 times before answering.
Rings=15 The alarm centre rings 15 times before answering.
Rings=255 The alarm centre rings 255 times before answering.
5. The control unit acknowledges your input with a
double “beep” tone and shows Installer Mode. 113 1 Call - download To change the settings:
3. Via the keypad, select from the following items
One Ring Off The alarm centre does not answer a call.
The alarm centre interprets a call as a message from a remote PC. 10 to 90 seconds later, the remote PC calls again once and the alarm centre answers immediately on the first call. (Set command 112 to a larger number of calls than other end devices on the line)
5. The control unit acknowledges your input with a
double “beep” tone and shows Installer Mode. 114 Call back mode To change the settings:
3. Via the keypad, select from the following items
CallBack OFF (the call to the remote PC must be triggered manually – command 0 user mode).
CallBack ON The alarm centre answers after the set number of calls. The alarm centre hangs up and checks the ID and software version of the remote PC. After a short delay time, the alarm centre calls back the PC (see command 118+119).
CallBack ANY When deactivated, the alarm centre answers after a set number of calls (command 112+113) and accepts the programming commands immediately.
5. The control unit acknowledges your input with a
double “beep” tone and shows Installer Mode.
115 Telephone number 1 To change the settings:
Use key A to enter a 4-second pause (shown by a comma).
5. The control unit acknowledges your input with a
double “beep” tone and shows Installer mode. 116 Telephone number 2 See command 115. 117 Client no. CS With SIA formats the control unit can report alarms using a six-digit account code. Account code 1234 becomes 001234. To change the settings:
3. Use the keyboard to enter the numbers of the
client no. („account no“) for partition A. Keys C and D move the cursor to the right and left.
5. Repeat step 3 for the additional partitions.
6. The control unit acknowledges your input with a
double “beep” tone and shows Installer Mode. Some European countries use letters in the account number. The alarm centre accepts the letters B, C, D, E and F. To enters letters, use the keyboard the same way as when assigning the zone names.75
118 RemoteTel No 1 To change the settings:
Use key A to enter a 4-second pause (shown by a comma).
5. The control unit acknowledges your input with a
3. Via the keypad, select from the following items
DL No 3=OFF The alarm centre does not just accept any remote telephone number.
DL No 3=ON The alarm centre accepts any numbers from remote PCs. The remote PC transmits its number to the alarm centre and the alarm centre uses this number for the call back.
5. The control unit acknowledges your input with a
double “beep” tone and shows Installer mode.
123 Reset report To change the settings:
3. Via the keypad, select from the following items
Restore OFF The alarm centre does not communicate any resets.
Restore ON The alarm centre communicates resets. (Function only with Scancom Fast Format)
5. The control unit acknowledges your input with a
double “beep” tone and shows Installer Mode. 124 Switch open/close To change the settings:
3. Via the keypad, select from the following items
Rev O/C OFF Open/Close not switched
Rev O/C ON The function switches the commands Open/Close for Scancom Fast Format.
5. The control unit acknowledges your input with a
double “beep” tone and shows Installer Mode.76
3. Via the keypad, select from the following items
Omit >1 ON The alarm centre does not transmit the „closed“ signal if more than 1 zone is locked. (Function only with Scancom Fast Format)
5. The control unit acknowledges your input with a
double “beep” tone and shows Installer Mode.
3. Via the keypad, select from the following items
5. The control unit acknowledges your input with a
double “beep” tone and shows Installer Mode.
128 External alarm All radio transmitters are monitored via the radio expansion unit. If a radio zone has not communicated with the radio expansion unit for more than 2 hours then this reports a monitoring error. The external alarm function describes how the alarm centre reacts to this fault. To change the settings:
3. Via the keypad, select from the following items
Full Alarm Sirens + call to central station
Inhibit Set Control unit tone; the alarm centre can not be activated until the faulty detector reacts
5. The control unit acknowledges your input with a
double “beep” tone and shows Installer Mode.77
3. Via the keypad, select from the following items
ExtUnset OFF The user must first enter the entry zone and thereby start the entry time before he is able to deactivate using the remote control.
ExtUnset OFF The user can deactivate the alarm centre without entering the entry zone.
5. The control unit acknowledges your input with a
double “beep” tone and shows Installer Mode. 131 SIA report mode To change the settings:
3. Via the keypad, select from the following items
5. The control unit acknowledges your input with a
double “beep” tone and shows Installer Mode. 132 Transmit tampering as burglary To change the settings:
3. Via the keypad, select from the following items
The alarm centre transmits all SIA reports as specified in command 131.
TA = BA ON During an external alarm, the alarm centre transmits tampering as a burglary message and contact ID 130 instead of Contact ID 137.
5. The control unit acknowledges your input with a
double “beep” tone and shows Installer Mode. 133 SIA Reset To change the settings:
3. Via the keypad, select from the following items
SIA Rst OFF The alarm centre does not transmit any SIA reset reports (fire, panic, technical, tamper resets)
5. The control unit acknowledges your input with a
double “beep” tone and shows Installer Mode.78
143 Contact ID report Rst To change the settings:
3. Via the keypad, select from the following items
Mode=Basic All reports with numbers as in the „CID Code“ column apart from those marked with a # (see appendix, SIA Report Mode)
Mode=Bas+Res All reports with numbers as in the „CID Code“ column (see appendix, SIA Report Mode)
5. The control unit acknowledges your input with a
double “beep” tone and shows Installer Mode.
151 Additional outputs By using the cable supplied or the optional relay PCB, you have access to eight further transistor outputs. To change the setting of output 1:
3. Via the keypad, select from the following items
5. The control unit acknowledges your input with a
double “beep” tone and shows Installer Mode. 152 Additional outputs Additional output 279
153 Additional outputs Additional output 3 154 Additional outputs Additional output 4 155 Additional outputs Additional output 5 156 Additional outputs Additional output 6 157 Additional outputs Additional output 7 158 Additional outputs Additional output 8 159 Inverting additional outputs You can also invert the additional transistor outputs for different applications. In inverted state, the voltage of +12V is applied in active state – e.g.: for addressing a visual signal.
3. Via the keypad, select from the following items
inv Pgby OFF +12V voltage is removed for activating the output. In deactivated state, the output is set to +12V.
Inv Pgby ON +12V voltage is applied for activating the output. In deactivated state, the output is set to ground.
5. The control unit acknowledges your input with a
double “beep” tone and shows Installer Mode.
160 Time-confirmed alarm To change the settings:
3. Via the keypad, select from the following items
Bestät=000-999 The timer starts when an alarm has been triggered for the first time. If another alarm is triggered before the time has expired then the alarm centre transmits a confirmed alarm to the central station (command 89=1)
161 Confirm internal loudspeaker To change the settings:
3. Via the keypad, select from the following items
Conf Int OFF Internal loudspeaker is on for unconfirmed alarm (command 89=1)
Conf Int OFF Internal loudspeaker is on for confirmed alarm (command 89=1)
3. Via the keypad, select from the following items
Conf Ext OFF External siren is on for unconfirmed alarm (command 89=1)
Conf Ext ON External siren is on for confirmed alarm (command 89=1)
163 Confirmed alarm during entry To change the settings:
3. Via the keypad, select from the following items
Conf Ent 1 A zone must be entered for a confirmed alarm
Conf Ent 2 Two zones must be entered for a confirmed alarm
164 User reset after confirmed alarm To change the settings:
3. Via the keypad, select from the following items
Alarm RstU/E The user can make a reset after the first alarm / installer is required for reset after confirmed alarm
Alarm RstU/U The user can make a reset after both types of alarm
Alarm RstE/E The installer can make a reset after both types of alarm
170 Prog. pulse outputs (time active) The outputs programmed as active 1–4 are pulse- addressed for a predefined time during activation of the alarm centre as well as for fire and panic alarms. First define the time in which these output are to be active.
values: are 00 for a latched output or a time duration from 01 to 12 seconds.
4. To confirm, press:
5. The LCD display shows: 170: Set 2 01
6. In the same way, enter pulse time 2 via the
7. Continue until all times are entered.
8. The control unit acknowledges your input with a
double “beep” tone and shows Installer mode. 171 Prog. pulse outputs (levels active) Define when the outputs are to activated by defining the type of activation/deactivation (A, B, C, D) for switching the outputs to active.
3. Via the keypad, enter the activation level. A =
overall active, B, C and D for internal active B, C or D.
4. To confirm, press:
5. The LCD display shows: 170: Set 2 ABCD
6. In the same way, enter activation level 2 via the
7. Continue until all levels are entered.
8. The control unit acknowledges your input with a
double “beep” tone and shows Installer Mode. 172 Prog. pulse outputs (time inactive) The outputs programmed as inactive 1–4 are pulse- addressed for a predefined time during deactivation of the alarm centre. First define the time in which these output are to be active.
values: are 00 for a latched output or a time duration from 01 to 12 seconds.
4. To confirm, press:
5. The LCD display shows: 172: Unset 2 01
6. In the same way, enter pulse time 2 via the
7. Continue until all times are entered.
8. The control unit acknowledges your input with a
double “beep” tone and shows Installer mode. 173 Prog. pulse outputs (levels inactive) Define when the outputs are to activated by defining the type of activation/deactivation (A, B, C, D) for switching the outputs to active.
3. Via the keypad, enter the activation level. A =
overall active, B, C and D for internal active B, C or D.
4. To confirm, press:
5. The LCD display shows: 173: Unset 2 ABCD
6. In the same way, enter activation level 2 via the
7. Continue until all levels are entered.
8. The control unit acknowledges your input with a
double “beep” tone and shows Installer Mode.
174 Prog. pulse outputs (fire option) Define whether the outputs are also to be activated for fire alarm by setting the Fire option to ON. Important: Only those outputs that are activated during deactivation of the alarm centre can also be activated for fire.
4. To confirm, press:
5. The LCD display shows: 174: Fire 2 ON
6. In the same way, enter the Fire 2 option via the
7. Continue until all outputs are entered.
8. The control unit acknowledges your input with a
double “beep” tone and shows Installer Mode. 175 Prog. pulse outputs (panic option) Define whether the outputs are also to be activated for panic alarm by setting the Panic option to ON. Important: Only those outputs that are activated during deactivation of the alarm centre can also be activated for panic.
4. To confirm, press:
6. In the same way, enter the Fire 2 option via the
7. Continue until all outputs are entered.
8. The control unit acknowledges your input with a
double “beep” tone and shows Installer Mode. 181 Guard code To change the settings:
3. Via the keypad, select from the following items
GuardCodeOFF No guard code is used
GuardCodeON Using the guard code, the user can deactivate the alarm centre after an alarm. An entry is made in the event memory.
5. The control unit acknowledges your input with a
double “beep” tone and shows Installer Mode. 182 Last output for settling time This time sets a delay in the alarm report for detectors in the exit area. The sirens are switched off during this time and the alarm centre ignores the alarms. To change the settings:
3. Via the keypad, select from the following items
and press: 07-12 Settling 07-12
5. The control unit acknowledges your input with a
double “beep” tone and shows Installer Mode. 183 Change display To change the settings:
3. Use the keyboard to change the display. Use the
keyboard in the same way as when assigning the zone names.
5. The control unit acknowledges your input with a
double “beep” tone and shows Installer Mode. 184 Fire signal transmitter To change the settings:
3. Via the keypad, select from the following items
5. The control unit acknowledges your input with a
double “beep” tone and shows Installer Mode. 185 Key switch auto reset To change the settings:
3. Via the keypad, select from the following items
5. The control unit acknowledges your input with a
double “beep” tone and shows Installer Mode. 186 Number of home „beep“ calls To change the settings:
3. Via the keypad, select from the following items
and press: 01-15 HB calls 01-15 Number of calls with report type home „beep“ (command 103=6)
5. The control unit acknowledges your input with a
double “beep” tone and shows Installer Mode. 191 Fast format channel 1 To change the settings::
3. Via the keypad, select from the following items
System Alarm In a partitioned system
5. The control unit acknowledges your input with a
double “beep” tone and shows Installer Mode. 192 Fast format channel 2 See command 191. Default setting: Panic to follow 193 Fast format channel 3 See command 191. Default setting: Burglary to follow 194 Fast format channel 4 See command 191. Default setting: Active/inactive to follow 195 Fast format channel 5 See command 191. Default setting: Zone locked 196 Fast format channel 6 See command 191. Default setting: Alarm cancellation to follow 197 Fast format channel 7 See command 191. Default setting: Panic to follow 198 Fast format channel 8 See command 191. Default setting: Technical alarm to follow 201 Prog. entry delay time 1 Define entry delay time 25.40 mm seconds. Proceed as follows:
3. Via the keypad, enter the entry delay time.
4. Confirm your input by pressing. .
5. The control unit acknowledges your input with a
double “beep” tone and shows Installer Mode. 202 Prog. entry delay time 2 Define entry delay time 2 in seconds. Proceed as follows:
3. Via the keypad, enter the entry delay time.
4. Confirm your input by pressing. .
5. The control unit acknowledges your input with a
double “beep” tone and shows Installer Mode. 203/204 Prog. entry delay time 3/4 Define entry delay time 3/4 in seconds. Proceed as follows:
3. Via the keypad, enter the entry delay time.
4. Confirm your input by pressing. .
5. The control unit acknowledges your input with a
double “beep” tone and shows Installer Mode.85
If you are using a partitioned system then you can use the following commands for programming the partitions.
1. Use the commands 01 to 16 and X17 to X32 to assign
a partition to each zone. - each zone belongs to partition A (factory setting). - Press key A to assign zones to partition A. Use keys B, C and D to assign zones to the respective partition.
2. Use command 32 to assign control units to partitions.
In the default setting, all control units belong to all partitions.
3. Programming from exit mode, alarm reaction and exit
commands 81 to 84. - Option 18 assigns the output to partition A. - Option 19 assigns the output to partition B. - Option 20 assigns the output to partition C. - Option 21 assigns the output to partition D.
5. Make sure that the main user is instructed on how to
assign individual user codes to partitions. Command changes for partitioned systems Some commands provide new functions for partitioned systems and some commands can no longer be used. The following table gathers together the differences in the programming: Command Partition System Single System 01-40 zone programming A – D = partitions A – D = sections of locations 28 mask out the status display partition active location active 32 control units and partitions control unit assigned to part.
16.5 Examples for a partitioned system
The following example shows a building with an entry area and two office areas. The two office areas are occupied by two different companies. The entry area is used by both companies. With a partitioned system, two separate alarm centres are simulated by one alarm centre.
When the user of partition A leaves the office, he enters his 4-digit code at the control unit (1234). All detectors intended for his partition are automatically activated. Detectors 1 and 2 are only activated when user 2 has also activated his partition (user code 5678).87
090 Event memory The alarm centre stores the last 250 events. Each event is stored with date and time. The event memory can be viewed via the program menu.
1. On the control unit, enter: 090
2. The LCD display shows the latest events first.
3. You can page forwards and backwards in the
event memory. Press key 1 to page forwards and key 3 to page backwards.
4. Press to switch between the event and the
5. Press to exit the event memory.
6. The event memory cannot be deleted by the
programmer or the user. Entries in the event memory and their meaning: Entry Meaning MAINS Fail Failure of 230V AC power supply MAINS Fail
230V AC power supply restored Alarm Abort Alarm aborted manually by user AUX DC Fail 12V DC power supply failed or AUX fuse defect AUX DC Fail
12V DC power supply restored Bad Checksum Error in alarm centre memory Batt Load Fail Failure of battery charger or battery fuse defect Batt Load Fail
Battery charger restored Burg Zone nn Zone nn has triggered a burglar alarm Burg Zone nn
Zone nn OK Defaults Loaded Factory settings restored EEPROM Fail Memory error in the alarm centre Fire Zone nn Zone nn has triggered a fire alarm Fire Zone nn
Zone nn reset Fire OK Fire alarm reset Excess Keys A user has tried too often to enter code in the control unit Keyboard Missing Control unit nn failed Keyboard Restore Control unit nn reconnected Keyboard Tamper Control unit has triggered a tamper alarm Keyboard Restore Control unit nn tamper reset Fire Zone Alarm Fire alarm triggered at control unit nn Medical Zone Alarm Medical emergency alarm triggered at control unit nn Key Sw Set # Alarm centre activated via key switch of zone nn Entry Meaning Key Sw Unset # Alarm centre deactivated via key switch of zone nn Key Box Cls
Zone nn with key box property closed Key Box Opn
Zone nn with key box property opened Lid Tamper The lid contact of the alarm centre was triggered Lid Tamper Restore The lid contact of the alarm centre is closed again Batt missing Battery supply interrupted (cable not plugged in) Batt Flt Restore Battery supply restored (cable connected) PA K -- Alarm BDT nn has triggered a panic alarm PA Z -- Alarm Zone nn has triggered a panic alarm PA Z -- Rstr Panic alarm of zone nn reset Set Fail Zone
The alarm centre could not be activated since ZN nn was triggered Fire Z – Alarm Zone nn has triggered a fire alarm88
Fire Z -- Rstr Zone nn fire alarm reset Soak Fail Z -- Zone nn sensor test failed Bell Tamper Rst Siren tamper alarm reset Bell Tamper Siren tamper alarm triggered System Rearmed System automatically rearmed System Startup System supplied with power and started Tamper Z -- Zone nn has triggered a panic alarm Tamper Z -- Restore Zone nn panic alarm reset Tech Z -- Alarm Zone nn has triggered a technical alarm Tech Z -- Restore Zone nn alarm reset Tel Line Fault Error in transmission (not for Terxon S) Tel Line Restrore Transmission error reset User-- Change User-
User nn has changed the user code of user nn User-- Delete User-- User nn has deleted the user code of user nn U -- Off-Site User nn has exited the program menu U -- On-Site User nn has entered the program menu User-- System Reset User nn has reset the alarm centre User-- # Set User nn has activated the alarm centre (area #) User-- # Unset User nn has deactivated the alarm centre (area #) User-- Time/Date User nn has changed the time and date User Zone # Omit User nn has removed ZN nn from monitoring User Zone # Unomit User nn has returned ZN nn to monitoring Global Tamper Only for zone property NC + tamper: Tamper line (COM A/T) triggered Global T. Restore Tamper line (COM A/T) reset
091 Test output 1 The alarm centre activates output 1 on the centre’s PCB until it is terminated manually. To start the test, you must open the program menu. Proceed as follows:
1. On the control unit, enter: 091 .
2. To end the test, press:
092 Test output 2 The alarm centre activates output 2 on the centre’s PCB until it is terminated manually. To start the test, you must open the program menu. Proceed as follows:
1. On the control unit, enter: 092 .
2. To end the test, press:
093 Test output 3 The alarm centre activates output 3 on the centre’s PCB until it is terminated manually. To start the test, you must open the program menu. Proceed as follows:
1. On the control unit, enter: 093 .
2. To end the test, press:
094 Test loudspeaker output The alarm centre activates the output for the optional loudspeaker on the PCB until it is terminated manually. To start the test, you must open the program menu. Proceed as follows:
1. On the control unit, enter: 094 .
2. To end the test, press:
095 Test control unit buzzer The alarm centre activates the control unit buzzer until it is terminated manually. To start the test, you must open the program menu. Proceed as follows:
097 Walk test If the walk test is activated, you can trigger all zones of the alarm centre to check their function. Activate the walk test and then trigger all zones in sequence. You should also test the tamper contact. Proceed as follows:
3. Trigger a zone. The buzzer of the control unit
emits a two-note tone. The LCD display shows: A:ZONE nn
5. To end the walk test, press: .
199 Measuring the resistance The alarm centre can measure the resistance values of the zones and display them. You can therefore see if the right resistors have been used. Proceed as follows:
3. To change from zone to zone, press key 1 and
991 Software version / Zone module check Using this function, the installer can read out the software version of the alarm centre and check whether the alarm centre is partitioned.
1. On the control unit, enter: 991 .
2. The LCD displays the software version and the
letter p for a partitioned system.
to check the connected expansion modules (max. 3). To exit the programming menu, re-press .
099 to exit the program menu:
1. On the control unit, enter: 099 .
2. To exit the menu, press:
3. The control unit acknowledges your input with a
long “beep” tone and displays the date and time again.90
TD (Time and Day) RESET JT 625
(1) If command 143=1 is set then all CID codes are transmitted. If command 143=0 is set then all commands marked by ‡ are not transmitted. (2) The alarm centre registers an anti-mask event as an anti-mask type lower than it actually is.92 17 Technical data Voltage supply External voltage supply: 230V AC +/-10% (ambient temperature 20°C) External power consumption: 1.0A maximum Internal voltage supply: 19VAC / -10% Internal power supply: 2.0A maximum CPU power consumption: 150mA maximum Power consumption of control unit: 35mA maximum
Emergency power supply: 12V DC, 7.0Ah lead rechargeable battery
- 18 Troubleshooting The alarm centre shows no reaction although mains and battery power are present. Check mains and battery connections and the three fuses. Replace fuses with fuses of similar rating if necessary. The display shows one or more open zones (although all alarm contacts seem to be at rest) and the alarm centre cannot be activated or there is no permanent error tone. Remove all connections of the alarm zone concerned and replace them by a wire jumper between CCT. If the zone is displayed as closed, the cause of the problem is in the connected alarm contacts/cables. Check them using a circuit tester. There may be a short-circuit between the alarm and tamper zone or the 0V contact. The alarm centre reports continuous tampering. Check the tamper contacts of the alarm centre and the control units. The springs of these contacts must be pressed in fully. Check the connected tamper contacts with a circuit tester and make sure there is no short-circuit. Make sure that the tamper zone of the siren is also terminated with 0V. The triggering of a sensor does not result in an alarm. If you have connected more than one sensor in an alarm line, check that all NC contacts are connected serially and not in parallel, then activate all connected sensors simultaneously. Make sure that you have removed the wire jumper of the zones that was fitted in the factory. Has the alarm zone been correctly programmed? External alarm does not start. Use a multimeter to check the transistor output to which n the siren is connected to ensure correct functioning of the alarm centre. Then connect the siren directly to the battery and check its function. Tamper alarm is not triggered although a tamper contact was opened on an alarm sensor. Check that all tamper contacts are connected in series. If they are connected in parallel, all contacts must first be opened to trigger a tamper alarm. There may be a short-circuit in the wiring. Sensors trigger a false alarm. Check that the sensors have been installed and adjusted according to the manufacturer’s instructions. In the case of motion sensors, check that they have been mounted to face into the room and not towards any heat source. In the case of door/window opening contacts, check that the switching distance between the reed contact and the magnet does not have too much movement. Check the wiring. Check that solder joints and clamps are sound. If cables are laid too near to high-voltage lines, errors can also occur. Program and user code forgotten. Disconnect mains and auxiliary power supply from the alarm centre. Short-circuit the “NVM RST” jumper under the connector block of the additional transistor outputs and then, with the jumper still short-circuited, reconnect the auxiliary power supply and then the mains supply. All code and chip keys deleted. The user code 1 (master code) is reset to 1234, and the installer code 7890. The programming, except for date/time, remains intact. You think the alarm centre has a malfunction. Restore the factory settings (program menu option 98) and check the function again. The fault is usually in the external cabling.94 19 Index of Programming Functions Account name p. 49
- Additional entry delay p. 69
- Additional outputs p. 78
- Alarm behaviour for internal (C) p. 64
- Alarm behaviour for internal (D) p. 65
- Alarm behaviour for internal active (B) p. 60
- Alarm cancellation p. 52
- Alarm confirmation p. 70
- Alarm on failed activation p. 50
- Battery test p. 58
- Behaviour of exist mode internal active (B)60 Behaviour of exit mode internal (C) p. 63
- Behaviour of exit mode internal (D) p. 65
- Block tamper p. 57
- Burglary output p. 69
- BVVO monitoring p. 58
- BVVO Sabotage reset p. 59
- Call - download p. 73
- Call back mode p. 74
- Call mode TWG p. 70
- Call until answer - download p. 73
- Cancel - Reset p. 57
- Change display p. 82
- Change language p. 76
- Changing the program code p. 48
- Changing the volume for internal alarm p. 49
- Changing the zone termination p. 48
- Client no. CS p. 74
- Confirm external sirens p. 80
- Confirm internal loudspeaker p. 79
- Confirmed alarm during entry p. 80
- Contact ID report Rst p. 78
- Control unit alarm p. 70
- Control unit lock p. 56
- Control units and partitions p. 51
- CSID code p. 57
- Date and time p. 57
- Deactivate external p. 77
- Download mode p. 73
- Dynamic test call p. 72
- Entry alarm delay p. 50
- Entry to follow behaviour on internal active (B) p. 59
- Entry to follow behaviour on internal active (C) p. 63
- Entry/exit behaviour on internal active (B) .59 Entry/exit behaviour on internal active (C) .62 Entry/exit delay tone volume p. 56
- Event memory p. 87
- Exit delay time A p. 55
- Exit delay time internal B p. 61
- Exit delay time internal C p. 64
- Exit delay time internal D p. 66
- Exit mode for overall activated (A) p. 53
- Exit program mode p. 70
- External alarm p. 76
- Factory settings p. 70
- Fast format channel p. 83
- Fire signal transmitter p. 82
- First alarm reaction p. 52
- Forbikobler correct p. 61
- Forbikobler door bell p. 66
- Forbikobler door lock p. 62
- Forbikobler entry time p. 62
- Forbikobler partitions p. 61
- Format Report p. 71
- Guard code p. 82
- Internal alarm p. 49
- Inverting additional outputs p. 79
- Key switch auto reset p. 82
- Last output for settling time p. 82
- Length of access code p. 5895
Exit time A Exit time B Exit time C Exit time D Entry time A Entry time B Entry time C Entry time D Siren duration Flashlight durationFR FR
0 Inactive 1 Active41
TE abcd – zone technique
SIAI1 Scancom SIA Level I
ACQUIT.TRANS / Comms Acknowledge
TD (Time and Day) RESET JT 625
1 10 sec. 2 20 sec. 3 30 sec. 4 45 sec. 5 60 sec. 6 120 sec.38
(BAT F-2A / 12VAUX F-
1. LCD-displayet viser: PROGR.MODUS.
2. LCD-displayet viser: 021: NC + Sabo
2. LCD-displayet viser: 027: INTERN ALARM
2. LCD-displayet viser: 044: UDG. A=10
2. LCD-displayet viser: 047: A = B-panel
2. LCD-displayet viser: 060: B=IU =IU
2. LCD-displayet viser: 061: B=IF =IF
2. LCD-displayet viser: 065: UDG. B=10
2. LCD-displayet viser: 067: B=IF =IF
2. LCD-displayet viser: 070: C=IU =IU
2. LCD-displayet viser: 071: C=IF =IU
2. LCD-displayet viser: 073: C = BP/INT
2. LCD-displayet viser: 075: UDG. C=10
2. LCD-displayet viser: 077: D = BP/INT
2. LCD-displayet viser: 079: UDG. D=10
2. LCD-displayet viser: 099: PROGR. SLUT?
SIAI1 Scancom SIA Level I
2. LCD-displayet viser: 106:LS=FRA
2. LCD-displayet viser: 132:TA = BA FRA
2. LCD-displayet viser: 159: INV UDG FRA
2. LCD-displayet viser: 183: 9752
2. LCD-displayet viser: 186:HB calls 02
Alarm system I delt system
2. LCD-displayet viser:
TD (Time and Day) RESET JT 625