1000 Turbo - Scooter SXT - Free user manual and instructions
Find the device manual for free 1000 Turbo SXT in PDF.
| Product Type | Foldable electric scooter |
| Brand | SXT |
| Model | 1000 Turbo |
| Power Supply | 36 V battery, mains charger included |
| Charging Time | 6 to 8 hours (do not exceed 24 hours) |
| Maximum User Weight | 120 kg |
| Recommended Minimum Age | 14 years |
| Driving Modes | ECO (60% power) and TURBO (full power) |
| Brakes | Front and rear cable brakes (caliper) |
| Tire Pressure | 3.5 bar maximum |
| Folding | Yes, via locking bar |
| Seat | Removable, mounted on post |
| Lighting | Kit supplied depending on version (model 1000) |
| Box Contents | 1 scooter, 1 36 V charger, tool kit, spare fuses, seat post, seat, clamp |
| Routine Maintenance | Check tire pressure, lubricate chain, regularly check screws and brakes |
| Safety | Wear helmet and protectors; do not use on road, wet surfaces, or in rainy weather |
| Warranty | Void if instructions not followed |
| Customer Service | 6 rue de la République, 94360 Bry-sur-Marne – info@sxt-scooters.fr |
Frequently Asked Questions - 1000 Turbo SXT
User questions about 1000 Turbo SXT
0 question about this device. Answer the ones you know or ask your own.
Ask a new question about this device
Download the instructions for your Scooter in PDF format for free! Find your manual 1000 Turbo - SXT and take your electronic device back in hand. On this page are published all the documents necessary for the use of your device. 1000 Turbo by SXT.
USER MANUAL 1000 Turbo SXT
EMPFOHLENE WERKZEUGE 11
natural_image
Assorted mechanical and electronic components laid out on a floor, including a motor, pressure gauge, and accessories (no visible text or symbols)ERSTE SCHRITTE
natural_image
Four-panel photo sequence showing a person assembling an electric scooter inside a storage room, with no visible text or symbols.natural_image
Close-up of hands adjusting a mechanical component with a metallic bracket (no visible text or symbols)
natural_image
Close-up of a robotic hand interacting with a black and silver device (no visible text or symbols)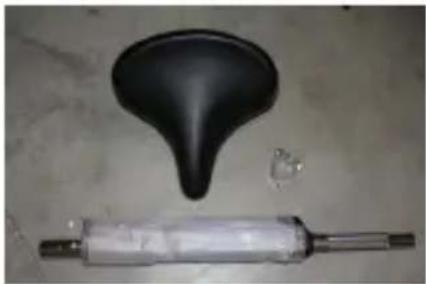
natural_image
Two mechanical components: a black funnel and a cylindrical tool with a transparent end cap (no visible text or symbols)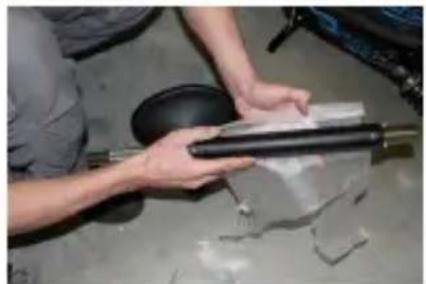
natural_image
Person handling a cylindrical object on a surface, with broken paper and a bowl nearby (no visible text or symbols)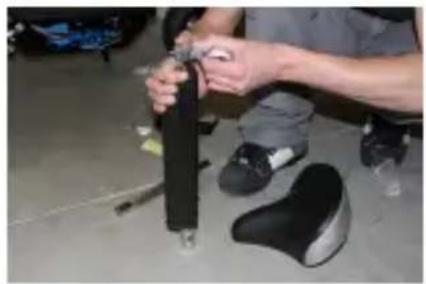
natural_image
Person adjusting a black safety belt on the floor, wearing shoes and boots (no visible text or symbols)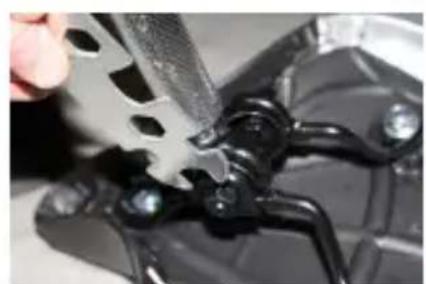
natural_image
Close-up of a hand using a tool to adjust or repair a mechanical component (no visible text or symbols)natural_image
Close-up of a hand holding a metal pipe fitting (no visible text or symbols)
natural_image
Close-up of a soldering iron being used to work on a blue-tinted electronic device (no visible text or symbols)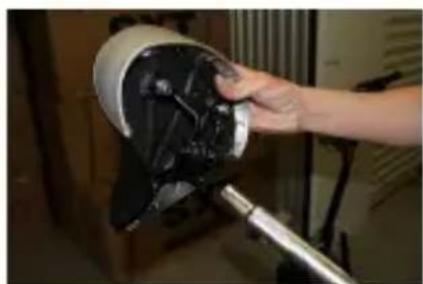
natural_image
Close-up of a hand holding a black mechanical component mounted on a stand (no visible text or symbols)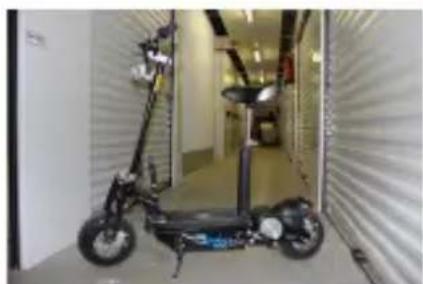
natural_image
Exterior view of a modern electric scooter parked inside a white corrugated corridor (no signage or text visible)AUFLADEN DER BATTERIE
natural_image
Close-up of a black mechanical component with two circular features and a blue patterned edge (no visible text or symbols)natural_image
Black rectangular electronic device with coiled cables and a power outlet, no visible text or symbols.natural_image
Close-up of a red tool interacting with a mechanical component, no visible text or symbols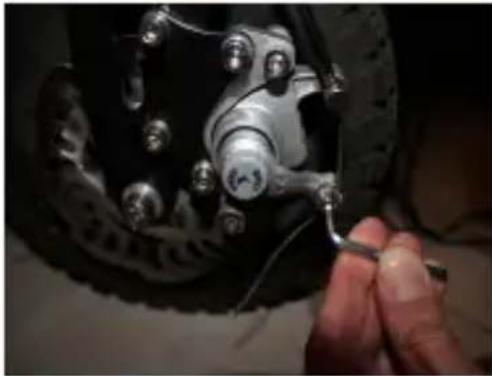
natural_image
Close-up of a hand adjusting a mechanical component with bolts and a tire (no visible text or symbols)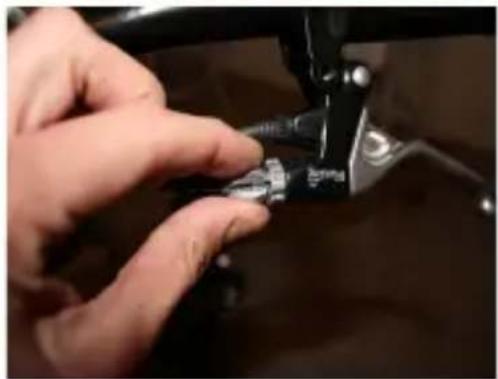
natural_image
Close-up of a hand using a sewing machine to adjust a small mechanical component (no visible text or symbols)natural_image
Close-up of a black hand gripping a motor with a green control switch and red button (no text or symbols visible)natural_image
Three-panel photo showing a hand using a tool to adjust the tire wheel, with no visible text or symbols.Spannen der Kette:
NE PAS UTILISER CE PRODUIT POUR DES SAUTS OU DES CASCA-DES
NE PAS UTILISER SOUS LA PLUIE OU SUR SURFACES MOUILLEES
natural_image
Assorted electronic devices and tools laid out on a surface, including a motor, pressure gauge, and accessories (no visible text or symbols)MISE EN ROUTE
natural_image
Person assembling or adjusting a mechanical device on a tiled floor (no visible text or symbols)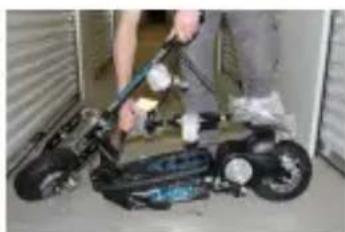
natural_image
Person using a tool to clean or inspect a small electric scooter (no visible text or symbols)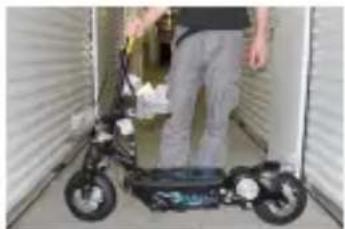
natural_image
Person standing beside a black electric scooter inside a white corrugated enclosure (no visible text or symbols)
natural_image
Person assembling a bicycle component with visible wiring and parts (no text or symbols)natural_image
Close-up of hands using a mechanical tool to adjust a component (no visible text or symbols)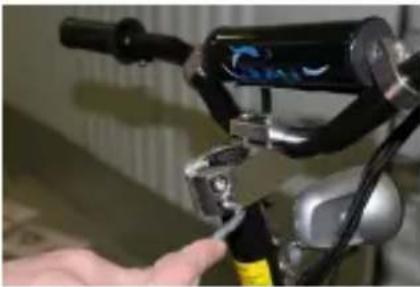
natural_image
Close-up of a hand adjusting a black and silver bicycle handle with a digital display (no visible text or symbols)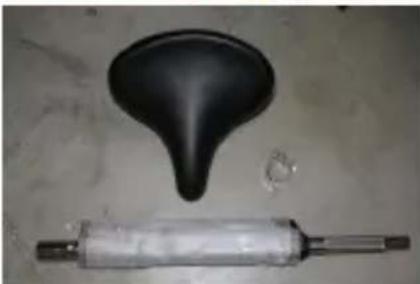
natural_image
Two mechanical components: a black funnel and a cylindrical tool, both on a plain surface (no text or symbols visible)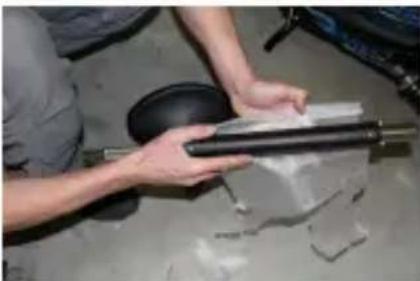
natural_image
Person handling a metal cylindrical object on a surface, no visible text or symbolsnatural_image
Person adjusting a black cylindrical object on a floor, with shoes and tools nearby (no visible text or symbols)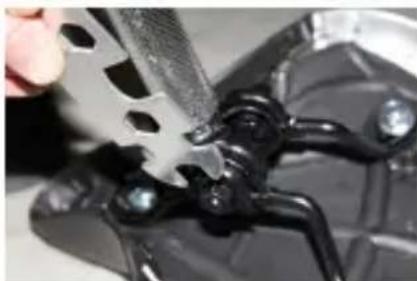
natural_image
Close-up of a hand using a tool to apply plastic components on a mechanical component (no visible text or symbols)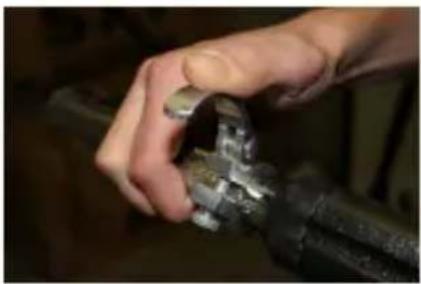
natural_image
Close-up of a hand adjusting a metal pipe fitting (no text or symbols visible)
natural_image
Close-up of a robotic arm with a soldering iron inserted, showing internal components (no visible text or symbols)
natural_image
Close-up of a hand holding a black mechanical component mounted on a stand (no visible text or symbols)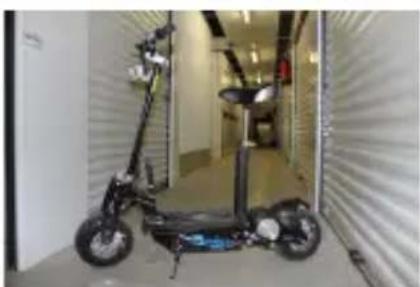
natural_image
Exterior view of a modern electric scooter inside a corrugated storage tunnel (no signage or text visible)CHARGE DE LA BATTERIE
natural_image
Close-up of a black plastic object with a circular button and abstract white markings, possibly a mechanical or electronic component (no readable text or symbols)natural_image
Black rectangular electronic device with multiple black cables and a power outlet, no visible text or symbols.CONDUITE
natural_image
Close-up of a red tool interacting with a mechanical component, no visible text or symbols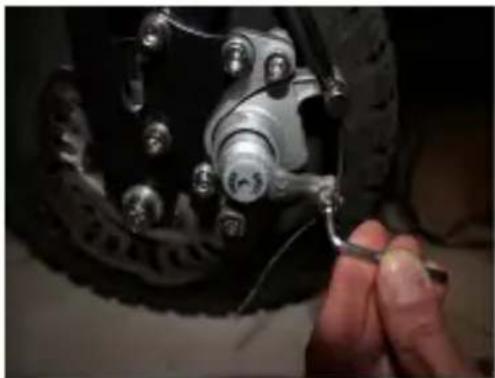
natural_image
Close-up of a hand adjusting a mechanical component with bolts and a tool (no visible text or symbols)
natural_image
Close-up of a hand using a tool to adjust a small electronic component (no visible text or symbols)natural_image
Close-up of a black automotive hand gripping a grip with control buttons (no visible text or symbols)ENTRETIEN ET MAINTENANCE REGLAGE DE LA TETE DE DIRECTION RÉGLAGE DE LA CHAÎNE
OUTILS RECOMMANDES
natural_image
Close-up of a hand operating a sewing machine needle with metal components (no visible text or symbols)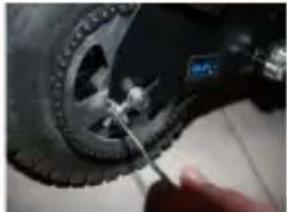
natural_image
Close-up of a hand using a tool to test tire tire components (no visible text or symbols)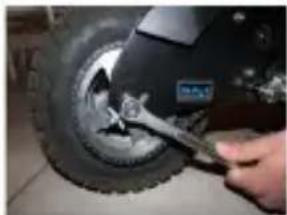
natural_image
Close-up of a hand using a wrench to adjust the wheel rim and tire (no visible text or symbols)Tendre la chaîne:
ALWAYS WEAR A HELMET AND
OBEY ALL LAWS!
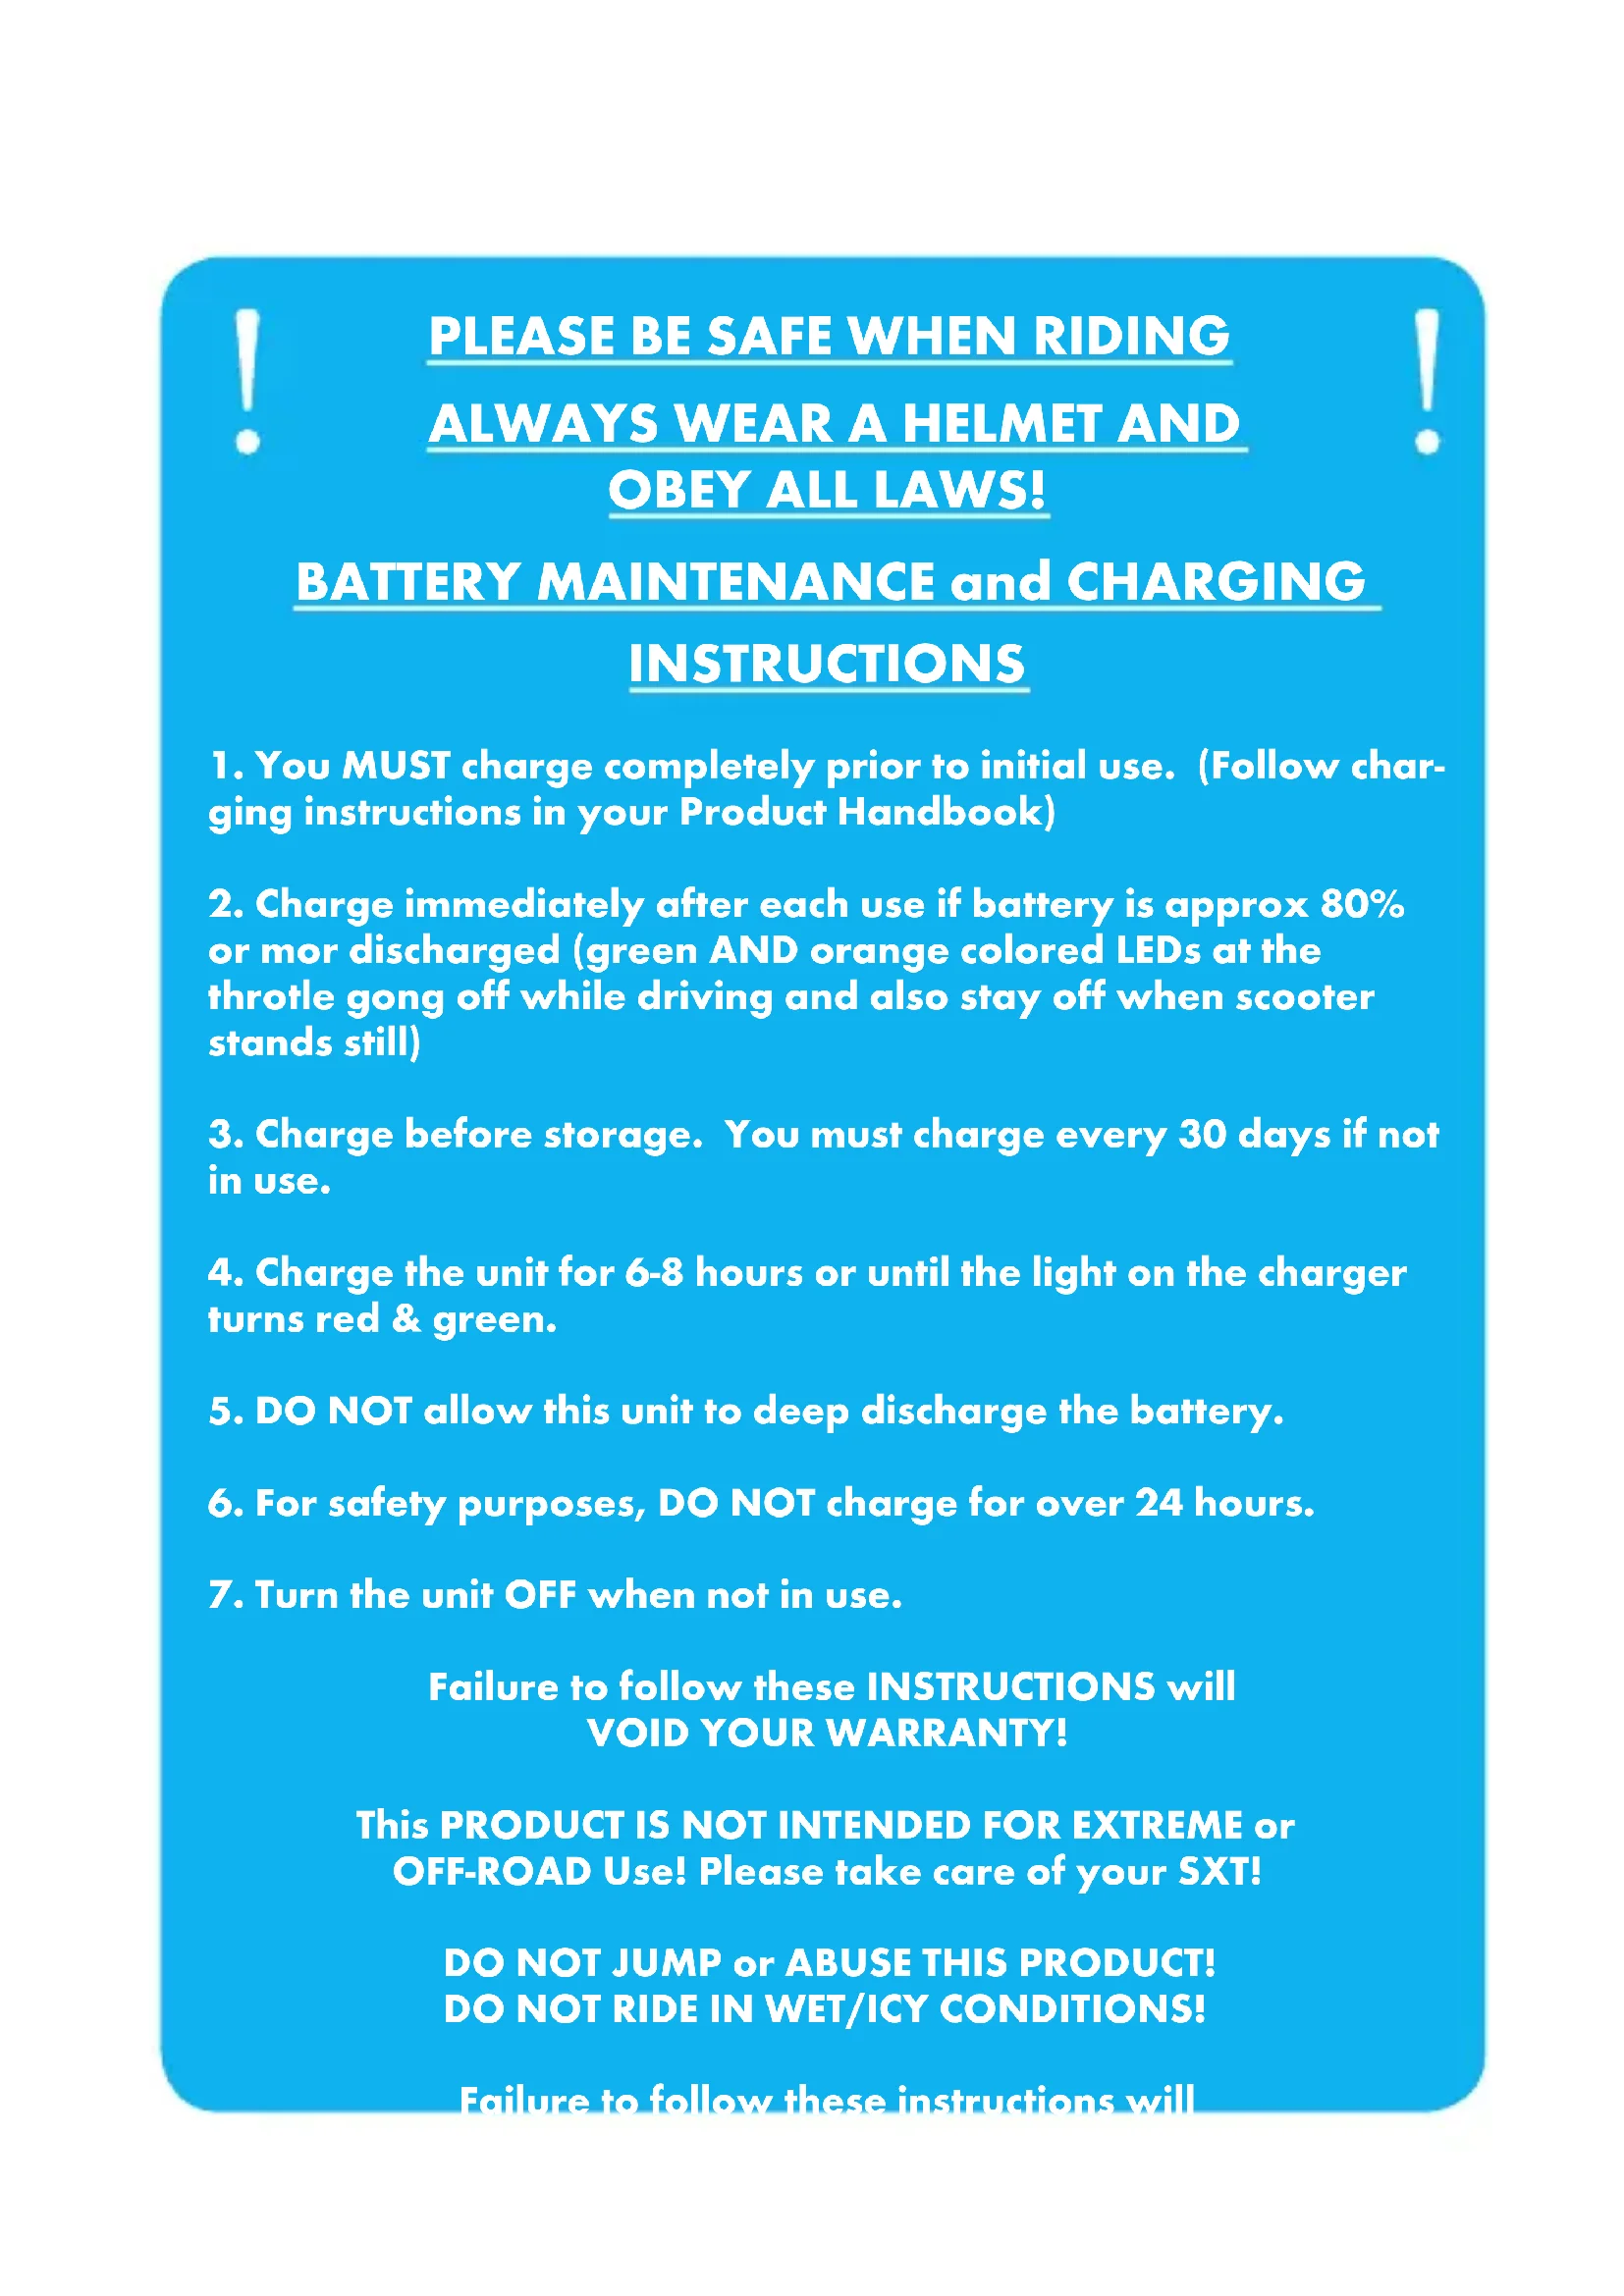
BATTERY MAINTENANCE and CHARGING
INSTRUCTIONS
- You MUST charge completely prior to initial use. (Follow charging instructions in your Product Handbook)
- Charge immediately after each use if battery is approx 80% or mor discharged (green AND orange colored LEDs at the throttle gong off while driving and also stay off when scooter stands still)
- Charge before storage. You must charge every 30 days if not in use.
- Charge the unit for 6-8 hours or until the light on the charger turns red & green.
- DO NOT allow this unit to deep discharge the battery.
- For safety purposes, DO NOT charge for over 24 hours.
- Turn the unit OFF when not in use.
Failure to follow these INSTRUCTIONS will VOID YOUR WARRANTY!
This PRODUCT IS NOT INTENDED FOR EXTREME or OFF-ROAD Use! Please take care of your SXT!
DO NOT JUMP or ABUSE THIS PRODUCT! DO NOT RIDE IN WET/ICY CONDITIONS!
Failure to follow these instructions will
IMPORTANT PLEASE READ THIS BEFORE USING THIS PRODUCT
WARNING!
This product does not conform to Federal Motor Vehicle Standards and is not intended for operation on public streets, roads or highways. Serious injury can result from the unsafe operations of this product. Operator can minimize these risks by using certain safety equipment such as: safety helmet, goggles, gloves, elbow and kneepads and appropriate footwear.
DO NOT operate this product in traffic, on wet, frozen, oily or unpaved surfaces or under the influence of drugs and/or alcohol. Avoid uneven surfaces, potholes, surface cracks and obstacles.
DO NOT use a water hose to clean this product. See Product Handbook for more information.
This product is recommended for riders 16 YEARS OF AGE and older.
SAFETY!
- Persons without excellent vision, balance, coordination, reflex, muscle and bone strength and good decision-making capabilities should not use this product.
- Minors without adult supervision should not use this product.
- Persons unwilling or unable to take responsibility for their own actions should not use this product.
- The user of this product assumes ALL risks associated with its use. To minimize these RISKS, the user must wear safety helmet, goggles, gloves, elbow and kneepads and appropriate footwear.
- This product is ELECTRIC! DO NOT ride this product in wet conditions, puddles or rainy weather.
QUICK REFERENCE SAFETY GUIDE
SAFETY GUIDE
- The recommended minimum age for riding this scooter is 16 years old.
• To avoid damage to the motor and footplate, do not overload the scooter.
• Never ride with more than one person. - Inspect your scooter thoroughly before each use for loose or missing parts.
- Avoid unintentional starts by turning the scooter off while not in use.
• To avoid the risk of a short circuit in the electrical parts, do not use your Electric scooter in the rain and never spray or wash off your scooter with water. - Do not place the battery near fire or heat.
• To avoid damage to the battery, do not use the charger if it has been damaged in any way. - Keep hands, face, feet and hair away from all moving parts.
- Do not touch the motor or wheels while they are rotating.
- Brakes are designed to control speed as well as stop the scooter. Practice braking for proper slowing down and smooth stops.
- Maintain your scooter as recommended in this Product Handbook.
- Use only quality replacement parts as recommended by the manufacturer.
- Inspect the entire scooter prior to each use. Replace any part that is cracked, chipped or damaged before use.
*NEVER ALLOW CHILDREN TO OPERATE THE SCOOTER WITHOUT ADULT SUPER-VISION.
*NEVER ATTEMPT TO OPERATE THE SCOOTER WHILE UNDER THE INFLUENCE OF ALCOHOL.
TABLE OF CONTENTS
IMPORTANT INFORMATION 1-2
QUICK REFERENCE 3
TABLE OF CONTENTS 3
GETTING TO KNOW YOUR SCOOTER 5
PACKAGE CONTENTS 6
GETTING STARTED 6
ASSEMBLY 6-7
FUSE INSTALLATION 7
SEAT & SEAT POST INSTALLATION 7
CHARGING 8
RIDING/BRAKING 8
FOLDING AND STORAGE 9
FOLDING AND STORAGE 9
ADJUSTING BRAKES 9
TIRE PRESSURE 10
TURBO- ECO MODE 10
CHARGE INDICATOR, FAULT DIAGNOSIS 10
MAINTENANCE 11
RECOMMENDED TOOLS 11
ADJUSTING THE HEAD UNIT 11
ADJUSTING THE CHAIN 11-12
MAINTENANCE SCHEDULE 12
TROUBLESHOOTING GUIDE 13
CONTACT 14
Notes
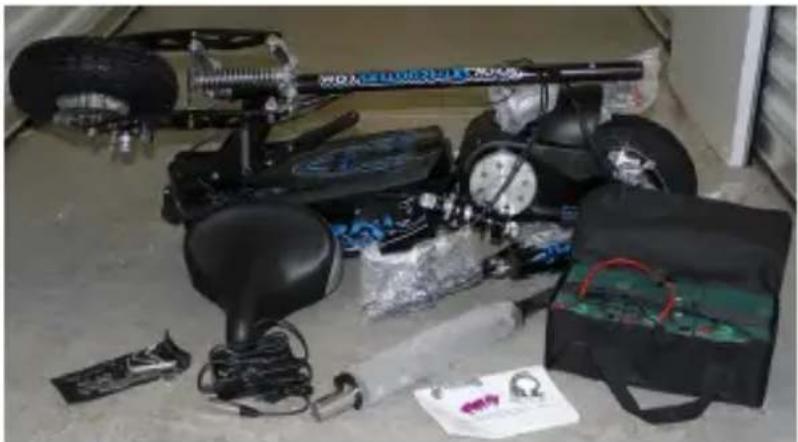
PACKAGE CONTENT / GETTING STARTED
Your SXT scooter comes with the following accessories:
- 1 Scooter SXT
2.1 36 V battery charger - Toolkit and fuses exchange
- Seatpost and saddle
- Clamp
natural_image
Assorted mechanical and electronic components laid out on a floor, including a motor, pressure gauge, and accessories (no visible text or symbols)Assembly
natural_image
Person handling a mechanical device with hoses and gauges (no visible text or symbols)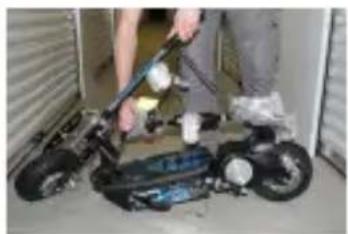
natural_image
Person using a cleaning tool to clean or store items on an electric scooter (no visible text or symbols)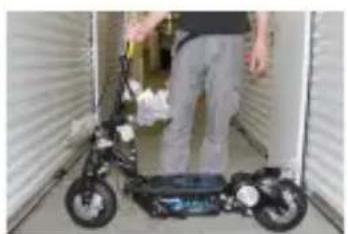
natural_image
Person standing beside a black electric scooter with a digital display, inside a white corrugated wall (no visible text or symbols)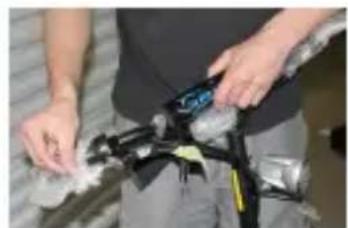
natural_image
Person assembling a bicycle component with visible wiring and tools (no text or symbols)Thank you for reading the instructions carefully.
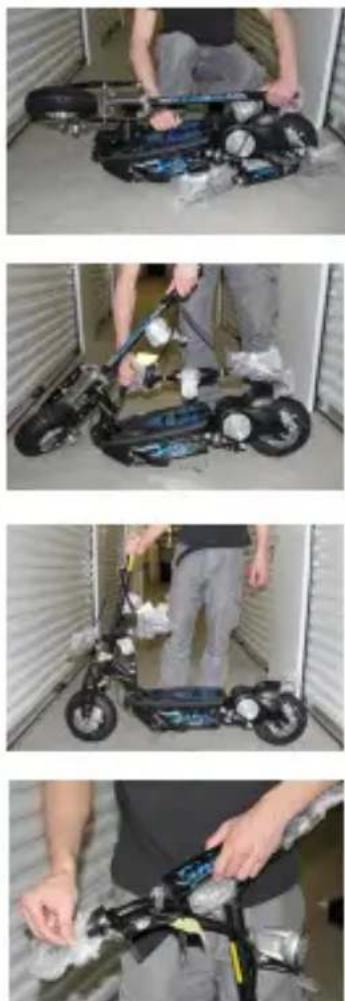
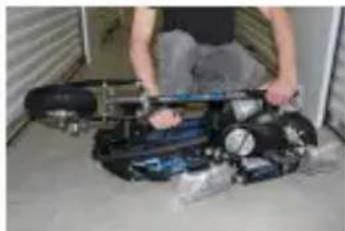
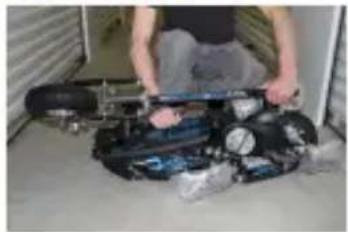
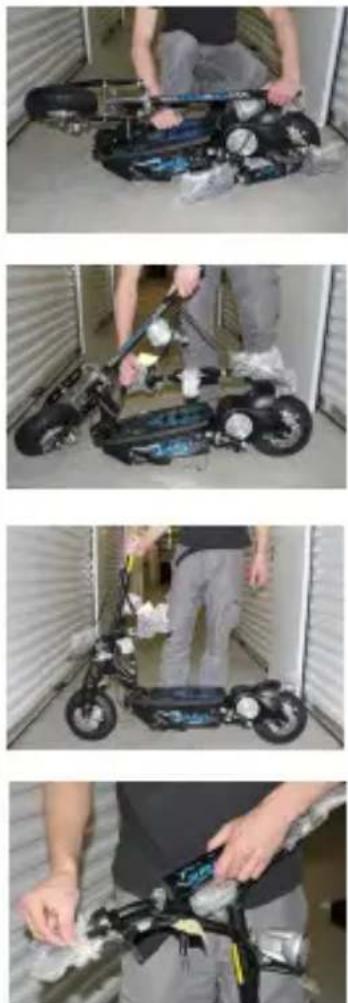
- Carefully remove the SXT Scooter from the box.
- To unfold the Scooter, begin by pressing down on the FOLDING HANDLE with one hand while gently pulling up on the handlebars with the other.
- Fully extend the handlebars to their upright position until you feel the mechanism lock into place.
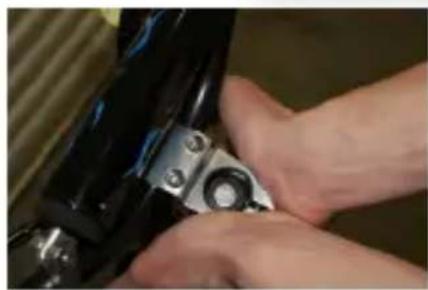
- Attach the handlebars by inserting the silver handlebar clamp onto the handlebar post stopping just below the top. Be sure to orient the bars in the correct riding position with the throttle on the rider's right side. Secure the handlebars to the post by tightening the bolts on the clamp with the enclosed Allen wrench as shown.
- Secure the hand brakes in place by using the provided Allen Wrench to first loosen the tension bolts. Adjust the levers to a comfortable position and tighten the bolts.
* BE CAREFUL NOT TO PULL ON THE CABLES!
GETTING STARTED
natural_image
Close-up of hands adjusting a mechanical component with a metallic knob (no visible text or symbols)- Remove the battery, open the protective bag and snap the fuse into the slot. Do not hesitate to press hard with your thumb to get the fuse.
natural_image
Close-up of a robotic hand gripping a mechanical device with a digital display (no visible text or symbols)-
Place the battery into the slot in the plastic platform and connect.
-
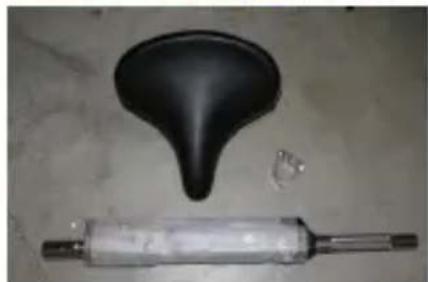
Insert the seatpost into the slot and snap the saddle and tighten the ring clamping. IF your clamping ring seems too small, do not hesitate to deviate a little so it fits more easily.
natural_image
Close-up of a black plastic funnel and a cylindrical tool with a metallic end cap (no text or symbols visible)-
Put the saddle on the seat pole and tighten the nuts on both sides by using the tools included.
-
Check all screws before the first departure SXT (screw brakes, fork, suspension ect).
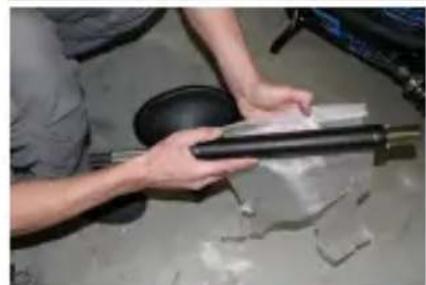
natural_image
Person handling a metal rod and plastic sheet on a concrete floor (no visible text or symbols)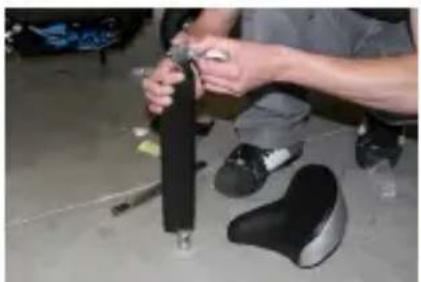
natural_image
Person kneeling on floor adjusting a black seat and black athletic shoe (no visible text or symbols)
natural_image
Close-up of a hand adjusting a metal pipe fitting (no visible text or symbols)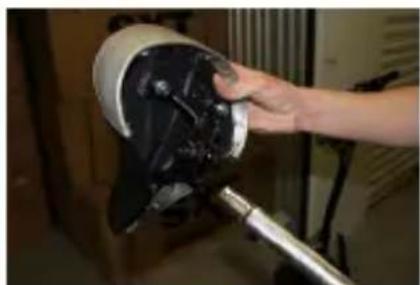
natural_image
Hand holding a black mechanical component mounted on a stand, no visible text or symbols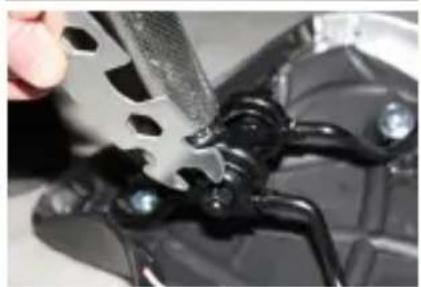
natural_image
Close-up of a hand using a tool to apply black plastic components on a curved surface (no visible text or symbols)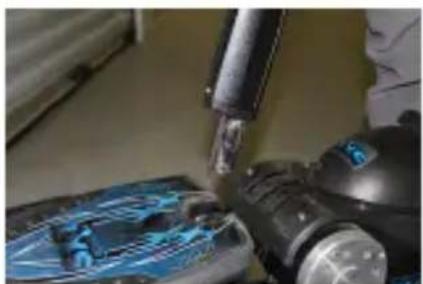
natural_image
Close-up of a robotic arm using a power tool to test a blue circuit board (no visible text or symbols)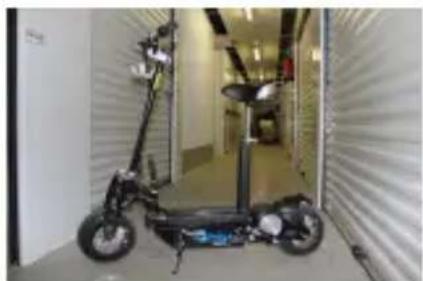
natural_image
Electric scooter parked inside a white corrugated corridor, no visible text or symbolsCHARGING
Your scooter comes charged out of the carton. We still recommend charging the unit for 6-8 hours prior to it's first use. We also recommend charging your scooter after each use and prior to storage if battery is 80% or more discharged.
WARNING: Do not allow your scooter to go into deep discharge, as this will damage the batteries.
natural_image
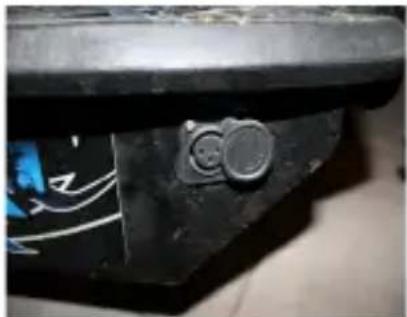
Close-up of a black mechanical component with a metallic knob and circular end (no visible text or symbols)- Make sure unit is turned off.
- Open the charging socket cover located on the right side of the scooter frame, under the footplate.
- Locate your Battery Charger. Find the charger socket end that has a three-prong socket and plug it into the scooter.
- Next, plug the AC plug into a wall outlet.

natural_image
Black electronic device with coiled cables and a label, no visible text or symbols on the device itself.When first plugged in, the charger has one red light that will illuminate at the same time, indicating that the charging process has started. Once the light on the charger turns from red to green, you may remove the charger and close the safety cap.
- Make sure that all of the exposed bolts and screws are tightened.
- Raise the kickstand to its upright position.
- Push the on/off switch (located on the left handlebar) to the ON position.
- Put one foot on the deck of the SXT while pushing off with the other foot, gently rotate the THROTTLE GRIP, on the right side of the handlebars. The scooter will begin to move on its own power.
**Your scooter has a variable speed hand throttle. You can control the speed of your scooter by the amount of pressure you use when rotating the hand throttle. The more you rotate, the faster you will go.
GENERAL
*Your SXT scooter is equipped with a variable throttle. Turn the handle to accelerate, then release to stop the motor. When the engine shuts off your scooter will slow automatically, use the brakes if necessary.
STOPPING & BRAKING
- To make the scooter stop release the throttle and pull both brake levers carefully. As soon as brake levers are pulled the engine of you scooter will automatically be deactivated.
CHARGE INDICATOR, FAULT DIAGNOSIS
- To brake, release the THROTTLE GRIP and depress the BRAKE LEVERS (on the left/right side of the handlebars. Depressing the brake will disengage power to the motor. When the unit feels like it is loosing power or not accelerating to full speed, the scooter is ready to be re-charged.
NOTE: If the on/off switch is left in the ON position for more than 10-15 minutes without moving, Smart Power will shut itself OFF. To reset, turn the unit OFF, wait a few seconds and then switch it back ON again.
BRAKING SYSTEM
The scooter uses a pinch braking system for the front, and a disc/caliper system for the rear. They are both activated by a hand brake lever on the left and right side of the handlebar. Squeezing the hand brake lever with your left hand activates the rear brake. Squeezing the hand brake lever with your right hand activates the front brake. Make sure to release the HAND THROTTLE GRIP when engaging the brakes. Your scooter is equipped with switches on each brake lever that will disengage power to the motor when the brake levers are depressed.
Practice braking on a smooth, dry surface to get used to the feel of the braking system. Braking distance is affected by wet conditions and loose and uneven riding surfaces.
GENERAL
ADJUSTING BRAKES
The Brakes on the scooter should come fully adjusted from the factory. However, it may be necessary to adjust the brakes from time to time.
natural_image
Close-up of a red-handled tool applying material to a mechanical component, no visible text or symbols
natural_image
Close-up of a hand holding a small metal tool next to a mechanical component with bolts and a central hub (no visible text or symbols)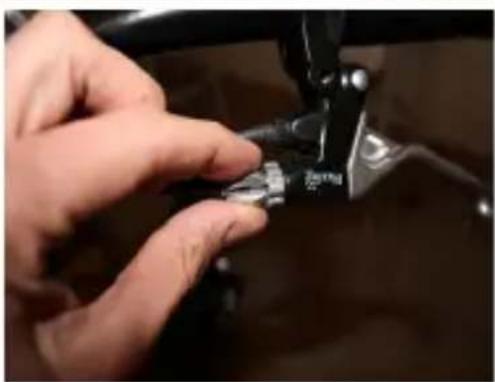
natural_image
Close-up of hands using a sewing machine to adjust a small metal component (no visible text or symbols)ADJUSTING BRAKES:
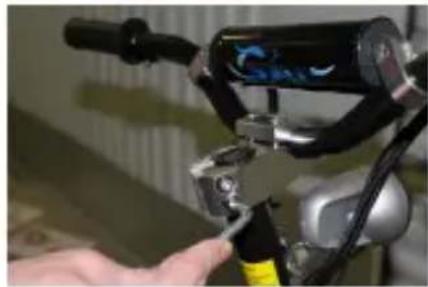
To adjust the rear brakes:
- Adjust the tension screw on the right hand brake lever by rotating it counter-clockwise until the wheel spins freely.
For brakes that are adjusted too tight:
- Tighten the tension screw on the right hand brake lever by rotating it clockwise until the wheel has a slight drag.
For Further Front Brake Adjustment :
- Locate the adjustment screw on the front brake assembly (located above the front wheel). Tighten or loosen as necessary.
For Further Rear Brake Adjustment :
- Locate the adjustment screw on the rear brake assembly (located on the left side of the back wheel. Tighten or loosen as necessary.
SQUEAKY BRAKES
The brakes may squeak before they are broken in. This is normal and will not affect the function or performance of the brakes. With continued use the squeak should go away.
TIRE PRESSURE BATTERY INDICATOR
TIRE PRESSURE
The tire must be inflated to a maximum of 50 P.S.I. It is also recommended to use a tube additive like Slime, available from any motorcycle shop, to avoid inconvenient punctures.
Empty all air from the tire, prior to loosening the bolt to split the rim.
BATTERY INDICATOR
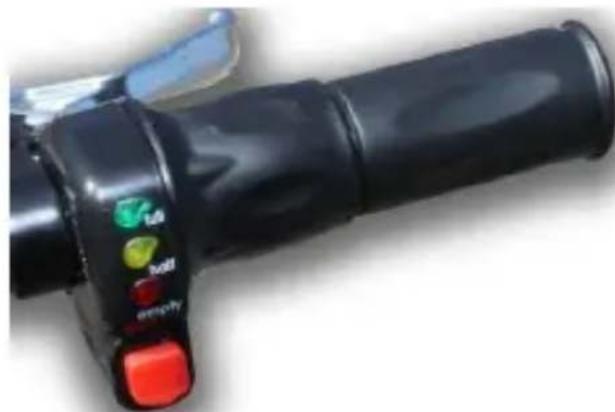
On the right handlebar is your battery indicator button and the ECO / ECO TURBO. The button will allow you to run at 60% power which will save your battery, so you can drive longer. If this button is not enabled, you can drive at full power. LED are also used for diagnostics of failures.
Turbo- / ECO mode :
By pressing the red button on your SXT, the ECO mode is activated and you can save up to 60% the engine - which saves power and extends battery life maximum attainable per battery charge. If the button is not enabled, the scooter is running at full power.
Charge level indicator :
Fault diagnosis indication :
natural_image
Close-up of a black hand gripping a vehicle's grip with control buttons (no readable text or symbols)MAINTENANCE ADJUSTING THE HEAD UNIT SETTING THE CHAIN
RECOMMENDED TOOLS
To adjust and service the scooter you will need the following tools:
- Allen Wrenches: 3/4/5/6 mm
- Wrenches: 10/13/13 mm Open end wrench
- Large Adjustable Crescent Wrench
- Philips Head Screwdrivers
- Oil, Grease or Lubricant
ADJUSTING THE HEAD UNIT
The head unit will come adjusted from the factory. However, riding on rough terrain and general use may cause the head unit to become loose over time. It may be necessary to adjust the head unit from time to time.
MAINTENANCE
How tight should the chain be ?
- If the chain is skipping or jumping on the sprockets, this is too loose and may be harmful.
- If the chain is making a humming sound when the wheel is turning, this is too tight and may cause the chain to snap.
- The correct tension is achieved by adjusting the chain from its loose position to when it becomes lightly tense.
natural_image
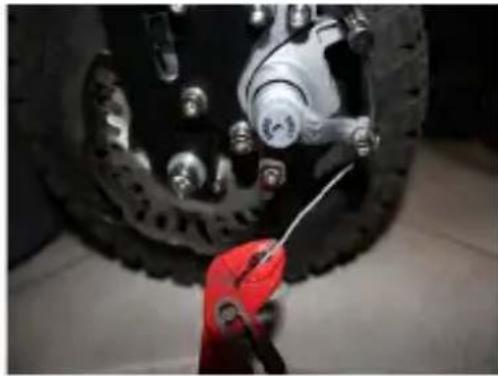
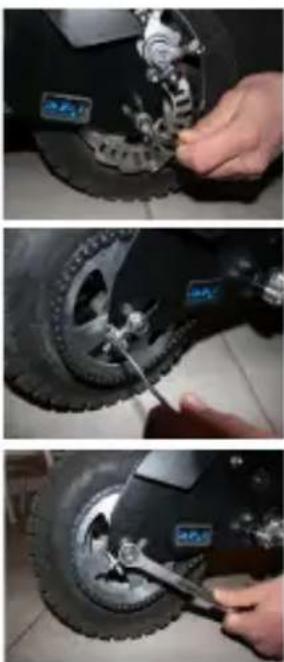
Three-panel photo showing a hand using a tool to adjust the tire wheel, with no visible text or symbols.To tighten the chains:
Slightly loosen the two axle bolts on both sides of the rear wheel. (Fig.14). Then slowly adjust the two adjusting screws on each side of the rear tire (Fig.15) until chain reaches the proper tension.
Rotate the rear wheel to make sure the chain is aligned.
Finally, lock and tighten the rear axle bolts prior to riding.
MAINTENANCE SCHEDULE
Proper care of your scooter will insure optimal performance and longer life span. The following are a few maintenance suggestions that will keep your scooter running in top condition.
DAILY MAINTENANCE
• Perform each time you ride your scooter
- Clean the exterior of the unit with a soft, damp rag. (DO NOT WASH WITH A HOSE)
- Check that all nuts and bolts are securely tightened.
- Lubricate the chain with any silicone spray, 3&1 oil or any good clean motor oil.
- Check battery charger for any frayed/cut wires.
| SYMPTONS | POTENTIAL CAUSE | SOLUTION |
| The charger light turns green & red right away | 1. This indicates the batteries are adequately charged.2. Bad Fuse or open connection between charger socket and batteries. | 1. Continue to charge the batteries for 6-8 hours prior to initial use.2. Check Fuse: Look for loose or disconnected wire |
| Batteries do not hold a charge. Unit does not have specified travel range. | 1. Batteries have reached the end of their useful life.2. Charger is malfunctioning. | 1. Replace Batteries2. Replace Charger Unit. |
| Unit moves intermittently or very slow. | 1. Batteries not fully charged.2. Loose Wire.3. Bad Throttle or controller. | 1. Charge or replace batteries.2. Check for loose wires3. Replace |
| Unit will not move when throttle lever is activated. | 1. Batteries not fully charged.2. Brake switches out of adjustment3. Batteries have reached the end of their useful life. | 1. Replace batteries or charger.2. Loosen brakes3. Replace batteries. |
| Unit stops abruptly during use. | 1. Fuse Blown2. Loose or broken wire. | 1. Replace Fuse2. Check for loose or broken wires and repair/replace. |
ZACHOWAJ OSTROŻNOŚĆ W CZASIE JAZDY
natural_image
Simple line drawing of a trash bin with crossed lines indicating no waste or plastic discharge (no text or symbols)natural_image
Assorted electronic devices and tools laid out on a floor, including a motor, pressure gauge, and medical bags (no visible text or symbols)ZACZYNAMY
natural_image
Close-up of hands assembling a mechanical component (no visible text or symbols)
natural_image
Close-up of a robotic hand interacting with a mechanical device (no visible text or symbols)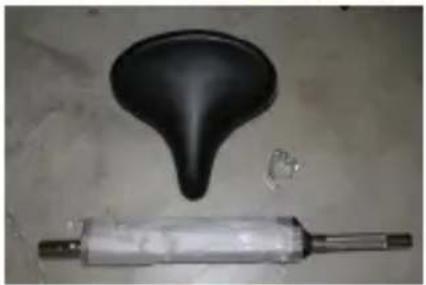
natural_image
Two mechanical components: a black funnel and a white cylindrical tool, both on a plain surface (no text or symbols visible)
natural_image
Person handling a cylindrical object on a concrete floor, no visible text or symbolsnatural_image
Person adjusting a black mechanical component on a floor, with shoes and tools nearby (no visible text or symbols)
natural_image
Close-up of a hand using a tool to adjust or repair a mechanical component (no visible text or symbols)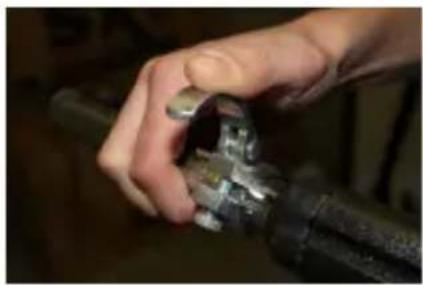
natural_image
Close-up of a hand holding a metal pipe fitting (no visible text or symbols)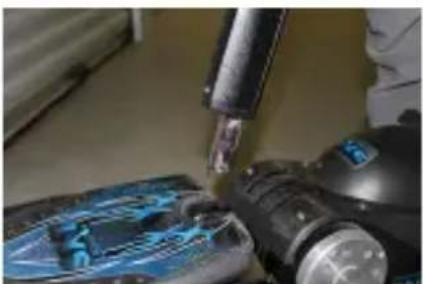
natural_image
Close-up of a soldering iron being used to work on a blue circuit board (no visible text or symbols)
natural_image
Close-up of a hand holding a small mechanical component, possibly a tool or device, with no visible text or symbols.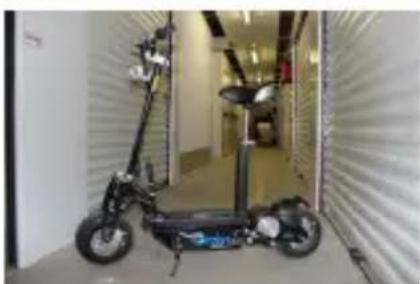
natural_image
Electric scooter parked inside a white corrugated storage room (no visible text or symbols)ŁADOWANIE AKUMULATORA
natural_image
Close-up of a black mechanical component with two circular features and a blue internal line (no visible text or symbols)
natural_image
Black electronic device with two cables and a power outlet, no visible text or symbolsnatural_image
Close-up of a red tool applying adhesive to a car tire component (no visible text or symbols)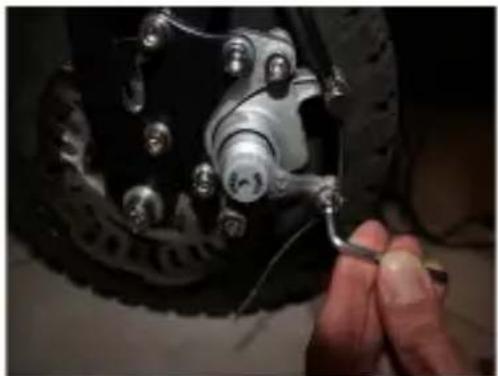
natural_image
Close-up of a hand adjusting a mechanical component with a tool (no visible text or symbols)
natural_image
Close-up of a hand using a sewing machine to adjust a small mechanical component (no visible text or symbols)natural_image
Close-up of a black hand gripping a lever with control buttons (no readable text or symbols)KONSERWACJA
ZALECANE NARZĘDZIA
In case of further questions or problems which are not mentioned here please contact an official SXT representative.