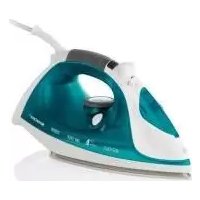
SDB 2200 D2 - Iron SILVERCREST - Free user manual and instructions
Find the device manual for free SDB 2200 D2 SILVERCREST in PDF.



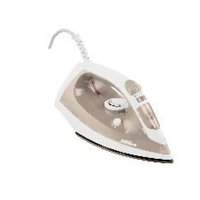
| Product Type | Steam Iron |
| Brand | SilverCrest |
| Model | SDB 2200 D2 |
| Rated Power | 2020 - 2400 W |
| Mains Voltage | 220-240 V ~ |
| Water Tank | Maximum capacity indicated by MAX mark (approx. 300 ml estimated) |
| Temperature Setting | Electronic with digital display (levels 1 to MAX) |
| Steam Functions | Continuous steam ironing, powerful steam jet, spray |
| Anti-Drip System | Yes, automatic steam stop at low temperature |
| Auto Shut-Off | Yes, after 30 s on soleplate or 8 min on base |
| Self-Cleaning Function | Yes (Self-Clean button) |
| Digital Screen | Displays temperature level and messages (OFF, PAUSE) |
| Soleplate | Material not specified, probably ceramic or stainless steel |
| Power Cord | With anti-kink protection, length not specified |
| Safety | Auto shut-off, overheat protection, double insulation |
| Maintenance | Clean the housing with a soft dry cloth; use the self-cleaning function regularly |
| Included Accessories | Graduated measuring cup, instruction manual |
| Warranty | 3 years |
| Country of Origin | Not specified (imported by Lidl) |
Frequently Asked Questions - SDB 2200 D2 SILVERCREST
User questions about SDB 2200 D2 SILVERCREST
0 question about this device. Answer the ones you know or ask your own.
Ask a new question about this device
Download the instructions for your Iron in PDF format for free! Find your manual SDB 2200 D2 - SILVERCREST and take your electronic device back in hand. On this page are published all the documents necessary for the use of your device. SDB 2200 D2 by SILVERCREST.
USER MANUAL SDB 2200 D2 SILVERCREST
Operating instructions
SE
ÅNGSTRYKJÄRN
Bruksanvisning
FR BE
FER À REPASSER VAPEUR
Mode d'emploi
DE AT CH
DAMPFBÜGELEISEN
Bedienungsanleitung
FI
HÖYRYSILITYSRAUTA
Käyttöohje
DK
DAMPSTRYGEJERN
Before reading, unfold the page containing the illustrations and familiarise yourself with all functions of the device.
FI
GB/IE Operating instructions Page 1
| FI | Käyttöohje | Sivu | 13 | |
| SE | Bruksanvisning | Sidan | 25 | |
| DK | Betjeningsvejledning | Side | 37 | |
| FR/BE Mode d'emploi Page 49 | ||||
| NL/BE Gebruiksaanwijzing Pagina 61 | ||||
| DE/AT/CH | Bedienungsanleitung | Seite 73 | ||
Contents
Introduction....2
Proper use....2
Package contents 2
Appliance description....2
Technical details 2
Safety instructions .... 3
Before first use ....6
Filling the water tank....6
Meaning of the display indicators....7
Operation 7
Plugging in and ironing 7
Steam ironing....8
Ironing with steam blast....8
Temporarily setting the steam iron down 8
Taking the steam iron out of service....8
Anti-drip system 8
Automatic switch-off....9
Cleaning....9
Self-cleaning function....9
Housing 9
Storage 10
Disposal....10
Warranty and Service 10
Importer 10
Troubleshooting 11
GB IE
Introduction
Congratulations on the purchase of your new appliance.
You have selected a high-quality product.
The operating instructions are a constituent of this product. They contain important information about safety, use and disposal. Before using the product, familiarise yourself with all operating and safety instructions. Use this product only as described and only for the specified areas of application. Please also pass these operating instructions on to any future owner(s).
Proper use
This steam iron is intended exclusively for the ironing of textiles. The iron may only be used indoors and in domestic households. All other use is deemed to be improper use. Not for commercial use!
Package contents
Steam iron
Measuring cup
Operating instructions
Check the delivery contents for completeness immediately after unpacking.
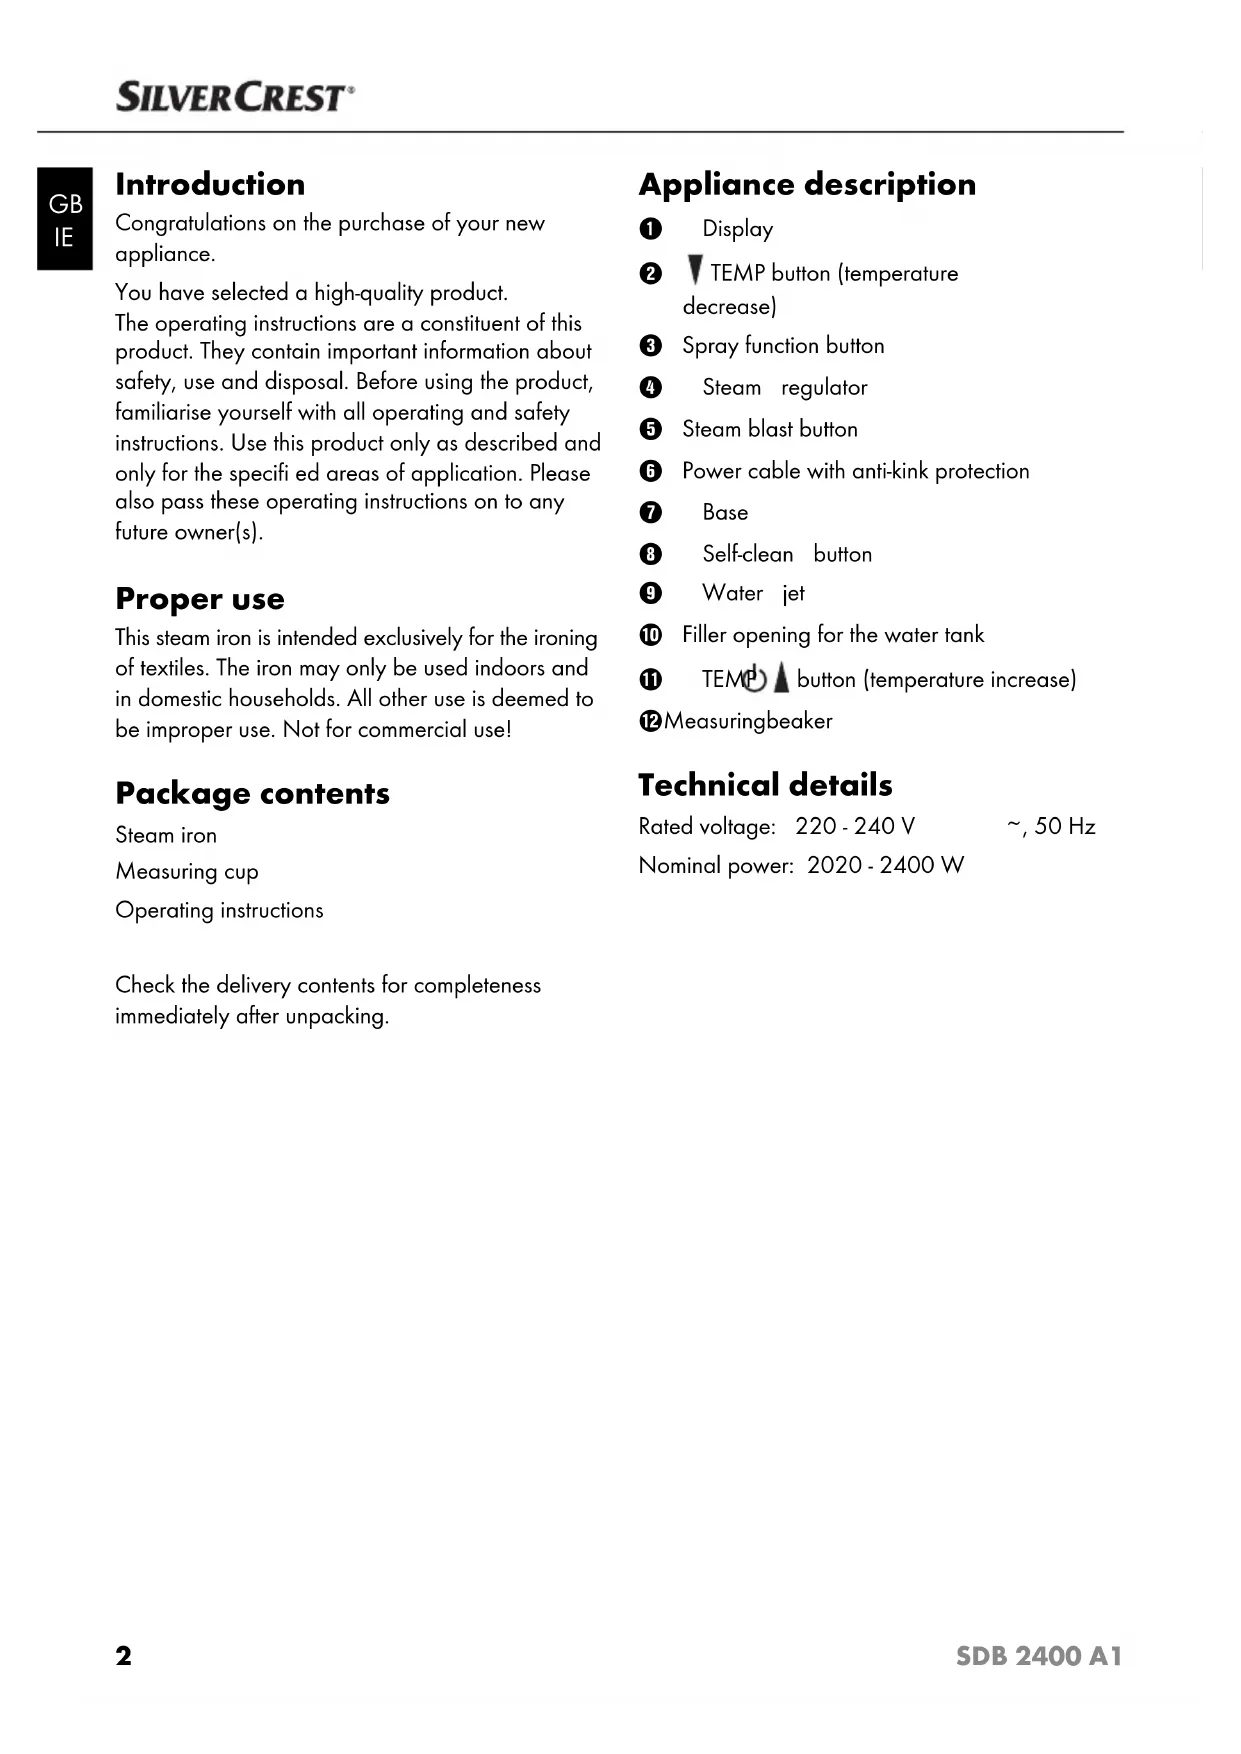
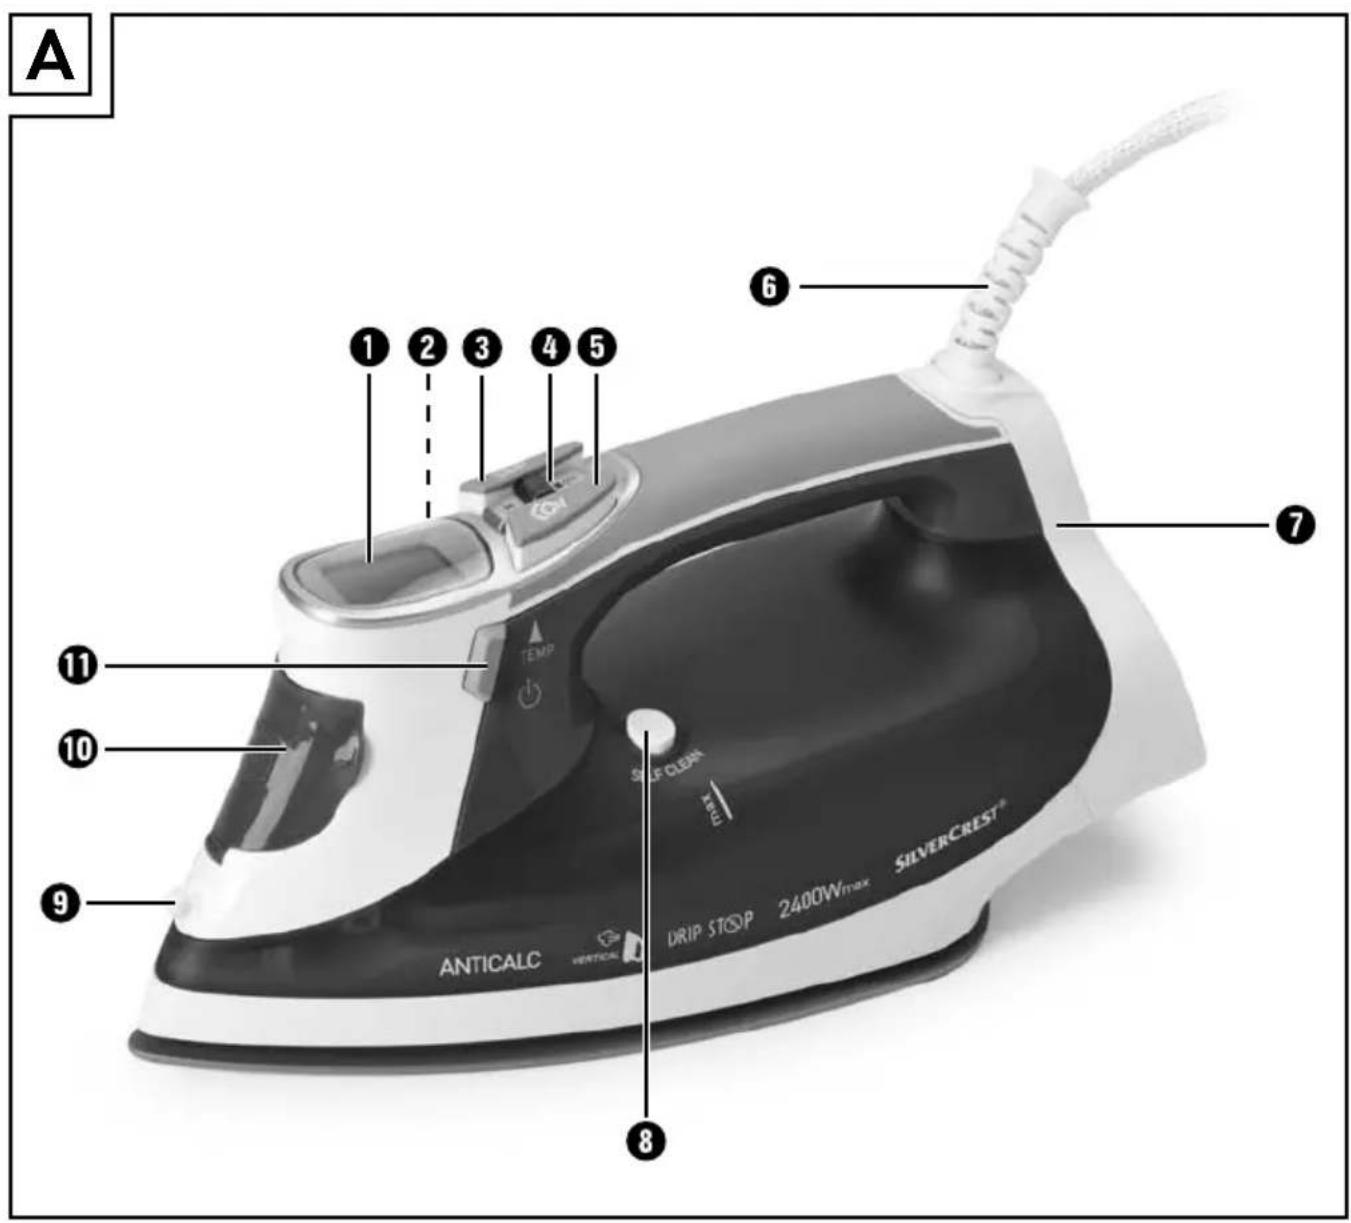
Appliance description
① Display
② ▼ TEMP button (temperature decrease)
③ Spray function button
4 Steam regulator
⑤ Steam blast button
6 Power cable with anti-kink protection
7 Base
8 Self-clean button
9 Water jet
10 Filler opening for the water tank
⑪ TEMP ▲ button (temperature increase)
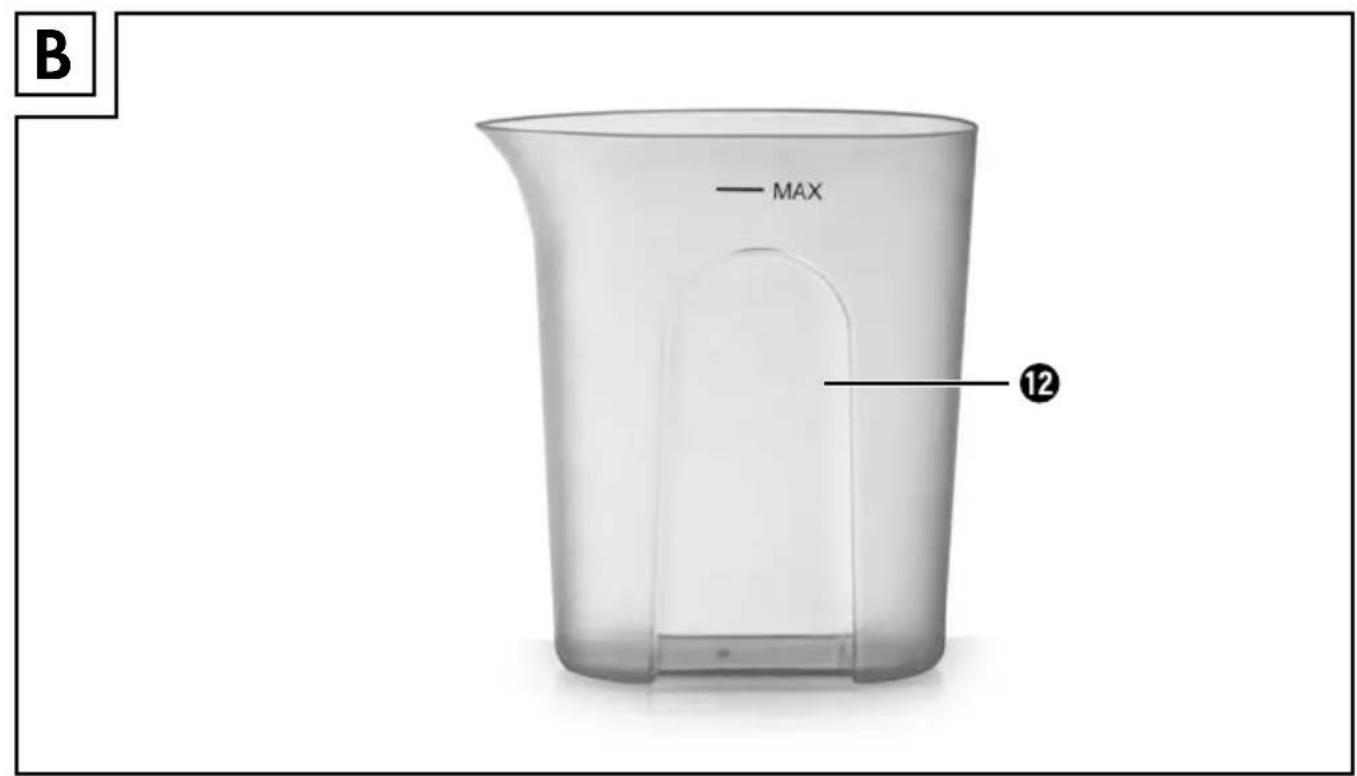
⑫ Measuringbeaker
Technical details
Rated voltage: 220 - 240 V \~, 50 Hz
Nominal power: 2020 - 2400 W
Safety instructions

DANGER – ELECTRIC SHOCK!
The rating of the local power supply must correspond with the details given on the rating plate of the appliance.
▶ To avoid potential risks, arrange for a defective appliance to be checked and possibly repaired by qualified technicians, or contact our Customer Service Department.
▶ To avoid risks, have defective plugs and/or power cables replaced immediately by qualified technicians or our Customer Service Department.
▶ Always disconnect from the mains power socket by pulling only on the plug itself, never on the mains cable.
▶ Never bend (kink) or crush the power cable, always route it in such a way that it cannot come into contact with hot surfaces and such that no-one can step on or trip over it.
▶ After every use, before cleaning and when refi lling with tap water, always remove the plug from the mains power socket.
▶ Always unroll the power cable fully before switching on and do not use an extension cable.
▶ Never touch the power cable or the plug with wet hands.
▶ Never use the steam iron adjacent to water contained in a bath, shower, wash basin or other vessels. The proximity of water is hazardous, even if the appliance is switched off.
▶ Under no circumstances should you submerge the steam iron in any liquid or permit liquids to penetrate into the housing of the steam iron. Do not expose the appliance to moisture and do not use it outdoors. If liquid gets into the housing, disconnect the appliance from the mains power socket immediately and have it repaired by a qualified technician.
▶ You may not open the steam iron appliance housing. Have a defective appliance repaired only by an authorised technician.

DANGER – ELECTRIC SHOCK!
▶ Under NO circumstance should you use the appliance if it shows visible signs of damage, has fallen or leaks water. Arrange for it to be repaired by qualified specialists.
- Discontinue use of the appliance if the anti-kink protection on the power cable is damaged!
This appliance may be used by children aged 8 years or more and by persons with reduced physical, sensory or mental capabilities or lack of experience and/or knowledge if they are supervised, or have been instructed in the safe use of the appliance and have understood the potential risks. Children must not play with the appliance. Cleaning and user maintenance must not be carried out by children unless they are supervised.

WARNING! RISK OF INJURY!
▶ When the steam iron is hot, hold it only by the handle.
▶ Children should be supervised to ensure that they do not play with the appliance.
▶ Never place your hands in the steam spray or on hot metal parts.
▶ You may not open the fi ller opening of the water reservoir while the iron is in use. Allow the steam iron to cool down fi rst and remove the plug from the power socket.
- When it is switched on or cooling down, the steam iron and its connecting cable must be kept out of the reach of children who are younger than 8 years old.
The steam iron may never be left unattended while it is connected to the mains power supply.
⚠️ CAUTION! DAMAGE TO PROPERTY!
▶ Never leave a hot steam iron unattended if it is switched on or connected to the mains power supply.
▶ Put the steam iron into storage only when it has cooled down completely.
This steam iron should only be used and set down on stable surfaces.
▶ Use only the ironing temperatures stated in the care instructions for the material, or those suitable for it. Otherwise, you could damage the textiles. Should care instructions not be given or known, start with the lowest temperature setting.
▶ NEVER permit children to use the steam iron.
- Place the steam iron only on level and heat-resistant surfaces. The steam iron must be stable.
▶ When you want to put the steam iron down, place it only on its base.
▶ If the clothing care instructions forbid ironing, symbol), the clothing item may not be ironed. Ignoring this warning could lead to permanent damage to the clothing item.
The water tank should be filled only with mains or distilled water. Otherwise you will damage the steam iron.
- Do not clean the steam iron with solvents, alcohol or abrasive cleaning agents. These could damage it.
GB IE
Before fi rst use
1) Remove the steam iron from the packaging.
2) Remove all stickers and protective foils from the steam iron and from sole of the iron.
WARNING - RISK OF ELECTRIC SHOCK!
Plastic bags can be dangerous. To avoid the risks of asphyxiation, keep plastic bags out of the reach of babies and toddlers.
3) Fill the water tank with water (See the chapter "Filling the water tank").
4) Insert the plug into a mains power socket supplying an electrical current as detailed on the rating plate.
5) Set the temperature level to 9/MAX (see chapter "Operation").
6) Heat the steam iron up for several minutes at this highest setting.
7) Activate the steam blast button ⑤ a couple of times so that steam comes out of the sole of the iron.
8) Then iron over a piece of unwanted material to remove any residues possibly remaining on the sole of the iron.
Filling the water tank
1) Place the steam iron on the base ⑦.
2) Open the cover of the filler opening for the water tank ⑩.
3) Using the measuring beaker 12, fill the water tank with water to the "MAX" marking, but no further.
4) Close the cover of the filler opening for the water tank 10.
NOTE
If the mains water in your area is rated as hard, it is recommended that you mix the mains water with some distilled water. Otherwise, the jets for the steam blast function could calcify (become blocked) prematurely.
To extend the optimal steam blast function, mix mains water with distilled water according to the table.
| Water hardness | Ratio of distilled water to mains water |
| very soft/soft 0 | |
| medium 1:1 | |
| hard 2:1 | |
| very hard 3:1 |
The water hardness level can be queried at your local water works.
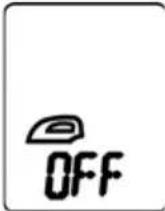
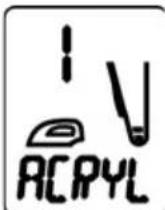
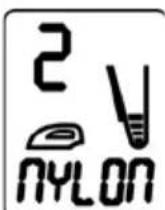
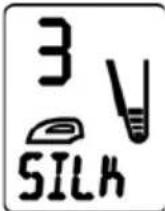
Meaning of the display indicators
| Display indicator Temperature level | Suitable for ... | Care instructions in the clothing |
 | The mains plug is in the mains power socket; the appliance is switched off. | |
 | Acrylic | |
 | Nylon | |
 | Silk | |
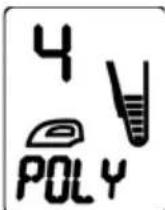 | Polyester | |
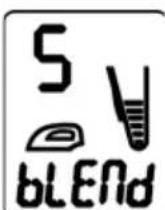 | Mixed fabric | |
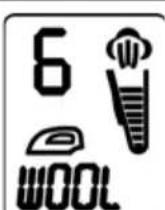 | Wool (steam ironing possible) | |
 | Cotton(steam ironing possible) |  |
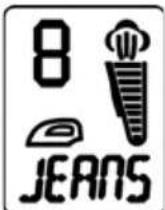 | Denim(steam ironing possible) |  |
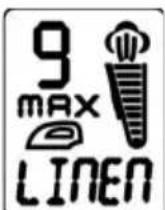 | Linen(steam ironing possible) | 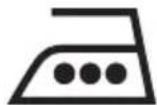 |
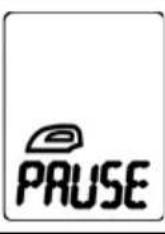 | The automatic switch-off is activated (see chapter "Automatic switch-off") | |
Operation
Plugging in and ironing
NOTE
You can dry iron without steam at all temperatures. Steam ironing is only possible from temperature level 6 and upward (also appears in the display 1).
1) Insert the plug into a mains power socket. There will be a beep and the display ① lights up red. After several symbols have flashed on the display ①, OFF appears.
CAUTION - PROPERTY DAMAGE!
▶ If the clothing care instructions forbid ironing (☑), the garment may not be ironed. Ignoring this warning could lead to permanent damage to the clothing item.
2) Check the care instructions on the labels in garments to see if they are suitable for being ironed, and at which temperature setting.
3) Press the TEMP ▲ button ⑪ until the required temperature level appears on the display ① (see chapter "Meaning of the display indicators"). Use the ▼ TEMP ② button to change to a higher or lower temperature level.
As soon as the indicator for the material type stops flashing on the display ① and a beep is heard, the set temperature has been reached and you can begin ironing.
NOTE
If you are ironing very dry and creased fabrics, you can dampen the material using the spray function. To dampen the material, press the button for the spray function ③.
Steam ironing
NOTE
The temperature level must be set to at least level 6. Otherwise no steam can be produced.
- Set the steam regulator 4 to the desired steam setting. As soon as you hold the steam iron horizontally, steam will discharge from the sole of the iron.
If you set the steam regulator ④ to 🌿 or hold the steam iron vertically no steam will come out of the sole of the iron.
Ironing with steam blast
The steam blast function is especially suitable for smoothing difficult-to-reach parts of a garment.
1) Slightly raise the steam iron.
2) Press the steam blast button ⑤ for a blast of steam.
Temporarily setting the steam iron down
CAUTION - RISK OF FIRE!
Never leave a hot steam iron unattended if it is switched on or connected to the mains power supply.
1) To switch off the steam iron, press and hold the TEMP ▲ button ⑪ or the ▼ TEMP ② button until you hear a beep and the display ① lights up red and indicates OFF.
Or:
2) Press the TEMP ② button repeatedly until you hear a beep and display ① lights up red and indicates OFF.
Taking the steam iron out of service
1) Remove the plug from the mains power socket.
2) Empty the water tank and clean the sole of the iron.
3) Place the cooled-down steam iron on the base ⑦.
Anti-drip system
With conventional steam irons it can happen that water drips from the iron sole at low temperatures. This steam iron, however, is equipped with a special anti-drip system. At low temperatures the steam iron automatically switches off the steam blast function. When this happens, a "click" can be heard. Set a suitable temperature level. As soon as this is reached, steam production is resumed.
Automatic switch-off
This steam iron is fitted with an automatic switch-off system. This stops the steam iron from heating up.
When the steam iron is resting on its sole and is not moved for approx. 30 seconds, 6 warning beeps will sound, "PAUSE" appears and the display lights up red. After a few seconds, the display illumination switches off. The steam iron will stop heating up.
To deactivate the automatic switch-off, lift up the steam iron and move it gently from side to side.
The display ① lights up blue, the previously set temperature level is shown and the steam iron heats up again.
When the steam iron is resting on its base ⑦ and is not moved for approx. 8 minutes, 6 warning beeps will sound, "PAUSE" appears and the display ① lights up red. After a few seconds, the illumination of the display ① switches off. The steam iron will stop heating up.
To deactivate the automatic switch-off, lift up the steam iron and move it gently from side to side.
The display ① lights up blue, the previously set temperature level is shown and the steam iron heats up again.
NOTE
The automatic switch-off is not intended as a substitute for removing the plug from the mains power!
It is merely designed to prevent the appliance from overheating and helps to avoid unnecessary power consumption.
It does not, however, in itself provide fi re protection, for instance, if you place and leave the hot steam iron on fl ammable material.
Cleaning
Self-cleaning function
1) Fill the water tank to the marking MAX.
2) Insert the plug into the mains power socket.
3) Set the temperature level to 9/MAX
4) Set the steam regulator ④ to maximum steam power.
5) Allow the steam iron to heat up to the set temperature.
6) Hold the steam iron horizontally over a catchment receptacle.
7) Press and hold down the self-clean button ⑧.
Steam and boiling water flows from the steam exit holes in the sole of the iron. Impurities that may be present are washed out.
8) Release the self-clean button ⑧ as soon as all of the water has run out.
9) Iron over a towel or old piece of material a few times to dry the sole of the iron thoroughly.
10) Remove the plug from the mains power socket.
11) Allow the steam iron to cool down before placing it in storage.
Housing
WARNING - RISK OF ELECTRIC SHOCK!
▶ Always remove the plug from the mains power socket before cleaning the appliance.
▶ Never open the appliance housing! Otherwise there is a risk of a fatal electric shock.
WARNING - RISK OF INJURY!
▶ Allow the appliance to cool down before cleaning it! Otherwise, there is a risk of burns!
CAUTION - PROPERTY DAMAGE!
▶ Do not use solvents or abrasive cleaners. These will damage the surface of the appliance!
▶ Do not use abrasive, aggressive or chemical cleaning agents! They could irreparably damage the surface!
■ Clean the housing with a soft, dry cloth only.
Storage
■ Empty any remaining water from the water tank.
■ Store the cooled-down appliance in a clean, dust-free and dry location.
Disposal
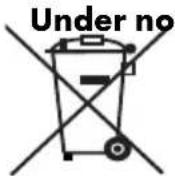
circumstances should you dispose of the appliance in the normal domestic waste. This product is subject to the provisions of European Directive 2012/19/EU.
Dispose of the appliance via an approved disposal company or your municipal waste facility. Please observe the currently applicable regulations. Please contact your waste disposal centre if you are in any doubt.

The packaging is made from environmentally friendly material and can be disposed of at your local recycling plant.
Warranty and Service
The warranty provided for this appliance is 3 years from the date of purchase. This appliance has been manufactured with care and inspected meticulously prior to delivery. Please retain your receipt as proof of purchase. In the event of a warranty claim, please contact your Customer Service by telephone. This is the only way to guarantee free return of your goods.
The warranty only covers claims for material and manufacturing defects, not for transport damage, wearing parts or for damage to fragile components such as switches or batteries. This appliance is intended solely for private use and not for commercial purposes.
The warranty is deemed void if this product has been subjected to improper or inappropriate handling, abuse or modifications which were not carried out by one of our authorised service centres.
Your statutory rights are not restricted in any way by this warranty.
The warranty period is not prolonged by repairs made under the warranty. This also applies to replaced and repaired parts. Damage and defects present at the time of purchase must be reported immediately after unpacking, or no later than two days after the date of purchase. Repairs made after expiry of the warranty period are chargeable.
GB
Service Great Britain
Tel.: 0871 5000 720 (£ 0.10/Min.)
E-Mail: kompernass@lidl.co.uk
IAN 93488
IE
Service Ireland
Tel.: 1890 930 034
(0,08 EUR/Min., (peak))
(0,06 EUR/Min., (off peak))
E-Mail: kompernass@lidl.ie
IAN 93488
Hotline availability:
Monday to Friday 08:00 - 20:00 (CET)
Importer
KOMPERNASS HANDELS GMBH
BURGSTRASSE 21
44867 BOCHUM
GERMANY
www.kompernass.com
Troubleshooting
| PROBLEM POSSIBLE CAUSE POSSIBLE SOLUTIONS | ||
| The appliance is not working. | The appliance is not connected with a mains power socket. | Connect the appliance to a mains power socket. |
| The appliance is damaged. Contact Customer Services. | ||
| The steam iron is producing no or very little steam. | The reserves of water in the steam iron are depleted. | Fill the water tank with water (See "Filling the water tank"). |
| The steam iron does not get hot. | The steam iron is not plugged in or is not switched on. | Insert the plug into a mains power socket and adjust the temperature regulator to the desired temperature level. |
| The steam iron is defective. | Arrange for the steam iron to be repaired by qualified specialists. | |
If the malfunction cannot be corrected with the above suggestions, or if you have found some other kind of malfunction, please contact our Customer Service.
Sisällysluettelo
Johdanto....14
KOMPERNASS HANDELS GMBH
BURGSTRASSE 21
44867 BOCHUM
GERMANY
www.kompernass.com
Vian korjaus
KOMPERNASS HANDELS GMBH
BURGSTRASSE 21
44867 BOCHUM
GERMANY
www.kompernass.com
Åtgärda fel
KOMPERNASS HANDELS GMBH
BURGSTRASSE 21
44867 BOCHUM
GERMANY
www.kompernass.com
Afhjælpning af fejl
KOMPERNASS HANDELS GMBH
BURGSTRASSE 21
44867 BOCHUM
GERMANY
www.kompernass.com
Dépannage
WAARSCHUWING! LETSELGEVAAR!
⚠WAARSCHUWING - GEVAAR VOOR VERSTIKKING!
⚠ WAARSCHUWING - LETSELGEVAAR!
KOMPERNASS HANDELS GMBH
BURGSTRASSE 21
44867 BOCHUM
GERMANY
www.kompernass.com
Problemen oplossen
KOMPERNASS HANDELS GMBH
BURGSTRASSE 21
44867 BOCHUM
GERMANY
www.kompernass.com
Fehlerbehebung
KOMPERNASS HANDELS GMBH
BURGSTRASSE 21
44867 BOCHUM
DEUTSCHLAND / GERMANY
www.kompernass.com
Last Information Update · Tietojen tila · Informationsstatus
Tilstand af information · Version des informations
Stand van de informatie · Stand der Informationen:
11 / 2013 · Ident.-No.: SDB2400A1-092013-2

- ÅNGSTRYKJÄRN
- FER À REPASSER VAPEUR
- DAMPFBÜGELEISEN
- HÖYRYSILITYSRAUTA
- DAMPSTRYGEJERN
- FI
- Contents
- Introduction
- Proper use
- Package contents
- Appliance description
- Technical details
- Safety instructions
- DANGER – ELECTRIC SHOCK!
- WARNING! RISK OF INJURY!
- ⚠️ CAUTION! DAMAGE TO PROPERTY!
- GB IE
- Before fi rst use
- WARNING - RISK OF ELECTRIC SHOCK!
- Filling the water tank
- NOTE
- Operation
- Plugging in and ironing
- CAUTION - PROPERTY DAMAGE!
- Steam ironing
- Ironing with steam blast
- Temporarily setting the steam iron down
- CAUTION - RISK OF FIRE!
- Taking the steam iron out of service
- Anti-drip system
- Automatic switch-off
- Cleaning
- Self-cleaning function
- Housing
- WARNING - RISK OF INJURY!
- Storage
- Disposal
- Warranty and Service
- GB
- Service Great Britain
- IE
- Service Ireland
- Hotline availability:
- Importer
- Troubleshooting
- Sisällysluettelo
- Åtgärda fel
- Afhjælpning af fejl
- WAARSCHUWING! LETSELGEVAAR!
- ⚠WAARSCHUWING - GEVAAR VOOR VERSTIKKING!
- ⚠ WAARSCHUWING - LETSELGEVAAR!
Brand : SILVERCREST
Model : SDB 2200 D2
Category : Iron