EXP 5 - Coffee machine TEAM - Free user manual and instructions
Find the device manual for free EXP 5 TEAM in PDF.
User questions about EXP 5 TEAM
0 question about this device. Answer the ones you know or ask your own.
Ask a new question about this device
Download the instructions for your Coffee machine in PDF format for free! Find your manual EXP 5 - TEAM and take your electronic device back in hand. On this page are published all the documents necessary for the use of your device. EXP 5 by TEAM.
USER MANUAL EXP 5 TEAM
Generated by Unregistered Batch DOC TO PDF Converter 2011.3.804.1511, please register!
Copies of the I/B. Please reproduce them without any changes except under special instruction from Team International BELGIUM. The pages must be reproduced and folded in order to obtain a booklet A5 (+/- 148.5 mm width x 210 mm height). When folding, make sure you keep the good numbering when you turn the pages of the I/B. Don't change the page numbering. Keep the language integrity.

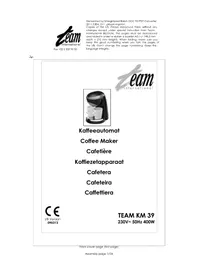
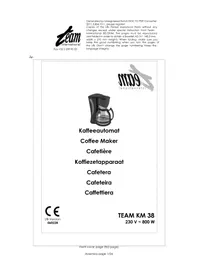
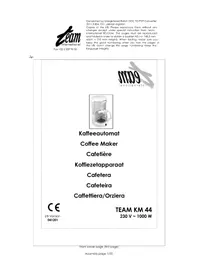
Espressomaschine
Expressomaker
Expresso
Expressoapparaat
Cafeteria express
- Expresso button
- Steam button
- Pilot light of the expresso function
- Pilot light of the steam function
- ON/OFF switch
- Removable water tank
- Support of the filter holder
- Filter locking lever
- Steam pipe
- Removable drip tray
- Drip tray cover
- Filter holder
- Filter
- Measuring spoon
- Creamer disk
- Shower disk of the brew head
- Steam control knob
- Cartridge filter
F
Please read these instructions carefully before using the appliance.
Before using the appliance check that your mains voltage corresponds to that stated on the rating plate of the appliance.
Never leave the appliance unsupervised when in use. Keep out of reach of children or incompetent persons.
From time to time check the cord for damages. Never use the appliance if cord or appliance show any signs of damage. Should the cord be damaged, it must be replaced by a competent qualified electrician*. All repairs should be made by a competent qualified electrician*
Only use the appliance for domestic purposes and in the way indicated in these instructions.
Never immerse the appliance in water or any other liquid for any reason whatsoever. Never place it into the dishwasher.
Never use the appliance near hot surfaces.
The switch has to be in position OFF and the appliance has to be unplugged from the power supply before cleaning the appliance or filling the water tank. Never leave the appliance unsupervised when in use (when functioning or not).
Never use the appliance outside and always place it in a dry environment.
Never use accessories which are not recommended by the producer. They could constitute a danger to the user and risk to damage the appliance.
Never move the appliance by pulling the cord. Make sure the cord cannot get caught in any way. Do not wind the cord around the appliance and never allow it to come into contact with the hot parts of the appliance.
Stand the appliance on a table or flat surface.
Be careful the filter holder, the filter and the steam tube get hot during use. Avoid manipulating them without taking special care.
Only use fresh (potable) and cold (moderate) water.
Make sure the appliance has cooled down before cleaning, storing or filling it.
Be careful not to get burned by the steam coming out of the tube. Only use the steam tube for heating water or milk or to make the milk scummy.
Before the first use of the coffee machine, it is absolutely necessary to operate the appliance only with water (three times).
To avoid the pipe getting blocked, use it regularly (for example to clean the filter and the filter holder).
Never use your appliance without water in the water tank.
Competent qualified electrician: after sales department of the producer or importer or any person who is qualified, approved and competent to perform this kind of repairs in order to avoid all danger. In any case you should return the appliance to this electrician.
UK STYLE PLUG WIRING INSTRUCTIONS (IN THE UK ONLY)
This product must only be used from a 13 amp power socket. If a BS1363 approved 13 amp plug is used, it should be fitted with a 13 amp fuse. The wires on the power cord are colour coded:
blue = neutral, brown = live, green or green & yellow = earth. The blue wire must be connected to the terminal marked N or coloured in black. The brown wire must be connected to the terminal marked L or coloured in red.
The green (& yellow) wire must be connected to the terminal marked E or coloured in green (& yellow).
PREPARING THE MACHINE
Check if all switches are on the OFF position.
Check that the steam control knob (17) is closed by turning it clockwise (Fig. 1).
We recommend to get used to all functions of your appliance before using it for the first time. Remove the water tank (Fig.2), fill it with cold water.
If there is a rubber cap at the end of the rubber pipe of the pump, remove it before use. Replace the water tank correctly (Fig. 3).
Before the first use, in order to clean the inner side of the appliance circuit, you have to operate it three times reading the "OPERATION" paragraph (without coffee in the filter holder).
Clean the accessories thoroughly in hot soapy water, rinse and dry them carefully. Be sure that the suction pads stick to the stand surface of the appliance.
OPERATION
Important: during the use, always check that there is enough water for the preparation in the water tank.
- Check that the switch (5) is in the OFF position and that the appliance is unplugged from the power supply.
- Fill water in the water tank.
- Replace the water tank and put the plug in an earthed socket. Your appliance is now ready for use.
NOTE: WHENEVER OPERATING THE APPLIANCE, BE SURE THAT THE STEAM CONTROL KNOB (17) IS COMPLETELY CLOSED BEFORE SWITCHING ON THE APPLIANCE
PREPARING EXPRESSO COFFEE
Expresso is a strong coffee, with a characteristic taste, extremely rich in aroma. Therefore, the water which arrives in the filter with a high temperature is pushed very fast through the coffee mass by a strong pressure. It extracts the nectar from the grinding and draws the essential aromas from the coffee. That's why the expresso is usually served in small "expresso" cups. Use preferably a special expresso coffee with suitable roasting and grinding. Remember that the expresso needs a finer grinding than the standard coffee.
- Place the creamer disk (15) correctly in the filter holder (12). The creamer disk consists of two parts, a rubber disk and a metal disk, that must be assembled first. The plastic part of the creamer disk should be assembled on top of its metal part.
- Put the filter (13) in the filter holder (12) (Fig.4)
- According to the required number of cups, put 1 or 2 measures of special expresso coffee powder in the filter (Fig 5).
- Then press the coffee with the measuring spoon (Fig. 6).
- Insert the filter holder (12) in the support of the filter holder (7). Therefore, place the handle of the filter holder to the left and check that the filter locking lever is as far as possible from the filter by pulling it to you. Insert the filter holder in its support and turn it firmly to the right until it blocks (Fig. 7). The filter holder (12) should be as far to the right of the closing zone as possible and at least in the middle of the appliance. This will avoid that the filter holder comes out of its housing as the pressure rises when the coffee is flowing. If the filter holder does not fit in the closing zone and at least in the middle of the appliance, do not operate your appliance, remove the filter holder and position it again as described here above.

- Place one or two cup(s) on the grid of the drip tray and under the release valve of the filter holder (Fig. 8).
- Check that the function switches are in off position and place the switch ON/OFF switch in ON position (Fig. 9). The power pilot light of the switch will light up and indicate that the appliance is switched on.
Wait until the pilot light of the espresso function (3) lights up. When it comes on, press the espresso button (Fig. 10) The pump will start functioning and a few seconds later the coffee will start coming out through the openings of the filter holder. At the beginning you can hear that the pump makes more noise than when the water starts flowing. This is absolutely normal. - When the cup(s) is (are) filled, press the expresso button again and the water will stop flowing.
To prepare other expressos, empty the used coffee of the filter. Therefore you have to remove the filter holder by turning it to the left. CAUTION: Be careful when you remove the filter holder (12) because the metal parts may be still hot. Never remove the filter holder
(12) when the expresso button is on. Put the filter locking lever against the edge of the filter in order to block it and beat the filter holder above the bin. CAUTION: some hot water might remain under the creamer disk (15), pay attention not to get burned. Rinse the accessories with clear water and fill the filter again with the desired amount of coffee. - Proceed as described here above.
Use of coffee cartridges
Instead of grinded coffee, you can also use special coffee cartridges. To do so, put the cartridge filter (18) instead of the filter (13) in the filter holder, and put a coffee cartridge in its filter. Then follow the instructions above to continue.
CAUTION:
If you have not used your appliance for a long time, it is necessary to make one or two brewing processes without coffee to rinse the inner parts of the appliance.
Before using the cartridge filter (18), always remove the creamer disk (15) first.
HOW TO PREPARE A CAPPUCCINO
First of all prepare a coffee as described here above letting enough place for the milk.
Caution: Before using the cappuccino function, make sure the filter holder (12) has been removed from its support.
In order to obtain a thick and creamy milk froth it is necessary to evacuate the remaining water in the hydraulic circuit of the appliance. To do so:
- Switch on the appliance.
Let the steam button in OFF position, swing the steam pipe (9) to the right (Fig. 11) and put a recipient under the steam pipe. - Open the steam control knob by turning it anti-clockwise (Fig. 12) wait a few seconds till the superfluous water has run in the recipient and then close the steam control knob by turning it clockwise.
- Then fill the desired milk quantity into a heat resistant container (it has to be large enough to avoid splashing, do not fill more than half of the recipient) and place it under the steam
pipe (9). Immerse the steam nozzle completely in the milk in order to reduce splashing (Fig. 13).
- Press the steam button (Fig. 14). When the pilot light of the steam function (4) comes on, turn the steam control knob anti-clockwise and the milk will start frothing, which means that the steam is coming out.
- When you obtain the required smoothness, turn the steam control knob clockwise and press the steam button again to put it in off-position.
- Then pour the preparation in your cup.
Caution: the steam pipe (9) should not touch the bottom of the container because it may bother the steam flood.
Clean the steam pipe (9) after each use especially when it has been immersed in milk. If you do not clean it, the inner side of the pipe can get blocked and it will be difficult to remove the milk residues around it. The plastic nozzle of the pipe can be removed for cleaning by simply unscrewing it and pulling it down. In case of obstruction of the pipe, use a needle to remove the milk residues. Just after having lathered up the milk, wipe the body of the pipe first with a damp cloth, then keep the cloth against the steam outlet and slowly open the steam control knob (17); let the steam escape for one or two seconds in order to throw out the milk residues and then close the knob (17).
CAUTION: PAY ATTENTION NOT TO GET BURNED WITH THE STEAM AND THE METAL PART OF THE PIPE (WHICH MAY BE HOT).
HOW TO PREPARE A TEA OR OTHER HOT BEVERAGE
With this appliance you can also obtain hot water to prepare some tea or other hot beverage. After having followed the instructions concerning the first use, place a container under the steam/water pipe (9) and press the steam button. When the pilot light of the steam function (4) comes on, open the steam control knob (17) by turning it anti-clockwise and press the expresso button simultaneously. Hot water will come out of the pipe.
When you obtain the desired water quantity, press the expresso button again to put it in off-position, put the steam button in off-position as well, and close the steam control knob (17) by turning it clockwise.
CLEANING
The body of the appliance: before cleaning the appliance, switch it off, remove the plug from the wall socket and wait until it has cooled down. Wipe the body of the appliance with a damp cloth. Never immerse the body of the appliance in water or any other liquid.
Filter: Can be washed in the upper side of a dishwasher. If the holes are blocked by coffee residues, you can wipe them with a small non-metallic brush.
Support of the filter holder: The ground coffee residues can be removed with a toothpick.
Steam pipe for cappuccino: See paragraph "How to prepare a cappuccino".
Creamer disk: Separate both parts and wipe them under hot water before assembling them.
Drip tray: In order to clean the drip tray, remove the tray and the grid.
CAUTION: NEVER TRY TO OPEN OR TO DISASSEMBLE THE BODY OF THE APPLIANCE.
DESCALING
The expresso machine has to be descaled regularly. The frequency depends on the water hardness and of the use frequency.
- Remove the scale and the coffee residues from the filter grid and from the support of the filter holder. It is recommended to use only liquid descaling agent that can be found in shops and in the proportions indicated on the packing paper by the producer.
- Place the container under the support of the filter holder and another one under the steam pipe (9) (Caution: do not use the filter holder (12) during the descaling).
- Press the ON Switch (5), turn the steam control knob (17) in the open position, and press the expresso button Wait until steam comes out the opening of the pipe (9).
- After approximatively 30 seconds, stop the hot water flow by closing the steam control knob (17) and let the descending solution flow through the support of the filter holder in the container.
- When the solution has finished flowing, switch off the appliance and let it cool down.
- Repeat this operation a second time.
Then proceed in the same way but this time only with fresh water to rinse the inner side of the circuit. For a good rinsing, the equivalent of two expresso tanks has to pass through the circuit. Switch off the appliance and remove the plug from the power supply. Let it cool down.
Attention: Never use vinegar as descending agent.
Some recognizable signs indicate that descending is necessary:
- Increase of the noise during boiling.
- A longer time of decoction cycle
For a regular use, the descaling has to be done in the following periodicity:
With little bit hard water, once a year
- With middle hard water, once a trimester
With hard water, once a month.
In case of doubt concerning the water quality, ask your local water company.
PROBLEMS AND CAUSES OF THE NON FUNCTIONING OF THE EXPRESSO
| PROBLEMS | CAUSES |
| No hot water | -Check that there is water in the water tank-Open the control knob (17) after having placed a container under the steam pipe (9) and press the expresso button to remove the air in the hydraulic circuit. When water comes out of the steam pipe (9), close the tap (17) and press the expresso button again.-If those solutions are not enough, please ask to the competent customer service. |
| No steam | -Clean every residue in the steam pipe with a needle.-Check that there is water in the water tank |

| Water overflows through the filter holder | -The filter holder is not well positioned. -The filter holder is not blocked enough. -The joint is dirty and has to be cleaned. -The joint is no more elastic and has to be replaced. -Coffee powder is remaining on the surround of the filter holder. -The shower or the filter are blocked by coffee residues and have to be cleaned/removed with a toothpick or a needle. -If those solutions are not enough, please ask to the competent customer service. |
| Coffee doesn't flow | -No water in the water tank. -No coffee in the filter of the filter holder. -The coffee grinding in the filter of the filter holder is too fine or the coffee is too tamped. -The holes of the filter or of the shower disk are blocked. Clean them (see above). |