
KM 45T - Coffee machine TEAM - Free user manual and instructions
Find the device manual for free KM 45T TEAM in PDF.
| Product type | Coffee maker |
| Brand | TEAM |
| Model | KM 45T |
| Programmable | Yes |
| Coffee type | Ground coffee (paper filter) |
| Display | LCD screen |
| Delay programming | Yes (up to 24 hours in advance) |
| Auto shut-off | Yes, after 2 hours |
| Keep warm | Yes, up to 2 hours on hot plate |
| Anti-drip valve | Yes |
| Carafe | Glass with lid |
| Removable filter holder | Yes |
| Cleaning | Carafe washable in warm soapy water; plastic parts with non-abrasive sponge |
| Descaling | Regularly recommended with special coffee maker descaler |
| Safety | Auto shut-off, do not immerse in water, do not use cracked carafe |
| Power supply | 220-240 V ~ 50 Hz |
Frequently Asked Questions - KM 45T TEAM
User questions about KM 45T TEAM
0 question about this device. Answer the ones you know or ask your own.
Ask a new question about this device
Download the instructions for your Coffee machine in PDF format for free! Find your manual KM 45T - TEAM and take your electronic device back in hand. On this page are published all the documents necessary for the use of your device. KM 45T by TEAM.
USER MANUAL KM 45T TEAM
natural_image
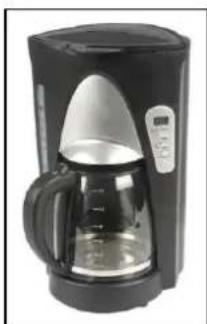
Black and silver coffee maker with digital display and control panel (no visible text or symbols)Programmierbarer Kaffeeautomat
Programmable Coffee Maker
- Main Body
- Hotplate
- Filter holder housing
- Graduated water tank
- Lid of the water tank
- Glass jug
- Lid of the glass jug
- START/STOP button
- Programming button (PROG.)
- LCD display
- HOUR button
- MIN button
FR
Copies of the I/B. Please reproduce them without any changes except under special instruction from Team International BELGIUM. The pages must be reproduced and folded in order to obtain a booklet A5 (+/- 148.5 mm width x 210 mm height). When folding, make sure you keep the good numbering when you turn the pages of the I/B. Don't change the page numbering. Keep the language integrity.
Fax +32 2 359 95 50

PRAKTISCHE HINWEISE
Please read these instructions carefully before using the appliance, and always follow the safety and operating instructions.
Important: People (including children) who are not able to use the appliance in a safe way, due to their physical, sensorial or mental capacity or their lack of experience or knowledge, must never use the appliance except if they are supervised by a person responsible for their safety or if they previously received instructions concerning the safe use of the appliance. Close supervision is necessary to prevent children from using the appliance as a toy.
☐ Check that your mains voltage corresponds to that stated on the appliance.
☐ Never leave the appliance unsupervised when in use.
From time to time check the cord for damages. Never use the appliance if cord or appliance shows any signs of damage. All repairs should be made by a competent qualified electrician ^1 .
☐ Only use the appliance for domestic purposes and in the way indicated in these instructions.
☐ Never immerse the appliance in water or any other liquid for any reason whatsoever. Never place it into the dishwasher.
☐ Never use the appliance near hot surfaces.
Before cleaning or storing the appliance, always unplug the appliance from the power supply and let it cool down.
☐ Never use the appliance outside and always place it in a dry environment.
☐ Never use accessories that are not recommended by the producer. They could constitute a danger to the user and risk to damage the appliance.
☐ Never move the appliance by pulling the cord. Stand the appliance on a table or flat surface. Make sure the cord cannot get caught in any way. Do not wind the cord around the appliance and do not bend it.
☐ Do not use your appliance if the carafe is cracked or broken. Use only the carafe delivered with your appliance. Attention, your carafe becomes hot during the use. Take it only by the handle.
☐ Never touch the hot parts of the appliance (be careful, also the warming plate is a hot part!), only touch the plastic parts and take the jug by the handle.
☐ Make sure the appliance never comes into contact with inflammable materials such as curtains, textiles... when it is in use as they might catch fire.
☐ When removing lime scale, only use special products for the removal of lime scale. Never use ammonia or any other substance that might damage your health.
☐ Only put ground coffee in the filter.
☐ Never use your coffee maker without water in it. If you have a programmable coffee maker, make sure to fill it with water before programming it.
Important: never put the jug in a microwave oven to warm up the coffee. We will not take any responsibility if you do so.
FIELD OF APPLICATION/OF OPERATION
- Use the appliance for domestic purposes only and in the way indicated in these instructions.
- This appliance is intended to be used for domestic applications and similar applications such as:
Kitchen corners reserved for personnel in shops, offices and other professional environments.
Farms.
The use by clients of hotels, motels and other environments with a residential character.
Environments of the "bed and breakfast" type.
INITIAL OPERATION
When you use your appliance for the first time, pour fresh water into the water tank and switch on the appliance (without coffee).
Once all the water has passed through, switch the appliance off and let it cool down. When it is cold enough, repeat the process with fresh water. Repeat this process twice.
SETTING THE CLOCK
- Plug in your coffee maker. The time "12:00" will flash on the electronic digital clock.
- To set the current time, press the HOUR button to set the hours, and the MIN button to change the minutes.
- By each impulse on one of those buttons, the hour or minutes will increase by 1 unit but if you keep the pressure, the time will roll forward more quickly.
- When the current time has been set correctly, do not touch the buttons anymore.
- If you want to change the current time, you simply have to press the HOUR and MIN buttons.
- Please note: you cannot set the current time when the coffee maker is in the programming mode (AUTO lamp on) or when it is brewing coffee (ON lamp on).
PREPARATION OF COFFEE
- Open the lid of the water tank.
- Using the glass carafe, pour the desired amount of water into the water tank. Make sure not to overfill by respecting the maximum level indicated on the water tank.
- Put a filter in the filter holder and add the desired quantity of ground coffee in the filter. Make sure the filter holder is placed correctly in the appliance.
- Never forget to close the lid of the water tank and to place the glass carafe on the warming plate before switching on your coffee maker.
- Press the START/STOP button twice to switch on the coffee maker. The "On" pilot light will be illuminated, indicating that your appliance is working. A device allows you to keep coffee warm for as long as the coffee maker is working and the jug is standing on the appliance.
- When you remove the jug from the appliance, a non-drip valve will automatically operate to stop any drops of coffee dripping onto the hotplate. Replacement of the carafe automatically opens the non-drip valve and allows remaining coffee to filter through into the jug.
- Wait until the brewing process is finished and the filter has run empty before removing the jug.
- You can switch off your appliance anytime simply by pressing the START/STOP button once (all pilot lights will be off).
- Your coffee maker will switch off automatically 2 hours after it has stopped brewing coffee.
PROGRAMMING THE COFFEE MAKER
To programme your coffee maker to brew fresh coffee at a preset time, first follow steps 1 to 4 in the "PREPARATION OF COFFEE" section.
Make sure the coffee maker's clock is set to the right time.
Press the PROG button. The clock will now display 12:00. Keep the PROG button pressed down (the word TIMER appears on the bottom of the LCD display) and use the HOUR and MIN buttons to set the desired brew time. Once the setting is finished, let go of the PROG button.
The programming time will disappear and will be replaced by the clock time.
Press the START/STOP button once to activate the preset brew cycle. The AUTO light will illuminate and "AUTO" will appear on the LCD display when the brew time is properly set.
When your preset brew time is reached and the coffee maker starts its brew cycle, the AUTO light will go out and the red "On" pilot light will illuminate.
As with the regular brew cycle, an automatic two-hour keep-warm cycle will commence after your coffee maker has finished brewing. When the 2 hours are over, the coffee maker will automatically shut itself off.
Note: to check the programming time after you have set it, press the PROG button and it will be displayed.
USE COMFORT
- When you remove the carafe from this appliance, a non-drip valve will automatically operate to stop any drops of coffee dripping onto the hotplate. Replacement of the carafe automatically opens the non-drip valve and allows any remaining coffee to filter through into the carafe.
- When the water tank is empty, wait a few seconds before removing the carafe in order to let the water in the filter flow totally.
- Once the coffee ready, you can keep it warm by letting it on the hotplate. This will start to heat up as soon as the coffee maker is on (red "On" pilot light on). With the automatic or the manual operation, the duration won't exceed about 2 hours because your coffee maker will switch off automatically after that.
• Never put an (almost) empty jug back on the hotplate when the latter is still hot. - Caution: when you switch your coffee maker off, the hotplate will also switch off, but it will still stay hot for a short while. So pay attention and wait until the hotplate has completely cooled down before cleaning or storing the appliance.
DESCALING AND CLEANING
- Descaling the coffee maker prolongs its lifespan. For decalcification, only use products especially made for the decalcification of coffee makers and follow their instruction manual carefully.
- Never put any part of the appliance in the dishwasher. Clean the jug with soapy water and rinse it with clear water.
- The filter holder of your coffee maker is removable in order to clean it more easily under a water pipe for example but also to avoid the manipulation of a dirty paper filter.
• To clean the plastic parts of the appliance, use a humid, non-abrasive cloth.
PRACTICAL HINTS
When you notice that the coffee making process is longer than it should be, it is probably time to decalcify the appliance. Do not wait until the situation gets worse. The decalcifying frequency depends on the amount of lime in the water and therefore can be different from family to family. Therefore it is important to pay attention to this. A good maintenance of your appliance will prolong its lifespan. Guarantee claims will not be accepted for the replacement of a heating element full of scale.
PROTECTION OF THE ENVIRONMENT – DIRECTIVE 2002/96/EC
In order to preserve our environment and protect human health, the waste electrical and electronic equipment should be disposed of in accordance with specific rules with the

implication of both suppliers and users. For this reason, as indicated by the symbol on the rating label or on the packaging, your appliance should not be disposed of as unsorted municipal waste. The user has the right to bring it to a municipal collection point performing waste recovery by means of reuse, recycling or use for other applications in accordance with the directive.
FR MODE D'EMPLOI
POUR VOTRE SECURITE
PROGRAMAREA CAFETIEREI
Team International Romania Srl;
Str. Industriilor 56A, sector 3, Bucuresti CUI 16991287; R.C. J40/19685/29.11.2004

УПЪТВАНЕ
- Programmierbarer Kaffeeautomat
- Programmable Coffee Maker
- FR
- PRAKTISCHE HINWEISE
- FIELD OF APPLICATION/OF OPERATION
- INITIAL OPERATION
- SETTING THE CLOCK
- PREPARATION OF COFFEE
- PROGRAMMING THE COFFEE MAKER
- USE COMFORT
- DESCALING AND CLEANING
- PRACTICAL HINTS
- PROTECTION OF THE ENVIRONMENT – DIRECTIVE 2002/96/EC
- FR MODE D'EMPLOI
- POUR VOTRE SECURITE
- PROGRAMAREA CAFETIEREI
- УПЪТВАНЕ
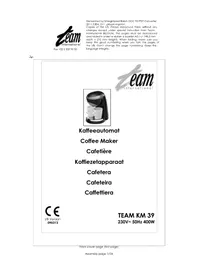
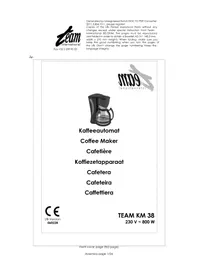
Brand : TEAM
Model : KM 45T
Category : Coffee machine