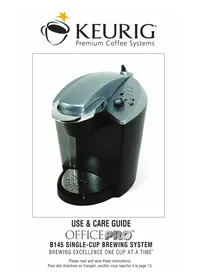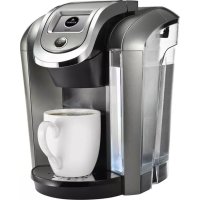
KCup 2.0 Brewer K550 - Coffee machine Keurig - Free user manual and instructions
Find the device manual for free KCup 2.0 Brewer K550 Keurig in PDF.



User questions about KCup 2.0 Brewer K550 Keurig
0 question about this device. Answer the ones you know or ask your own.
Ask a new question about this device
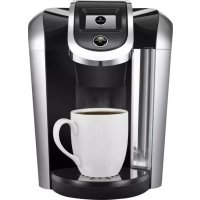
Download the instructions for your Coffee machine in PDF format for free! Find your manual KCup 2.0 Brewer K550 - Keurig and take your electronic device back in hand. On this page are published all the documents necessary for the use of your device. KCup 2.0 Brewer K550 by Keurig.
USER MANUAL KCup 2.0 Brewer K550 Keurig
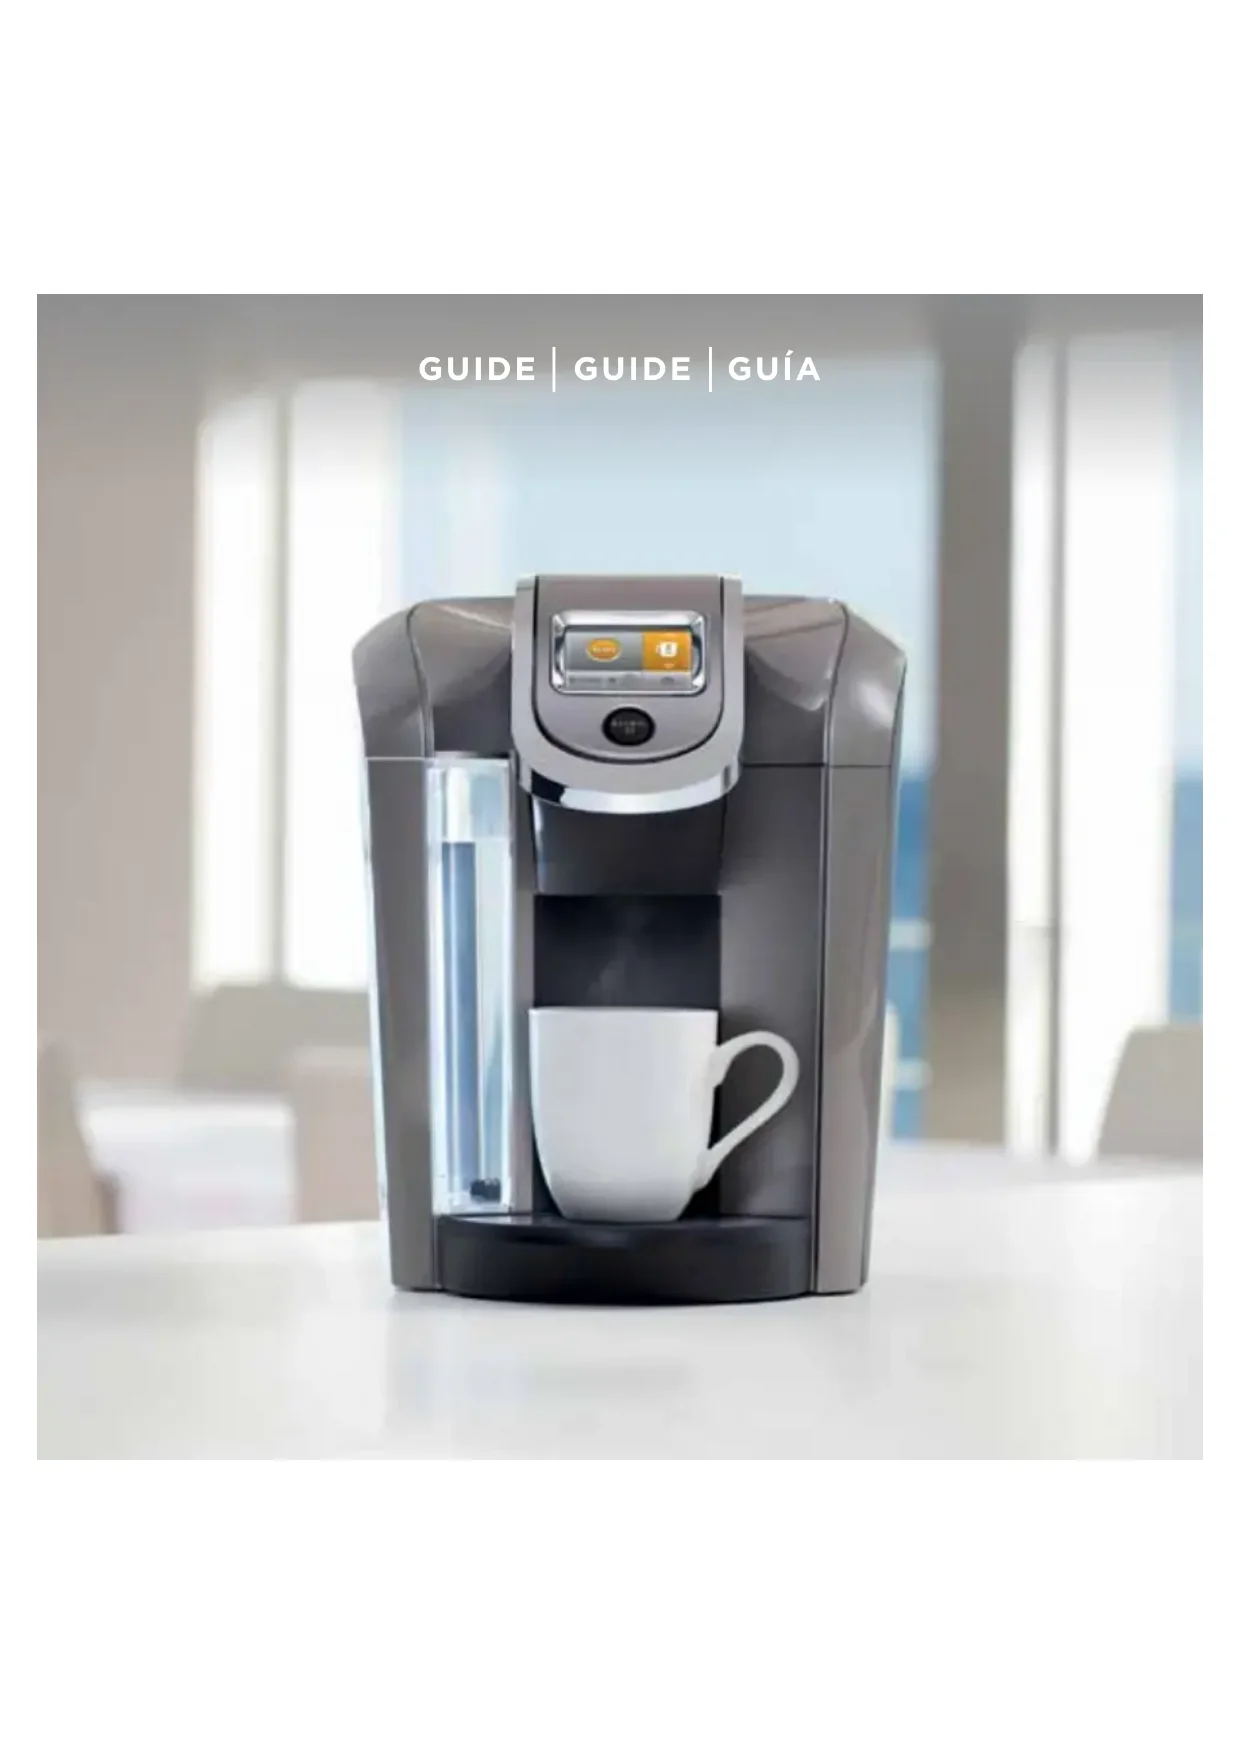
GUIDE | GUIDE | GUIA
IMPORTANT SAFEGUARDS
When using electrical appliances, basic safety precautions should be followed, including the following:
- Read all instructions before using.
- Do not touch hot surfaces. Use handles and knobs when available.
- This appliance must be properly installed and located in accordance with these instructions before it is used.
- The use of accessory attachments not recommended by the appliance manufacturer may result in fire, electrical shock or injury to persons.
- Do not place on or near a hot gas or electric burner, or in a heated oven.
- Do not use outdoors.
- To protect against fire, electric shock and injury do not immerse cords, plugs or the appliance in water or any other liquid.
- Do not fill the Water Reservoir above the MAX FILL line.
-
Use only water in this appliance! Do not put any other liquids or foods in the Water Reservoir except as instructed in the cleaning instructions in this guide.
-
Turn off and unplug the brewer before cleaning or maintenance. Allow to cool before putting on or taking off parts and before cleaning the appliance.
- For best operation, plug the appliance into its own electrical outlet on a dedicated circuit to prevent flickering of lights, blowing of fuses or tripping a circuit breaker.
- Do not operate any appliance with a damaged Power Cord or plug or after the appliance malfunctions or is damaged in any manner. Contact Keurig Customer Service to report any malfunction of or damage to the brewer.
- Do not let the Power Cord hang over the edge of the table or counter, or touch hot surfaces.
- To disconnect, press the Power Button on the brewer to "OFF" status and then remove the plug from the wall outlet.
- Close supervision is necessary when any appliance is used by or near children.
-
Do not lift the brewer Handle while brewing is in progress.
-
Always keep the Flip-Top Reservoir Lid on the Water Reservoir unless you are refilling it.
- This appliance is equipped with a Power Cord having a grounding wire with a grounding plug. The appliance must be grounded using a 3-hole properly grounded outlet. In the event of an electrical short circuit, grounding reduces the risk of electrical shock.
- If the outlet is a standard 2-prong wall outlet, it is your personal responsibility and obligation to have it replaced with a properly grounded 3-prong wall outlet.
- Do not, under any circumstances, cut or remove the third (ground) prong from the Power Cord or use an adapter.
- Consult a qualified electrician if the grounding instructions are not completely understood, or if doubt exists as to whether the appliance is properly grounded.
- Do not use the appliance for other than its intended use.
- Remove the shipping disk before brewing.
SAVE THESE INSTRUCTIONS.
WARNING TO USERS AND PARENTS:
- DO NOT permit children to use the brewer unless there is adult supervision. Brewer dispenses very hot water.
- SPECIAL NOTICE FOR HOT COCOA/OTHER USERS: IMMEDIATELY AFTER USING A HOT COCOA/OTHER PACK, RUN A HOT WATER BREW CYCLE
without a pack to avoid the possibility of clogging the exit needle. DO NOT assume the next user will do this.
WARNING
RISK OF FIRE OR

WARNING: TO REDUCE THE RISK OF FIRE OR ELECTRIC SHOCK, DO NOT REMOVE THE BOTTOM COVER. NO USER SERVICEABLE PARTS ARE INSIDE. REPAIR SHOULD BE DONE BY AUTHORIZATED PERSONNEL.
CAUTION: There are three sharp needles that puncture packs, two above the Pack Holder and the other in the bottom of the Pack Holder. To avoid risk of injury, do not put your fingers in the Pack Holder Assembly.
CAUTION: There is extremely hot water in the Pack Holder during the brew process. To avoid risk of injury, do not lift the Handle or open the Pack Holder Assembly during the brewing process.
CAUTION: Do not fill above the MAX FILL line. If you fill the Water Reservoir above this point, you may occasionally get a larger brew than you selected for your first brew of the day. If you prefer to have your Water Reservoir filled to the top, we recommend you use a large mug for your first brew of the day to avoid any risk of overflow.
CAUTION: Please always keep the brewer in its upright position to avoid potential injury and/or damage to your brewer.
CAUTION: Very hot liquid. Adult supervision required.
SHORT CORD INSTRUCTIONS: A short power supply cord is provided to reduce the risk of becoming entangled in or tripping over a longer cord.
Longer detachable power-supply cords or extension cords are available and may be used if care is exercised in their use. If an extension cord is used, (1) the marked electrical rating of the cord set or extension cord should be at least as great as the electrical rating of the appliance;
(2) the cord should be arranged so that it will not drape over the countertop or tabletop where it can be pulled on by children or tripped over unintentionally; and
(3) the extension cord must include a 3-prong grounding plug.
Your Keurig 2.0 brewer will not work with packs that do not have the Keurig ^ 念 logo on them. Keurig 2.0 brewers are not compatible with the My K-Cup ^ reusable filter accessory.
THIS PRODUCT IS FOR HOUSEHOLD USE ONLY.
WARNING
THIS PRODUCT CONTAINS CHEMICALS, INCLUDING LEAD, WHICH IS KNOWN TO THE STATE OF CALIFORNIA TO CAUSE CANCER, BIRTH DEFECTS OR OTHER REPRODUCTIVE HARM.
TABLE OF CONTENTS
KEURIG 2.0 BREWING SYSTEM | K2.0-500 SERIES BREWER
Features 6
Touchscreen Controls 7
SECTION 1
Set-Up & Cleansing Brew 8
Brew Your First K-Cup Pack 10
Brew Your First K-Carafe Pack 11
SetCarafeAutoBrewMode12
SECTION 2
Stopping the Brew Process 14
Adding Water 14
Dispensing Hot Water into a Mug 15
Adding a Favorite 16
Editing a Favorite 17
Using a Favorite 17
Settings Menu 18
Caring For Your Brewer 23
Maintenance Alerts 28
Recycling K-CarafePacks 31
SECTION 3
Troubleshooting 32
SECTION 4
Warranty 34
FEATURES
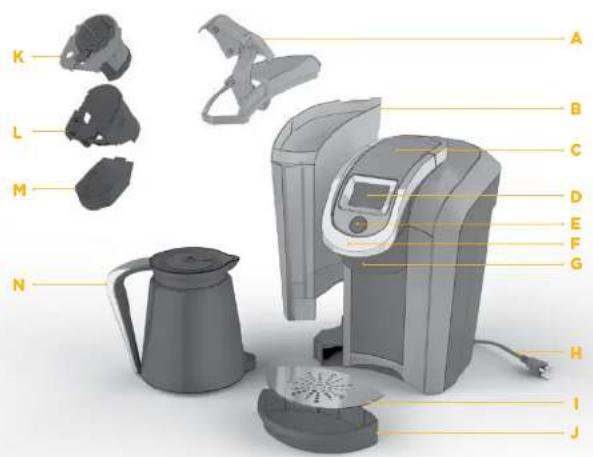
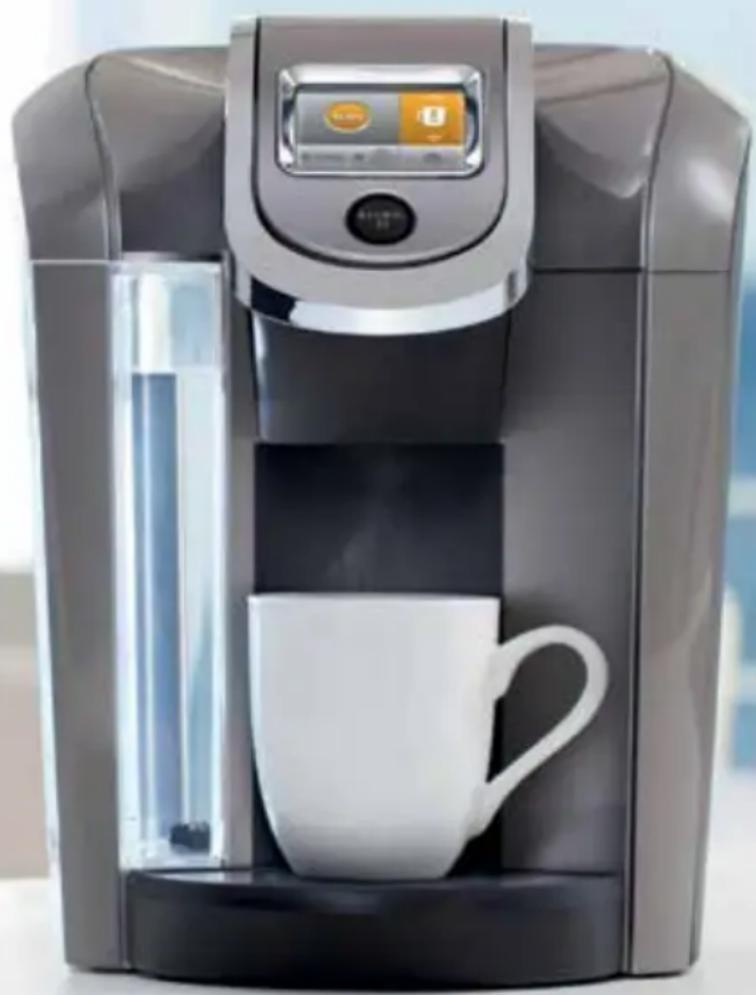
K2.0-500 SERIES BREWER
A. Flip-Top Reservoir Lid
B. Water Reservoir
C. Top Housing
D. Touchscreen/Power Button
E. Brew Button
F. Handle
G. Brew Head
H. Power Cord
1.Drip Tray Plate
Drip Tray
K. Pack Holder
Housing (K and L are the
Pack Holter Assembly)
M. Base
N. Keurig Carafo
A. STRONG
only available for coffee)
B. HOT COCOA/OTHER
(For anod non-convex bevegases)
C. Brew Size
D. Power Button
SCREEN FOR K-CARAFE PACKS
A. KEURIG BREWS
Setting 1
B.AUTO BREW
only available for (if currently not)
6. Poweline
D. Power Button
F. Favorite Button
BREW SETTINGS (OUTLINE INDICATES DEFAULT SIZE)
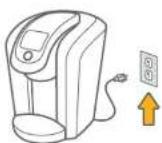
SET-UP
- Place the brewer on a counter and plug into a grounded outlet.
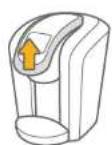
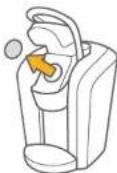
- Lift the Handle, remove and discard the shipping disk.
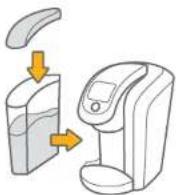
- Rinse the Water Reservoir, fill with bottled or filtered water, and return it to the brewer;
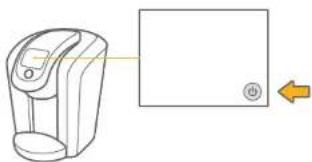
- Press the Power Button and wait for preheating to complete, about three minutes.
CLEANSING BREW
- To begin a cleansing brew, place a 12 ounce mug on the Drip Tray.
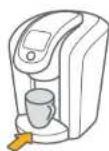
- Lift and lower the Handle. Do not place a Keurig brand pack in the Pack Holder.
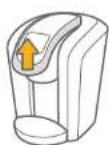
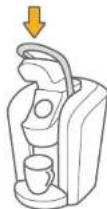
3.Hold down the Brew Button until 6 ounces of hot water has been dispensed. The brewer will automatically stop dispensing after 6 ounces.
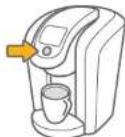
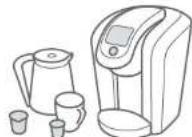
- You are now ready to use your brewer!
BREW YOUR FIRST K-CUP PACK
BREW YOUR FIRST K-CARAFE PACK
SECTION 1
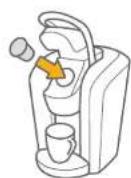
- Place a mug on the Drip Tray. Select a K-Cup® pack, place firmly in the Pack Holder.

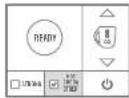
- Select a Brew Size. Select STRONG if desired. (STRONG setting is for coffee.)
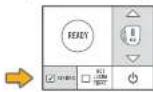

Press HOT COCOA/OTHER for select non-coffee beverages.
NOTE: Make sure to check instructions on portion pack packaging.
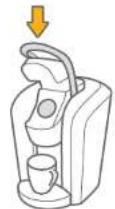
- Lower the Handle. CAUTION: There are sharp needles that puncture the K-Cap' pack above and below the Pack Hold. To avoid injury, do not put your fingers in the Pack Hulter. NOTE: Your Keurig' 2.0 brewer will not work with packs that do not have a Keurig' logo on them.
- Press the Brew Button and enjoy your first cup!
GAUSSON: There is extremely not water in the K-Cup pack.
TREASONS: To avoid injury, do not lift the handle during the renew process.
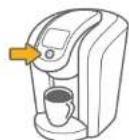
- Make sure the Keurig Carafe is empty. Remove the Drip Tray and insert the Keurig Carafe securely in its place. NOTE: Do not remove the foil lid or puncture the K-Carafe pack. NOTE: Refer to page 27 for Keurig-Carafe operation.
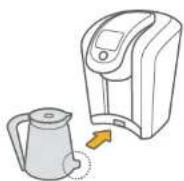
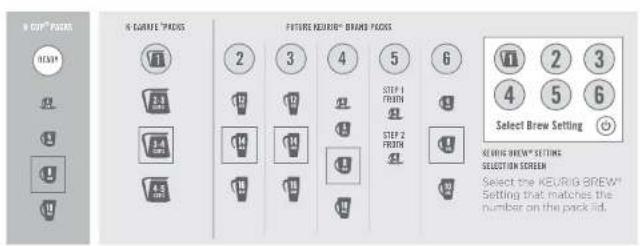
- Select a Brew Size NOTE: Make sure the number on this Touchscreen matches the number of the Ki-Centile "pack you're brewing in the Pock Holder."
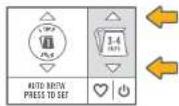
- Select a K-Carafe"pack, place firmly in the Pack Holder and lower the Handle. CAUTION: There are shares reoluals that puncture the K-Carafe"pack above and below the Pack Holder To avoid injury, do not put your fingers in the Pack Holder NOTE: Your Kearf 2.0 brewer will not work with packs that do not have a Keurig logo on them.
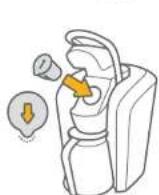
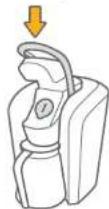
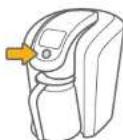
- Press the Brew Button and enjoy your first carafe of coffee! CAUTION: There is extremely hot water in the K-Datel pack during the brew process. To avoid injury, do not lift the handle during the brew process.
(1)
SET CARAFE AUTO BREW MODE
- Make sure the Keurig" Carafe is empty, Remove the Drip Tray and insert the Keurig."Carafe security in its place.
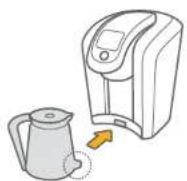
- Select AUTO BREW PRESS TO SET
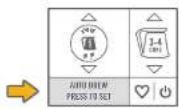
- Select a K-Carafe"pack, place firmly in the Pack Holder and lower the Handle. NOTE. Ensure the current time is accurate. Refer to page 19 to adjust.
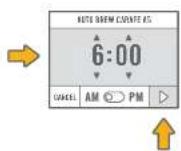
- Select the time you want to begin brewing, then press the right arrow.
SECTION 1
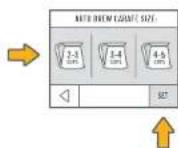
- Select a Brew Size, then press SET.
- To edit any options, select TOUCH HERE TO EDIT.
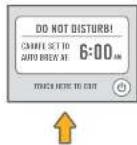
- The Touchscreen will indicate: DO NOT DISTURB!
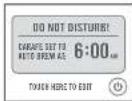
- To put the brewer in sleep mode, quickly press and release the Power Button. Removing the Keung Carafe or lifting the Handle will cancel the CARAFE AUTO BREW MODE.

STOPPING THE BREW PROCESS
dispensing hot water into a mug
SECTION 2
FOR K-CUP PACKS AND K-CARAFE PACKS (KEURIG BREW SETTING 1)
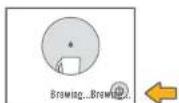
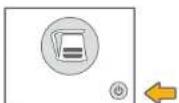
To stop the brewing process, press and hold the Power Button for one second or slowly lift the Handle. Remove and dispose of any used pack. Brewing a used pack is not recommended.
ADDING WATER
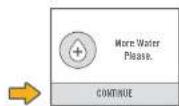
Your Kourig 2.0 brewer will indicate when the water level in the Water Reservoir is low and you will not be able to brew. The brewer will only indicate "More Water Please," if there is not enough to complete your brew.
For example: A Keurig Carafe will require more water than a 10 ounce mug.
14
- Press the Hot Water Button.
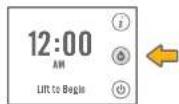
- Follow the Touchscreen instructions.
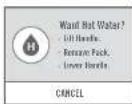
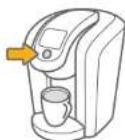
- Press and hold the Brew Button to dispense up to 6 ounces of hot water. The brewer will stop dispensing after 6 ounces.
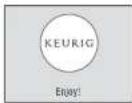
- When the brew process is complete, the Touchscreen will indicate Enjoy!
ADDING A FAVORITE
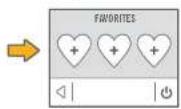
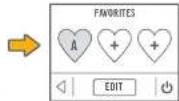
The Favorites Button is like a little shortcut to perfection. Just save the settings you use most often and make each day that much easier. You can save your preferred settings for K-Carafe packages and future Keuriq brand innovations (except K-Cup3 packs).
2. Choose one of the three FAVORITES icons to save your favorite.
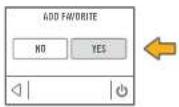
Press YES to confirm.
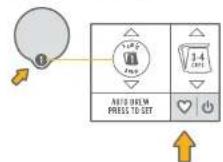
- To set first match the KEURIG
BREW Setting to the number on the pack you inserted. Then select your favorite options for size and strength (not available for all KEURIG BREW Settings). Do not press the Brew Button, press the Favorites Button.
- Press a FAVORITES icon and the Touchscreen will indicate the settings for this favorite.
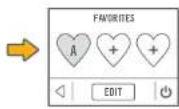
EDITING A FAVORITE
- Press the Favorites Button and select EDIT.
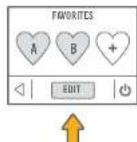
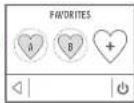
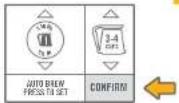
- Select the FAVORITES icon that you wish to change. Edit the settings and press CONFIRM. Your settings are now changed.

USING A FAVORITE
- Place a mug on the Drip Tray, Place a Kourig brand pack in the Pack Holder and lower the Handle. NOTE: Favorites is only available for KOURIG BREW! Settings: Through 0. NOTE: If using KOURIG BREW! Setting 1. Insert the empty Kourig! Carton.
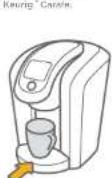
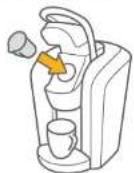
- Press the Favorites Button and choose the FAVORITES icon you would like to brew.
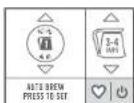

Press the Brew Button.
NOTE: Make sure the selected favorite matches KEURIS.
Please keep track of your progress! I thought 6 for the pack you're brewing in the Pack Holdings.
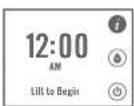
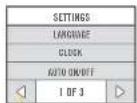
ACCESS SETTINGS
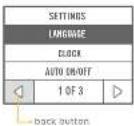
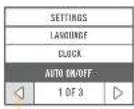
Explore everything your Keurig? 2.0 brewer has to offer by accessing the SETTINGS menu. From the home screen, select the Settings Button.
Use the arrows to scroll through the menu. To exit, press the back button.
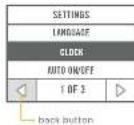
SET CLOCK
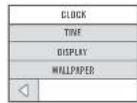
The CLOCK menu gives you the following three settings.
Use the back button to return to the SETTINGS menu.
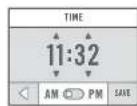
Time: Set the current time using the arrows, then choose AM or PM.
Press SAVE to confirm or use the back button to return to the SETTINGS menu
CHOOSE LANGUAGE
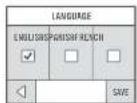
Press English, Spanish or French to select the LANGUAGE.
Press SAVE to confirm or use the back button to return to the SETTINGS menu.
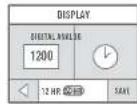
Display: Choose DIGITAL or ANALOG DISPLAY. For DIGITAL DISPLAY only, use the toggle to select 12 HR or 24 HR (military).
Press SAVE to confirm or use the back button to return to the SETTINGS menu.
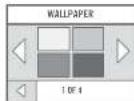
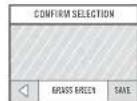
Wallpaper: You can customize your Touchscreen color. Simply press a color window to select a WALLPAPER for the home screen.
Press SAVE to CONFIRM SELECTION or use the back button to return to the WALLPAPER menu.
back button
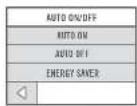
ENABLE AUTO ON/OFF
You can leave your brewer on at all times so it's ready to make your perfect cup any time of day, or you can set the AUTO ON, AUTO OFF or ENERGY SAVER mode
Use the back button to return to the SETTINGS menu.
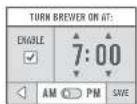
Auto On: Select ENABLE to activate AUTO ON. Use the arrows to set the time for the brewer to automatically turn on.
Press SAVE to confirm or use the back button to return to the SETTINGS menu.
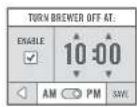
Auto Off: Select ENABLE to activate AUTO OFF. Use the arrows to set the time for the brewer to automatically turn off.
Press SAVE to confirm or use the back button to return to the SETTINGS menu.
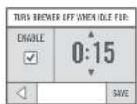
Energy Saver: Select ENABLE to activate ENERGY SAVER mode. In increments of 15 minutes, set the brewer to turn off after a set length of time after the last brew.
Press SAVE to confirm or use the back button to return to the SETTINGS menu.
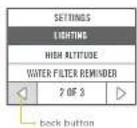
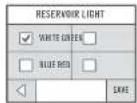
APPLY LIGHTING
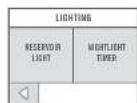
Everything looks better in the right light. Choose the color of your WATER RESERVOIR LIGHT and engage NIGHTLIGHT TIMER to provide a warm glow in your kitchen at night.
Use the back button to return to the SETTINGS menu.
Water Reservoir Light: Choose white, green, blue or red.
Press SAVE to confirm or use the back button to return to the SETTINGS menu
Nightlight Timer: Choose SET NIGHTLIGHT ON or SET NIGHTLIGHT OFF.
Use the back button to return to the SETTINGS menu.
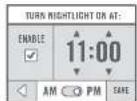
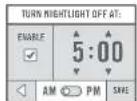
Select ENABLE to activate the NIGHTLIGHT TIMER.Use the arrows to set the time for the home screen to match the color of the WATER RESERVOIR LIGHT.
Press SAVE to confirm or use the back button to return to the SETTINGS menu
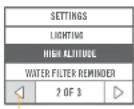
back button
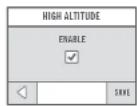
ENABLE HIGH ALTITUDE
To ensure your brewer works properly at higher altitudes (5.000 feet), ENABLE the HIGH ALTITUDE mode.
Press SAVE to confirm or use the back button to return to the SETTINGS menu.
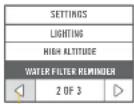
back button
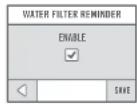
ENABLE WATER FILTER REMINDER
If you are using a Keurig Water Filter, select ENABLE to activate the WATER FILTER REMINDER notices.
Press SAVE to confirm or use the back button to return to the SETTINGS menu.
Refer to page 28 for more information.
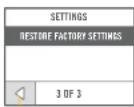
back button
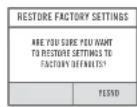
RESTORE FACTORY SETTINGS
Press YES to restore your brewer to the default settings. (Restoring defaults erases any saved FAVORITES, AUTO ON/OFF and LIGHTING. The clock will be set to 12:00 AM.)
Press NO to return to the SETTINGS menu.
CLEANING THE BREWER EXTERIOR
Keep your Keurig 2.0 brewer looking its best by cleaning the exterior from time to time. Just clean with a damp, soapy, lint-free, non-abrasive cloth. Never immerse the brewer in water or other liquids.
CLEANING THE DRIP TRAY
The Drip Tray can accumulate up to 8 ounces of overflow. The Drip Tray and the Drip Tray Plate should occasionally be rinsed clean. To remove the Drip Tray, simply slide it toward you, keeping it level at all times to avoid spilling. Clean with a damp, soapy, lint-free, non-abrasive cloth.
CLEANING THE WATER RESERVOIR AND THE FLIP-TOP RESERVOIR LID
Clean the Water Reservoir and the Flip-Top Reservoir Lid with a damp, soapy, lint-free, non-abrasive cloth and rinse thoroughly.
Do not dry the inside of the Water Reservoir with a cloth as lint may remain. Be sure to rinse the Water Reservoir thoroughly after cleaning to ensure that no cleaning solutions remain as they may contaminate the water supply in the brewer.
DO NOT PLACE THESE ITEMS IN THE DISHWASHER.
CARING FOR YOUR BREWER
SECTION 2
CLEANING THE PACK HOLDER
- Lift the Handle.
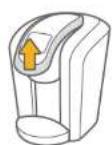
- Push up while grabbing the sides of the Pack Holder Assembly, Pull away from the brewer.
CAUTION: Sharp needles. Do not put fingers in chamber.
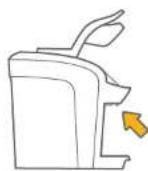
- Clean the Pack Holder (1), Housing (2) and Base (3) with a damp, soapy, lint-free, non-abrasive cloth and rinse thoroughly.


CLEANING THE EXIT NEEDLE
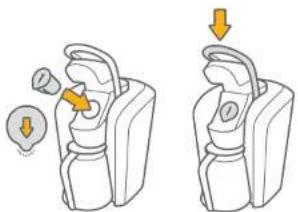
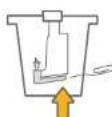
- If a clog arises in the exit needle, push the lever of the Pack Holder to reveal the exit needle.

3.Pull out the Pack Holder Assembly (1) and Base 2).
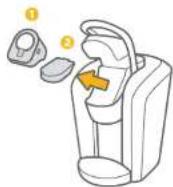
- Press the release buttons on both sides of the Pack Holder Assembly.
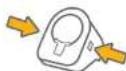
Separate the Pack Holder from the Housing.

- Use a paper clip or similar tool to loosen the clog. Rinse thoroughly with hot water.
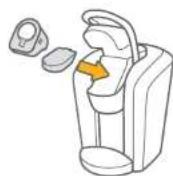
- After all pieces are cleaned, place the Basc, then the Pack Holder Assembly into the Brew Head. Lower the Handle CAUTION: Sharp needles do not put fingers in chamber.
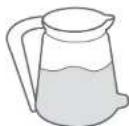
CLEANING THE KEURIG CARAFE
- Carefully empty the Keurig Carafe
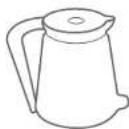
- Wipe the inside of the Keurig Carafe and the lid with a damp, soapy, lint-free, non-abrasive cloth. Rinse thoroughly with hot water. The Keurig Carafe should not be placed in the dishwasher or submerged.
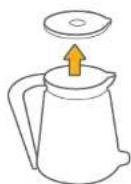
- Remove the lid.
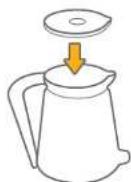
- Replace the lid. Ensure that the lid is securely in place prior to brewing your next carafe of coffee.
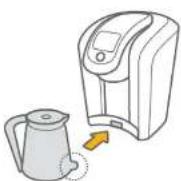
This unique Keurig Carafe was specifically designed for use with the Keurig 2.0 brewer. To connect the Keurig Carafe to the brewer, make sure the Keurig Carafe is securely inserted into the brewer. The Keurig 2.0 brewer contains a sensory system that determines when the Keurig Carafe is in place and it is safe to begin brewing. If the Keurig Carafe is not in place or incorrectly inserted, the brewing process will not begin. If the Keurig Carafe is removed during brewing, brewing will stop.
CAUTION: Make sure the Keurig Carafe is empty before each use.
CAUTION: After brewing, the Keurig' Carafe will contain extremely hot liquid. Take care when pouring from the Keurig" Carafe. Never place your hand over the Keurig' Carafe where hot steam is venting. Never allow children to use the Keurig' Carafe or operate the brewer without adult supervision. Press the Power Button to terminate the brew process. Follow the Instructions on the Touchscreen before removing the Keurig' Carafe. The brewer will return to the home screen. Remove and discard the used K-Carafe' pack.
CAUTION: There is extremely hot water in the Pack Holder during the brew process. To avoid risk of injury, do not lift the Handle during the brewing process.
To maintain the ideal combination of taste, freshness and temperature, we recommend preheating the Keurig' Carale. To preheat the Keurig' Carale, fill it with hot water for approximately 30 seconds and then pour out entirely prior to placing the Keurig' Carafe into the brewer.
CAUTION: HAND WASH ONLY. DO NOT SUBMERGE. DO NOT MICROWAVE.
274
Your brewer is designed to deliver the perfect cup time after time, year after year. To keep it working at peak performance, your Keurig 2.0 brewer will let you know when it needs a little attention.
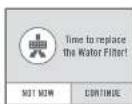
TIME TO REPLACE THE KEURIG WATER FILTER (VISIT KEURIG.COM TO PURCHASE)
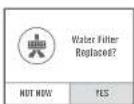
Your brewer will indicate "Time to replace the Water Filter" after every 1,000 ounces or two months. Once you've replaced the Keung"Water Filter, press YES to re-set the WATER FILTER REMINDER notices.


TIME TO DESCALE THE BREWER
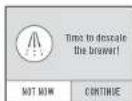
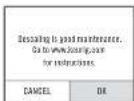
Depending on the mineral content of your water, calcium deposits or scale may build up in your brewer. This is why we recommend using bottled or filtered water. Scale is non-toxic but if left unattended can hinder brewer performance. Regularly scaling your brewer every three to six months helps maintain the heating element, and other internal parts that come in contact with water. Calcium deposits may build up faster, making it necessary to descale more often.
You should promptly descale when the Touchscreen indicates "Time to descale the brewer." However, even if this is not indicated, you should continue to descale your brewer every three to six months.


28 29
DESCALING YOUR BREWER
Before you begin, you will need a large mug, fresh water, Keurig' Descaling Solution and access to a sink. Do not use a paper cup.
- Empty the water from the Water Reservoir. If there is a Kourig Water Filter, remove and set aside. Disable AUTO OFF features, if necessary (refer to page 20).
STEP1:FIRST DESCALING SOLUTION RINSE
- Press and hold the Power Button to power the brewer off.
Pour the entire bottle of Keurig' Dscaling Solution into the Water Reservoir. Then fill the empty bottle with water and pour into the Water Reservoir. Press and hold the Power Button to turn the brewer back on. - Place a large mug on the Drip Tray and run a cleansing brew by pressing and holding the Brew Button until 6 ounces of water has been dispensed. The brewer will automatically stop dispensing after 6 ounces. Do not use a Keurig® brand pack. Pour the contents of the mug into the sink.
STEP 2: SECOND DESCALING SOLUTION RINSE
- Repeat the cleansing brew process until the Touchscreen indicates "More Water Please." Let the brewer stand for at least 30 minutes while still on.
After 30 minutes, discard any residual solution and rinse the Water Reservoir thoroughly.
STEP 3: FRESH WATER RINSE
- Ensure the Water Reservoir is filled with fresh water to and not beyond the MAX FILL line.
- Place a large mug on the Drip Tray and run a cleansing brew. Pour the contents of the mug into the sink.
Repeat the cleansing brew process at least 12 times. You may need to refill the Water Reservoir at least one time during this process: NOTE: it "Time to desighe the brow" is still indicated after completing the procedure, repeat the desigating procedures as
DESCALING YOUR BREWER (CONTINUED)
The cleaning action of Keurig15 Descalging Solution may result in a foam dispensed from the brewer. This is natural, as the solution is reacting with the scale inside. For a brewer that is heavily scaled, the brewer may not fill properly after the descaler is added. If this occurs, you may see only a small or no output dispensed followed by the sound of air blowing out. If this occurs:
- Turn off and unplug the brewer.
- If there is Keurig. Descaling Solution in the Water Reservoir, discard the contents, rinse the Water Reservoir thoroughly and refill with bottled or filtered water.
- Plug the brewer back in, power on, and repeat STEP 3: FRESH WATER RINSE (refer to page 29). The brewer should begin to function normally as the solution is rinsed out and the scale is removed. If the problem persists, allow the brewer to sit unplugged for at least 30 minutes, then continue with the fresh water rinse.
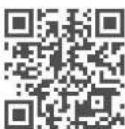
Scan this QR code with your smartphone for stop-by-step videos on cleaning, descaling and more. Or if you prefer, you can watch the videos online at Keurig.com.
The plastic cups of K-Carafe"packs can be recycled wherever #5 plastic is accepted,#5 plastic may not be recyclable in your community today,so please check locally with your municipality or waste hauler,or visit Keurigrecycling.com for more information.

- Once cool, separate the lid and filter from the cup. The filter will adhere to the lid.
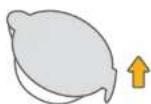
- Once brewing is complete, lift the Handle and carefully remove the K-Carafe pack by holding the outer rim.
CAUTION: The K-Caraca' pack will be split after Enwrning. The Enwrning is not remaining. Allots it to come completely before handling.
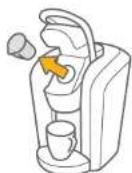
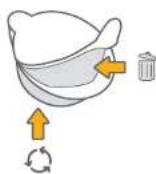
- Once separated, discard the lid and the attached filter. Recycle your K-Carafe pack's plastic cup wherever #5 plastic is accepted.
BREWER DOES NOT HAVE POWER
Plug the brewer into an independent outlet without dimmer control.
- Check to be sure that the brewer is plugged in securely.
Plug the brewer into a different outlet.
- Reset your home's circuit breaker if necessary.
- Press and hold the Power Button and ensure the Touchscreen is illuminated.
BREWER WILL NOT BREW
After placing a pack in the Pack Holder, make sure the Handle is lowered completely and the Touchscreen displays the appropriate brew screen. Follow the brewing instructions in SECTION 1 (refer to pages 10 - 11).
- if the Touchscreen indicates "More Water Please." add water to the Water Reservoir or make sure the Water Reservoir is seated properly in its base.
- If the Touchscreen indicates "More Water Please." even after refilling, remove the Water Reservoir and emphy the water. Then thoroughly clean (refer to page 23). Fill the Water Reservoir to the MAX FILL line, return it to the brewer and ensure it is seated properly in its base.
- The Pack Holder may need to be cleaned (refer to pages 24 - 25) or the brewer may need to be descaled (refer to pages 28 - 30).
- If you have completed the above procedure two times and this situation persists, contact Customer Service at 1.866.901.BREW (2739).
BREWER BREWS ONLY A PARTIAL CUP
Clean the Pack Holder if necessary (refer to pages 24 - 25).
- The Water Reservoir may have been removed during brewing. Replace the Water Reservoir and perform a cleansing brew (refer to page 9) without a pack.
Descale the brewer (refer to pages 28 - 30).
- If you have repeated the descale procedure on your brewer two times and it is still only brewing a partial cup, contact Customer Service at 1.866.901.BREW (2739).
BREWER SHUTS OFF OR TURNS ON AUTOMATICALLY
Check to make sure that the AUTO ON/OFF settings have not been set (refer to page 20).
The water level is low and a full cup cannot be brewed. Add water to the Water Reservoir.
THE TOUCHSCREEN INDICATES "MORE WATER PLEASE."
- If the water level is not low, remove the Water Reservoir and empty the water. Then thoroughly clean (refer to page 23). Fill the Water Reservoir to the MAX FILL line, return it to the brewer and ensure it is seated properly in its base.
THE TIME IS NOT DISPLAYED ON THE TOUCHSCREEN
- if power is interrupted to the brewer by unplugging it, or if power is lost, follow the procedure on page 19 to set the CLOCK.
THE K-CUP PACK HAS A KEURIG LOGO, BUT TOUCHSCREEN INDICATES "OOPS!"
- Your Keurig® 2.0 brewer will not work with packs that don't have the Keurig® logo on them. Some Keurig® brand packs produced prior to January 2014 may not be enabled to work with the Keurig® 2.0 brewer. Please contact Customer Service at 1,866,901.BREW (2739) for a solution.
STILL HAVING TROUBLE? VISIT KEURIG.COM FOR MORE INFORMATION.
LIMITED ONE YEAR WARRANTY
Keurig warrants that your brewer will be free of defects in materials or workmanship under normal home use for one year from the date of purchase. It is recommended that you fill out and return the warranty card enclosed with your brewer so that your purchase information will be stored in our system. Keurig will, at its option, repair or replace a defective brewer without charge upon its receipt of proof of the date of purchase. If a replacement brewer is necessary to service this warranty, the replacement brewer may be new or reconditioned. If a replacement brewer is sent, a new limited one year warranty will be applied to the replacement brewer.
This warranty only applies to brewers operated in the United States and Canada. This warranty gives you specific legal rights, and you may also have other rights that vary from state to state and, in the case of Canada, from province to province.
The Keurig® 2.0 brewer is designed to only work with Keurig® brand packs. Any damage to or malfunction of your brewer resulting from the use of non-Keurig® brand packs and accessories may not be covered by this warranty or may result in a service fee if the damage or malfunction is determined to be caused by such use.
WHAT IS NOT COVERED BY THE LIMITED WARRANTY?
THIS WARRANTY DOES NOT COVER CONSEQUENTIAL OR INCIDENTIAL DAMAGES. SUCH AS PROPERTY DAMAGE AND DOES NOT COVER INCIDENTAL COSTS AND EXPENSES RESULTING FROM ANY BREACH OF THIS WARRANTY. EVEN IF FORESEEAABLE. Some states or provinces do not allow the exclusion or limitations of incidental or consequential damages, so the above limitation or exclusion may not apply to you depending on the state or province of purchase.
Nor does this warranty cover damages caused by use of non-Keurig brand packs or accessories, services performed by anyone other than Keurig or its authorized service providers, use of parts other than genuine Keurig parts, or external causes such as abuse, misuse, inappropriate power supply or acts of God.
OTHER LIMITATIONS
THIS WARRANTY IS EXCLUSIVE AND IS IN LIEU OF ANY OTHER EXPRESS WARRANTY, WHETHER WRITTEN OR ORAL. IN ADDITION, KEURIG HEREBY SPECIFICALLY DISCLAIMS ALL OTHER WARRANTYES WITH RESPECT TO YOUR K20-500 BREWER, INCLUDING ANY IMPLIED WARRANTY OF MERCHANTABILITY OR FITNESS FOR ANY PARTICULAR PURPOSE. Some states or provinces do not allow disclaimers of such implied warranties or limitations on how long an implied warranty lasts, so the above limitation may not apply to you depending on the state or the province of purchase.
HOW DO YOU OBTAIN WARRANTY SERVICE?
Keurig®brewers are high-quality appliances and, with proper care, are intended to provide years of satisfying performance. However, should the need arise for warranty servicing, simply call Keurig Customer Service at our toll free phone number 1.866.901BREW (2739). Please do not return your brewer for servicing without first speaking to Keurig Customer Service to obtain an Authorization to Return number (ATR). Keurig®brewers returned without an ATR number will be returned to the sender without servicing.
Keurig, Incorporated
33 Coffee Lane
Waterbury, VT (
1.866.901.BREW(2739)