Espresso Master 113 - Coffee machine Solis - Free user manual and instructions
Find the device manual for free Espresso Master 113 Solis in PDF.


User questions about Espresso Master 113 Solis
0 question about this device. Answer the ones you know or ask your own.
Ask a new question about this device
Download the instructions for your Coffee machine in PDF format for free! Find your manual Espresso Master 113 - Solis and take your electronic device back in hand. On this page are published all the documents necessary for the use of your device. Espresso Master 113 by Solis.
USER MANUAL Espresso Master 113 Solis
Instructions for use

OF SWITZERLAND
SOLIS Espresso Master
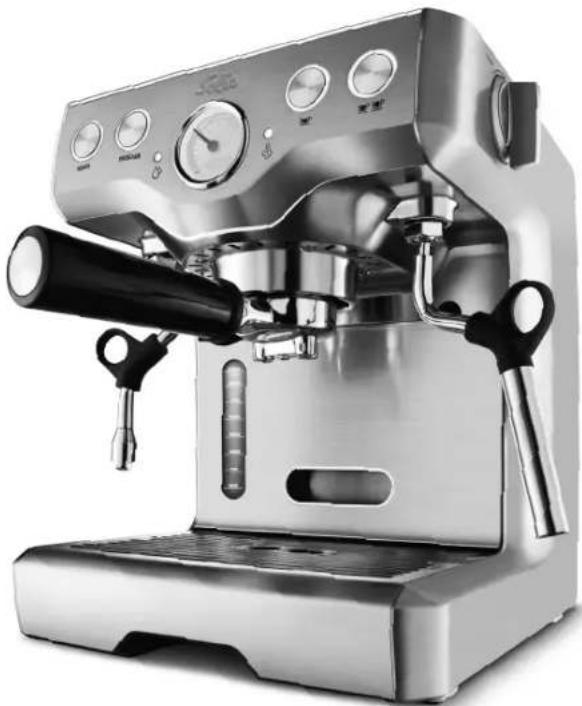
Typ/Type 113
Inhaltsverzeichnis
SOLIS you felicite 26
Securite / Elimination Page 27
Safety / Disposal . 49
Features of your SOLIS Espresso Master programmable .Side 50-51
Know your programmable SOLIS Espresso Master 52-53
Assembling your SOLIS Espresso Master .Side 54-55
Operating your SOLIS Espresso Master .Side 56-59
How to texture milk for a capuccino or latte Side 60-61
Using the hot water function. 62
Coffee making tips. Side 62-63
Care and cleaning .Side 64-66
Trouble shooting guide .Side 67-69
SOLIS gratuliert
Espresso programme - DOUBLE Espresso
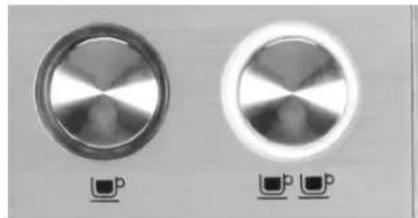
on the purchase of your new SOLIS Espresso Master
From its heavy-duty housing and professional-grade functionality through to its superior and easy operation, SOLIS Espresso Master was designed for the true coffee connoisseur. In developing this booklet, our goal was to provide you with the fundamental point from which you can start to discover the incredible versatility of your SOLIS Espresso Master; the Espresso Machine that delivers simply superior coffee. Our hope is that with each page, you gain increasing pleasure from your SOLIS Espresso Master and its ability to help you create a wonderfully broad range of flavour-rich coffees.
We would just like to say thank you and... enjoy.
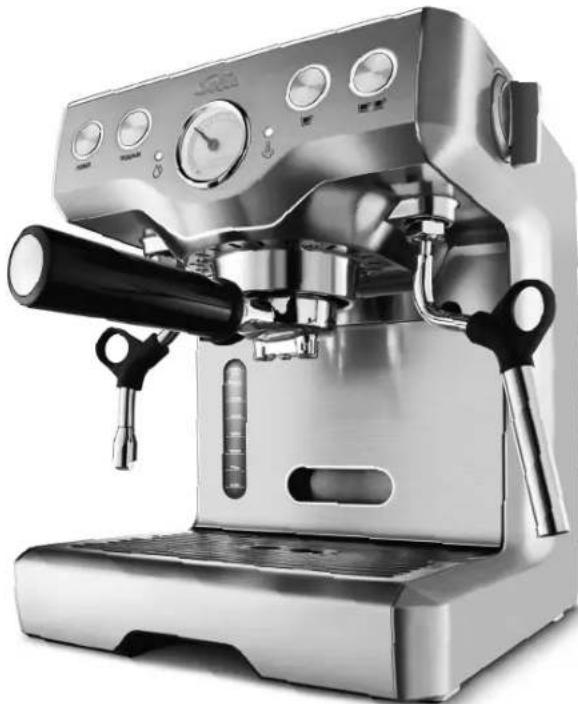
SOLIS recommends safety first
We at Solis are very safety conscious. We design and manufacture consumer products with the safety of you, our valued customer foremost in mind. In addition we ask that you exercise a degree of care when using any electrical appliance and adhere to the following precautions:
IMPORTANT SAFEGUARDS FOR YOUR SOLIS ESPRESSO MASTER AND FOR ALL ELECTRICAL APPLIANCES
- Carefully read all instructions before operating and save for future reference.
- Do not place the SOLIS Espresso Master near the edge of a bench or table during operation.
Ensure the surface is level, clean and free of water.
- Remove any promotional stickers before using the SOLIS Espresso Master for the first time.
- Do not place the SOLIS Espresso Master or near a hot gas or electric burner, or where it could touch a heated oven.
Always make sure the SOLIS Espresso Master is properly assembled before connecting to power outlet and operating. - Use only cold water in the water tank. Do not use any other liquid.
- Never use the SOLIS Espresso Master without water in the water tank.
-
Ensure the filter holder is firmly inserted and secured into the brewing head before using the machine.
-
Never remove the filter holder during the brewing operation as the machine is under pressure.
- Do not leave the SOLIS Espresso Master unattended when in use.
- Do not touch hot surfaces. Allow the SOLIS Espresso Master to cool down before moving or cleaning any parts.
- Do not place anything, other than cups for warming, on top of the SOLIS Espresso Master.
Always switch the SOLIS Espresso Master off, and unplug if appliance is to be left unattended, if not in use, before cleaning, before attempting to move the appliance, disassembling, assembling and when storing the appliance. - Keep the appliance and accessories clean. Follow the cleaning instructions provided in this book.
- Unwind the cord before use.
- To protect against electric shock, do not immerse cord, plug or appliance in water or any other liquid.
- Do not let the cord hang over the edge of a table or counter, touch hot surfaces, or become knotted.
- This appliance is not intended for use by young children or infirm persons without supervision.
- Young children should be supervised to ensure that they do not play with the appliance.
- It is recommended to inspect the appliance regularly. Do not use the appliance if power supply cord, plug or appliance becomes damaged
in anyway. Return the entire appliance to the nearest authorised SOLIS Service Centre for examination and/or repair.
- Any maintenance other than cleaning should be performed at an authorised SOLIS Service Centre.
- This appliance is for household use only. Do not use this appliance for anything other than its intended use. Do not use in moving vehicles or boats. Do not use outdoors.
- The installation of a residual current device (safety switch) is recommended to provide additional safety protection when using electrical appliances, (available from most leading supermarkets, department stores and hardware stores or Solismail, www.solis-mail.ch).
Disposal of appliance

2002/96/EC
In conformity with Directive 2002/96/EC on waste electrical and electronic equipment (WEEE), at the end of its life the unit should be taken to an electrical appliance collection point for its environmentally friendly disposal.
Features of your SOLIS Espresso Master programmable
Programmable Function
This espresso machine offers a convenient choice between the Manual Operation or the intelligent Programmable Function that can be personalised with the user's favourite espresso setting.
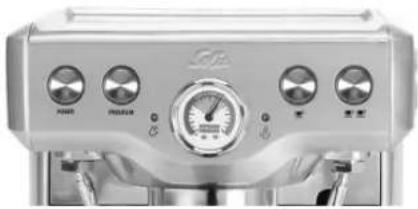
Espresso Pressure Gauge
The espresso pressure gauge assists in obtaining the most favourable extraction pressure, guiding the user to create their ideal espresso. This is achieved by measuring the pressure at which the water is being forced through the ground coffee in the filter holder.
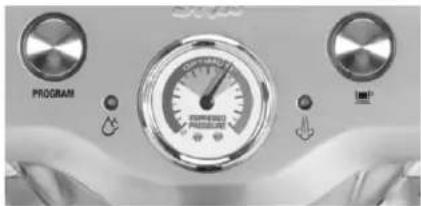
50
Ideal Espresso - Optimum Zone
The gauge needle when positioned within the recommended Optimum Zone during pouring indicates that the espresso will be produced at the ideal pressure. The brewed espresso should have a generous layer of fine textured and evenly coloured golden crème.
Under Extracted Espresso
The gauge needle when positioned below the Optimum Zone during pouring indicates that the espresso will be produced with insufficient pressure resulting in an 'under extracted' espresso. This occurs when the water flow through the ground coffee in the filter is too fast. As a result the optimal flavour will not be extracted and the coffee will be watery and lack thick crème on the top. Possible other causes for under extraction are: coffee grind is too coarse and/or insufficient coffee in filter and/or under tamping.
Over Extracted Espresso
The gauge needle when positioned above the Optimum Zone during pouring will indicate that the espresso will be produced with too much pressure resulting in an 'over extracted' espresso. This occurs when the water flow through the ground coffee in the filter is too slow. As a result the coffee will be very dark and bitter, with a mottled and uneven crème on top. Possible other causes for over extraction are: ground coffee is too fine and/or too much ground coffee in filter and/or over tamping.
Hot Water Wand
The dedicated hot water wand is ideal for making your favourite hot drinks. For convenient use the wand has a commercial style 360^ ball joint.
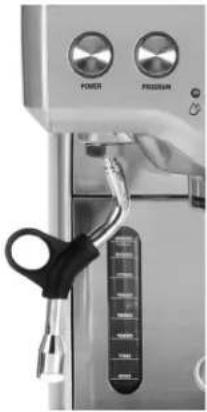
Commercial Style Steam Wand
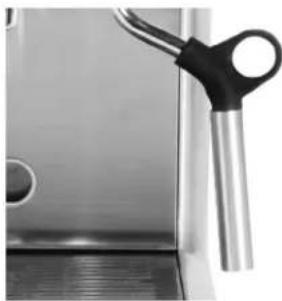
The swivel-action steam wand, with stainless steel frothing attachment, easily adjusts to the perfect position for texturing milk. The wand has a commercial style 360^ ball joint.
Advanced Dual Wall Créma Systems Filters Advanced Dual Wall Créma System Filters (one and two cup) are supplied with the SOLIS Espresso Master Programmable Espresso Machine.
The Advanced Dual Wall Créma System Filters are designed to intentionally slow the water flow rate during brewing, allowing you to easily pour your espresso at the ideal pressure, for the perfect créma.
Electronic Temperature Control
The electronic temperature control system accurately maintains the optimal brewing temperature of the water. This helps ensure the user gets the best possible extraction each time an espresso is made.
Energy Saving Features
The SOLIS Espresso Master will enter the 'Power Save Mode' if not used for one hour, and will automatically switch off if not used for a further three hours. The 'Power Save Mode' uses 45% less power than when the machine is in 'Stand by' Mode.
During 'Power Save Mode' only the POWER button surround will be illuminated. All other button and light surrounds will not be illuminated.
To re-activate the machine during 'Power Save Mode', simply press the program or one-cup or two-cup buttons. The POWER button surround will then illuminate and flash while the machine quickly reheats to operational temperature. When the correct temperature has been reached, all the button surrounds on the control panel will illuminate.
To switch off the espresso machine whilst it is in 'Power Save Mode', simply press the POWER button once.
Know your programmable SOLIS Espresso Master
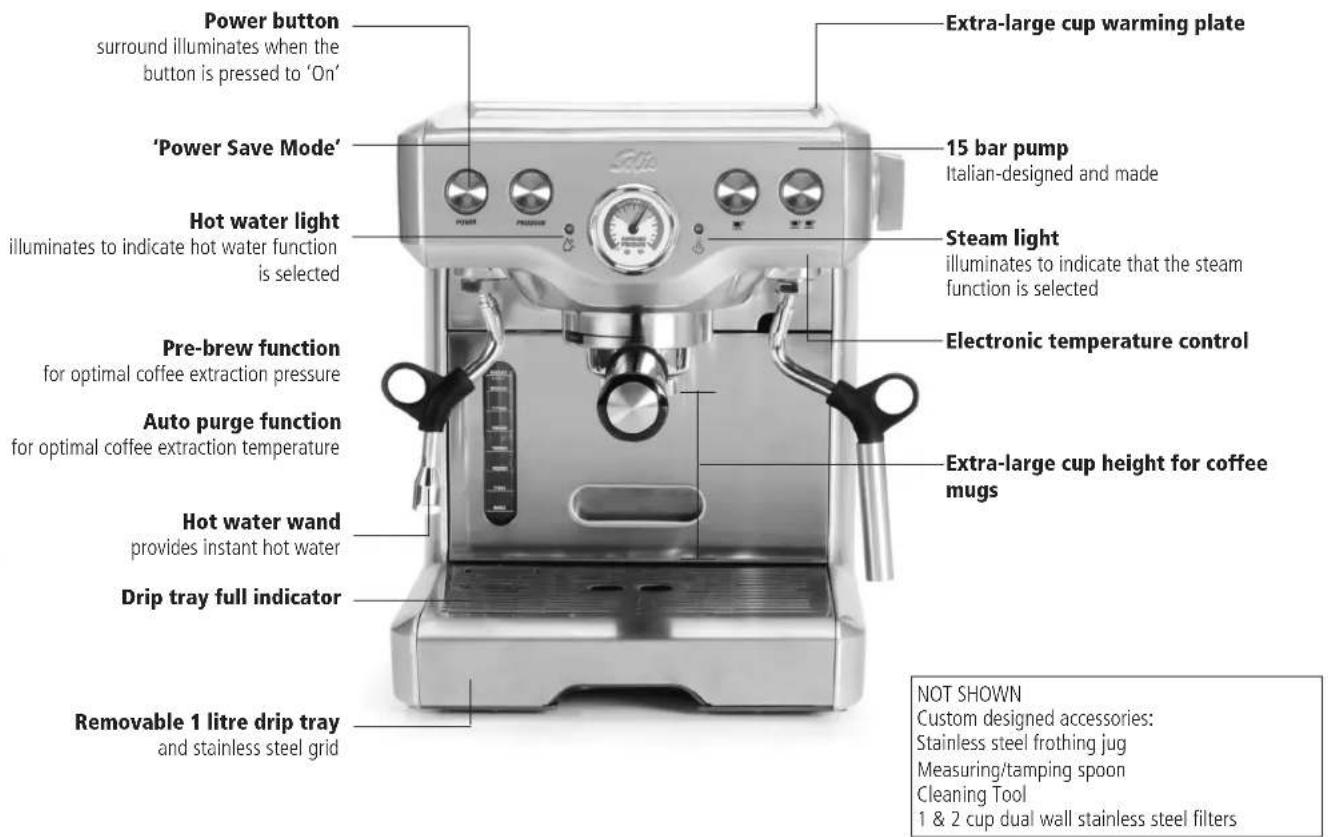
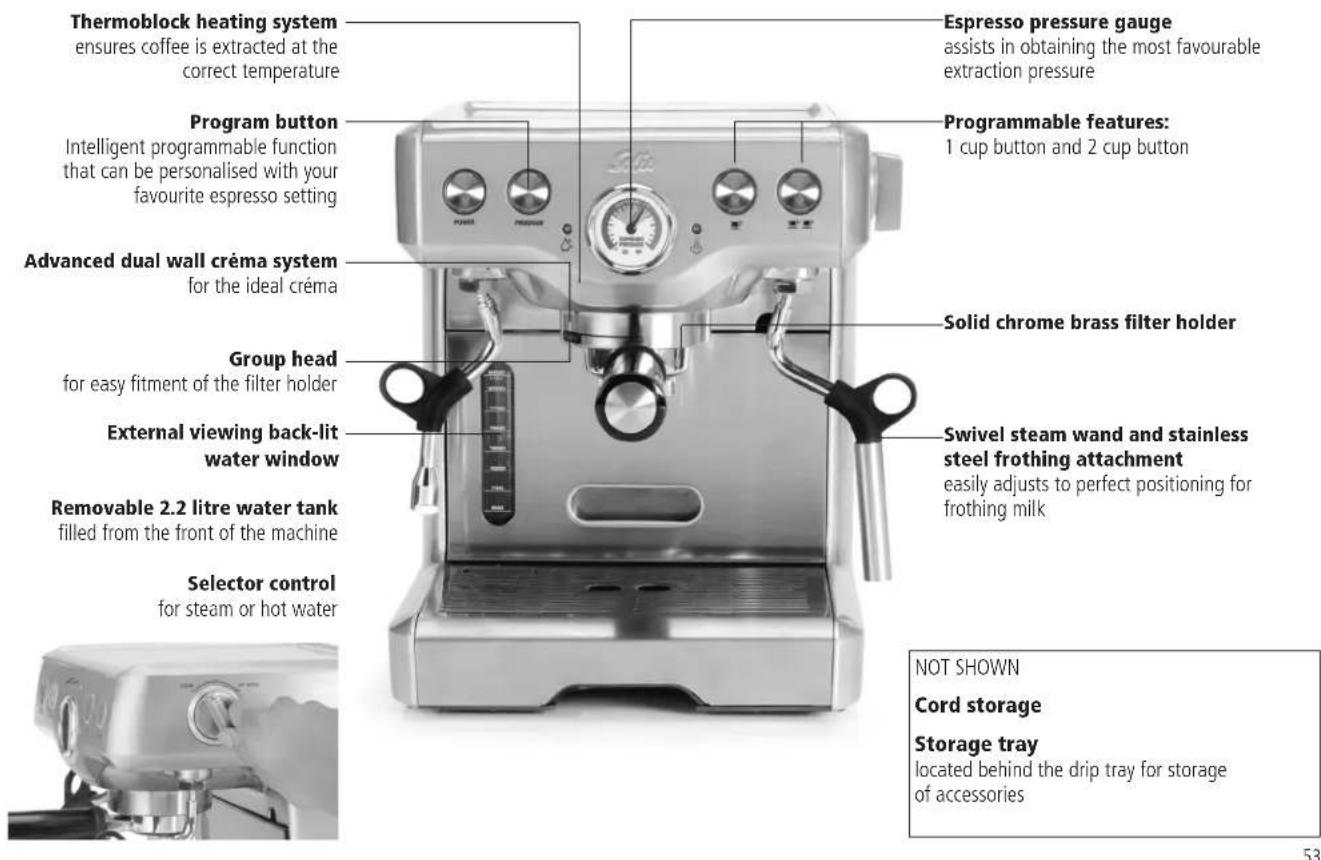
Know your programmable SOLIS Espresso Master
Assembling your SOLIS Espresso Master
Your SOLIS Espresso Master will have the Drip Tray, Storage Tray and Water Tank in place when you unpack it from the box.
The Storage Tray is located at the base of the machine against the back wall. The Drip Tray is located in the base of the machine in front of the Storage Tray. The Water Tank is located over the Drip Tray, in the front opening of the machine.
The 2 stainless steel Filters, Cleaning Tool, Measuring/ tamping Spoon, Filter Holder and Frothing Jug will all be packed inside the foam packaging. Ensure you have located all parts and accessories before setting the packaging aside.
The original packaging has been designed to be especially robust so that the machine can be dispatched by the postal service. Therefore please keep the packaging materials in case it is necessary to return the machine.
The Storage Tray is a convenient location to store the Cleaning Tool, stainless steel filters and Measuring/ tamping Spoon when not in use, so they are not misplaced.
Remove the Drip Tray, Water Tank and Storage Tray and wash all parts and accessories in warm, soapy water using a non-abrasive washing liquid. Rinse and dry thoroughly.
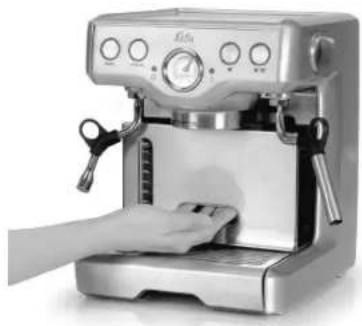
NOTE: Do not clean any of the parts or accessories in the dishwasher.
Assembling your SOLIS Espresso Master
To reassemble: STEP 1
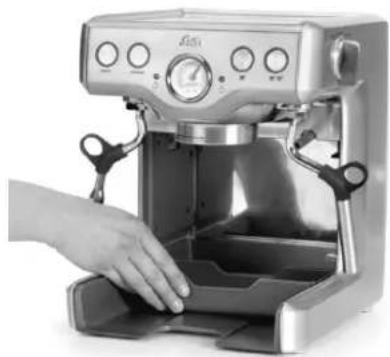
Insert the storage tray into the base of the machine and slide towards the back wall. The storage tray conveniently stores the cleaning tool, stainless steel filters, measuring/tamping spoon and Quick Guide when not in use, so they are not misplaced.
STEP2
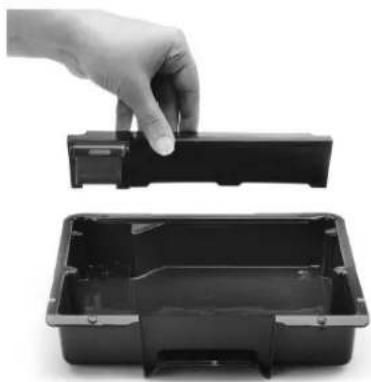
Place the Drip Tray full Indicator into the the Drip Tray and then place the stainless steel grid on top. Slide the Drip Tray into the base of the machine in front of the Storage Tray.
STEP3
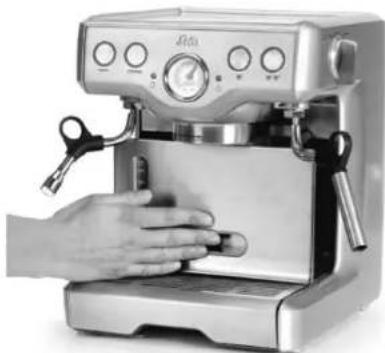
Slide the water tank over the drip tray and into the front opening of the machine and into position above the storage tray. Ensure the water tank aligns flush with the sides of the machine.
NOTE: Before each use it is recommended to complete a water flushing operation, without ground coffee, to ensure that all internal piping has been preheated. Refer to Steps 1 and 4 in 'Operating your SOLIS Espresso Master', page 56 and 57.
Operating your SOLIS Espresso Master
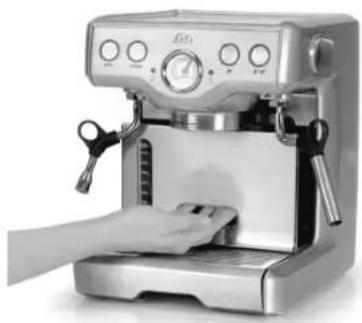
STEP 1 - filling the water tank
- Ensure the Power button is in the 'Off' position and the Selector Control, on the side of the machine, is set to the Standby position.
- Unplug the power cord.
- Remove the filter holder if locked into the brew head and move the steam wand to the side of the machine.
-
Remove the water tank by sliding out using the handle insert in the front of the water tank.
-
As the water tank is removed, a black tube slides and extends out from the water tank storage area. Do not touch or try to remove this tube, it will automatically slide back into position when the water tank is re inserted.
- Fill the water tank with cold, tap water to the maximum mark on the water window and slide the water tank carefully back into position in the machine.
- Ensure the Selector Control is in the 'Standby' position and plug the power cord into a 230V power outlet and switch on.
- Press the POWER button to 'On', the POWER button surround will flash while the machine is heating. When the correct temperature has been reached, all the button surrounds on the control panel will illuminate.
NOTE: Check the water level before use and replace the water daily. The water tank should be refilled with fresh, cold tap water before each use. Do not use mineral or distilled water or any other liquid.
STEP 2 - pre-warming the cups
The Cup Warming Plate will start to warm as the machine heats.
- Pre-warm the espresso cups by placing on the Cup Warming Plate. This will help maintain the coffee's optimal temperature when brewed into the cups.
STEP 3 - preparing the coffee
- Place the 1 or 2 cup filter into the filter holder (use the smaller filter for 1 cup and the larger filter for 2 cups). When brewing for a mug of coffee always use the 2 cup filter and only extract 60ml . If you require a larger coffee, add the hot water first and then brew the coffee.
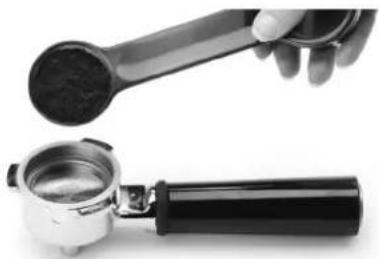
- Preheat the filter holder by placing underneath the group head. Rinse with hot water from the wand using the hot water function or from the group head and rinse with hot water using the manual pour function. Dry the filter and filter holder thoroughly before use.
- Use 1 level measure of ground espresso coffee for the 1 cup filter and 2 level measures for the 2 cup filter. It is important to use the correct amount of coffee for each filter as the filter perforations have been constructed to utilise the pressure in the machine to extract optimal flavour with each brewing. Refer to 'The Coffee Making Tip', page 62-63.

STEP 4 - tamping the ground coffee
- Distribute the ground coffee evenly in the filter and press down lightly with the tamping end of the measuring spoon. Refer to 'Coffee Making Tips', page 62-63.
Clean any excess ground coffee from the rim of the filter holder to ensure a proper fit into the group head.
STEP 5 - priming the group head
- Before placing the filter holder into position, it is recommended to run a short flow of water through the group head.
- Place a container or empty cup under the group head.
- With the filter holder removed, prime the group head by pressing and holding down the single or double cup button for approximately 5 seconds. Refer to 'Manual Espresso', page 59. A pumping noise will be heard during this operation, and water will run through the group head.
NOTE - pre-warming the cups
- The Cup Warming Plate will start to warm as the machine heats.
- Pre-warm the espresso cups by placing on the Cup Warming Plate. This will help maintain the coffee's optimal temperature when brewed into the cups.
STEP 6 - inserting the filter holder
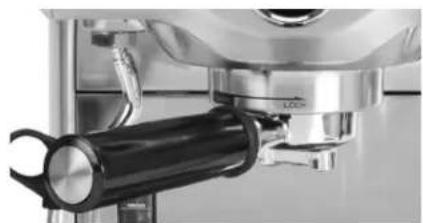
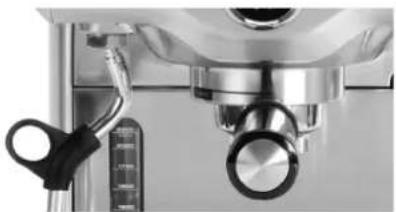
- Place the filter holder underneath the group head so that the handle is aligned with the insert graphic. Insert the filter holder up into the group head and rotate the handle to the right until resistance is felt, this will be at an approximate 90^ angle to the machine.
STEP 7 - brewing the coffee
-
Ensure all the button surrounds on the control panel are illuminated, indicating the machine has reached the correct temperature for brewing, and is ready for use.
-
Ensure the drip tray and filter holder are in place.
- Place one or two pre-warmed cups beneath the filter holder outlet.
Programmed Espreso - ONE Cup
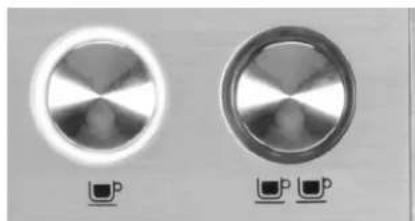
Press the one cup button once. After a few seconds, aromatic coffee will begin to pour into the cup. A pumping noise will be heard in this operation. The machine will automatically stop once the preset pour has been delivered.
Programmed Espreso - DOUBLE Cup
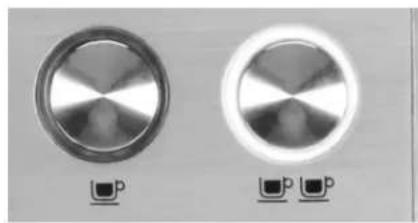
Press the two cup button once.
After a few seconds, aromatic coffee will begin to brew into the cup. A pumping noise will be heard in this operation. The machine will automatically stop once the preset pour has been delivered.
NOTE: The minimum pour for one cup and two cups is set at 15ml.
NOTE: Pressing the one cup or two cup buttons during a programmed espresso will immediately stop the pour.
Programming Single Espreso
- Prepare to make a single cup of espresso by following steps 2 to 6 in 'Operating your Espresso Machine', pages 56-58.
- Place your cup underneath the group head.
- To begin programming, press the 'PROGRAM' button once. The machine will beep once and the program button will begin to flash. This indicates the machine is in programming mode.
- Press the one cup button once. The machine will commence normal pour function, and the one cup button surround will begin to flash.
- When the desired amount of espresso has poured into the cup, press the one cup button to stop the pour. The machine will beep twice, indicating it has saved your measured pour quantity and exited rogramming mode.
Programming Double Espreso
- Prepare to make a two cup of espresso by following steps 2 to 6 in 'Operating your Espresso Machine', pages 56-58.
- Place your cup underneath the group head.
- To begin programming, press the 'PROGRAM' button once. The machine will beep once and the program button will begin to flash. This indicates the machine is in programming mode.
- Press the two cup button once. The machine will commence normal pour function, and the two cup button surround will begin to flash.
- When the desired amount of espresso has poured into the cup, press the two cup button to stop the pour.
The machine will beep twice, indicating it has saved and exited programming mode.
Resetting Default Volumes
To reset the machine to the default one and two cup pour quantities, press and hold the program button, until the machine beeps three times. Release button. This indicates the machine has returned to its original default settings.
NOTE: Default settings: one cup pour is approximately 30ml. Two cups is approximately 60ml.
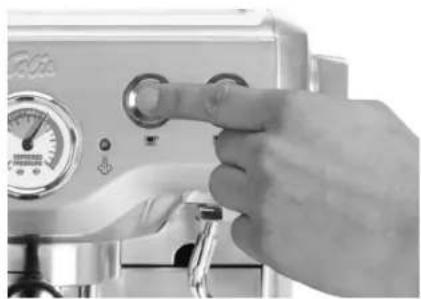
Manual Espresso
Press and hold the single or two cup button. Release the button once sufficient coffee has flowed into the cup.
STEP 8 - emptying the filter holder
Remove the filter holder from the group head by rotating the filter holder to the left until it releases. To empty the used coffee grounds, turn the filter holder upside down in a bin and gently tap out the coffee (used coffee grounds should be thrown away with domestic waste and not down the sink which may block drains). Remove the filter by using the indents on the side of the filter holder. Rinse the filter and filter holder with water and allow to dry.
WARNING: The metal parts of the filter holder may still be very hot. Cool these parts in cold water.
NOTE: PRE-BREW FUNCTION -
When a single or double coffee is selected, the machine will pump water momentarily, followed by a pause then continues to pump the water through to the ground coffee in the filter holder. The ground coffee is moistened by a small amount of water before full extraction then expands resulting in greater pressure build-up to extract all the oils and full flavour from the ground coffee.
How to texture milk for a capuccino or latté
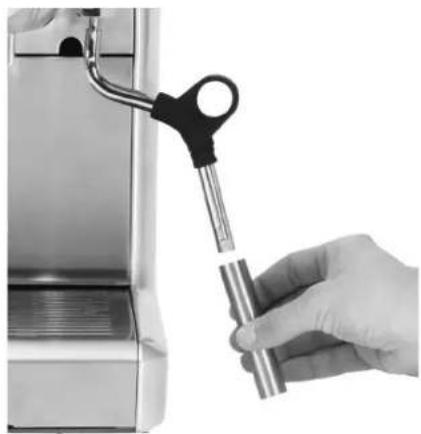
The SOLIS Espresso Master comes complete with a Commercial Style Swivel Steam Wand and Stainless Steel Frothing Attachment. When using the frothing attachment on the steam wand a large amount of froth is easily created.
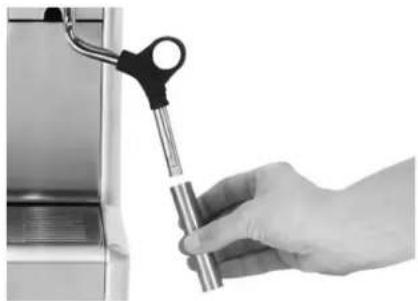
If less texture is required, remove the frothing attachment from the steam wand and steam the milk using the steam wand. To remove the frothing attachment, ensure it is cool then simply pull down and remove. The frothing attachment can be stored in the storage tray inside the machine if not used regularly.
60
To refit the frothing attachment ensure it is securely attached to the steam wand by inserting it, from either opening, onto the steam wand and pushing firmly upwards onto the rubber surround. Ensure the fine steam holes on either end of the frothing attachment are clean to achieve optimal texturing.
- Press the POWER button to 'On'.
The first step in making a cappuccino or latte is to make a short espresso. Refer to 'Operating your Espresso Machine', pages 56-58. - Then fill the stainless steel frothing jug 13 full with cold, fresh milk.
- Turn the Selector Control to the 'Steam' position. The white steam light will start to flash indicating that the Thermoblock Heating System is heating and preparing to create steam.
- For improved results, purge the steam wand of water before placing into the milk.
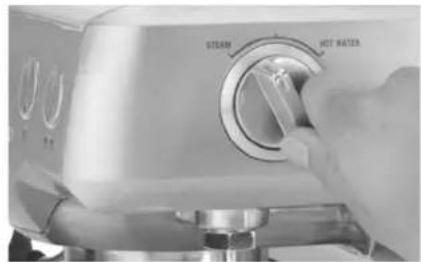
NOTE: When the espresso machine creates steam, a pumping noise can be heard. This is the normal operation of the 15 Bar pump.
- When the steam light stops flashing, quickly insert the steam wand into the jug of milk so that the froth attachment is just immersed into the milk.
NOTE: If steam starts coming from the steam wand before it is immersed in the milk, pause the steam by turning the Selector Control back to the 'Standby' position. This will avoid the steam pressure blowing milk out of the jug.
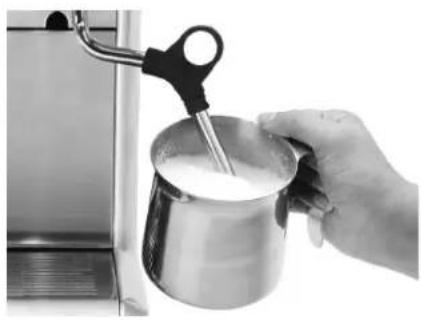
- Hold the frothing jug at an angle so that steam wand and/or the frothing attachment sits just below the surface of the heating milk and the steam will move the milk around the inside of the jug in a circular motion.
NOTE: The espresso machine features a swivel steam wand assembly so the position of the steam wand can be changed to a comfortable angle.
- When the milk starts to increase in volume, immerse the steam wand and/or frothing attachment deeper into the jug to heat the milk.
- Hold the jug at an angle with one hand and place your other hand on the outer base of the stainless frothing jug.
- When the base of the jug becomes too hot to touch, set the Selector Control to the 'Standby' position, stopping the steaming function before removing the jug. A pumping noise will sound for a short time, do not be alarmed as there will be a five second delay prior to the machine carrying out the Auto-purge function.
- Pour the steamed milk into each cup of freshly brewed espresso coffee and spoon in the frothing milk, in the following ratios:
Cappuccino - 1/3 teaspoon, 1/3 steamed milk, 1/3 frothed milk
Latte -1 / 3 espresso topped with steamed milk and approximately 1cm frothed milk, traditionally served in a glass.
NOTE: After 5 minutes of continuous steaming, the machine will automatically disable the steam function. The steam and hot water lights will flash. When this occurs return the selector control to the 'Standby' position.
NOTE: Always ensure that the frothing attachment has been firmly pushed onto the steam wand and connects with the rubber surround. For best results use cold fresh milk (lowfat milk will froth easier). Always clean the steam wand and frothing attachment after every use. Refer to 'Care and Cleaning', page 64.
NOTE: For brewing more coffee immediately after using the steam function, this machine features an auto-purge function. This ensures that ground coffee will not be burnt by the initial water flow from the thermoblock being too hot. Instead this water is automatically released internally into the drip tray ensuring that the internal thermostat is at optimal temperature for extracting coffee. Your coffee will always be extracted at this optimal temperature ensuring only the best flavoured coffee is achieved.
WARNING: Milk should not be allowed to run over the top of the frothing attachment, otherwise it will not function properly. To avoid splattering of hot milk, do not lift the end of the frothing attachment above the surface of the milk while frothing. Ensure the selector control is in the 'Standby' position before removing the frothing jug.
Using the hot water function
The SOLIS Espresso Master features a separate hot water function that can be used for making tea, hot chocolate and other warm drinks. The hot water is dispensed from the dedicated Hot Water Wand.
Place a jug or cup underneath the Hot Water Wand to collect the hot water.
To use the hot water function, turn the Selector Control to HOT WATER. The hot water light will illuminate when selected.
To turn the hot water off, turn the Selector Control to the 'Standby' position.
Limit the extraction of hot water to 2 litres each use.
The machine is not designed to make large pots of coffee and tea. The more hot water used at the one time, the cooler it becomes.
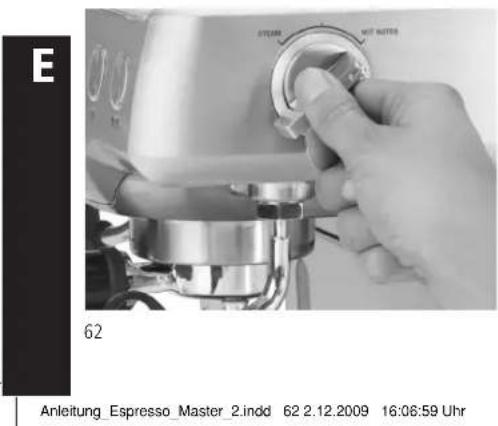
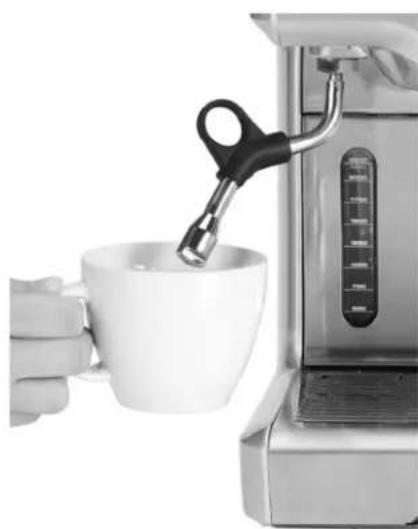
NOTE: After 2 minutes of continued hot water use, the machine will automatically disable the hot water function. The steam and hot water lights will flash. When this occurs return the selector to the 'Standby' position.
Coffee making tips
Warming your cup or glass
A warm cup will help maintain the coffee's optimal temperature. Preheat your cup by storing on the cup warming tray or rinsing with hot water from the hot water wand.
Warming the filter holder
A cold filter holder can drop the extraction temperature enough to significantly affect the quality of your coffee. Always ensure the filter holder is preheated by running hot water through it before tamping it with coffee.
NOTE: Always wipe the filter and filter holder dry before tamping with ground coffee as moisture can encourage 'drilling' - this is when water bypasses the ground coffee during extraction.
The grind
If using a pre-ground coffee, ensure an espresso grind suitable for espresso/cappuccino machines is purchased.
If grinding coffee beans, the grind should be fine but not too fine or powdery. The grind will effect the rate at which the water flows through the coffee in the filter and therefore the taste of the coffee.
If the grind is too fine (looks like powder and feels like flour when rubbed between fingers), the water will not flow through the coffee even when under pressure. The resulting coffee will be over extracted, too dark and bitter, with a mottled and uneven crème on top.
If the grind is too coarse the water will flow through the coffee too quickly. This will result in an under-extracted coffee lacking in flavour and without the thick crème on the top layer of coffee.
The right measurement
A single espresso is made with 14 ounce or 7g of coffee. A level measure of the tamp/spoon is the correct amount of coffee for a single espresso and 2 level measures for a double espresso. It is important to use the correct filter for the amount of coffee.
Tamping correctly
Level the desired amount of coffee by gently tapping the side of the filter holder before pressing down firmly with the tamping end of the measuring spoon.
When packing for a double espresso it is important only to tamp after the second measure. Tamping between measures will create a layer in the coffee that can impede full extraction.
PURGE THE GROUP HEAD
Before inserting the filter holder, run some water through the group head. It will ensure that your machine has a last minute 'clean through' and stabilises the temperature prior to extracting.
NOTE: Make sure to wipe off any excess coffee from the rim of the filter to ensure a proper seal is achieved under the group head.
BREWING YOUR ESPRESSO
The most common mistake in brewing is to over
extract from your ground coffee. This results in a bitter beverage with visibly bleached crème. Crème is the caramel coloured layer that floats on top of the coffee following extraction.
NOTE: The taste of your coffee will, of course, depend on personal preference and on many other factors such as the type of coffee bean used, the coarseness or fineness of the grind and the tamping pressure (pressed down). We recommend experimenting by varying these factors to achieve the coffee taste of your preference.
The optimally harmonised interaction of coffee and machine is a vital prerequisite for absolutely first-class results.
The SOLIS ESPRESSO MASTER meets the highest standards and guarantees a consistently perfect coffee quality. And to ensure that the results you get are always outstanding, please keep the following few points in mind:
Using coffee portions («pads» or «pods»)
- Please do not use «hard» portions. These products are also known as «E.S.E.-pads», Comprehensive tests have shown that soft portions such as the «creminopresso cialda», by Chicco d'Oro are especially suited to use with this machine. Make sure these portions are
inserted into the 1-cup filter with the cambered side facing down. These portions can be ordered at www.solis-mail.ch, or by telephone: 0848 804 884 or fax: 0848 804 890 (available in Switzerland only). Order No. 992.09 (24 portions) or 992.30 (100 portions).
- Coffee portions may only be used together with the 1-cup filter. Never use the 2-cup filter!
- Press the coffee portion firmly into the 1-cup filter and tighten the filter holder well (all the way to the stop).
Using ground coffee beans
- Coffee residue can collect in the filter inserts. They have to be kept clean in order to ensure optimum flow. Therefore: please clean the inserts as described in section «Care and cleaning».
Decalcifying the machine
- The calcium contained in the water settles in the machine and, as well as reducing the service life of the machine, affects the quality of your coffee. We hence advise you to decalcify your machine at regular intervals. For details please refer to section «Care and cleaning».
Do you need help?
- The SOLIS ESPRESSO MASTER is extremely reliable. It will delight you with superb results, day in and day out, provided it is used and cared for appropriately. If you should nevertheless have a question regarding machine operation, please phone us (044 874 64 14; for customers in Switzerland only). We will be delighted to help you!
Care and cleaning
Cleaning the Steam Wand and Frothing Attachment
The steam wand and frothing attachment should always be cleaned after frothing milk
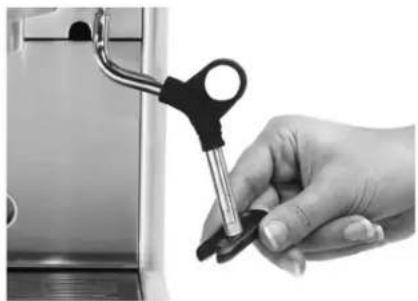
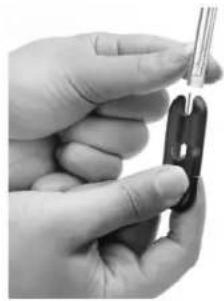
- Remove the frothing attachment and rinse in warm tap water. Ensure the two fine steam holes on either end of the frothing attachment are clear. Use the pin on the cleaning tool to unblock these holes.
- Wipe the steam wand with a damp cloth, and then with the steam wand directed back into the drip tray, briefly set the Selector Control to the 'Steam' position. This will clear any remaining milk from inside the steam wand.
- Ensure the Selector Control is in the 'Standby' position. Press the POWER button to off, switch off at the power outlet, unplug the power cord and allow the machine to cool.
- If the Steam Wand remains blocked, use the pin on the cleaning tool to clear the opening.
- If the steam wand continues to be blocked, the tip of the steam wand can be removed by using the spanner in the middle of the cleaning tool.
- Soak the tip in hot water before using the pin on the cleaning tool to unblock. Replace the tip back onto the steam wand and secure with the cleaning tool.
Cleaning the Filters, Filter Holder and Group Head
- The stainless steel filters and filter holder should be rinsed under water directly after use to remove all coffee particles. Should the fine holes in the filters become blocked, the fine pin on the cleaning tool can be used to clear the holes.
- The group head interior should be wiped with a damp cloth to remove any ground coffee particles.
Periodically run water through the machine with the filter holder in place, but without any ground coffee, to rinse out any residual coffee particles.
Cleaning the Outer Housing / Cup Warming Plate
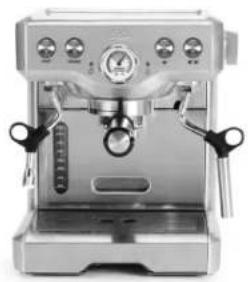
- The outer housing and cup warming plate can be cleaned with a soft, damp cloth. Then polish with a soft, dry cloth. Do not use abrasive cleansers, pads or cloths which can scratch the surface.
Cleaning the Drip Tray
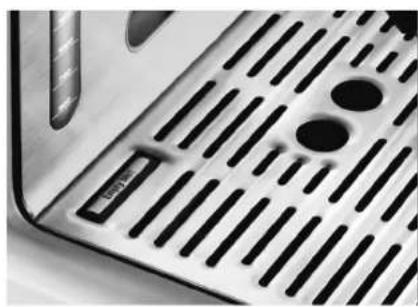
- The drip tray should be removed, emptied and cleaned at regular intervals, particularly when the drip tray full indicator is showing 'Empty Me!'.
- Remove the stainless steel grid and 'Empty Me!' indicator from the drip tray, wash with warm soapy water, using a non-abrasive washing liquid, rinse and dry thoroughly. The 'Empty Me!' indicator can be removed from the drip tray by inserting fingers into two holes in the corners and pulling upwards to release the side latches.
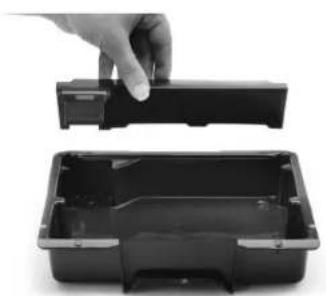
Cleaning the Storage Tray
- The storage tray can be removed after the drip tray is removed then cleaned with a soft, damp cloth (do not use abrasive cleansers, pads or cloths which can scratch the surface).
NOTE: Do not clean any of the parts or accessories in the dishwasher.
Decalcifying
- After regular use, hard water can cause mineral build up in and on many of the inner functioning components, reducing the brewing flow, power of the machine, and affecting the quality of coffee.
- We advise decalcifying the machine on a regular basis (every 2–3 months) using a proprietary descaler (Solipol) which is available from most leading supermarkets, department stores and hardware stores or Solismail (www.solis-mail.ch). Follow the instructions provided.
Decalcifying the Machine
- Ensure the Selector Control is in the 'Standby' position, the POWER button is in the 'Off' position and the machine is switched off at the power outlet and unplugged.
- Remove the filter holder and frothing attachment. Pour the mixture of discaler and water into the water tank. (0.5 Litres Solipol and 0.75 Litres of water)
- Plug the machine into the power outlet.
- Press the POWER button to the 'On' position.
- Place a large container under the group head, steam wand and hot water wand.
-
When the brewing temperature has been reached all the button surrounds on the Control Panel will illuminate. Press and hold the single or double cup button to commence manual pour. Release the button once half the mixture of discaler and water has run through the group head.
-
Set the Selector Control to the 'STEAM' position and allow steam to run through the Steam Wand for approximately 2 minutes. Return the Selector Control back to the 'Standby' position.
- Set the Selector Control to the 'HOT WATER' position and allow the remaining liquid to run through the hot water wand. When the liquid stops flowing, set the Selector Control back to 'Standby' position.
After decalcifying, remove the water tank and rinse thoroughly then re-fill with fresh cold water. To rinse the machine, repeat previous steps.
WARNING:
Do not immerse cord, plug or appliance in water or any other liquid.
The water tank should never be removed or completely emptied during decalcifying.
Trouble shooting guide
| Problem POSSIBLE CAUSES What to do | ||
| Coffee does not run through 'on' position. Water tank is empty Refer to step 1 - Coffee grind is too fine Ensure you use page 62-63. Too much coffee in the filter Refer to 'Preparing the coffee' on page 57. Coffee tamped too firmly Refer to 'Cleaning the filters' on page 64. | Machine is not turned on or plugged in | Ensure the machine is plugged in and the 'on/off' button is in the |
| Filling the water tank on page 56. | ||
| a suitable espresso grind. Refer to 'The Grind' on | ||
| The filter is blocked Use the fine pin on Please refer to 'Cleaning the filters' on page 64. | ||
| Coffee runs out quickly page 62-63. | The coffee grind is too coarse | Ensure you use a suitable espresso grind. Refer to 'The Grind' on |
| Not enough coffee in the filter | Refer to 'Preparing the coffee' on page 57. | |
| Coffee not tamped firmly enough | Refer to 'Preparing the coffee' on page 57. | |
| Coffee runs out around the edge of the filter holde a proper fit into the brew head. Too much coffee in the filter Refer to 'Preparing the coffee' on page 57. filter for 2 cups of coffee. | Filter holder is not inserted in the brew head properly | Refer to 'Inserting the filter holder' on page 58. |
| There are coffee grounds around the filter rim | Clean any excess coffee from the rim of the filter holder to ensure | |
| Preparing the coffee' on page 57. | ||
| Coffee has been tamped too firmly | Refer to 'Tamping the coffee' on page 57. | |
| Incorrect filter for amount of coffee used | Ensure you use the small filter for 1 cup of coffee and the large | |
Trouble shooting guide
| Problem POSSIBLE CAUSES What to do | ||
| Coffee filters out in drops edge of the filter holde Coffee grind is too fine Ensure you use a suitable espresso grind. Refer to 'The Grind' on page 62-63. | Refer to step 1-Filling the water tank on page 56. | |
| Machine is blocked by mineral deposits | Decalcify the machine; please refer to 'Decalcifying' on Page 66. | |
| Machine is making pumping noiseWater tank is not securely in place | Water tank is empty | Refer to step 1-Filling the water tank on page 56. |
| Refer to step 1-Filling the water tank on page 56. | ||
| Coffee is too weak or watery | Coffee grind is not fine enough | Ensure you use a suitable espresso grind.Use a dark roast coffee generally labelled 'Espresso Blend'. Refer to 'The Grind' on page 62-63. |
| Coffee is too cold | Cups not preheatedPlease refer to 'Pre-warming the cups' on page 56. | The cup warming plate starts to warm up as the machine warms up. |
| Milk not heated enough (if making a cappuccino or latte) for a cappuccino or latte on page 60. | When the base of the jug becomes too hot to touch this is when the milk is heated at the correct temperature. Please refer to 'How to froth milk | |
| No cremaFilter holes are blocked Use the fine | Coffee is not tamped firmly enough | Refer to 'Tamping the coffee' on page 57. |
| Coffee grind is too coarse | Ensure you use a suitable espresso grind.Refer to 'The Grind' on page 62-63. | |
| Ground Coffee is not freshPlease refer to 'The coffee' on page 62-63. | Pre-ground coffee should not be kept for longer than a week. | |
| pin on the cleaning tool to clear the holes.Please refer to 'Cleaning the filters' on page 64. | page 64. | |
| Problem POSSIBLE CAUSES What to do | ||
| Machine is making pulsing/pumping sound while 15 bar pumping coffee or steaming milk | The machine is carrying out the normal operation of the pump | No action required as this is the normal operation of the machine |
| No steam/hot water is generated 'on' position.Water tank is empty Refer to step 1wand continues to be blocked, removing the spanner in the middle of 'Care and cleaning' on page 64. | Machine is not turned on | Ensure the machine is plugged in and the 'on/off' button is in the |
| -Filling the water tank on page 56. | ||
| Selector Control not in 'Steam or Hot Water' position | Turn the selector control to the 'Steam' position. Ensure the steam button is selected for steam and 'Hot Water' button selected for hot water. | |
| Steam Wand is blockedove the tip of the steam wandthe cleaning tool. Please refer to | Use the pin on the cleaning tool to clear the opening. If the steam | |
| Milk is not foamy after frothinga cappuccino or latte' on page 60. | Not enough steamon page 64. | Steam wand may be blocked. Please refer to 'Care and cleaning' |
| Milk is not fresh and cold | Milk must be cold and fresh. Please refer to 'How to froth milk for | |
| Machine not working30-60 minutes. | The unit appears to be 'on' but the machine ceases to operate. | The safety thermal cut-out may have activated due to the pump overheating. Turn the machine off and allow it cool for about |

SOLIS AG
Solis-Haus · CH-8152 Glattbrugg-Zurich · Telefon +41 448746454 Fax +41 448746499 · info@solis.ch · www.solis.ch · www.solis.com
0000