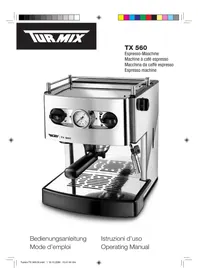
TX 530 - Coffee machine Turmix - Free user manual and instructions
Find the device manual for free TX 530 Turmix in PDF.
User questions about TX 530 Turmix
0 question about this device. Answer the ones you know or ask your own.
Ask a new question about this device
Download the instructions for your Coffee machine in PDF format for free! Find your manual TX 530 - Turmix and take your electronic device back in hand. On this page are published all the documents necessary for the use of your device. TX 530 by Turmix.
USER MANUAL TX 530 Turmix
natural_image
Exterior view of a modern TUR-MIX | TX 530 espresso machine (no signage or text on device body)natural_image
Line drawing of a cable with two connectors, labeled with number 12 (no text or symbols on the cable itself)
text_image
TUR MIX

5
natural_image
Illustration of a modern espresso machine (no text or symbols visible)
natural_image
Metallic industrial vessel with control knobs and an upward arrow indicating motion (no text or symbols)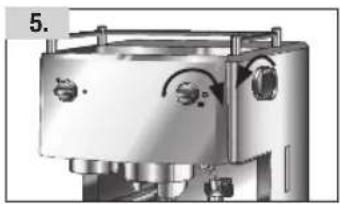
natural_image
Close-up of a metallic industrial machine component with control knobs and mounting brackets (no visible text or symbols)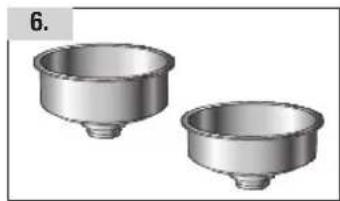
natural_image
Two metallic cylindrical containers with flanges, no text or symbols visible
natural_image
Close-up of a mechanical device with metallic components and adjustment knobs (no visible text or symbols)
natural_image
Close-up of a metallic mechanical component with three small parts, no visible text or symbolsnatural_image
Exterior view of a modern espresso machine (no visible text or labels)natural_image
Close-up of a stainless steel industrial vessel with control knobs and piping (no visible text or symbols)natural_image
Illustration of a modern espresso machine with dual levers and control panel (no text or symbols visible)3
natural_image
Industrial stainless steel mixing tank with control knobs and piping (no visible text or symbols)5
natural_image
Close-up of a stainless steel kitchen appliance with handlebars and control knob (no visible text or symbols)7
natural_image
Close-up of a stainless steel kitchen appliance with handlebars and control knobs (no visible text or symbols)8
natural_image
Close-up of a stainless steel coffee machine with a lever and handle (no visible text or symbols)9
FR Chères clients, chers clients,
natural_image
Line drawing of a cable with two connectors, labeled with number 12 (no text or symbols on the diagram itself)
natural_image
Exterior view of a modern espresso machine (no text or symbols visible)
natural_image
Metallic industrial vessel with control knobs and an upward arrow indicating motion (no text or symbols)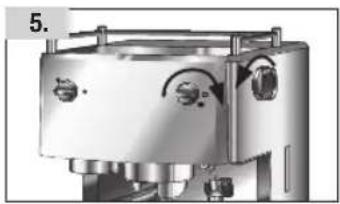
natural_image
Close-up of a metallic industrial machine component with control knobs and mounting flanges (no visible text or symbols)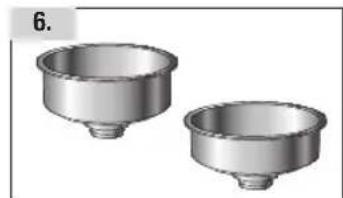
natural_image
Two metallic cylindrical containers with threaded bases, shown from different angles (no text or symbols)
natural_image
Close-up of a mechanical device with metallic components and adjustment knobs (no visible text or symbols)
natural_image
Close-up of a metallic mechanical component with three small bolts and a circular housing (no text or symbols visible)natural_image
Exterior view of a modern stainless steel coffee machine (no visible text or labels)natural_image
Close-up of a stainless steel industrial vessel with control knobs and piping (no visible text or symbols)natural_image
Illustration of a modern espresso machine with dual levers and control buttons (no text or symbols visible)3
natural_image
Industrial equipment component with dual control knobs and a cylindrical base (no visible text or symbols)5
natural_image
Close-up of a stainless steel kitchen grater with handlebars and control knob (no text or symbols visible)7
natural_image
Close-up of a metallic mechanical component with circular ports and a metal frame (no visible text or symbols)8
natural_image
Close-up of a stainless steel coffee machine with a lever handle (no visible text or symbols)9
natural_image
Line drawing of a cable with two connectors, labeled with number 12 (no text or symbols on the diagram itself)
text_image
TUR MIX

natural_image
Exterior view of a modern espresso machine (no text or symbols visible)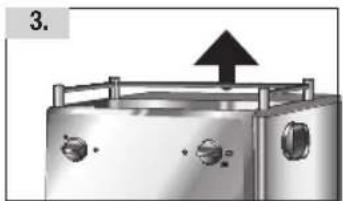
natural_image
Metallic industrial vessel with control knobs and an upward arrow indicating motion (no text or symbols)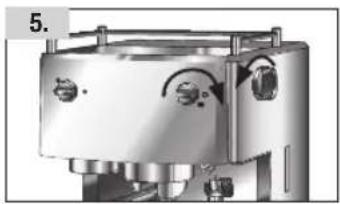
natural_image
Close-up of a metallic industrial machine component with control knobs and mounting brackets (no visible text or symbols)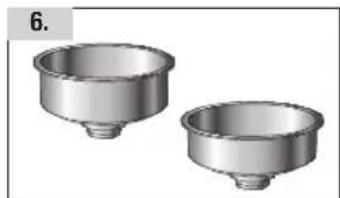
natural_image
Two metallic cylindrical containers with threaded bases, shown from different angles (no text or symbols)
natural_image
Close-up of a mechanical device with no visible text or symbols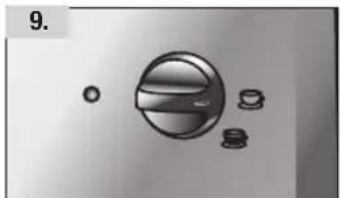
natural_image
Close-up of a metallic mechanical component with three small circular features (no text or symbols visible)natural_image
Exterior view of a modern stainless steel coffee machine (no visible text or labels)natural_image
Close-up of a stainless steel industrial vessel with control knobs and a rotary dial (no visible text or symbols)natural_image
Exterior view of a modern stainless steel coffee machine (no text or symbols visible)3
natural_image
Industrial stainless steel mixing tank with control knobs and piping (no visible text or symbols)5
natural_image
Illustration of a stainless steel kitchen appliance with control knobs and a side panel (no text or symbols)7
natural_image
Close-up of a metallic industrial component with circular ports and a metal frame (no visible text or symbols)8
natural_image
Close-up of a stainless steel coffee maker with a lever and handle (no visible text or symbols)9
Lanes and Gentlemen,
Thank you for choosing to purchase this TURMIX product. Since 1933 we have been working to one end alone – to give you pleasure in using our equipment. Our philosophy can be summed up in just four words: lasting, uncomplicated, fascinating and reliable.
This means that we lay a great deal of stress on quality, ergonomics, simplicity and service and repairs, with a view to offering you the very best in the way products and services.
We hope you will get a lot of pleasure out of your new TURMIX product!


Important: Storage and transport
If the equipment is not in use, or if it is sent to the service centre, the water must be removed from the system. Remove the water tank, open the steam valves, start coffee supply and wait until only air exits. Activate coffee supply switch again, and close valve.

Table of Contents
| 1 First commissioning | 1.1 Description of Parts 46 | |
| 1.2 Instructions in brief 48 | ||
| 2. Safety requirements 492 Important safety in | ||
| 3 Commissioning | 3.1 First commissioning 50 | |
| 3.2 Setting up the equipment 50 | ||
| 3.3 Preparing the equipment 50 | ||
| 3.4 Filling / replenishing the water tank 50 | ||
| 3.5 Air removal 50 | ||
| 3.6 Making coffee 51 | ||
| 3.6.1 With ground coffee 51 | ||
| 3.6.2 With single-portion bags (pads) 52 | ||
| 3.7 Making cappuccino 53 | ||
| 3.8 Hot water supply 54 | ||
| 3.9 Cleaning the machine 54 | ||
| 3.10 Descaling the machine 55 | ||
| 3.11 TURMIX technology 55 | ||
| 4 Troubleshooting | 4.1 Troubleshooting 56 | |
| 4.2 Storage and transport 56 | ||
| 5 Disposal | 5.1 Disposing of the equipment 57 | |
| 6 Appendix | 6.1 Fault analysis 59 | |
| 6.2 Warranty 60 | ||
| 6.3 Accessories 61 | ||


text_image
TUR MIX

46
natural_image
Line drawing of a cable with two connectors, labeled with number 12 (no text or symbols on the diagram itself)
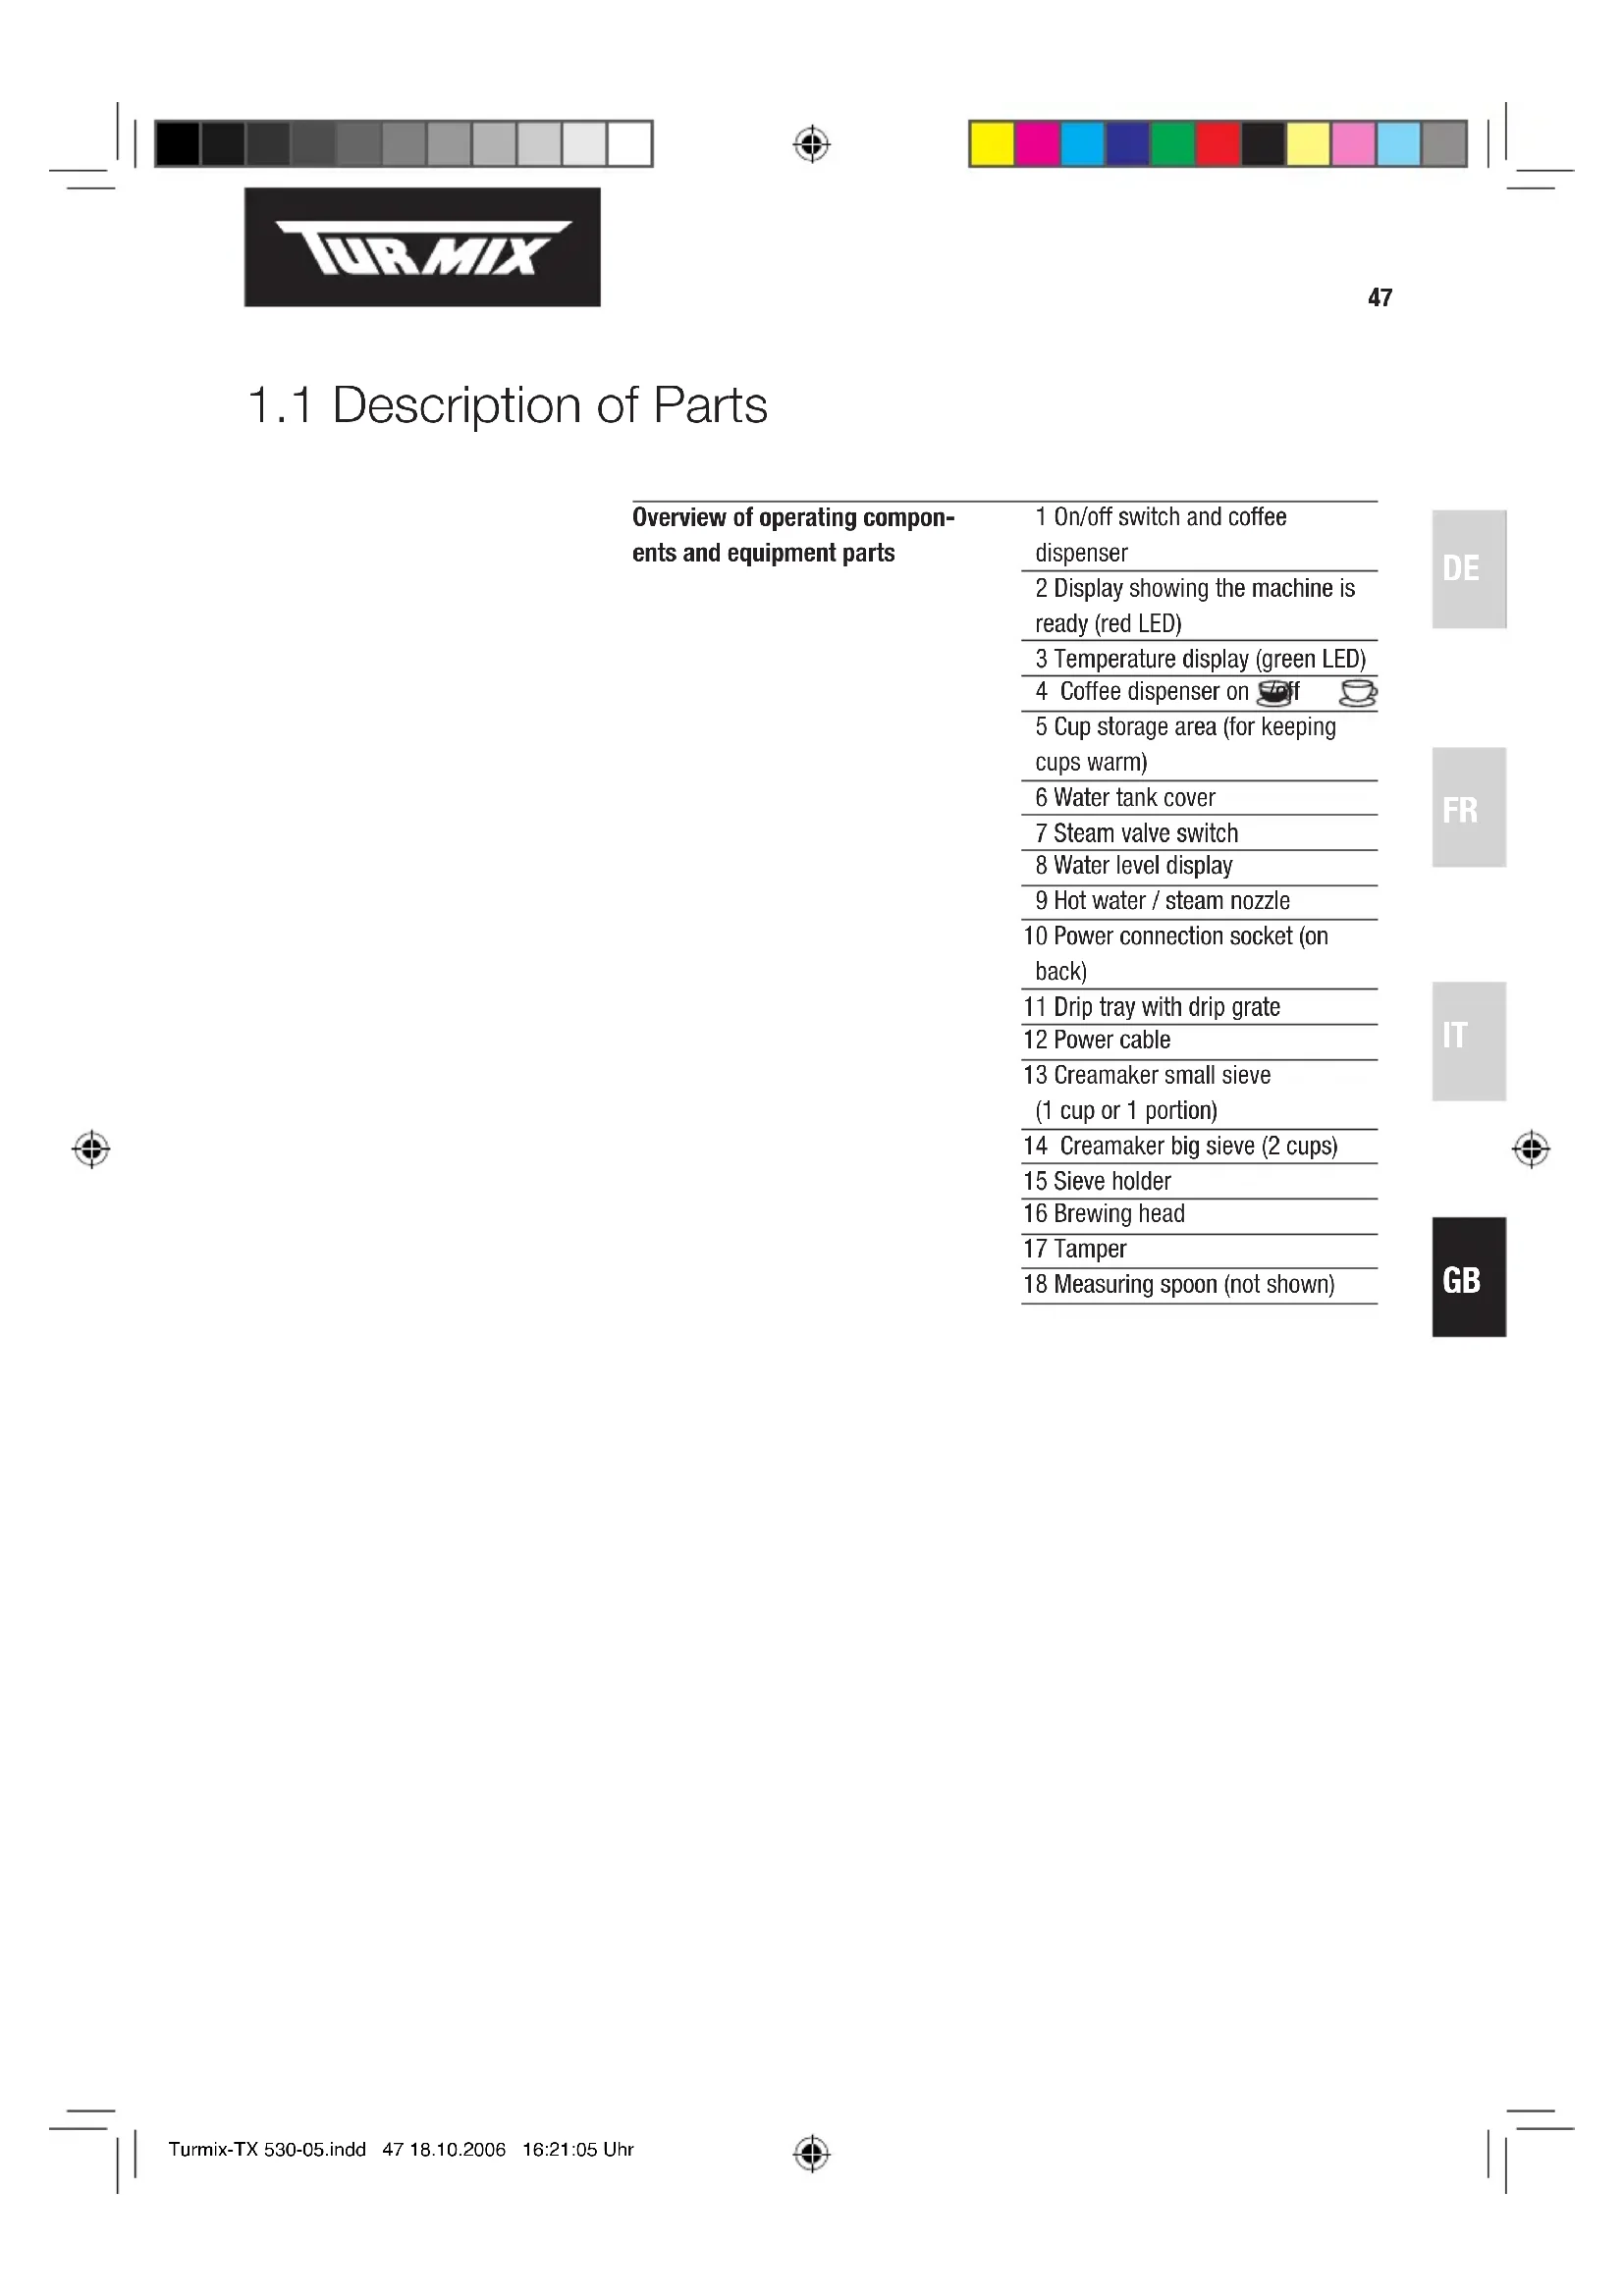
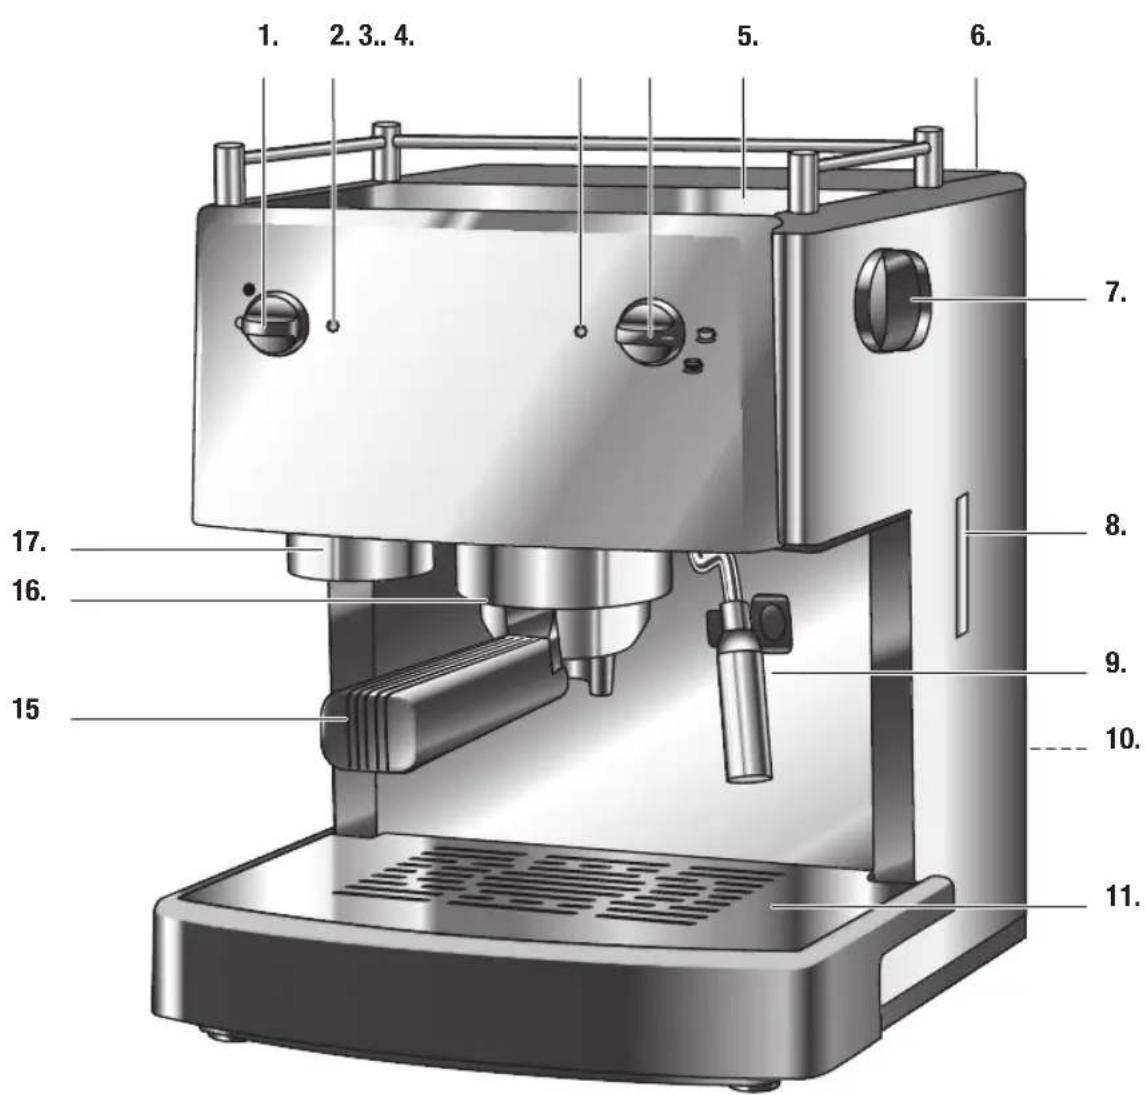
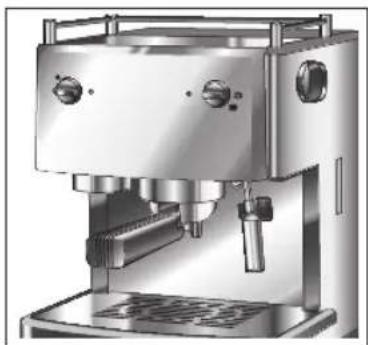
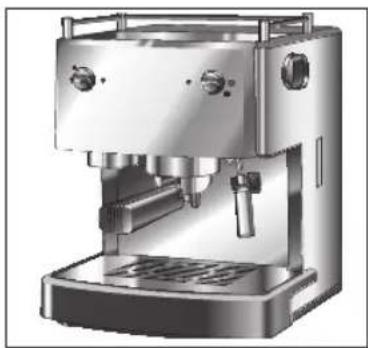
1.1 Description of Parts
| Overview of operating components and equipment parts | 1 On/off switch and coffee dispenser |
| 2 Display showing the machine is ready (red LED) | |
| 3 Temperature display (green LED) | |
| 4 Coffee dispenser on off | |
| 5 Cup storage area (for keeping cups warm) | |
| 6 Water tank cover | |
| 7 Steam valve switch | |
| 8 Water level display | |
| 9 Hot water / steam nozzle | |
| 10 Power connection socket (on back) | |
| 11 Drip tray with drip grate | |
| 12 Power cable | |
| 13 Creamaker small sieve(1 cup or 1 portion) | |
| 14 Creamaker big sieve (2 cups) | |
| 15 Sieve holder | |
| 16 Brewing head | |
| 17 Tamper | |
| 18 Measuring spoon (not shown) |

text_image
TUR MIX1.2 Instructions in brief
natural_image
Illustration of a modern espresso machine (no text or symbols visible)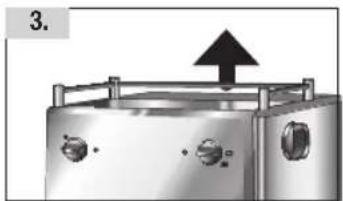
natural_image
Metallic industrial vessel with control knobs and an upward arrow indicating motion (no text or symbols)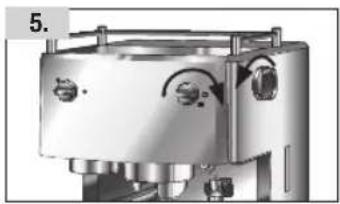
natural_image
Close-up of a metallic industrial machine component with control knobs and ports (no visible text or symbols)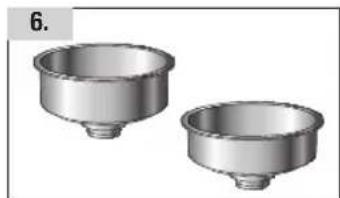
natural_image
Two metallic cylindrical containers with threaded bases, shown from different angles (no text or symbols)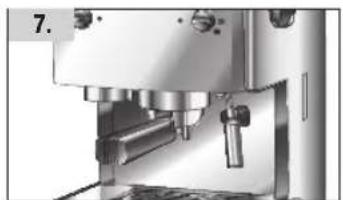
natural_image
Close-up of a mechanical device with metallic components and a handle (no visible text or symbols)
natural_image
Close-up of a metallic mechanical component with three small bolts and a central hub (no text or symbols visible)- Position the machine on a firm base
- Wash water tank, sieve support, sieves and measuring spoon
- Remove water tank and fill with cold water. When replacing, you must feel the tank slot into place
- Plug in power connection and switch on the machine at the on/off switch (turn to ●▼ the red operating display will light up)
- Place cup under steam nozzle, open steam valve on right and activate the coffee supply switch (front left). Then wait until water without air emerges from the hot water nozzle. Again activate the coffee supply switch (fig. 5), and close the steam valve switch. The pump comes to a stop
- To make coffee
- place sieve in sieve holder (small sieve for 1 cup / individual portions, large sieve for 2 cups)
- add 1 level measuring spoon per cup of ground coffee to the sieve and press down lightly with the tamper
- Insert sieve support from below (holding it on left) into the brewing unit, and then turn completely to the right. Place cup under dispenser
-
Wait until the green control LED lights up. Then turn right knob to the right to . The pump is now working. If the cup is full, turn switch back again to . The pump comes to a stop
-
After coffee has been dispensed, remove the sieve holder and knock out the coffee grounds
-
The machine should be regularly cleaned and descaled
2. Important Safety Notes

When using the coffee machine, you must observe the following safety precautions:
- It is essential to read the operating instructions carefully through.
- Do not touch the hot surfaces. You should only come into contact with the handles and knobs.
- There is the risk of an electric shock if the machine, power cable or plugs should be dipped in water or any other liquid medium.
– Children should operate electrical equipment only under supervision. - When the machine is not in use, and before cleaning, always remember to unplug the power. Before inserting or removing parts for cleaning, always allow the machine first to cool down.
- Equipment with a defective plug or power cable, and equipment that has been damaged or shows impaired functionality, should be inspected and repaired by an authorised customer service agent before you try to use it again.
- The use of accessories or spare parts that are not authorised by the manufacturer may result in fires, electric shocks or personal injury.
- Do not use the equipment in the open air.
- The power cable must not come into contact with hot surfaces and should not hang down from tables or working surfaces.
- Do not set up the equipment in the immediate vicinity of gas stoves, electric stoves or grills.
- The equipment should only be used domestically for the purposes for which it is intended.
- To switch off the equipment, the power switch must first be turned to «○», after which you can unplug the power.
- After unpacking the equipment, take care that the plastic wraps are kept in a place where children will not find them.
- Persons, including children, who in view of the level of their physical, sensory or mental capacities, or their lack of experience or knowledge, are not in a position to use the equipment with safety, may not use the equipment without supervision or instruction from a responsible person.
PLEASE KEEP THESE SAFETY INSTRUCTIONS IN A SAFE PLACE!
3. Commissioning
3.1 First commissioning
Before putting the machine into operation for the first time, please read right through the operating instructions.
3.2 Setting up the machine
Position the machine on a firm and stable base. Do not try to carry the machine by the upper flanges!
3.3 Preparing the machine
First of all, wash all the accessories (sieve support, measuring spoon, sieve, water tank) with lukewarm water and detergent, and then rinse them in clean water.
3.4 Filling / replenishing the water tank

It is essential that before doing anything else you take out the water tank and fill it with cold water. Otherwise your new coffee machine could be damaged!
3.5 Air removal
natural_image
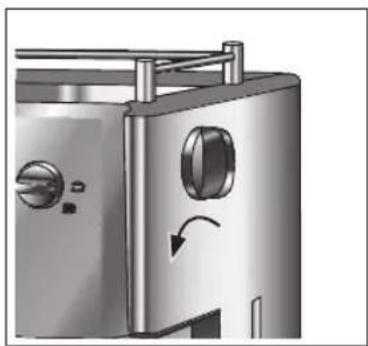
Exterior view of a modern espresso machine (no visible text or labels)The machine is fitted with an automated suction pump.
Place a cup under the brewing head, and turn the right knob to 📄 you will hear the noise of the pump. Just a few seconds later, water will start to flow from the brewing head. Turn the knob again to 📄 as soon as the cup is full. The pump will switch off.
Repeat this operation a few times before you start to make coffee, so as to clean the pump and the water hoses.
natural_image
Mechanical component with metallic casing and control knobs (no visible text or symbols)If air is found in the hose system, the pump may be prevented from working properly.
If no water comes out of the brewing head, place a cup under the steam pipe. Open the steam valve on the right and turn the coffee supply switch (right front) to the right. Then wait until water issues from the hot water nozzle without any air.
Again activate the coffee supply switch to the left and close the valve. The pump will come to a stop 2.
The coffee machine is now ready to operate.
3.6 Making coffee
3.6.1 With ground coffee
natural_image
Exterior view of a modern stainless steel coffee machine (no text or symbols visible)3
Remove the water tank and fill it with cold water.
Connect power.
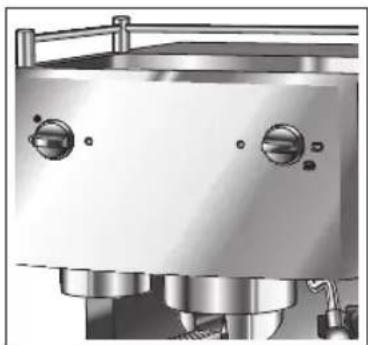
Turn power switch to ●. The red operating display will light up 3.
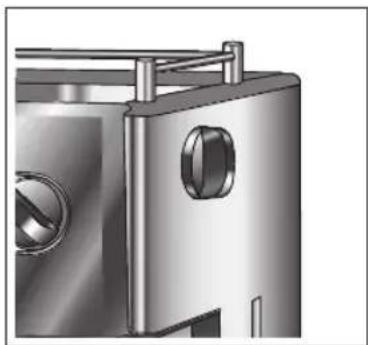
Insert the Creamaker® sieve in the sieve support 4. Press the sieve into position with your thumbs, and then insert the sieve support in the brewing head to warm it up. To insert the sieve support in the brewing head, hold the handle at an angle of about 45 degrees to the left, raise it a little and place the sieve support in the fitting. Then turn the handle to the right until the sieve support sits securely in the fitting.

4
When the operating temperature has been reached, the green display showing that the machine is ready to operate will light up.
Take the warmed sieve support out of the brewing head, and fill it with ground coffee, using the accompanying measuring spoon. Use one level spoonful for each cup. Press the ground coffee lightly down with the tamper. It should not however be too compressed. Remove any superfluous coffee grounds from the rim of the sieve support, and place it in the brewing head as described above.
natural_image
Industrial stainless steel industrial vessel with control knobs and piping (no visible text or symbols)5
Place one or two cups on the drip grate, directly below the openings in the sieve support. Use cups that have been warmed in advance, or your coffee may not be hot enough.
Turn the right knob to shortly after this, the coffee will pour into the cups 5.
If you again turn the right knob to the dispensing of coffee can be aborted at any time 5.
The more water is used, the weaker your coffee will be. Remove cups, and serve the coffee.
Remove the sieve support by turning the handle carefully to the left. Warning: the sieve support may still contain hot water.
Shake any remaining liquid out of the sieve support. To do this, you should make use of the sieve holder, otherwise there is a risk that along with the excess liquid the sieve may fall out of the sieve support. The sieve does not need to be rinsed.
Continued below ...


text_image
TUR MIX

IMPORTANT:
If you have just made coffee using ground coffee, and now want to work with single-portion bags, you must first of all clean the machine, getting rid of any residue of ground coffee that remains. For this purpose you should turn the right knob to the water that is emitted will clean the brewing head.
3.6.2 With single-portion bags (pads)
6
Single-portion bags, like tea bags, are ready-measured portions of coffee, each for one cup. Using single-portion bags you can make your coffee quickly, reliably and without a hitch.
You should use the sieve support together with the smaller sieve for single-portion bags 6.
Note:
With single-portion bags you can only make one cup of coffee at a time in each brewing operation.


text_image
TUR MIX

3.7 Making cappuccino
Cappuccino is a mixture of coffee and milk froth. You can use your machine to make real cappuccino.
To make cappuccino, besides other ingredients you should have ready a container half filled with skimmed or low-fat milk, and some large cups.
The lower the fat content of the milk, the more solid will be the froth. Using the steam pipe you can produce perfect milk froth – just take care that the milk does not boil.
NB: you should use large cups.
Turn the power switch to ●. The red operating display will light up. When the green operating display lights up, the machine is ready.
SPlace the container half filled with milk below the steam pipe in such a way that the nozzle is a little below the surface of the milk. Never let the steam pipe be completely covered by the milk.
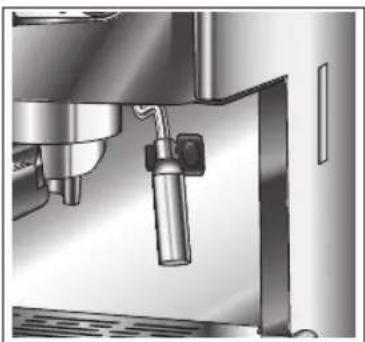
natural_image
Close-up of a stainless steel kitchen appliance with a rotary knob and handle (no visible text or symbols)7
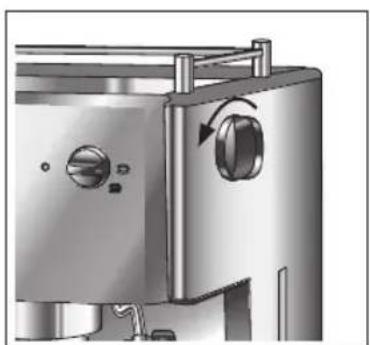
First of all, open the steam valve slowly by turning the knob one revolution counterclockwise 8. Then open the valve completely.
Move the container with the milk in a circle below the steam pipe, taking care that the nozzle should only be a little below the surface of the milk. The steam pipe has small openings through which it must be possible for air to be sucked in – so these must not be covered by the milk. Take care that the milk is not allowed to boil – otherwise it will not foam.
When the milk has become frothy, close the steam valve by turning the knob clockwise, and remove the container. Let the frothy milk stand for about 15 seconds, before you add it to the coffee.
Add the milk froth to the coffee with a spoon, and then pour the milk in carefully at the edge of the cup. Then dust the milk froth with cinnamon, cocoa, nutmeg or chocolate powder. Done!
TIP:
If you want to make coffee immediately after foaming milk, you must refill the water tank and lower the operating temperature of the machine – otherwise the coffee will taste burnt. To lower the operating temperature, turn the knob to 📂 and let some water run off without any ground coffee. After this you will be able to make coffee again.

3.8. Hot water supply
natural_image
Close-up of a metallic industrial component with circular ports and a metal frame (no visible text or symbols)8
To make tea, bouillon or any other hot drink, you can use your machine to obtain fresh hot water:
Take out the water tank and fill it with water.
Connect power.
Turn power switch to ●. The red display, showing the machine is ready to operate, will light up.
Hold the cup under the steam pipe.
Open the steam valve (on the right side of the machine) and turn the right knob to 🍴
When you have as much water as you need, turn the left knob to ● and close the steam valve.
3.9. Cleaning the machine
natural_image
Close-up of a stainless steel coffee maker with a lever and handle (no visible text or symbols)9
Clean the steam pipe after every time it is used, so that the nozzle and the small openings in the pipe do not get blocked 10. Milk that has dried on can be difficult to remove subsequently.
To clean, hold a damp cloth firmly below the nozzle and open the steam valve. Leave the valve open for one or two seconds, to clean the nozzle. Then wipe the surface of the steam pipe with the damp cloth.
The steam pipe may be removed. Simply turn it a little, and pull firmly. To clean it, soak it in hot water, then rinse and replace. If necessary you can also use a needle to clean the openings in the steam pipe.
From time to time you should also unscrew the nozzle at the bottom of the steam pipe and clean it carefully.
The sieve support and sieve should be cleaned after use with water and a small quantity of detergent.
Remove the drip tray and drip grate and clean them with warm water and a small quantity of detergent. For cleaning the drip tray, we would advise you to use a damp sponge.
Coffee grounds have a tendency to collect on the brewing head insulating seal. You should keep the seal clean, otherwise the taste of your coffee will be impaired.
If the coffee machine has not been used for some time, before making coffee you should first remove the standing water that remains in the hose system.
First fill the water tank with fresh water. Then turn the right knob to
After a few seconds, turn the knob to The stale water will now have been removed from the hose system.
Important:
Never activate the left knob when there is no water in the water tank, or the pump could be damaged.
3.10. Descaling the machine
Depending on the hardness of your water supply and the frequency with which the machine is used, the coffee machine should be descaled every 4 to 6 weeks. If your coffee becomes noticeably colder, or if it only runs out slowly, this indicates that it is time for the equipment to be descaled.
To do this, you would be advised to use TURMIX Calco Clean (art. 11458) or some other descaling agent for coffee machines that is standard in the trade. It is essential to get the right concentration. Never use vinegar, as this could damage the seals of the machine.
Descaling procedure:
- Switch on the machine.
- Place a sufficiently large vessel below the coffee dispensing outlet, and a second one below the hot water nozzle.
- Fill the water tank with 500 ml of cold water and 100 ml of Calco Clean.
- Activate the coffee dispensing switch without inserting the sieve holder, and let about half of the solution run through. Let the remainder run out through the hot water nozzle into the second vessel.
- Repeat this procedure with the same solution once more.
- Rinse the water tank thoroughly with clean water, and fill it with fresh water. Again place the vessels below the coffee dispensing outlet and the hot water nozzle, and let half the water that is in the tank run out through each in order to clean out the system.
- Fill the water tank once more with fresh cold water.
- Your machine is now ready to operate.
IMPORTANT NOTE:
To descale the machine, you should only use products standard in the trade that are recommended for use with coffee machines. Damage to the machine that may be caused by scale deposits will not be covered by the guarantee. Cleaning and maintenance operations other than those described here should only be carried out by qualified persons.
3.11. TURMIX technology
CREMAKER® SIEVE:
This patented filter sieve for the sieve support will guarantee a solid froth (cream) on your coffee. Can be used for one cup (small sieve) or two (large sieve).
4. Troubleshooting
| PROBLEM POSSIBLE CAUSES / SUGGESTED SOLUTIONS | |
| The coffee does not taste good | - Try again with a different quantity of coffee or a different brand. |
| The coffee has no foam or very little foam | - The coffee is not fresh. |
| - Try using more finely ground or freshly ground coffee. | |
| - Use more coffee. | |
| The coffee is not hot enough - | Warm the cups in advance (e.g. in the cup storage area). |
| - Pre-heat the sieve holder by inserting it for a few minutes. | |
| The cups are not equally full | - The coffee has not been evenly distributed in the sieve. Do not press the coffee down too firmly! |
| - Clean the sieve support. | |
| Milk foam cannot be produced | - The steam pipe is blocked. Clean the steam pipe. |
| - Use a bigger, rather narrow beaker, ideally made of stainless steel. | |
| - Always use cold milk. | |
| The coffee drips out of the sieve support | - Put less coffee in the sieve support. |
| - The single-portion bag ("pad") is incorrectly positioned. | |
| - Clean the water outlet. | |
| Water issues from the machine | - Empty the water catch basin regularly. |
| The coffee flows very slowly out of the sieve holder or does not flow at all | - The quantity of coffee grounds in the sieve is excessive. |
| - Use more coarsely ground coffee. | |
| - The machine needs descaling. | |
| - The filter sieve is blocked. Clean the sieve. | |
| - Clean the water outlet of the brewing head. | |
| Coffee grounds are found in the cup | - Clean the sieve. |
| The pump makes too much noise | - Stop the machine dispensing coffee at once (turn right knob to The water tank is incorrectly positioned or is empty. Adjust the water tank, or take it out and fill it with water. |
| The machine just doesn't work at all | - Check the power cable and the plug. |
| - Possibly the water tank was empty, and consequently the safety valve has been activated. | |
| - Switch off the machine and wait for about 30 minutes. Then switch it on again. | |
4.2 Storage and transport
If the equipment is not in use, or if it is sent to the service centre, the water must be removed from the system. Remove the water tank, open the steam valves, start coffee supply and wait until only air exits.
Activate coffee supply switch again, and close valve.
text_image
TURMIX

57
5. Disposal
5.1 Disposing of equipment
Equipment that has reached the end of its service life can be handed over at a sales outlet, and will be professionally disposed of free of charge.
Equipment that has hazardous defects should be disposed of immediately. Please ensure that it cannot be used again.
Do not dispose of equipment with household rubbish (for environmental reasons).
DE
FR
IT

GB


text_image
TURMIX

58


text_image
TUR MIX59
Our TURMIX electrical household appliances carry a warranty of 2 years from the date of purchase. We undertake to replace, free of cost, any parts of the appliance that get damaged as a consequence of material or manufacturing defects during the warranty period. Return shipments should be packed in the original packing or something equivalent. In case of improper handling or in case repairs are attempted by third parties, the warranty is rendered null and void. Damage from hydro-chemical influences (e.g. owing to calcification) as well as parts that are subjected to normal wear, do not fall under the warranty. Moreover, damage or function faults that are a consequence of water from softening plants are excluded from the warranty.
Please preserve your receipt carefully, it serves as the warranty certificate as well.
SERVICE CENTER
Grindelstrasse 3-5, 8303 Bassersdorf, Switzerland
Tel. +41 (0)43 266 16 00, Fax +41 (0)43 266 16 27
info@sckt.ch www.turmix.ch
SERVICE CENTER
office@turmix.at www.turmix.at


text_image
TUR MIX61
Zubehör/Accessoires/Accessori/Accessories

text_image
VOLANCE CALCO CLEANArt. 11458
DE
This extra gentle special descaling agent has been developed for use with all espresso machines, and will achieve ideal results. Your espresso machine will thank you for using it.

text_image
TURMIX

62


text_image
TURMIX

63
DE
FR
IT
GB


text_image
TUR MIX


D0380.10010 / 10.2006
Änderungen vorbehalten / Sous réserve de modifications / Con riserva di modifiche / Alterations reserved
www.turmix.com