MD 16322 - Vacuum Cleaner Micromaxx - Free user manual and instructions
Find the device manual for free MD 16322 Micromaxx in PDF.

| Product Type | Cordless Stick Vacuum |
| Brand | Micromaxx |
| Model | MD 16322 |
| Dimensions | 406 x 104 x 130 mm |
| Power | 45 W |
| Battery | Lithium-ion, 7.4 V, 1300 mAh |
| Runtime | Approximately 15 minutes |
| Charging time | Approximately 6 hours |
| Dust bin capacity | 0.4 L (dry) / 0.15 L (liquid) |
| Filtration system | Cyclone with washable dust filter |
| Included accessories | Crevice tool, liquid nozzle, wall mount, power adapter GQ05-096030-CG, car adapter BE24L-030-096 |
| Usage | Dry and liquid vacuuming, indoor and vehicle |
| Power supply | Power adapter 100-240 V~50/60 Hz, car adapter 12 V |
| Cleaning | Dust bin and filter washable with water |
| Safety | Do not use near flammable materials, do not immerse, do not vacuum hot ashes |
| Wall mounting | Wall mount included for storage and charging |
| Warranty | 2 years (commercial warranty) |
| Customer service | Hotline France: 02 43 16 60 30, Belgium: 022006198 |
Frequently Asked Questions - MD 16322 Micromaxx
User questions about MD 16322 Micromaxx
0 question about this device. Answer the ones you know or ask your own.
Ask a new question about this device
Download the instructions for your Vacuum Cleaner in PDF format for free! Find your manual MD 16322 - Micromaxx and take your electronic device back in hand. On this page are published all the documents necessary for the use of your device. MD 16322 by Micromaxx.
USER MANUAL MD 16322 Micromaxx
natural_image
Black vacuum cleaner with clear handle and side panel (no visible text or symbols)Akku-Zyklon-Handstaubsauger Aspirateur à main cyclonique sans fil Cyclone handstofzuiger op accu Rechargeable cyclone vacuum cleaner
micromaxx ^® MD 16322
Inhaltsverzeichnis
DE
natural_image
Pure electrical circuit lines without any symbols
natural_image
Technical line drawing of a mechanical component with no visible text or symbols
natural_image
Simple line drawing of a 3D geometric shape resembling a truncated prism or wedge, with no text or symbols present.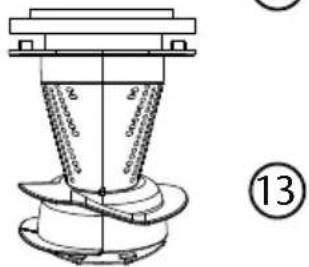
natural_image
Technical line drawing of a mechanical component with concentric rings and a central shaft (no text or symbols)
natural_image
Line drawing of a mechanical component with a numbered circle marker (14), no text or symbols present.natural_image
Technical line drawing of a mechanical component with an arrow indicating direction (no text or symbols)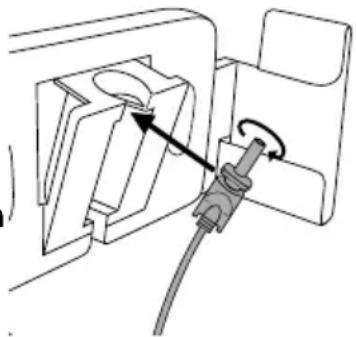
natural_image
Diagram of a plug inserted into a socket, showing internal components and a cable (no text or symbols)natural_image
Close-up of a black mechanical component with a curved arrow indicating rotation (no text or symbols visible)
HINWEIS!
natural_image
Pure electrical circuit lines without any symbols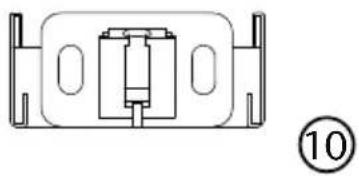
natural_image
Pure technical diagram of a mechanical component with no text or symbols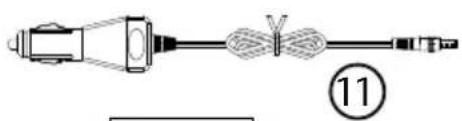

natural_image
Simple line drawing of a 3D geometric shape resembling a frustum or wedge, with no text or symbols present.
natural_image
Technical line drawing of a mechanical component with concentric rings and a central shaft (no text or symbols)
natural_image
Line drawing of a mechanical component with a numbered label (14) in the corner, no text or symbols present.natural_image
Close-up of a black mechanical device with a curved arrow indicating rotation (no text or symbols visible)
REMARQUE!
16. Garantie commerciale limitee (France)
natural_image
Pure electrical circuit lines without any symbols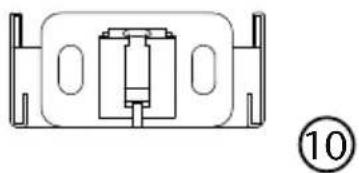
natural_image
Technical line drawing of a mechanical component with no visible text or symbols

natural_image
Simple line drawing of a 3D geometric shape resembling a frustum or wedge, with no text or symbols present.
natural_image
Technical line drawing of a mechanical component with concentric rings and a central shaft (no text or symbols)
natural_image
Line drawing of a mechanical component with a numbered label (14) in the corner, no text or symbols present.9) Netvoeding
natural_image
Technical line drawing of a mechanical component with an arrow indicating direction (no text or symbols)
natural_image
Diagram of a plug or socket assembly with a cable and directional arrow indicating rotation (no text or symbols)natural_image
Close-up of a black mechanical component with a curved arrow indicating rotation (no text or symbols visible)Electronic Co., Ltd, China

(6,3 x 32 mm, snel, US-norm, 3A)
Geïntegreerde accu
Type Li-ion, 7,4 V, 1300 mAh
www.medion.com/conformity.
15. Colofon
Copyright © 2015
- About these instructions....72
1.1. Warning symbols and key words used in these instructions .....72
FR
-
Package contents
-
Proper use
-
Safety instructions
4.1. People not permitted to use this appliance ....74
4.2. Safe operation....74
4.3. Use of rechargeable batteries ....75
4.4. Faults 76
4.5. Cleaning....76
4.6. Wall mounting 76
- Overview of the appliance 77
5.1. Accessories....77
-
Installing the wall mount 78
-
Preparing the appliance.... 78
7.1. Charging the battery 78
-
Using the vacuum cleaner....79
-
Cleaning and care 80
9.1. Cleaning the dust container 80
9.2. Cleaning the suction opening....80
- Maintenance.... 80
10.1. Replacing the fuse in the car charger adapter 80
- Troubleshooting 81
- Disposal 81
- Technical data 82
- Declaration of conformity....82
- Legal notice 83
- Restricted Warranty (United Kingdom) 84
- Service Address....88
1. About these instructions

Please be sure to read these operating instructions carefully and follow all instructions given. The instructions will help you to operate the appliance reliably and help increase its service life. Always store these instructions near the appliance. Keep these operating instructions so that you can pass them on with the appliance if you sell it.
1.1. Warning symbols and key words used in these instructions

DANGER!
Warning: immediate mortal danger!
WARNING!
Warning of possible risk of fatal injury and/or serious irreversible injuries!
WARNING!
Danger of possible minor or moderate injuries!

CAUTION!
Please follow the guidelines to avoid property damage!

PLEASE NOTE!
Additional information on using the appliance!

PLEASE NOTE!
Please follow the guidelines in the operating instructions!
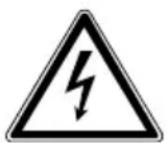
WARNING! Warning of risk of electric shock!
- Bullet point/information on operating steps and results
▶ Tasks to be performed
2. Package contents
Ensure that the following parts are included:
-Vacuum cleaner
-Crevice nozzle
-Nozzle for liquids
-Mains adapter GQ05-096030-CG
-Car charger adapter BE24L-030-096
-Wall mounting set
-Operating instructions and warranty documents
3. Proper use
The vacuum cleaner is designed for sucking up dry dirt like dust, crumbs or lint inside the house or the car. It is also suitable for sucking up small volumes of liquid.
- The appliance is intended for private use only and not for industrial/commercial use.
Please note that we shall not be liable in cases of improper use:
- Do not modify the appliance without our consent and do not use any auxiliary equipment which we have not approved or supplied.
- Use only spare parts and accessories which we have supplied or approved.
- Heed all the information in these operating instructions, especially the safety information. Any other use is deemed improper and can cause personal injury or property damage.
- Do not use the appliance in extreme environmental conditions.
4. Safety instructions
4.1. People not permitted to use this appliance
- Keep the appliance and its accessories out of reach of children.
- This appliance may be used by children over the age of 8 and by persons with reduced physical, sensory or mental abilities or by those without experience and/or knowledge, if they are supervised or have been instructed in the safe use of the appliance and have understood the dangers that result from it. Children must not play with the appliance. Cleaning and user maintenance must not be carried out by children, unless they are aged 8 or over and are supervised.
- Children younger than 8 should be kept away from the appliance and the mains cable.

WARNING!
Keep plastic packaging out of the reach of children.
There is a risk of suffocation!
4.2. Safe operation
- Only use the supplied mains adapter GQ05-096030-CG or the car charger adapter BE24L-030-096 to charge the vacuum cleaner.
- The appliance must not be connected to the mains adapter or the car charger adapter during use.
- Only connect the mains adapter GQ05-096030-CG to a freely accessible, properly installed power socket with a power supply of 220-240 V\~50 Hz.
- Do not use an extension cable.
- Connect the car charger adapter BE24L-030-096 to the 12 V --- socket in your car.
- The mains adapter and car charger adapter may only be used in dry rooms.
-
Only use the vacuum cleaner in enclosed spaces and never expose the appliance to dripping or splashing water.
-
RISK OF EXPLOSION! Never use the appliance near flammable materials. Do not use it to vacuum sharp-edged or flammable objects or liquids, e.g. matches or hot ashes. When vacuuming combustible liquids there is the risk of fire or explosion!
- Keep hair and items of clothing away from the suction opening.
- Only ever use the vacuum cleaner with the filters and dust container inserted.
- Do not cover the suction and outlet openings.
- Never pull on the cable to remove the plug from the mains socket or the car charger adapter from the vehicle socket.
- Always switch off the vacuum cleaner before changing the accessories, emptying the dust container or cleaning the filter. Never use the appliance without any filter elements.
4.3. Use of rechargeable batteries
This appliance contains a lithium-ion battery.

WARNING!
Please note the following when using lithium-ion rechargeable batteries:
- Charge the battery regularly and as fully as possible. Do not leave the battery discharged for long periods.
- Keep rechargeable batteries away from heat sources such as radiators or open flames, e.g. candles. There is a risk of explosion!
- If the appliance cannot be switched on although it is connected to a power source, please contact your service centre.
- Do not use charging devices that are damaged in any way.
- Do not dismantle or deform the batteries. You could injure your hands or fingers, or battery fluid could come into contact with your eyes or skin. If this happens, rinse the affected areas with plenty of clean water and contact your doctor immediately.
- Do not leave the battery in hot or cold locations, e.g. in a car
in summer or winter. Extremes of temperature adversely affect the battery's capability to charge correctly.
4.4. Faults

WARNING!
Live components. There is a risk of electric shock.
Therefore, follow the instructions below:
- If the plug, cable or appliance itself is damaged, disconnect the appliance from the mains immediately.
- CAUTION! To avoid risks, never try to open and/or repair the appliance yourself. There is a risk of electric shock. In the event of a fault, contact our Service Centre or another suitable professional repair workshop.
- If the mains cable on the appliance is damaged it must be replaced by the manufacturer, its customer service agent or other suitably qualified person. This is to avoid hazards.
4.5. Cleaning
- Never immerse the vacuum cleaner in water for cleaning.
• Empty the dust container regularly. - Clean the dust filter regularly.

CAUTION!
Breathing in the dust when emptying the dust container can pose health risks or trigger allergies. Empty the dust container outside directly into a waste bin.
4.6. Wall mounting

WARNING!
There is a risk of electric shock. Select a suitable location for installing the appliance and take care not to damage any hidden electrical or installation cables when drilling the holes.
5. Overview of the appliance
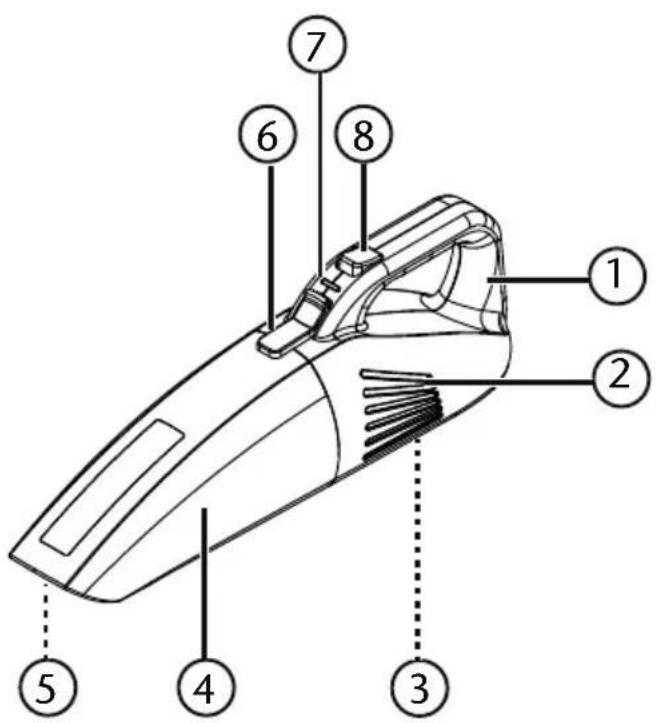
1) Carrying handle
2) Motor block with ventilation slits
3) Power connection (not illustrated)
4) Dust container
5) Suction opening (not illustrated)
6) Unlocking button
7) Operating light
8) On/Off switch
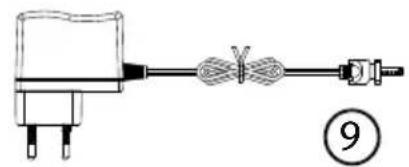
5.1. Accessories
natural_image
Simple line drawing of a plug connected to a coiled cable and connector, labeled with number 9 (no text or symbols on the diagram itself)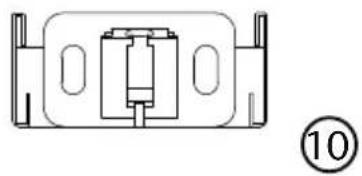
natural_image
Pure technical line drawing of a mechanical component or housing without any text, numbers, or symbols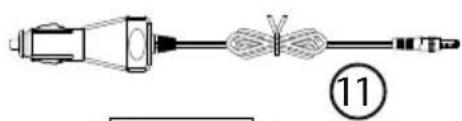
natural_image
Pure mechanical diagram showing a connector and cable assembly without any text or symbols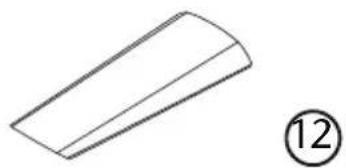
natural_image
Simple line drawing of a 3D geometric shape resembling a truncated prism, with no text or symbols present.
natural_image
Line drawing of a mechanical component with a numbered circle marker (14), no text or symbols present.9) Mains adapter
10) Wall mount
11) Car charger adapter
12) Crevice nozzle
13) Cyclone insert with dust filter
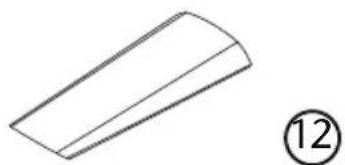
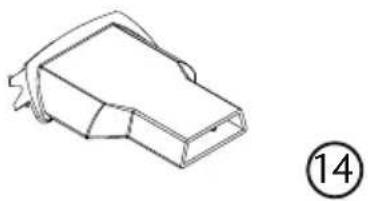
14) Nozzle for liquids
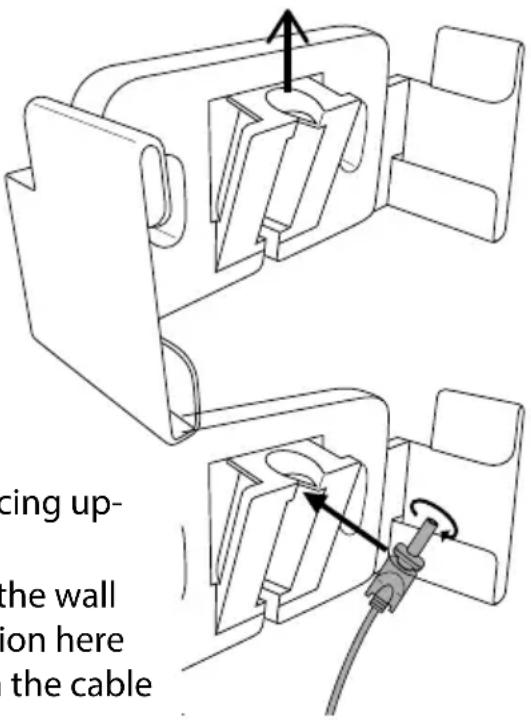
6. Installing the wall mount
The supplied wall mount provides you with the option of securely storing the vacuum cleaner on the wall.
▶ Select a space near a mains plug.
▶ Hold the wall mount against the installation location and mark the positions for the two drill holes with a pen.
▶ Drill 2 suitable holes in the marked positions in order to fix the screws.
▶ Insert the wall plugs into the drill holes.
- Fix the wall mount to the wall using the two screws supplied with the recess for the plug facing upwards.
Insert the jack plug into the cable holder on the wall mount as illustrated in the diagram. Pay attention here to the recess on the plug and the guide slot on the cable holder.
- Lock the plug in place by twisting it a quarter turn.
7. Preparing the appliance
Remove all packaging materials from the appliance and the accessories.
▶ Firstly connect the cyclone insert and the dust filter together. Ensure that the tabs on the cyclone insert fit into the recess on the dust filter.
▶ Fit the cyclone insert with the dust filter into the dust container so that the seal on the dust filter closes off the dust container.
Place the dust container onto the motor block by firstly inserting it into the catch at the bottom of the motor block and then folding it shut until the unlocking button clicks audibly into place.
7.1. Charging the battery
You can charge your vacuum cleaner using the supplied mains adapter GQ05-096030-CG or the car charger adapter BE24L-030-096; please observe the following steps:

NOTE!
Switch off the appliance before charging it (On/Off switch set to position 0).
▶ Attach the mains adapter or the car charger adapter to the power connection on the bottom of the vacuum cleaner.
Connect the mains plug to the mains socket or the car charger adapter
BE24L-030-096 to the 12 V SOCKET in your car.
The appliance will charge; the operating light flashes red. Once the battery is charged, the operating light will light up green.
▶ After charging, remove the plug on the mains adapter from the mains socket or the car charger adapter from the socket in the car and remove the jack plug from the appliance.

NOTE!
Charge the battery for at least 24 hours before using the vacuum cleaner for the first time.
Always charge the battery when the suction power drops significantly and the operating light flashes green.
7.1.1. Charging in the wall mount
If you want to charge the vacuum cleaner in the wall mount, proceed as follows: Install the wall mount and the mains cable as described above.
Connect the mains adapter to a mains socket for charging the battery.
- Hold the vacuum cleaner by the handle and insert it into the wall mount with the dust container facing upwards.
When the operating light flashes red, the vacuum cleaner is correctly mounted and the battery is being charged. Once the battery is charged, the operating light will flash green.
▶ After charging or when the appliance is not in use, pull the plug on the mains adapter out of the mains socket again.
8. Using the vacuum cleaner
▶ Ensure that the filter housing and the dust filter are precisely fitted in the dust container and that the dust container has been securely mounted on the motor block.
▶ Connect a suitable suction nozzle:
—The crevice nozzle for vacuuming difficult-to-reach areas.
- The nozzle for liquids for vacuuming up small amounts of liquid (e.g. spilt drinks or similar).
▶ Switch on the vacuum cleaner by setting the On/Off switch to position I.

NOTE!
For reasons of hygiene, clean the dust container and the filter immediately after you have vacuumed up liquids. Allow the parts to dry completely before using the appliance again.
▶ Switch off the vacuum cleaner by setting the On/Off switch to position 0.
9. Cleaning and care
Empty the dust container and clean the filter and cyclone insert ideally after every use. Clean the suction opening as required.
- Do not use solvents or caustic/gaseous cleaning agents to clean the surfaces of the appliance and the accessories. Wipe the surface with a damp cloth.
9.1. Cleaning the dust container
We recommend emptying the dust container and cleaning the filter after every use. Carry out the following steps:
The appliance is switched off.
▶ Press the unlocking button above the handle.
Remove the dust container from the motor block.
Remove the dust filter by pulling on the ribbed flap.
Remove the cyclone insert by taking hold of it inside the opening and pulling it out.
▶ Empty the dust container over a dustbin.
- Rinse the dust container and the cyclone filter with water and clean the dust filter regularly under running water. Rinsing is not necessary every time. Never put the dust container in the dishwasher!
When the dust container, cyclone insert and filter are dry again, fit the filter housing and the cyclone insert with the dust filter into the dust container so that the seal on the filter closes off the dust container.
Place the dust container onto the motor block by firstly inserting it into the catch at the bottom of the motor block and then folding it shut until the unlocking button clicks audibly into place.

CAUTION!
Before using the appliance for the first time, please ensure that the dust filter in the dust container has been inserted correctly. If this is not the case, it can lead to the vacuum cleaner being damaged.
9.2. Cleaning the suction opening
After a while, dirt and dust can collect around the suction opening and can reduce the suction power. To avoid this, the suction opening should be cleaned regularly.
▶ Switch off the appliance.
Remove dirt and dust from around and inside the suction opening.
10. Maintenance
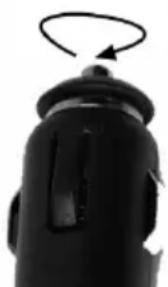
10.1. Replacing the fuse in the car charge
▶ Pull the car charger adapter BE24L-030-096 out of the 12 V socket in your car.
natural_image
Close-up of a black mechanical component with a curved arrow indicating rotation (no text or symbols visible)▶ Twist off the fuse cover as illustrated.

NOTE!
When replacing the fuse for the first time, it is possible that the fuse cover will be very difficult to unscrew.
Replace the faulty fuse with a new F 3A/250V fuse and screw the
fuse cover back in place.
11. Troubleshooting
If the appliance malfunctions, please check first if you can eliminate the error yourself with the help of the following overview.
Never try to repair the appliances yourself. Contact our Service Centre or other qualified personnel if a repair is necessary.
| Problem Rectification | |
| The vacuum cleaner is not working | ▸ The rechargeable battery is not sufficiently charged |
| The suction capacity is reduced | ▸ The suction nozzle is blocked. Switch off the appliance. Remove the blockage.▸ Dust filter/cyclone insert is dirty. Clean the dust filter/cyclone insert. |
| The vacuum cleaner makes unusual noises during operation | Switch off the vacuum cleaner immediately. The suction nozzle is blocked. Remove the blockage. |
12. Disposal

Packaging
Your appliance has been packaged to protect it against transportation damage. Packaging is raw material and can be re-used or added to the recycling system.
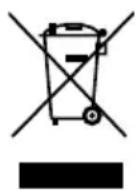
Correct disposal of this product
The appliance is fitted with a built-in high-performance lithium battery. Within the EU this symbol indicates that this product may not be thrown away with the household refuse. Old appliances contain valuable recyclable materials which should be disposed of through the proper channels in the interests of the environment and human health. Therefore please use the collection systems provided or send the product back to the place where you bought it so that it can be disposed of correctly. and recycled as appropriate.
13. Technical data
Power output 45 W
Voltage: DC 7.4 V
Input: DC 9.6 V

Mains adapter
Model GQ05-096030-CG
Manufacturer Dong Guan City GangQi Electronic Co., Ltd, China

Manufacturer Dong Guan City GangQi Electronic Co., Ltd, China
Input: 12 V / 2 A
Output DC 9.6 V Fuse: F 3A/250V
(6.3 x 32 mm, flink, US standard, 3A)
Integrated rechargeable battery
Type Li-Ion, 1300 mAh
Charging time approx. 6 hours
Operating time approx. 15min
Dust capacity: 0.4 l
Liquid capacity 0.15 l
Dimensions: approx. 406 x 104 x 130 mm
14. Declaration of conformity

Medion AG hereby declares that the product MD 16322 conforms to the following European requirements:
• EMC Directive 2004/108/EC
• Low Voltage Directive 2006/95/EC
• Ecodesign Directive 2009/125/EC
• RoHS Directive 2011/65/EU.
Full declarations of conformity are available at www.medion.com/conformity.
15. Legal notice
Copyright © 2015
All rights reserved.
This operating manual is protected by copyright.
Mechanical, electronic and any other form of reproduction is prohibited without the written permission of the manufacturer
Copyright is owned by the company:
Medion AG
Am Zehnthof 77
45307 Essen
Germany

The operating manual can be reordered via the service hotline and is available for download via the service portal at www.medion.com/gb/service/start/.
You can also scan the QR code above and download the operating manual onto your mobile device via the service portal.
16. Restricted Warranty (United Kingdom)
16.1. General Conditions of Warranty
16.1.1. General
This warranty covers defects relating to workmanship and manufacture in MEDION products. The period during which this warranty is valid and during which claims against the warranty can be made to MEDION must be in accordance with the following terms in order to be considered eligible:
- Is effective from the date of purchase or receipt of the MEDION product from an authorised seller of MEDION products;
and
- expires at the end of the warranty period.
For the warranty to be valid, you must:
• provide suitable evidence of purchase, a copy of the original purchase receipt from an authorised seller of MEDION products is preferred;
or
- register your product within 28 days of purchase online at www.MEDION.co.uk.
Please keep the original purchase receipt in a safe place. MEDION and its authorised sellers reserve the right to refuse a repair under warranty or a warranty confirmation if a proof of purchase [or registration of purchase] cannot be established, or has not been, submitted.
When it is necessary to return your product for repair please ensure that your product is suitably packed for transportation.
Provided that your product is still within warranty (please check the duration of the warranty period as described above) and is eligible for repair or replacement under the terms of the warranty, to return your product, please telephone MEDION on the service hotline number. You will be sent a pre-paid transportation box suitable for returning your product to MEDION or a voucher.
PLEASE MAKE SURE THAT YOU HAVE A BACKUP COPY OF ALL DATA ON THE PRODUCT BEFORE RETURNING THE PRODUCT TO MEDION.
MEDION shall bear the costs of postage and packaging for returning the product and the transportation risk. However, if following examination of the defective product in question, MEDION, in its reasonable opinion, considers that the defect has been caused by:
- your operating and/or using the product other than as instructed in the accompanying documentation;
- damage caused in transit as a result of your negligence in packaging of the product; and/or
- otherwise than in accordance with the terms of this warranty;
This warranty shall be void and you may be required by MEDION to reimburse MEDION for the reasonable costs of postage and packaging before MEDION will return the product to you. If so and you would still like MEDION to repair or replace the
product, MEDION may do so but you will be charged MEDION's standard rates for repair and replacement for this service.
Before returning the product, please contact MEDION via the service hotline or via the internet www.MEDION.co.uk. You will receive a reference number (RMA No.). Please mark the outside of your package to ensure that this reference number is clearly visible. Please submit a letter containing as much detailed information as possible and, a full description of the defect or fault.
This should include:
• a description of the fault;
- when it occurred, how long it has been evident and how frequently it occurs;
- any errors message(s) displayed when using the product;
- a description of the circumstance(s) and conditions in which the fault occurs; and
- whether it is an intermittent or persistent fault.
This will greatly assist MEDION in identifying the defect, when submitted together with the defective product.
Unless otherwise instructed by a MEDION representative in all cases, the product must be returned complete with all parts which were included with the original product. Incomplete contents of the returned package may lead to a delay in the repair or replacement. MEDION does not accept any liability for any additionally submitted material(s) which were not supplied with the original MEDION product.
This warranty does not affect your statutory rights in any way and is subject to the applicable legal statutes of the country where the product was sold to you by an authorised MEDION seller.
16.1.2. Scope
Subject to any exclusions set out within this warranty, where there is a defect in your MEDION product covered by this warranty, MEDION will repair or replace the MEDION product. The decision whether to repair or replace the product will be made solely at the discretion of MEDION. MEDION may, in its own discretion, replace the product returned for repair under warranty with a replacement product that is either identical or, in the event that such product(s) are no longer available, a product of equal or superior specification and quality.
No warranty is given for batteries or rechargeable batteries or for consumable materials subject to wear and tear, i.e. for parts which have to be replaced periodically during the normal use of the product, such as video-projector lamp.
Non critical failures that fall within industry specified tolerances e.g. noise, LCD pixels are not covered by this warranty. Please consult the appropriate section in your user or instruction manual for this product for exact specifications and tolerances.
To the extent which is permitted under law, MEDION will accept no liability for burnt-in images on plasma or LCD products as a result of normal wear and tear during the operation of the product. Please refer to your user or instruction manual for this product for detailed operating instructions for your plasma or LCD product.
The warranty does not cover errors relating to the playback of data media in an incompatible format or created with unsuitable software.
If it is found during repair or assessment that the defect concerned is not covered under warranty, MEDION reserves the right to invoice you for all reasonable costs incurred by MEDION. These costs will be in relation to the return of the product, including reasonable administration costs, plus reasonable costs for materials used and labour provided when repairing or replacing the product. This is subject to MEDION providing you with an estimate for carrying out such work prior to costs being incurred and that you have accepted the estimate.
You are entitled to seek independent advice or consultation relating to your product or any of MEDION's findings. MEDION will not be liable for any costs incurred to you when doing so.
16.1.3. Exclusion from warranty
To the extent permitted by law, this warranty shall be void in the event that defects or loss caused by:
- failure and damage resulting from the operation of the product in an environment other than that recommended in the accompanying user or instruction manual (e.g. in direct sunlight or in a damp room);
- accidental damage;
- use other than in accordance with the accompanying user or instruction manual;
- modifications, conversions, expansions, maintenance and/or repairs made to the MEDION product by unauthorised repairers or use of unauthorised third party parts;
- negligence;
• virus attack or software errors;
or
- improper transportation or packaging during return of the product.
- This warranty will also be considered void if labels or serial numbers of the product or of a component of the product are modified or made illegible.
- To the extent permitted by law, MEDION shall; only be responsible for losses which are a reasonably foreseeable consequence of the relevant defect in the product; MEDION will not be responsible for any costs incurred in relation to software configuration; economic loss; loss of opportunity; loss of income; or loss of data or software arising out of its repair or replacement of a MEDION product under this warranty
16.1.4. Service Hotline
Before returning the product to MEDION you must contact us using the service hotline or via the internet (www.MEDION.co.uk). You will receive further instructions for making your claim under warranty when you call.
The price of your call will be stated at the beginning of the call.
16.2. Special warranty conditions for MEDION PC, notebook, pocket PC (PDA) and navigation devices (PNA)
The following terms apply to MEDION PC, notebook, desktop, pocket PC and laptop products and optional items included with such products. If one of these items has a fault, you also have a warranty claim for its repair or replacement, from MEDION. The warranty covers the costs of materials and labour for repairing or replacing the defective MEDION product or the optional item in question.
Hardware connected to your product that was not produced or marketed by MEDION can invalidate the warranty if MEDION can reasonably demonstrate that damage to the MEDION product or of the optional item included with the delivery was caused by such hardware. You are entitled to seek independent advice or consultation relating to your product or any of MEDION's findings. MEDION will not be liable for any costs incurred to you when doing so.
This warranty is restricted in relation to any pre-installed operating system as well as to application programme software that is included with the MEDION product in question. This warranty is restricted as follows:
For pre-installed operating system as well as to application programme software included in the MEDION product, MEDION only guarantees the data media (e.g. the diskettes and CD-ROMs) upon which this software is delivered and warrants that such data media shall be free from material and processing defects for a period of 90 days from the date of purchase of the MEDION product from an authorised seller of MEDION. MEDION will replace defective data media free of charge.
Any claims in respect of defective pre-installed operating system as well as to application programme software are hereby expressly excluded and you should contact the relevant licensor or copyright owner of the defective software in question. MEDION does not guarantee that any software supplied with MEDION products will function without interruption, will be free from errors or that it will fulfil your requirements. MEDION does not guarantee the 100% accuracy of the maps provided with the Navigation device.
It may be necessary to delete all data in the product in order to repair the MEDION product. PLEASE MAKE SURE THAT YOU HAVE A BACKUP COPY OF ALL DATA ON THE PRODUCT BEFORE RETURNING THE PRODUCT TO MEDION. To the extent permitted by law, MEDION excludes all liability for loss of data and MEDION recommends in all cases that you back up all data on your MEDION product before returning the product to MEDION.
16.3. Special warranty conditions for repair on site or replacement on site
If a claim for repair or replacement on site is included with the product, the special warranty conditions for repair or replacement of your MEDION product on site apply.
The following provisions must be made by you for carrying out repairs or replacements on site:
- MEDION or its authorised personnel must have unrestricted, safe and immediate access to the products.
- Telecommunication facilities required by MEDION or its authorised personnel for proper execution of your order, for testing and diagnostic purposes and for remedying faults are provided by you at your own expense.
- You are responsible yourself for restoring the application software after the repair services have been carried out by MEDION or its authorised personnel.
- You must take all other necessary steps to enable MEDION or its authorised personnel to carry out your order properly.
- You are responsible yourself for connecting and configuring any existing external peripheral products after MEDION or its authorised personnel have carried out their repairs.
- The free cancellation period for repairs or replacements on site is 24 hours, thereafter our reasonable costs resulting from late or missing cancellation shall be invoiced at your expense.
17. Service Address
① 0871 37 61 020 01793 715716
(Costs 7p/min from a BT landline, mobile costs may be higher)
Mo - Fr: 08:00 - 20:00
Sa - Su: 10:00 - 16:00
www.medion.co.uk
@ To contact us by email please visit the „Service“ section of our website at www.medion.co.uk.