
Solo 915 - Sports Watch Sportline - Free user manual and instructions
Find the device manual for free Solo 915 Sportline in PDF.
User questions about Solo 915 Sportline
0 question about this device. Answer the ones you know or ask your own.
Ask a new question about this device
Download the instructions for your Sports Watch in PDF format for free! Find your manual Solo 915 - Sportline and take your electronic device back in hand. On this page are published all the documents necessary for the use of your device. Solo 915 by Sportline.
USER MANUAL Solo 915 Sportline
HOW TO USE THIS MANUAL 1
ACTIVATING THE WATCH FROM POWER DOWN MODE 1
WARNINGS & CAUTIONS 2
KEYS AND THEIR FUNCTIONS 5-6
ACQUIRING HEART RATE 7
HEART RATE LOCK 8
POWER DOWN MODE 8
VIEWING THE BACKLIGHT 8
SETTING DAILY ALARM 12
OPERATING THE CHRONOGRAPH 13
SETTING & OPERATING THE COUNTDOWN TIMER 14
REPLACING THE WATCH BATTERY 17
BATTERY SAFETY INFORMATION 18
TROUBLE SHOOTING 19
WARRANTY
20
SOLO 915
INTRODUCTION
Congratulations on your purchase of a Sportline Personal Fitness Monitor. Please keep in mind; your watch is a sensitive technical instrument. With proper care and maintenance, it will last for many years. However, improper care and handling can cause the various sensors to be damaged and to stop functioning.
HOW TO USE THIS MANUAL
Sportline Personal Fitness Monitors have many unique features and functions. Please read all sections of this manual carefully and become fully familiar with the operation of the watch before using it in the field.
Proper setup and operation will greatly enhance the watches usefulness and your enjoyment.
The manual is divided into sections outlining each of the major functions of the watch. A drawing of the watch screen that represents the starting point or other important screens for each operational process are shown adjacent to the instructions for the process; important keys are shown indicating
PRESS & HOLD and PRESS.
The steps for the programming or operation are adjacent to the screen illustration. Key points and important information are shown in highlighted blocks.
ACTIVATING THE WATCH FROM POWER DOWN MODE
PLEASE NOTE: Your watch was originally shipped in Power Down Mode to conserve battery life.
To deactivate Power Down mode: PRESS & HOLD ANY KEY for 5 seconds (see page 8 for more information on Power Down mode).
WARNINGS & CAUTIONS
WARNING: Before starting any exercise program or performing any vigorous physical activity, we strongly suggest you visit your doctor for a complete physical and to discuss your plans.
CAUTION: Your watch is designed to be water resistant to a static pressure of 5 ATM and can be worn while showering and light swimming. However, we recommend that extensive use of the unit in the water be avoided whenever possible. Care should be taken not to press any keys while the unit is submerged as this can force moisture past the key seals and damage the unit.
CAUTION: Avoid exposing your watch to extreme conditions for a prolonged period of time.
CAUTION: Avoid rough usage or severe impacts to your watch.
DO NOT use hand cream as it will insulate the signal between the skin and sensor contacts.
DO NOT use the fingertips where the skin is dry and thick. For those with extremely dry skin, moisten fingers and wrist with tap water or a conductive gel.
CLEAN the Back Cover occasionally by using a damp cloth. Then wipe dry to remove any residual grease.
CLEAN your skin and fingers with soap and water for a better signal transmission.
AVOID doing awkward motions during measurement. It may create inaccurate heart rate readings.
SOLO 915
CARE & MAINTENANCE
- NEVER attempt to disassemble or service your unit.
- DO NOT expose the unit to extreme heat, shocks, magnetic fields, electrical noise, strong vibration or long-term exposure to direct sunlight.
• DO NOT drop or step on the watch. - TO CLEAN THE UNIT: wipe with a lightly moistened cloth. Apply mild soap to the area if there are stubborn stains or marks. Do not expose the unit to strong chemicals such as gasoline, cleaning solvents, acetone, alcohol or insect repellents, as they may damage the unit's seal, case and/or finish.
- STORE the unit in a dry place when you are not using it.
CUSTOMER SUPPORT
If you experience any problems with this product or have questions, please first contact our Customer Service Team at 1-866-694-4575. We are ready to help.
WATCH FUNCTIONS
TIME
• Time/Day/Date/Month
• 12-/24-hour formats
- Daily Alarm
HEART RATE
• ECG Accurate Heart Rate
- Calorie Consumption
EXERCISE TIMER
• 1/100 second resolution
• 100-hr
CHRONOGRAPH
• 10-hr
• 1/100 second resolution
COUNTDOWN TIMER
• 10-hr
• 1-second resolution
OTHER
- EL Backlight System
• Water Resistant 50m (165ft)
KEYS AND THEIR FUNCTIONS
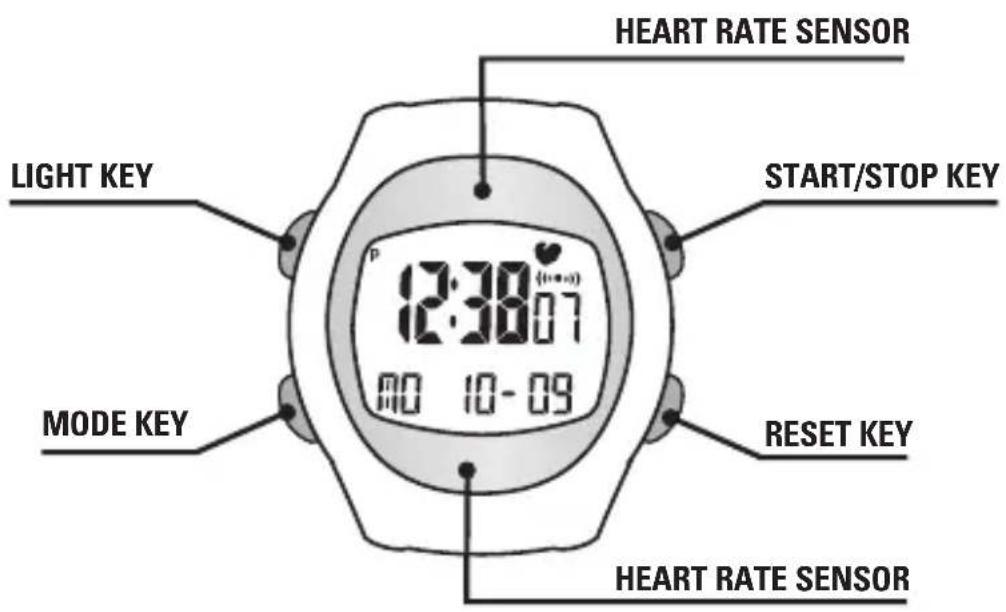
text_image
LIGHT KEY MODE KEY START/STOP KEY RESET KEY HEART RATE SENSOR 12:30:07 MO 10-09KEYS AND THEIR FUNCTIONS
MODE KEY
- Scroll through operating modes
- Advance through variables in setting sequence
- PRESS & HOLD: Enter/Exit the programming sequence
- Exit Finger Touch Heart Rate mode
START/STOP KEY (S/S)
- Start/Stop Chronograph
- Start/Stop Calories/Exercise Timer
- Start/Stop Countdown Timer
- Increase setting values during programming sequence
RESET KEY (R)
- Reset Calories/Exercise Timer, Chronograph & Countdown Timer
- Decrease setting values during programming sequence
- PRESS & HOLD: Activate/deactivate Heart Rate Lock in Time mode
HEART RATE SENSOR
• TOUCH & HOLD: Activates Heart Rate
LIGHT KEY
- Activates (EL) backlight system
SOLO 915
ACQUIRING HEART RATE
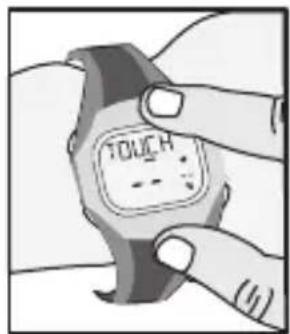
ACQUIRING HEART RATE: FINGER TOUCH
Heart rate may be acquired from any operating mode (not in any Setting Sequence).
- With the watch attached to your wrist, TOUCH & HOLD the HEART RATE SENSOR (anywhere on the metal top plate of the watch) with your index finger.
NOTE: If Heart Rate Sensors are accidentally touched, the watch will automatically attempt to acquire heart rate. If no heart rate is detected, watch will resume operating mode in approximately 10 seconds. This will not interfere with any timing functions in progress.
NOTE: You may exit Heart Rate mode at any time by Pressing the Mode, Start/Stop or Reset key.
- Continue TOUCHING & HOLDING until heart rate displays.
- Once Heart Rate is acquired, RELEASE THE SENSOR. Heart Rate will continue to display for a period of approximately 5 seconds.
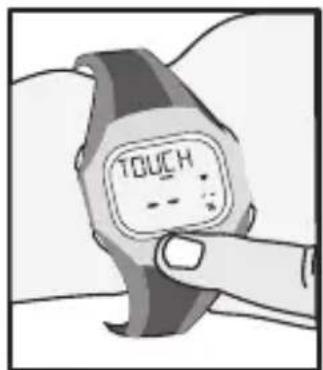
text_image
TOUCH --OR
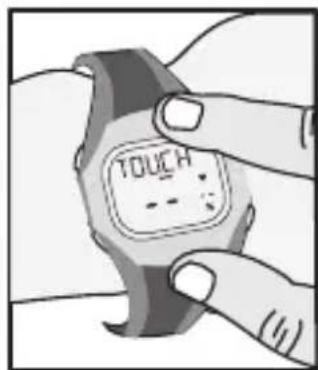
text_image
TOUCH (1)NOTE: The Monitor displays both actual heart rate (in beats per minute) and percent of estimated maximum heart rate.
To deactivate finger Touch Heart Rate (when you don't want to accidentally acquire heart rate):
- PRESS & HOLD the RESET (R) key in Time mode for 5 seconds. The heart icon will disappear from the upper right of the display.
- To unlock PRESS & HOLD THE RESET (R) key for 5 seconds in Time mode. The heart icon (♥) will appear in the upper right of the display.
POWER DOWN MODE
Power Down mode allows you to conserve battery life by deactivating the unit when the monitor is not being used for long periods of time. To activate Power Down mode:
- In Time mode, PRESS & HOLD the MODE, RESET & START/STOP keys for 5 seconds. The display will go blank.
NOTE: Time/Date, User Profiles and Memory files will be preserved.
- To deactivate Power Save mode and resume normal operation, PRESS & HOLD ANY KEY for 5 seconds.
NOTE: All Time & Personal Profile and Memory settings will be lost.
VIEWING THE BACKLIGHT SYSTEM
The Sportline Solo 915 is equipped with an electroluminescent (EL) Backlight System for viewing the display in low light conditions. To operate the Backlight:
PRESS the LIGHT key. Backlight will illuminate for approximately 5 seconds.
NOTE: Excessive use of Backlight System may significantly reduce battery life.
SOLO 915
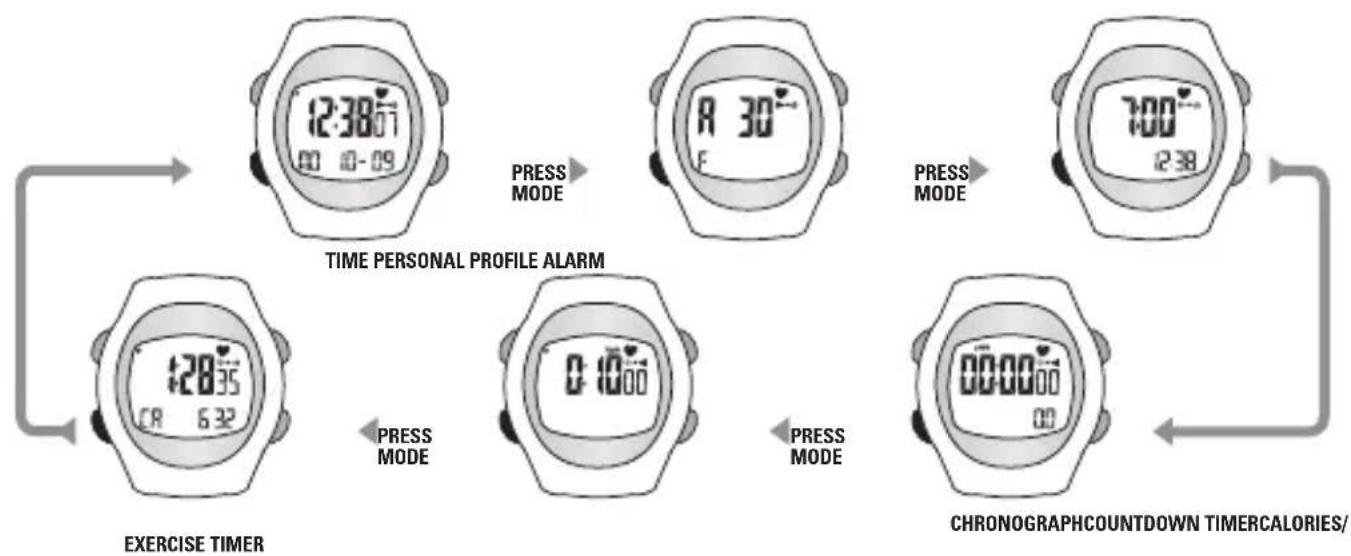
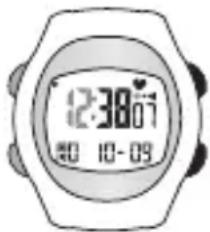
The Sportline Solo 915 has 6 main operating modes: Time, Personal Profile, Alarm, Chronograph, Countdown Timer and Calories/Exercise Timer. Scroll through main modes by PRESSING the MODE key. Acquire Finger Touch Heart Rate by TOUCHING & HOLDING the HEART RATE SENSOR in any operating mode.
flowchart
graph TD
    A["12:38 07"] -->|PRESS MODE| B["12:30 07"]
    B -->|PRESS MODE| C["7:00 07"]
    C --> D["00:00 00"]
    D --> E["00:00 00"]
    E --> F["6:32 CR"]
    F --> G["EXERCISE TIMER"]
    G --> H["TIME PERSONAL PROFILE ALARM"]
    H --> I["5:10 00"]
    I --> J["CHRONOGRAPHCOUNTDOWN TIMERCALORIES/"]
SETTING & OPERATING THE WATCH
SETTING TIME AND DATE
In this Programming Sequence, you will program the Time & Calendar functions.
- In Time mode, PRESS & HOLD the MODE key to enter the programming sequence. The variable being adjusted will flash on and off.
- Reset Seconds to zero (00) by PRESSING the START/STOP (S/S) or RESET (R) key. Advance to Set Minutes by PRESSING the MODE key.
- Adjust Minutes by PRESSING S/S (to increase) or R (to decrease). Set Minutes and advance to Set Hour by PRESSING the MODE key.
- Adjust Hour by PRESSING S/S or R. Set Hour and advance to Set Year by PRESSING the MODE key.
- Adjust Year by PRESSING S/S or R. Set by PRESSING MODE.
- Adjust Month by PRESSING S/S or R. Set by PRESSING MODE.
- Adjust Day by PRESSING S/S or R. Set by PRESSING MODE.
- Adjust date format (month - day or day - month) by PRESSING S/S or R. Set Format by PRESSING MODE.
- Adjust 12/24-hour format by PRESSING S/S or R. Set Format by PRESSING MODE.
- Turn Key Beep ON or OFF by PRESSING S/S or R. Set by PRESSING MODE.
- PRESS & HOLD the MODE key to exit the Programming Sequence & resume Operating mode.
text_image
12:30:07 10:00 10:09ADJUST: S/S or R
text_image
12:30'07 10-09SET: MODE
SOLO 915
SETTING & OPERATING THE WATCH
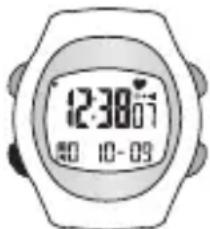
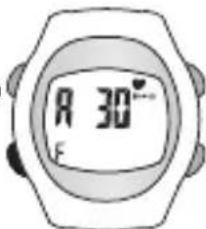
SETTING PERSONAL PROFILE
The Sportline Solo 915 uses an advanced algorithm based on your Personal Profile to estimate your maximum heart rate and calculate calories burned. This sequence must be completed to ensure accuracy of the watch's functions.
- In Personal Profile mode, PRESS & HOLD the MODE key to enter the programming sequence. The variable being adjusted will flash on and off.
- Adjust Age by PRESSING the START/STOP (S/S) or RESET (R) key. Advance to Set Gender by PRESSING the MODE key.
- Select Gender (M=male, F=female) by PRESSING the START/STOP (S/S) or RESET (R) key. Set Gender by PRESSING the MODE key.
- PRESS & HOLD the MODE key to exit the Programming Sequence & resume Operating mode.
text_image
R 30° FADJUST: S/S or R
text_image
A 30°FSET: MODE
SETTING & OPERATING THE WATCH
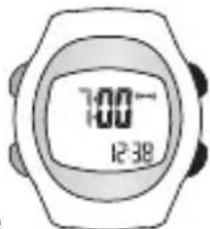
SETTING DAILY ALARM
The Sportline Solo 915 features a Daily Alarm. To set Alarm:
- In Alarm mode, PRESS & HOLD the MODE key to enter the programming sequence.
- Adjust Hour by PRESSING START/STOP (S/S) or RESET (R). Set by PRESSING MODE.
- Adjust Minutes by PRESSING S/S or R. Set by PRESSING MODE.
- PRESS & HOLD the MODE key to exit the Programming Sequence and return to Time mode.
- Turn Alarm ON or Off by PRESSING the START/STOP (S/S) key. The Alarm icon (w) will be visible when activated.
- Turn Hourly Chime ON or Off by PRESSING the RESET (R) key. The Chime icon (◀) will be visible when activated.

text_image
10:00 12:38ON/OFF: S/S
text_image
7:00- 12:38ADJUST: S/S or R
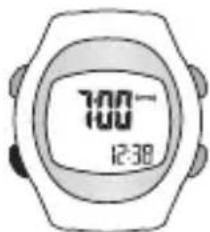
text_image
7:00- 12:38SET: MODE
SOLO 915
SETTING & OPERATING THE WATCH
OPERATING THE CHRONOGRAPH
To operate the Chronograph:
- To START timing, PRESS the START/STOP (S/S) key.
- To STOP timing, PRESS the S/S key.
- To RESET the Chronograph, PRESS & HOLD the RESET (R) key.

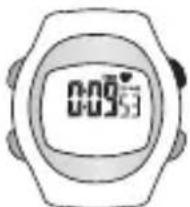
text_image
00:07:58 38START/STOP TIMING: PRESS S/S

natural_image
Illustration of a digital stopwatch with no visible text or symbols on the face or backgroundRESET: PRESS R
SETTING & OPERATING THE WATCH
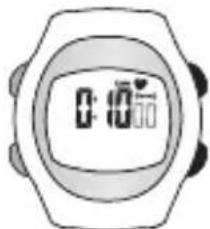
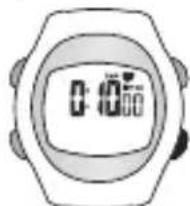
SETTING THE COUNTDOWN TIMER
The Sportline Solo 915 is equipped with a 100-hour Countdown Timer. To set Timer:
- PRESS & HOLD the MODE key in Timer mode.
- Adjust Seconds by PRESSING START/STOP (S/S) or RESET (R). Set by PRESSING MODE.
- Adjust Minutes by PRESSING S/S or R. Set by PRESSING MODE.
- Adjust Hours by PRESSING S/S or R. Set by PRESSING MODE.
- PRESS & HOLD the MODE key to exit the Programming Sequence and return to Timer mode.
To operate the Timer:
- To START timing, PRESS the START/STOP (S/S) key.
- To STOP timing, PRESS the S/S key.
- To RESET the Timer, PRESS & HOLD the R key.
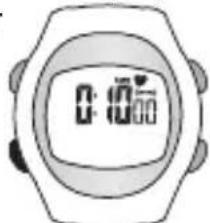
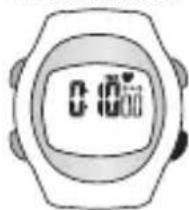
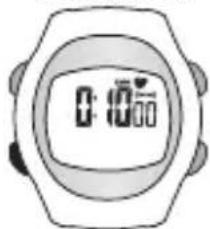
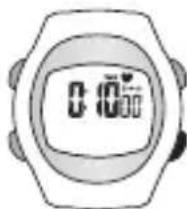
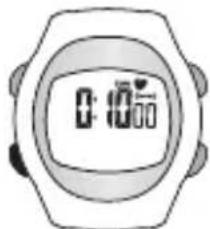
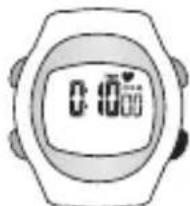
natural_image
Illustration of a wristwatch with digital display showing 0:10' and 30' (no text or symbols beyond basic clock face)ADJUST: S/S or R

natural_image
Illustration of a wristwatch with digital display showing time and minute (no text or symbols)SET: MODE
START/STOP TIMING: PRESS S/S
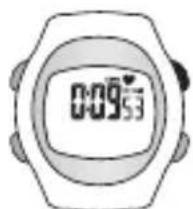
text_image
0:10:00RESET: PRESS R
SOLO 915
SETTING & OPERATING THE WATCH
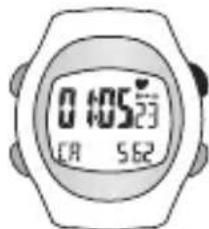
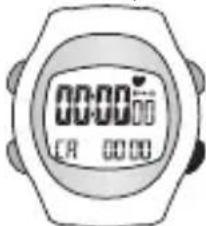
The Sportline Solo 915 uses an advanced algorithm based on your Personal Profile to estimate your maximum heart rate and calculate calories burned. The monitor displays Total Exercise Time and Calories Burned (CA). To operate Calories/Exercise Timer:
-
To START timing, PRESS the START/STOP (S/S) key.
-
To STOP timing, PRESS the S/S key.
-
To RESET the Exercise Timer, PRESS & HOLD the R key.
TIP: The more frequent heart rate readings are taken, the more accurate the calories burned estimate will be.
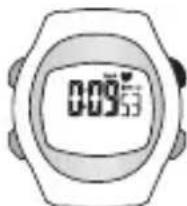
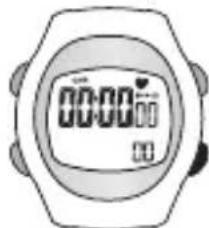
text_image
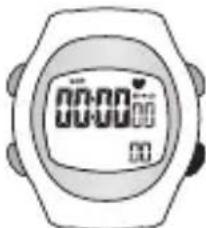
0:05:23 08 5:32START/STOP TIMING: PRESS S/S
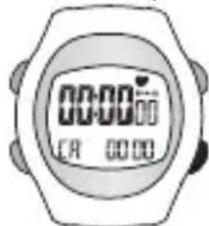
text_image
00:00 CA 00:00RESET: PRESS R
RANGES & SPECIFICATIONS
TIME
• AM, PM, hour, minute, second
• 12/24 hour format
- Calendar: month, date, day display with auto leap year adjustment
ALARM
• Daily alarm
• Alarm duration: 30 seconds
EXERCISE TIMER
- Resolution: 1 second
- Measuring range: 99 hours, 59 minutes, 59.99 seconds
HEART RATE
- Range: 40-200 beats per minute
COUNTDOWN TIMER
- Resolution: 1 second
- Measuring Range: 99 hours, 59 minutes, 59 seconds
OTHER
• Electroluminescent (EL) backlight
• Water resistant up to 50 meters
- Battery: CR 2032
SOLO 915
REPLACING THE WATCH BATTERY
The Sportline Solo 915 uses a single CR2032 lithium battery.
Battery replacement will be required from time to time, and should occur when:
- The display fades in part or completely
- The heart rate function will not activate
- Backlight System does not operate
- The Low Battery icon is visible
To replace the battery of your Sportline Solo 915, we recommend you take it to a watch repair service center or certified jeweler. This will ensure that the water resistance will be retained after battery replacement.
BATTERY SAFETY INFORMATION
CAUTION – BATTERY SAFETY INFORMATION
• Non-rechargeable batteries are not to be recharged
- Rechargeable batteries must be removed before recharging
- Rechargeable batteries should only be recharged under adult supervision
- Do not mix alkaline, standard (carbon-zinc), or rechargeable (nickel-cadmium) batteries
• Exhausted batteries are to be removed
- Do not mix old and new batteries
- Do not dispose of batteries in fire; batteries may explode or leak
- Do not dispose of product in fire; batteries may explode or leak
- If this product will not be used for an extended period of time, remove the batteries from the product
- The supply terminals are not to be short-circuited
- Batteries are to be inserted with correct polarity
- Clean the battery contacts and also those of the product prior to battery installation
- As always, dispose of batteries in an eco-friendly manner

The purpose of the crossed-out wheelie bin symbol is to remind us that most electrical products, and batteries, contain trace elements (including Mercury – Hg, Cadmium – Cd and Lead – Pb) which could be harmful to our environment and therefore our health. We must all be careful to dispose of them responsibly in a specifically designated way – either using a collection scheme or into the correctly labelled civic amenity (NOT into general waste) – this will help your local authority to arrange to recycle or dispose of them in the appropriate manner.
SOLO 915
TROUBLE SHOOTING
POTENTIAL CAUSES FOR NO HEART RATE READING OR LONG RESPONSE TIME:
CAUSE: DRY SKIN
SOLUTION: Apply conductive gel thoroughly finger. Tap water may help if conductive gel is not available.
CAUSE: MUSCLE TREMORS CAUSED BY PRESSING ON SENSORS TOO HARD
SOLUTION: Decrease finger pressure on the Sensor Pads.
CAUSE: DEAD SKIN ON WRIST OR FINGER.
SOLUTION: Rub off excessive dead skin with a towel
CAUSE: A THIN LAYER OF BODY GREASE INSULATES THE ECG SIGNAL PREVENTING THE WATCH FROM DETECTING ECG HEART RATE
SOLUTION: Wipe wrist and the back of watch with a tissue or soft towel.
CAUSE: HAIRY SKIN
SOLUTION: Apply conductive gel to wrist.
CAUSE: LOW BATTERY
SOLUTION: Replace the battery in watch.
SOLO 915
TABLE DES MATIÈRES
SOLO 915
MONITEUR DE FREQUENCE CARDIAQUE ET DE CALORIES
INTRODUCTION
COMMENT UTILISER CE MANUEL 23
AVERTISSEMENTS ET MISES EN GARDE 24
NETTOYAGE ET ENTRETIEN 25
SERVICE À LA CLIENTÈLE 25
FONCTIONS DE LA MONTRE 26
TOUCHES ET FONCTIONS 27
CAPTAGE DE LA FRÉQUENCE CARDIAQUE 29
23
PRINCIPAUX MODES DE FONCTIONNEMENT 30
COMMENT UTILISER CE MANUEL
text_image
00:07:58 38METTRE EN MARCHE/ ARRETER LE MINUTEUR
natural_image
Illustration of a digital stopwatch with no visible text or symbols on the face or backgroundAPPUYEZ SUR START/ STOP (MARCHE/ ARRÊT)
RÉGLAGE ET FONCTIONNEMENT DE LA MONTRE
RÉGLAGE DE LA FONCTION DE COMPTE À REBOURS
natural_image
Illustration of a wristwatch with digital display showing 0:10' and 30' (no text or symbols beyond basic clock face)RÉGLER : START/STOP (MARCHE/ARRET) ou RESET (RAZ)
natural_image
Simple line drawing of a wristwatch with digital display (no text or symbols)CONFIRMER: MODE
text_image
0:09:53APPUYEZ SUR LA TOUCHE ET LA MAINTENIR PRESSÉE
natural_image
Illustration of a wristwatch with a digital display showing time (no text or symbols)REMISE À ZÉRO :
SOLO 915
RÉGLAGE ET FONCTIONNEMENT DE LA MONTRE
FONCTIONNEMENT DES CALORIES/MINUTEUR D'ENTRAÎNEMENT
text_image
Digital stopwatch with time display showing 00:00, featuring a heart icon and control buttonsAPPUYEZ SUR LA TOU- CHE ET LA MAINTENIR PRESSÉE
PLAGES ET CARACTÉRISTIQUES
TIME (HEURE)
INFORMATIONS DE SÉCURITÉ RELATIVES AUX PILES
ATTENTION – INFORMATIONS DE SECURITE RELATIVES AUX PILES
text_image
12:38:57 90 10-09AJUSTAR: S/S o R

text_image
12:38:57 90 10-09FIJAR: MODO
SOLO 915
text_image
00:07:58 38INICIAR/DETENER CRONOMETRAJE: PULSE S/S

natural_image
Illustration of a digital stopwatch with no visible text or symbols on the face or backgroundREINICIO: PULSE R
natural_image
Illustration of a wristwatch with digital display showing time and minute (no text or symbols)AJUSTAR: S/S o R
natural_image
Illustration of a wristwatch with digital display showing 0:10, 10:30, and 24:50 (no text or symbols beyond clock hands)FIJAR: MODO
FUNCIONAMIENTO DEL CRONÓMETRO DE CUENTA ATRÁS
natural_image
Illustration of a wristwatch with digital display showing 0:10'00 (no text or symbols beyond clock face)REINICIO: PULSE R
SOLO 915
text_image
12:38:01 90 10-09SPEICHERN: MODE
SOLO 915
text_image
00:07:58 38natural_image
Illustration of a digital stopwatch with no visible text or symbols on the face or backgroundZURÜCKSETZEN: R DRÜCKEN
natural_image
Illustration of a wristwatch with digital display showing time and minute (no text or symbols)EINSTELLEN: S/S
ODER R

natural_image
Illustration of a wristwatch with digital display showing time and battery (no text or symbols)SPEICHERN: MODE
natural_image
Illustration of a wristwatch with digital display showing 0:00 (no text or symbols beyond clock face)ZURÜCKSETZEN: R DRÜCKEN
SOLO 915
TASTO MODE (MODALITÀ)
natural_image
Illustration of a hand holding a wristwatch with a digital display showing 'TOUCH' (no text or symbols on the watch face)OR
text_image
TOUCH (1)text_image
12:30'07 10-09IMPOSTARE: MODE
SOLO 915
text_image
00:07:58 38START/STOP CONTEGGIO: PREMERE S/S
natural_image
Illustration of a wristwatch with digital display showing 00:00 (no text or symbols beyond clock face)RESET: PREMERE R
natural_image
Illustration of a wristwatch with digital display showing 0:10' and 30' (no text or symbols beyond basic clock face)REGOLARE: S/S o R
natural_image
Illustration of a wristwatch with digital display showing 0:10 AM (no text or symbols beyond clock face)IMPOSTARE: MODE
natural_image
Illustration of a wristwatch with a digital display showing 0:09:53 (no text or symbols beyond the display)START/STOP CONTEGGIO: PREMERE S/S
RESET: PREMERE R
SOLO 915
text_image
0:105:23 CA 562START/STOP CONTEGGIO: PREMERE S/S
text_image
00:00 CA 00:00RESET: PREMERE R
INTERVALLI € SPECIFICHE
ORA
Sportline® is a trademark of SPORTLINE, a division
of EB Sport Group, Yonkers, NY 10701
Distributed in the UK by
EB Brands (UK), Worcester, WR4 9FA
All Rights Reserved. ©2010
SP4964IS03SPO

SOLO 915
HEART RATE + CALORIE MONITOR
