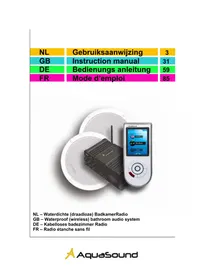
Wipod - Radio AquaSound - Free user manual and instructions
Find the device manual for free Wipod AquaSound in PDF.


User questions about Wipod AquaSound
0 question about this device. Answer the ones you know or ask your own.
Ask a new question about this device
Download the instructions for your Radio in PDF format for free! Find your manual Wipod - AquaSound and take your electronic device back in hand. On this page are published all the documents necessary for the use of your device. Wipod by AquaSound.
USER MANUAL Wipod AquaSound
GB - Waterproof (wireless) bathroom audio system
DE - Kabelloses badezimmer Radio
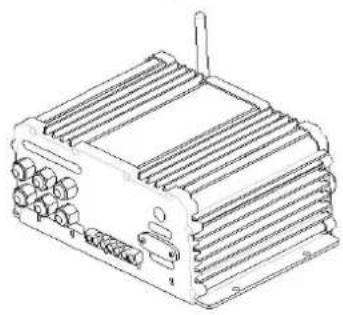
Receiver-box (IP55) 1x
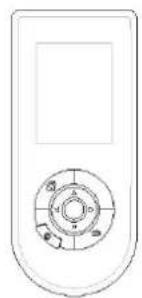
Wipod (afstandsbediening, IPX6) 1x
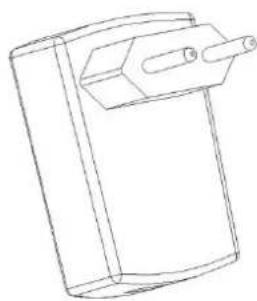
Batterij lader 1x
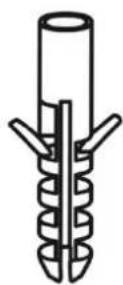
Plug 2x
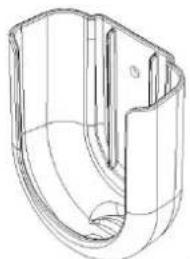
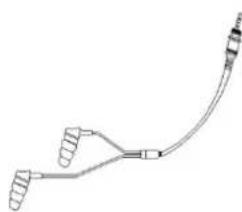
Wandhouser 1x oortelefoon 1x
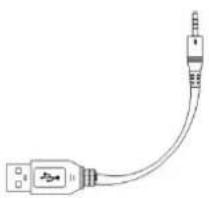
USB-kabel
Schroeven 2x

B. Plaats bepaling
1 Receiver-box in zone 1; ontvangst perfect.
2 Receiver-box in zone 2; ontvangst goed
3 Receiver-box in zone 3; ontvangst matig tot slecht
Houdt de Receiver-Box bereikbaar:
A. Components checklist
B. Placing
C. Specifications
D. Safety
E. Speakers
F. Receiver-box
G. Wipod:
- Navigation functions
-
Menu functions
-
Listening to Radio
- Listening to MP3 (My Music)
Audio - External Bluetooth
AUX 1/AUX 2 - USB
- Info
- IR (Infrared function)
- Settings
H. Charging your Wipod
I. Resetting your Wipod
J. Good to know
Guarantee:
You have a full guarantee on your Wipod Music Center. That guarantee is only limited if the product been used improperly, but also if the instructions in the manual have not been observed or if it appears that the product has been damaged or is defective by, for example, having fallen or being dropped.
Receiver-box: Guarantee 24 months.
Wipod: Guarantee 12 months.
Speakers: Guarantee 24 months.

Aquasound
AquaSound
De Run
5504
www.aquasound.nl
6720
info@aqu
Veldhoven
The Netherlands
tel. 0031
fax 0031
0031
Netherlanda
40-2534205
40-2541645

A. Components checklist
Thank you for buying this AquaSound product. The Wipod Music Center (WMC) is an advanced (wireless) audio system for the bathroom, kitchen, Jacuzzi, veranda and garden, with which you can listen to both the radio and your favourite MP3 music. A system specially developed for wet rooms/locations. You'll find the following components in the packaging:
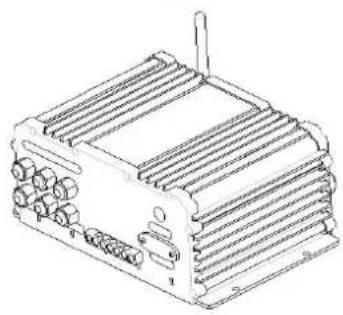
Receiver-box (IP55) 1x
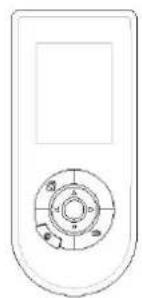
Wipod (remote control, IPX6) 1x
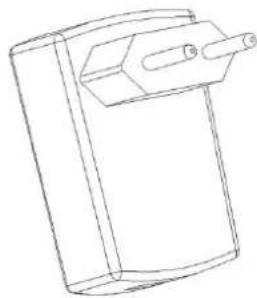
Battery charger 1x
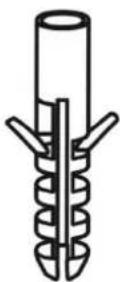
Plug 2x
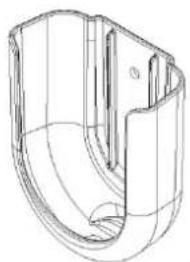
Wall Holder 1x
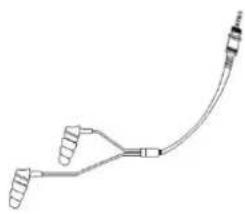
Earphone 1x
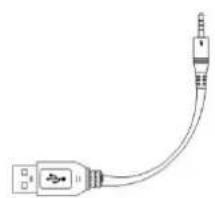
USB-cable

Screws 2x
B. Placing
Based on the drawing below, define the place for the Receiver-box vis-à-vis the Wipod. Always make sure that there is never more than 1 wall between the Wipod and Receiver-box.
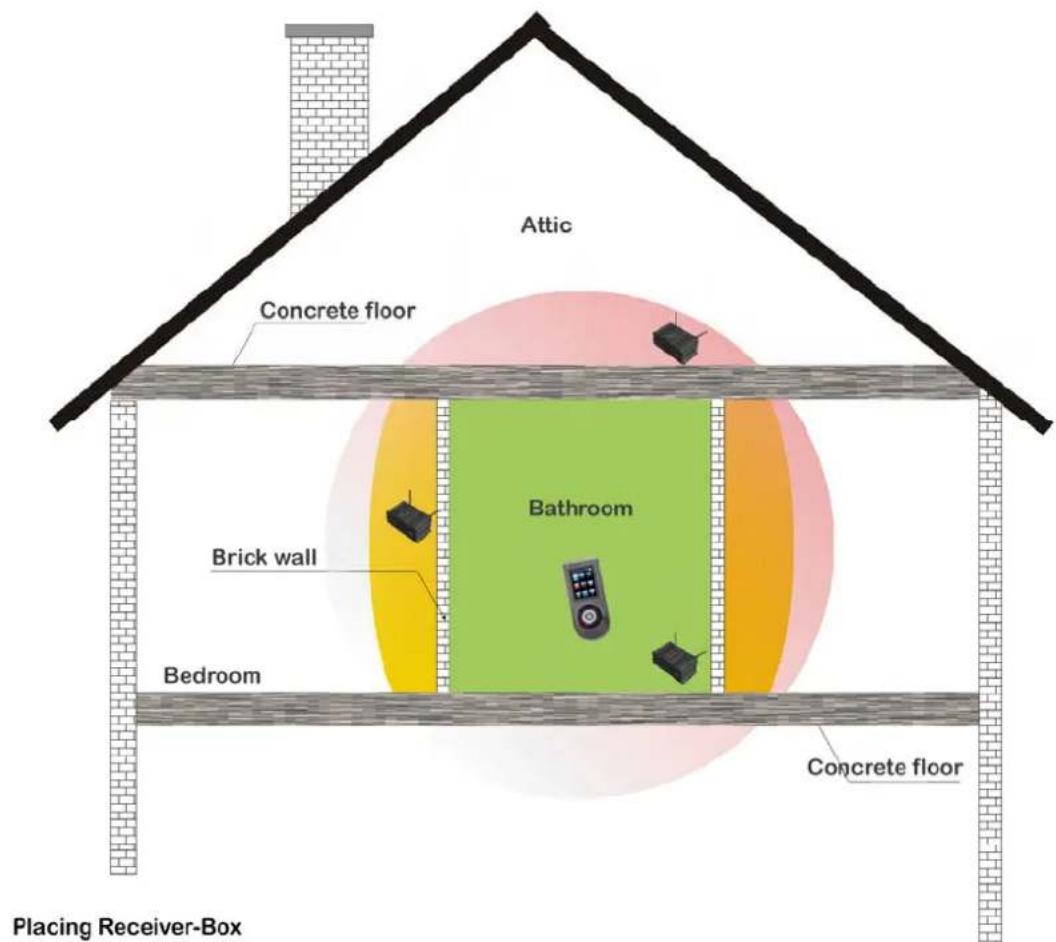
1 Receiver-box in Green zone (1); reception perfect.
2 Receiver-box in Yellow zone; reception good.
3 Receiver-box in Red zone; moderate to poor reception
Keep the Receiver-Box accessible:
The Receiver-box must be kept accessible at all times for maintenance, repair or replacement. AquaSound shall not be liable for the extra costs incurred for de-installation/breaking out of the Receiver-box.
Aluminium ceiling:
Do not place the Receiver-box behind an aluminium ceiling. The communication between Receiver-box and Wipod takes the form of RF signals and Bluetooth. Those signals can penetrate an aluminium ceiling only with difficulty, if at all.
C. Specifications
Specs. Receiver-box
| Waterproof class IP55 | |
| Integrated Bluetooth module: Yes | |
| Ring-core transformer: Yes | |
| Protocol: | Bluetooth2.0 |
| Signal frequency: 2.4GHz | |
| Total harmonic distortion: <0.5% | |
| Signal/noise ratio (dB): 110dB | |
| Frequency range: 20-20KHz | |
| Impendancy: 8 Ohm | |
| Maximum power (watts): | 55W: WMC55Light and WMC55Luxe 75W: WMC75Pro |
| Channels: | 2 |
| Voltage: | AV |
| Capacity: 2chx30W bij 8Ohm | |
| Housing: | Anodized |
| Dimensions (WxLxH): 240x160x100mm | |
| Weight: | 2 |
| Effective reception range between Receiver- box and Wipod (or other Bluetooth device compatible with Bluetooth 2.0) | +/- 5 metres |
230V
Kg
Specs. Wipod
| Waterproof class: | IPX6 |
| Integrated Flash memory: | 0 GB / 1 GB / 2GB |
| Audio decoder: | MP3 |
| Integrated rechargeable battery: | 1500mAh |
| Maximum play time of battery: | 8 ur |
| Data transmission technology: | Bluetooth2.0 A2DP |
| Waterproof MP3 player: | Yes |
| Colour LED screen: | 2.4 Inch |
| Multi-language OSD menu | Dutch / English / German / Français |
| Integrated IR module: Yes; WMC75Pro only | |
| Dimensions(WxLxH): | 142x63x25.5 mm |
| Specs Speakerset | Impedance | 8 |
| Power / max. peak 2x 35 Watt / 2x 55 Watt. | ||
| Length of speaker cord: | 2x 100 cm (Optional Extension cable 2x 750 cm) | |
| Size: | 156 | |
| Depth: | 37 | |
| Hole size: 129 mm |
Ohm
mr mm
All figures and photos are intended only as support. AquaSound reserves the right to make changes and/or improvements to the products as it sees fit and without prior notice.
D. Safety
This product has been developed and produced in accordance with international safety standards. You must study these safety rules before using this product.
The Receiver-box and Wipod can function best when both devices are no more than 5 metres away from one another. Other devices (microwave ovens, mobile phones, wireless networks) may cause interference, because of which this product will not work as well. Walls, concrete ceilings etc. will impact the range negatively.
- The transmitter elements of the Wipod may not be placed in direct sunshine. Otherwise, the device may not work as well or even fail.
- Once the batteries are almost dead you need to recharge them in good time, otherwise the Wipod will not work as well, if at all.
- Use the battery only for the purpose it was produced for. Do not use a battery charger other than the one supplied with the product.
- Do not change anything on the battery / battery charger. Make sure the battery does not come into contact with water.
- Do not throw the Wipod or expose it to direct sunshine for longer periods. Do not immerse the Wipod for long times under water.
E. Speakers
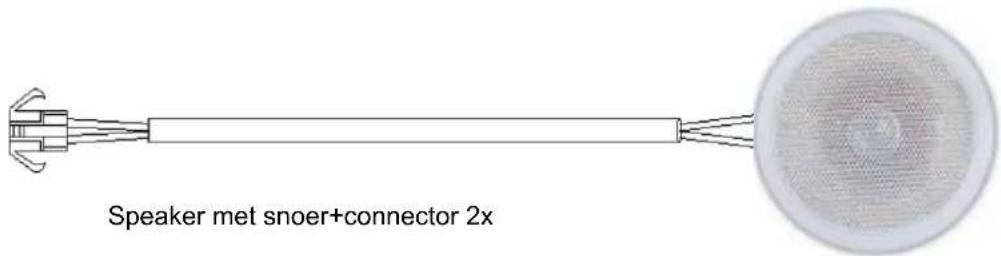
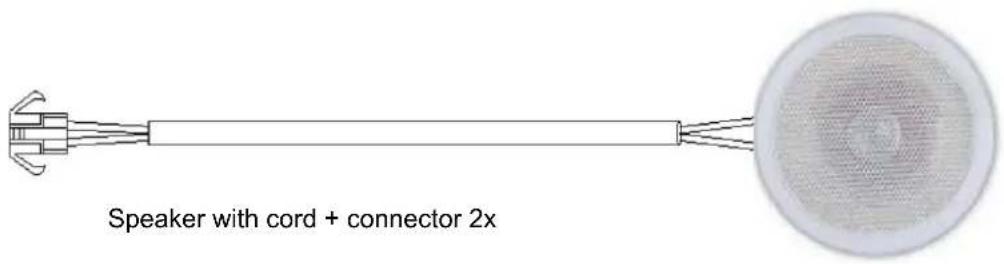
The speakers supplied are delivered in plug&play condition. Push the plugs of the same colours (of Receiver-box and speakers) into one another. Only then connect the plug to the mains.
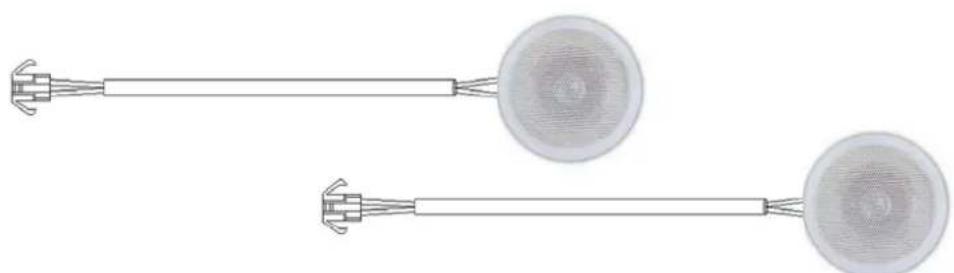
Note: Order the (optional) extension cable (2x 750 cm) to lengthen the speaker cable. If you want to lengthen the speaker cable by yourselves, you do so entirely at your own risk. Always pull the plug out of the mains socket and make sure the speaker cable you have installed can never cause a short circuit. Short circuits will cause irreparable damage to the system. This falls outside the AquaSound guarantee.
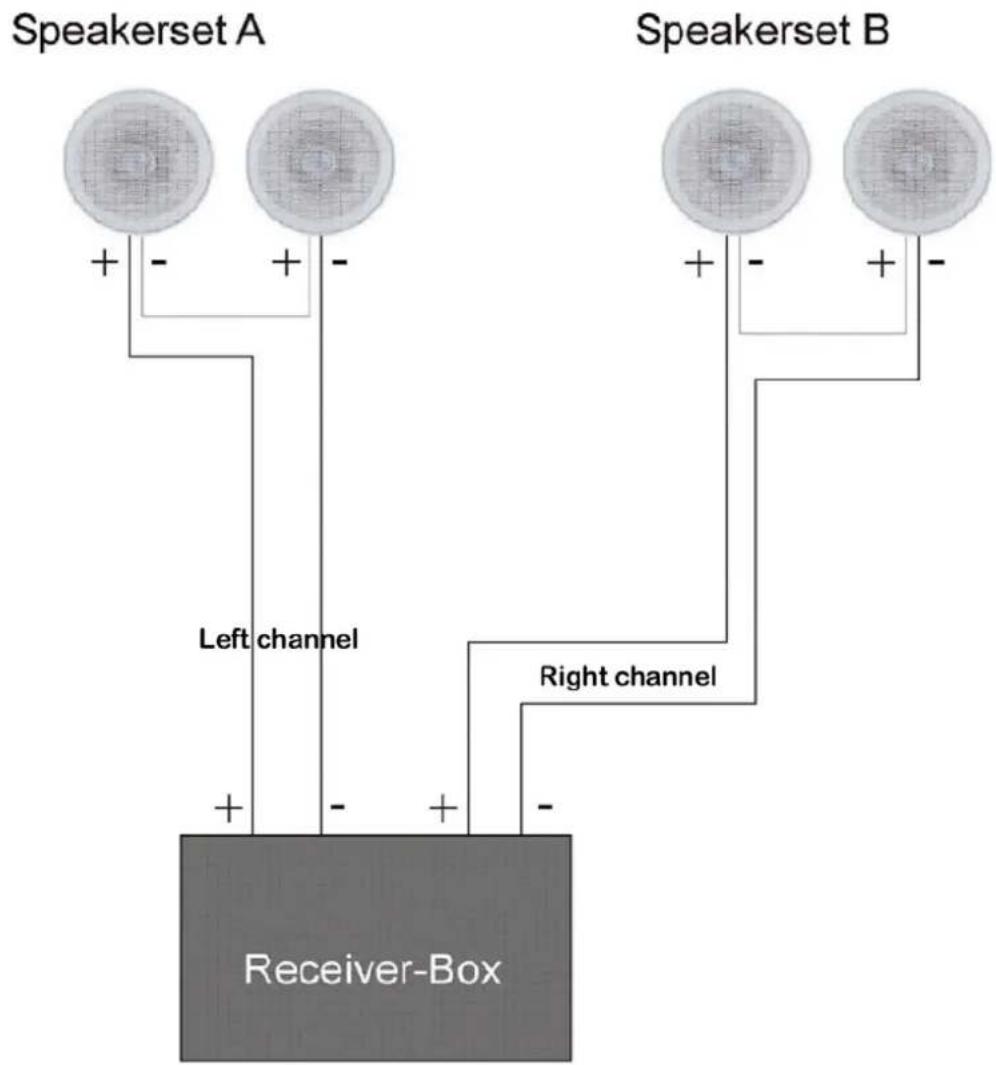
Serial connection of speakers :
To connect multiple speakers to 1 Receiver-box, you must connect them in series. See the wiring diagram below for the correct method.
F. Receiver-box
Only connect the Receiver-box to the mains once the speaker cords have been properly connected.
Antenne:
1 Radio signal from the ether:
Place the ends of the antenna vertically such that they create a V-form. This is the best way to receive radio signals from the ether.
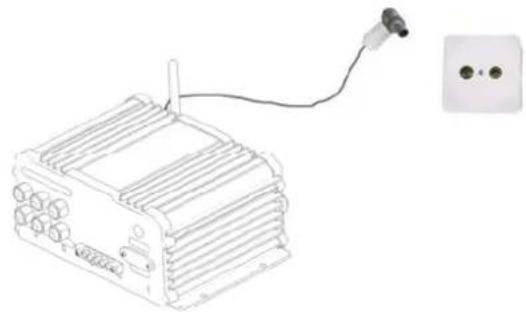
2 Radio signal via CAI:
If you have a CAI connection in the vicinity of the Receiver-box, you can mount a COAX plug (male) on the ends of one of the antenna wires. Push that plug into the CAI connection of the radio.
G.1 Wipod: Wipod: functions (navigation functions)
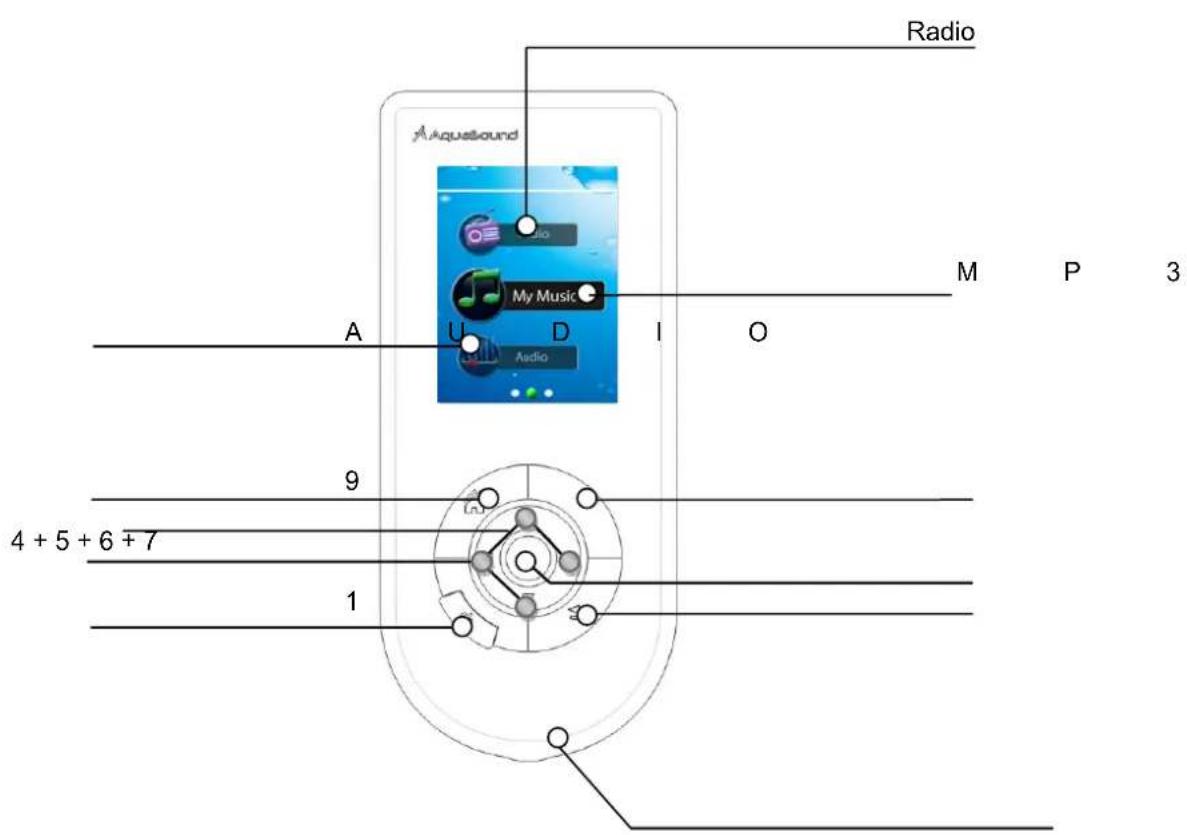
1) On/off Press this button for 2 seconds to switch the Wipod on. The Receiver-box will also emit a signal to confirm. Press this button briefly to switch the Wipod off.
2) OK Press this button to go to a sub-menu or to confirm an action.
3) Back/ESC This takes you one step back in the menu. Press several times on this button to keep going further back.
4) Up Press this button to scroll up.
5) Down Press this button to scroll down.
6) Left Press this button to scroll left.
7) Right Press this button to scroll right.
8) User button This button can have various functions (depending on the menu). This button is mentioned several times in the explanation of the buttons.
9) Home Press this button to go back to the start menu.
10) Wipod This advanced remote control is waterproof (IPX6), but long-term immersion can cause irreparable damage to the device.
G. 2 Wipod: functions (menu functions)
Intro and home screen:
1 Switch the Wipod on by pressing on the red 'On/off' button for at least 2 seconds.
2 Press 'OK' to skip the intro screen.

3 After you've started up the Wipod, the middle Home screen will always appear first
4 The Home screen consists of 3 screens with 9 buttons.
5 Navigate through the menu with the 4 buttons 'Up' / 'Down' / 'Left' / 'Right'.
6 Press 'OK' to go to the next screen.
Select 'Radio' in the Home screen and press OK. The screen below will appear:
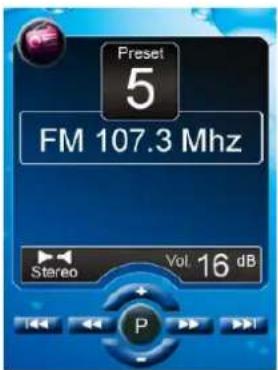
1 Press (and hold) the left or right button to search for stations automatically.
2 Press the left or right button to search for stations manually.
3 Once you've found a station you want to keep, press (and hold) the OK button. That frequency will be saved on 1 of the 8 memory banks.
4 Press OK to zap through the 8 pre-set stations.
5 Press Up or Down to adjust the volume.
6 Press User button to switch radio off.
The FM range is 87.5 to 108MHz.
Select 'My Music' in the Home screen and press OK. The screen below will appear:
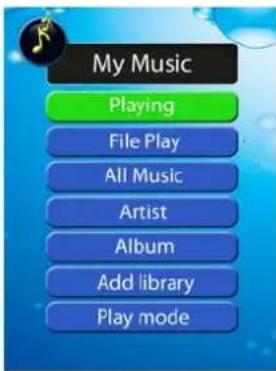
You see 7 buttons, as explained below.
Playing #
1 Scroll to "Playing" to see which MP3 song is playing at this moment (as long as you had previously chosen a number). The screen below will then appear:
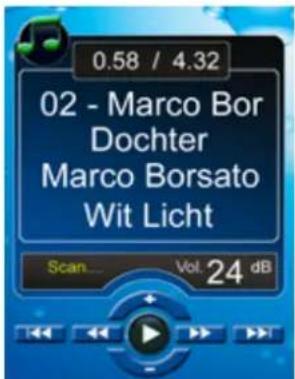
2 You can now use the Up or Down buttons to adjust the volume (1 and 80 dB).
3 Press left button 1x, music goes back 10 seconds.
4 Press left button 1x, music goes forward 10 seconds.
5 Press left button (and hold), play the number again.
6 Press (and hold) right button. The next number will now be played.
7 Press OK button to pause the number.
This function will only work once you've chosen an MP3 number under "File Play".
File Play
Select the "File Play" menu. Press OK to go to the menu. Choose a number in File Play and press OK (see note).
All music*
Select "All music*. Press OK to go to the menu. Choose a number from the playlist and press OK (see note).
Artist*
Select "Artist". Press OK to go to the menu. Choose an artist from the playlist and press OK (see note).
Album*
Select "Album". Press OK to go to the menu. Choose an album from the playlist and press OK.
Add library
Once you've copied the MP3 files to the Wipod, they first need to be assigned. Select "Add library" and press OK. The Wipod will now check all MP3 files and place them in the right category. Buttons 'All music', 'Artist' and 'Album' will now be activated.
- These buttons will only be activated once you've added all numbers to the library (Add library).
Play mode
Select "Play mode" and press OK to go to the menu. Press right button to run through the various options.
All song loop Single song Single loop Random play All song
Note: The making of the Bluetooth connection can take 30 seconds. Once the connection is there, she will be remained during the use of the MP3 function.
Audio:
Choose 'Audio' in the Home screen and press OK. The screen below will appear:
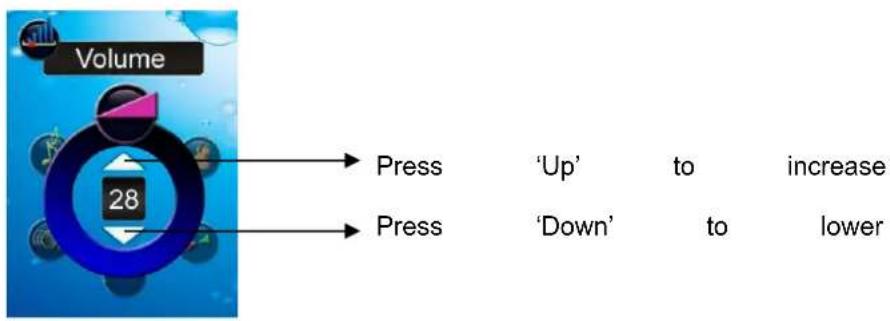
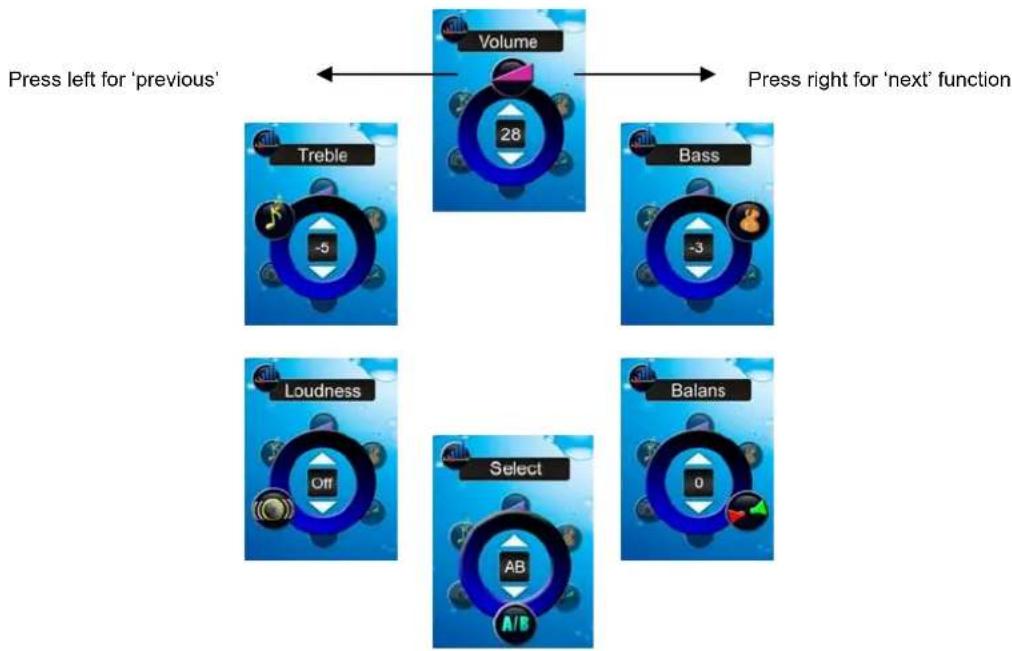
1 You see the Audio screen with 6 buttons.
2 As the first, the Volume function will be active.
3 Now press 'Left' (or 'Right') to activate the next (or previous) function.
4 Run through the menu that way.
5 Press 'Up' and 'Down' to increase or lower the values. Volume: from 1 to 80
| Bass: from -7 to +7 | |||
| Balance | from | -31 | to +31 |
| Select from | A → | B → | AB |
| Loudness: | from | On | to Off |
| Treble | from | -7 | to +7 |
Choose 'Bluetooth' in the Home screen and press OK. The screen below will appear:
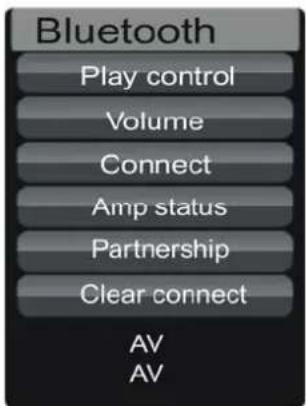
With this function you can also couple other Bluetooth devices (iPhone, SmartPhone or other devices with Bluetooth functionality) to the WMC75Pro. The maximum distance between the external device and the Wipod may be 5 metres.
Explanation of buttons:
1 Play control
Press OK to play or stop a music file (on the external Bluetooth device). Press left or right to select the previous or next number from the external Bluetooth device. This function will only work if it is supported by the external Bluetooth device (AVRCP).
2 Volume
1 - 80dB. Press OK to read off the volume. Press left or right to increase or lower the volume.
3 Connect
Use this to couple an external Bluetooth device.
4 Amp
Status
Check the status of the Bluetooth receiver.
5 Partnership (authorise)
Press this button to start the association process. The Wipod (and receiver-box) will be in the association status for maximum 180 seconds. During those 180 seconds you can couple an external Bluetooth device to the Wipod.
1 First activate the Bluetooth functionality of the external device before starting to couple.
2 Allow your external Bluetooth device to search for other Bluetooth devices. The name that appears in the screen of your external Bluetooth device is "JBM-150" or "Wipod". The search will stop.
3 Choose the Wipod. A new menu will appear on your external Bluetooth device. Select the right options.
4 Your external Bluetooth device will then ask for a code. Type the code "0000". Once you've confirmed, your external Bluetooth device will be coupled to the AquaSound Wipod.
5 Select a music file on your external Bluetooth device and press on Play.
6 Now, the Wipod can take over the basic functions, such as:
Play number
Next number
Previous number
Volume +
Volume -
Pause
7 From now on, the Wipod will always have the rights to play music files from your external Bluetooth device without having to authorise again for that purpose.
The next time you want to couple the same external device to the Wipod, do the following:
A Choose 'Bluetooth' in the Home screen of the Wipod and press 'OK'.
B Go to Bluetooth on your external device.
C Choose the Wipod from the list of 'known devices' and confirm.
D Your external device will now connect to the Wipod again.
6 Clear connect
Select this function if you want to remove an external Bluetooth device. The last device coupled will be removed and you will need to select "Pair" again to couple that device to the Wipod again.
Note: Only 1 external Bluetooth device can be coupled to the Wipod at the same time.
AUX:
If you've connected a DVD or CD player (or other source) to the Receiver-Box, you can use the 'AUX' function to listen to the sound from that device via this music system.
1 Choose 'AUX' in the Home screen and press OK. The screen below will appear:
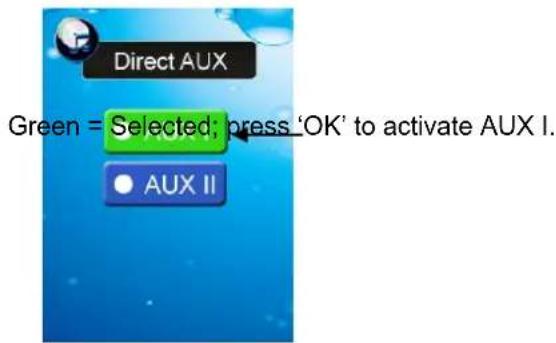
2 Choose AUX I here if you've connected your DVD player (or other source) to Audio I on the Receiver-Box.
Choose AUX II here if you've connected your DVD player (or other source) to Audio II on the Receiver-Box.
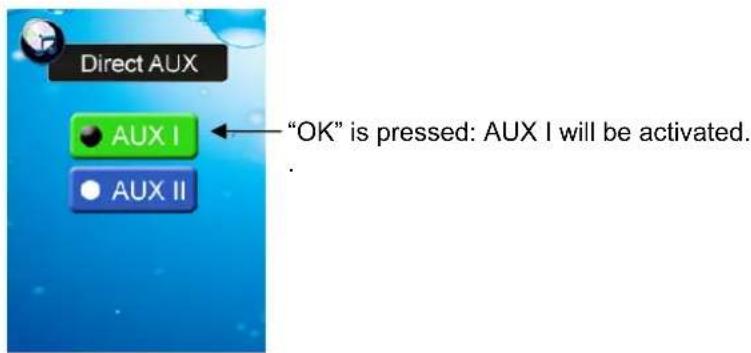
3 After 1 second, the 'Audio' screen appears (see the 'Audio' section in this manual).
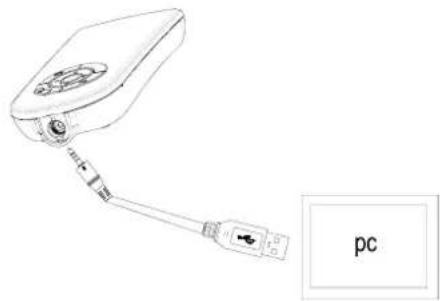
After you've connected the Wipod to your laptop or computer (using the USB cable supplied), choose USB in the Home menu and press 'OK'. The computer will recognise the device automatically and you can now exchange files with the computer.
Disconnecting your Wipod from the computer:
To avoid loss of data, choose 'Safely remove hardware' in the taskbar of your PC (desktop; bottom right). Choose the right device and click on Stop. You can now safely disconnect the Wipod from your PC.
The Flash memory of the Wipod is formatted based on the FAT32 format. You do not need to format it again.
Formatting anyway:
If you want to format the Wipod anyway, that is possible. Only the data files that were copied to the Wipod will be lost. Firmware will NOT be removed. After formatting you can use the Wipod again as usual. You need only to upload new music files (MP3).
With the USB connection on the Wipod you can:
- Exchange music files with a laptop or computer.
- Update firmware.
Charge the battery.
Choose 'Info' to get an overview of the status of the Wipod. The screen below will appear.
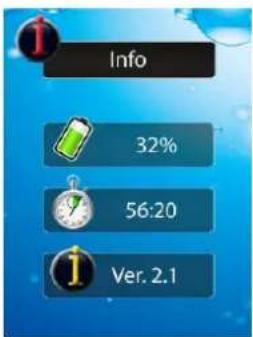
Battery status:
You can see the status of the battery. This is expressed as a percentage. Depending on use, the battery is good for about 8 hours.
Timer:
If you've set the system time-out in the 'Settings' menu, you can see here when the Wipod will switch itself off.
Version:
Here you can see what the firmware version of your Wipod is. At www.aquasound.nl you can download new firmware and thus update the Wipod.
Choose 'Infrared' in the Home menu if you want to operate external devices via infrared (for example the AquaSound TV). The screen below will appear.
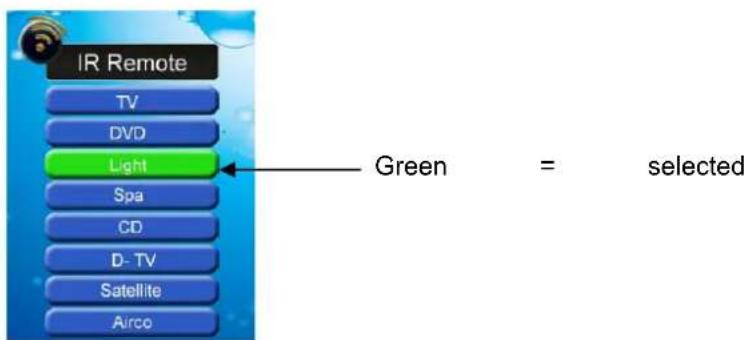
1 Select the device you want to operate from the list (e.g. TV).
2 The screen below will appear:
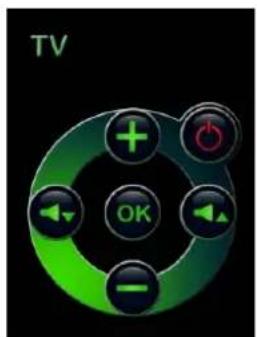
3 This screen matches the 6 operating buttons of the Wipod. The Home and the Back buttons are not available for operation of other IR devices. You need these buttons to go back to the start screen (Home button) or to a previous screen (Back button). You can train in practically all IR codes of other IR devices. Sometimes, an IR device has a very specific IR code. That cannot be trained in. That has nothing to do with your Wipod.
Training a function in:
Before training in an IR function, you need the original remote control of the device you want to operate. As an example, we will take an AquaSound TV remote control and train the Power button into the Wipod.
1 Switch the Wipod on, choose 'Infra Red' in the 'Home' menu and press OK.
2 Now choose the device for which you want to train in an IR code (in this example TV).
3 Place the Wipod and the original remote control opposite one another.
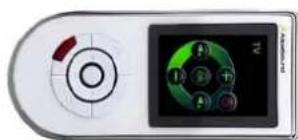
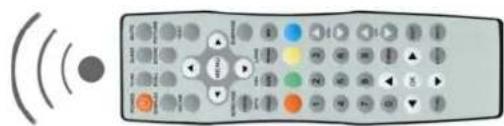
4 Now press (on the original remote control) 1x on the button the Wipod needs to learn (in this example 'Power').
5 The Wipod recognises the code; the IR-IN symbol appears in the display.
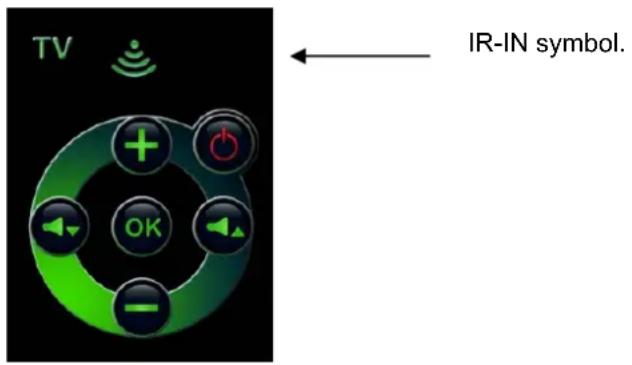
6 Now press (and hold) the button on which you want to save this function.
7 Press the button for as long as it takes for the OK symbol to briefly appear in the display.
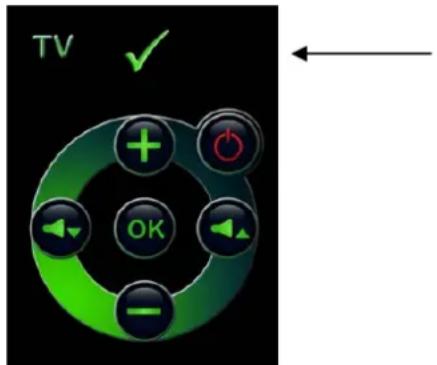
O K - s y m
8 The function is now stored under that button and you can now test/use it.
9 Repeat steps 3 to 8 to train in more functions.
Note: Under each device button (TV, DVD, Light, etc., etc.) you can train in 6 buttons to suit yourself.
Settings
Choose 'Settings' in the Home menu. The screen below will appear.
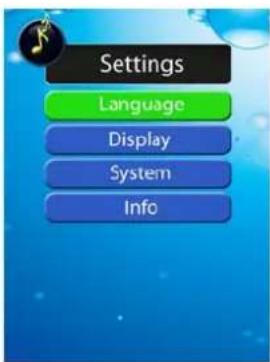
1. Language:
Press 'OK' to go to the menu. Scroll 'UP' or 'Down' to choose the various languages.
English German Netherlands Francais
2. Display:
A LCD brightness: 1-5
Press 'Left' or 'Right' to set the brightness of the LCD screen.
B LCD time-out: 5-60 seconds
Press 'Left' or 'Right' to adjust the time-out time of the screen.
3. System:
Scroll to System; press OK' to go to the menu. The screen below will appear.
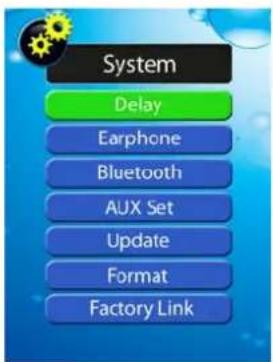
A Delay
Press 'OK' to go to the menu. You see 3 buttons:
1 Music time-out (0-60 minutes)
After 'x' minutes without a button being touched or without music being played, the system will switch itself off.
If you choose 0 (zero), the system will not switch itself off automatically.
2 System time-out (0-180 minutes)
After 'x' minutes the system will switch itself off. You can read the timer in the "Info" screen. If you choose 0 (zero), the system will not switch itself off automatically. The "Info" screen will then show 0 (zero).
3 Bluetooth time-out (0-60 seconds)
After 'x' seconds without a Bluetooth connection, the Bluetooth will be switched off to save the battery.
If you choose 0 (zero), the Bluetooth will be continuously active. Choose 0 (zero) if you frequently need to switch between your SmartPhone (or iPhone) and the internal MP3 player of the Wipod.
B Earphone
Press 'OK' to go to the menu.
By pressing the buttons Up or Down, you can choose various settings.
Earphone only:
Choose this setting if you only want to listen to music via the earphone. Wireless transmission of the MP 3 music will not take place. You can now use the Wipod as a waterproof and portable MP3 player.
Auto select:
Choose this function if you want the Wipod to select automatically. If there are no headphones connected, the Wipod will transmit the MP3 music via Bluetooth.
If there are headphones connected, the Wipod will play the music via the headphones.
Transmit only:
Choose this setting if you only want to listen to music via Bluetooth transmission. Only wireless transmission of the MP3 music will take place, regardless of whether you've connected an earphone or not.
C Bluetooth (Bluetooth connection between Wipod and Receiver-Box)
Press 'OK' to go to the menu. The following screen appears:
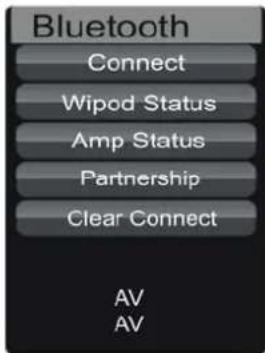
1 Connect:
Couple the Bluetooth transmitter (Wipod) and Bluetooth receiver (in Receiver-box) with one another (this function will only work if pairing has already taken place).
2 Wipod status:
Check the status of the Bluetooth transmitter (Wipod). You hear a test tone.
3 AMP status:
Check the status of the Bluetooth receiver (Receiver-box). You hear a test tone.
4 Pair:
At the moment you press on 'Pair', both devices (Wipod and Receiver-Box) will go into the pairing mode. After 60 seconds, that mode will be switched off automatically. If pairing succeeds, you will see 2x AUDIO at the bottom of the screen. If no successful pairing has taken place after 60 seconds, you need to first press "Clear Connect" before pressing "Pair" again.
Note: During pairing you need to switch other Bluetooth devices off. This pairing has (in principle) already been done for you and you do not need to do it again.
5 Clear Connect:
Remove devices that (correctly or incorrectly) are coupled.
D Set AUX (for WMC55Luxe WMC75Pro only)
For you to understand this function properly, we will first give an example.
Example:
You want the sound from an AquaSound TV to run via this AquaSound system. You've connected the TV to AUX I of the Receiver-Box. To be able to hear the sound from the TV, you need to choose AUX I at AUX (in the Home menu). The Receiver-Box will now feed the sound from the connected device (the TV) to AUX I. You can now operate the TV on Infrared.
It can also happen faster:
Choose 'TV' in the 'Settings/System/Set AUX' menu. The screen below will appear.
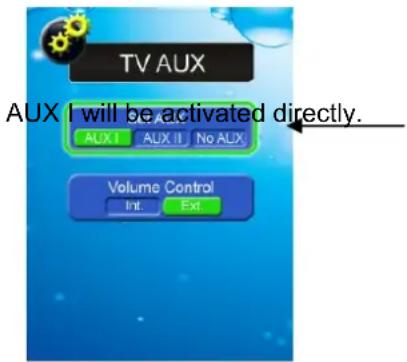
Set AUX:
Here you can indicate which AUX the Receiver-Box must select if you choose 'TV' at AUX (in the above example AUX I). Select the AUX you want (AUX I, AUX II, or No AUX.)
Volume Control:
You can choose to train the 'Volume +' and 'Volume -' of the TV into the Wipod. You then control the volume of the AquaSound TV with the Wipod. The volume of the Receiver-Box will not increase or lower. If you want that, select 'Ext'.
If you've the volume on your TV set at a fixed level, select 'Int' here. Here you are saying that the volume of the Receiver-Box should change if you press 'Volume +' or
Volume - ' on Infrared. If you've chosen 'Int', it will not be possible to train in these buttons.
E Update (for WMC55Luxe and WMC75Pro only)
Press 'OK' to go to the menu. You can now update the firmware on your Wipod. At www.aquasound.nl you can see what the most current version is that is available for your model of Wipod.
Download that firmware and copy it to the Wipod (via USB connection). Now select System Update and press 'OK'. The Wipod will work in the latest firmware. After a few minutes the Wipod is ready for use again. The saved music files will not have been deleted. Then remove the update file from the Wipod.
Note: Make sure the Wipod is fully charged (or is connected to the adapter or computer).
Under no circumstances switch the Wipod off while updating.
F Formatting (for WMC55Luxe and WMC75Pro only)
Press 'OK' to start formatting. This function works only if you've connected the Wipod to a computer via a USB cable. This function will only format the Flash memory of the Wipod. All files will be deleted from the Flash memory. The internal firmware will NOT be deleted. After formatting, the Wipod is ready for use again.
G Factory link
Before reading further - this coupling has already been done for you and you only need to do it if the Receiver-box does not react to commands from the Wipod. Or if you want to couple another (new) Wipod to the Receiver-box.
Choose 'Factory Link' and press OK to go to the menu. With this function you can couple a Wipod with a Receiver-box. The screen below will appear.
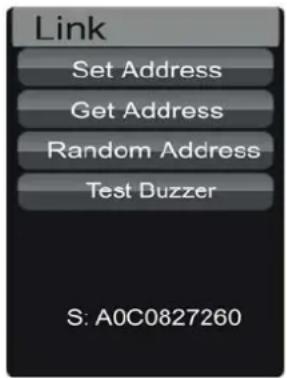
S:A00E1437BO(address code of the Wipod)
D:A00A5235DE(address code of the Receiver-box)
(both devices have a different address and are thus not coupled.)
1 Get Address and Save Address:
Pull the plug (of the Receiver-box) out of the mains socket for a few seconds and then plug it back in again. Now press (within 5 seconds) Get Address and then Set Address. You now see that both devices have the same address and are thus coupled. You can now operate the Receiver-box with the Wipod.
2 Random address:
Pull the plug (of the Receiver-box) out of the mains socket for a few seconds and then plug it back in again. Press "Random address" five times so that the Receiver-box generates a random address. This function makes sure that every Receiver-box gets a random address, otherwise it might happen that one Wipod controls two (or more) Receiver-boxes at the same time.
Note: You (actually) never need to use this function. A random address was already chosen for the Receiver-box during production.
3 Test tone:
With this function you can test whether the Wipod and Receiver-box are actually coupled. By pressing "Test Tone", the Receiver-box will emit a signal (tone). This indicates that both devices are correctly coupled.
If you've performed the above steps correctly, the devices will have been successfully coupled.
S:A00A5235DE(address code of the Wipod)
D:A00A5235DE(address code of the Receiver-box)
(both devices now have the same address and are thus correctly coupled.)
H. Charging your Wipod
The battery is charged as follows:
- Take the USB/USB-jack cable out of the packaging.
- Connect the USB-jack to the earphone connection of the Wipod.
- Connect the other end of the cable (USB) to the adapter or directly to your computer.
- The average charging time of the battery is 3 to 4 hours. The best charging time for the first 2 or 3 times is 5 hours, but no longer than 8 hours.
Note:
The battery reaches its optimum capacity once the Wipod has been charged up and discharged a few times.
If you do not use the Wipod for a longer time, it is advisable to charge it at least once a month.
- Do not charge the battery at high temperatures.
The integrated battery is made to be charged hundreds of times. Do not open the Wipod to replace the batteries or to make modifications to the device.
I. Wipod resetten
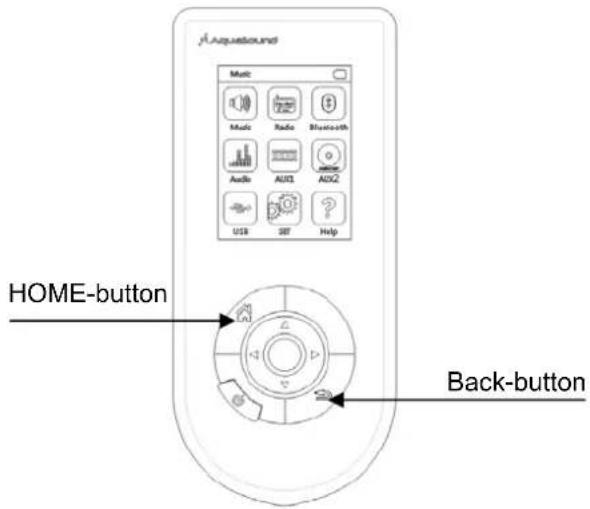
Through incorrect use or for other reasons, it can happen that the Wipod "freezes" and will no longer switch on or off. In that case, press the 'HOME' button and the 'Back' button at the same time (for 3 seconds). The Wipod has been reset and will now work properly again.
J. Good to know
This Wipod Music Center is an advanced (high-tech) system. The very latest technologies are integrated in it, among them Bluetooth A2DP. This is a wireless means of communication between devices that make use of the ether. It can though happen that this communication is disrupted by external factors, for example microwave ovens, mobile phones, wireless (computer) networks, but also natural influences. If such a fault occurs, it may well be the case that one of the above factors is the cause. In most cases, such faults are temporary in nature. Switching the Wipod off and on again may already provide for improvement.

Aquasound
AquaSound
De Run
5504 DV
The Netherlands
tel. 0031
fax 0031
www.aquasound.nl
6720
info@aquasound.nl
Veldhoven
INHALTSVERZEICHNIS
3 Bluetooth time-out (0-60 seconds)