ASV2769B - TV AquaSound - Free user manual and instructions
Find the device manual for free ASV2769B AquaSound in PDF.


User questions about ASV2769B AquaSound
0 question about this device. Answer the ones you know or ask your own.
Ask a new question about this device
Download the instructions for your TV in PDF format for free! Find your manual ASV2769B - AquaSound and take your electronic device back in hand. On this page are published all the documents necessary for the use of your device. ASV2769B by AquaSound.
USER MANUAL ASV2769B AquaSound
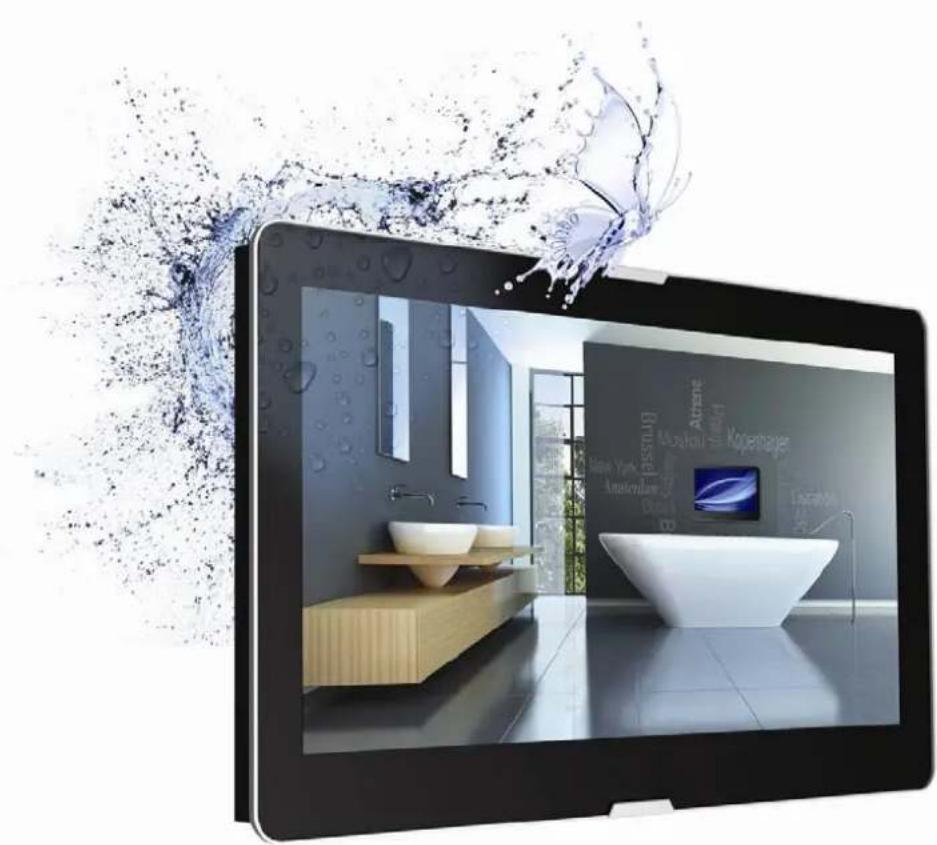
27 inch Waterproof LED TV
natural_image
Modern bathroom interior displayed on a tablet, with water splash effect and no visible text or symbols on the main scene.ASV2769N / ASV2769B / ASV2769D
ASV2769IN / ASV2769IB / ASV2769ID
Table of Contents
Important Instructions...... 3P
Overview...... 4P
Accessories.... 4P
Remote Controller.... 5P
Media-Box.... 6P
Source List.... 7P
Screen Menu.... 8 P
- TV Mode...... 8P
Channel Menu 8P
Picture Menu 9P
Sound Menu 10P
Time Menu 11P
Option Menu 12P
- USB Mode.... 14P
Photo Menu 14P
Music Play 15P
Film Play 15P
Text Show 16P
- IR-Repeating.... 16P
Technical Specification...... 17P
Troubleshooting.... 19P
Installation Guide...... 20P
Important Instructions
WARNING! Do not remove any cover.
WARNING! Do not insert any objects into any openings of this TV.
WARNING! Clean only with a damp, dry and soft towel. Do not use harsh abrasives as these may damage the aluminum and steel parts.
WARNING! Do not block any ventilation openings. Install in accordance with any specific manufacturer's instructions. Always allow a sufficient gap around the TV to avoid overheating.
WARNING! Do not install near any heat sources such as radiators, gas heaters, stoves or other apparatus (including amplifiers) that produce heat. Do not leave in direct sunlight.
WARNING! Do not place any naked flame source, such as lighted candles on any electrical apparatus.
WARNING! Connect to a suitable power supply only specified in the specification.
WARNING! Young children must be supervised to ensure that they do not play with the TV. Ensure young children have enough knowledge to operate the TV safety if they do have access to this TV.
WARNING! Do not abuse or damage a power cord. If any power cord is damaged, it must be replaced by the manufacturer, its service agent or a similarly qualified person in order to avoid a hazard. A replaceable cord must be replaced with an authorized replacement from an authorized service agent only.
WARNING! Only use attachments/accessories specified by the manufacturer.
WARNING! Unplug completely when unused for long periods of time.
WARNING! Attention is drawn to the environmental aspects of disposing of any battery.
WARNING! If this TV is to be used by a third party, please supply these instructions with it.
WARNING! No liability will be accepted for any personal injury or damage caused by failure to follow these instructions.
IMPORTANT! Keep and follow these instructions.
IMPORTANT! Heed all warnings.
IMPORTANT! Use the bracket only supplied by the manufacturer or sold with the apparatus.
IMPORTANT! Do not overload wall outlets. Overloaded wall outlets could damage the TV and could result in electric shock or fire.
Periodically examine the cord of your TV. If its appearance indicates damage or deterioration, unplug it. Stop using it until you have it replaced with a cord authorized by your dealer. Protect the power cord from physical or mechanical abuse, such as being twisted, kinked or pinched.
IMPORTANT! The fluorescent lamp used in this TV. Disposal of this TV must be carried out in accordance to the regulations of your local authority.
Overview
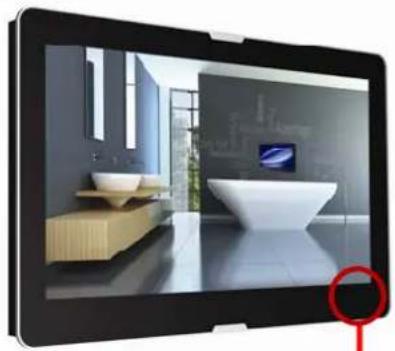
- This is a simplified representation of front panel.
natural_image
Modern digital kitchen console with ambient lighting and a monitor on the wall (no visible text or symbols)Front View
natural_image
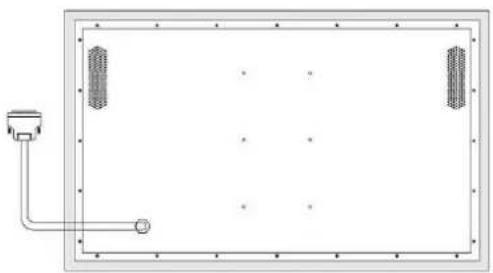
Pure electrical circuit lines without any symbolsBack View
| Indication | name | Fuction description |
| Remote Sensor | Infrared sensor for the remote controller | |
| Power Indicator | Show red in standby mode, show blue when TV is switched on |
Accessories
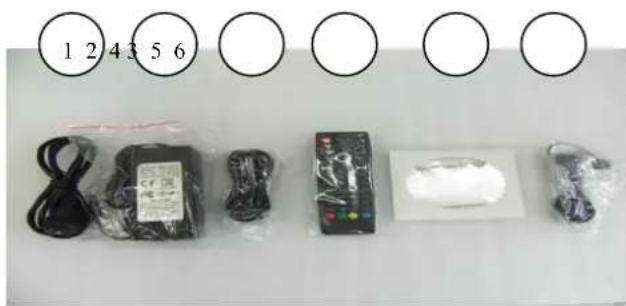
natural_image
Product display image showing various electronic components and accessories (no visible text or labels)1 : Power Cord
2: Adaptor
3: RF Antenna cable
4 : Remote controller with battery
5 : CD-ROM of manual
6 : IR-repeater
- Check if the accessory bag contains the above accessories.
Remote controller
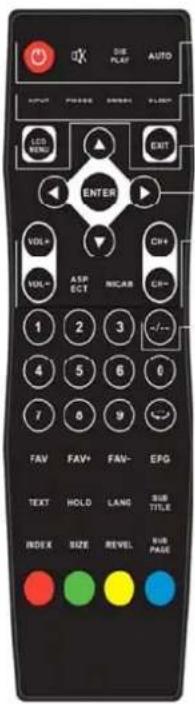
text_image
AIR PLAY AUTO OUTPUT POWER LOG RENG EXIT ENTER VOL+ VOL- ASPECT MASCAR CH+ CR+ 1 2 3 4 5 6 0 7 8 9 FAV FAV+ FAV- EPG TEXT HOLD LANC SUB TITLE INDEX SIZE REVEL SUB PAGE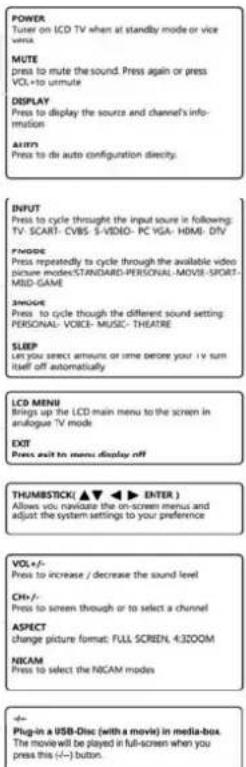
text_image
POWER Tuner on LCD TV when at standby mode or vice versa. MUTE press to mute the sound. Press again or press VOL+to unmute DISPLAY Press to display the sources and channel's information AUTO Press to do auto configuration directly. INFUT Press to cycle through the input source in following: TV- SCART- CVBS -S-VIDEO- PC VGA- HDMI- DIV FINDORE Press repeatedly to cycle through the available video picture modes/STANDARD-PERSONAL-MOVE-SPORT-MID-GAME INFOARE Press to cycle through the different sound setting: PERSONAL- VOICE- MUSIC- THEATRE SLEEP Can you select amounts or some before your iV sum itself off automatically LCD MENU Bings up the LCD main menu to the screen in analogue TV mode EXIT Press exit to menu display off THUMBSTICK (▲▼ ▶ ENTER) Allows you navigate the on-screen menus and adjust the system settings to your preference VOL+/- Press to increase / decrease the sound level CH+/- Press to screen through or to select a channel ASPECT Change picture format: FULL SCREEN, 4:3ZOOM NICAM Press to select the NICAM modes Plug-in a USB-Disc (with a movie) in media-box. The movie will be played in full-screen when you press this (-)<-> button.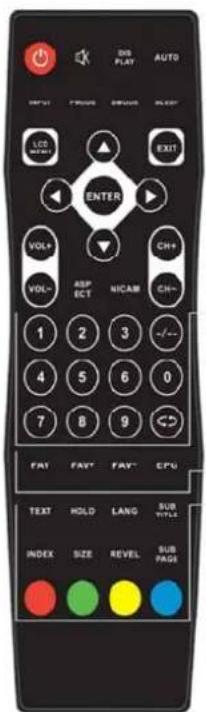
text_image
DIS PLAY AUTO OFF:1 FLOOD GROUND PLET LCS EXIT ENTER VOL+ VOL- ASP ECT NICAM CH+ CH- 1 2 3 4 5 6 0 7 8 9 FAT FAV+ FAV- CPU TEXT HOLD LANG SUB TITLE INDEX SIZE REVEL SUB PAGE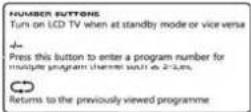
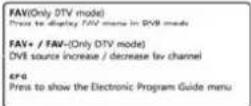
text_image
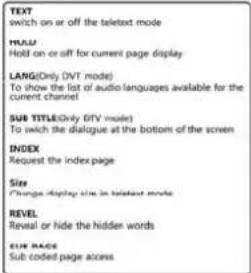
TEXT switch on or off the teletext mode TRALM Hold on or off for current page display LANG(Only DVT mode) To show the list of audio languages available for the current channel SUB TITLE(Only DVT mode) To switch the dialogue at the bottom of the screen INDEX Request the index page Size Change display size in teletext mode REVEL Reveal or hide the hidden words EUN PAGE Sub coded page accessMedia-Box
text_image
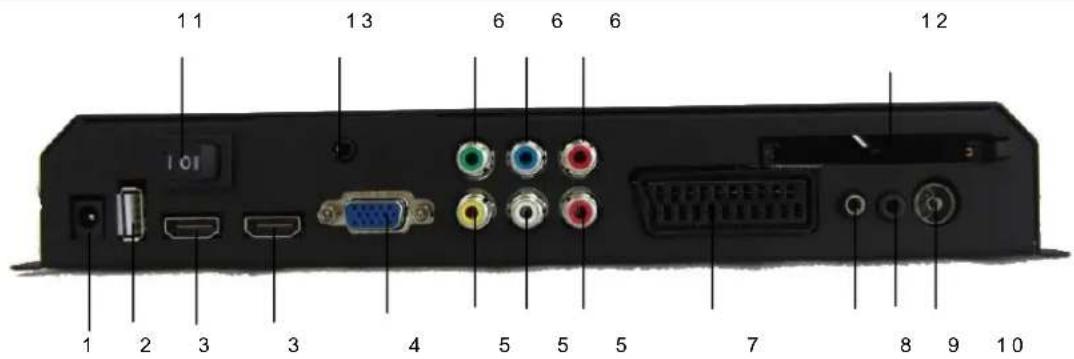
11 13 6 6 6 12 1 2 3 3 4 5 5 5 7 8 9 10| No | Button Name | Function description |
| 1 DC 12V Input Connect DC Input of Power cord | ||
| 2 USB Input Connect USB | cable or USB Storage device | |
| 3 HDMI Input Connect HDMI output jack of DVD player or PC | ||
| 4 VGA Input Connect VGA | output jack of PC | |
| 5 COMPOSITE Input | Yellow input for VIDEO In, White input for AUDIO(L), Red input for AUDIO(R) | |
| 6 COMPONENT Input | Green input for Y, Blue input for Pb, Red input for Pr | |
| 7 SCART Input | Connect AV system with SCART output | |
| 8 AUDIO In | Connect audio output jack of PC | |
| 9 AUDIO Out | Connect earphone or headphone | |
| 10 RF Input | Connect TV antenna | |
| 11 SOUND SWITCH | Switch to right to use built-in speaker, to left to use external speaker | |
| 12 CI Slot Input | Connect CI Slot (Smart card) | |
| 13 IR-repeater | Connect IR-repeater | |
text_image
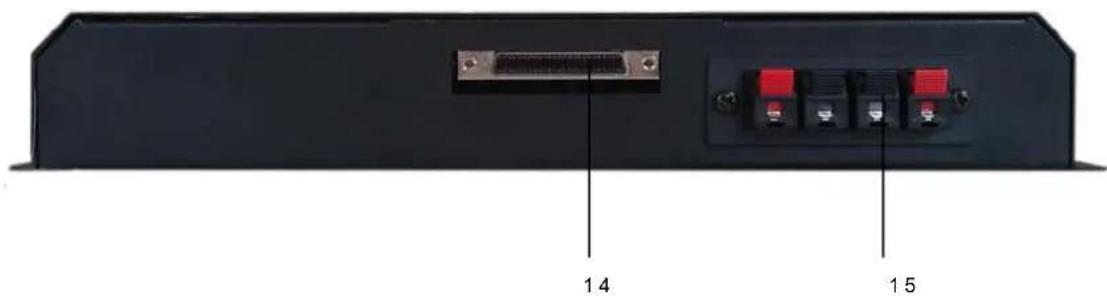
14 15| No | Button Name | Function description |
| 14 | Cable connector | Connect Media cable |
| 15 | External speaker output | Connect External speakers |
Source List
| Input Source |
| DTV |
| ATV |
| SCART |
| Component |
| PC-RGB |
| HDMI1 |
| HDMI2 |
| AV |
| DVD |
| USB |
| OK Select |
Press Source button to show source list.
Press ▲▼ button to choose the mode.
Press OK button to enter the mode.
Screen Menu
1. TV MODE
text_image
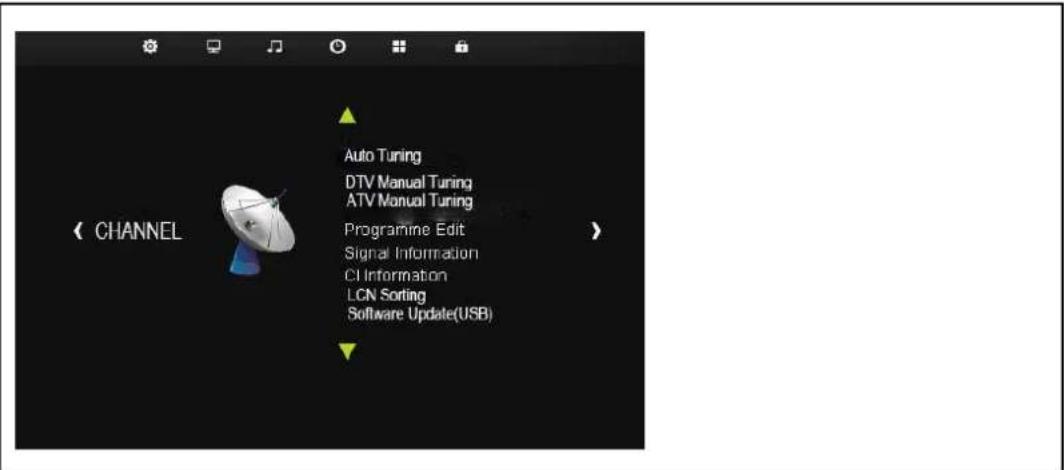
Auto Tuning DTV Manual Tuning ATV Manual Tuning Programme Edit Signal Information CI Information LCN Sorting Software Update(USB)Press SETUP button to show Channel, Picture, Sound, Time, Option, Lock menu. Press OK button to select specific submenu and the adjustable value. In the submenu, press ▲▼ or ▶ button to select menu item.
Channel Menu
text_image
DTEV Manual Tuning VHF CH 6 NO SIGNAL Temp: Frequency: 104.28 MHz Channel Auto Tuning DTV Manual Tuning ATV Manual Tuning Programme Edit Signal Information CI Information LCN Sorting Software Update(USB) ATV Manual Tuning Storage To 1 System DK Current CH 1 Search Find Tune Frequency Unregistered ReturnAuto Tuning
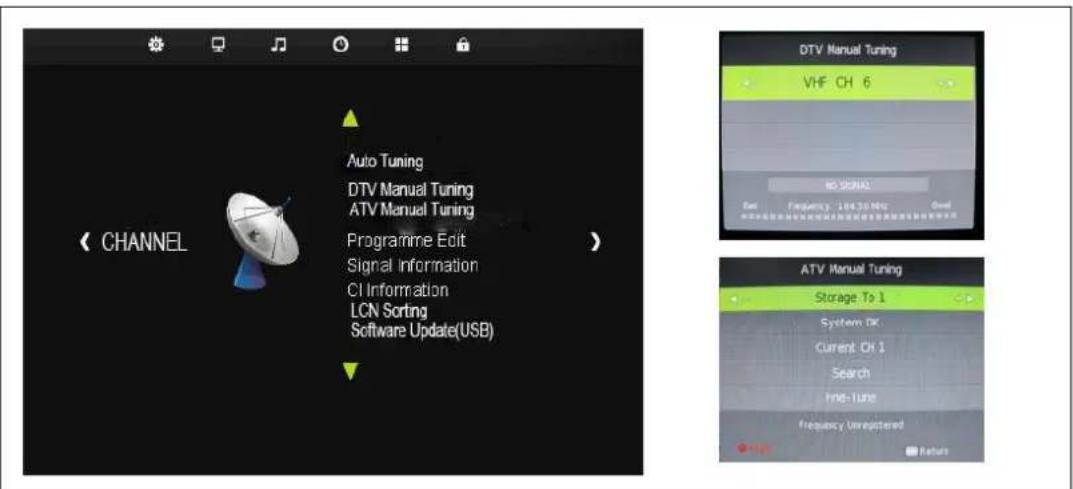
Press ▲▼ button to select Auto Tuning, and then press OK button to choose ATV/DTV/ATV+DTV with ◀▶ button and press ▲▼ or ◀▶ button to select country channel like German, Italy.
DTV Manual Tuning
Press ▲▼ button to select DTV Manual Tuning, and then press OK button then press ◀▶ button to select channel number, or directly press number keys to select channel number, and then press OK to begin to search channel.
ATV Manual Tuning
Press ▲▼ button to select ATV Manual Tuning, and then press OK button then press ◀▶ button to select. Press ▲▼ or ◀▶ button to select specific submenu and the adjustable value.
Program Edit
Press ▲▼ button to select program edit, and then press OK button to enter menu.
Signal Information
Press ▲▼ button to select Signal Information, and then press OK button to see Signal Information
CI Information
Press ▲▼ button to select CI Information, and then press OK button to see CI Information
LCN Sorting
Press ▲▼ button to select LCN Sorting, and then press OK button to set sort on/off
Software Update (USB)
Press ▲▼ button to select Software Update, connect USB Port to operate.
Picture Menu
text_image
Picture Mode Standard Color Tempuraler Aspect Ratio Noise Reduction Screen < PICTURE > Picture Mode Standard Contrast 57 Brightness: 15 color 30 lightness: 80 try 50 ReturnPicture Mode
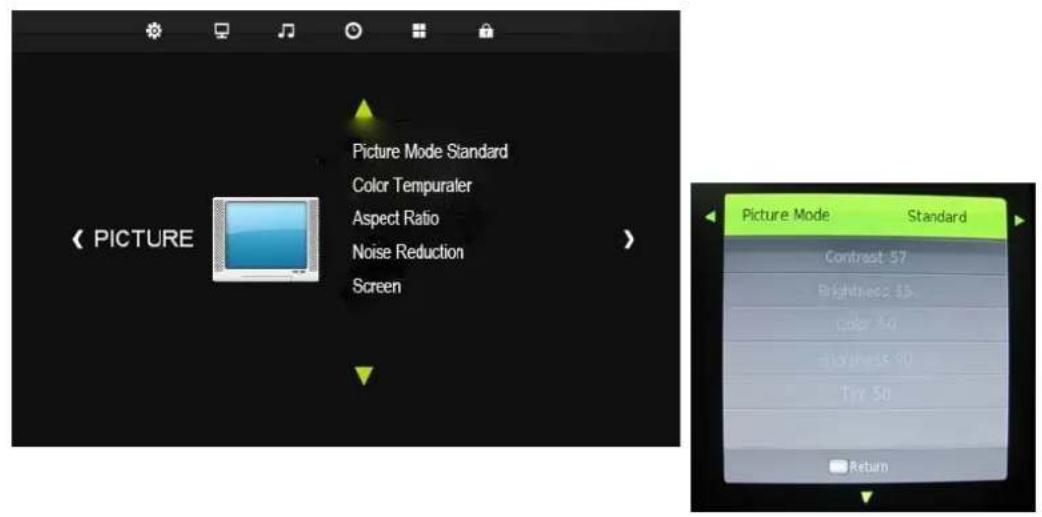
Press ▲▼ to select Picture mode, and then OK button to enter. Press ◀▶ button to select standard/mild/dynamic mode and press ▲▼ or ◀▶ to adjust value.
Color Temperature
Press ▲▼ to select Color Temperature, and then OK button to enter and press ◀▶ button to select cool/ warm/ user mode.
Aspect Ratio
Press ▲▼ to select Aspect Ratio, and then OK button to enter
Noise Reduction
Press ▲▼ to select Noise Reduction mode, and then OK to enter submenu. You can select off/low/middle/high/default by pressing ▲▼ button.
Screen
Press ▲▼ to select Screen mode, and then press OK to enter submenu in pc mode.
Sound Menu
text_image
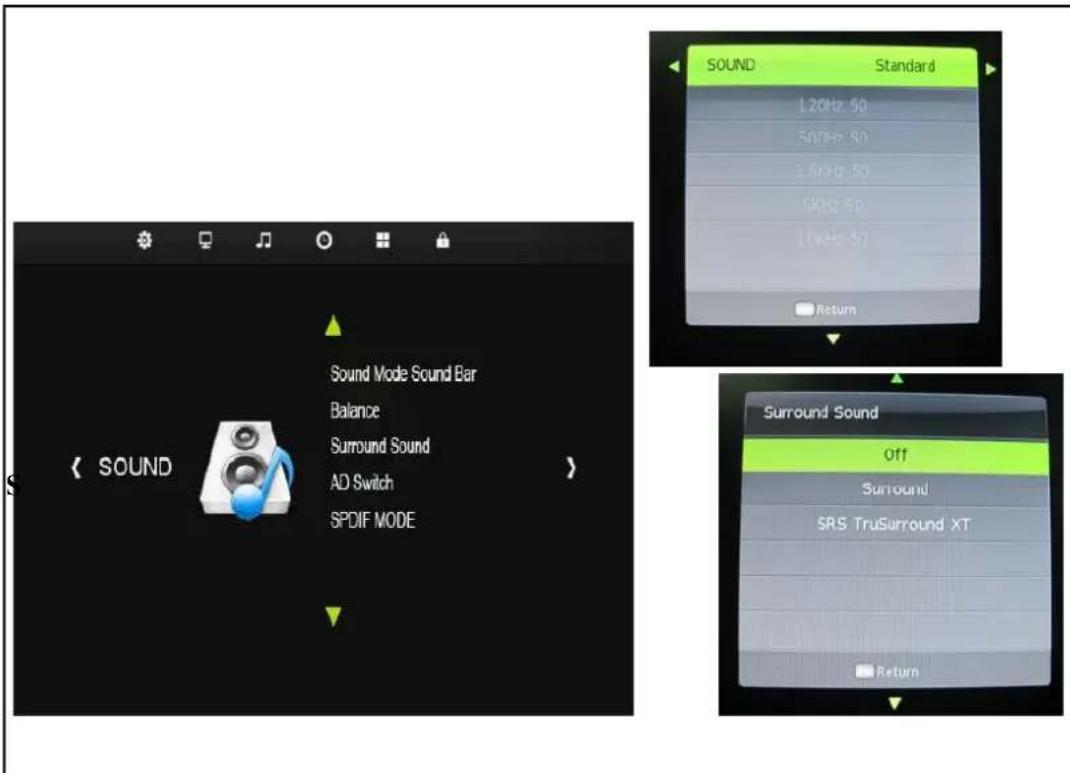
SOUND Sound Mode Sound Bar Balance Surround Sound AD Switch SPDIF MODE < SOUND SOUND Standard 120Hz 50 50Hz 50 150Hz 50 50Hz 50 100Hz 50 Return Surround Sound Off Surround SRS TruSurround XT ReturnPress ▲▼ to select Sound Mode, and then OK button, press ◀▶ button to select standard/music/movie/sports/user/int spk/sound bar mode.
Balance
Press ▲▼ to select Balance, and OK button to enter submenu, press ◀▶ button to adjust balance value.
Surround Sound
Press ▲▼ to select Surround Sound, and then OK button to enter submenu, then press ▲▼ button to select off/surround/SRS trusurround XT mode.
AD Switch
Press ▲▼ to select AD Switch, and then OK button to select on/ off, and you can adjust
AD volume value by pressing ◀▶ button when AD switch is set to on.
SPDIF MODE
Press ▲▼ to select SPDIF mode, and then OK button to select PCM/AUTO mode
Time Menu
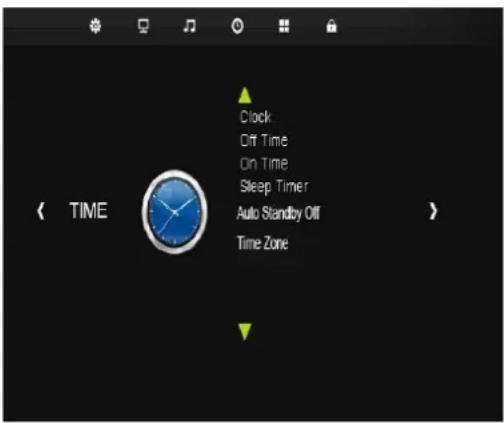
Clock
Press ▲▼ to select Clock, and then OK button to set.
Off Time
Press ▲▼ to select Off Time, and then OK button to enter the submenu, press
◀▶ to select
off/once/everyday/Mon-Sat etc. And you can adjust hour or minute by pressing
▶ button.
On Time
Press ▲▼ to select On Time, and then OK button to enter the submenu, press
◀▶ to select
off/once/everyday/Mon-Sat etc. And you can adjust hour / minute / source / channel
/ volume by pressing ◀▶ button.
to select the sleep timer type.
Auto Standby off
Press ▲▼ to select Auto Standby off and then Ok button to set and select 3h/4h etc.
text_image
Clock Off Time On Time Sleep Timer Auto Standby Off Time ZoneSleep Timer
Press ▲▼ to select Sleep Timer, and then
Ok button to enter submenu, and press ▲▼
Time Zone
Press ▲▼ to select Time Zone, and then OK button to enter submenu, and press ▲▼ or ▶ to adjust the time zone.
Option Menu
text_image
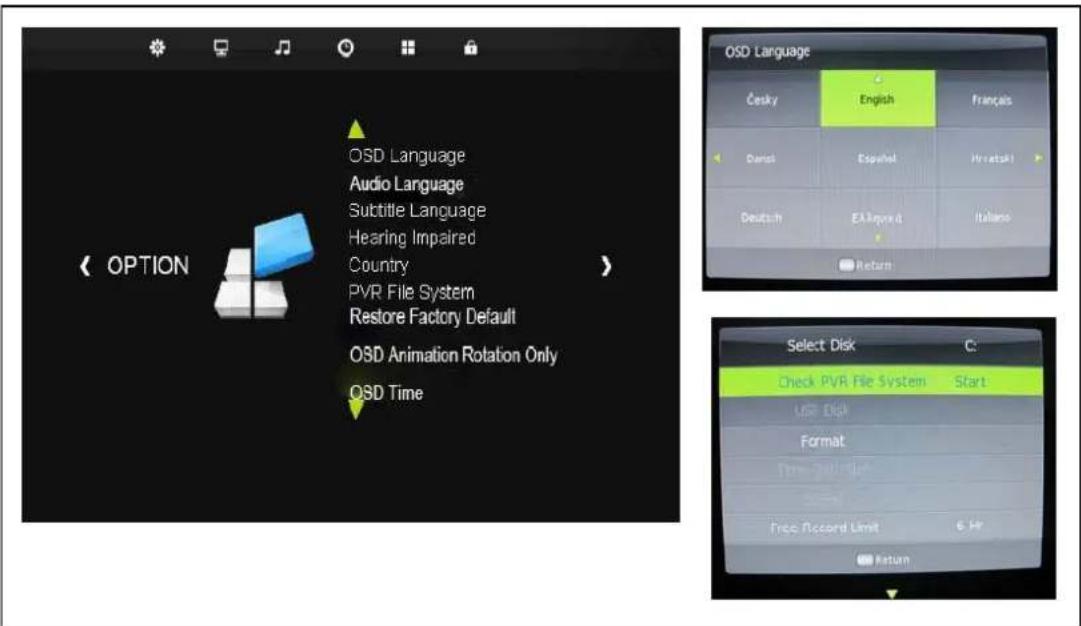
〈 OPTION OSD Language Audio Language Subtitle Language Hearing Impaired Country PVR File System Restore Factory Default OSD Animation Rotation Only OSD Time OSD Language Český English Français Danali Españal Hrvatski Deutsch EALmpend Italiano Return Select Disk Check PVR File System Start USB Disk Format Time Splitter 2000 Free Record Limit 6 Hz ReturnOSD Language
Press ▲▼ to select OSD Language, and then OK button. Press ▲▼ or ◀▶ button to choose language choices.
Audio Language
Press ▲▼ to select Audio Language, and then OK button to enter submenu, and then press ▶ to select primary or secondary type.
Subtitle Language
Press ▲▼ to select Subtitle Language, and then OK button to select prime or second.
Hearing impaired
Press ▲ ▼ to select Hearing impaired, and then OK button to select on/off
Country
Press ▲ ▼ to select Country, and then OK button to select country
PVR File system
Press ▲ ▼ to select PVR File system, and then OK button to select Disk C and press ▲ ▼ to adjust.
Press ▲▼ to select Restore Factory Default, and then OK button to select sure or not.
OSD Animation Rotation Only
Press ▲ ▼ to select OSD Animation Rotation, and then OK button to select on or only.
OSD Time
Press ▲▼ to select OSD Time, and then OK button to select 30s/60s etc.
ECO Mode
Press ▲▼ to select ECO Mode and press ▲▼ button to select high/middle/low mode
Blue Screen
Press ▲ ▼ to select Blue screen and OK button to select on/off.
Option Menu
text_image
Lock System Set Password Block Program Parental Guidance < LOCK > Parental Guidance Off 4 5 6 7 8 ReturnLock System
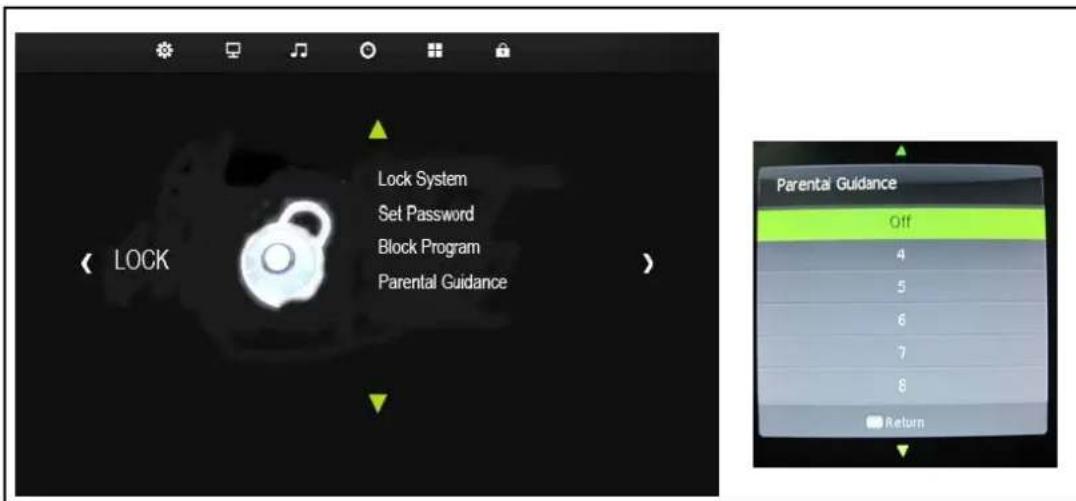
Press ▲ ▼ to select Lock System, and then OK button to select on/off to open and close the lock function.
Set Password
Press ▲▼ to select Set Password, and then OK button to input old password “0000” and set new password
Block Program
Press ▲▼ to select Block Program, and then OK button to enter the submenu and then green button to choose lock/ unlock mode.
Parental Guidance
Press ▲▼ to select Parental Guidance, and then OK button to select off/4/5 etc.
2. USB Mode

text_image
PHOTO MUSIC TREM TextPress setup button to show Photo, Music, Film, Text. Press ◀▶ button to choose specific menu and the adjustable value. In the submenu, press ▲▼ or ◀▶ button to choose menu item.
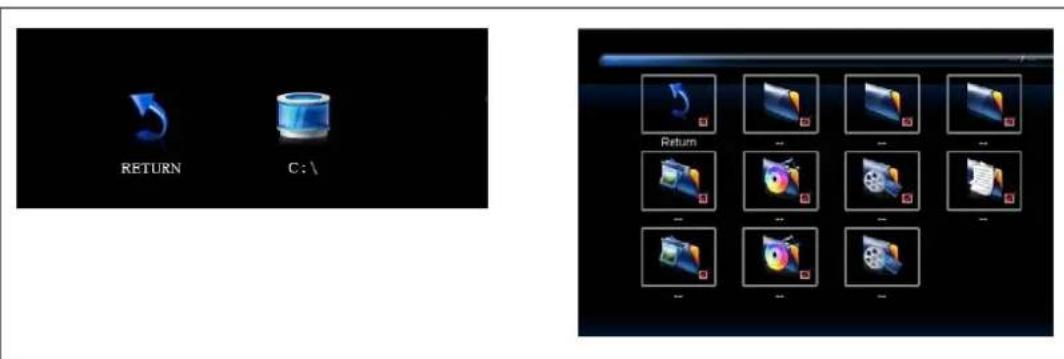
Photo Show
text_image
RETURN C:\Select C:\, press OK button to enter submenu
-
Insert USB Port to USB entry.
-
Press ◀▶ to select photo, and then OK button to enter submenu.
-
Select C:\, press OK button to enter submenu
-
Select the specific photo, and press ▶ button to play, press ◀ button to play previous one, press ▶ to play next one.
-
Press Exit button to exit.
Music Play
text_image
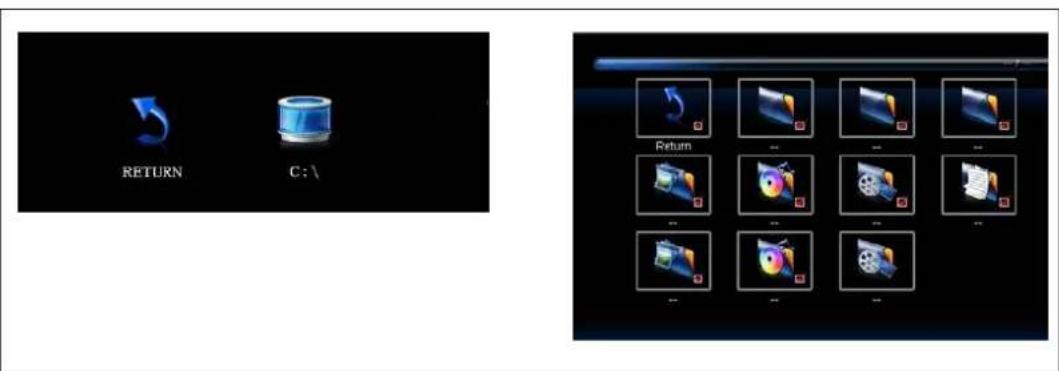
RETURN C:\Select C:\, press OK button to enter submenu
- Insert USB Port to USB entry.
- Press ◀▶ to select music, and then OK button to enter submenu.
- Select C:\, press OK button to enter submenu
-
Select the specific music, and press ▶|| button to play, press ◀◀ button to play previous one, press ▶▶| to play next one。
-
Press Exit button to exit.
Film Play
text_image
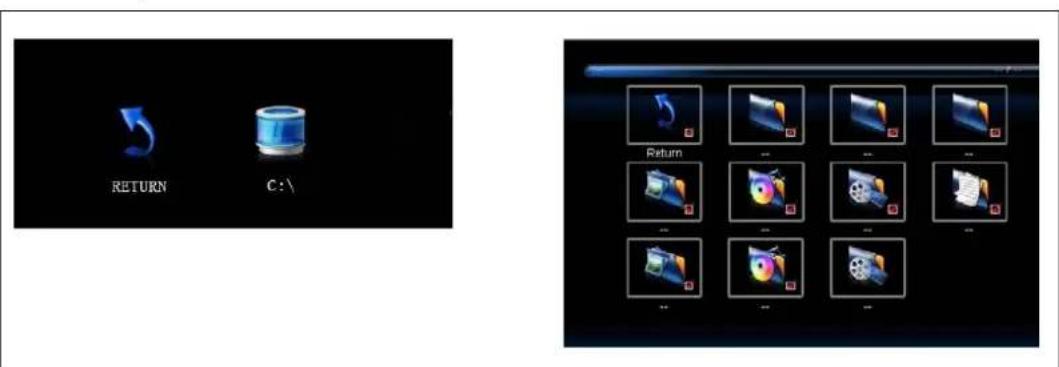
RETURN C:\Select C:\, press OK button to enter submenu
- Insert USB Port to USB entry.
- Press ◀▶ to select film, and then OK button to enter submenu.
- Select C:\, press OK button to enter submenu.
-
Select the specific film, and press ▶|| button to play, press ◀◀ button to play previous one, press ▶▶| to play next one.
-
Press Exit button to exit.
Note: To play the movie in full screen mode, press -/--
Text Show
text_image
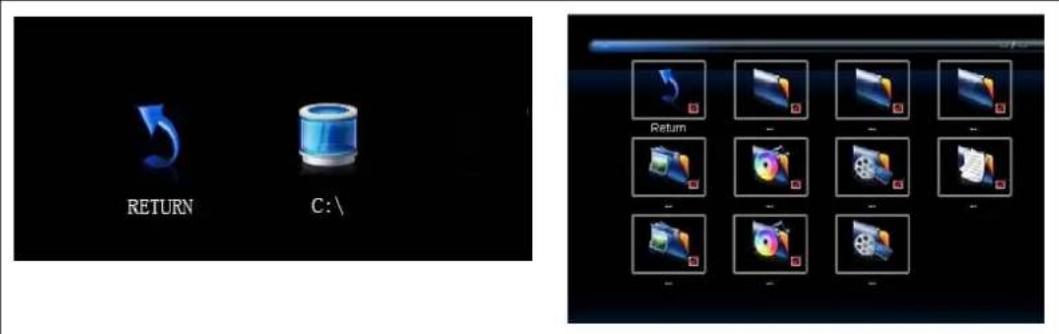
RETURN C:\Select C:\, press OK button to enter submenu
-
Insert USB Port to USB entry.
-
Press ◀▶ to select text, and then OK button to enter submenu.
-
Select C:\, press OK button to enter submenu
-
Select the specific text, and press ▶|| button to play, press ◀◀ button to play
previous one, press ▶▶▶ I to play next one.
- Press Exit button to exit.
3. IR – repeating system.
The IR-repeating system allows user to control other equipment (such as: DVD-player/Set top box, etc) through the TV. Aim original remote controller (from DVD-player) to TV and press a command-button (for example: PLAY)...the TV receives this signal and send it back to Media-Box. The connected IR LED forwards this signal to the external equipment. DVD-player starts to play.
- Connect the IR-LED (mini-jack) to Media-Box.
- Aim IR-LED on IR window from DVD-player.
- Now you can control DVD-player through TV.
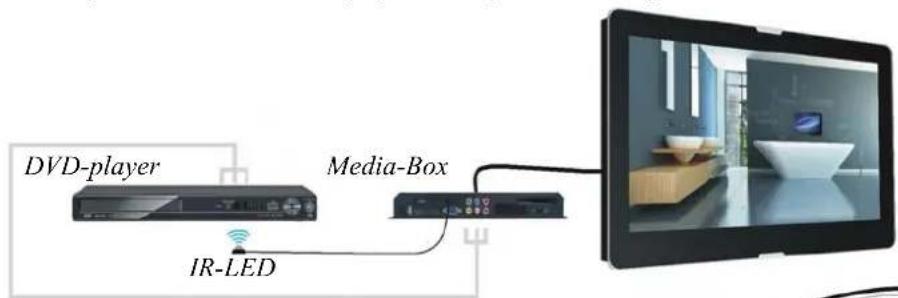
text_image
DVD-player IR-LED Media-BoxRemote controller
f r o m
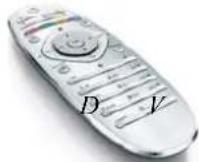
D - p l
Technical Specification
| Waterproof LED TV Specification(Model:VT-270W Series) | |||
| Panel | Size 27 inches Wide (LG Display) | ||
| Recommended Resolution | 1920X1080 pixels | ||
| Aspect Ratio 16:9 | |||
| Contrast Ratio 1000:1 (Typical) | |||
| Brightness | 250cd/m2 (Typical), LED Backlight | ||
| Response Time 4ms (Rise+Decay time) | |||
| Viewing Angle (Wide) | Horizontal: 170° (Left/Right), Vertical: 160° (Up/Down) | ||
| Display Area | 630mm (W) x 368.2mm (H) x 14.5 (D)(typ) | ||
| Display Colors 16,777,216 | |||
| Surface Treatment | Hard coating (3H), Anti-glare treatment of the front polarizer | ||
| Terminal | Input | TV / DTV Input IEC 75 ohm X 1 | |
| PC (RGB) 15 Pin D-Sub X 1 | |||
| Scart Full Scart X 1 | |||
| S-Video S-Video X 1 | |||
| HDMI | HDMI X 1 (~ 1080p)- Standard, HDMI X 1 (~ 1080p)- Option. | ||
| CI Slot | CI Slot X 1 | ||
| USB Slot | USB Slot X 1 (Optional) | ||
| CVBS Audio / S-Video Audio | RCA Type X 2 | ||
| PC (RGB) Audio | Earphone x 1 | ||
| Output | IR-repeater | 3m Cable x1 | |
| Coaxial Cable | RCA Type X 1 (for 5.1 Channel) | ||
| Extra Audio | 1Way 2Spaeker System | ||
| Earphone | Earphone X 1 | ||
| Function | ATV | PAL, SECAM (Video System) | |
| ATV:100, DTV:600(Receive Channel) | |||
| BG,DK,I,L/L' NICAM/A2 | |||
| (Sound System) | |||
| DTV | MPEG-2, 4 (Video System) | ||
| MPEG-1 Layer 1,2 (Sound System) | |||
| Enhancement features | 2D Comb Filter, 3D Deinterlace, Weak signal Enhancement, Noise Reduction | ||
| Others | EPG, Subtitle, Teletext, IR-repeater: Distance 0.5m (Option) | ||
| Languages | English, French, German, Italian, Spanish, Portugese, Russian, Polish, Duch. | ||
| Power | Audio Sound Output (Watts) | Max. 6W (3W X 2, 1 Way 2 Speakers System) | |
| Power Supply | AC 110~240V, 50/60Hz Input ,DC 12V/7.5A | ||
| Power Consumption | Operating : 80W, Stand By : less than 1W | ||
| Others | Product Definition (VT-260 ~) | WE : MHEG5 with Aluminum front, WD : DVB-T with Aluminum front | |
| Dimensions (WxHxD) | Main Body : 670mmX431mmX49.5mm | ||
| Sub Body (Main Board part) : 270mmX130mmX42mm | |||
| Weight | Monitor Body : 10.2kg /Media Board : 1.2kg /Wall Braket: 2.8kg TOTAL: 15.6kg | ||
| Certification / Regulation CE / RoHS | |||
| Accessories | RF Cable, Water-proof Remote Controller, Batteries, IR-Repeater System. AC Power Cord, 12V Adaptor, User's Manual CD. | ||
■ Specification is subject to change without notice.
Troubleshooting
NOTE : Please check if all cables are properly connected to the Media-Box at all times.
| Problem | Possible Solution |
| No sound and picture | - Check if the Power cord has been connected to a wall outlet |
| - Check if the adapter has been connected to the MEDIA BOX | |
| - Check if you have pressed the POWER button on the front of the TV | |
| - Check the picture contrast and brightness settings | |
| Normal picture but no sound | - Check the volume |
| - Sound muted? Press the SPEAKER OUT Icon on the remote controller | |
| - Try another channel (the problem may be with the broadcast | |
| - Check if the Audio cables are installed properly | |
| Remote controller out of order | - Check if there is any object between the TV and the remote controller |
| - Check if the batteries (provided) are inserted properly | |
| - Insert new batteries | |
| Power is suddenly turned off | - Check SLEEP TIMER set |
| - Check the power control setting | |
| Picture appears slowly after switchin on | - This is normal, the image is muted during the TV starup processPlease contact your service center, if the picture has not appeared after five minutes |
| No or poor color or poor picture | - Adjust the color in menu option |
| - Keep a sufficient distance between the TV and VCR | |
| - Try another channel (the problem may be with the broadcast | |
| - Check if the Video cables are installed properly | |
| - Activate any function to restore the brightness of the picture | |
| Horizontal/Vertical bars or picture shaking | - Check local interference such as an electrical appliance or power tool |
| Lines or streaks in pictures | - Check the antenna |
| No output from one of the speakers | - Adjust the balance in menu option |
| Signal is out of range | - Adjust the balance in menu option |
| - Check if signal cable is connected or loose |
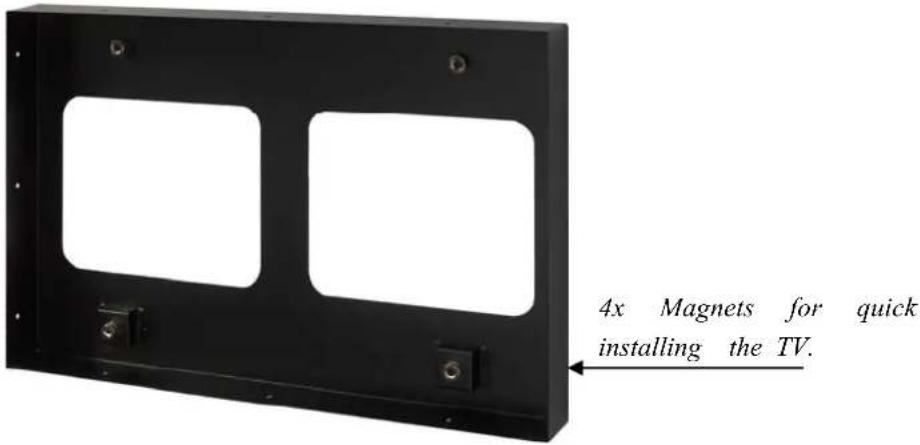
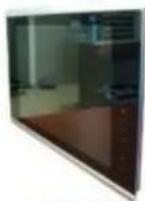
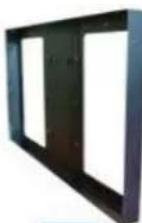
Installation Guide back-box
- Check if the Extension cable attached with the TV.
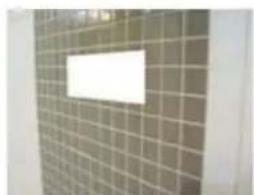
- Make hole as big as the Back box size on wall.
Back-box
text_image
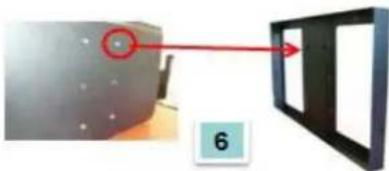
4x Magnets for quick installing the TV.- Secure a small hall so the Extension cable comes out.
- Insert the Back box into the wall hall.
- Attach the Back box to the wall with screws provided.
- Hang the TV onto the magnet (magnet-fix) of the Back box.
- Link the Extension cable with the Media-Box.
- Check if the TV turns on.
1
6
4

natural_image
Close-up of a tiled wall with a white rectangular patch, no visible text or symbols2
natural_image
Exterior view of a modern office building (no signage)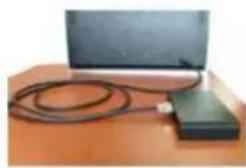
natural_image
Computer setup with a black monitor, cable, and USB drive on a wooden desk (no visible text or symbols)7

AquaSound
AquaSound
De Run 6720
5504 DV Veldhoven
tel. 040-2534205
fax 040-2541645
www.aquasound.nl
info@aquasound.nl