
MCI210 - Loudspeaker LENCO - Free user manual and instructions
Find the device manual for free MCI210 LENCO in PDF.
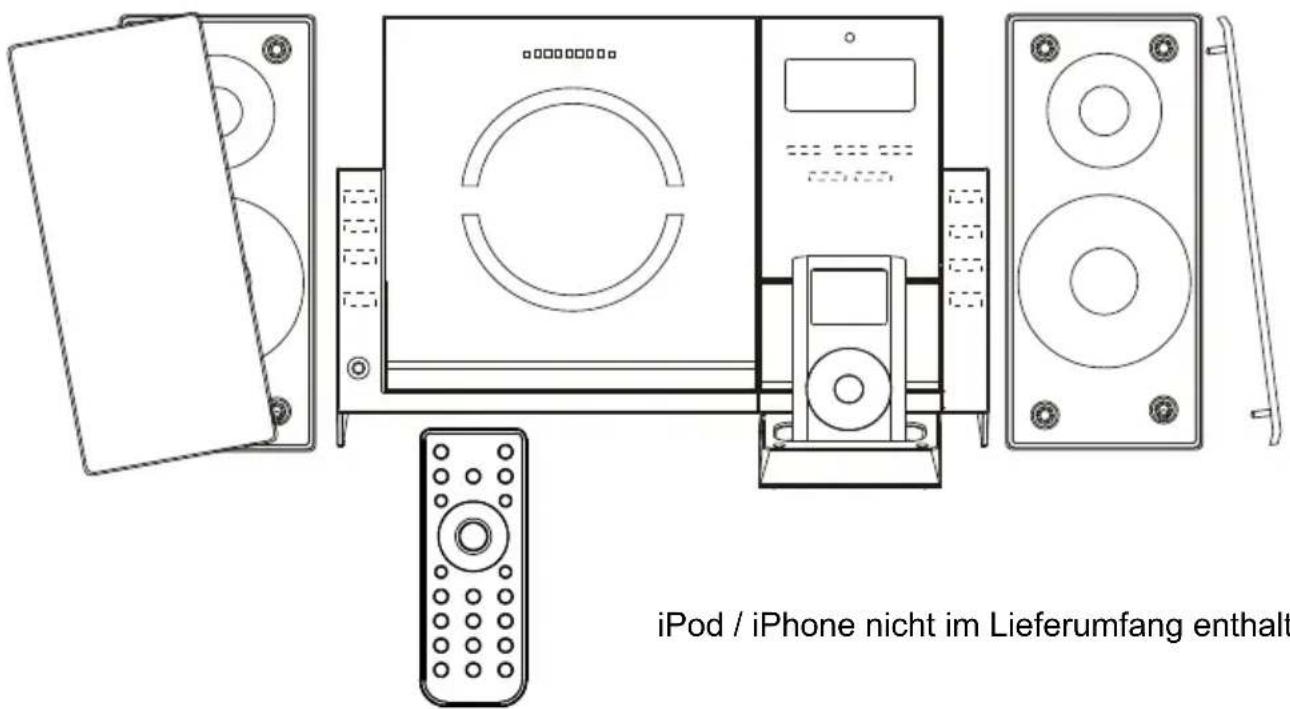
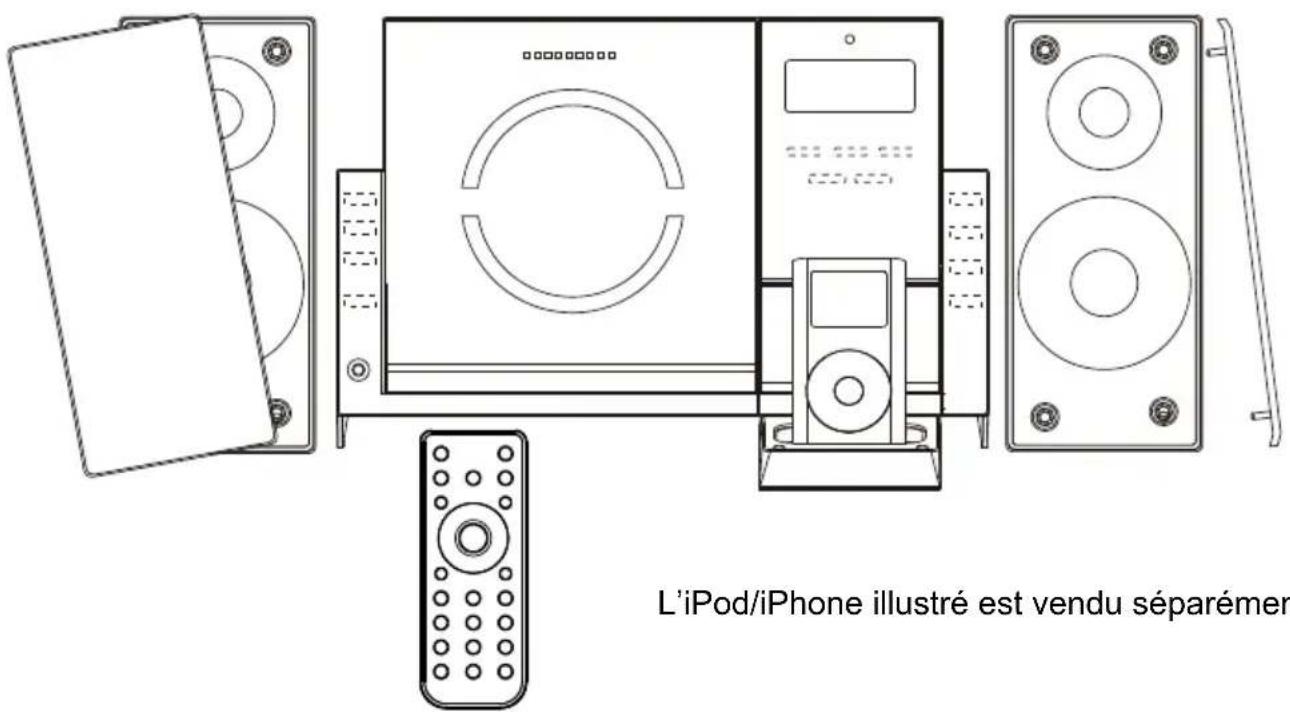
| Product type | Micro hi-fi system with CD/MP3 player, FM radio, iPod/iPhone docking station, USB ports and SD card |
| Brand | Lenco |
| Model | MCI210 |
| Unit dimensions (W x D x H) | 300 x 128 x 198 mm |
| Speaker dimensions (W x D x H) | 91 x 128 x 198 mm |
| Weight | 2.91 kg |
| Power supply | 100-240 V, 60/50 Hz |
| Output power | 10 W x 2 |
| Radio | FM PLL stereo with memory for up to 30 stations |
| CD player | CD, CD-R, CD-RW, MP3 and WMA support |
| iPod/iPhone docking station | Yes, with battery charging |
| USB port | Yes, for MP3 file playback |
| Memory card slot | SD/MMC, for MP3 file playback |
| Auxiliary audio input | RCA (left/right), voltage 350-500 mV, impedance 47 kΩ |
| Headphone output | 3.5 mm stereo connector (front) |
| Remote control | Yes, with CR2032 battery included |
| Display | LCD screen with adjustable backlight |
| Audio functions | Equalizer (5 modes), Surround, Bass boost, Mute |
| Timer | Sleep (90 min max) and programmable timer (on/off) |
| Clock | 12/24 h, with backup battery (2 x AAA 1.5 V, not included) |
| Maintenance and cleaning | Dust with a soft cloth; do not use chemicals |
| Safety | Do not expose to water, do not obstruct ventilation, minimum distance 10 cm |
| Spare parts and repairability | No user-serviceable parts; contact an authorized service center |
Frequently Asked Questions - MCI210 LENCO
User questions about MCI210 LENCO
0 question about this device. Answer the ones you know or ask your own.
Ask a new question about this device
Download the instructions for your Loudspeaker in PDF format for free! Find your manual MCI210 - LENCO and take your electronic device back in hand. On this page are published all the documents necessary for the use of your device. MCI210 by LENCO.
USER MANUAL MCI210 LENCO
MICRO HI-FI SYSTEM WITH iPod/iPhone DOCKING STATION, CD/MP3 PLAYER, PLL FM RADIO, USB AND CARD READER

iPod/iPhone shown not included
For information and support, www.lenco.eu
Made for

iPod

iPhone
iPod & iPhone are trademarks of Apple Inc., registered in the U.S. and other countries. "Made for iPod" and "Made for iPhone" mean that an electronic accessory has been designed to connect specifically to iPod or iPhone respectively, and has been certified by the developer to meet Apple performance standards. Apple is not responsible for the operation of this device or its compliance with safety and regulatory standards. Please note that the use of this accessory with iPod or iPhone may affect wireless performance.
INSTRUCTION MANUAL
CE
SAFETY PRECAUTIONS
To achieve the utmost in enjoyment and performance, and in order to become familiar with its features, please read this manual carefully before attempting to operate the unit.
Important Notes
This safety and operating instruction should be retained for future reference.
The apparatus shall not be exposed to dripping or splashing and no objects filled with liquids, such as vases, shall be placed on apparatus. Avoid installing the unit in locations described below:
-
- Places exposed to direct sunlight or close to heat radiating appliances such as electric heaters, on top of other stereo equipment that radiate too much heat.
-
- Places blocking ventilation or dusty places.
-
- Places subject to constant vibration, humid or moist places.
No naked flame sources such as lighted candles should be placed on the unit.
Attention should be drawn to the environmental aspects of battery disposal.
Make sure not to obstruct the ventilation openings, a minimum of 10cm should be kept around the apparatus for ventilation.
The ventilation should not be impeded by covering the ventilation openings with items such as newspaper, table-cloths, curtains, etc. Use apparatus in moderate climates only.
Operate tuning controls and switches as instructed in the manual.
Before turning on the power for the first time, make sure the power cord is properly installed.
Store your CD in a cool area to avoid damage from heat.
The mains plug is used as the disconnect device and it must remain readily operable. To completely disconnect the power input, the mains plug of the apparatus must be disconnected from the mains.
The normal function of the product may be disturbed by Strong Electro Magnetic Interference. If so, simply reset the product to resume normal operation by following the instruction manual. In case the function could not resume, please use the product in other location.
Do not attempt to remove any screws, or open the casing of the unit; there are no user serviceable parts inside, refer all servicing to qualified service personnel.


CAUTION: TO REDUCE THE RISK OF ELECTRIC SHOCK DO NOT REMOVE COVER (OR BACK), NO USER SERVICEABLE PARTS INSIDE, REFER SERVICING TO QUALIFIED SERVICE PERSONNEL.

DANGEROUS VOLTAGE
Conductor dangerous voltage, that may be of sufficient magnitude to constitute a risk of electric shock to persons is present within this product's enclosure.
ATTENTION
The owner's manual contains important operating and maintenance instructions, for your safety, it is necessary to refer to the manual.
WARNING :TO PREVENT FIRE OR SHOCK HAZARD, DO NOT EXPOSE THIS APPLIANCE TODRIPPING OR SPLASHING.
Note: This unit will become warm when used for a long period of time. This is normal and does not indicate a problem with the unit. This unit includes micro-processors which may malfunction as a result of external electrical interference/noise or electrostatic discharge. If the unit is not working properly, disconnect the power source and then reconnect it.
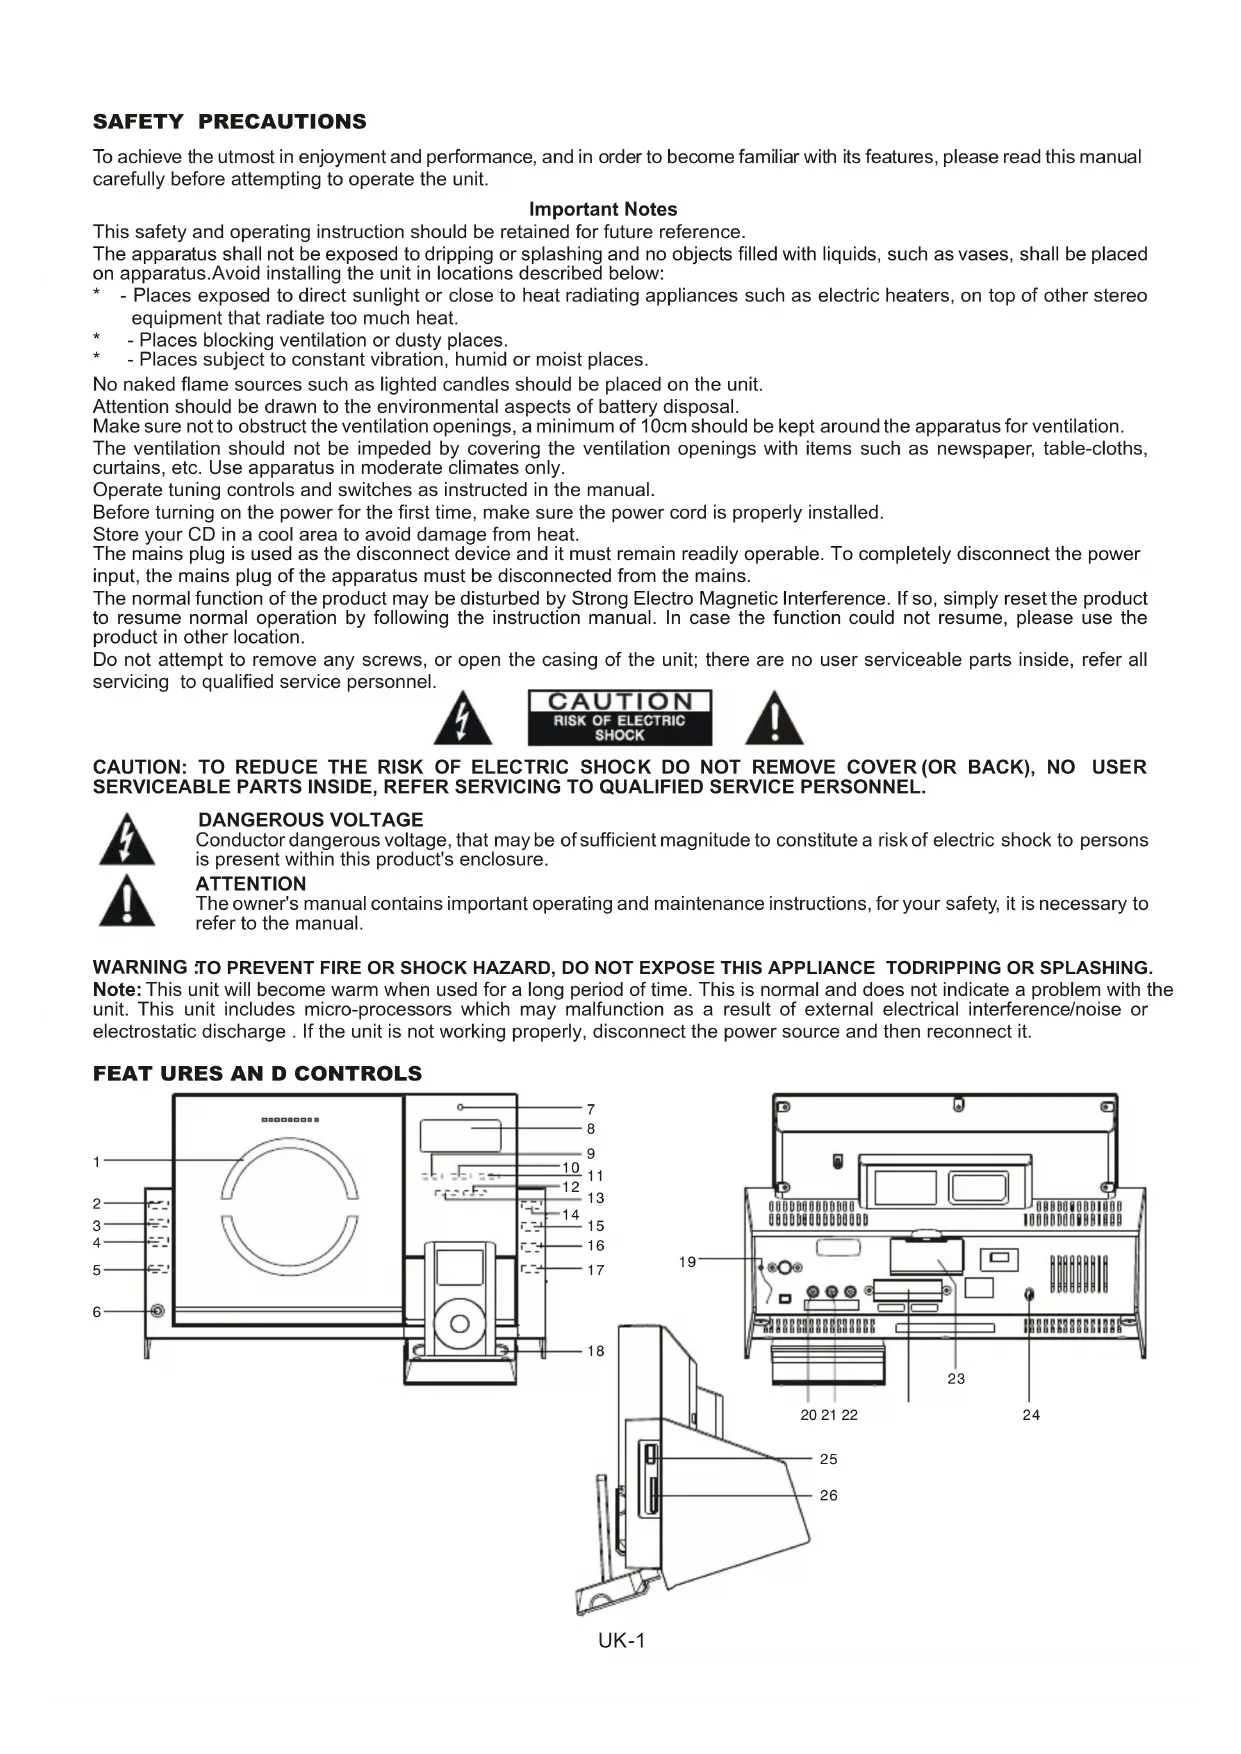
FEAT URES AND CONTROLS
UK-1
FEATURE RES AND CONTROLS
- CD DOOR
- CD DOOR OPEN/CLOSE(touch pad)
- SELECT/REPEAT(touch pad)
- VOLUME + (touch pad)
- VOLUME-(touch pad)
- HEADPHONE JACK
- IR SENSOR
- LCD DISPLAY
- SKIP TONEV (touch pad)
- SKIP▶I/TUNE▲(touch pad)
REMOTE CONTROL
- STANDBY/ON BUTTON
- iPod/CD BUTTON
- BACKLIGHT BUTTON
- PLAY/PAUSE BUTTON
- 1 BUTTON
- STOP/MENU BUTTON
- RANDOM BUTTON
8.PROGRAM BUTTON - PS/FOL/MENU▼ BUTTON
- X-BASS BUTTON
- VOLUME + BUTTON
- EQ BUTTON
-
VOLUME-B BUTTON
-
OPEN/CLOSE BUTTON
- AUX/USB/SD BUTTON
- TUNER BUTTON
- CLOCK/DISPLAY BUTTON
18.▶I BUTTON - SELECT/REPEAT BUTTON
- INTRO BUTTON
- PS/FOL/MENU▲ BUTTON
- SLEEP BUTTON
- TIMER BUTTON
- SURROUND BUTTON
-
MUTE BUTTON
-
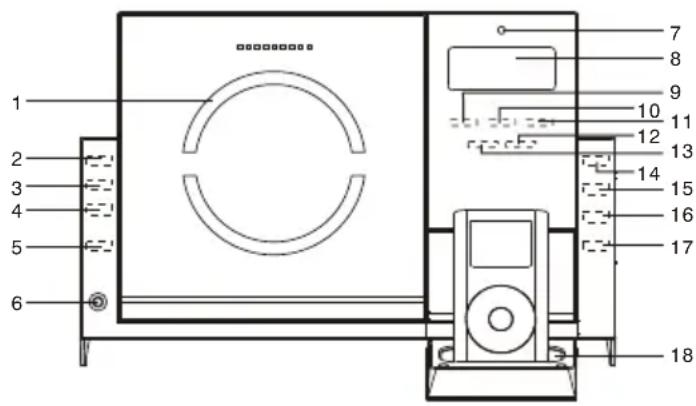
AUX IN(LEFT) JACK
22 SPEAKER TERMINALS - BATTERY DOOR
- AC CORD
- USB DEVICE IN PORT
- SD CARD IN SLOT
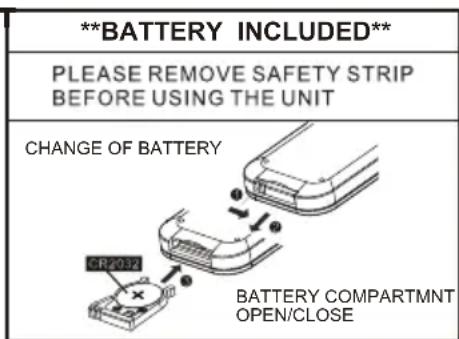
PUT TING THE BATTERY IN TO THE REMOTE CONTROL U N
- Press the battery compartment gently according to the direction indicated in the illustration.
- Slide to open the battery compartment.
- Insert the supplied CR2032 battery into the compartment according to the polarity markings (^+ + ^+ and - - ) inside the compartment and on the battery. Replace the battery compartment until it clicks.
NOTE :Remove the battery from the remote control if not in use for long period of time. Replace with new battery when the battery become weak, otherwise the remote control will not function properly.
TOUCH SENSING CONTROL
The unit is utilizing a human capacitive sensing technology, the front panel controls are designed to be touch sensing key pads; you can operate the unit by the touch of your finger tips. The blue light dots on the CD front panel will be flashing up every time when you perform your touch operation.
CLOCK SETTING
When the unit is powered up for the first time, it will be in standby mode, the display will show the clock and flash. To perform the clock setting, ensure the unit is in standby mode.
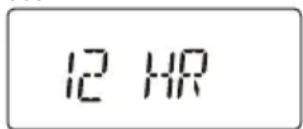
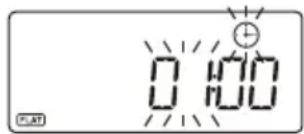
- Setting the clock display format - Keep touching the CLOCK/DISPLAY touch pad on the front panel until the display shows "12 HR" or "24 HR", then touch on the I or touch pad to select the "12 HR" (12-Hour) or "24 HR" (24-Hour) clock display format, when your desired format appears in the display, touch on the CLOCK/DISPLAY to confirm. (F. 1)
- After the clock display format is set, the display will show the clock with the hour digits flash, touch on the I or to set to the correct hour, then touch on the CLOCK/DISPLAY to confirm, first set the hour and then the minute, when the display shows the correct time, touch on the CLOCK/DISPLAY again to confirm, the clock setting is now completed. (F. 2)(F. 3)
- The clock is displayed during unit standby. To see the clock during unit operation, repeatedly touch on the CLOCK/DISPLAY until the display shows the clock and it will be displayed for 5 seconds.
F.1

F.2

F.3
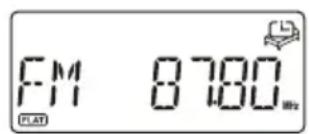
When the unit is first switched on from standby, it will automatically enter into the FM radio mode. You should fully extend the FM lead wire antenna located at the back of the unit and adjust its position and direction until you find the best reception.
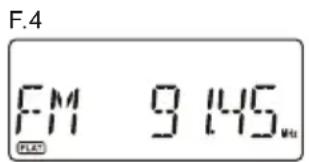
To select radio mode during other operation modes, touch on the TUNER touch pad on the front panel, the display will show the FM frequency. (F. 4)
Manual tuning
You can use the manual tuning to tune to weak stations or your desired frequency.
- Repeatedly touch on the I or touch pad until you read the correct frequency or the reception is at its best.
- The display will show the stereo icon "ST" a FM stereo station is received. (F. 5)
Automatic tuning
- Keep touching on the I or touch pad until it starts to search down or up, it will automatically search for the first station of sufficient signal strength.
- Repeat the above procedure if you wish to select another station.
Programming preset stations (remote control only)
You can preset stations of your choice and store up to 30 FM stations into its memory.
- Press the TUNER button on the remote to select radio mode, then tune to the desired station.
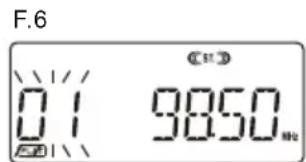
- Press the PROGRAM button on the remote once, the display will show "01" and flash, press the PS/FOL/MENU +/- buttons on the remote to select the preset station number. (F. 6)
- When your desired preset station number appears, press the PROGRAM button again to confirm your selection, the current station will be stored in your desired preset number.
- Repeat the above steps to program more preset stations or to change the stored preset station, storing a new station into a preset location will erase the previous stored station in that location.
Selecting the preset stations (remote control only)
- Press the TUNER button on the remote to select radio mode.
- Press the PS/FOL/MENU +/- buttons on the remote to select your desired preset station, the display will show the preset station number and the frequency.

LISTENING TO YOUR COMPACT DISCS
NOTE : Although this CD/MP3 player can read CD-R and CD-RW discs in addition to normal CDs, the playability of CD-R and CD-RW discs may be affected by the type of software that was used to create the discs, as well as the quality and condition of the blank media you are using, 100% playability cannot be guaranteed. This is not an indication of a problem with the player.
IMPORTANT : THIS MODEL HAS A MOTORIZED ELECTRONIC CD DOOR. DO NOT ATTEMPT TO OPEN THE DOOR MANUALLY. THIS COULD CAUSE DAMAGE TO THE DOOR OPENING MECHANISM.
Playing the entire CD
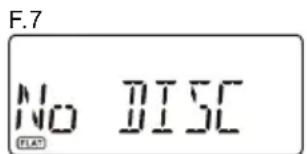
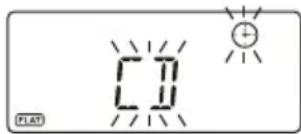
- When the unit is ON, touch on the CD touch pad to select CD function. The display will first show "CD" and then finally "No DISC" to indicate that there is no disc in the player. (F. 7)
- Touch on the OPEN/CLOSE touch pad to open the CD door, the display will show "OPEN".
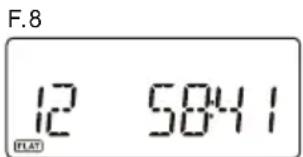
- Load the disc with the printed label side facing up and then touch on the OPEN/CLOSE again to close the CD door. The display will first show "READING" and then finally the total track number and time will be displayed. (F. 8)
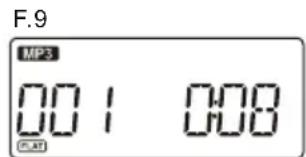
- To start playback from the beginning, touch on the / II touch pad. If a MP3 disc is being played, "MP3" will be displayed. (F. 9)
- To interrupt playback, touch on the / II touch pad, the elapsed time in the display will flash.
- To resume playback, touch on the / II touch pad again.
- To stop playback, touch on the touch pad.
Selecting a different track during play
- During playback, repeatedly touching on the I or touch pad until you read your desired track in the display, playback will be started from this track.
- If a MP3 disc is being played, the display will show the ID3 tag if available.
- To select other folders in the MP3 disc, press the PS/FOL/MENU +/- buttons on the remote.
- To play the next track, touch on the I touch pad once.
- To play the current track again from the beginning, touch on the I touch pad once.
- To play the previous track, touch on the I▲ touch pad twice.
Repeat play
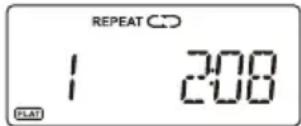
During normal playback, you can touch on the REPEAT touch pad to select the repeat play function:
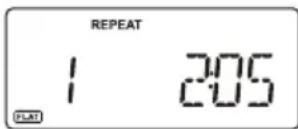
- To repeat the same track, touch on the REPEAT once, the display will show "REPEAT" (F. 10)
- If you are playing a MP3 disc, an additional " " option will appear. This will repeat the current folder.
- To repeat the entire disc, touch on the REPEAT again, the display will show "C". (F. 11)
- To cancel repeat play, repeatedly touch on the REPEAT touch pad until "REPEAT" disappears in the display.
Random play (remote control only)
You can press the RANDOM button on the remote control to select the random play function:
- During CD stop, press the RANDOM button once to select random play, the display will show "RANDOM", one track will be randomly selected and started to play.(F. 12)
- During playback, first press the RANDOM button once, the display will show "RANDOM", then press the I or button, one track will be randomly selected and started to play.
- To resume normal playback, press the RANDOM button again until "RANDOM" disappears.
F.11F.10 F.12

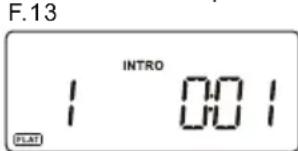
Intro play (remote control only)
- Press the INTRO button on the remote control to start intro play. The display will show "INTRO" and will start playing the first 10 seconds of each track. (F. 13)
- To resume normal playback, press the INTRO button again, the "INTRO" in the display will disappear.
Program play (remote control only)
You can use the program play feature to play up to 60 tracks on a disc in any desired order. You may also program a particular track to play several times within a programmed sequence.
- Load your disc as usual and wait until the display shows the total number of tracks on the disc.
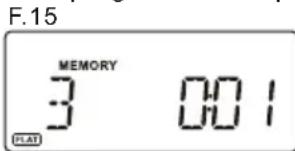
- Ensue it is in CD stop mode, press the PROGRAM button on the remote control once, the display will show "MEMORY" and "P-01". (F. 14)
- Press the I or button to select the first track number to be programmed. When the desired track number appears in the display, press the PROGRAM button to confirm and the first track to play is programmed. The program memory number will advance to "P-02" and ready for the next entry.
- If a MP3 disc is being loaded, an additional "folder" option will appear before the track selection, press the PS/FOL/MENU +/- buttons to select the folder.
- Repeat the above steps to program other tracks, a maximum number of 60 tracks can be programmed. When you have completed programming, press the / II button to begin program play, playback will be started on the first track you programmed and will continue until the last programmed track has played. The display will show "MEMORY". (F. 15)
- When the program play is completed, the player stops and "MEMORY" will be displayed. The player remains in the program play mode. Press the / II button will play the programmed sequence again.
- To erase the program, in CD stop mode, press the button once; in CD play mode, press the button twice. "MEMORY" will be disappeared.
Repeat Program play
You may use the program play and the repeat play features together to continuously repeat a programmed sequence. First use the remote control to program the desired playback sequence, when program play begins, Touch on the REPEAT touch pad to select repeating the current track or the entire programmed sequence.

LISTENING TO YOUR iPod&iPhone
This unit incorporates an iPod/iPhone docking function, your favourite songs in the iPod/iPhone can be playback through this unit.
- To select iPod operation, repeatedly touch on the iPod/CD touch pad until the display shows "No iPod".
- Lift down the iPod docking station located on the front right side under the display, install an adaptor which matches your iPod/iPhone model into the docking tray.
- Insert your iPod/iPhone into the docking tray, the display will show "iPod" and now you can start your iPod operation.
- To start or interrupt playback, touch on the /ll touch pad.(F.16)
- To skip forward or back to other tracks during playback, touch on the or I touch pad.
- To select "iPod Menu", press on the MENU button on the remote.
- To scroll up or down in the "iPod Menu", press the PS/FOL/MENU +/- buttons on the remote.
- To confirm the selection in the "iPod Menu", press the SELECT button on the remote.
CHARGING UP YOUR iPod&iPhone
You can charge your iPod or iPhone via the docking tray in either standby or under operation, the iPod or iPhone will be automatically charged when it is docked.
USB & SD/MMC CARD MP3 PLAYBACK
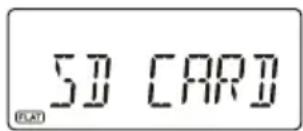
- To select USB or SD/MMC function, repeatedly touch on the AUX/USB/SD touch pad until the display shows "USB" or "SD CARD". (F. 17) (F. 18)
- Insert your USB device to the USB port or your SD/MMC card to the memory card slot.
- The display will first show "READING" and then the total number of folders and tracks.
- To start playback from the first folder and track, touch on the / II touch pad. The display will show the folder/track no., the time and the ID3 tag if available.
- To interrupt playback, touch on the / II , the elapsed time in the display will flash.
- To resume playback, touch on the / II again.
- To play the next file/track, touch on the once.
- To play the current playing file/track again from the beginning, touch on the I once.
- To play the previous file/track, touch on the I twice.
- To select different folder in the device, press the PS/FOL/MENU +/- buttons on the remote.
- To stop playback, touch on the touch pad.
NOTE: Due to hardware and software compatibility, some kinds of "Dual Voltage-MMC" card or "MMC-Plus" card might not be supported.
F.16


F.18F.17
AUX INPUT
The AUX IN RCA jacks are located at the back of the unit, analogue audio sound signals from other sources can be input to the system through these jacks.
- Use a cable with RCA jacks to connect the input to other analogue audio source.
- To select the AUX input function, repeatedly touch on the AUX/USB/SD touch pad until the display shows "AUX". (F. 19)
- Adjust the volume control for your desired sound output level.
SLEEP FUNCTION (remote control only)
This function allows you to program the system to switch off itself after a set period of time. You can set your sleep time in power on mode:
- To activate the sleep function, press the SLEEP button on the remote, the display will show the flash sleep timer icon " ” and "90".
- Repeatedly press the SLEEP button to select the sleep time, it will change in sequence on every press:

- When the display shows your desired sleep time, release the button, the sleep timer is now activated. The sleep icon in the display will become stable. When the sleep time counts to zero, the unit will go off. (F.20)
- To cancel sleep, press the SLEEP button once again, the display will show "SLP OFF" and the sleep icon will disappear.
TIMER FUNCTION (remote control only)
This function allows you to switch on and off the system at your desired time and mode:
- Press the TIMER button on the remote control to toggle the timer function between on and off. The display will show “ ” to indicate timer function on.
- To set the on timer clock, press and hold the TIMER button on the remote control until the display shows "ON TIME", the on timer clock will be displayed and the "hour" digit of the timer clock will flash.(F.21)
- Press the I or button to set to the desired hour, then press the TIMER button to confirm, first set the hour and finally the minute, the on timer clock is set.
- Then you will enter into the off timer clock setting, the display will show "OFF TIME", the off timer clock will be displayed and the "hour" digit will flash. Press the I or button to set to the desired hour, then press the TIMER button to confirm, first set the hour and finally the minute, the off timer clock is set.
- Finally you will enter into the timer on mode setting, press the I or button to select the timer on mode-iPod, CD, TUNER, AUX, USB or SD CARD, then press the TIMER button to confirm. The timer setting is now completed.(F.22)
- The on and off timer settings will be displayed in the first few seconds every time while the timer function is set to on.
NOTE: In the 12-Hour clock display format, the segment on left side of the hour digit will light up to represent AM or PM - the upper one is for AM and the lower one is for the PM.
F.19 F.20

F.21 F.22
PRESET EQ (remote control only)
Press the EQ button on the remote control to select different preset EQ mode, the display will show in sequence of every press:

SURROUND SOUND (remote control only)
Press the SURROUND button on the remote control to toggle the surround sound mode between on and off. The display will show "SURR ON" or "SURR OFF". When the surround sound mode is on, the surround sound effect is activated and the icon "SURROUND" will be displayed.
X-BASS FUNCTION (remote control only)
Press the X-BASS button on the remote control will toggle this function between on and off. The display will show "BASS ON" or "BASS OFF". When the X-BASS is on, the bass sound is enhanced and the icon "X-BASS" will be displayed.
MUTE FUNCTION (remote control only)
Press the MUTE button on the remote control to stop the sound from the speakers temporarily, the sound stops and the display will show "
To cancel mute, press the MUTE button again or press the VOLUME +l , " 喜 disappears in the display and the sound is restored.
BACKLIGHT CONTROL (remote control only)
During unit on, press the BACKLIGHT button on the remote control will toggle the display backlight between on and off.
HEADPHONE JACK
The stereo headphone jack is located on the left side of the front panel. Connect a set of stereo headphones (not included) to this jack for private listening. When headphones are in use, the speakers will be automatically disconnected.
IMPORTANT: When using headphones always set the volume control to a low level before you put the headphones on, then put the headphones on and gradually increase the volume to a comfortable listening level.
MEMORY BACKUP
This unit incorporates a battery back up circuit that will keep the clock running in the event of temporary power interruption.
Insert 2 x 1.5V UM-4, AAA or equivalent batteries into the battery compartment located at the back of the cabinet. For best results, replace with fresh batteries every 9 to12 months. Do not mix old and new batteries or different types of batteries such as alkaline and carbon-zinc batteries together.
LCD DISPLAY WINDOW
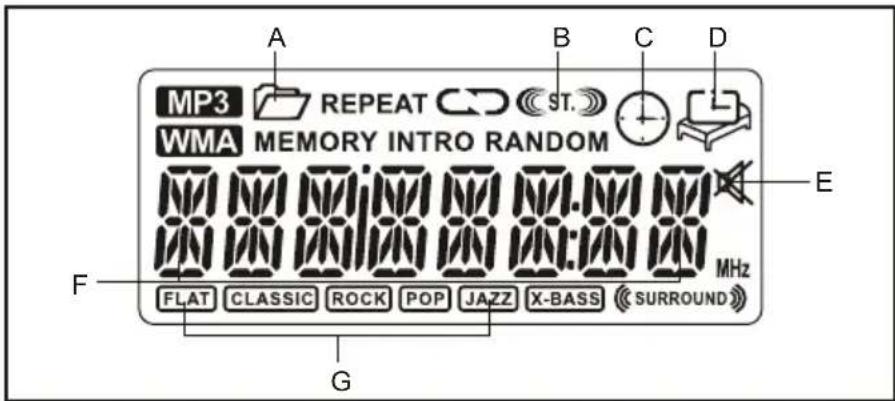
A. MP3 FOLDER INDICATOR
C. TIMER INDICATOR
E. MUTE INDICATOR
G. EQ INDICATOR
B. FM STEREO INDICATOR
D. SLEEP INDICATOR
F. BAND/TRACK NUMBER/FREQUENCY/TIME INDICATOR
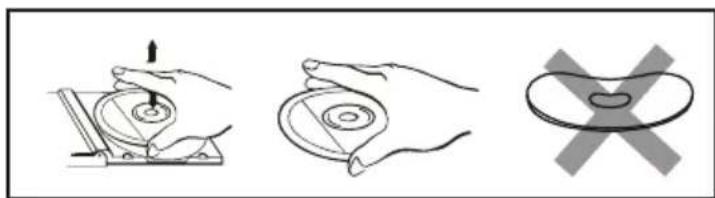
COMPACT DISC
- Always use compact discs bearing the mark as shown.

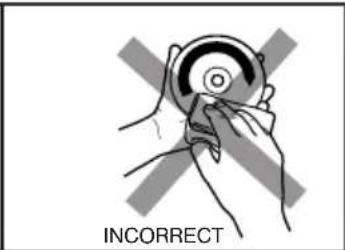
- Notes on handling discs
Removing the disc from its storage case.
- Do not touch the reflective recorded surface.
- Do not stick paper or write anything on the surface.
- Do not bend the disc.
-
Storage
-
Store the disc in its case.
-
Do not expose discs to direct sunlight or high temperatures, high humidity or dusty places.
-
Cleaning a disc
-
Should the disc become soiled, wipe off dust, dirt and fingerprints with a soft cloth.
- The disc should be cleaned from the centre to the edge.

- Never use benzene, thinners, record cleaner fluid or anti static spray.
- Be sure to close the CD door so the lens is not contaminated by dust.
- Do not touch the lens.
SPECIFICATION
POWER SUPPLY: 100-240V~60/50Hz
OUTPUT POWER: 10W X2
UNIT DIMENSION: 300(W) × 128(D) × 198(H) mm
SPEAKER DIMENSION: 91(W) x 128(D) x 198(H) mm
WEIGHT: 2.91kg
RADIO SECTION
FREQUENCY RANGE: FM 87.5 - 108 MHz
COMPACT DISC SECTION
CD MEDIA: CD-DA, CD-ROM, CD-R, CD-RW
SUPPORTED FORMATS: ISO9660, UDF
MP3 DECODE
FILE MPEG1/2 Layer3 [.mp3] [.MP3]
SAMPLING RATE (KHz) 48, 44.1, 32, 24, 22.05, 16, 11.025, 8
BIT RATE (kbps): 8-320 Constant & VBR (Variable Bit Rate)
ID3 TAG: V2.4, V2.3 V2.2, V2.1, V1.x
MAX. FILE NO. 256/511 (Dir/Dir+File)
FOLDER/FILNAME
ID3 Title/Artist/Album
30/30 (Max. no. of bytes)
30/30/30 (Max. no. of bytes)
WMA DECODE (OPTIONAL)
FILE Windows Media Audio 9 [.wma] [.WMA]
SAMPLING RATE (KHz) 48, 44.1, 32, 22.05, 16, 11.025, 8
BIT RATE (kbps): 32-192
MAX. FILE NO. 256/511 (Dir/Dir+File)
FOLDER/FILE NAME
30/30 (Max. no. of bytes)
ID3 Title/Artist/Album
30/30/30 (Max. no. of bytes)
AUX INPUT
INPUT VOLTAGE RANGE:
350mV - 500mV
IMPEDANCE:
47KΩ
** SPECIFICATION SUBJECT TO CHANGE WITHOUT FURTHER NOTICE **

If at any time in the future you should need to dispose of this product please not that: Waste electrical products should not be disposed of with household waste. Please recycle where facilities exist. Check with your Local Authority or retailer for recycling advice.(Waste Electrical and Electronic Equipment Directive)
Lenco
Mci-210
HIFI MICROANLAGE MIT iPod/iPhone DOCKINGSTATION, CD/MP3 PLAYER, PLL UKW RADIO, USB-ANSCHLUSS UND KARTENSLOT
ID3-TAG: V2.4, V2.3, V2.2, V2.1, V1.x
AFMETINGEN APPARAAT: 300(B)X128(D)X198(H)mm
AFMETINGEN LUIDSPREKER: 91(B)X128(D)X198(H)mm
GEWICHT:2.91kg
RADIOSECTIE:
FREQUENTIEBEREIK: FM87.5—108MHz
CD-SECTIE
CD MEDIA: CD-DA, CD-ROM, CD-R, CD-RW
ONDERSTEUNDE FORMATEN: ISO9660, UDF
MP3 DECODEREN
BESTAND: MPEG 1/2 Layer3 [.mp3] [.mp3]
BITRATE(kbps): 8-320 Constant & VBR (Variabele Bitrate)
ID3-TAG: V2.4, V2.3, V2.2, V2.1, V1.x
MAX. AANTAL BESTANDEN. 256/511 (Map/Map+Bestand)
MAP/BESTANDSNAAM: 30/30 (Max. aantal bytes)
ID3 Titel/Artiest/Album: 30/30/30(Max. aantal bytes)
WMA DECODEREN (OPTIONEEL)
BESTAND: Windows Media Audio [.wma] [.WMA]
SAMPLINGRATE(KHz): 48, 44.1, 32, 22.05, 16, 11.025, 8
BITRATE(kbps): 32-192
MAX. AANTAL BESTANDEN.: 256/511 (Map/Map+Bestand)
MAP/BESTANDSNAAM: 30/30 (Max. aantal bytes)
ID3 Titel/Artiest/Album: 30/30/30 (Max. aantal bytes)
AUX-INGANG
INGANGSSPANNING:350mV-500Mv
IMPEDANTIE: 47 kΩ
\*\*SPECIFICATIONS ONDERHEVIG AAN VERANDERING ZONDER BERICHTGEVING \*\*

AVEC DOCKING STATION PARA iPod/iPhone,
LECTEUR CD/MP3,
RADIO PLL FM ET PORT USB/CARTE
ETIQUETA ID3: V2.4, V2.3, V2.2, V2.1, V1.x

- MICRO HI-FI SYSTEM WITH iPod/iPhone DOCKING STATION, CD/MP3 PLAYER, PLL FM RADIO, USB AND CARD READER
- SAFETY PRECAUTIONS
- Important Notes
- DANGEROUS VOLTAGE
- ATTENTION
- FEATURE RES AND CONTROLS
- REMOTE CONTROL
- PUT TING THE BATTERY IN TO THE REMOTE CONTROL U N
- TOUCH SENSING CONTROL
- CLOCK SETTING
- Manual tuning
- Automatic tuning
- Programming preset stations (remote control only)
- Selecting the preset stations (remote control only)
- LISTENING TO YOUR COMPACT DISCS
- Playing the entire CD
- Selecting a different track during play
- Repeat play
- Random play (remote control only)
- Intro play (remote control only)
- Program play (remote control only)
- Repeat Program play
- LISTENING TO YOUR iPod&iPhone
- CHARGING UP YOUR iPod&iPhone
- USB & SD/MMC CARD MP3 PLAYBACK
- AUX INPUT
- SLEEP FUNCTION (remote control only)
- TIMER FUNCTION (remote control only)
- PRESET EQ (remote control only)
- SURROUND SOUND (remote control only)
- X-BASS FUNCTION (remote control only)
- MUTE FUNCTION (remote control only)
- BACKLIGHT CONTROL (remote control only)
- HEADPHONE JACK
- MEMORY BACKUP
- LCD DISPLAY WINDOW
- COMPACT DISC
- SPECIFICATION
- RADIO SECTION
- COMPACT DISC SECTION
- MP3 DECODE
- WMA DECODE (OPTIONAL)
- ** SPECIFICATION SUBJECT TO CHANGE WITHOUT FURTHER NOTICE **
- Lenco
- RADIOSECTIE:
- CD-SECTIE
- MP3 DECODEREN
- WMA DECODEREN (OPTIONEEL)
- AUX-INGANG
- \*\*SPECIFICATIONS ONDERHEVIG AAN VERANDERING ZONDER BERICHTGEVING \*\*
- AVEC DOCKING STATION PARA iPod/iPhone,
- LECTEUR CD/MP3,
- RADIO PLL FM ET PORT USB/CARTE
Brand : LENCO
Model : MCI210
Category : Loudspeaker