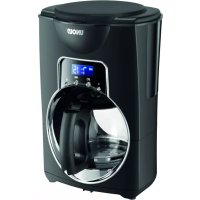
28605 - Coffee machine UNOLD - Free user manual and instructions
Find the device manual for free 28605 UNOLD in PDF.


| Product type | Filter coffee machine |
| Brand | Unold |
| Model | 28605 |
| Capacity | 1.5 liters (approx. 12 cups) |
| Filter type | Paper filter, size 1 x 4 |
| Carafe material | Glass with markings and lid |
| Dishwasher-safe carafe | Yes |
| Housing material | Brushed stainless steel (surround) |
| Power cord length | Approx. 120 cm, fixed mount |
| Power supply | 230 V ~ 50 Hz |
| Display | Dual digital display with clock and timer |
| Functions | Delay programming, keep warm (2 h), automatic shut-off |
| Hot plate | With non-stick coating, keep warm 2 hours |
| Filter holder | Removable for 1x4 paper filters |
| Indicator lights | On/Off |
| Safety | Automatic shut-off, overheating protection, do not immerse |
| Maintenance | Regular descaling with descaler or citric acid |
| Cleaning | Housing and plate: damp cloth; carafe, lid, filter holder: soapy water |
| Included accessories | Instruction manual |
| Warranty | 24 months (Germany and Austria) |
Frequently Asked Questions - 28605 UNOLD
User questions about 28605 UNOLD
0 question about this device. Answer the ones you know or ask your own.
Ask a new question about this device
Download the instructions for your Coffee machine in PDF format for free! Find your manual 28605 - UNOLD and take your electronic device back in hand. On this page are published all the documents necessary for the use of your device. 28605 by UNOLD.
USER MANUAL 28605 UNOLD
Instructions for use Model 28605
Technical Specifications 15
Important Safeguards. 15
Tips for perfect coffee enjoyment 16
Before using the appliance the first time 16
Setting the time 17
Brewing coffee without the timer function 17
Brewing coffee with the timer function 18
Cleaning the appliance. 19
19
Guarantee Conditions 46
Waste Disposal / Environmental Protection 50
Specification technique 20
2 D Taste "I/O" Ein/Aus
GB ON//OFF switch (I/O)
F Touche I/O MARCHE/ARRÉT
NL Toets I/O AAN/UIT
I Pulsante acceso/spento I/O
E Tecla de CONEXION/DESCONEXION I/O
CZ Tlačitko I/O ZAP/VYP
GB Display with time
F Touche PROG PROG Programmation
NL Toets PROG PROG programmeren
Grosse (L/B/H): Ca. 24,0 x 23,0 x 36,0 cm
Volume: 1.5 litres = approx. 12 cups
Filter size: Paper filter size 1 x 4
Dimensions: Approx. 24,0 × 23,0 × 36,0 cm (B/T/H)
Weight: Approx. 2,05 kg
Power cord length: Approx. 120 cm
Features: High-gloss stainless steel trim
Glass pot is dishwasher suitable
Warming plate (2 hours) with non-stick coating
Removable filter for size 1x4 filter papers
2-function display with digital timer and clock function
On/Off indicator lamps
Automatic shut-off
Accessories: Instruction manual
Technical details subject to change.
EXPLANATION OF SYMBOLS

This symbol denotes a possible hazard which could cause injury or damage to the appliance.

This symbol denotes a possible risk of scalding. Please always be particularly vigilant here.
IMPORTANT SAFEGUARDS
- Please read the following information and keep it for future reference.
- This appliance is not intended for use by persons (including children) with limited physical, sensory or mental abilities or with lack of experience or lack of knowledge, unless they are supervised by a person who is responsible for their safety or have been instructed on how to use the appliance.
- Children should be supervised in order to ensure that they do not play with the appliance.
-
Keep the appliance out of the reach of children.
-
Connect appliance only to an AC power supply with voltage corresponding to the voltage on the rating plate.
- Do not operate this appliance with an external timer or remote control system.
- For reasons of electrical safety, never immerse the appliance or the power cord in water or other liquids.
- For reasons of electrical safety, do not clean the appliance in the dishwasher.
- The switch and power cord should never come into contact with water or other liquids. In case this ever happens, all parts must be completely dry before operating the appliance again.



-
Never touch the appliance or power cord with wet hands.
-
This appliance is intended to be used in household and similar applications such as:
-
staff kitchen areas in shops, offices and other working environments;
farm houses;
by client in hotels, motels and other working environments;
bed and breakfast type environments. -
For safety reasons, never place the appliance on hot surfaces, a metal tray or a wet surface.
- Do not place the appliance or power cord near open flames during operation.
- Always use the coffeemaker on a level, uncluttered and heatresistant surface.
- The appliance is approved for household use only and may be used only for brewing coffee, never for heating milk or other liquids or keeping them warm.
- Make sure that the power cord does not hang over the edge of the countertop or table, since this can cause accidents, for example if small children pull on the cord.
- Route the power cord so that there is no possibility of the cord being pulled or tripped over.
- Do not wrap the power cord around the appliance and avoid kinking of the power cord to prevent damage.
- Use the coffeemaker only indoors.
- When in use, never cover the coffeemaker, since this could cause the appliance to overheat.
- Only use fresh, cold water to brew coffee. Fill the water container at least up to the lowest marking (2 cups) and do not overfill.
-
Do not switch on the appliance until after you have filled the water tank with water.
-
In case of repeated use, allow the appliance to cool off at least 5 minutes between use.
- Never use the coffee pot in the microwave; it is not suitable for such use.
- Do not move the appliance as long as it is in operation, to prevent injuries.
- Make sure that all users, especially children, are aware of the danger of injury from emerging steam and hot splashing water - danger of burns!
- To avoid damage to the coffee jug, never place it empty into the appliance when the appliance is switched on.
- Do not use the appliance with accessories of other manufacturers or brands, to prevent damage.
- Unplug the appliance from the power supply after use and prior to cleaning. Never leave the appliance unattended when it is plugged in to the power supply.
- Check the appliance, the plug and the power cord regularly for wear or damage. In case of damage to the power cord or other parts, please send the appliance or the power cord for inspection and repair to our after sales service. Unauthorized repairs can result in serious risks to the user and void the warranty.
- If the supply cord is damaged, it must be replaced by the manufacturer or its service agent or a similarly qualified person in order to avoid a hazard.

CAUTION:
The appliance becomes very hot during operation!

Never open the casing of the appliance to prevent electric shock.
The manufacturer will not be liable in the event of incorrect assembly, improper or incorrect use or if repairs are carried out by unauthorized third parties.
TIPS FOR PERFECT COFFEE ENJOYMENT
- Make sure that your coffeemaker is clean and descaled at all times. (see chapter Cleaning and descaling on page 18).
-
Keep coffee beans and ground coffee in a tightly closed can and store in a cool, dark place, but not in the refrigerator.
-
For optimal coffee enjoyment we recommend grinding the coffee beans right before use.
- Use only fresh water.
- Coffee tastes best freshly brewed. If coffee is kept warm too long, it can become bitter.
BEFORE USING THE APPLIANCE THE FIRST TIME
Before brewing coffee for the first time, please run one or two brewing cycles with water only to remove any residue from the manufacturing process. We also recommend running one brewing cycle without coffee if the appliance has not been in use for an extended period.
- Remove all packaging and any transportation locks.
- Check that all the listed accessories are included.
- Clean all parts with a damp cloth, as described in the section "Cleaning the appliance" (page 18).
- Check that all the parts are correctly assembled and that the appliance is in a stable position.
- Insert the plug of the power cord into an electrical socket (230V ,50Hz)
- Open the lid of the appliance.
- Fill the water tank with clear, cold water up to the marker "12".
-
Close the lid of the appliance.
-
Place the coffee jug with its lid closed onto the hotplate.
- Switch on the appliance by pressing the "I/O" switch.
- The red indicator lamp of the "I/O" switch lights up and the brewing process begins.
- Once the brewing process has finished, switch off the appliance by pressing the "I/O" switch once.
- Discard the water from the first brew.
- Clean the coffee jug and filter.
- The appliance is now ready for operation and you can start brewing coffee.
SETTING THE TIME
- As soon as the coffee maker is connected to the mains supply, the time "0:00" will be shown in the display.
-
To set the time, press the button marked "H" (for the hours) and "M" (for the minutes) as often is necessary for the correct time to be displayed. The time is shown in am/pm format, i.e. until 12 noon, "am" is additionally shown in the display, from 12 noon onwards, "pm".
-
If neither button is pressed within 10 seconds, the appliance will return to its original state. The current time will be displayed and you can now start brewing coffee.
- The appliance does not save the time if power is cut off for more than 10 seconds, i.e. you will have to reset the time if the appliance is disconnected from the mains supply
BREWING COFFEE WITHOUT THE PROGRAM FUNCTION
- Prepare the appliance, as described under "Before using the appliance for the first time" on page 17.
- Open the lid of the appliance.
- Fill the water tank with enough clear, cold water for the required number of cups, taking care not to exceed the maximum capacity (marker "12").
- Make sure that the filter holder has been correctly inserted into the appliance. The filter holder can only be inserted in one direction.
- Fold over the bottom edge of the paper filter and place it directly in the filter holder. The paper filter must not protrude over the top of the filter holder. If it does protrude over the
top of the filter holder, you will have to fold it over several times until it fits.
6. Spoon the required amount of medium fine ground coffee (5-7 g per cup according to taste) into the paper filter. If the coffee ground is too fine, it could clog up the pores of the filter and cause the coffee maker to overflow.
7. Close the lid of the appliance.
8. Place the coffee jug with its lid closed onto the hotplate.
9. Press the "I/OF" switch.
10. The red indicator lamp of the "I/O" switch lights up and the brewing process begins.
11. Once the brewing process has finished, switch off the appliance by pressing the
"I/O" switch once. If you do not switch off the appliance manually, it will switch off automatically after two hours.
-
The coffee jug may be removed at any time during the brewing process to serve coffee, but must be replaced on the hotplate after max. 20 seconds to avoid the filter from overflowing.
-
Disconnect the appliance from the mains supply if necessary.
-
Once the appliance has cooled down, remove the permanent filter and dispose of the coffee grounds.
BREWING COFFEE WITH THE PROGRAM FUNCTION
- Please first check that the time is correctly set. Only then will the timer be able to work as required (see section "Setting the time" on page 17).
- Prepare the appliance, as described under "Before using the appliance for the first time" on page 17.
- Open the lid of the appliance.
- Fill the water tank with enough clear, cold water for the required number of cups, taking care not to exceed the maximum capacity (marker "12").
- Make sure that the filter holder has been correctly inserted into the appliance. The filter holder can only be inserted in one direction.
- Fold over the bottom edge of the paper filter and place it directly in the filter holder. The paper filter must not protrude over the top of the filter holder. If it does protrude over the top of the filter holder, you will have to fold it over several times until it fits.
- Spoon the required amount of medium fine ground coffee (5-7g per cup according to taste) into the paper filter. If the coffee ground is too fine, it could clog up the pores of the filter and cause the coffee maker to overflow.
- Close the lid of the appliance.
CLEANING THE APPLIANCE
- Allow the appliance to cool before cleaning it.
- Before cleaning, always turn off the appliance and unplug it from the power supply.
- Do not immerse the appliance and power cord in water or other liquids or wash them in the dishwasher.
- Open the lid of the appliance and remove the permanent filter. Dispose of the coffee grounds.
-
Condensation can collect above the filter. After brewing coffee, wipe off the bottom of the lid with a dry cloth.
-
Place the coffee jug with its lid closed onto the hotplate.
- Hold down the "PROG" button. The digits in the display will start blinking.
- With the other hand, press the "H" and "M" buttons to set the required brew start time.
- On releasing the "PROG" button, the current time will be displayed again.
- Now press the "PROG" button once. The green indicator lamp in the button will light up.
- Brewing will start automatically at the preset time.
- Once the brewing process has finished, switch off the appliance by pressing the "I/O" switch once. If you do not switch off the appliance manually, it will switch off automatically after two hours.
- The coffee jug may be removed at any time during the brewing process to serve coffee, but must be replaced on the hotplate after max. 20 seconds to avoid the filter from overflowing.
- Disconnect the appliance from the mains supply if necessary.
-
Once the appliance has cooled down, remove the permanent filter and dispose of the coffee grounds.
-
Wipe off the housing and the plate with a damp cloth and a little dishwashing detergent. Do not use any abrasive scouring agents, steel wool, metal objects, hot cleaning agents or disinfectants, since they can damage the appliance.
- Clean the pot, its lid, the filter holder and filter in water with a little dishwashing detergent added.
- The appliance must be completely dry before you use it again.
DESCALING
- Regular descending allows the coffeemaker to operate more efficiently and prolongs the service life.
- If the appliance switches off before the end of the warming period or if water remains in the water tank after brewing, the appliance has to be descaled
- Use a commercially available descaling product, following the instructions on the package.
- Fill the water tank to the MAX marking with the descending solution.
- You can also use citric acid instead. Use 25 to 50g of citric acid for one liter of water.
- Place the coffee pot on the plate.
-
Now press the "I/O" button and let about one-third of the water run through.
-
Switch off the appliance by pressing the "I/O" button twice and allow the descending solution to work for about 15 to 30 minutes. In case of heavy scaling, you can leave the solution in the appliance overnight.
- Then press the "I/O" button again and let the rest of the descending solution run through.
- Pour out the descending solution and run clear water through the appliance at least two times.
SPÉCIFICATION TECHNIQUE
Puissance: 900 W, 230 V~, 50 Hz
Dimensions: Env. 24,0 × 23,0 × 36,0 cm (B/T/H)
Poids: Env. 2,05 kg
PREPARATION DU CAFÉ AVEC PROGRAMMATION
KOFFIE BEREIDEN MET PROGRAMMEERFUNCTIE
Ingombro: 24,0 x 23,0 x 36,0 cm (B/T/H) circa
Peso: 2,05 kg circa
Dimensiones: Ca. 24,0 x 23,0 x 36,0 cm (B/T/H)
Peso: Ca. 2,05 kg
Velikost (D/Š/V): Cca. 24,0 x 23,0 x 36,0 cm
We guarantee our appliances for 24 months, or in case of commercial use for 12 months, from the date of purchase in case of defects that occur during normal use and are demonstrably due to a factory fault. Within the warranty period we will remedy defective materials or workmanship through repair or replacement, at our option.
Our warranty terms apply only to appliances sold in Germany and Austria. For other countries, please contact the responsible importer. In the event of a claim for remedy of defects, please send the appliance to our after sales service, properly packaged and postage paid, together with a copy of the automatically generated sales receipt, which must show the date of purchase, and a description of the defect. If the defect is covered by the warranty, the customer will be reimbursed for the shipping costs. The warranty does not cover damage from normal wear, improper handling and failure to comply with the maintenance and care instructions. The warranty is void if repairs or modifications are made to the appliance by third parties.
Any claims of the end consumer vis-à-vis the retailer are not limited by this warranty.
CONDITIONS DE GARANTIE
E-Mail office@esc-service.at
SCHWEIZ
MENAGROS SA
Route der Servion
CH-1083Mezières
Telefon +41 (0) 21 9 03 01-15
Telefax +41 (0) 21 9 03 01-11
E-Mail info@menagros.ch
Internet www.menagros.ch
POLEN
"Quadra-net" Sp. z o.o.
Skadowa 5
61-888 Poznan Skadowa 5
Internet www.quadra-net.pl
Our appliances are produced on a high quality level for a long lifetime. Regular maintenance and expert repairs by our after-sales service can extend the useful life of the appliance. If an appliance is defective and repair is not possible we ask you to follow the following instructions for disposal.
Do not dispose this appliance together with your standard household waste. Please bring this product to an approved collection point for recycling of electric and electronic products.
By separate collection and disposal of waste products you help to protect natural resources and ensure, that the product is disposed in an adequate way to protect health and environment.
TRAITEMENT DES DÉCHETS / PROTECTION DE L'ENVIRONNEMENT


- INSTRUCTIONS FOR USE MODEL 28605
- EXPLANATION OF SYMBOLS
- IMPORTANT SAFEGUARDS
- CAUTION
- TIPS FOR PERFECT COFFEE ENJOYMENT
- BEFORE USING THE APPLIANCE THE FIRST TIME
- SETTING THE TIME
- BREWING COFFEE WITHOUT THE PROGRAM FUNCTION
- BREWING COFFEE WITH THE PROGRAM FUNCTION
- CLEANING THE APPLIANCE
- DESCALING
- SPÉCIFICATION TECHNIQUE
- PREPARATION DU CAFÉ AVEC PROGRAMMATION
- KOFFIE BEREIDEN MET PROGRAMMEERFUNCTIE
- CONDITIONS DE GARANTIE
- SCHWEIZ
- POLEN
- TRAITEMENT DES DÉCHETS / PROTECTION DE L'ENVIRONNEMENT
Brand : UNOLD
Model : 28605
Category : Coffee machine