
KA 1565 CB - Coffee machine BOMANN - Free user manual and instructions
Find the device manual for free KA 1565 CB BOMANN in PDF.

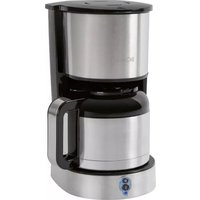
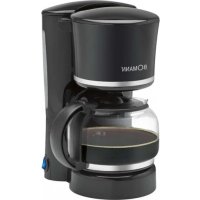
| Product type | Automatic drip coffee maker |
| Brand | Bomann |
| Model | KA 1565 CB |
| Water tank capacity | approx. 1.20 L |
| Maximum number of cups | approx. 10 |
| Net weight | approx. 1.85 kg |
| Power supply | 220-240 V~, 50 Hz |
| Coffee type | Ground coffee |
| Filter type | Paper filter (size 1x4) |
| Anti-drip device | Yes |
| Keep warm function | Yes (hot plate) |
| Included parts | Filter holder, glass carafe, lid |
| Carafe material | Glass |
| Cleaning | Damp cloth for the exterior; wash the carafe and filter holder with soapy water |
| Descaling | With a citric acid-based product, rinse 3 to 4 times |
| Safety | Hot surface, do not immerse in water, do not leave unattended |
| Recommended use | Household |
Frequently Asked Questions - KA 1565 CB BOMANN
User questions about KA 1565 CB BOMANN
0 question about this device. Answer the ones you know or ask your own.
Ask a new question about this device
Download the instructions for your Coffee machine in PDF format for free! Find your manual KA 1565 CB - BOMANN and take your electronic device back in hand. On this page are published all the documents necessary for the use of your device. KA 1565 CB by BOMANN.
USER MANUAL KA 1565 CB BOMANN
ATTENTION: Anti-goutte
Consummation : 900 W
Thank you for choosing our product. We hope you will enjoy using the appliance.
Symbols in these Instructions for use
Important information for your safety is specially marked. It is essential to comply with these instructions in order to avoid accidents and prevent damage to the machine:
WARNING:
This warns you of dangers to your health and indicates possible injury risks.
CAUTION:
This refers to possible hazards to the machine or other objects.
NOTE: This highlights tips and information.
General Notes
Read the operating instructions carefully before putting the appliance into operation and keep the instructions including the warranty, the receipt and, if possible, the box with the internal packing. If you give this device to other people, please also pass on the operating instructions.
- The appliance is designed exclusively for private use and for the envisaged purpose. This appliance is not fit for commercial use.
- Do not use it outdoors. Keep it away from sources of heat, direct sunlight, humidity (never dip it into any liquid) and sharp edges. Do not use the appliance with wet hands. If the appliance is humid or wet, unplug it immediately.
- When cleaning or putting it away, switch off the appliance and always pull out the plug from the socket (pull the plug itself, not the lead) if the appliance is not being used and remove the attached accessories.
- Do not operate the machine without supervision. If you leave the room you should always turn the device off. Remove the plug from the socket.
- The device and the mains lead have to be checked regularly for signs of damage. If damage is found the device must not be used.
- Use only original spare parts.
- In order to ensure your children's safety, please keep all packaging (plastic bags, boxes, polystyrene etc.) out of their reach.
WARNING:
Do not allow small children to play with the foil. There is a danger of suffocation!
Special Safety Instructions for this Machine
WARNING: Risk of burns!
- The hotplate and the pot get very hot. Only grab the glass pot by the handle.
-
Never open the lid of the water reservoir during the cooking process.
-
Use the appliance only on a level work surface.
- Only use the appliance when water is filled into the water container.
- Do not move the appliance when it is in operation.
- This appliance can be used by children aged from 8 years and above if they have been given supervision or instruction concerning the safe use of the appliance understand the hazards involved.
-
Cleaning and maintenance by the user shall not be made by children unless they are older 8 years and supervised.
-
Keep the appliance and its cord out of reach of children less than 8 years.
Children shall not play with the appliance. - Appliances can be used by persons with reduced physical, sensory or mental capabilities or lack of experience and knowledge if they have been given supervision or instruction concerning use of the appliance in a safe way and if they understand the hazards involved.
- Do not try to repair the appliance on your own. Always contact an authorized technician. To avoid the exposure to danger, always have a faulty cable be replaced only by the manufacturer, by our customer service or by a qualified person and with a cable of the same type.
- This appliance serves for brewing of ground coffee.
-
Only use the appliance in a dry, indoor area. It is intended for domestic use and similar areas of use such as e.g.
-
In staff kitchens in shops, offices and other commercial areas;
- By guests in hotels, motels and other accommodation facilities.
It is not intended for use in farm accommodation or Bed & Breakfast establishments.
CAUTION:
The appliance must not be immersed in water for cleaning. Refer to the instructions provided in the chapter "Cleaning".
Supplied parts
1 Automatic coffee maker
1 Filter holder
1 Glass coffee pot
1 Coffee pot lid
Unpacking the appliance
- Remove the appliance from its packaging.
- Remove all packaging materials such as films, filler material, cable clips and carton.
- Check the contents for completeness.
- In the event that the packaging content should be incomplete or if damages are noticeable, do not operate the appliance. Return it to the dealer immediately.

NOTE:
Production residue or dust may have collected on the appliance. We recommend cleaning the appliance according to chapter "Cleaning".
Instructions
Placement
- Place the automatic coffee maker on a stable and level surface. Place the appliance in such way that it cannot tip over.
- Do not place the appliance in close proximity to a gas or electric stove or any other heat source.
Electric Connection

NOTE:
Make sure the device is switched off. The switch must be at the "0" position.
- Ensure that your mains power corresponds with the specifications of the appliance. The specifications are printed on the type label.
- Connect the mains cable to a properly installed and earthed wall outlet.
Operation
Before making coffee for the first time operate the appliance twice with clean water only and without paper filter. This removes dust, which may have collected during transport. Follow the instructions given under "Operation".
Operation
- Open the lid of the water tank.
- Fill cold water according to the desired amount of cups of coffee into the rear water tank. The water level is displayed on the indicator.

NOTE:
You can use the pot to fill the water tank.

CAUTION:
Do not overfill the tank! Do not fill it above the MAX mark.
- Ensure that the filter holder is properly attached.
- Turn over the lower fold of the paper filter (size 1x4) and place it in the filter funnel. Then fill it with coffee powder.
- Now close the lid of the water tank.
- Place the jug onto the warming plate.

CAUTION: Drip stop
Your appliance comes with a drip stop. It closes when removing the coffee pot. This prevents the coffee from dripping onto the warming plate if there is still water in the filter.
-
Ensure that the lid is attached to the coffee pot. It opens the drip stop.
If there is still water in the tank, place the pot underneath as soon as possible. Otherwise the filter might overflow. -
Switch on the device. The indicator lamp in the switch will light up.
The Coffee Is Ready
NOTE:
The brewing process lasts approximately 10 minutes.
- When no more coffee is flowing through the filter you can remove the pot.
- Turn the device off.
- Would you like to keep the remaining coffee warm? Leave the machine switched on until the pot is empty.
NOTE:
The filter holder can be removed from the machine by its handle.
This makes it easier to dispose of the old coffee filter, for example.
WAR
If you want to make another pot of coffee immediately, switch off the device first. Let it cool down with the water tank open in order to avoid hot water splashing when refilling with water.
De-scaling
De-scaling is necessary when the brewing time increases substantially.
- Use only commercially available citrus acidbased de-scaler.
- Follow the recommended instructions for use.

WARNING:
- Afterwards you should boil fresh water in the pot three or four times in order to rinse out residues of the descaling agent.
- Do not use any coffee powder!
- Do not use this water for consumption.
Cleaning
WARNING:
- Before cleaning, always remove the mains plug and wait until the device has cooled down.
- Do not immerse the device in water. Otherwise this might result in an electric shock or fire.
CAUTION:
- Do not use a wire brush or any abrasive items.
-
Do not use any acidic or abrasive detergents.
-
The exterior of the device should be cleaned as necessary with a slightly damp cloth - without any additives.
- Remove spilled coffee grounds with a paper towel from the inner casing. Afterwards wipe with a damp cloth.
- The coffee pot and the filter pad should be cleaned by rinsing in warm water. Use a soft brush if necessary.
Storage
- Clean the appliance as described and let it dry completely.
- For longer periods of non-use we recommend storing the appliance in its original packaging.
Always store the appliance in a well-ventilated and dry place out of reach of children.
Troubleshooting
| Problem Possible | cause Solution | |
| The appliance does not work. | The appliance is not connected to mains power. | Check the wall outlet with a different appliance. |
| Insert the plug properly in the wall outlet. | ||
| Check the fuse. | ||
| The appliance is defective. | Contact our service or a repair center. | |
| Filter blockage: coffee grounds spill over the edge of the filter. | The drip stop is closed: The coffee pot is not on the warming plate or the lid is not on the coffee pot. | 1. Switch the appliance off. Disconnect from mains power supply.2. Put the coffee pot with lid on the warming plate so that the filter is emptied.3. Dispose of the paper filter.4. Clean the appliance as described. |
| Too much coffee powder in the filter. |
| Problem Possible | cause Solution | |
| Coffee grounds in the coffee. | The paper filter is too small. | Use a paper filter size "1x4". |
| Too much coffee powder in the filter. | Use less coffee powder. | |
| The brewing process takes too long. | Limescale deposits in the appliance. | Decalcify the appliance as described. |
Technical Data
Model: KA 1565CB
Power supply: 220-240 V\~, 50 Hz
Power consumption: 900 W
Filling quantity: approx. 1.20 Liter Protection class:
Net weight: approx. 1.85 kg
The right to make technical and design modifications in the course of continuous product development remains reserved.
This device has been tested according to all relevant current CE guidelines, such as electromagnetic compatibility and low voltage directives, and has been constructed in accordance with the latest safety regulations
Disposal
Meaning of the "Dustbin" Symbol
Protect our environment: do not dispose of electrical equipment in the domestic waste.
Please return any electrical equipment that you will no longer use to the collection points provided for their disposal.
This helps avoid the potential effects of incorrect disposal on the environment and human health.
This will contribute to the recycling and other forms of reutilisation of electrical and electronic equipment.
Information concerning where the equipment can be disposed of can be obtained from your local authority.
Instrukcja obstugi
- BjdkpnIte KpnIuKy EmHocI dIra BOIN.
- HanIne BoNy BiINOBiHNO Do NotpiBHOI KINbKOCTi YaIoo Ka TINbHi CTOpOHi EMHOCTI. PBeHb BoNn BiIObpaKaTeBCaHa NOKAKUky.
ITPIMITKA.
YcyHeHH HeCnpaBHOCTe
He nepenonHnIe EMKoCTb IaB OBObl! He 3aJIbAitE BDOy BblIe OTMeTKn MAX.
- Y6eIntecb, yTO epKeTaTeNb cHJIbTp a yCTaHOBneH DoJHK HbIM 06pa3OM.
- NpOOrHnTe HmKnn KpaBymaxKnro OpnbTpa (pa3MeP 1x4) n yIoxnTe ero B pInbTpOBAJIbHyIO BOpOHky. HaONHnTe ero MOnOTbIM KOpe.
- 3akpoIte KpbIuKy EMKoCTn IaBovbl.
- NocTaBbTe YauH Na noDorpeBaioUyNo nOCTaBky.
BHIMAHHE:3uNTaOTNOTeKaHn
YCTPOICTBO CHa6KeHO 3aUHTOJ OT NODTeKaHn. OHO 3aKpbIbAeTc npN I3BNeueHn KoFeHnHa. 3To npDeIOTBpa7aet KanAHne KoPe Ha 3JIeKTPoPnITKy, ecnBФПЛТpe BCE eEeEcTb BOda.
Y6eIntecb, YTO KpbIuKa npincoeINHeHa K KOpeHnKy. OHa o6ecneuBaET 3aunTy OT noTeKaHn.
EcnB EMMKoCTN euee cTb BODa,TO CBOeBpeMeHNO CHOBa NODCTaBbTe KoPeHnIK. HNaYe MoKeT nepeNoJIHNITbcra QnIbTp.
- Bклнчиприбор.На Быклнчatele 3aropntcЯндika-topнаялампа.
KoPe npriroTOBJIeH
I PIMMEUAHNIA:
Ipocecc BapeHnI dNITcI npIM. 10 MNHT.
- Pocne TOrO, KAK KOpe 6oNbIe He TeuET Uepe3 OINbTp, KOpeHnIK MOXHO yOuPaTb.
- BbiknIOHTe np6op.
BbXOTMe, YTO6bIOCTaTOK KOpe OCTaBaIcR TENbIM? OCTaBBTe npIN6Op BKNIOHcHHbIM Do TEX nOp, NOKa He 3a-KOHHTcRA KOpe B KOpeHnke.
I PIMMEUAHNA:
I P E D U N P E X K D E H N E:
- Bcerda nepeq chKoB BbHMaTe ceTeBOJ uTeKeP i Xdnte, noka np6op He octbIHeT.
He norpykaite npnbop B Body. 3To moKet 6bITb npuHOn 3JeKtpnuecko yda pa nnn noxapa.
BHIMAHINE:
He nCnoJIb3yIte npOBOUHbIe 1eTkn IIN dpynE capaanaIOuIne npEmdTebl.
He nCnoJIb3yIte cnIbHbIe IIN capanaIOUne YnCTaUne CpeIcTBA.
C hapyKHO CTOpObI, pRn Heo6xOdMocTn, npOTnpaTe np6op cJeKa BnaXHOn TpRKnO 6e3 DoabHeHm MOIOxuX cpeDCTB.
- YdaJIte npocbIaNabUnece 3epHa Kope c BHyTpEnHNe CTOpObI KOpNcA C NOMOuBIO 6yMaXKHO TNOJToEHua. IocHe 3TOrO BbITPnTe NOBepxHOCTB BNAXHOBEToBuIO.
KoepHnBOPOHkyPnIbTa npombIaIte,Kak O6bIuHO, BMOUcEMpactBOpe.Ipn Heo6xOIMOCn,BOCIOJIb3yITecbMfKOUIETKOI.
XpaHene
-ПОИСТITEуCTpoICTBOBCCOTBTCTBUNCONICAHNEM,ДаиTe EMY NOJIHOCThIO BbICOXHyTb.
- PeKoMeHdyeTcXpaHntb ycTpoiCTBO B erO opnHaJIbHOy naKOBKe, ecn OHO He NcONb3yeTcD nITeJIbHOe BpeM.
Bcerda xpaHnTe yctpoIcTBO B cyXOM, XopoIOB BeHTINpIpyEMOM MeCTe, HeIOCTyTHOM IJIa DeTei.
YcTaPHeHHe HeCnPaBHOCTe
J 1
J 1
J 1
J 1
J 1
J 1
J 1
J 1
J 1
J 1
J 1
J 1
J 1
J 1
J 1
J 1
J 1
J 1
J 1
J 1
J 1
J 1
J 1
J 1
J 1
J 1
y. jao aagaaal g jall g aal al piaa jao jai 12
jai jai jai jai jai jai jai jai jai jai jai jai jai jai jai jai jai jai jai jai jai jai jai jai jai jai jai jai jai jai jai jai jai jai jai jai jai jai jai jai jai jai jai jai jai jai jai jai jai jai jai
#
jglal piaiwi ciui j Jali.i i jaiil 8
pssuuii ciua jga
Iie Ilaal laaiaeall cialgai all oiae lclde gian p
jgljll jgl jglal
y
A
clogallgail
#


- ATTENTION: Anti-goutte
- Symbols in these Instructions for use
- WARNING:
- CAUTION:
- General Notes
- Special Safety Instructions for this Machine
- WARNING: Risk of burns!
- Supplied parts
- Unpacking the appliance
- NOTE:
- Instructions
- Placement
- Electric Connection
- Operation
- CAUTION: Drip stop
- The Coffee Is Ready
- WAR
- De-scaling
- Cleaning
- Storage
- Technical Data
- Disposal
- Meaning of the "Dustbin" Symbol
- Instrukcja obstugi
- ITPIMITKA.
- BHIMAHHE:3uNTaOTNOTeKaHn
- KoPe npriroTOBJIeH
- I PIMMEUAHNIA:
- I PIMMEUAHNA:
- I P E D U N P E X K D E H N E:
- BHIMAHINE:
- XpaHene
- #
- pssuuii ciua jga
Brand : BOMANN
Model : KA 1565 CB
Category : Coffee machine