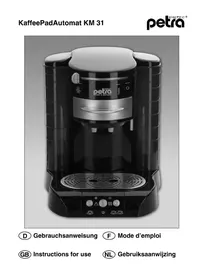
KM 31.17 - Coffee machine Petra Electric - Free user manual and instructions
Find the device manual for free KM 31.17 Petra Electric in PDF.


User questions about KM 31.17 Petra Electric
0 question about this device. Answer the ones you know or ask your own.
Ask a new question about this device
Download the instructions for your Coffee machine in PDF format for free! Find your manual KM 31.17 - Petra Electric and take your electronic device back in hand. On this page are published all the documents necessary for the use of your device. KM 31.17 by Petra Electric.
USER MANUAL KM 31.17 Petra Electric
GB Instructions for use
We congratulate you on your purchase of the Coffeemaker for Soft Pods. You got a modern appliance with which you will be pleased to make a fresh, aromatic coffee.
Only use the appliance for the purpose mentioned in these instructions. Therefore, read the instructions carefully before use. They contain important notes for the use, cleaning and maintenance of the appliance. In case of non-observation of this instruction manual no liability will be taken for possible damages. Keep the instructions in a safe place and transfer them together with the appliance to a future user. The appliance is not designed for commercial purposes.
The warning triangle indicates all the important instructions for the safety. They should always be observed, otherwise you might get injured or the appliance might get damaged.
11 The numbers refer to pictures.
(3) Numbers in brackets refer to single parts indicated in the pictures.
The original packing is specially created in order to have a safe transport in case of service. Therefore, keep the packing at least up to the end of the guarantee period.
Safety advice
Only connect the appliance to a correctly installed earthed socket. The voltage must comply with the indication on the rating plate at the bottom of the appliance.
Do not jam the connection cord and protect it from sharp edges, moisture, heat or oil.
Do not connect the appliance to a socket, if the connection cord is damaged. It must then be replaced by our authorised service agent or by a qualified electrician immediately. Substantial dangers for the user can arise from inappropriate repairs.
Do not use the appliance or unplug it immediately if it is damaged or leaking or if any defect occurs after the appliance has accidentally been dropped or something similar is suspected. In such cases have the appliance repaired.
Do not put the appliance on hot surfaces, e.g. hot plate, etc. or near an open gas flame, the housing might melt. Do not place on surfaces which are sensitive to water as they might be damaged by water splashes.
This appliance is not meant to be used by persons (including children) with reduced physical, sen
sorial or mental capacities or in absence of the necessary experience and/or knowledge - unless they are supervised by a person responsible for their safety and from whom they get instructions on how to use the appliance.
Keep out of reach from children.
Disconnect the appliance if it is not used for a long period of time.
Scalding danger due to hot water. When using the appliance, please observe the advice indicated in this instruction manual.
Danger of frost! After ventilating the appliance, i.e. after filling it with water, it must only be stored and operated in frost-free rooms, otherwise the appliance might get damaged. We do not give a guarantee for frost damages.
Meaning of the symbols
| A | Red flashlight | Top up water in the water contai- ner |
| A | Red steady light | Appliance is ventilating, rinsing or heating |
| A | Green flash- light | Programming mode for cups is active, see „Changing coffee quantity“ |
| A | Green steady light | Appliance is ready for brewing |
| B | Yellow steady light | Descaling programme is active, see „Descaling programme“ |
| A | Red-green flashlight | Empty collecting bowl (only in descaling programme) |
Putting into operation
Place the appliance onto a stable and waterresistant surface.
The appliance must not be used in locations which are situated at more than 1500m above the sea level.
2 You can store the connection cord (2) (when not in use) at the bottom (1) of the appliance.
Preparation
Before using for the first time, we recommend to rinse the water container (3), the pod holder (7) and the coffee outlet (8) with washing-up liquid first and afterwards rinse it with fresh water.
3 When the lid (4) is open you can take the water container (3) by the handle, tip it backwards slightly and pull it out. Inserting has to be done in reverse order.
7 For removing the pod holder (7) slide the swivel lever (5) to the right hand-side into the starting position
The coffee outlet (8) can be screwed in or out to adjust the height. You can use the two outlet nozzles and adjust the height or you can remove it out completely.
Turn the coffee outlet (8) upside down and the filter insert will fall out. It provides an optimal crema quality. After cleaning it has to be inserted again as demonstrated in picture 8
For the assembly of the coffee outlet (8) set it at the thread as demonstrated in picture 9 and screw it in up to the desired height. The two outlet nozzles always have to be over the two openings of the drip tray (9).
Anti-chlorine filter ACF 30 option
You can obtain the anti-chlorine filter ACF 30 (with 3 filter cartridges) wherever you purchased the appliance, or you can order it directly from petra-electric.
5 The anti-chlorine filter (15) ensures a pure coffee taste. It filters chlorine and other impurities out of the water.
4 Put the filter cartridge (16) after rinsing it under fresh water into the ring (17) from the top part. Afterwards, place the filter holder (18) and engage it by turning.
5 In order to lock the already installed filter (15) in the outlet of the water container (3), push it downwards as far as it will go.
The effect of the filter depends on how much the coffeemaker is used. In case of a daily average consumption of 8 cups of coffee, it should be exchanged after 3 months (approx. 700 cups) at the latest.
4 Adjust the time of the next filter exchange on the change indicator (19).
Ventilating (only new appliance)
Before you use the appliance for the first time, the heating system has to be ventilated first.
- Fill the water container (3) with fresh water up to the max indication, insert it into the appliance and close the lid (4).
Only fill the water container (3) with fresh water, never with carbonated water or other liquids, e.g.
milk, etc.
- Put a collecting bowl with a maximum height of 10 cm and a capacity of at least 650ml or 2 big coffee cups under the coffee outlet (8).
3.7 Push the empty pod holder (7) into the brewing chamber (6) and 10 push the swivel lever (5) over the symbol
Advice: If there is no pod holder (7) in the brewing chamber (6), it is not possible to place the swivel lever in the area of symbol "Brewing"
4.11 Push the ON/OFF button 12). The display (10) illuminates red and after a few seconds the pump starts to work. When the heating system is filled, some water runs off into the collecting bowl and the appliance switches off after approx. 60 seconds.
5. Empty the collecting bowl and push the ON/OFF button 12) once more. After approx. 60 seconds the pump switches off automatically and the water in the appliance is heated-up until the display changes to green.
Important advice: For a successful first usage it is compulsory that both rinsing operations (4. and 5.) work completely up to the automatic switch-off of the pump (approx. 60 seconds). In case you switched off the appliance manually beforehand, e.g. if a collecting bowl was too small and thus overflowed, you have to start the operation all over again by pushing the ON/OFF button ①.
- Before brewing coffee for the first time, you should rinse the appliance once again as described in the following section. Afterwards you can be sure that any residue which might detract from your coffee pleasure is eliminated.
Attention! The water is now hot!
Rinsing
If the appliance was not in use for several days you should start rinsing in order to renew the water in the heating system:
-
Put a collecting bowl with a maximum height of 10 cm and a capacity of at least 650ml or 2 big coffee cups under the coffee outlet (8).
2.7ush the empty pod holder (7) into the brewing chamber (6) and 10 place the swivel lever (5) over the symbol ,Brewing"
3.12Push both start buttons (11) and (13) briefly at the same time.The pump starts to work and the display (10) illuminates red. -
Push the swivel lever (5) after the switch-off of the pump into the starting position After approx. 90 seconds the display changes to green, the appliance is ready for brewing.
Brewing of coffee
Please make sure that the water container (3) is sufficiently filled. The filling capacity at the max marking is sufficient for approx. 12 cups of 125ml each.
Push the swivel lever (5) into the starting position O and push the ON/OFF button 02). The display illuminates red, it is being heated. During this time you can prepare brewing:
Brewing with coffee soft pods
You can use all the usual coffee soft pods in the trade (diameter approx. 70mm ,coffee quantity approx. 7g - The more carefully you insert the soft pods, the better is the coffee. It is important that the coffee powder in the pod is equally distributed up to the side so that no water runs past the soft pod. 13 14 Slightly tap the pod with your fingertips so that you push the middle of the pod down.
Damaged soft pods must not be used, as otherwise the brewing system might clog.
One Cup
Put a cup in the middle of the drip tray (9).
13 Put the pod holder (7) down so that the "1" is visible from the top of the handle. Put one coffee pod into the depression, as described above.
Two cups
Put two cups under one outlet nozzle each of the coffee outlet (8).
14 Just turn over the pod holder (7) so that the _,2^ is visible from the top of the handle. Now there is space for two pods. The first pod must be pushed into the cavity - with this the paper side stands up. Then put the second pod over the first one, as described above.
Pay attention that the paper side is flat in the cavity and does not stand out or is folded to the inside. When inserting the pod holder (7) pay attention that the pod does not move in the cavity because otherwise the brewing chamber (6) will not shut tightly.
10 Lock the brewing chamber (6) firmly by pushing the swivel lever (5) in the area of the brewing symbol to the left-hand side as far as it will go. This is impor
tant for an optimal coffee quality.
Wait until the display illuminates green, i.e. the appliance is ready for brewing.
15 16 Depending on whether you prepared one or two cups, push the corresponding start button or
. You can stop brewing at any time by pushing the respective start button again.
Before you take out the finished coffee, push the swivel lever (5) to the right-hand side into the starting position. This reduces the time the coffee drips-off from the coffee outlet (8).
Used pods should soon be removed from the brewing chamber (6) for hygienical reason. They are degradable.
Advice for optimal coffee:
Stir the coffee before consumption - with this you get an equal coffee intensity in your cup.
Close the pod bag carefully to avoid the loss of aroma. The best storage place is the refrigerator. Use fresh water daily. The water container should be rinsed just before use. If the appliance is not used for several days, please proceed as described in chapter "Rinsing".
Powder cassette PK 30 option
The powder cassette PK 30 and the filter paper may be obtained wherever the appliance was purchased or you may order directly from petra-electric.
You are also able to enjoy your favourite coffee brand freshly grounded with crema. For this, use the powder holder (21/22) described as follows:
19 Insert one sheet of filter paper into the bottom part of the powder holder (21). It retains particulate material which improves the taste of the coffee. However, you can also brew coffee without any filter paper.
20 Fill in coffee or espresso powder. Depending on the coffee quality, the powder holder holds between 5.5 to 7.5g . This is sufficient for one cup of coffee.
21 Press on the powder only slightly and wipe it off till the brim. If too much coffee is filled in, the brewing chamber cannot be closed.
22 Open the lid of the powder holder (22) and remove any powder remains which might have spilled on the outside.
Powder remains might clog the opening in the middle of the pod holder (7) and the brewing chamber!
23 Insert the powder holder into the pod holder into the compartment for 2 pads and 10 lock the brewing
chamber (6) mly.
15 The appliance is ready for brewing when the display illuminates green. Then push the start button
24 After brewing, empty the powder holder. The paper filter is also degradable just like the coffee powder.
25 26 The powder holder and the pod holder have to be rinsed after each brewing process.
Check regularly whether the opening in the middle of the pod holder (7) is free of coffee remains.
Changing coffee quantity
The coffee quantity in one pod and in the powder holder respectively is optimal for one cup. You can vary the filling amount per cup according to your personal taste by changing the intensity of the coffee.
The Coffeemaker for Soft Pods gives the comfortable possibility to programm the individual coffee amount desired for each start button
- Insert the pod as described above, push the swivel lever (5) into the area of „Brewing“ to the left-hand side as far as it will go and wait until the display illuminates green, i.e. the appliance is ready for brewing.
- Push the programmable start button or as long (3 to 4 seconds) until the display flashes green. While brewing, the programming mode is active. Observe the filling process of the cup. When the quantity desired is reached, push the same start button again. The brewing stops and the brewing time (power-on-time of the pump) is programmed. When pushing this start button, you always have the same brewing time. The coffee quantity prepared will only differ slightly - according to the coffee quantity.
Advice for the programming mode:
While brewing the programming mode is active for max. 30 seconds and/or 60 seconds . If
you do not push the start button before brewing stops automatically, the maximal filling amount is programmed.
Recovering standard quantity
In order to achieve the original filling amount, please proceed as follows:
- Switch off the appliance.
- Push the start button as long (3 to 4 seconds) as both displays and flash up twice shortly.
Preparation of hot water
For the preparation of tea or instant drinks you can take the water with an optimum temperature from the hot water outlet (20).
17 Put a tea or coffee cup with a maximum height of 9.5cm under the hot water outlet (20) on the drip tray (9).
Wait until the display /Numinates green, i.e. the appliance is ready for brewing.
6 Place the swivel lever (5) over the symbol „Hot water“.
17 According to the size of the drinking cup press the required start button
When pressing the same start button on the quantity of the hot water might vary considerably from the usual coffee quantity.
Therefore, please observe the filling process. You can stop at any time by pushing the corresponding start button or again.
Before removing the cup, push the swivel lever (5) into the starting position. This reduces the dripping time from the hot water outlet (20).
It is of course also possible to programm the hot water quantity as described in section "Changing coffee quantity".
Disconnection
The appliance can be switched off at any time by pushing the ON/OFF button If the appliance remains switched on, it switches off automatically 60 minutes after the last usage. Afterwards, the power consumption is less than 2 Watt.
Level indicator
The fresh water level is constantly controlled by a float in the water container (3). If the required minimum filling amount is under-run, the display flashes red. As soon as you top up the filled water container (3), the operation continues.
Descaling

The appliance must be descaled regularly, as every hot-water appliance. For this purpose use the special de-scaling agent durgol®swiss espresso® which is available in selected specialist retailers. If you wait too long before descending, the appliance might get damaged. The follo-wing indications are guidelines. When the crema of the coffee is no longer
rich, when the coffee amount has reduced perceptibly or when the outlet (8) drops when heating, you have to descale earlier.
| Hardness degree | Hardness | Dscaling intervals |
| 1 soft 0 - 7° dH 1500 up to 200 cups | ||
| 2 middle > 7 - 14° dH 1000 up to 1300 cups | ||
| 3 hard > 14 - 21° dH 600 bis 800 cups | ||
| 4 very hard > 21° dH 400 bis 500 cups | ||
| 1° dH corresponds to approx 0.18 mmol/l Ca-and Mg-lons | ||
You can inquire about the hardness degree in your living area at the corresponding waterworks or at the local administration.
5 For descending, the chlorine filter (15, optional equipment) has to be removed from the water container (3).
We assume no guarantee for damages which arise through non-observation of the descaling instructions.
Be careful with the descaler to avoid any damage to furniture and clothes.
Dscaling programme
Your Coffeemaker for Soft Pods has an automatic descending programme. It lasts between 15 and 20 minutes and is interrupted twice so that you can refill water.
Advice: Once the descending programme is started, it cannot be stopped by pushing a button. This is for the safety of all users. It prevents coffee from being brewed until after the descending solution has been completely rinsed out.
In case of need you can unplug the appliance. In this case, you should rinse twice afterwards as described in chapter "Rinsing".
- 8 put a collecting bowl which has a capacity of at least 650ml or 2 big coffee cups under the coffee outlet (8).
- 1ert the empty pod holder (7) into the brewing chamber (6) and 10 place the swivel lever (5) over the symbol ,Brewing"
- Fill one portion (125 ml) of durgol® swiss espresso® into the empty water reservoir (3) and place it in the appliance.
-
Switch the appliance on by pressing the ON/OFF button ①. The display flashes red. Carefully only fill in enough water until it is continuously illuminated.
-
18 Push both start buttons and simultaneously until (3 to 4 seconds), until the display 4) lights yellow steadily. Now you can release the buttons, the descending programme starts.
-
After approx. 10 minutes the display flashes red. Empty the collecting bowl and put it under the hot water outlet (20) again. After rinsing the water container (3) carefully, fill it with fresh water up to the max indication.
-
6 Push the swivel lever (5) over the symbol .Hot water"
-
Push any start button or in order to continue the first rinse.
-
After approx. 3 minutes the display flashes red/green. Empty the collecting bowl and put it under the coffee outlet (8) again.
-
10 Push the swivel lever (5) over the symbol „Brewing“
11.Push any start button or in order to continue with the second rinse.
- After approx. 3 minutes, the descending programme is finished and the appliance switches off automatically.
After descending it is best to put the pod holder (7) and the coffee outlet (8) with filter insert into the dishwasher.
Help if faults occur
The following advice shall help you to remedy faults. If you should not succeed, please send the appliance to our service department for repairing.
Red flashlight despite filled water container
It might be possible that lime scale prevents the free movement of the float in the water container (3) after a longer utilisation. Left-overs of the packing material of the new appliance might block the float.
The water container (3) has to be cleaned and descaled. If you shake the empty water container, the float should move clearly audible.
Appliance also switches off after second descending
For a successful first usage it is compulsory that both rinsing operations work completely up to the automatic switch-off of the pump (approx. 60 seconds). In case you switched off the appliance manually beforehand, e.g. if a collecting bowl was too small and thus overflowed, you have to start the operation again.
Push the ON/OFF button ①. After the automatic
switch-off of the pump, the water in the appliance is heated, until the display changes to green.
Rinsing not possible
Check whether the swivel lever (5) is in the area of symbol „Brewing“
It is difficult to lock the brewing chamber
Check whether the pod is properly positioned in the pod holder (7). The pod might have moved due to a too zestful insertion of the pod holder.
If you use 2 pods, the lower one has to be pressed into the cavity firmly.
Tap the pod so that a small cavity is formed in the middle.
No coffee outflow despite pump is active
Try to push the swivel lever (5) in the "Brewing" position a bit further to the left-hand side.
It might be the case that the opening in the middle of the pod holder (7) is calcified or there is coffee powder in it. A valve reduces the pressure to a unperilous value and deduces water into the water container (3).
Check regularly whether the opening in the middle of the pod holder (7) is free of coffee and lime.
It is not possible to brew hot water
check whether the swivel lever (5) is over the symbol „Hot water“
The first coffee fails
Possibly you have not rinsed the appliance sufficiently.
Rinse according to the instructions in the section "Putting into operation".
Intensity of coffee is not sufficient
The more carefully the soft pod is inserted, the better is the coffee. Please observe the advice in section "Brewing with coffee soft pods".
The powder holder always has to be brimful as aforementioned. Otherwise the coffee won't turn out well.
The coffee becomes stronger when you reduce the filling quantity of the cups, as above-mentioned.
Choose a stronger sort of coffee.
Coffee is too strong
The coffee becomes less strong when you increase the filling quantity of the cups, as mentioned in section "Changing coffee quantity".
Choose a milder type of coffee.
Thecreamaderrioratesnoticeably
The filter insert in the coffee outlet (8), which ensures the optimal quality of the crema, is calcified or there are coffee remains in it.
Descale and clean the coffee outlet (8) with the filter insert. Pay attention to the advice in section „Cleaning and Maintenance".
If you have to descale the filter insert several times due to an insufficient crema, you should also descale the appliance.
The two filters in the filter insert must not be pushed against each other. If this happens, the filter insert has to be replaced.
The brewing chamber cannot be opened
If the opening in the middle of the pod holder (7) is calcified or there is coffee powder in it, the pressure in the brewing chamber cannot escape completely and the swivel lever (5) is blocked.
Unplug the appliance and let it stand for several hours in order to relieve pressure. If this does not work, you can clear the opening of the pod holder (7) with a needle. For this purpose remove the water container (3), the outlet insert (9), the drip tray and the coffee outlet (8) together with the filter insert. Rest the appliance on its side. The opening in the pod holder (7) is now accessible. Try to clear it with a needle. Caution! The coffee might splash.
Check regularly whether the opening in the middle of the pod holder (7) is free of coffee and lime.
Water on the appliance under the water container
Possibly, you used the appliance without having closed the lid (4). When heating, the expansion water drips out of the overflow under the lid (4) – not as designed in the water container (3) but next to it.
The lid (4) has to be closed during operation.
The coffee quantity reduces despite unchanged settings
Always push the swivel lever (5) in the area of symbol to the left-hand side as far as it will go.
Lime scales might block the inner mains and might damage the appliance.
Have the appliance descaled.
The opening in the middle of the pod holder (7) might be calcified or there is coffee powder or lime scales in it.
Check regularly whether the opening in the middle of
the pod holder (7) is free of coffee and lime.
The outlet drips during re-heating
Lime scales might damage the function of the valves.
Have the appliance descaled.
Always push the swivel lever (5) after brewing to the right-hand side into the starting position in order to avoid extra water dropping off the coffee outlet.
Appliance switches off after heating
If the required temperature for brewing is not reached (display red), the appliance switches off automatically after approx. 2 minutes.
The appliance must not be used in locations which are situated at more than 1500m above the sea level. Otherwise the water could boil before reaching the brewing temperature.
Cleaning and maintenance
Unplug the appliance prior to cleaning.
The appliance must not be immersed in water.
It has to be checked regularly to see whether the opening in the middle of the pod holder (7) is blocked or not.
Clean the water container (3) in water with some washing-up liquid and rinse it carefully afterwards in clear water. The pod holder (7), the outlet (8), the drip tray (9) and the powder holder (21/22) are dishwasher-proof.
Treat the filter insert in the coffee outlet (8) properly without brush. It is best to put it into a descending solution regularly and afterwards into the dish washer.
Attention: In order to have a constant good quality of the crema, the two filters lying upon each other, must not be pushed against each other.
Wipe the appliance on the outside with a damp cloth only. Do not use any caustic or scouring cleansing agents - otherwise the surface would be damaged.
For UK use only
- This product is supplied with a 13 A plug conforming to BS 1363 fitted to the mains lead. If the plug is unsuitable for your socket outlets or needs to be replaced, please note the following. If the plug is a non-rewireable one, cut it from the mains lead and immediately dispose of it. Never insert it into a socket outlet as there is a very great risk of an electric shock.
- The replacement of the plug at the mains lead has to be done according to the following instructions:
Warning - This appliance must be earthed
Important: The wires in this mains lead are coloured in accordance with the following code:
green/yellow Earth
blue Neutral
brown Live
As the colours of the wires in the mains lead of this appliance may not correspond with the coloured markings identifying the terminals in your plug, proceed as follows:
- the wire which is coloured green and yellow must be connected to the terminal which is marked with the letter E or by the earth symbol 12 or coloured green or green and yellow,
- the wire which is coloured blue must be connected to the terminal which is marked the letter N or coloured black,
-
the wire which is coloured brown must be connected to the terminal which is marked with the letter L or coloured red.
-
If a 13 A (BS 1363) plug is used it must be fitted with a 13 A fuse conforming to BS 1362 and be ASTA approved. If any other type of plug is used, the appliance must be protected by a 10 A fuse either in the plug or adapter or at the distribution board. If in doubt - consult a qualified electrician.
- Never use the plug without closing the fuse cover.

The appliance complies with the European directives 2006/95/EC and 89/336/EEC.
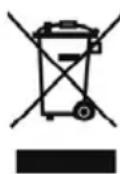
At the end of its lifetime this product must not be disposed of through the normal domestic waste, but it should be handed to an assembly point for the recycling of electrical and electronic appliances. You can
inquire about details at the local administration.
Subject to technical changes.
Special decalcifier durgol® swiss espresso®
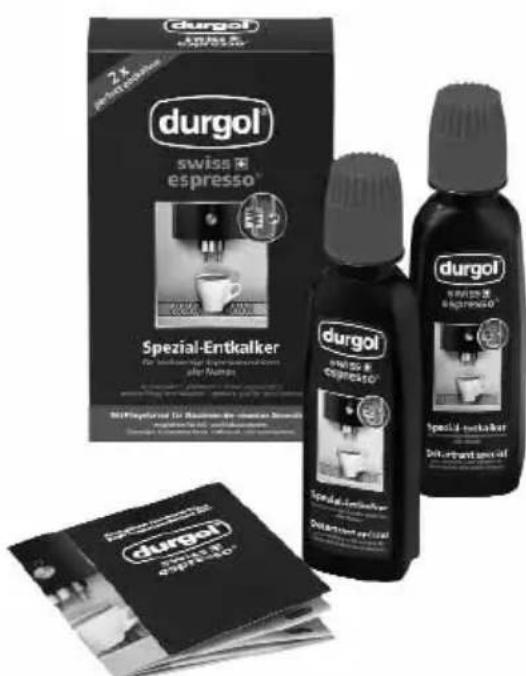
durgol® swiss espresso® is very effective, easy and safe to use and guarantees an effortless and quick decalcification within an additional soaking period. A routine use assures the best quality of your coffee and extends the service life of your automatic coffee pad system due to a special safety formula. durgol® swiss espresso® does not leave any residue. If your machine is rinsed after decalcification, as described in the operating instructions, you will be able to again brew coffee without hesitation.
Please observe the extensive information for the decalcification with durgol® swiss espresso® as well as the warning instructions that may be found in the brochure enclosed with the decalcifier.
You may obtain durgol® swiss espresso® where you bought the appliance; directly from a select dealer or you can order it directly from petra-electric. A package contains two portions of 125 ml each.
A dose is coordinated.