BikElift 2010 - Bike rack Twinny Load - Free user manual and instructions
Find the device manual for free BikElift 2010 Twinny Load in PDF.
| Product type | Towbar bike rack |
| Brand | Twinny Load |
| Model | BikElift 2010 |
| Bike rack weight | 19.2 kg |
| Maximum total load (rack + bikes) | 75 kg |
| Bike capacity | 2 bikes |
| Compatible frame diameter | 28-38 mm (seatpost) |
| Lighting power supply | 12 V |
| Standards | CE certification |
| Warranty | 7 years (conditions apply) |
| Delivery contents | Carrier support, lighting bar, bag of parts, protective cap, 4 wheel channels, 2 chassis arms, crank handle, lock, warranty card |
| Recommended cleaning | After each use, avoid salt and diesel |
| Storage | In a dry place |
| Fixation system | On towball with crank handle |
| Safety | Second lock, wheel straps, anti-theft |
| Lighting width adjustment | Up to 2.02 m |
| Maximum nose weight | Depending on vehicle, do not exceed 75 kg total |
| Additional accessories | Available at www.twinnyload.com |
| Instruction video | Available at www.twinnyload.com |
Frequently Asked Questions - BikElift 2010 Twinny Load
User questions about BikElift 2010 Twinny Load
0 question about this device. Answer the ones you know or ask your own.
Ask a new question about this device
Download the instructions for your Bike rack in PDF format for free! Find your manual BikElift 2010 - Twinny Load and take your electronic device back in hand. On this page are published all the documents necessary for the use of your device. BikElift 2010 by Twinny Load.
USER MANUAL BikElift 2010 Twinny Load
natural_image
Technical line drawing of a mechanical assembly with no visible text or symbolsInstallation and use instructions
The BikElift has been developed by
For your own administration, write down the following:
Carrier type:
□ Twinny Load BikE-Lift
Serial number:
Purchase date: ____
Congratulations with the purchase of your new BikE-Lift bicycle carrier.
You can now go touring carefree by car and bicycles. Simply staying active and discovering new routes. Good luck with your new bicycle carrier!
natural_image
Line drawing of a hand gripping a mechanical device with a blue arrow indicating force direction (no text or symbols)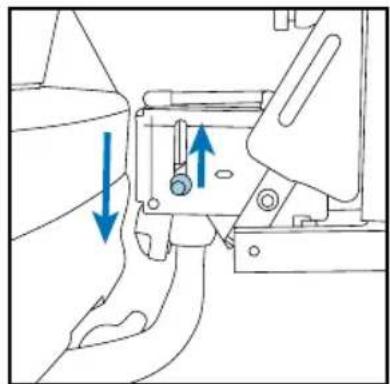
natural_image
Technical line drawing of a mechanical assembly with blue arrows indicating directional movement (no text or symbols)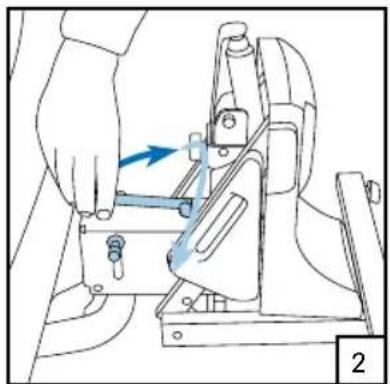
natural_image
Illustration of a hand operating a mechanical clamp or fixture with a blue arrow indicating motion (no text or symbols present)
natural_image
Line drawing of a hand operating a sewing machine with a blue arrow indicating the motion direction (no text or symbols present)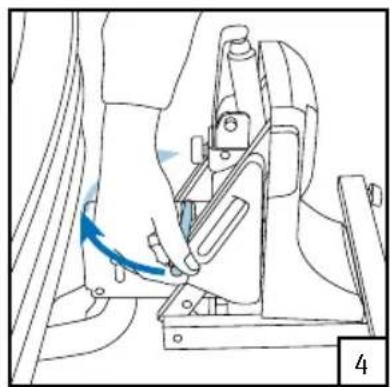
natural_image
Line drawing of a hand operating a mechanical device with a blue arrow indicating motion (no text or symbols)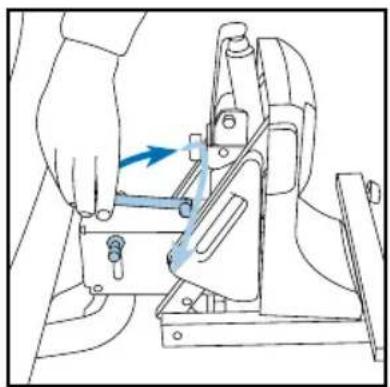
natural_image
Line drawing of a hand operating a mechanical device with a blue arrow indicating motion (no text or symbols)Montage lichtbalk
natural_image
Technical line drawings of mechanical components including a bracket, gear, and rectangular parts (no text or symbols)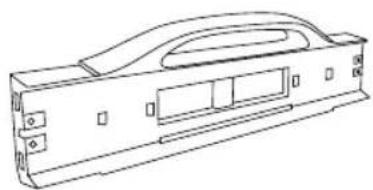
natural_image
Technical line drawing of a mechanical housing or enclosure component (no text or symbols)
2 x2 x steeksleutel 10 mm in bussleutel 5 mm
natural_image
Illustration of hands using a tool to adjust or install a mechanical component, with blue arrows indicating motion direction (no text or symbols)
natural_image
Technical line drawing of a mechanical assembly with no visible text or symbols
natural_image
Illustration of a hand using a tool to adjust or install a blue component on a mechanical fixture (no text or symbols visible)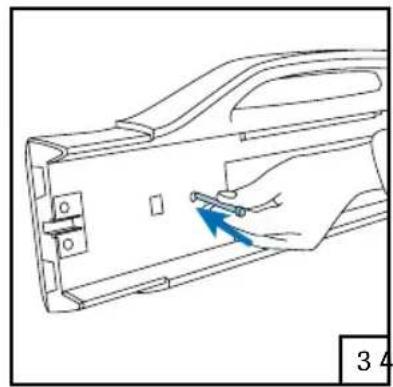
natural_image
Line drawing of a hand inserting a small component into a device casing (no text or symbols)5

natural_image
Technical line drawing of a mechanical bracket assembly with a blue arrow indicating a specific part (no text or symbols present)
natural_image
Technical line drawing of a mechanical assembly with blue components and directional arrows (no text or symbols)

natural_image
Line drawing of hands assembling a mechanical component with a blue curved arrow indicating rotation (no text or symbols)
natural_image
Line drawing of a hand using a tool to adjust or install a mechanical component, with no visible text or symbols.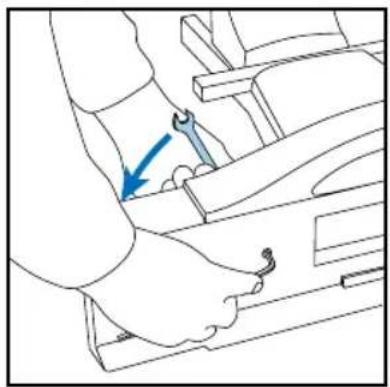
natural_image
Line drawing of a mechanical assembly with a blue arrow indicating a specific component (no text or symbols present)natural_image
Illustration of a hand inserting a component into a wall-mounted device (no text or symbols visible)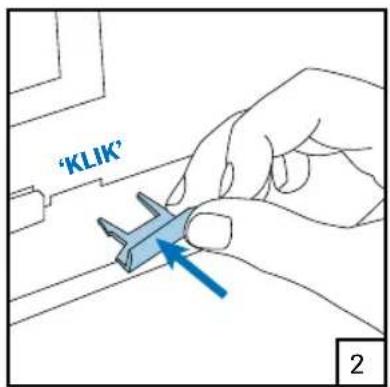
text_image
'KLIK' 2
text_image
TWINNY LOAD 3Let op!
natural_image
Technical diagram of a mechanical assembly with blue arrows indicating directional components (no text or labels)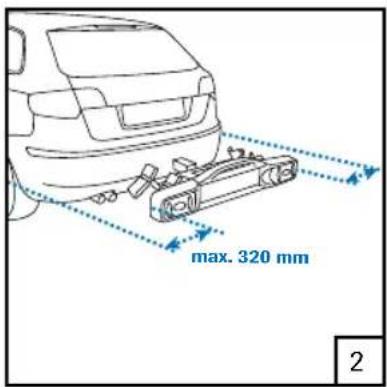
text_image
max. 320 mm 2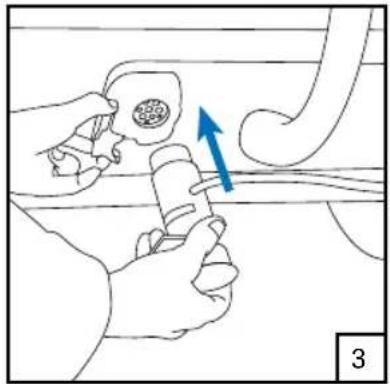
natural_image
Illustration of a hand holding a tool near a pipe with a blue arrow indicating direction (no text or symbols)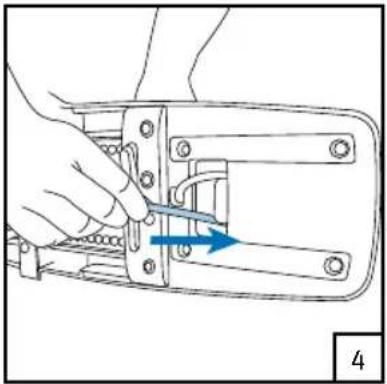
natural_image
Line drawing of a hand using a tool to adjust or install a mechanical component (no text or symbols visible)natural_image
Illustration of hands performing a mechanical manipulation or tooling task with blue arrows indicating motion (no text or symbols present)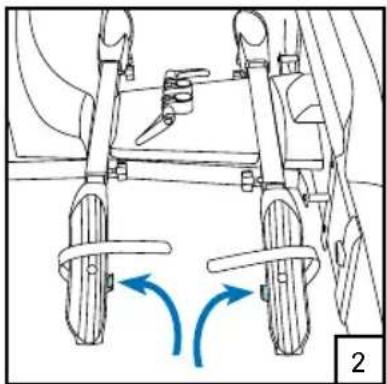
natural_image
Technical line drawing of a mechanical assembly with two wheels and directional arrows indicating motion (no text or symbols)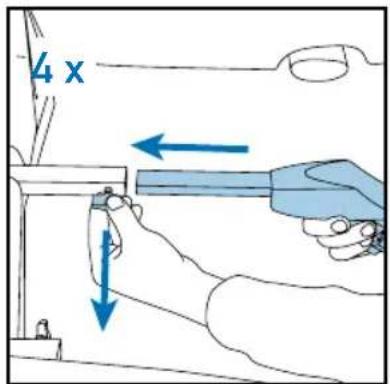
text_image
4 x
natural_image
Illustration of a hand holding a blue cable with a blue arrow indicating clockwise motion (no text or symbols)Montage framebuizen
natural_image
Mechanical assembly diagram showing a hand operating a tool with a blue arrow indicating downward motion (no text or symbols present)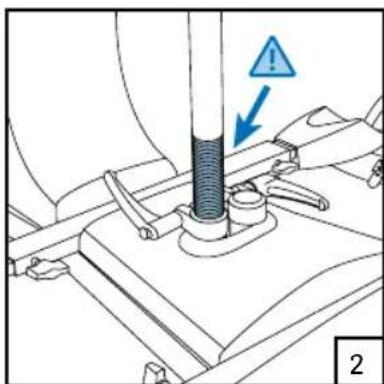
text_image
Technical diagram showing a mechanical assembly with a warning symbol and labeled component '2'
natural_image
Mechanical assembly diagram showing a tool interacting with a base plate (no text or symbols visible)
natural_image
Illustration of hands using a tool to adjust or install a mechanical component, with a blue arrow indicating direction (no text or symbols present)
natural_image
Illustration of hands using a tool to adjust or install a mechanical component, with no visible text or symbols.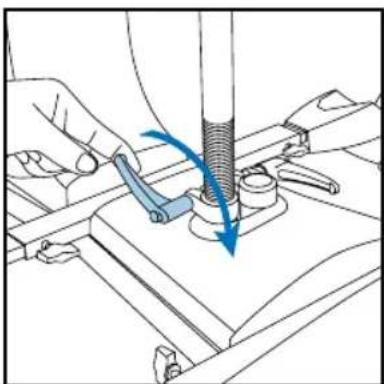
natural_image
Technical illustration of a mechanical assembly with hands operating a tool and a blue arrow indicating motion (no text or symbols present)
natural_image
Technical line drawing of a mechanical assembly with no visible text or symbols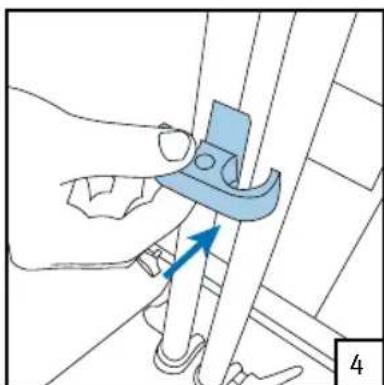
natural_image
Illustration of a hand using a tool to adjust or install a mechanical component, with no visible text or symbols.
natural_image
Illustration of a hand holding a blue rectangular object with a circular end, connected by a curved arrow indicating rotation (no text or symbols present)natural_image
Line drawing of a person assembling or adjusting a vehicle chassis (no text or symbols visible)
natural_image
Line drawing of a hand holding a key inserted into a mechanical component (no text or symbols)Drager omlaag brengen
natural_image
Line drawing of a hand operating a mechanical device with a blue arrow indicating rotation (no text or symbols)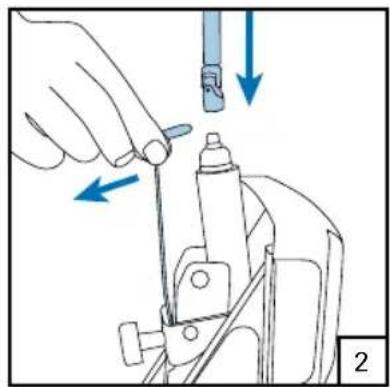
natural_image
Illustration of a hand using a tool to adjust or install a mechanical component, with blue arrows indicating direction (no text or symbols present)
natural_image
Technical line drawing of a mechanical component with an arrow indicating direction (no text or symbols)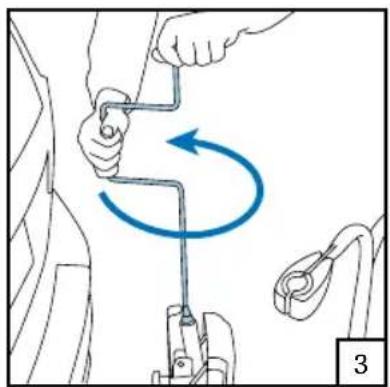
natural_image
Diagram showing a person using a tool to lift a car, with a blue curved arrow indicating rotational motion (no text or symbols present)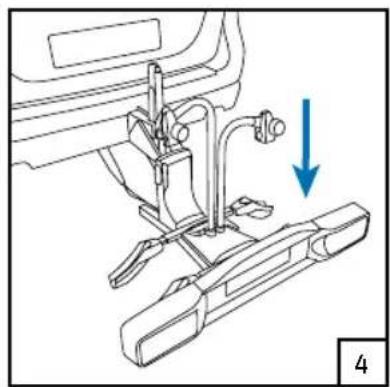
natural_image
Mechanical assembly diagram showing a sewing machine with a blue arrow indicating direction (no text or symbols present)Let op!
natural_image
Technical line drawing of a mechanical assembly with a blue X mark indicating a specific component (no text or symbols present)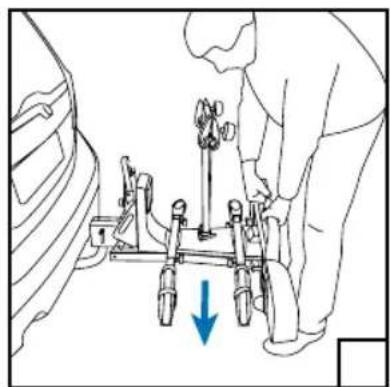
natural_image
Line drawing of a person using a mechanical device with a blue arrow indicating downward motion (no text or symbols)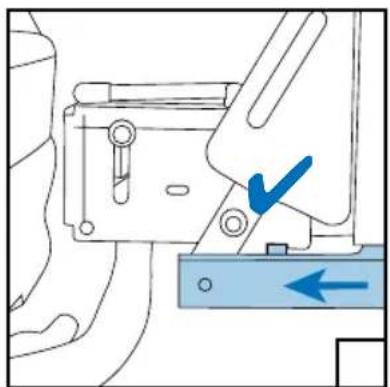
natural_image
Mechanical assembly diagram showing a bracket with a blue checkmark and directional arrow (no text or symbols)Fietsen plaatsen
natural_image
Illustration of a hand using a tool to adjust or install a mechanical component, with arrows indicating direction (no text or symbols present)3
natural_image
Illustration of a medical procedure with hands and tools, no visible text or symbols
natural_image
Line drawing of a bicycle mounted on a vehicle chassis, with a blue arrow indicating the direction (no text or symbols present)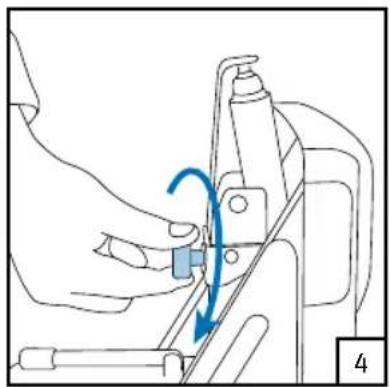
natural_image
Line drawing of a mechanical assembly with a blue arrow indicating motion (no text or symbols)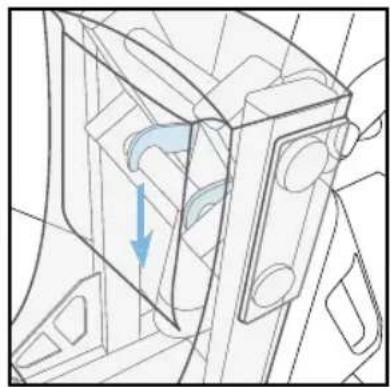
natural_image
Technical line drawing of a mechanical component with a blue arrow indicating direction (no text or symbols)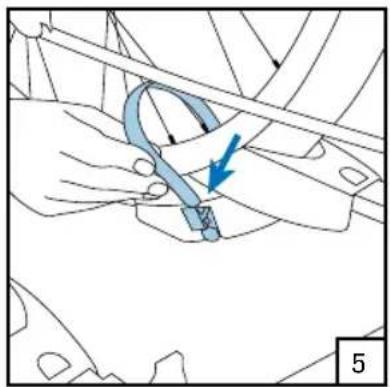
natural_image
Technical diagram showing a hand holding a curved mechanical component with an arrow indicating direction (no text or symbols present)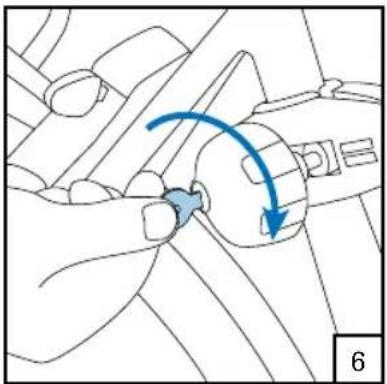
natural_image
Diagram of a mechanical component with a blue curved arrow indicating motion or force direction (no text or symbols)Fietsen afnemen
natural_image
Line drawing of a hand operating a mechanical device with a blue arrow indicating rotation (no text or symbols)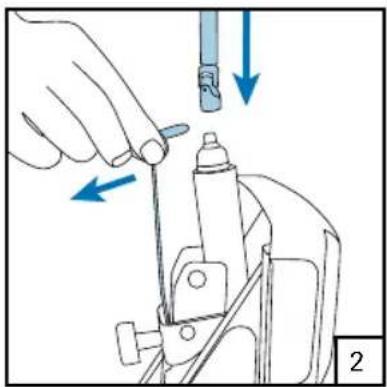
natural_image
Illustration of a hand using a tool to adjust or install a mechanical component, with arrows indicating direction (no text or symbols present)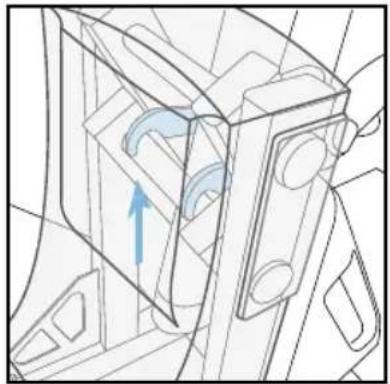
natural_image
Technical line drawing of a mechanical component with an arrow indicating direction (no text or symbols)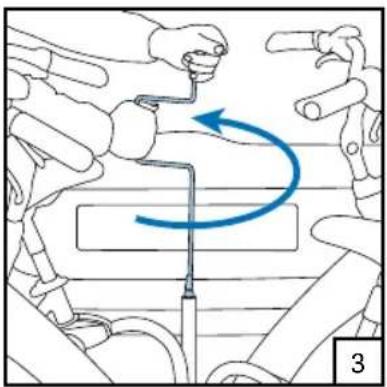
natural_image
Illustration of a robotic arm with motion arrows indicating rotational movement (no text or symbols)
natural_image
Line drawing of a bicycle with wheels and a blue arrow indicating direction (no text or symbols)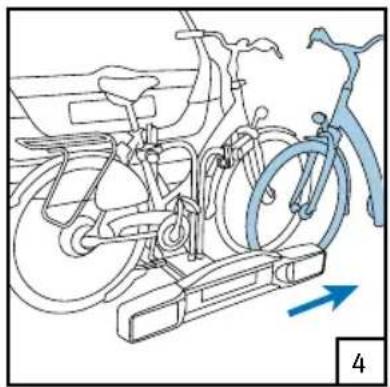
natural_image
Line drawing of a bicycle on an exercise platform with a blue bicycle handle, showing no text or symbols.
Garantie
natural_image
Illustration of a hand gripping a mechanical device with a blue arrow indicating force or movement (no text or symbols)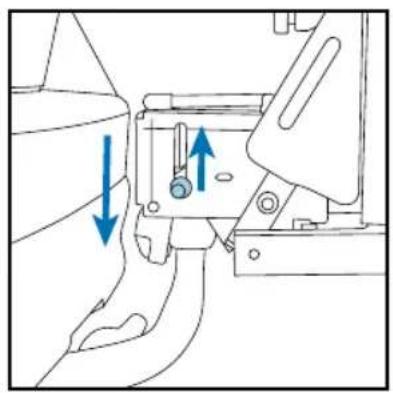
natural_image
Mechanical assembly diagram showing a valve mechanism with blue arrows indicating direction (no text or symbols)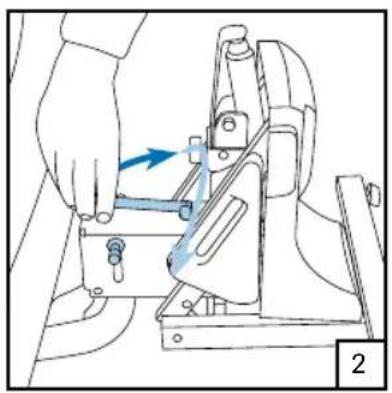
natural_image
Illustration of a hand using a tool to adjust or install a mechanical component, with no visible text or symbols.
natural_image
Mechanical assembly diagram showing a hand operating a switch with a blue arrow indicating motion (no text or symbols present)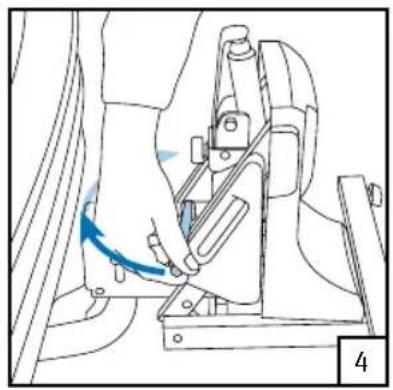
natural_image
Line drawing of a hand using a tool to adjust or install a mechanical component (no text or symbols visible)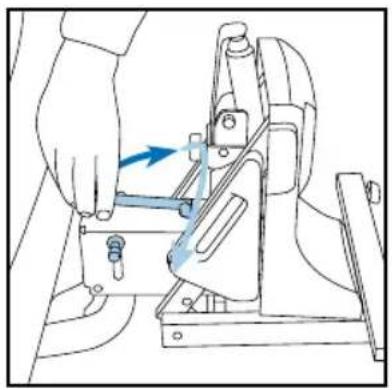
natural_image
Line drawing of a hand operating a mechanical press or clamp device with a blue arrow indicating motion (no text or symbols present)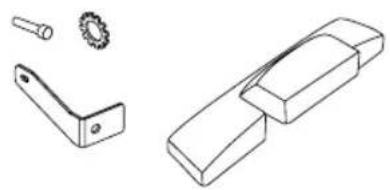
natural_image
Technical line drawings of mechanical components including a bracket, gear, and housing (no text or symbols)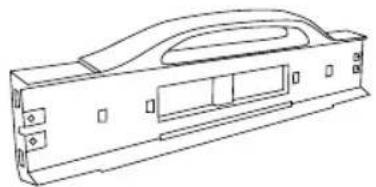
natural_image
Technical line drawing of a mechanical housing or enclosure component (no text or symbols)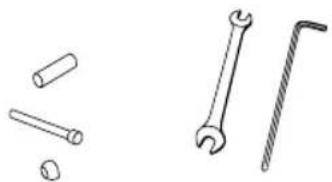
natural_image
Illustration of various wrench and screw tools (no text or symbols)Schlüssel 10 mm 2 x 2 x Sechskantschlüssel 5 mm
natural_image
Illustration of hands using a tool to adjust or install a mechanical component, with blue arrows indicating rotational motion (no text or symbols)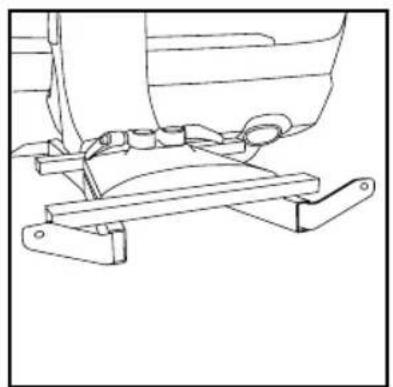
natural_image
Technical line drawing of a mechanical assembly with levers and brackets (no text or symbols)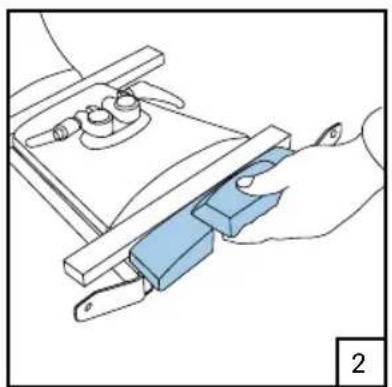
natural_image
Illustration of a hand using a tool to adjust or install a component, no text or symbols present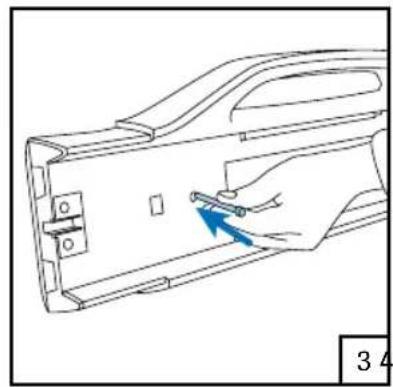
natural_image
Line drawing of a hand inserting a small component into a device casing (no text or symbols)5

natural_image
Technical line drawing of a mechanical bracket assembly with a blue arrow indicating a specific part (no text or symbols present)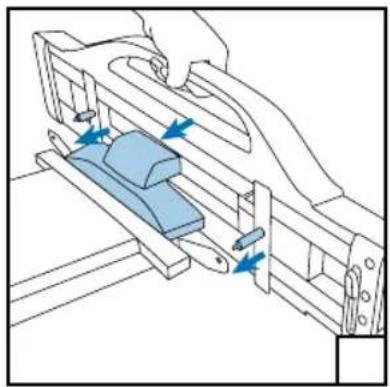
natural_image
Technical diagram of a mechanical assembly with blue arrows indicating motion or force direction (no text or symbols present)

natural_image
Line drawing of hands assembling a mechanical component with a blue curved arrow indicating rotation (no text or symbols)
natural_image
Line drawing of a hand using a tool to adjust or install a mechanical component, with no visible text or symbols.
natural_image
Line drawing of a mechanical assembly with a blue arrow indicating a specific component (no text or symbols present)natural_image
Illustration of a hand inserting a component into a wall-mounted device (no text or symbols visible)
text_image
'Klick' 2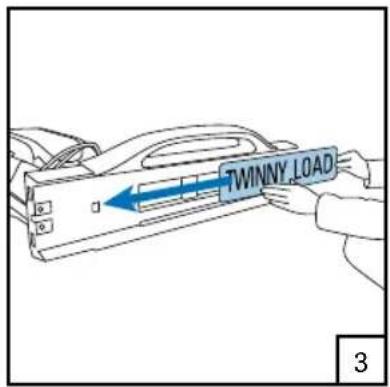
text_image
TWINNY LOAD 3Achtung!
text_image
Technical diagram showing mechanical assembly with blue arrows indicating direction of movement or force, labeled '1' in corner.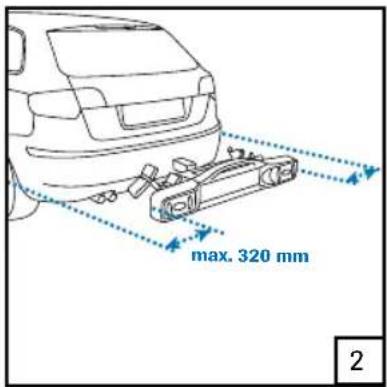
text_image
max. 320 mm 2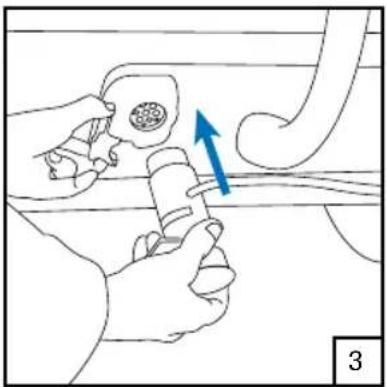
natural_image
Illustration of a hand holding a tool with a blue arrow indicating direction, no text or symbols present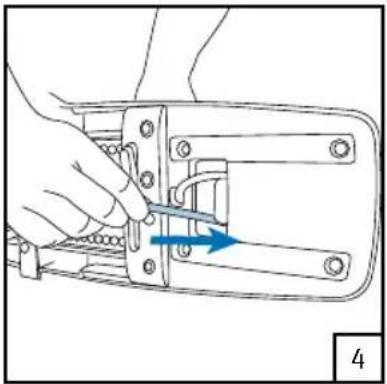
natural_image
Hand holding a mechanical component with a blue arrow indicating direction (no text or symbols)natural_image
Diagram of a vehicle's suspension system showing two wheels with blue directional arrows indicating motion (no text or labels)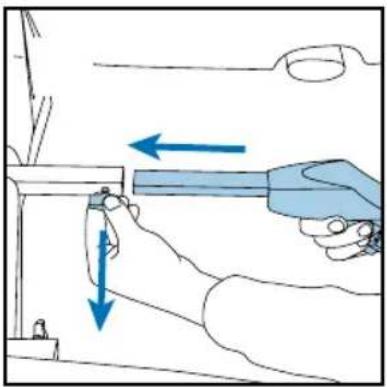
natural_image
Illustration of a hand using a tool to adjust or install a component, with arrows indicating direction (no text or symbols present)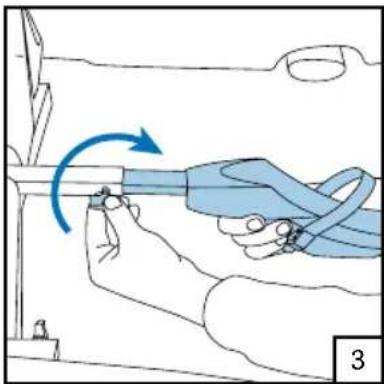
natural_image
Illustration of a hand holding a blue cable with a blue arrow indicating clockwise motion (no text or symbols)
natural_image
Line drawing of a person using a tool to adjust or install a vehicle seatbelt, with a blue arrow indicating the motion direction (no text or symbols present)
text_image
Technical diagram showing a mechanical assembly with a warning symbol and labeled component '2'
natural_image
Technical illustration of a mechanical assembly with a tool and blue directional arrows indicating motion (no text or symbols)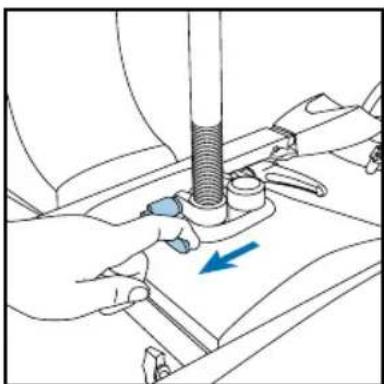
natural_image
Illustration of hands using a tool to adjust a mechanical component, with a blue arrow indicating direction (no text or symbols present)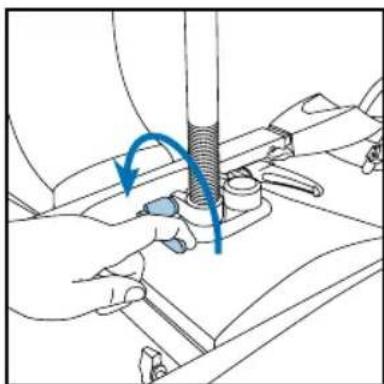
natural_image
Illustration of hands using a tool to adjust or install a mechanical component, with no visible text or symbols.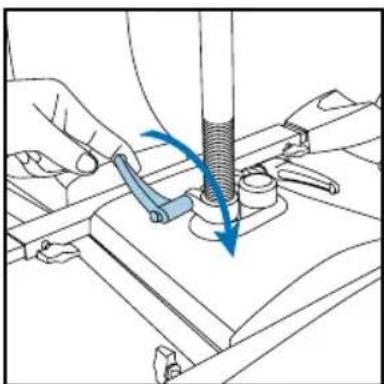
natural_image
Technical illustration of a mechanical assembly with hands operating a tool (no text or symbols visible)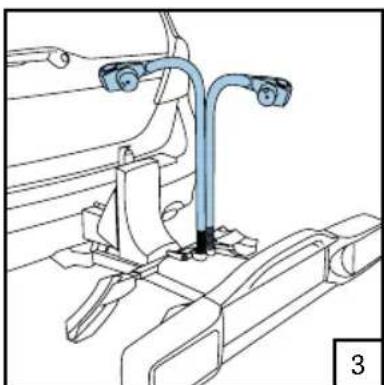
natural_image
Technical line drawing of a mechanical assembly with no visible text or symbols
natural_image
Illustration of a hand using a tool to adjust or install a mechanical component, with no visible text or symbols.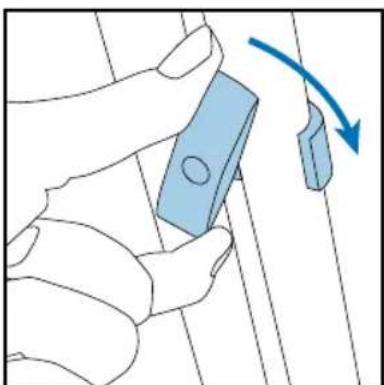
natural_image
Illustration of a hand holding a blue rectangular object with a circular end, connected by a curved arrow indicating rotation (no text or symbols present)natural_image
Line drawing of a person assembling or adjusting a vehicle chassis (no text or symbols visible)
natural_image
Line drawing of a hand holding a key inserted into a mechanical component (no text or symbols)natural_image
Illustration of a hand operating a mechanical device with a blue arrow indicating rotation (no text or symbols)
natural_image
Illustration of a hand using a tool to adjust or install a mechanical component, with arrows indicating direction (no text or symbols present)
natural_image
Technical line drawing of a mechanical component with an arrow indicating direction (no text or symbols)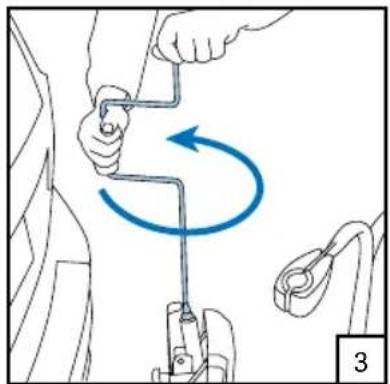
natural_image
Diagram showing a hand holding a tool with a blue circular arrow indicating rotational motion (no text or symbols)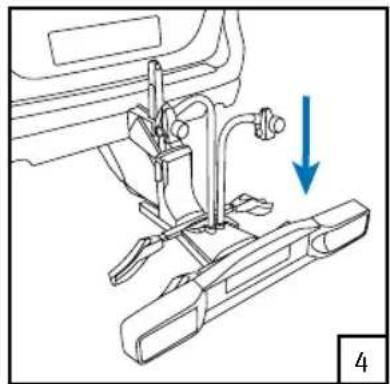
natural_image
Mechanical assembly diagram showing a sewing machine with a blue arrow indicating a downward motion (no text or symbols present)Achtung!
natural_image
Technical line drawing of a mechanical assembly with a blue X mark and numbered reference (no text or symbols)
natural_image
Line drawing of a person using a mechanical device to adjust or install a vehicle (no text or symbols present)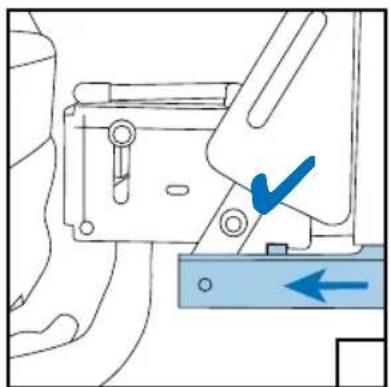
natural_image
Mechanical assembly diagram showing a lever mechanism with a blue checkmark and directional arrow (no text or symbols)natural_image
Illustration of a hand holding a blue device with a curved arrow indicating motion (no text or symbols)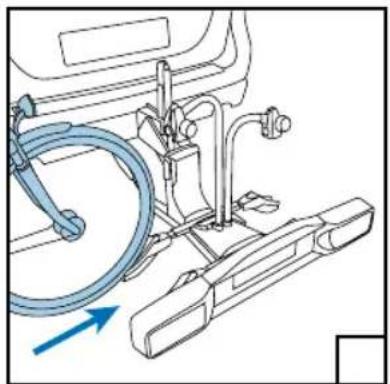
natural_image
Technical line drawing of a car interior with hoses and a blue arrow indicating direction (no text or symbols)
natural_image
Line drawing of a bicycle with visible wheels, suspension rings, and mechanical components (no text or symbols)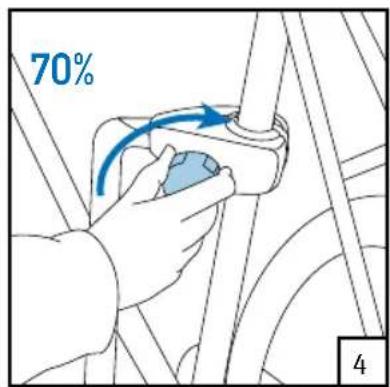
text_image
70% 4
natural_image
Diagram of a hand holding a knife with blue directional arrows indicating movement or force (no text or symbols present)
natural_image
Mechanical assembly diagram showing a hand operating a tool with a blue component, no visible text or symbols8
text_image
100%
natural_image
Line drawing of a bicycle with wheels and a blue bicycle handle, showing no text or symbols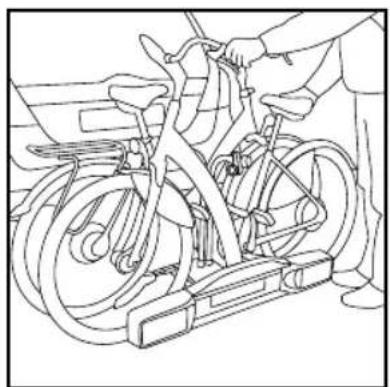
natural_image
Line drawing of a person using an exercise bike with visible wheels and suspension components (no text or symbols)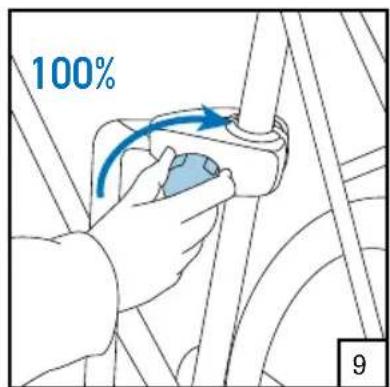
text_image
100% 9natural_image
Illustration of a hand using a tool to adjust or install a mechanical component, with arrows indicating direction (no text or symbols present)3
natural_image
Illustration of a robotic arm with a blue curved arrow indicating rotational motion (no text or symbols)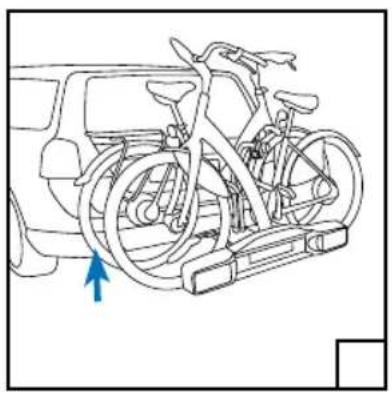
natural_image
Line drawing of a bicycle mounted on a vehicle chassis, with a blue arrow pointing to the front wheel (no text or symbols present)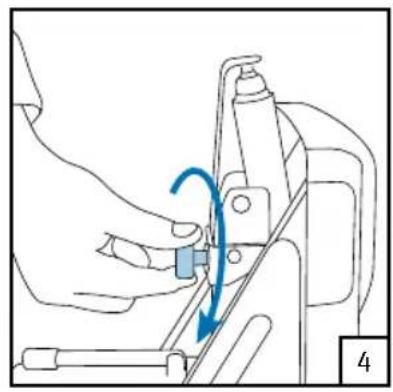
natural_image
Line drawing of a hand operating a sewing machine with a blue arrow indicating rotation (no text or symbols)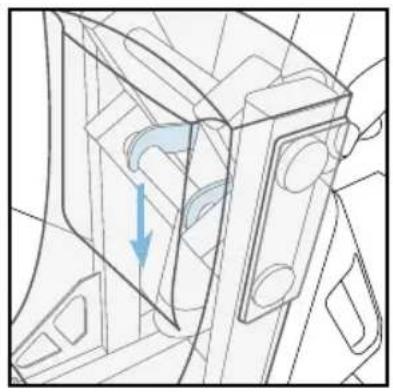
natural_image
Technical line drawing of a mechanical component with internal flow arrows (no text or symbols)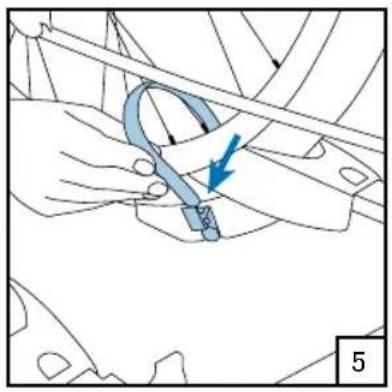
natural_image
Technical diagram showing a mechanical component with a blue arrow indicating direction (no text or symbols present)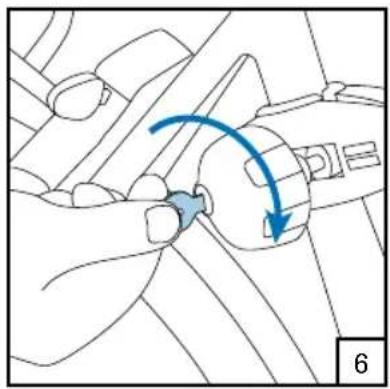
natural_image
Diagram of a hand holding a small object with a blue curved arrow indicating rotation or movement (no text or symbols present)natural_image
Line drawing of a hand operating a mechanical device with a blue arrow indicating rotation (no text or symbols)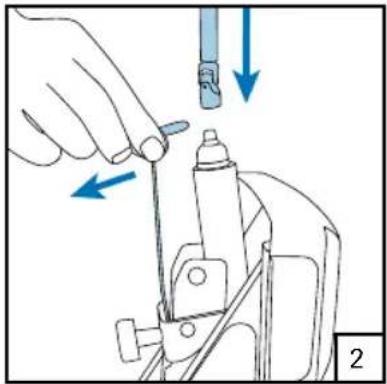
natural_image
Illustration of a hand using a tool to adjust or install a mechanical component, with arrows indicating direction (no text or symbols present)
natural_image
Technical line drawing of a mechanical component with an arrow indicating direction (no text or symbols)

natural_image
Illustration of a robotic arm with motion arrows indicating rotational movement (no text or symbols)
natural_image
Line drawing of a bicycle with wheels and a blue arrow indicating direction (no text or symbols)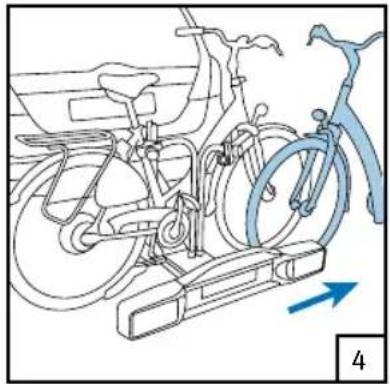
natural_image
Line drawing of a bicycle with wheels and a blue bicycle handle, showing no text or symbolsAuflagen - D-WERT
$$ D = \frac {9 , 8 1 G ^ {*} A}{\therefore (D \text { in kN:A und G in kg })} 1 0 0 0 (D + A) $$
The type plate of the towing hook indicates the maximum permissible ball pressure. The total combined weight of the bicycle carrier and bicycles may not be higher than this ball pressure and in no case may it be higher than 75 kg. The weight of the BikE-Lift is 19,2 kg. You can find the weight of your bicycle in the supplied booklet or perhaps on the Internet.
Lighting
The lighting of the bicycle carrier is 12V.
Legal requirements
You will find the legal requirements that apply in Europe for the transport of bicycles on a bicycle carrier at www.twinnyload.com
Quality
All carriers are designed and produced in accordance with the highest quality standard. Stability, flexibility, ease of use, good driving behaviour and solidity are of paramount importance for us.
Cleaning
Clean the carrier after use and ensure that it is free from brine and diesel deposit.
Storage
Store the carrier at all times in dry condition.
Accessories
Various accessories are available for your bicycle carrier. For a complete overview go to www.twinnyload.com or obtain information at the sales address.
Frame diameter
The frame clamp is suitable for saddle tubes with a diameter of 28-38 mm.
Instructionvideo
Besides the paper manual before you, we also want to point out that there is an instruction video on our Internet site www.twinnyload.com. This instruction video explains step-by-step how to assemble and use your bicycle carrier.
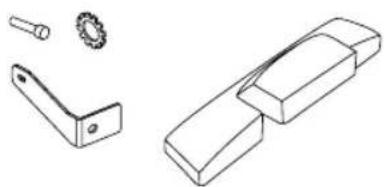
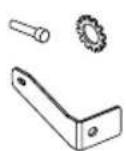
Components of BikeE-Lift
- 1 x carrier
- 1 x light bar 13/7 pole
- 1 x bag of parts
- 1 x cover
- 4 x wheel rails
- 2 x frame arm
- 1 x handle
- 1 x padlock
- 1 x warranty card
Warnings
- Always operate the spindle with the supplied crank.
- Always degrease the ball of the towing hook before installing the bicycle carrier.
- The bicycle carrier must be assembled according to the installation instructions.
- The carrier and bicycle must be installed according to the use instructions.
- No changes may be made to the product.
- The lighting is intended for a 12V installation.
- After the first kilometres, check the attachment of the bicycle carrier and bicycles.
- Adjust your speed at speed ramps.
- Never use straps or ropes to fasten your bicycle. These can irreparably damage the frame of your bicycle.
- Attention! When the fog rear light remains on constantly after connecting your bicycle carrier, the socket of the car is not connected in accordance with the DIN. Have this repaired by your garage.
Before driving, check that:
- the bicycle carrier is well attached to the towing hook;
- the second lock is properly tightened.
- the lighting on the bicycle carrier functions properly;
- the two light units are set at the correct width and are clicked into the securing device;
- no cable is hanging loose;
- all wing bolts of the wheel rails are tightened;
- the clamps on the pedal arm of the bicycles are well tightened;
- all wheels have been fixed with the straps;
- no loose items are on the bicycles or bicycle carrier;
- the keys are removed from the locks.
- the fog rear light is in the left light unit.
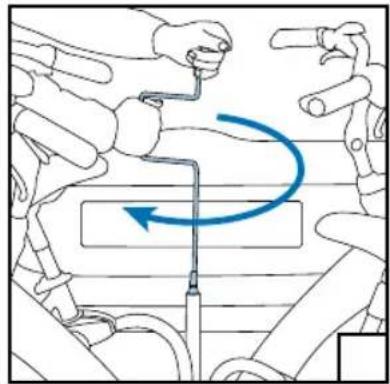
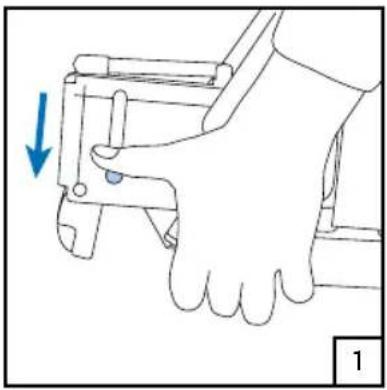
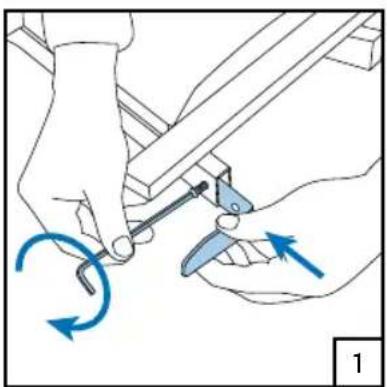
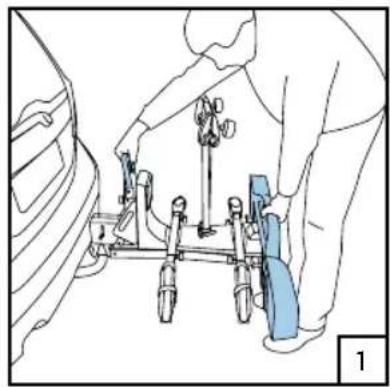
Placing the bike carrier for assembly
Tip: The assembly of the bicycle is easier when it is placed on the bullet.
Place the bicycle carrier on the bullet 1, tighten it horizontally 2, raise the handle 3, tighten it horizontally 4, repeat steps 2, 3 and 4.
natural_image
Illustration of a hand operating a mechanical device with a blue arrow indicating force or movement (no text or symbols present)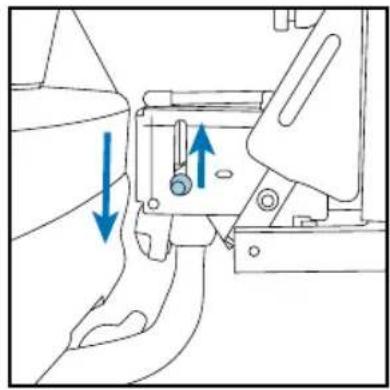
natural_image
Mechanical assembly diagram showing a belt switch mechanism with blue arrows indicating direction (no text or labels)
natural_image
Illustration of a hand operating a mechanical device with a blue arrow indicating motion (no text or symbols present)
natural_image
Mechanical assembly diagram showing a hand operating a lever mechanism with a blue arrow indicating motion (no text or symbols present)
natural_image
Mechanical assembly diagram showing a hand operating a lever mechanism (no text or symbols visible)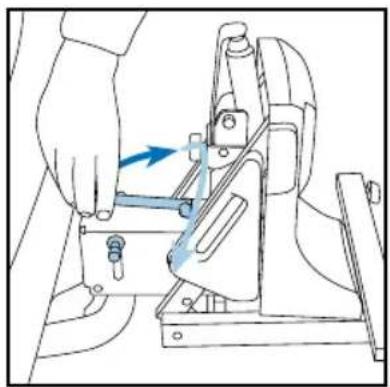
natural_image
Line drawing of a hand using a tool to adjust or install a mechanical component (no text or symbols visible)Assembly of light bar

natural_image
Simple line drawing of two rectangular blocks with no text or symbols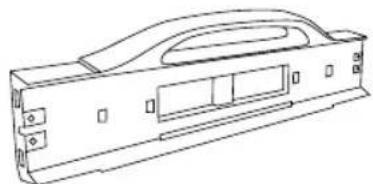
natural_image
Technical line drawing of a mechanical housing or enclosure component (no text or symbols)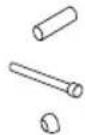
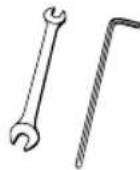
2 x 2 x
spanner 10 mm
allan key 5 mm
Assemble the clamps 1,2,3, place the cover □, insert the bolts □, place the bolt spacer □, position and tighten the light bar 5.
natural_image
Illustration of hands using a tool to adjust or install a mechanical component, with blue arrows indicating motion direction (no text or symbols)
natural_image
Technical line drawing of a mechanical assembly with levers and brackets (no text or symbols)
natural_image
Illustration of a hand using a tool to adjust or install a blue mechanical component (no text or symbols visible)
natural_image
Line drawing of a hand inserting a small component into a device casing (no text or symbols)5
natural_image
Technical line drawing of a mechanical bracket assembly with a blue arrow indicating a specific part (no text or symbols present)
natural_image
Technical line drawing of a mechanical assembly with blue arrows indicating motion or force direction (no text or symbols)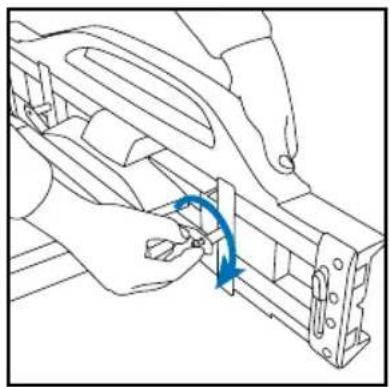
natural_image
Line drawing of hands assembling a mechanical component with a blue curved arrow indicating rotation (no text or symbols)
natural_image
Line drawing of a hand using a tool to adjust or install a mechanical component, with no visible text or symbols.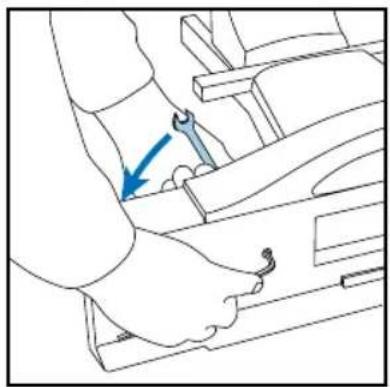
natural_image
Line drawing of a mechanical assembly with a blue arrow indicating a specific component (no text or symbols present)Installation of number plate
Break four lugs out 1,2,3 place them in the cut-ways □, slide the number plate into the light bar □.
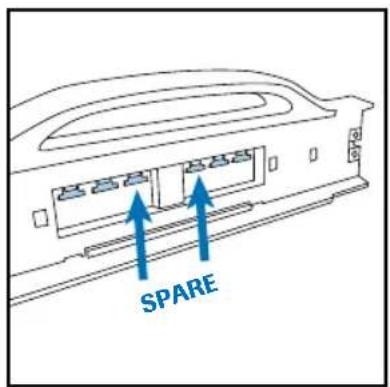
text_image
SPARE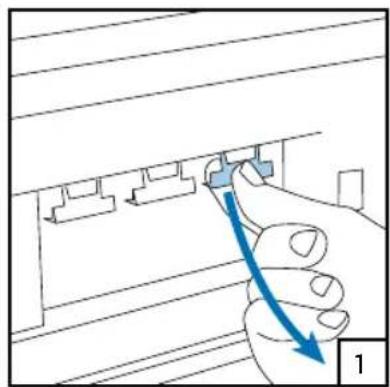
natural_image
Illustration of a hand inserting a component into a wall-mounted device (no text or symbols visible)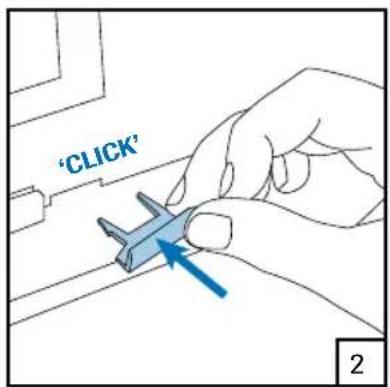
text_image
'CLICK' 2
text_image
TWINNY LOAD 3Beware!
Slide short Belgian number plate up to the first stop.
Austrian number plate can be installed without lugs.
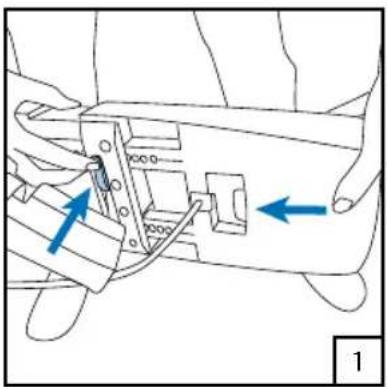
Installation of light units
Place the light units in the light bar 1, width adjustment: slide the light units out in steps of 1 cm 2. Connect the plug and check the lighting 3, put away superfluous wiring 4.
natural_image
Technical diagram of a mechanical assembly with blue arrows indicating directional components (no text or labels)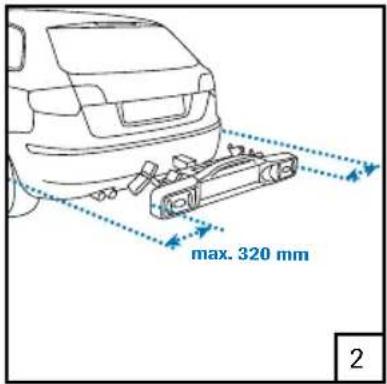
text_image
max. 320 mm 2
natural_image
Illustration of a hand holding a tool near a pipe with a blue arrow indicating direction (no text or symbols)
natural_image
Line drawing of a hand using a tool to adjust or install a mechanical component (no text or symbols visible)Car width Slide out per side
Up to 1,80 m do not slide out
Up to 1,84 m 2 nd click
Up to 1,88 m 4 ^th click
Up to 1,92 m 6 ^th click
Up to 1,96 m 8 ^th click
Up to 2,02 m 11 ^th click (= max)
The width of your car is listed in the car's instruction manual.
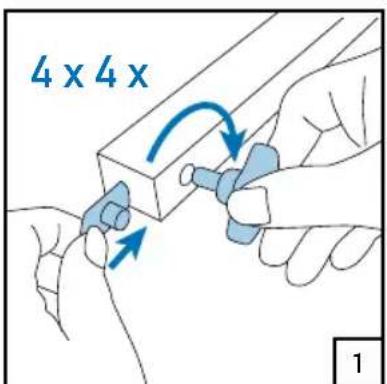
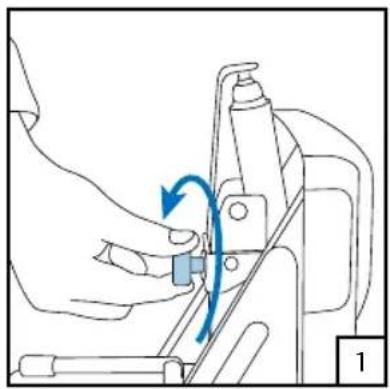
Assembly of wheel rails
4 × 2 × 2 ×
Insert the flange nut and screw the wing bolt in it 1, insert the wheel rails with the clips in the direction of the inside 2, tighten the wing bolts 3.
text_image
4 x 4 x 1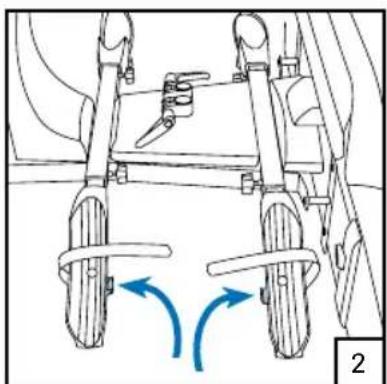
natural_image
Diagram of a vehicle chassis with wheels and directional arrows indicating motion (no text or symbols)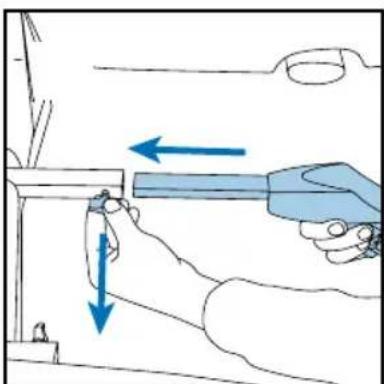
natural_image
Illustration of a hand using a tool to adjust or install a component, with arrows indicating direction (no text or symbols present)
natural_image
Illustration of a hand holding a blue cable with a blue arrow indicating clockwise motion (no text or symbols)Assembly of frame tubes
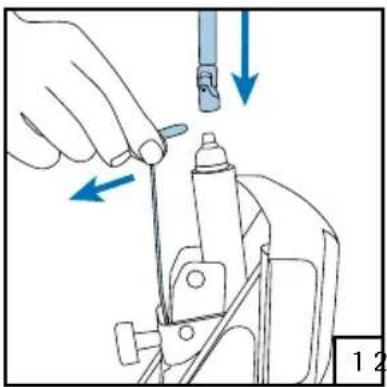
Insert the frame tube 1, tighten the frame tube on the notched area 2, repeat the steps for the second frame tube 3, assemble the tube clamp 4.
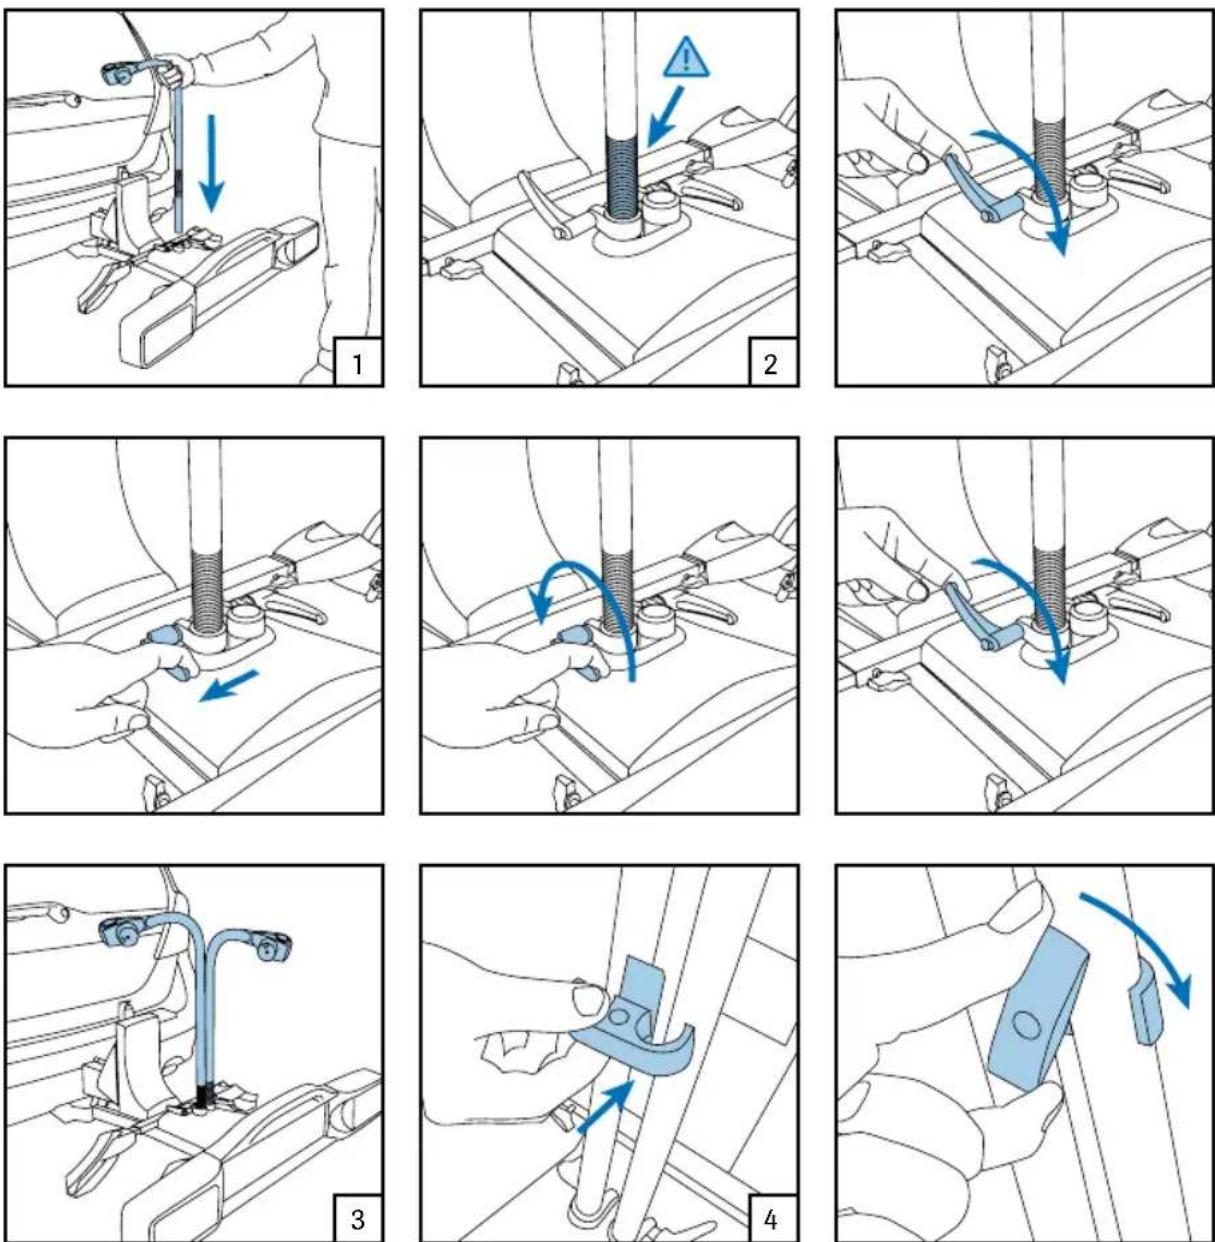

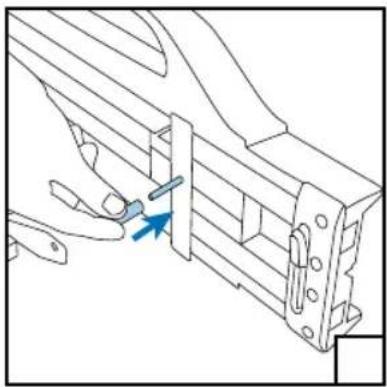
Placing the Assembled carrier
When the bicycle carrier is already assembled, place it as follows 1. Lock the carrier 2.
natural_image
Line drawing of a person assembling or adjusting a vehicle chassis (no text or symbols visible)
natural_image
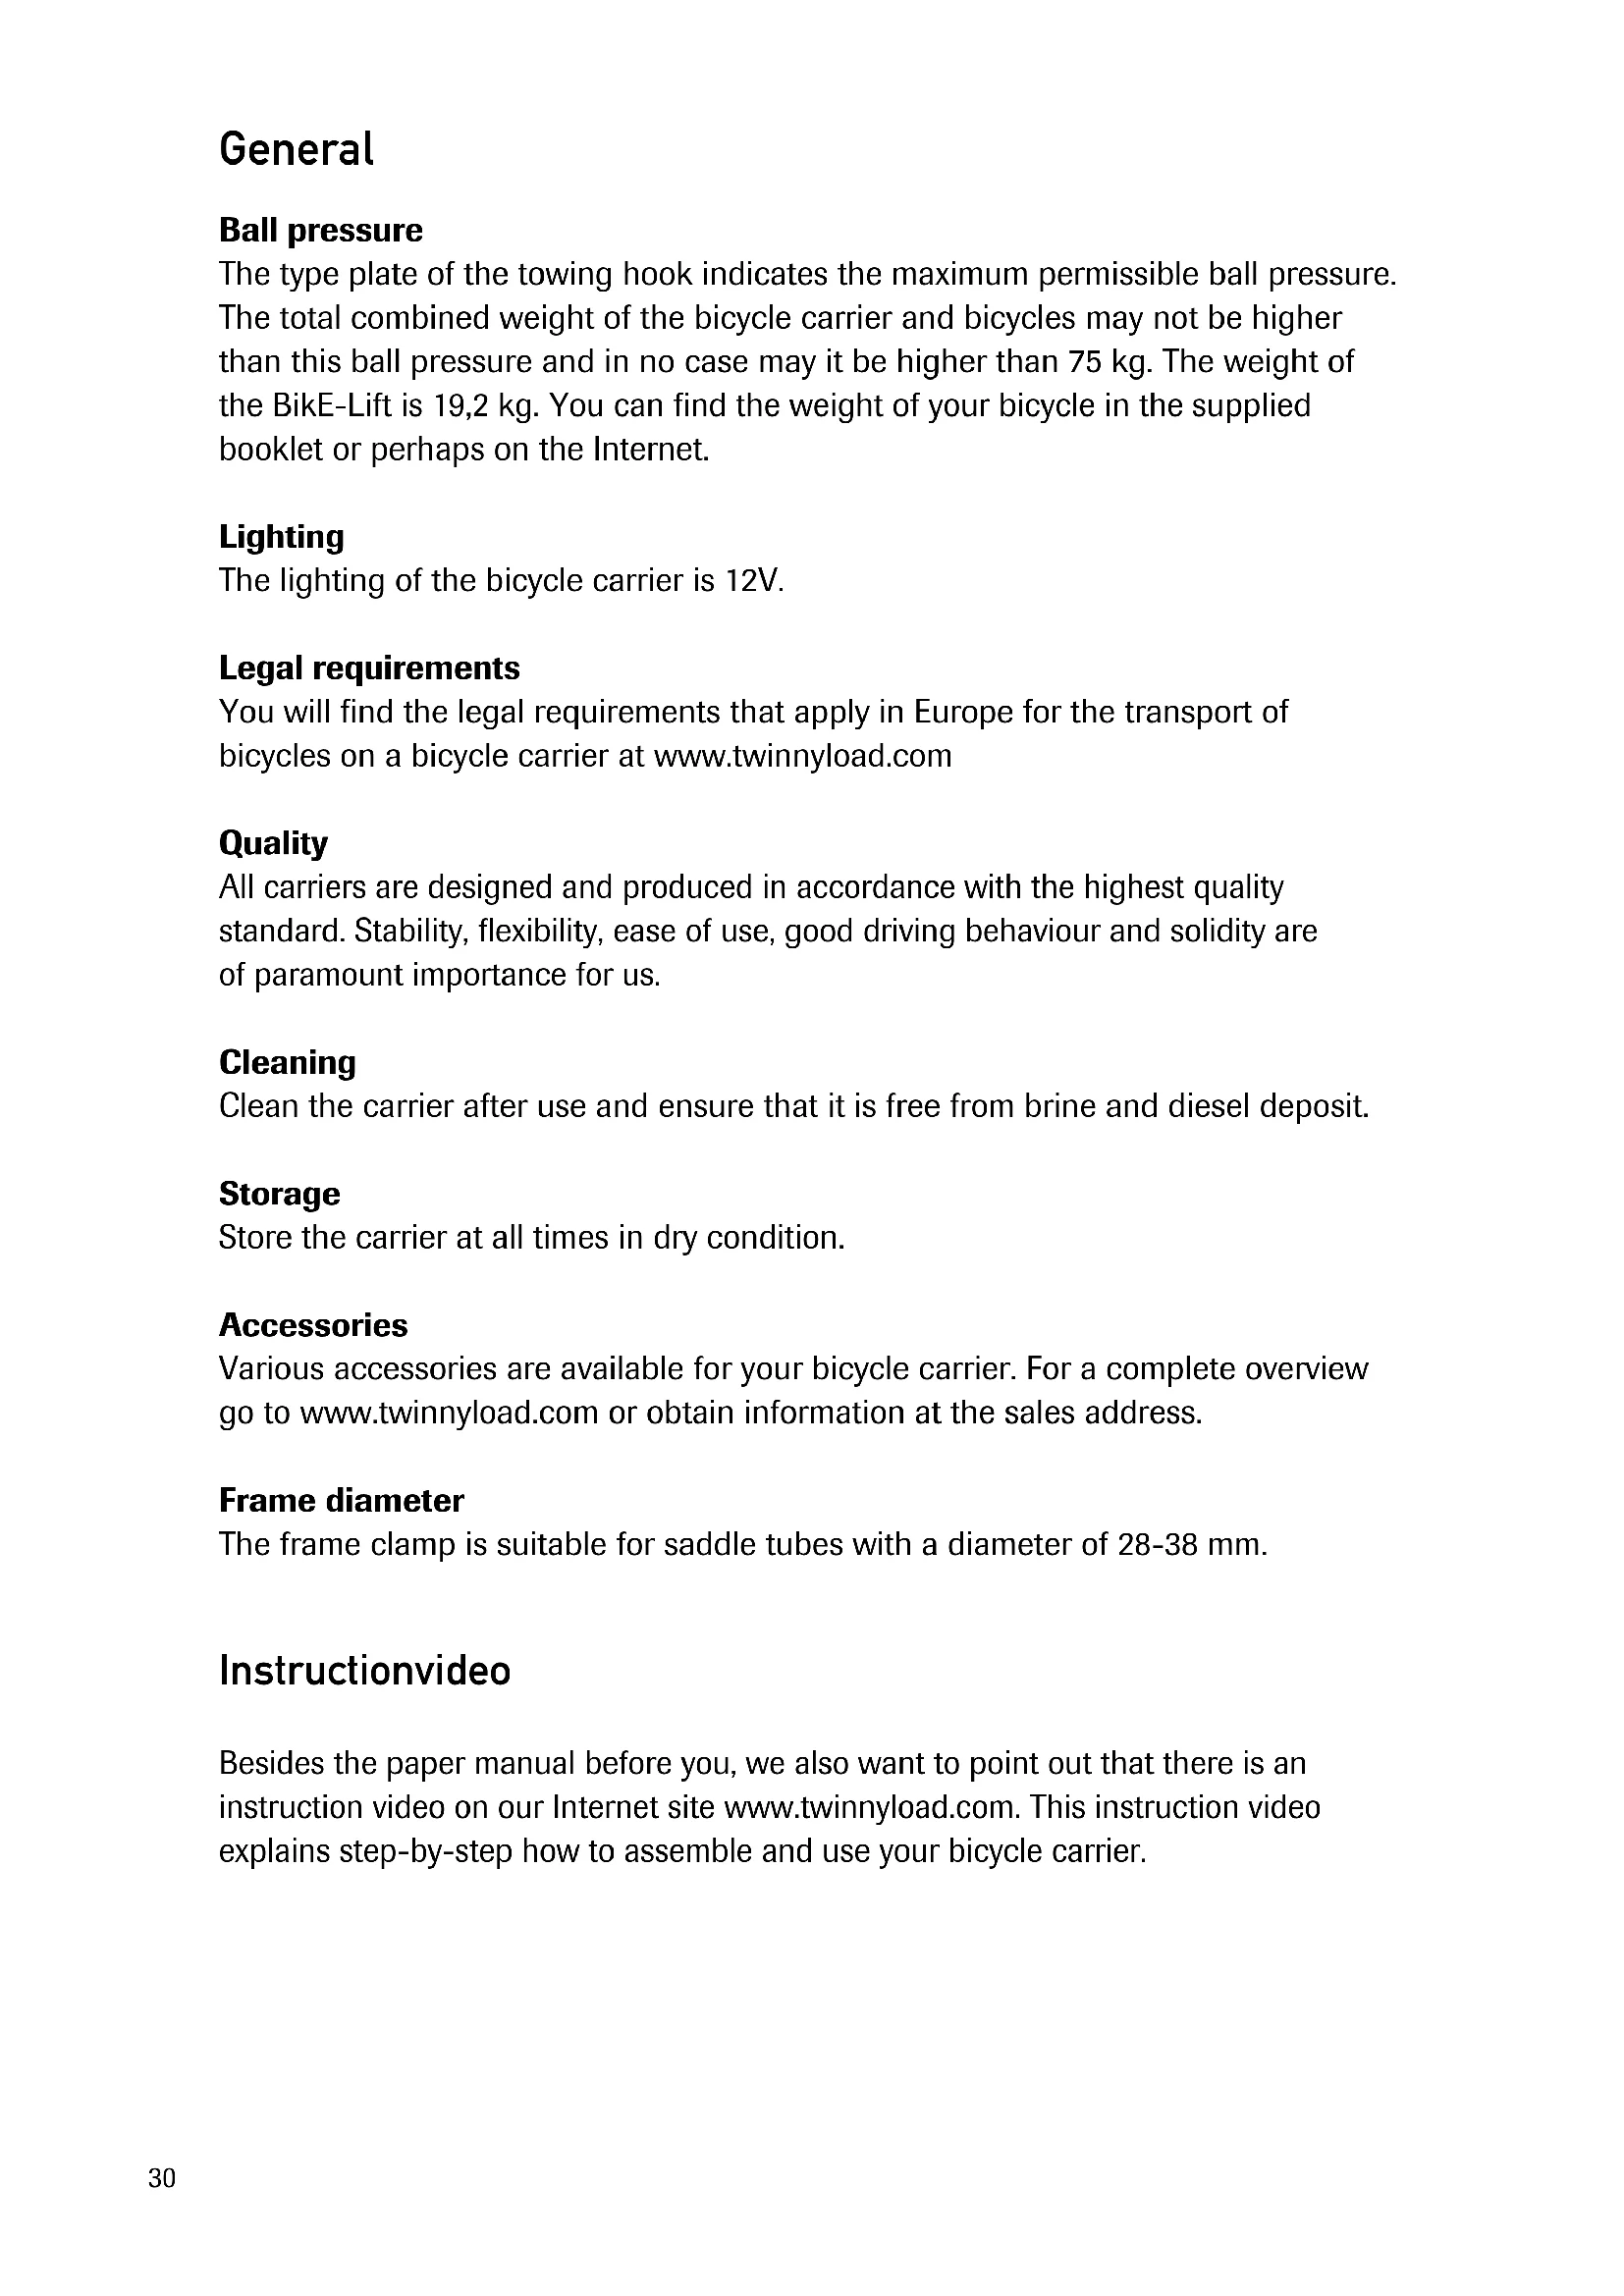
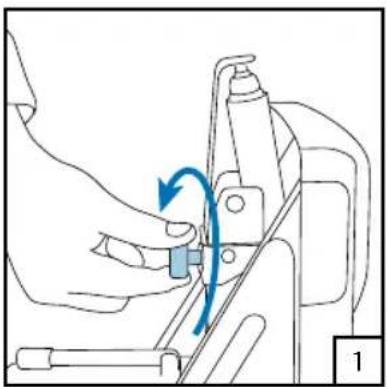
Line drawing of a hand holding a key inserted into a mechanical component (no text or symbols)Lowering the carrier
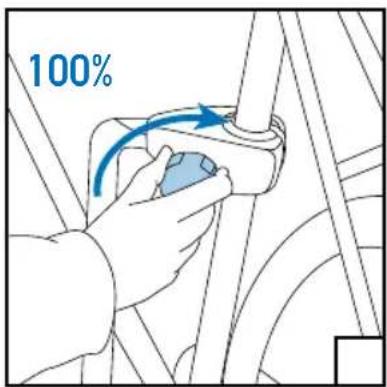
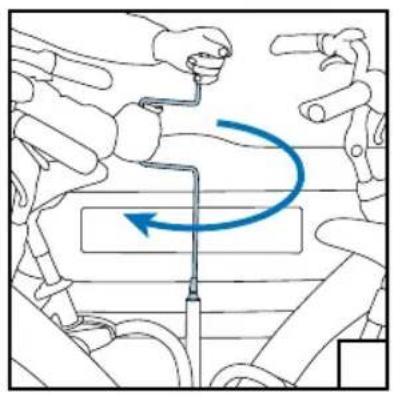
Loosen the second lock 1, place the crank 2, rotate the bicycle carrier down 3, end position on the ground 4.
natural_image
Line drawing of a hand operating a mechanical device with a blue arrow indicating rotation (no text or symbols)
natural_image
Illustration of a hand using a tool to adjust or install a mechanical component, with arrows indicating direction (no text or symbols present)
natural_image
Technical line drawing of a mechanical component with an arrow indicating direction (no text or symbols)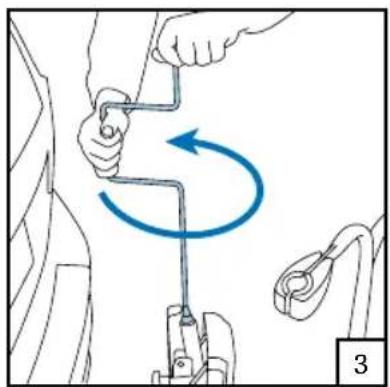
natural_image
Diagram showing a person using a tool to lift a car, with a blue curved arrow indicating rotational motion (no text or symbols present)
natural_image
Mechanical assembly diagram showing a sewing machine with a blue arrow indicating direction (no text or symbols present)Attention!
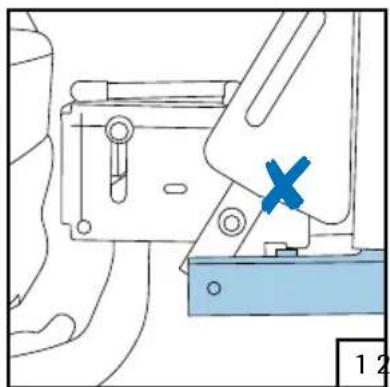
When it is rotated up for the first time without bicycles, the carrier is not yet "set". The base frame will then sometimes not fall into the second lock opening 1. To prevent this, you must apply pressure on the light bar when rotating the carrier up 2, so that the base frame falls into the second lock opening 3.
natural_image
Technical line drawing of a mechanical assembly with a blue X mark and numbered label (1, 2), no readable text or symbols present.
natural_image
Line drawing of a person using a mechanical device with a blue arrow indicating downward motion (no text or symbols)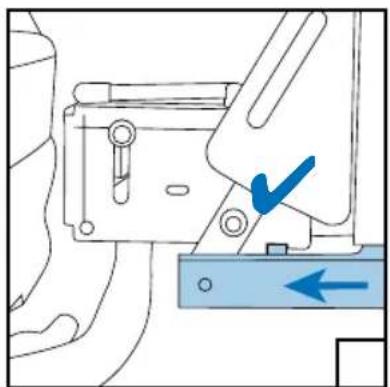
natural_image
Mechanical assembly diagram showing a bracket with a blue checkmark and directional arrow (no text or symbols)Placing of bicycles
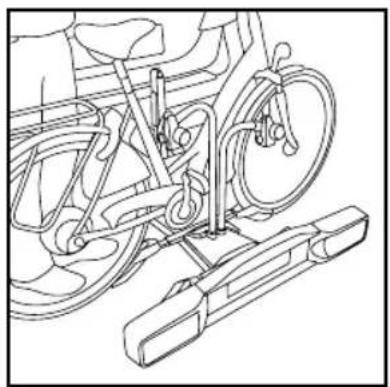
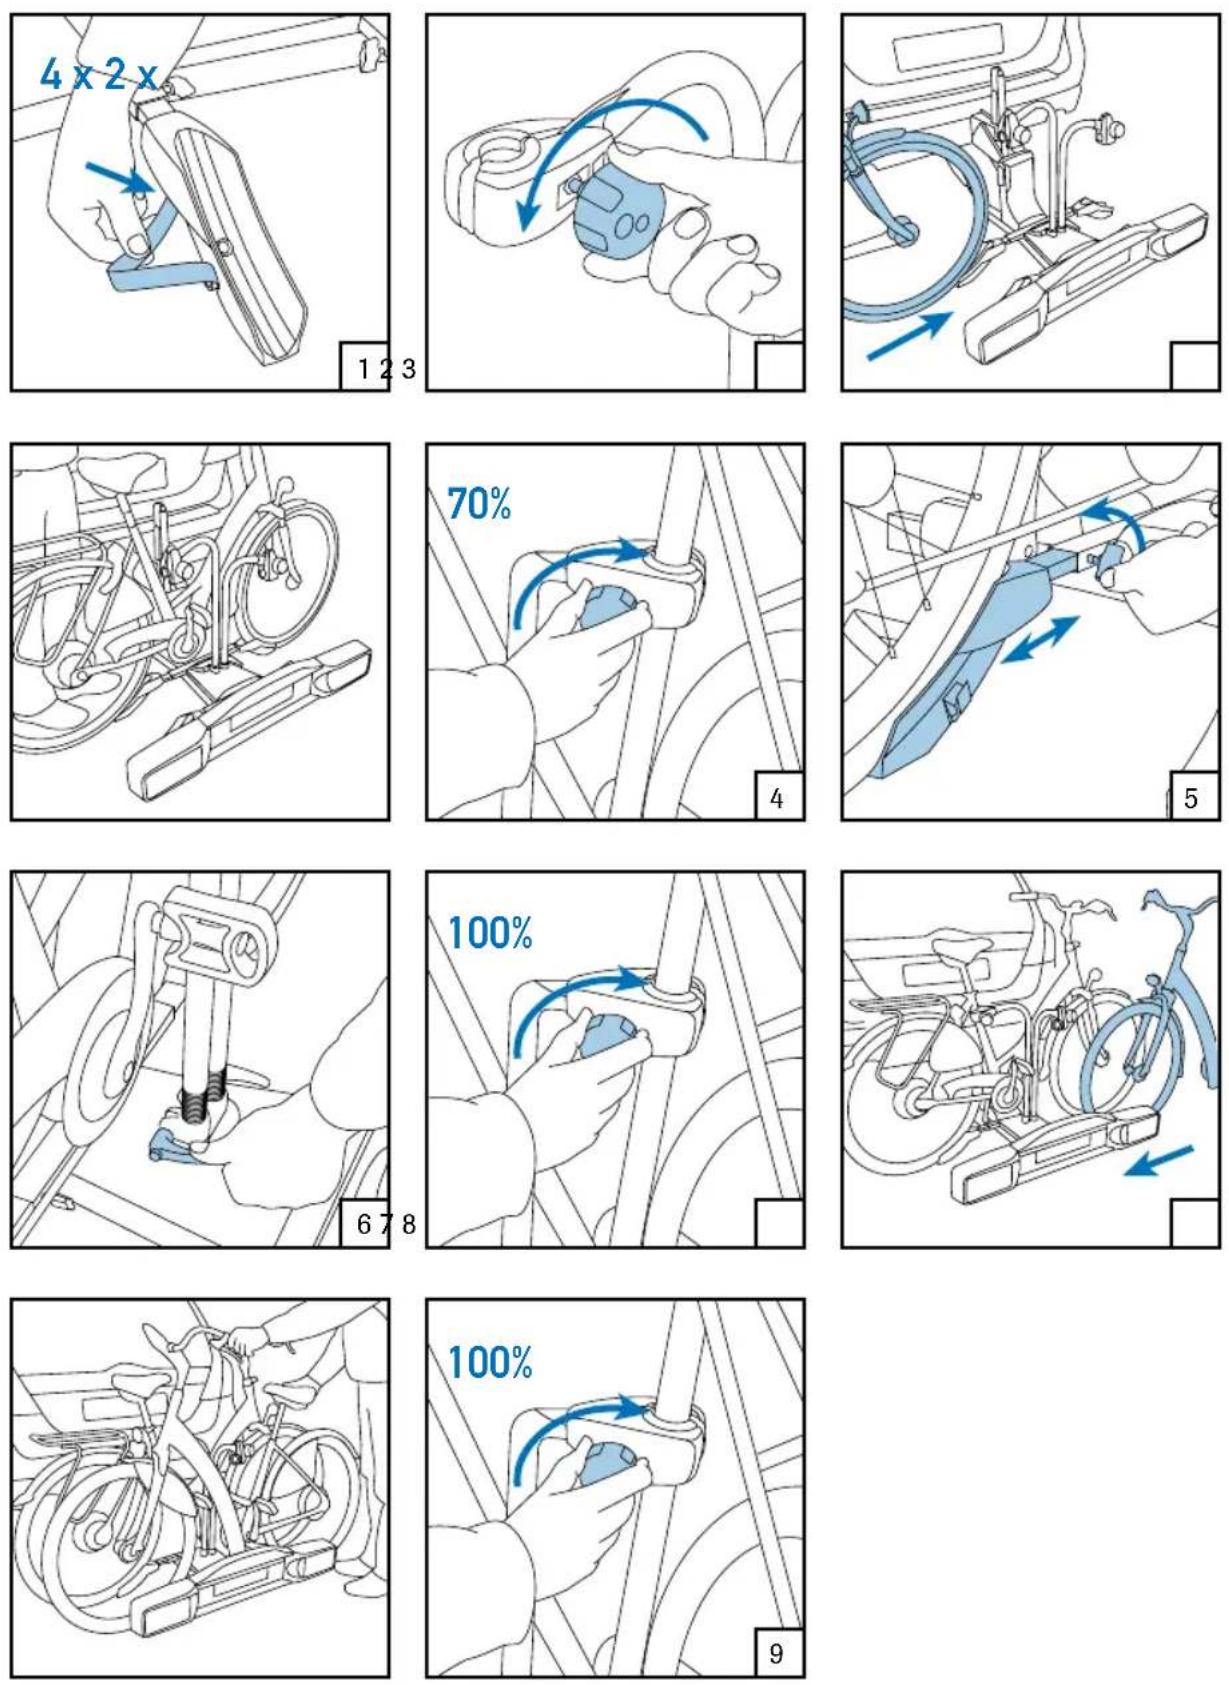
Bend the strap backwards and clamp it 1, loosen the frame clamps 2, ride up the first bicycle on the driver's side 3, tighten the frame clamps until they are finger tight 4, adjust the wheel rails and tighten the wing bolts 5, tighten the frame tube 6, tighten the frame clamp 7, ride up the second bicycle 8, repeat steps 4 to 7 9.

Rotating the carrier up and securing it
Place the lever 1, rotate the bicycle carrier up 2, end position 3, tighten the second lock 4, make sure the second lock is locked, fasten the wheel straps 5, lock the frame clamp 6.
natural_image
Illustration of a hand using a tool to adjust or install a mechanical component, with arrows indicating direction (no text or symbols present)3

natural_image
Illustration of a medical procedure with hands and tools, no visible text or symbols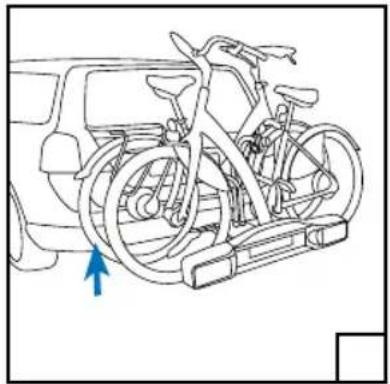
natural_image
Line drawing of a bicycle mounted on a stationary platform with a blue arrow indicating the direction (no text or symbols present)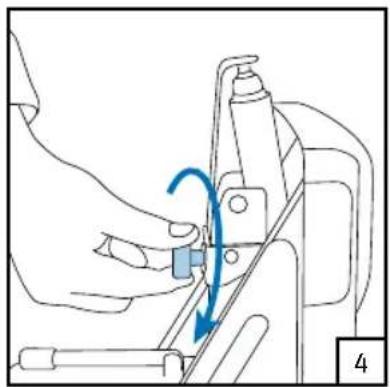
natural_image
Line drawing of a mechanical assembly with a blue arrow indicating motion (no text or symbols)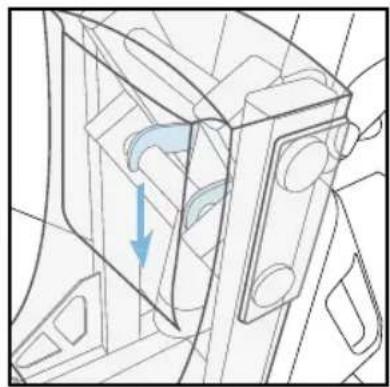
natural_image
Technical line drawing of a mechanical component with a blue arrow indicating direction (no text or symbols)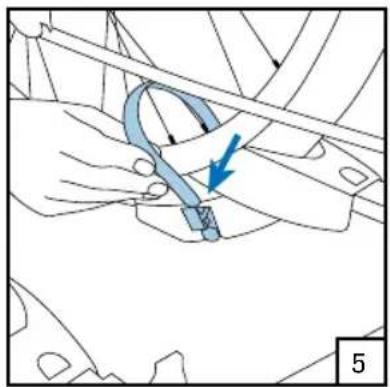
natural_image
Technical diagram showing a hand holding a mechanical component with a blue arrow indicating direction (no text or symbols present)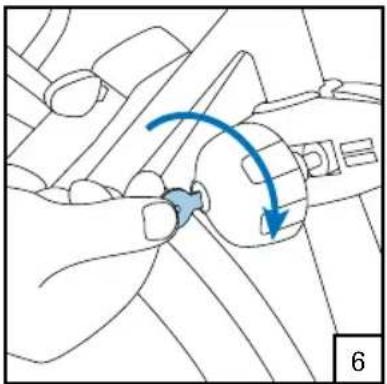
natural_image
Diagram of a mechanical component with a blue curved arrow indicating motion or force direction (no text or symbols present)Taking the bicycle off
Loosen the second lock 1, make sure the second lock is unlocked, place the lever 2, rotate the bicycle carrier down 3, uncouple the bicycles and take them down one by one 4.
natural_image
Line drawing of a hand operating a sewing machine with a blue arrow indicating rotation (no text or symbols)
natural_image
Illustration of a hand using a tool to adjust or install a mechanical component, with arrows indicating direction (no text or symbols present)
natural_image
Technical line drawing of a mechanical component with an arrow indicating direction (no text or symbols)
natural_image
Illustration of a robotic arm demonstrating a curved motion with directional arrows (no text or symbols)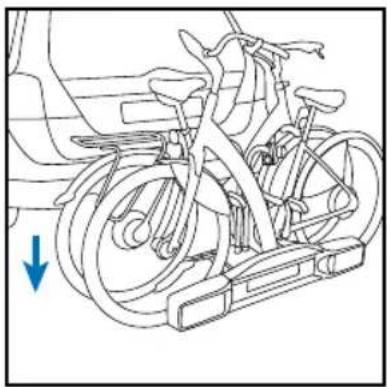
natural_image
Line drawing of a bicycle with wheels and a blue arrow indicating direction (no text or symbols)
natural_image
Line drawing of a bicycle with wheels and a blue bicycle handle, showing mechanical components without any text or symbols.
Guarantee
On presentation of the guarantee certificate and purchase ticket, Twinny Load ^® gives a seven-year guarantee on the Twinny Load ^® bicycle carrier, counting from the date of purchase as listed on the purchase ticket.
The guarantee consists of free repair or replacement of parts in case of material and construction errors.
The guarantee is effective after you have activated the guarantee certificate on the Twinny Load website www.twinnyload.com or via sending the reply card supplied with the guarantee certificate.
Terms and conditions:
- The bicycle carrier must be assembled according to the supplied installation instructions.
- The bicycle carrier must be installed on the car according to the supplied use instructions.
- The bicycles must be placed and fixed on the bicycle carrier according to the supplied use instructions.
- No changes may be made to the product.
- Any responsibility for personal injury and/or damage to properties and ensuing asset loss that are caused by improper installation or improper use shall be excluded.
- There shall be no guarantee on defects that are caused by accidents, illegal and incompetent use of the vehicle or defects of the vehicle on which the bicycle carrier is installed.
- The term of guarantee shall not be extended or renewed due to performance of guarantee activities.
- Repair or replacement of the product within the specified term of guarantee shall only be possible for the original buyer in accordance with the purchase certificate.
- Claims should be submitted at the purchasing address listed on the purchase ticket. The bicycle carrier, including all supplied components, must be left behind at this address.
- The buyer is responsible for the costs of returning and collecting the product and/or parts at the purchasing address.
- The guarantee shall be cancelled if the bicycle carrier has been handled carelessly and improperly or poorly maintained, such at the discretion of Twinny Load ^® .
- The guarantee shall be cancelled if the serial number has been changed, damaged or removed. The bicycle carrier must meet the technical specifications.
- The guarantee shall be cancelled if there is no purchase ticket, the ticket has been changed or is illegible.
- Defects as a result of wear due to normal use, such at the discretion of Twinny Load ^® , shall not fall under the guarantee.
Disclaimer
The guarantee does not cover materials not installed by Twinny Load®. The manufacturer's liability pursuant to the agreement is expressly limited to compliance with the guarantee obligations described in this certificate. Any claim for damages, except those in respect of non-compliance with guarantee obligations, is excluded. Taking into account the mandatory provisions of law concerning (product) liability, more rights can never derived with respect to any business or consequential loss, or (personal) loss of whatever nature, ensuing from defects to the materials or activities delivered by Twinny Load®.
Généralités
Poids en flèche
natural_image
Simple line drawing of two rectangular blocks with no text or symbols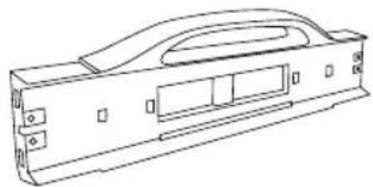
natural_image
Technical line drawing of a mechanical housing or enclosure component (no text or symbols)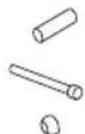
natural_image
Illustration of hands using a tool to adjust or install a mechanical component, with blue arrows indicating rotation or adjustment (no text or symbols present)
natural_image
Technical line drawing of a mechanical assembly with no visible text or symbols
natural_image
Illustration of a hand using a tool to adjust a blue mechanical component (no text or symbols visible)
natural_image
Line drawing of a hand holding a tool inside a device casing (no text or symbols)5

natural_image
Technical line drawing of a mechanical bracket assembly with a blue arrow indicating a specific part (no text or symbols present)
natural_image
Technical line drawing of a mechanical assembly with blue components and directional arrows (no text or symbols)
natural_image
Line drawing of hands assembling a mechanical component with a blue curved arrow indicating rotation (no text or symbols)
natural_image
Line drawing of a hand using a tool to adjust or install a mechanical component, with no visible text or symbols.
natural_image
Line drawing of a mechanical assembly with a blue arrow indicating a specific component (no text or symbols present)
natural_image
Illustration of a hand inserting a component into a window frame, with a blue arrow indicating direction (no text or symbols present)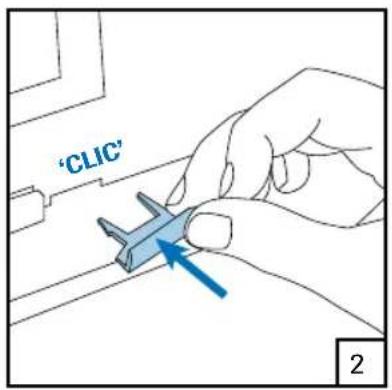
text_image
'CLIC' 2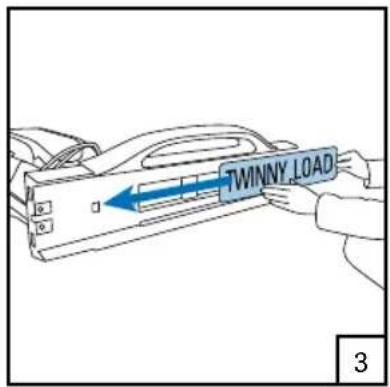
text_image
TWINNY_LOAD 3Attention!
text_image
Technical diagram showing mechanical assembly with blue arrows indicating directional components and numbered label '1'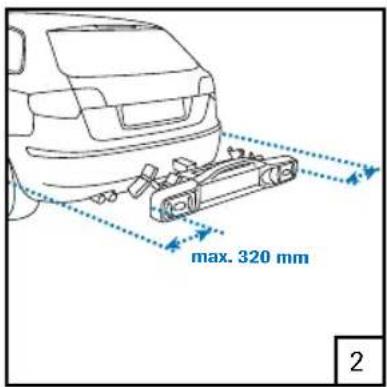
text_image
max. 320 mm 2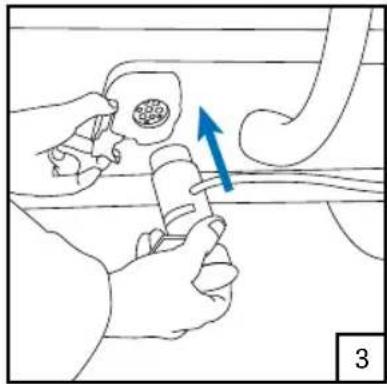
natural_image
Illustration of a hand holding a tool near a pipe with a blue arrow indicating direction (no text or symbols)
natural_image
Line drawing of a hand using a tool to adjust or install a mechanical component (no text or symbols visible)natural_image
Diagram of a vehicle's suspension system with two wheels and directional arrows indicating motion (no text or symbols)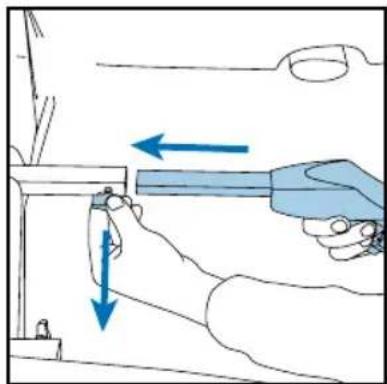
natural_image
Illustration of a hand using a tool to adjust or install a component, with arrows indicating direction (no text or symbols present)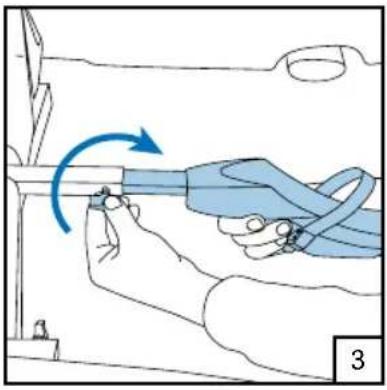
natural_image
Illustration of a hand holding a blue ribbon with a blue arrow indicating rotation, no text or symbols presentnatural_image
Line drawing of a person assembling or adjusting a vehicle chassis (no text or symbols visible)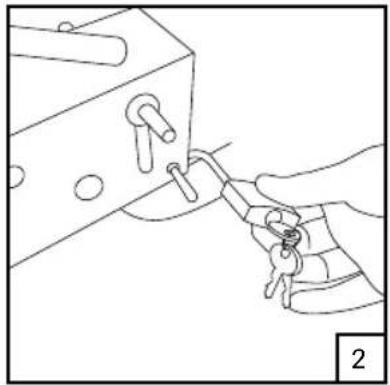
natural_image
Line drawing of a hand holding a key inserted into a mechanical component (no text or symbols)natural_image
Line drawing of a hand operating a mechanical device with a blue arrow indicating rotation (no text or symbols)
natural_image
Illustration of a hand using a tool to adjust or install a mechanical component, with arrows indicating direction (no text or symbols present)
natural_image
Technical line drawing of a mechanical component with an arrow indicating direction (no text or symbols)
natural_image
Diagram showing a person using a tool to lift a car, with a blue curved arrow indicating rotational motion (no text or symbols present)
natural_image
Mechanical assembly diagram showing a sewing machine with a blue arrow indicating direction (no text or symbols present)Attention!
natural_image
Technical line drawing of a mechanical assembly with a blue X mark and numbered reference (no text or symbols)
natural_image
Line drawing of a person using a mechanical device with a blue arrow indicating downward motion (no text or symbols)
natural_image
Mechanical assembly diagram showing a bracket with a blue checkmark and directional arrow (no text or symbols)Placer les vélos
natural_image
Line drawing of a hand operating a mechanical device with a blue arrow indicating rotation (no text or symbols)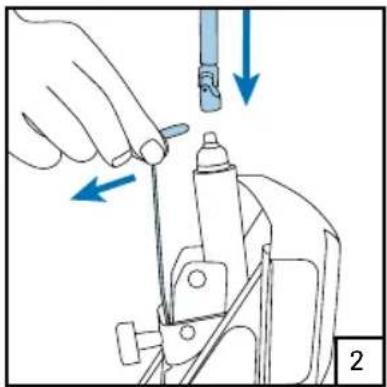
natural_image
Illustration of a hand using a tool to adjust or install a mechanical component, with arrows indicating direction (no text or symbols present)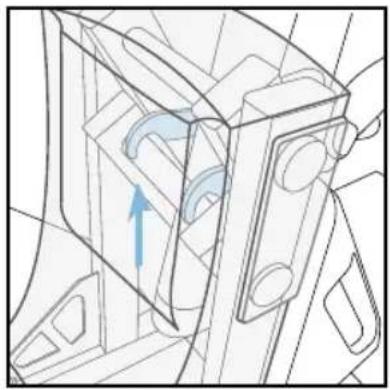
natural_image
Technical line drawing of a mechanical component with an arrow indicating direction (no text or symbols)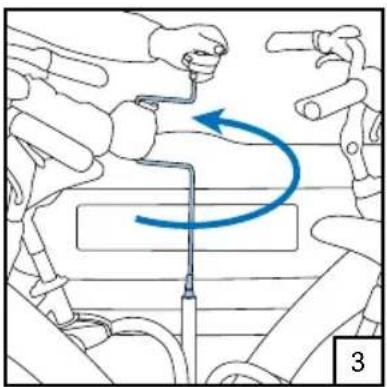
natural_image
Illustration of a robotic arm performing a manual maneuver with a blue arrow indicating rotational motion (no text or symbols)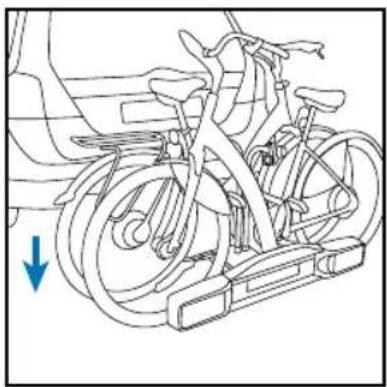
natural_image
Line drawing of a bicycle with wheels and a blue arrow indicating motion direction (no text or symbols)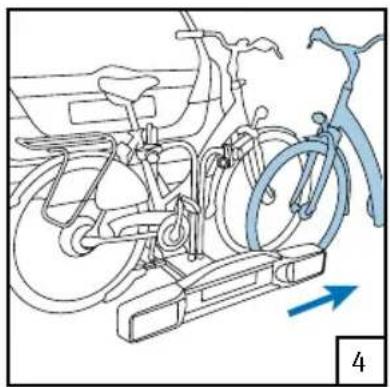
natural_image
Line drawing of a bicycle stationary system with wheels and a blue arrow indicating direction (no text or symbols)