Pure T8055 - Stroller Topmark - Free user manual and instructions
Find the device manual for free Pure T8055 Topmark in PDF.
User questions about Pure T8055 Topmark
0 question about this device. Answer the ones you know or ask your own.
Ask a new question about this device
Download the instructions for your Stroller in PDF format for free! Find your manual Pure T8055 - Topmark and take your electronic device back in hand. On this page are published all the documents necessary for the use of your device. Pure T8055 by Topmark.
USER MANUAL Pure T8055 Topmark
natural_image
Black leather seat with a side panel and camera mechanism (no text or symbols visible)PURE & FLAIR
0-6

0-9 kg
T8055
Gebruiksaanwijzing
Instrucon manual
Gebrauchsanleitung
Manuel d'instrucons
text_image
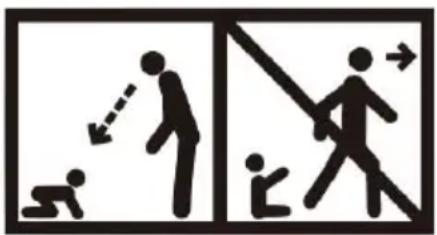
Safety warning illustration showing two scenarios: one with a person walking away and another with a person running away, both pointing to a child.MONTEREN/IN GEBRUIK NEMEN
natural_image
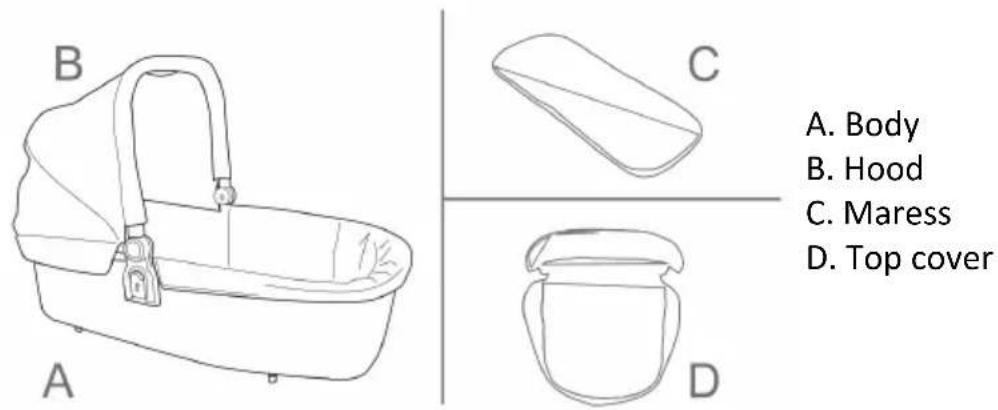
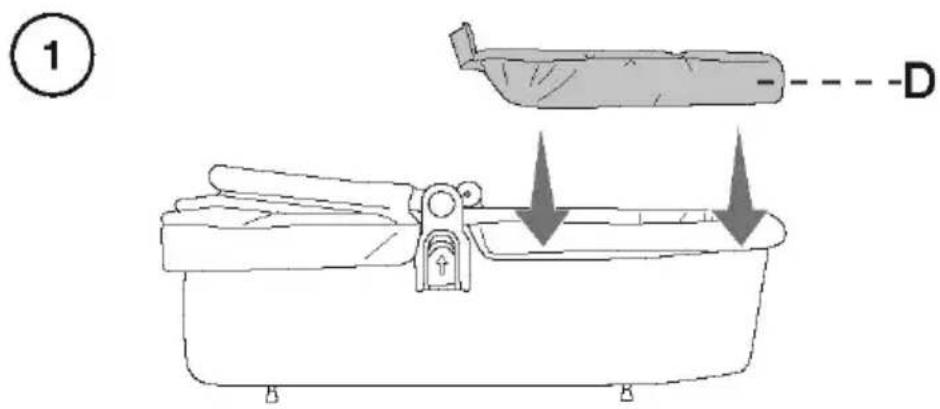
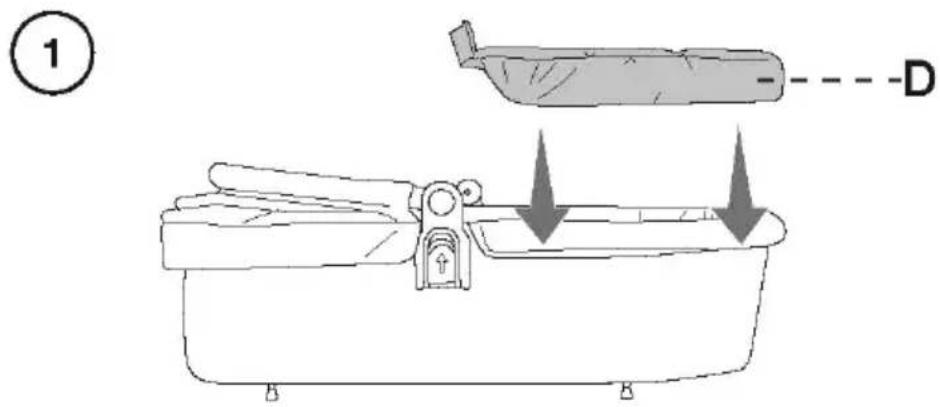
Line drawings of a basin with labeled parts A, B, C, D (no text or symbols on the basin itself)A. Reiswieg bak
B. Kap
C. matras
D. Dekje
text_image
Line drawing of a box with numbered parts labeled 1, 2, and 3natural_image
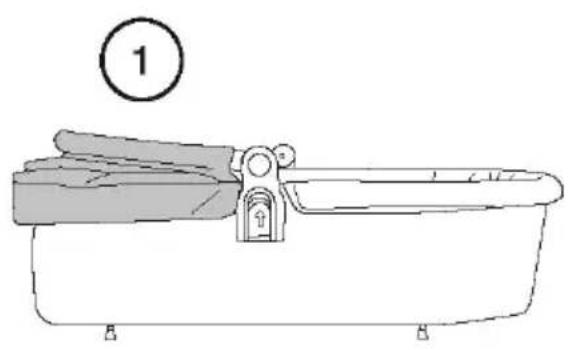
Line drawing of a bathtub with a handle and seat, marked with number 1 (no text or symbols on the diagram itself)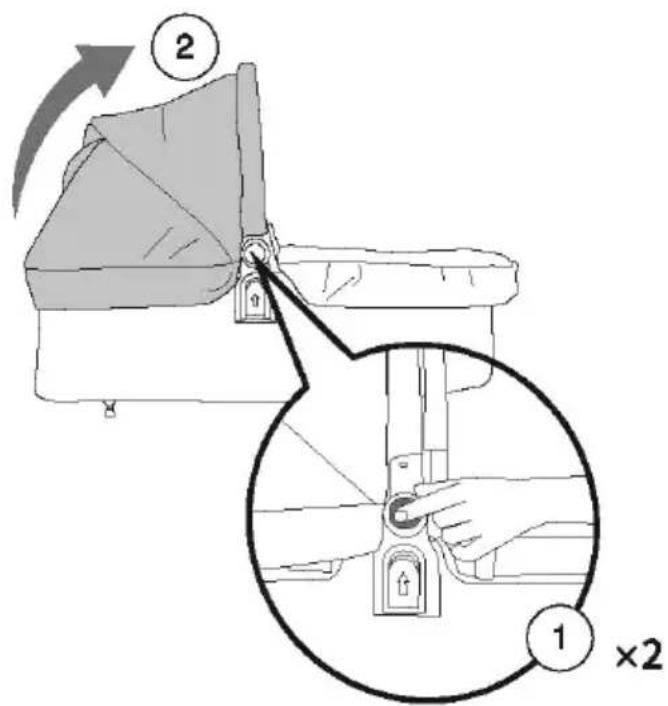
text_image
Diagram illustrating a sewing machine's seatbelt mechanism with labeled parts and magnified detail view3. DEKJE
1
text_image
Technical diagram showing a mechanical assembly with labeled component D and directional arrows indicating motion or force.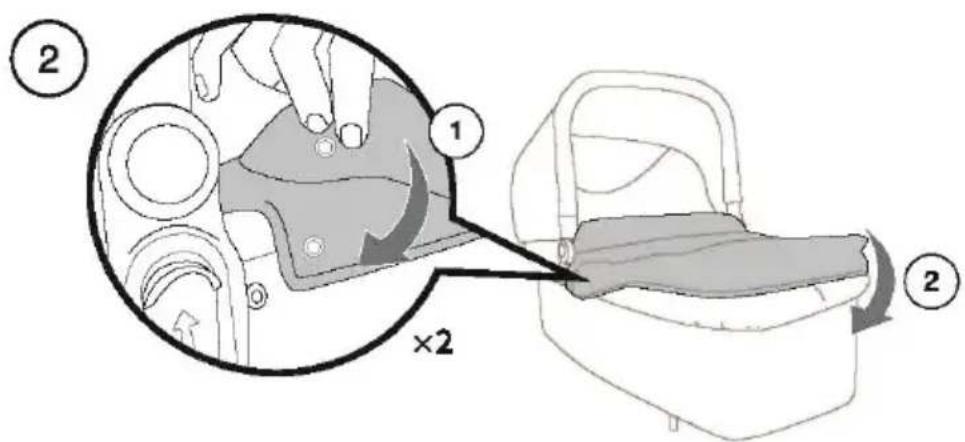
text_image
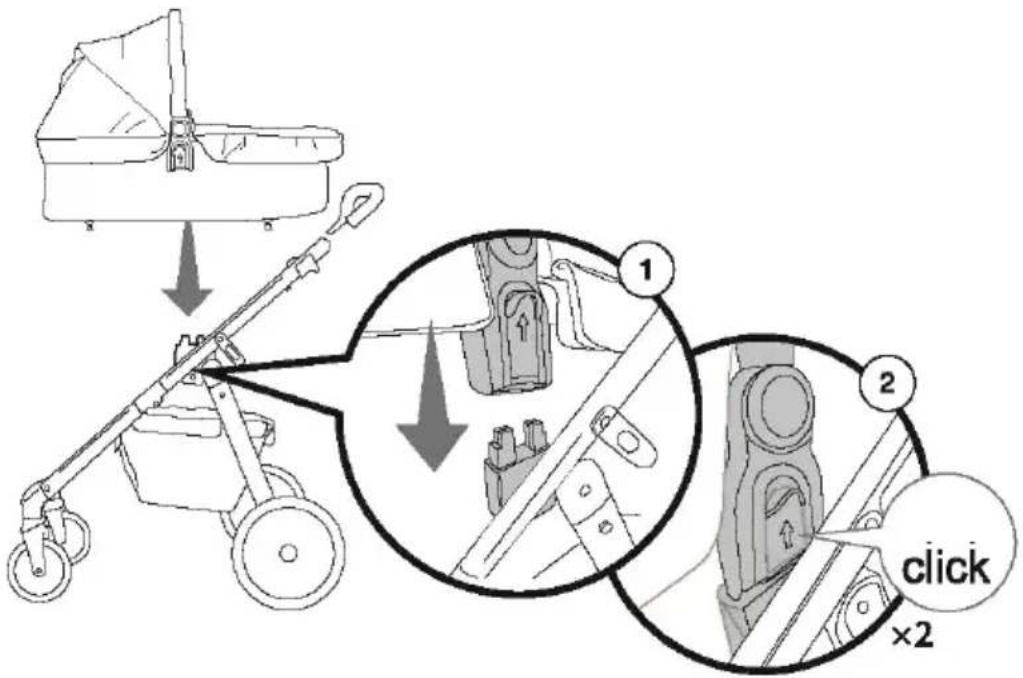
Diagram illustrating a hand operating a device with labeled parts and directional arrows, showing two steps (① and ②) for handling or assembly.MONTEREN/IN GEBRUIK NEMEN
4. BEVESTIGING VAN DE REISWIEG OP HET FRAME

text_image
Diagram illustrating a mechanical device with labeled parts and instructions, including zoomed-in views and a 'click' annotation.NL
5. VERWIJDEREN VAN DE REISWIEG

text_image
Technical diagram illustrating a stroller mechanism with labeled parts and directional arrows indicating motion or assembly.VERZORGING EN ONDERHOUD
IMPORTANT: KEEP FOR FUTURE REFERENCE.
- Read this instrucons carefully before use and keep for future reference.
- Your child's safety may be aected if you do not follow these instrucons.
- Use only spare parts delivered by importer for replacing parts or reparaon.
- Damages caused by overloading or wrong folding are not granted.
- Prolonged exposure to sunshine may cause changes in the colour of materials and fabrics.
- Do not expose this product to extreme temperatures. Extreme sunshine or temperatures may cause colour changes or bent parts.
WARNING
- Do not add additional maress.
- The use of this carry cot is recommended for children from 0-6 months.
- This product is suitable for a child who cannot sit up unaided, roll over and cannot push itself up on its hands and knees. Maximum weight of the child is 9 kg.
- This carry cot does not replace a cot or bed.
- Do not let other children play unaended near the carry cot.
- Do not use if any part is broken, torn or missing.
- Use only on a rm ground which is horizontal level and dry.
- Be aware of the risk of open re and other source of strong heat, such as electric bar res, gas res, etc. in the near vicinity of a child.
- Avoid hot liquids, power cables and other possible dangers may come within range of a child.
-
Do not allow more than 1 child in the carry cot.
-
This product is not suitable for running or skang.
- Handle and the boom should be inspected regularly for signs of damage and wear.
- Never leave your child unaended even for the shortest me.
- Never use the carry cot on a stand.
- Do not use the hard carry cot on an elevated area, for example a table or a chair etc.
- Accessories which are not approved by the manufacturer shall not be used.
- Replace any damaged parts immediately.
- Only replacement parts supplied or recommend by the manufacturer/distributor shall be used.
- This carry cot is applicable with chassis of PURE/T8050 and FLAIR/T8052.


WARNING
text_image
Safety warning illustration showing pictograms of a person using a tool to avoid falls and fall, with directional arrows indicating movement.ASSEMBLING/USING
Check if following spare parts are in the box:
text_image
A. Body B. Hood C. Maress D. Top coverIf one or more of the above menoned spare parts are missing or broken, please contact the store where you bought the product, before using.
WARNING:
Please keep all packaging material away from babies and children, to prevent suocaon.
text_image
Line drawing of a box with numbered parts labeled 1, 2, and 3- Removable top cover
- Buons to acvate the hood
- Hood adjustable in 3 posions
ASSEMBLING/USING
1. UNFOLD

text_image
① ×5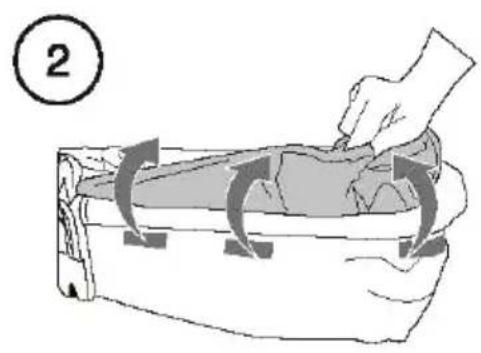
natural_image
Illustration of a hand pressing down on a mechanical component with directional arrows (no text or symbols)EN
text_image
③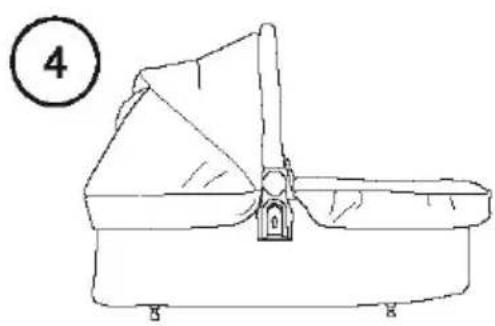
natural_image
Line drawing of a mechanical device with a handle and base, labeled with number 4 (no text or symbols on the diagram itself)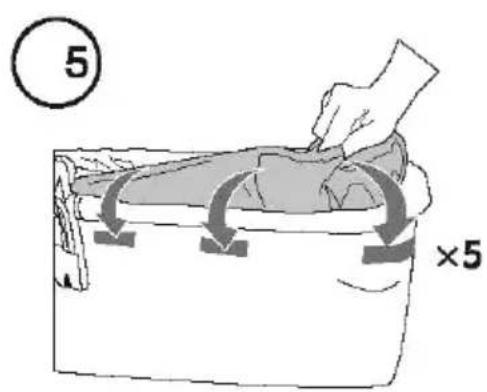
text_image
5 ×5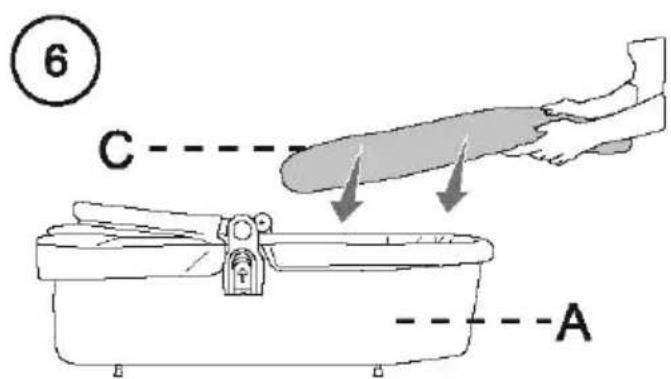
text_image
⑥ C AASSEMBLING/USING
2. HOOD
natural_image
Line drawing of a bathtub with a handle and lock, labeled with number 1 (no text or symbols on the diagram itself)
text_image
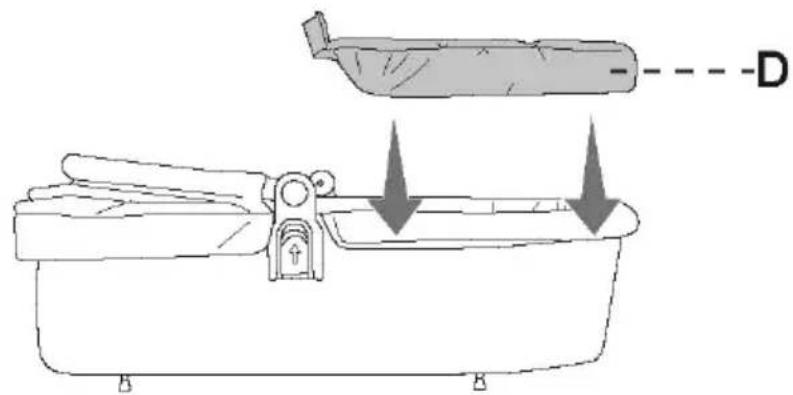
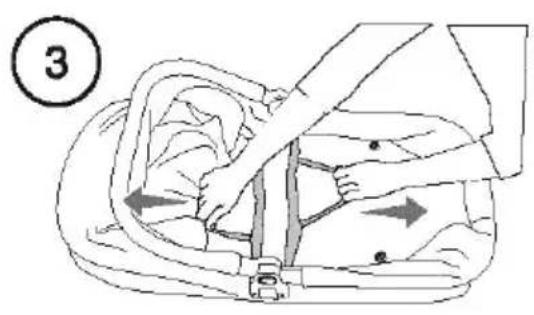
Diagram illustrating a sewing machine's seatbelt mechanism with numbered steps and magnified detail view3. TOP COVER
text_image
① D
text_image
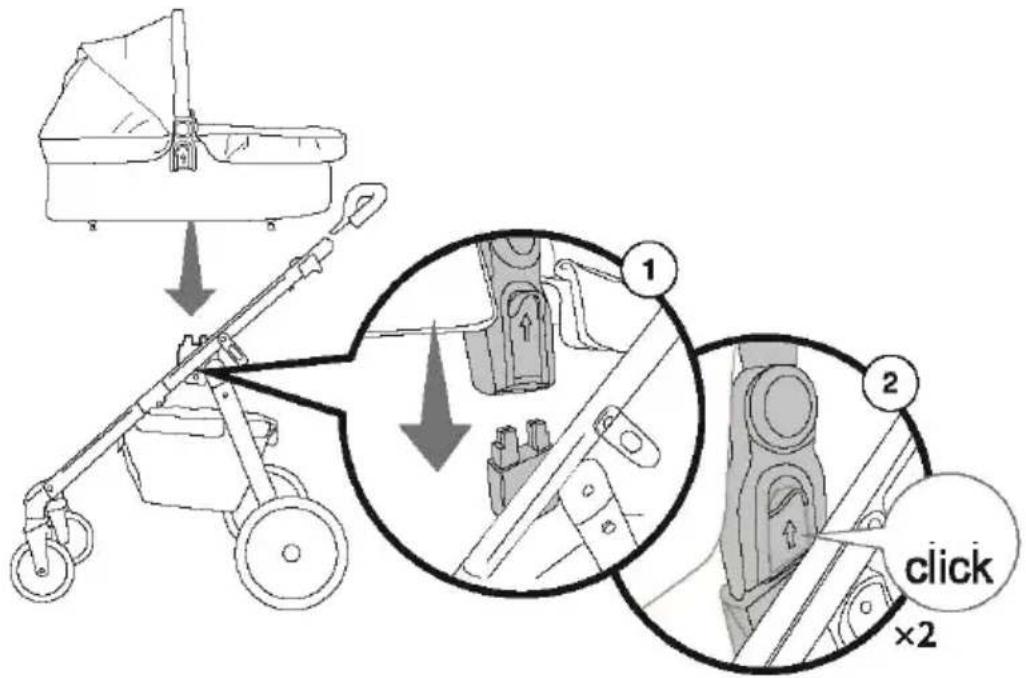
Diagram illustrating a hand operating a device with labeled parts and directional arrows, showing two steps (① and ②) for handling or assembly.ASSEMBLING/USING
4. FITTING CARRYCOT ONTO FRAME

text_image
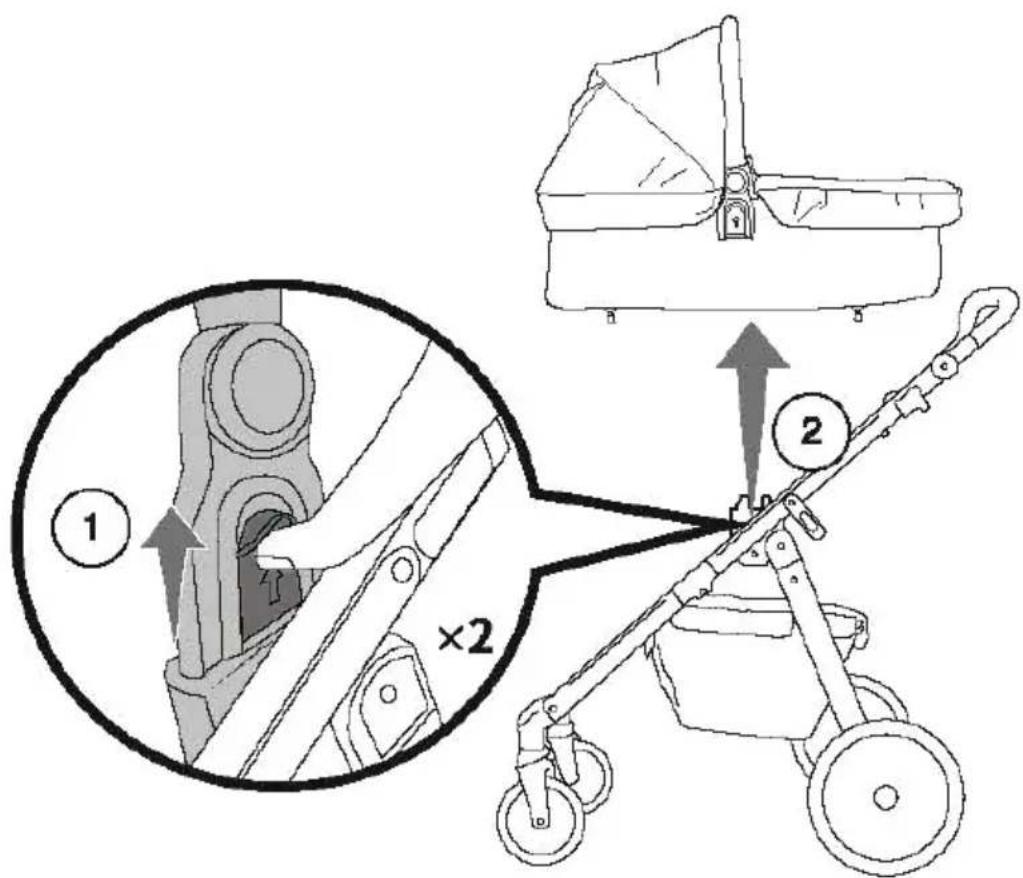
Diagram illustrating a mechanical device with labeled parts and instructions, including a zoomed-in view and click instruction.EN
5. REMOVE THE CARRYCOT

text_image
Technical diagram of a stroller with labeled parts and directional arrows indicating assembly or movement.CARE AND MAINTENANCE
To prolong the life of your nursery product, keep it clean and do not leave in the direct sunlight for extended periods of me.
Removable fabric covers and trims may be cleaned using warm water with a household soap or a mild detergent. Allow it to dry fully in the air, preferably away from direct sunlight.
Do not dry clean or use bleach.
Do not machine wash, tumble or spin dry, unless the care labelling on the product permits these methods.
Non removable fabric covers and trims may be cleaned using a damp sponge with soap or mild detergent. Allow it to dry completely before folding or storing it away. In some climates the covers and trims may be aected by mould and mildew. To help prevent this occurring, do not fold or store the product if it is damp or wet. Always store the product in a well venlated area.
Always check parts regularly for ghtness of screws, nuts and other fasteners, ghten if required. To maintain the safety of your nursery product, seek prompt repairs for bent, torn, worn or broken parts.
Use only parts and accessories approved by the supplier.
GUARANTEE
We grant 2 year guarantee on this product commencing on the date of purchase. Within the guarantee period we will eliminate, free of charge, any defects in the appliance resulting from faults in materials or workmanship, either by repairing or replacing the complete product.
This guarantee does not cover: damage due to improper use, normal wear or use as well as defects that have a negligible effect on the value or operation of the product.
Damages caused by overloading or wrong folding are not granted.
To obtain service within the guarantee period, hand in the complete product with your sales receipt to the store where the product has been bought.
The warranty applies only to the rst owner and is not transferable.
Top Mark B.V.
Postbus 308
8200 AH Lelystad
NETHERLANDS
service@topmark.nl
www.topmark.nl
EN1466
text_image
Diagram illustrating human walking and deflection rules with labeled figures and directional arrowsMONTAGE/GEBRAUCH
natural_image
Line drawings of a baby basin with labeled parts A, B, C, D (no text or symbols on the basin itself)A. Körper
B. Verdeck
C. Matratze
D. Abdeckung
DE
text_image
Line drawing of a box with numbered parts labeled 1, 2, and 3natural_image
Line drawing of a bathtub with a handle and lock, labeled with number 1 (no text or symbols on the diagram itself)DE
3. ABDECKUNG
text_image
① D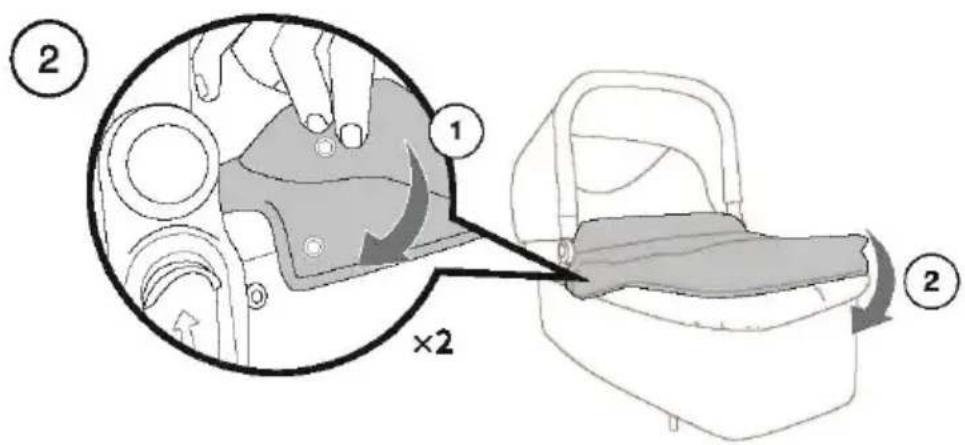
text_image
Diagram illustrating a hand operating a device with labeled parts and directional arrows, showing two steps (① and ②) for handling or assembly.MONTAGE/GEBRAUCH
text_image
Diagram illustrating a two-step car shift mechanism with labeled steps and instructionsDE
text_image
Technical diagram of a stroller with labeled parts and directional arrows indicating assembly or movement.PFLEGE
text_image
Diagram showing two scenarios of human walking and climbing, with arrows indicating movement direction.MONTAGE/UTILISATION
natural_image
Line drawing of a baby bathtub with labeled parts A, B, C, D (no text or symbols on the basin itself)A. Corps
B. Capote
C. Matelas
D. Couvre
text_image
Technical diagram of a box with numbered parts labeled 1, 2, and 3natural_image
Line drawing of a bathtub with a handle and lock, labeled with number 1 (no text or symbols on the diagram itself)
text_image
Diagram illustrating a sewing machine's seatbelt mechanism with labeled parts and magnified detail viewFR
3. COUVRE

text_image
① D
text_image
Diagram illustrating a hand operating a device with labeled parts and directional arrows, showing two steps (① and ②) for handling or assembly.MONTAGE/UTILISATION
4. MONTAGE COUFFIN SUR LE CHASSIS
text_image
Diagram illustrating a two-step car shift mechanism with labeled steps and instructions5. DEMONTAGE
text_image
Technical diagram showing a stroller with two labeled parts (1 and 2) and an inset view of the device's handle structure.SOIN ET ENTRETIEN
text_image
Safety warning illustration showing pictograms of human and child walking with directional arrows indicating movement or safety.INSTALLATION/USO
text_image
Line drawing of a box with numbered parts labeled 1, 2, and 3natural_image
Line drawing of a bathtub with a handle and lock, labeled with number 1 (no text or symbols on the diagram itself)
text_image
Diagram illustrating a sewing machine's seatbelt mechanism with labeled parts and magnified detail view3. CUBIERTA

text_image
① D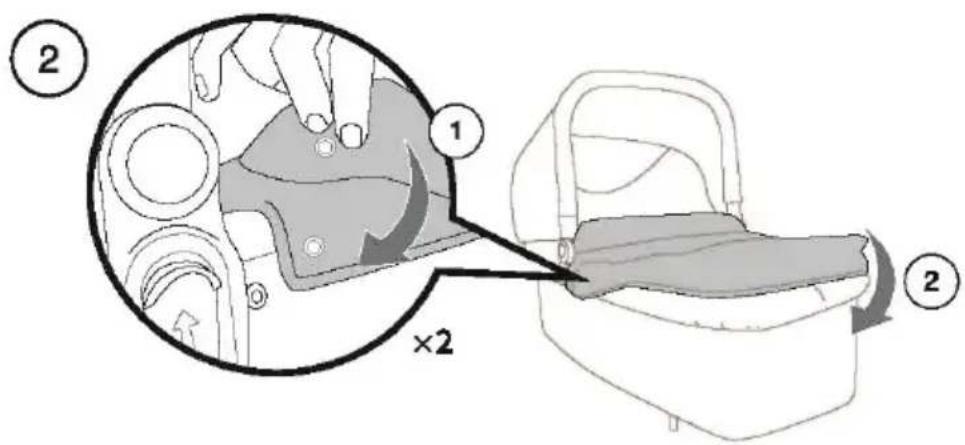
text_image
Diagram illustrating a mechanical assembly process with labeled parts and directional arrows, showing two steps of assembly.ES
INSTALLATION/USO
4. CAPAZO MONTAJE EN CHASIS
text_image
Diagram illustrating a mechanical device with labeled parts and instructions, including zoomed-in views and a 'click' annotation.5. RETIRE EL CAPAZO
ES