
CM310050 - Cooker CONSTRUCTA - Free user manual and instructions
Find the device manual for free CM310050 CONSTRUCTA in PDF.
| Product type | Built-in electric cooker |
| Brand | Constructa |
| Model | CM310050 |
| Cooking type | Electric hotplates |
| Number of cooking zones | 4 (estimated) |
| Power levels | 6 or 9 positions depending on version |
| Supply voltage | 230 V (standard) |
| Frequency | 50 Hz |
| Table material | Enamel and stainless steel |
| Maintenance | Water and soap, drying, oiling the burners |
| Steam cleaning | Prohibited |
| Safety | Do not use a steam cleaner; cut off power in case of incident |
| Installation | Built-in, min. distance 80 mm from a wall |
| Connection | By authorized technician, grounding mandatory |
| Warranty | Upon presentation of proof of purchase |
| Technical Service | Contact for repairs |
| Manual | 101 pages, multilingual (FR, DA, DE, EL, EN, ES, FI, IT, NL, NO, SV) |
Frequently Asked Questions - CM310050 CONSTRUCTA
User questions about CM310050 CONSTRUCTA
0 question about this device. Answer the ones you know or ask your own.
Ask a new question about this device
Download the instructions for your Cooker in PDF format for free! Find your manual CM310050 - CONSTRUCTA and take your electronic device back in hand. On this page are published all the documents necessary for the use of your device. CM310050 by CONSTRUCTA.
USER MANUAL CM310050 CONSTRUCTA
de BEDIENUNGS-UND MONTAGE-ANWEISUNG.... 2
en OPERATING AND INSTALLATION INSTRUCTIONS.... 11
nl BEDIENINGS- EN MONTAGEAANWIJZINGEN.... 20
fr MODE D'EMPLOI ET DE MONTAGE.... 29
it ISTRUZIONI PER L'USO ED IL MONTAGGIO.... 38
es INSTRUCCIONES PARA EL USO Y MONTAJE...... 47
el OΔΗΓΙΕΣ ΧΡΗΣΗΣ ΚΑΙ ΜΟΝΤΑΡΙΣΜΑΤΟΣ.... 56
sv ANVISNINGAR FOR MONTERING OCH ANVANDNING...... 66
da BRUGS- OG INSTALLATIONSVEJLEDNING....74
⑪ KAYTTO-JA ASENNUSOHJEET 83
no BRUKS- OG MONTERINGSANVISNING.... 92
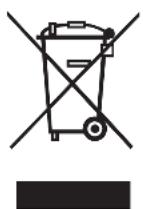
Built-in electric hob unit
Electric hotplates 12
Before using for the first time 12
Operation 12
Warnings for use 13
Cleaning and maintenance 14
Enamel surfaces 14
Stainless stell surfaces 14
Preventing damages 14
Technical Assistance Service 15
Warranty conditions 15
Packaging and old appliances 15
Disposing in an environmentally-responsible manner 15
Hob installation 16
Safety precautions.... 16
Before installing 16
Preparing the kitchen unit 17
Hob installation 17
Hob connection 17
emoval of cooking hob 18
⚠️ Important notes
Read these instructions carefully. Reading these instructions will enable you to use yopur appliance safely and effectively.
These operating instructions should be retained, and passed onto the owner if the appliance is sold.
The manufacturer is exempt from all responsibility resulting from non-compliance with the requirements of this manual.
Safety precautions
All installation and connection operations must be carried out by an authorised technician, in line with legal regulations and guidelines in force in the country, and local electricity providers' guidelines. It is recommended that you call our Technical Assistance Service for any of these jobs.
This appliance has been designed for home use only.
Do not tamper with the appliance's interior. If necessary, call our Technical Assistance Service.
Do not switch on the appliance if it is damaged in any way. Contact our Technical Assistance Service.
The surfaces of cooking appliances heat up during use. Care must be taken when using these appliances. Keep out of the reach of children.
This appliance is only intended for cooking purposes, not as a heating system.
Fat or oil which is overheated can catch fire easily. Never leave fat or oil to heat up unattended. If it does catch fire, never use water to put the fire out. Risk of burns! Put the fire out by covering the pan with a lid and switch off the hotplate.
In the event of a malfunction, switch off the appliance's power supply. For repairs, call our Technical Assistance Service.
Do not clean the appliance using steam cleaners. Risk of electrocution!
Electric hotplates
Before using for the first time
To remove the new smell, switch the hotplates on to full power for five minutes, one by one, without placing any pans on top. Do not switch more than one hotplate on at a time. At this point it is normal to notice smoke and odours, but these will disappear over time.
Caution! Do not operate the hotplates without placing pans on top, except during this initial heating phase.
Operation
Switching on
Turn the knob clockwise to the required setting.
Setting 1: low power.
Setting 6 or 9 (depending on the model): full power
Tip It is recommended to start cooking on full power and then to use intermediate power levels after a few minutes.
Switching off
Turn the knob anticlockwise to the off setting.
Residual heat
The electric hotplates can be switched off slightly before the end of the cooking time. The residual heat will enable you to continue cooking for several minutes, thus saving energy.
Suggestions
The following suggestions are intended as a guide only. Increase the power for:
■ large quantities of liquid,
■ preparing large quantities of food,
■ using pans without lids.
| Power (6 settings) | Power (9 settings) | |
| Melting: chocolate, butter, gelatin 1 - 2 1 - 2 | ||
| Cooking: rice, béchamel sauce, ragout 1 - 2 2 - 3 | ||
| Cooking: potatoes, pasta, vegetables 2 - 3 4 - 5 | ||
| Searing: stews, roast joints 2 - 3 4 - 5 | ||
| Steaming: fish 3 5 | ||
| Heating, warming: ready meals 3 - 4 2 - 3 - 4 - 5 | ||
| Grilling: cutlets, steaks, omelettes 4 - 5 6 - 7 - 8 | ||
| Cooking and browning 6 9 |
Warnings for use
The following advice is intended to help you save energy and prevent cookware damage:
- Use pans which are suitably sized for the hotplate. The diameter of the base of the pan should match that of the hotplate, and should not be smaller.
■ Use a pan with thick flat base. - Do not use damaged cookware, which does not sit evenly on the hotplate.
- Place the pan in the centre of the hotplate. Otherwise it could be overturned.
■ Always use the pan lids when cooking. - Do not strike the hob and do not place excessive weight on it.
■ Pans should be placed on the hob carefully. - Do not cover the hob with aluminium foil or similar products when cooking. This could damage the hob.
- Do not allow liquids to boil over onto the hob and hotplates. Use deep pans when cooking with large quantities of liquid.
- The hob must be kept dry. Salt water and wet pans can damage the hob. Do not cook with wet pans.
Cleaning and maintenance
Any food which spills onto the hob must be cleaned off immediately with a dishcloth.
Once the hotplates are cool, they should be cleaned with soap and water.
Dry the hob. Moisture may cause the hotplates to rust over time. Wet hotplates should be dried quickly.
To protect the surface of the hotplates, treat them using an oil or other protective product available on the market.
The edges of the hotplates may turn slightly yellow with use. This is normal. Clean the edges using a stainless steel cleaner. These cleaners must not be used on areas with printed symbols. The symbols may be wiped off.
Enamel surfaces
Clean the cooking hob using a damp cloth.
Do not use a abrasive cleaning products or scouring sponges. This could cause the hob to lose its shine.
Stainless steel surfaces
Over time, bluish or yellowish stains may appear on the hob and around the edges of the hotplates. Use stainless steel cleaners.
Do not use abrasive cleaning products.
Preventing damages
The hob must be kept dry. Salt water and wet pans can damage the hob.
Try not to spill salt on the hob.
Never use sharp instruments, knives, etc. to remove bits of hardened food that have stuck to the hob.
Do not clean the appliance using steam cleaners; this could cause damage.
Technical Assistance Service
When contacting our Technical Assistance Service, please provide the product number (E-Nr.) and production number (FD) of the appliance. This information is given on the specifications plate of the appliance and can be found on the sticker in the instruction manual.
Warranty conditions
The applicable warranty conditions are those set out by the company's representative office in the country of pruchase. Detailed information is available from retail outlets.
Proof of purchase must be presented to obtain the benefits of the warranty.
We reserve the right to introduce changes.
Packaging and old appliances
If the symbol appears on the specifications plate, follow these instructions:
Disposing in an environmentally-responsible manner
Unpack the appliance and dispose of the packaging in an environmentally-responsible manner.
This appliance is labelled in accordance with the European Directive 2002/96/EC concerning used electrical and electronic appliances (waste electrical and electronic equipment - WEEE).
The guideline determines the framework for the return and recycling of used appliances as applicable.
Hob installation
These instructions must be read carefully before proceeding to install the appliance.
The manufacturer is exempt from all responsibility resulting from non-compliance with the requirements of this manual.
Safety precautions
All installation and connection operations must be carried out by an authorised technician, in line with legal regulations and guidelines in force in the country, and local electricity providers' guidelines. It is recommended that you call our Technical Assistance Service for any of these jobs.
This appliance has been designed for home use only.
Before you begin, turn off the appliance's electricity supply.
The appliance's electrical connection cables must not be in contact with the hot parts of the hob. This could cause damage to the cable insulation.
Appliances with any electrical component must be earthed.
Do not tamper with the appliance's interior. If necessary, call our Technical Assistance Service.
Check that the hob is compatible with the oven or control module.
Before installing
The units next to the appliance must be made of non-inflammable materials. The laminated covering and and glue for adhering it must be heat resistant.
This appliance cannot be installed on fridges, washing machines, dishwashers or similar.
Preparing the kitchen unit
If installing your hob close to a wall or the side of a cupboard, allow a minimum distance of 80mm between the opening for the built-in appliance and the wall.
The work surface must be cut as shown in the drawing (minimum 38mm thick).
Coat the surfaces with a moisture and heat-resistant varnish. For tiled work surfaces, seal the joints where the tiles meet with silicone rubber. Use heat-resistant adhesives ( >150^ ) for all bonding operations around the hob.
If the base of the control module hob is accessible, a separator must be fitted at least 100mm from the hob base, to prevent any contact.
Hob installation
- Fit the clamps at the points provided. These points must not be machined.
- Tighten the clamps via the upper hole. Use the lower hole on tiled work surfaces.
- Affix the adhesive joint along the edge of the plate. The ends of the joint must not overlap.
- Before fitting the hob into the built-in opening, check that the colour of the plug matches the colour of the connector.
- Position the hob via the opening and fit it in place by pressing upwards. Feed the cables through to the front section.
Hob connection
Check that the power and voltage of the appliance given on the specifications plate are compatible with the electrical installation.
This appliance is type "Y": The input cable must only be changed by the Technical Assistance Service. The cable type and minimum cross-section must be respected.
-
Connect the hob and the control module or oven to the electricity supply. Do not switch any of the appliances on at the mains.
-
Tighten the grounding clip (green and yellow cable) of the hob to the clip on the oven or control module.
- Connect the various hotplate plugs into the corresponding sockets. The colour marked on the cable must match the colour of the dot next to the socket.
- Fit the oven or control module in place, taking care not to damage any cables.
Note: Once installed, if the hob does not work, check the main supply fuses. If it still does not work, call an authorised technician.
Removal of cooking hob
- Switch off the power supply to the oven. Always switch off the power supply before disconnecting the grounding clip.
- Disconnect the grounding clip (green and yellow cable).
- The oven is disassembled in the reverse order to assembly.
Service Technique 33
Conditions de garantie 33
Earth connection. Fitted kitchen
Aansuizing aardingskabel. Inbouworhuis Compassione del cabo di massa e terra. Cicupio ad incastro


- ⚠️ Important notes
- Safety precautions
- Electric hotplates
- Before using for the first time
- Operation
- Switching on
- Switching off
- Residual heat
- Suggestions
- Warnings for use
- Cleaning and maintenance
- Enamel surfaces
- Stainless steel surfaces
- Preventing damages
- Technical Assistance Service
- Warranty conditions
- Packaging and old appliances
- Disposing in an environmentally-responsible manner
- Hob installation
- Before installing
- Preparing the kitchen unit
- Hob connection
- Removal of cooking hob
Brand : CONSTRUCTA
Model : CM310050
Category : Cooker