
K 303 I - Fridge MIELE - Free user manual and instructions
Find the device manual for free K 303 I MIELE in PDF.

User questions about K 303 I MIELE
0 question about this device. Answer the ones you know or ask your own.
Ask a new question about this device
Download the instructions for your Fridge in PDF format for free! Find your manual K 303 I - MIELE and take your electronic device back in hand. On this page are published all the documents necessary for the use of your device. K 303 I by MIELE.
USER MANUAL K 303 I MIELE
Warning and Safety instructions 70
To the customer: Instructions for use 72
Service engineer fitting instructions 73
Possible combinations. 73
Fitting instructions 73
Installation and connection 73
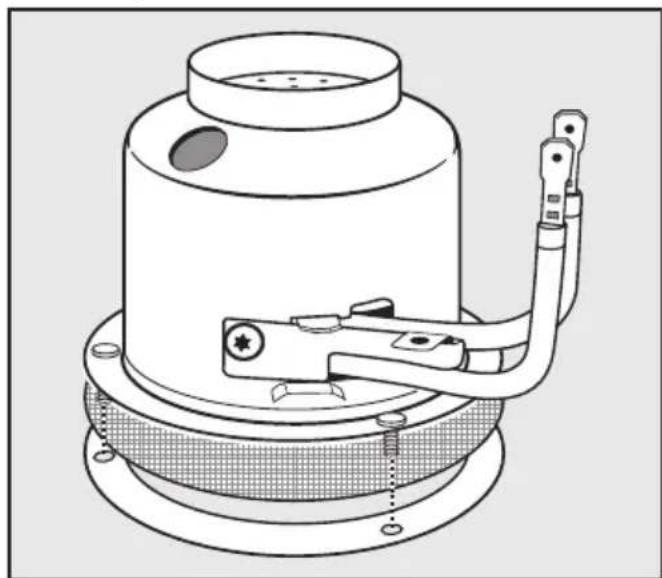
① Catalyser
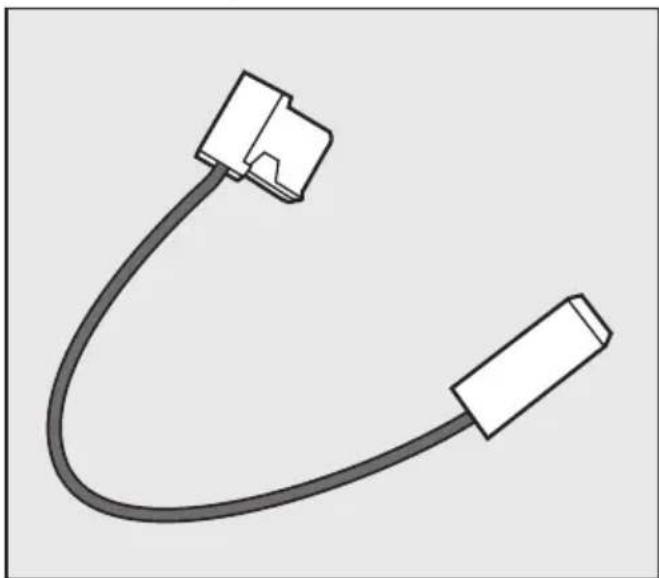
④ Connecting cable
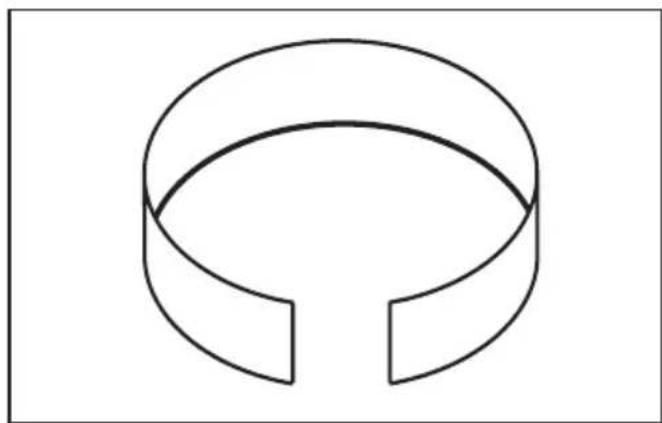
② Fitting guide
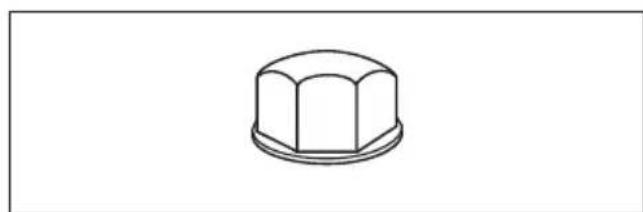
⑤Dome nuts (x 3)
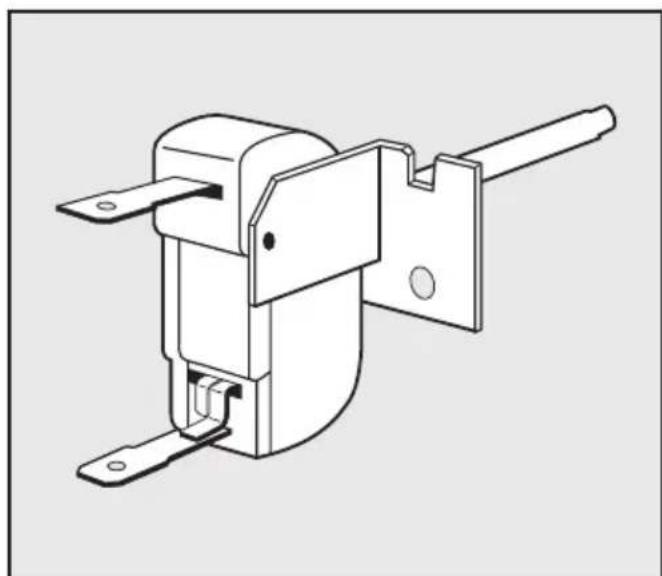
③ Temperature regulator
Self-tapping screw
This appliance complies with all relevant legal safety requirements. Incorrect use can lead to personal injury as well as damage to the appliance.
The catalyser must be installed and then maintained by a suitably qualified and competent person in accordance with current safety legislation.
Read these instructions carefully before installation and before using it for the first time. They contain important notes on installation, use and maintenance of the appliance.
Keep these operating instructions in a safe place and pass them on to any future user.
Correct usage
The K 303/K303-1 catalyser may only be used in the following Miele
ovens / cookers: H 331, H 341, H 334, H 344, H 353, H 363, H 355, H 365 and H 357.
It must not be fitted to any other oven as this could be dangerous.
The manufacturer cannot be held liable for damage caused by incorrect fitting or improper use.
Technical safety
To prevent the risk of damage to the appliance, before connecting the catalyser to the mains supply, make sure that the connection data on the packaging correspond to the voltage and frequency of the household electricity supply.
Consult a competent person if in doubt.
The electrical safety of this appliance can only be guaranteed when continuity is complete between the appliance and an effective earthing system, which complies with local and national safety regulations. It is most important that this basic safety requirement is present, and where there is any doubt the wiring system in the house should be tested by a qualified electrician. The manufacturer cannot be held liable for the consequences of an inadequate earthing system (e.g. electric shock).
The appliance must only be operated when built-in to ensure that all electrical components are shielded.
Never open the housing of the appliance. Contact with current bearing components and alterations to the electrical or mechanical structures are dangerous and could lead to injury and malfunction of the appliance.
Installation work and repairs may only be carried out by suitably qualified and competent persons to ensure safety.
Repairs and other work by unqualified persons could be dangerous and the manufacturer will not be held liable.
The appliance is only completely isolated from the electricity supply when:
- it is switched off at the wall socket, or
- the oven mains fuse is withdrawn, or
- the screw-out fuse for the oven is removed in countries where this is applicable.
Do not connect the appliance to the mains electricity supply by an extension lead.
Extension leads do not guarantee the required safety of the appliance, (e.g. danger of overheating).
If you wish to complete a cooking process using the residual heat, do not switch the appliance off. Leave the oven selector at the chosen position and turn the temperature selector to the lowest setting.
Failure to do this could result in deposits remaining in the catalyser, causing an unpleasant smell the next time the oven is used.
In countries where there are areas which may be subject to infestation by cockroaches or other vermin, pay particular attention to keeping the appliance and its surroundings in a clean condition at all times. Any damage which may be caused by cockroaches or other vermin will not be covered by the appliance guarantee.
Disposal of your old appliance
Before discarding an old appliance, switch off and disconnect it from the power supply. This should be done by a competent person. Cut off and render any plug useless. Cut off the cable directly behind the appliance to prevent misuse.
The manufacturer cannot be held liable for damage caused by non-compliance with these Warning and Safety instructions.
The catalyser is fitted into the oven's ventilation system.
It filters fat from the escaping vapours and thus reduces cooking smells.
Before using for the first time
When using the catalyser for the first time following installation, you may notice an unpleasant smell. This will quickly disappear if you heat the oven up with nothing in it for approx. 30 minutes.
Select Fan Heat together with
The highest temperature setting.
On models with a timer, you can set this procedure to finish automatically.
Please ensure the room is well ventilated during this operation.
Please note:
If you wish to complete cooking using residual heat do not switch the oven off.
Leave the selector at the chosen position and turn the temperature selector down to the lowest setting.
Failure to do this could result in deposits remaining in the catalyser, causing an unpleasant smell the next the time oven is used.
Possible combinations
The K 303/K 303-1 catalyser may only be combined with the following Miele ovens and cookers:
H331,H341
H334,H344
H353,H363
H355,H365
H357
Fitting instructions
The catalyser must only be fitted by a suitably qualified and competent person. Faulty installation could expose the user to considerable danger.
The necessary connection data and model name are located on the catalyser packaging.
The connection data must correspond to the voltage and frequency of the household electricity supply and of the oven/cooker.
After fitting the catalyser
The oven/cooker must be tested in accordance with local and national safety regulations.
Installation and connection
Turn off the mains electricity supply.
Remove the oven door.
Pull the oven/cooker out of its niche.
- Unscrew the upper housing cover and the electrical connection cover plate.

Pull the vent duct retaining bracket out of its holder.
Removing the support panels around the appliance's built-in components makes it easier to fit the catalyser. The plug connector for the electrical connection of the catalyser will be more accessible.
Service engineer fitting instructions
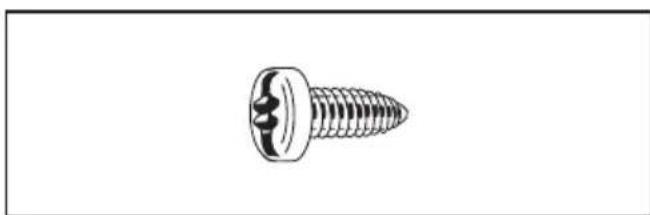
- Loosen the panel at the rear. Depending on model, when doing this, also loosen the connector plugs for the hob.
- Remove the side panel on the right. The catalyser connection cables, located near the vent duct, are now easily accessible.
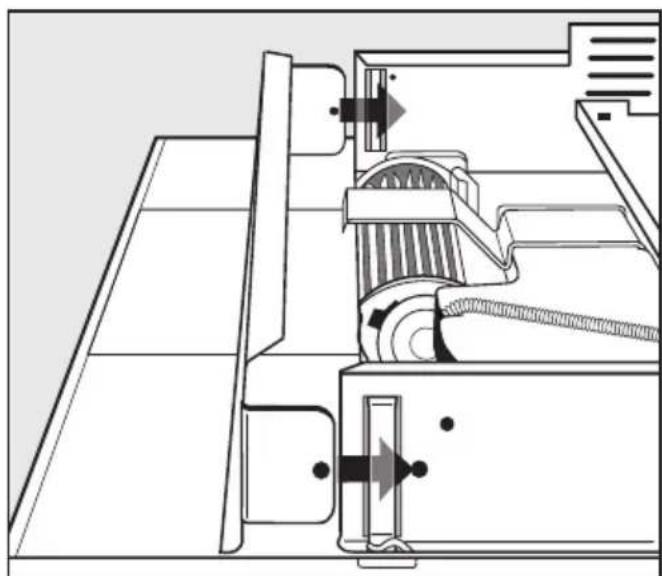
The vent duct for the ventilation system is held in place by a coil spring.
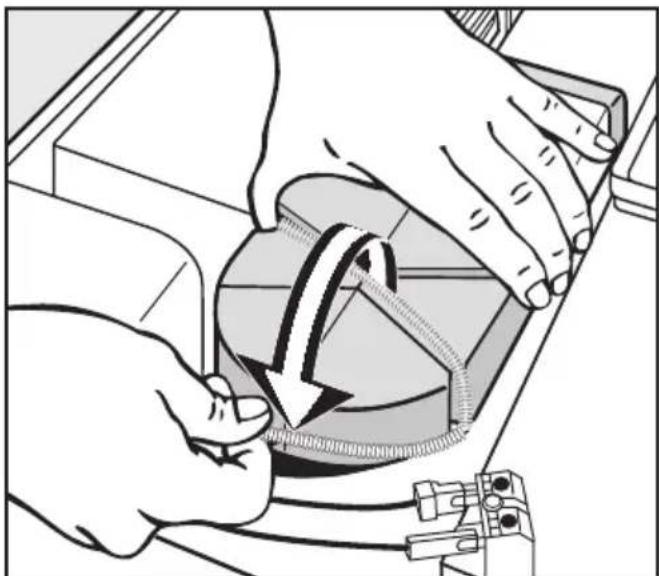
Pull the coil spring to one side so that the vent duct can be removed.
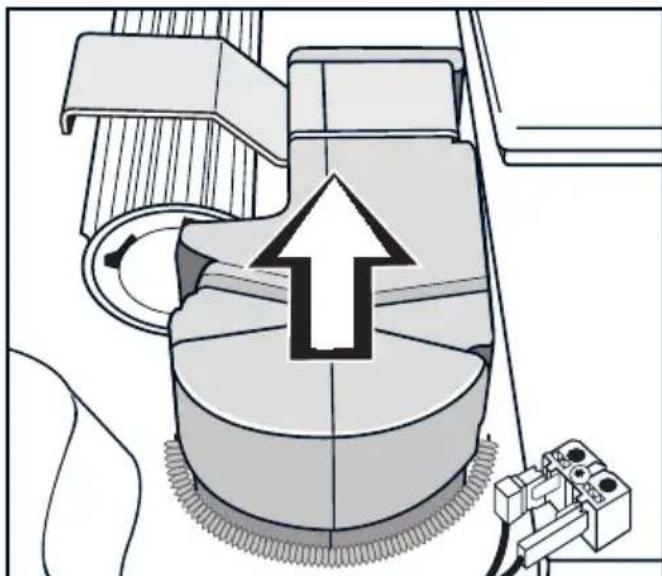
- Remove the vent duct and its retaining bracket.
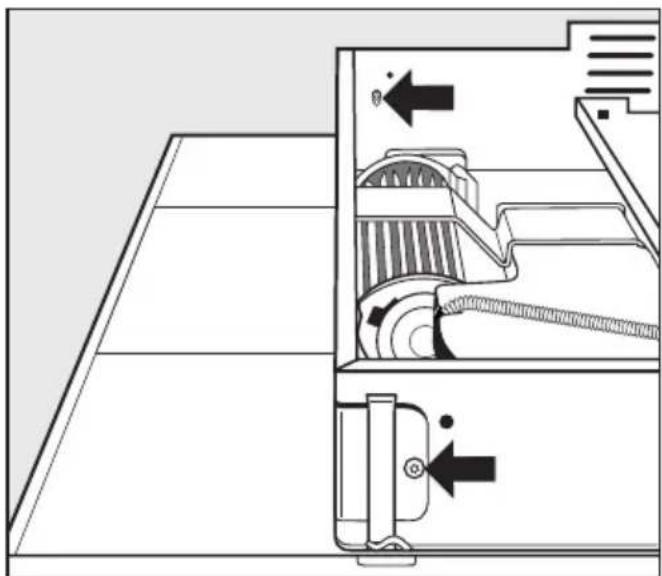
The screws on the oven interior roof must be loosened, before the vapour outlet can be removed.
- Remove the oven shelf supports and lower the top heat heating element.
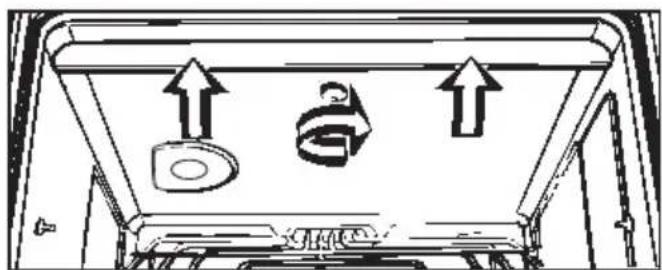
- Remove the roof liner (depending on model).
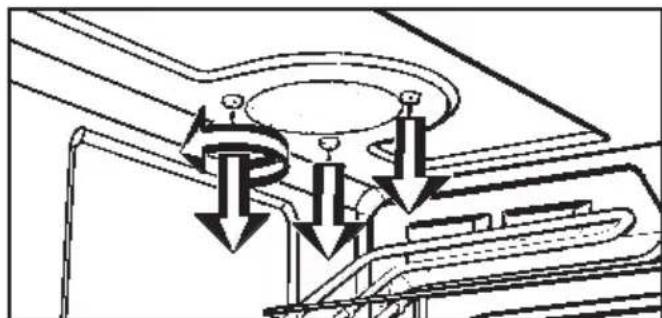
■Unscrew the vapour outlet screws.
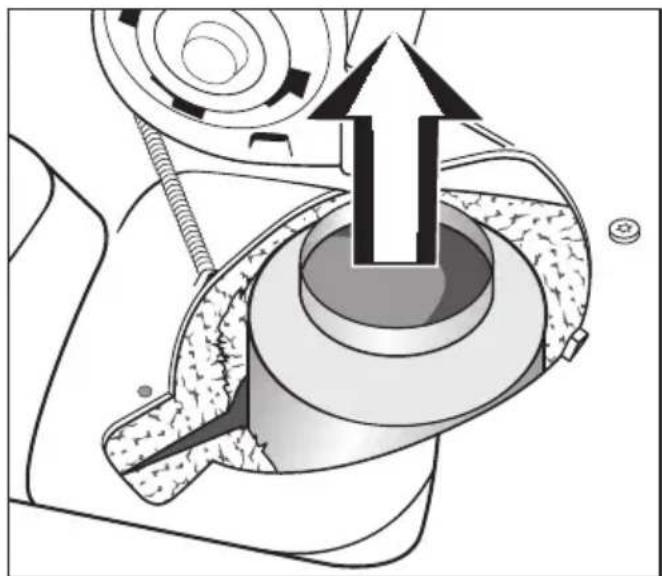
Remove the vapour outlet. It is no longer required.
Some models also have a perforated panel fitted underneath the vapour outlet. It must be removed before fitting the catalyser as it is no longer required.
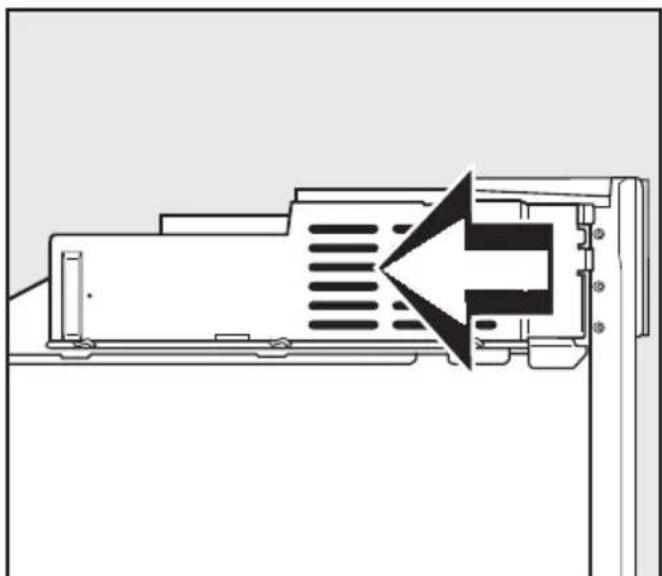
Press back the oven ceiling insulation.
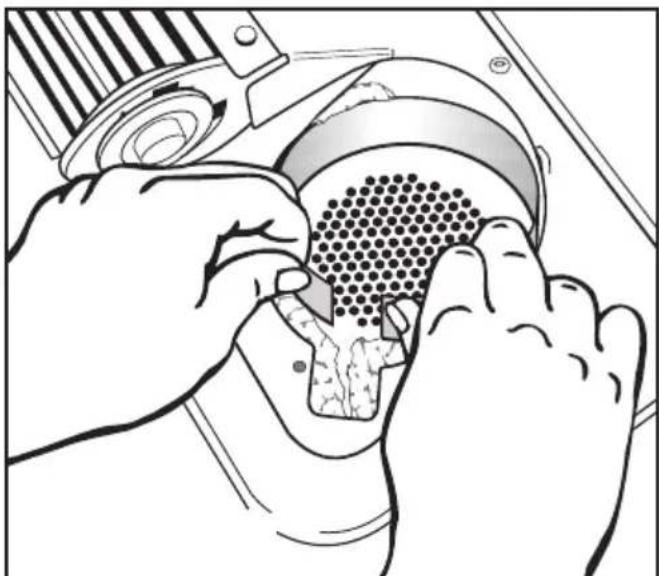
Gently compress the fitting guide 2 and put in place.
Then release the fitting guide and in doing so press back the insulation.
Ensure that the insulation is fully pressed in by the fitting guide.
Do not allow the insulation to get trapped by the fitting guide.
The fitting guide remains in the appliance once fitted.
For reasons of hygiene, the area around the catalyser should be thoroughly vacuum cleaned to ensure that insulation fibres cannot get into the oven cavity.
Service engineer fitting instructions
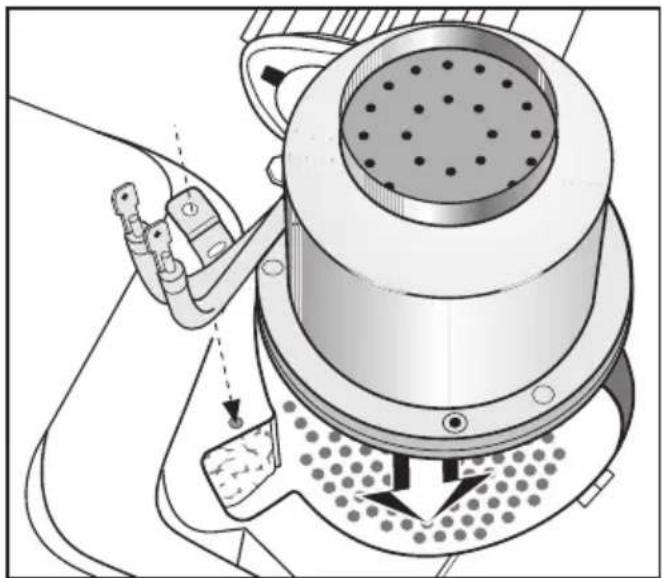
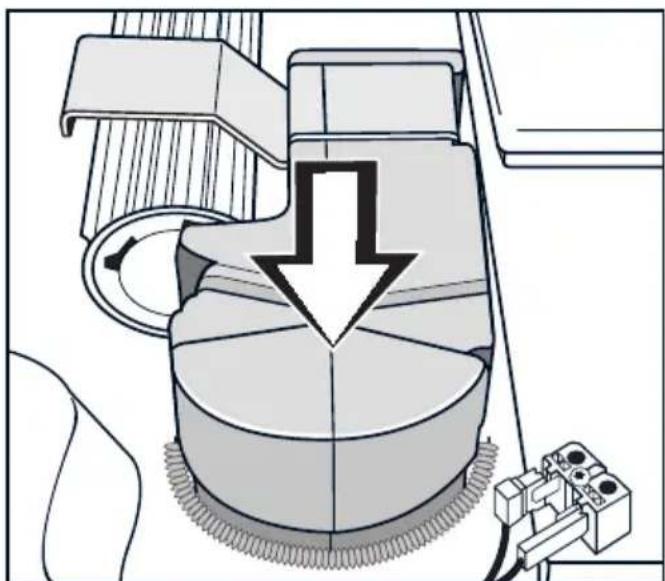
Insert the catalyser ①.
Ensure that the metal filter and seal are fitted underneath the catalyser.
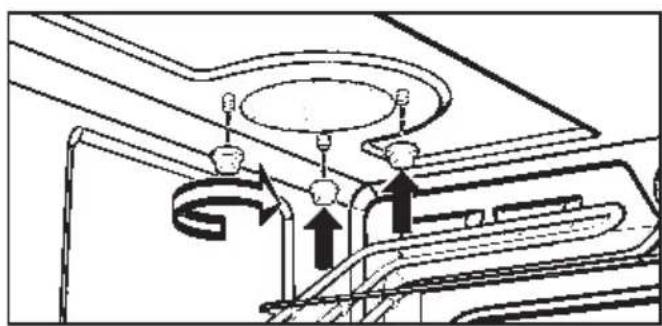
- Secure the catalyser with the domenuts ⑤.
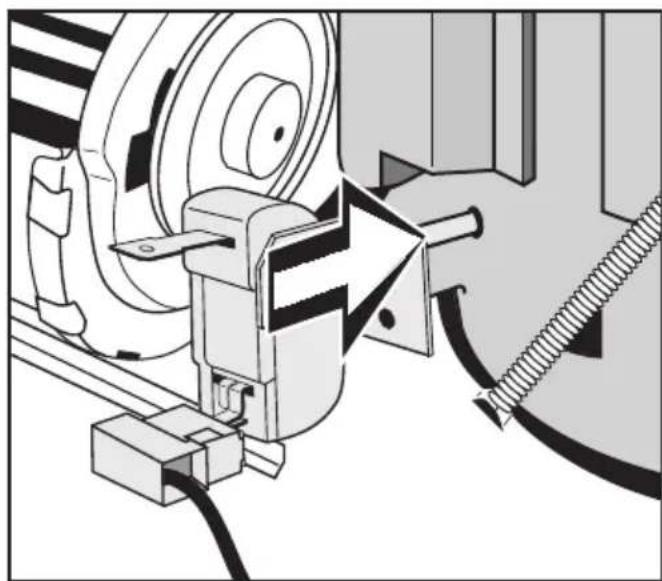
The earth tag on the catalyser must be secured to ensure that the catalyser is correctly earthed.
To secure the earth tag use the self-tapping screw ⑥ supplied.
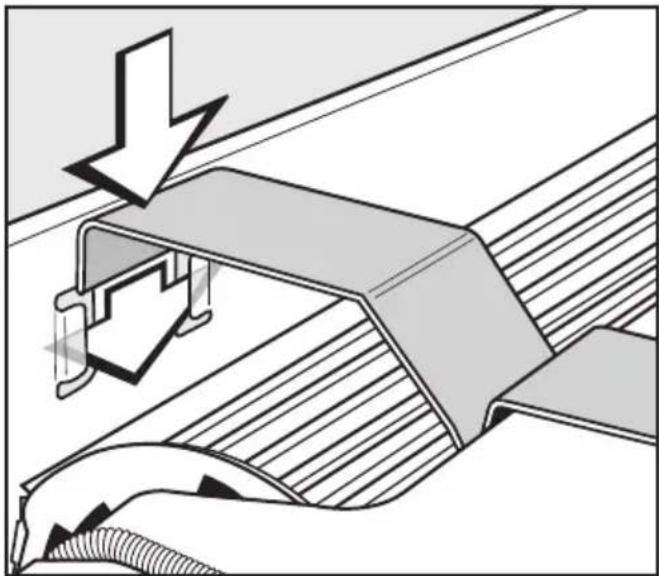
- When the vent duct was removed, the coil spring may have come out of its holders. If this is the case, hook the coil spring back in again, before replacing the vent duct.
- Replace the vent duct together with its retaining plate.
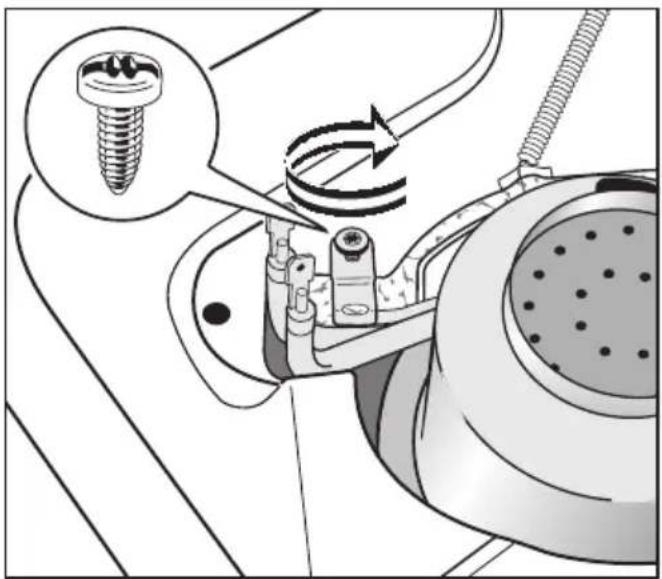
- Secure the connection cable supplied ④ to the temperature regulator ③.
Fit the temperature regulator in the opening provided in the vent duct.
Use the coil spring to secure the vent duct together with the temperature regulator.
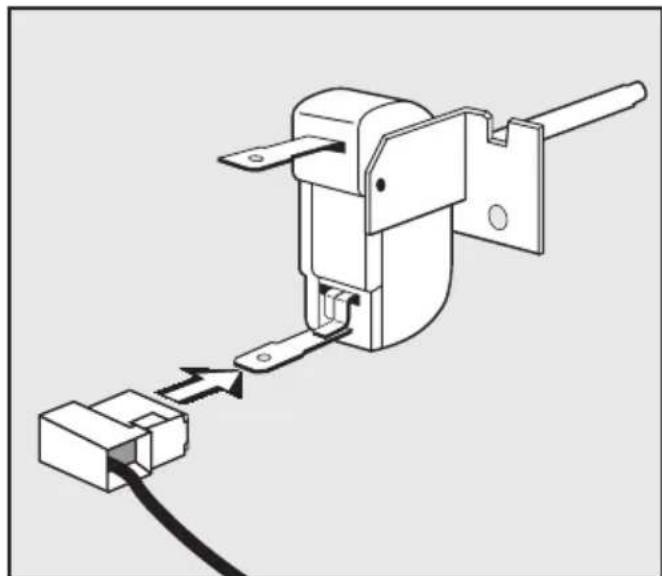
Finally, the electrical connectors must be fitted to the catalyser.
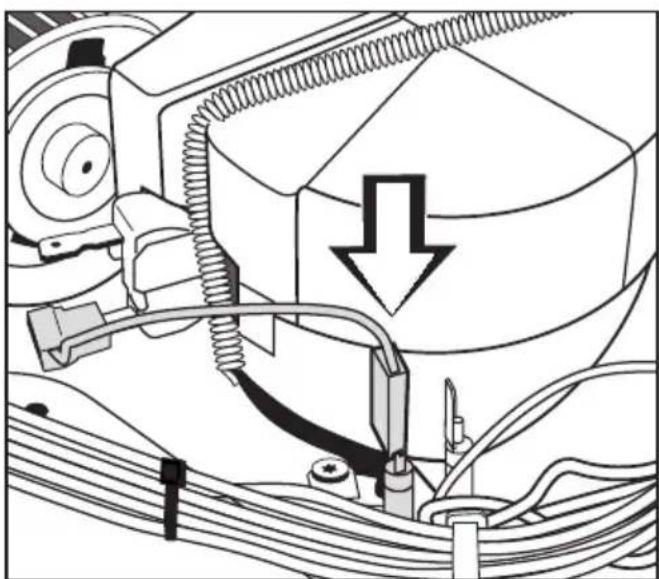
- Connection cable ④: secure to one end of catalyser heater element ①.
The other two connection cables used to connect the catalyser are located in their storage position beside the vent duct.
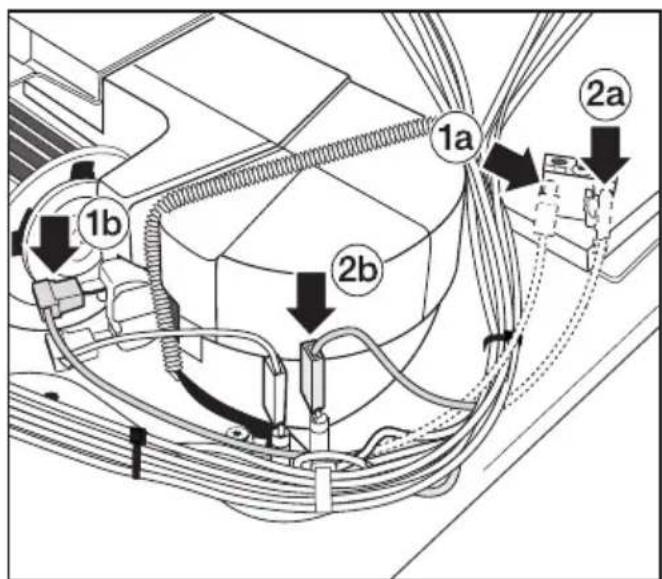
Connect cables 1 and 2 to the temperature regulator and to the remaining free catalyser heater element end.
Secure the cable to the temperature regulator with the angled connector.
Service engineer fitting instructions
Finally the side and rear panels of the frame need to be replaced so that the vent duct retaining bracket can be hooked back on again.
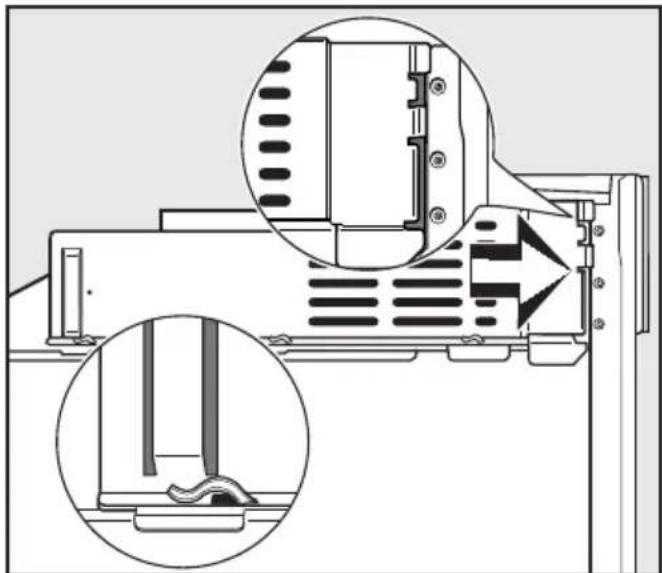
■Secure the right hand side panel.
- Secure the rear panel.
- Hook the retaining bracket back on again.
Screw the electrical connection cover plate and the upper housing cover back on again.
After fitting the catalyser, the oven/cooker must be tested in accordance with local and national safety regulations.
Alteration rights reserved