EWS170 - Weather Station HAMA - Free user manual and instructions
Find the device manual for free EWS170 HAMA in PDF.
User questions about EWS170 HAMA
0 question about this device. Answer the ones you know or ask your own.
Ask a new question about this device
Download the instructions for your Weather Station in PDF format for free! Find your manual EWS170 - HAMA and take your electronic device back in hand. On this page are published all the documents necessary for the use of your device. EWS170 by HAMA.
USER MANUAL EWS170 HAMA
All listed brands are trademarks of the corresponding companies. Errors and omissions excepted, and subject to technical changes. Our general terms of delivery and payment are applied.
00092654/02.10

Bedienungsanleitung
Operating Instruction
Congratulations on your of purchasing this new In-Out Thermo Clock. This unique product is G. designed for everydayuse for the home or office and is a definite asset of great use. To fully benefit from all the features and understand the correct operation of this product, please read this instruction manual thoroughly.
FUNCTIONS OF THE IN-OUT THERMO CLOCK
This In-Out thermo clock measures temperature of the environment of its surrounding area and receives up to threeoutdoor thermometer for temperature. The data is continuously updated to bring you the latest weather information displayed on the LCD of the receiving unit.
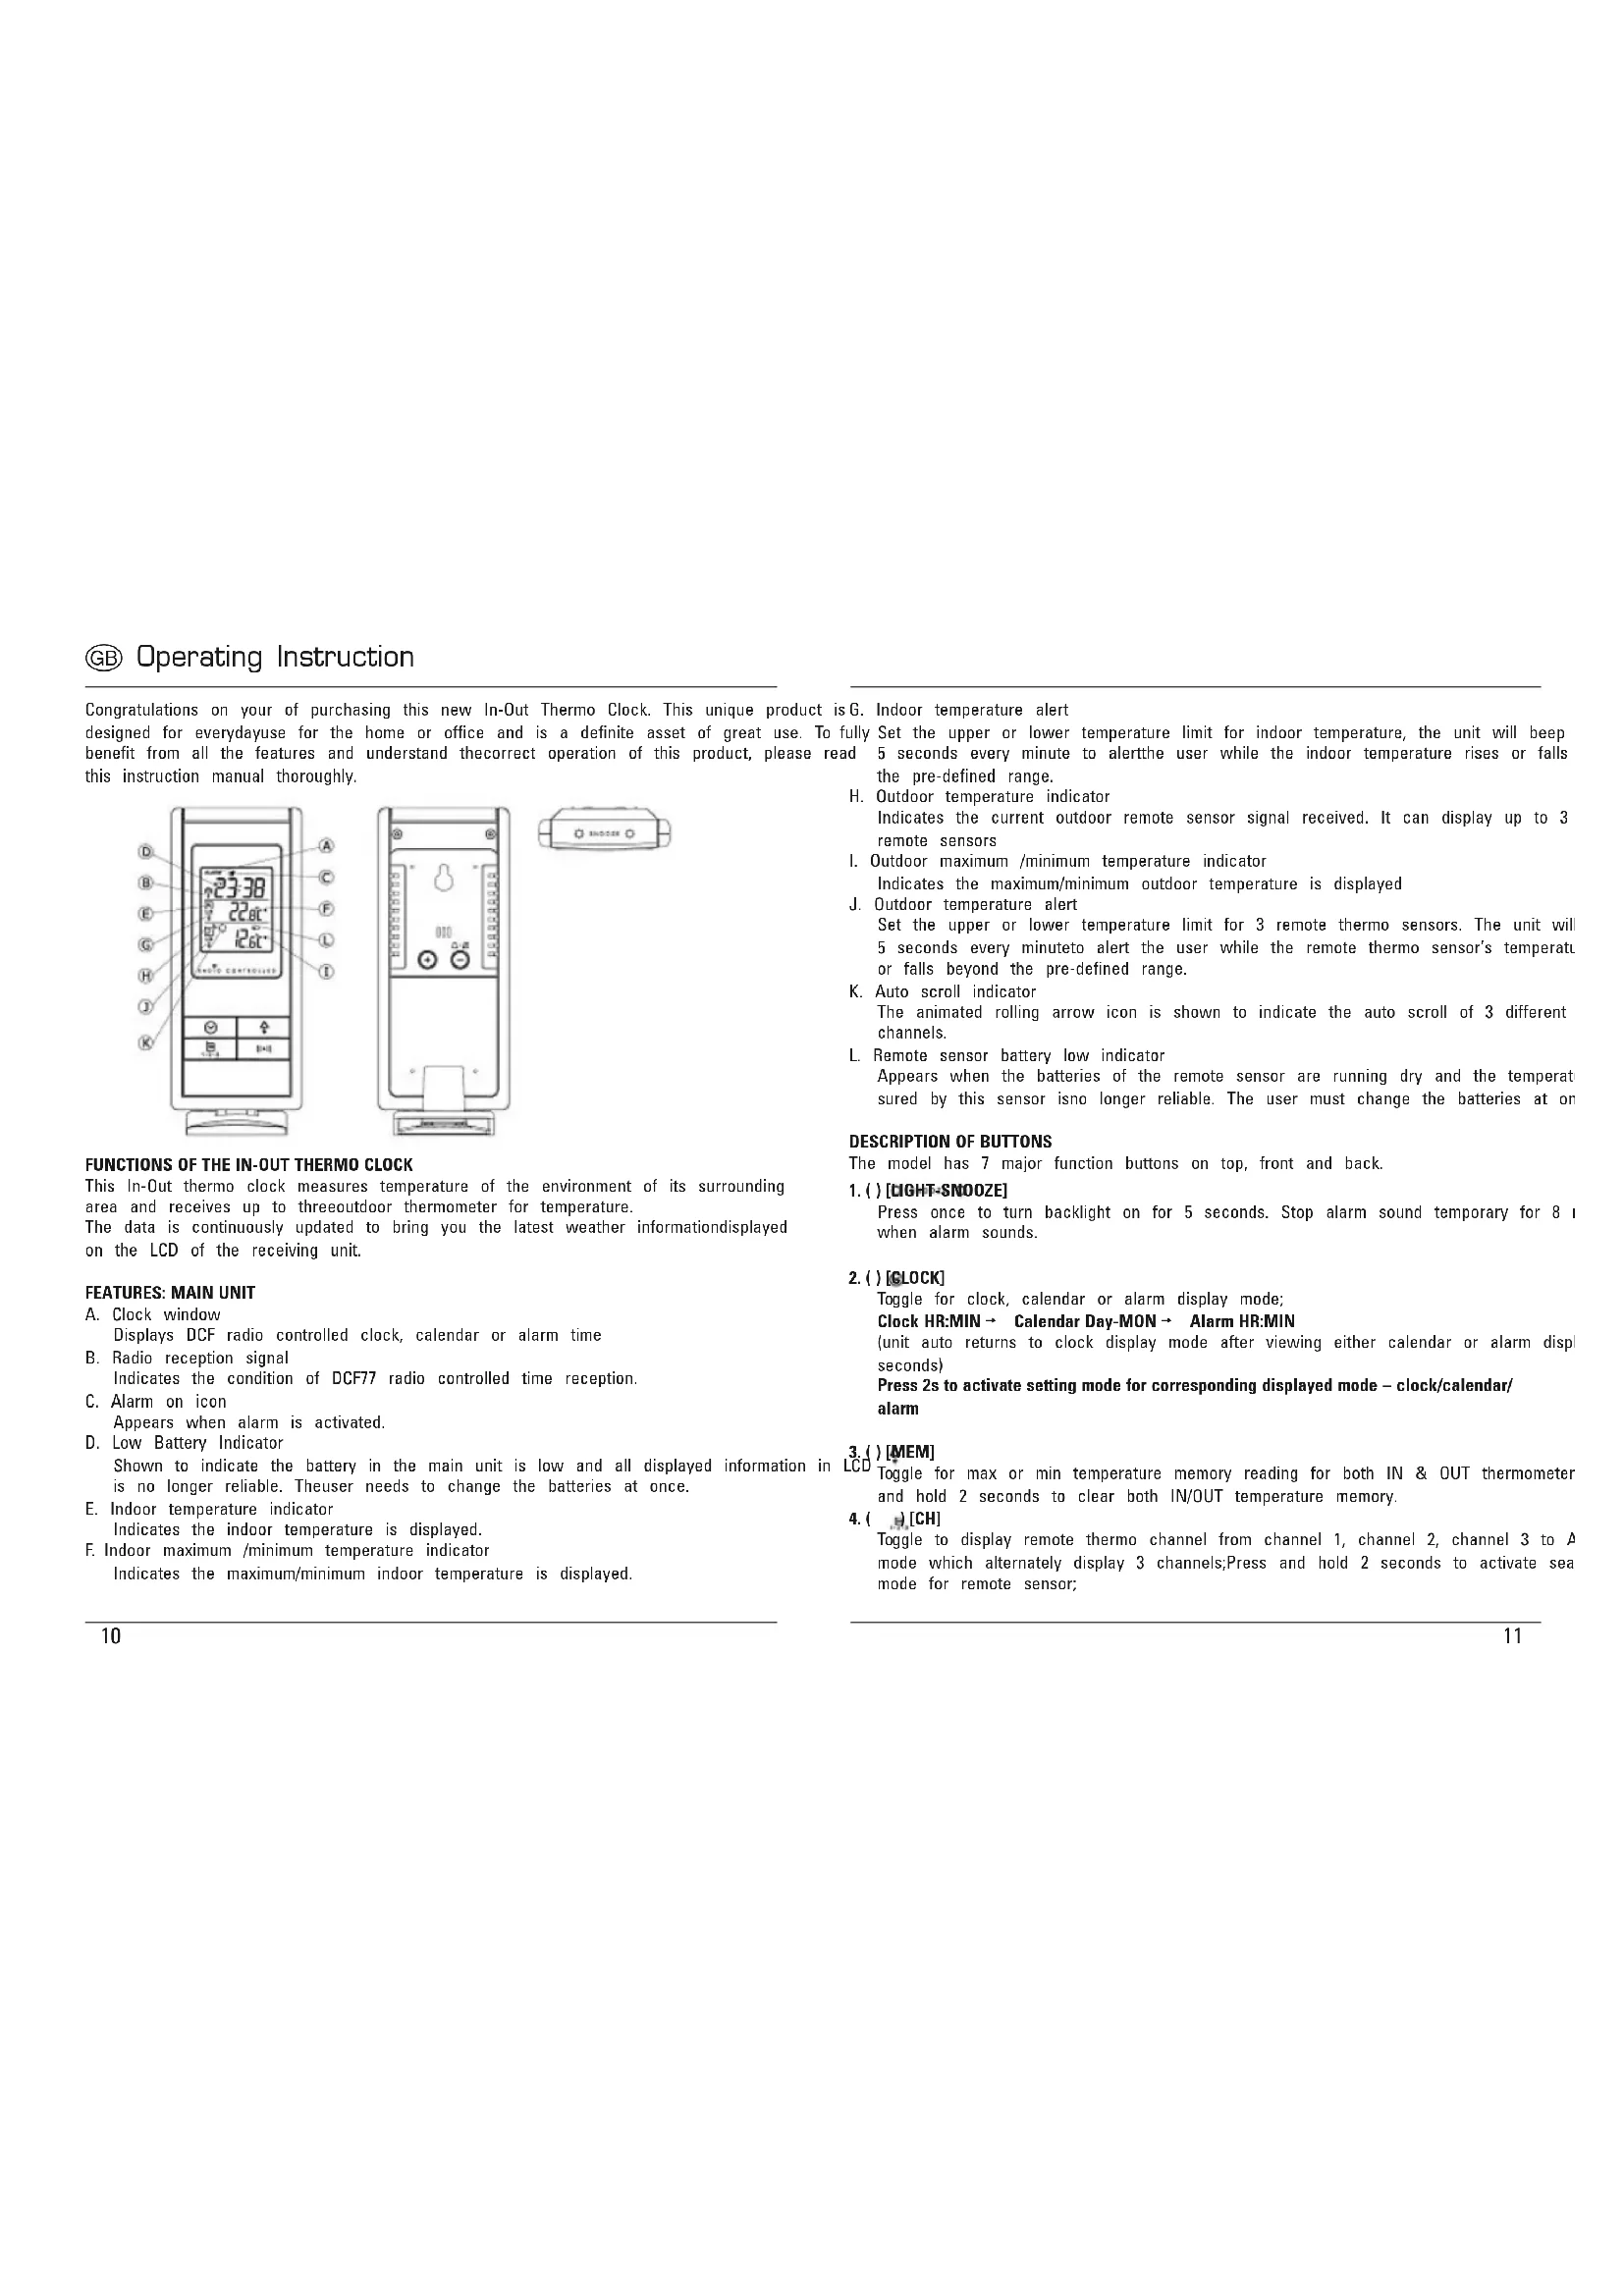
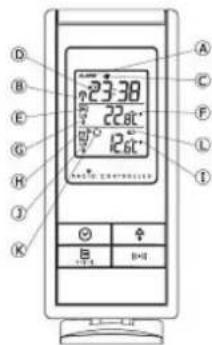
FEATURES: MAIN UNIT
A. Clock window
Displays DCF radio controlled clock, calendar or alarm time
B. Radio reception signal
Indicates the condition of DCF77 radio controlled time reception.
C. Alarm on icon
Appears when alarm is activated.
D. Low Battery Indicator
Shown to indicate the battery in the main unit is low and all displayed information is no longer reliable. The user needs to change the batteries at once.
E. Indoor temperature indicator
Indicates the indoor temperature is displayed.
F. Indoor maximum /minimum temperature indicator
Indicates the maximum/minimum indoor temperature is displayed.
G. Indoor temperature alert
Fully Set the upper or lower temperature limit for indoor temperature, the unit will beep and 5 seconds every minute to alert the user while the indoor temperature rises or falls the pre-defined range.
H. Outdoor temperature indicator Indicates the current outdoor remote sensor signal received. It can display up to 3 remote sensors
- Outdoor maximum /minimum temperature indicator
Indicates the maximum/minimum outdoor temperature is displayed
J. Outdoor temperature alert
Set the upper or lower temperature limit for 3 remote thermo sensors. The unit will 5 seconds every minuteto alert the user while the remote thermo sensor's temperatu or falls beyond the pre-defined range.
K. Auto scroll indicator
The animated rolling arrow icon is shown to indicate the auto scroll of 3 different channels.
L. Remote sensor battery low indicator
Appears when the batteries of the remote sensor are running dry and the temperat sured by this sensor is no longer reliable. The user must change the batteries at or
DESCRIPTION OF BUTTONS
The model has 7 major function buttons on top, front and back.
1.()[LIGHT-SNOOZE]
Press once to turn backlight on for 5 seconds. Stop alarm sound temporary for 8 when alarm sounds.
2.() [GLOCK]
Toggle for clock, calendar or alarm display mode;
Clock HR:MIN Calendar Day-MON Alarm HR:MIN
(unit auto returns to clock display mode after viewing either calendar or alarm disp seconds)
Press 2s to activate setting mode for corresponding displayed mode - clock/calendar/ alarm
3.()[MEM]
Toggle for max or min temperature memory reading for both IN & OUT thermometer and hold 2 seconds to clear both IN/OUT temperature memory.
4.(CH)
Toggle to display remote thermo channel from channel 1, channel 2, channel 3 to A mode which alternately display 3 channels; Press and hold 2 seconds to activate sea mode for remote sensor;
5.()[ALERT]
Toggle to display high temperature alert and then low temperature alert for indoor thermometer, channel 1, 2, 3remote thermometers respectively and then return to normal thermo display mode;
Press & hold for 2 seconds at the desired alert temperature display to enter its setting 2mol , a small type screwdriver to remove the battery cover screws; use [ + ] /[-] keys to change the settings. press [ ] again to confirm the setting or press on key for 5 seconds to auto-exit to normal thermo display and confirm the setting; 3. Insert 2 pieces of AAA size batteries according to the "+" and -
6. + [UP]
Increase the setting
Press and hold 2 seconds to manually activate radio controlled function; press once again deactivate radio controlled function;
7.[DOWN]
Decrease the setting
Toggle Daily Alarm on/off when display shows Alarm mode;
Toggle Alert on/off when display shows corresponding Temperature Alert mode.
And 2 buttons inside battery compartment
8.[°C/°F]
Toggle the temperature unit ^ C < - > ^
9.[Reset]
To activate system reset to the main unit during abnormal condition which will reset all settings back to factory values.
GETTING STARTED
This In-Out thermo clock was designed for easy set up. For best operation, the following steps are required to be done in the proper sequence.
-
Insert batteries for main unit before doing so for the sensor units.
-
Receiving unit cannot be programmed manually until the wireless remote sensor unit registration procedure has been completed.
-
Position the remote unit and main unit within effective transmission range, which, in usual circumstances, is 50m . Although the remote unit is weather resistant, it should be placed away from direct sunlight, rain or snow.
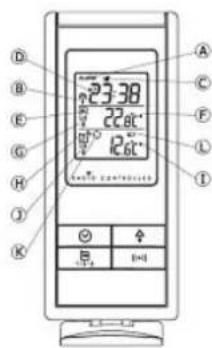
BATTERY INSTALLATION FOR MAIN UNIT
- Remove the battery door;
- Insert 2 pieces AAA size 1.5V alkaline battery as indicate by the polarity;
- Close the battery door.
Note: Replace the batteries when the low battery indicator appears on the top-right corner of the LCD.
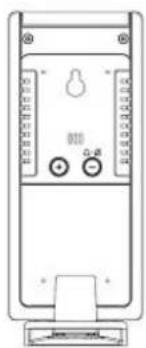
Remote Sonso

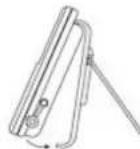
Bracket Stand
Lift of this part
WIRELESS REMOTE SENSOR REGISTRATION PROCEDURE
- Insert 2 AAA batteries first to the main unit. The temperature display shows - - - the wave icon will keep blinking for 2 minutes indicate the main unit is in sensor mode.
- In a second step, insert the 2 AAA batteries into the sensor unit. The LED on the will start flashing at a rate of one time per around 2 seconds indicates channel-1
- While the LED is flashing, press once the [CH] key will change the sensor channel steps to 2. Keep toggle on [CH] key can change channel setting up to 3. The LED is bl frequency to indicate the channel setting, i.e. continuous blinks 2 times indicate changes selected.
Note: If user does not press any key for 10 seconds, it will exit the channel setting mode and transmit the RF signal. The main unit will register the temperature reading.
REMOTE CHANNEL AUTO-SCROLLING
This device is equipped with an auto- scroll function. While the auto- scroll function is s unit will automatically cycle to display the temperature of each remote sensor for 6 se
- To retrieve manually the specific sensor temperature and humidity reading, press key until desired channel number is displayed.
- To enable autoScroll function, use button to toggle channel 1,2,... until auto scroll icon appears beside the channel indicator.
DCF 77 RADIO CONTROLLED CLOCK
The radio-controlled time is calculated by the Cesium Atomic clock of Braunschweig (official clock of Germany). Then the time is coded and transmitted from Mainflingen - Frankfurt - via a signal on DCF-77 (77.5kHz) . The transmitting range of the signal is which means that most of Western and Central Europe is covered by this signal. Within this range the received time is completely accurate. Once sensor signal(s) are received, the wave icon will flash to indicate that the receiving unit starts to receive the DCF radio controlled time signal. Radio Controlled wave icon can indicate 4 levels of signal status:
Very weak Weak Medium Strong
Once the time signal is received, the wave icon will stay on the LCD, and time and automatically be updated.
Note: During the 10-minute time signal reception, all manual settings will be suspended. If setting is desired, press once [+] key to deactivate the reception. You can also press and hold the same key for 2 seconds to manually activate the reception in normal mode. SET THE CLOCK & CALENDAR
- Press & hold [ ] button for 2 seconds to enter clock setting mode. Flashing 24 hours will appear.
- Press [+] or [-] button to switch between 24 hours and 12 hours format, and then press[ ] button to confirm.
- The hour digits will flash. Use the [+] button to increase by one hour or [-] button decrease by one hour to your desired hours. Holding down either button will change the increment rapidly. Press[ ] button to confirm.
- The minute digits will flash. Use the [+] button or [-] button to set your desired Holding down either button will change the increment rapidly Press [ ] button to confirm.
Note: Every change of minute digit will automatically reset the seconds to zero.
-
The year digit will flash and Yr icon appears. Press [+] or [-] button to set your desired year. Press ] button to confirm. Note: Year range is from 2000 to 2099.
-
D and M icons will flash. Press [+] or [-] to select D M (Date Month) or M format. Press ] button to confirm.
near
kmMonth digits will flash. Press [ + ] or [ - ] button to set your desire month. Pres to confirm. Do the same to set Date.
TO SET DAILY ALARM
- In clock time display mode, press [ ] button twice to display alarm time for 10 sec
- Press [-] button in alarm display mode to arm or disarm the daily alarm.
- Press and hold ] for 2 seconds to enter the alarm setting mode.
- The hour digit will flash, use [ + ] button to increase by one hour or [-] button one hour to your desired hours. Hold down the button will change the increment rapidly. Press button to confirm.
- The minute digits will flash. Use [ + ] button to increase by one minute or [-] by decrease by one minute to your desired minutes. Hold down the button will change increment rapidly. Press [ ] button to confirm and finish the setting.
HOW TO SET TEMPERATURE ALERT
- Press [@] key to your desire Hi or Lo temperature limit for designated IN or REMO thermo at the desirable channel;
-
Press and hold the 串 + 串 | key for 2 seconds, the corresponding display digits start blir 3.Use the [+ &[-] keys to change for your desired setting;
-
Press [ ] key to confirm setting and exit the setting mode. " " or " " icon appear if the indicate the lower or upper alert is armed)
-
Auto-exit the temperature alert display and returns to current temperature display more after 5 seconds. (Hi-Lo temperature limit icon disappears; leaving " " or " " icon t indicator alert is armed.)
- To disarm the temperature alert - go to the desired temperature alert display mode, -] key once to disable the ale, the or icon disappears.
SPECIFICATIONS
Main Unit
| Displayed IN temperature range: -10 °C to +60,0 °C (14 °F to 140,0 °F) | |
| Proposed operating range: 0 °C to +50,0 °C (32,0 °F to 122,0 °F) | |
| Temperature resolution: 0,1 °C (0,2 °F) | |
| Remote Temperature measurement Displayed OUT temperature range: | -50,0 °C to +70,0 °C (-58,0 °F to 158,0 °F) |
| Temperature resolution: 0.1°C (0.2°F) | |
| Battery: DC 3 V, 2 x AAA size | |
| Snoopze: 8 minutes | |
Remote Unit
| Sensor with LCD Display: 0 °C to +50,0°C (+32,0 °F to 122,0 °F) | |
| Temperature resolution: 0,1 °C (0,2 °F) | |
| RF Transmission Frequency: 433 MHz | |
| Transmission Range: 30 meters/100 feet, open area | |
| Temperature sensing cycle: 60 - 75 seconds | |
| Battery: DC 3V, 2 x AAA size | |
The information in this document has been viewed and is believed to be accurate. However, neither the manufacturer nor its affiliates assume any responsibility for inaccuracies, errors or omissions that may be contained herein. In no event will the manufacturer or its affiliates be liable for direct, indirect, special, incidental or consequential damages arisen by using this product or resulting from any defect/omission in this document, even if advised of the possibility of such damages. The manufacturer and its affiliates reserve the right to make improvements or changes to this document and the products and services described at any time, without notice or obligation.
Registration and Safety Certification/General Information
This device bears the CE symbol as specified by the provisions of Directive R & TTE (1 Hama GmbH & Co. KG hereby declares that this device is in compliance with the basic requirements and other relevant guidelines and regulations of the 1999/5/EC guideline. You will find the declaration of compliance and declaration of conformity in the Internet http://www.hama.com

Mode d'emploi
Haxmte u yepxmbaTc 3y KhoNky, To6b BkIOHTb/BbIKIOHTb fyHKnIO CMHaHn3aunno
TEMnepatype.Haxmte HyepxmbaTe 3y KhoNky 2 cekynb,HTobBoTN BHaCtpoKy peKIMM CnHnHa3aum no Temnepatype.
-
- Khonka [UP] (Bbepx)
YBENHHE 3aHHeHn. HaxMITE u yepxmbte 3ty KOnky 2 ckyhbl, YTOb BKNIOHTpeXMM padno-cHHPOHN3aun qacob.
-
- Khonka [DOWN] (BHN3)
ymehbueHMe 3haeHHa
B pexime 6yduhNka -OTKIOHHe/BKIOHHe Me rHa;
B pexime temnepaTyHON CnHAN3aun - BKNIOHHeO/OTKIOHHeCnHana.
KhoKnHa 3aHne nane
- Khonka [^o C / ^o F]
PepeknueHne pexmMa TemnepaTpybl
- Khonka [RESET] (C6poc)
ДяakTbuaunCnCTeMHoro c6poca 6a3oBoro 6Ioka K 3aBoDcKIM yCTaHOBkAM.
UctaHOBKa 6atapei
a) Haxmte Ha KpbuKy 6atapeHoro OTeKa Ha 3aDHeN CTOpoe 6a3oBOrO 6Ioka N CdBnhte BnH. YCTAOBHTe 2 6atapen pa3Mepa AAA, co6IIOaIaONIpaHOCTb.
b)OTcoeHNHTNE NOCTABKY OT BHeHrero DaTtMka,OCB6oDnB 23aIeNKn BnH3y, C NOMOuHbOTBePTK, CHMNTE Kpblkky BaTapeHOrO OTeKa.
c) YctaHOBATE 26atapeeKn pa3Mepa AAA, co6HIOdaI NOIApHOCTb, n 3akpoTe KpbuKy 6atapeHOrO oTcKa.
d) OCHOBH BNOK CHaBXEN DBYM INDAKATOPAMN pa3pRA 6batapej, oINH JnO OCHOBHORO 6IOKA, DpyroJnBHEWHERO datyWA (-OB). ECIN NOBHTCR CNMBON pa3pRA 6batapej 3aMeHNHe COOTBCTBTOUIONE 6batapej.
BHeHHM daTmK

IpoeDypa pernctpaunn 6ecnpoBodHoro BHeuHero daTnka
1.ChaHala yctahOBInTe 2 6atapeiKIN AAA B OCHOBHO 6IOK. Ha 3KpaHe NORBHTc TEMnepaTpya. POKa HkOPAe 6yDeT MEpTaB KAPTINHKA BOIHy, OCHOBHO 6IOK 6yDeT HXODITC B PEXHMe NOCKA DAtNHKO8 (2 MNHTb).
2.BCTaBtBe 26aTapeKn AA BO BHeuHn DaTuK.CBeToIOuHa nepeHne NaeHn HauHET MmraTb CuaCToToI 1pa3npMepHo B 2cekyHbI,poKa3bBaYTO HCNOB3yETc KaHAI 1.
3. Ioka CBeToDIOM Mmraet, HaxMMte HONIKY [CH] OINH pa3, TTObI nepeKIIIOUHTcR Ha KaHAN Haxab eue pa3, MOxHO nepeKIIIOHTbcR ha KaHAN 3. Hactota MePauHAn CBeToDIOA nokaKeT KAKOI KAHAN BB6paH.
ABTO npokpytka noka3aHn BHeuHnx DaTHNKOB
3To ycTPOINCTBO HMEET dyHKIIO ABOTMATHECKO INpOKpyTKB Cnyae,ecnnoKIOHHe2 1nH yctpoiCTBA.PnTOM LKNIHCECKN BYD TOpKaTHCBaDHbE NO KaHbAMOT 1do 3-ro.
- HaxMMTE [ ] KhoNkY To6b Bbl6paTb TemnepaTybH KaHAN 1,2,3 nn ABTonpOkoTyK
BatapeH/BheuHH daTuk DC 3B,2 uT. pa3Mep AAA
Iopematb 8 MNHT
OTkA3 OT OTBETCTBEHHOCTM
HINΦOPMaHnB 3OTM DOKyMEHTE 6bIa paccMOTePA H, KAKoIaIAIOT, TOHa. OIaHko, HN IHTOBTiJIb, HN ERO PNDCTABITENIe HEPINMAHIOIT OTBETCTBEHOCTH 3a NORPOUHOCTH, OUIbIKN IIN yUYuEHnA, KOtOBpTE MyOgCepXaTcBc3dEcN. HN B KOem CUYae He bdyet I3rTOBtENTB INI ERO PNDCTABITENIe OTBETCTBEHNH 3a PnPBMe, KOCBHeHbIe, CNEIaIIbHBe, HENPEDBHEHbIE INI KOCBHeHbIe YUePb6b, BO3HKUWe npi HcNOJb3OBaHm 3TO T OYCTPOINCTBA INI CNEIyOUue INI JIOO BOWIKy/HyNUeBHnA B 3OTM DOKyMEHTE, DAXE ECNI PNDynpeKdAnI O B03MOx TAKIN XbIbTKo, HN TROBTiJIb, HN ERO PNDCTABITENIe OCTabJIOT 3a COBoI npAO IpON13BeCTN YCOBERPEHCTBOBAHHN INI M3MeEHnE 3TO DOKyMEHTY n OINCAHHO YCTPOINCTBA B IIOOe BVPMe, 6E3 YELOOMLEHHN INI O8a3ATEbCTB.
CnTeTbTaO donycke K 3KcNpyataunu N 6e3onacnoctn/O6une CBeDenna
Ha n3dennm mmeetc mapknpobka C, cornacno noonoxehnma Dnepektvbb R&TTE (1999/5/E) KomnaHnna Hama GmbH & Co. KG HactoTumn noTBePXDAAET, TQ DAHHoe n3dne IIOHOCT COOTBETCTBYET OCHOBHm Tpe6oBaHnma, a TAKK e PneDIncaHnma N noIooXeHnM HopMaTHBOB 1999/5/EG 3aRNeHnO o COOTBETCTBn TObapa XapakTePNCNTKAM n HopMaTHBam CM. Ha Be6) http://www.hama.com

Instructiuni de'utilizare
Weficitam prn tch a cestui termetr intn ce extern ccas deptator coman. Alarnpntu teratura interna dat prin radio. Acest aparat unic in feul lui este destnat utilizari zlinice acasa, sa la birou, iar pntru a putea utiliza functla de alarnpntu termuata interna trebuie s setati o valoare functile sale multiple are o valoare deutilize mare. Va rugam,citi teineic manualul deutilizemita minima si maxima penta temperatura interna.Daca temperatura interna se afia n prtu a va familiarza cu deservirea aparatului si penta putea beneficiia din plin de functile salezonei setate, in fiecare minut se va azi tim de cinci secunde un sunet de semnaliza


HactpoBaHe Ha yaca 3a exeJheBHO cb6yKdaHe
- DokaTo ce nok3Ba YacBt, HnTncHeTe Da BnTbNbTOHa [ ] 3a da ce nokKe 3a Decet CEkyHd NpeMeTo 3a Cb6yKJaHe.
2.AKoBpeKIM3aNOKa3BaHaNEb6yDnHINKaHATNHcHTeBEHNb6yTOHa[-],ΦYHKUITRA3aEKEJCNHEOBc6yJXdAeCakTIBPA,cbOTBeTHNOHAKTINBPA.
3a 3a HacptpoBae Ha BpeMeTo 3a Cb6yKdAe DpJxTe 6yHaHnCHAT 3a DBe cekynH. -
MIRATIHAPHTA HACOBAETe.HaONPOTeJHEJAHNTeCABOE.C6yTOHa[+]yEBNIAUBATe UHPPATA HA YACOBETe[C-1]HnHAMAIABATEcEHNHc3A 3b6p30 HAcTPOBaHE3aADpBkTe CbOTBEHTNHOTOHATHCNCHAT.3aNotbPckDEHAEHATNCHE6yTOHa[
-
MInaruHMHyTHe HAMHYHTe.HAcToIe MHyTHe.C6yToHa[+]yBnHaaate uHpaTa HAMHyTHe, C[-]mHAMALBaTe cEaHMAHyTa.3a 6bp3o HAcTOPiBaHe 3adpBxTe cbOTBeHHAT 6yToH HAtNCHeTe 6yToHa[0], 3a da NotBbPnTe n 3abPnHTe HAcTOKnTe.
HactpoBaHe Ha TemnepaTyPhaT aIapMa
- Hatackaihe 6ytoha [0]JOKATO CE NOKAXE JENAHATA ROPHA rpanu HA TEMNepaTpa (H) mIIN DOJIHa rpanuHa TEMNepaTpa (Lo) 3a BtpeWHaTn H BbHHTA TEmNepaTpa H JEAHNAH KAHAN.
- NpksTe 6yToHa [0] HATMCHAT 3a DBE CEkyHnCera MMRT cHTBETHTHE UKFPn HA NOKA3AHHtO.
- PpomeHete HactpoKaTHa Ha JxehaHATA CTOHOC Tc ByHOHTe [+] n[-].
4.HATNCHE 6yToHA [0]3a Da NOTBpDIne Hn3e3eTe OT peKIMMa 3a HAcTPOINKe, CCMBBOJb 已 ,CBOTBETHO 己 ,IOM CCAKTHBNPA rOPHATA,CBOTBETHO JOIHATA TEMNepaTPHa anapma.)
5.TemnepaTpHaTana anapMa cBETBa 3a net cekyHm.CneT TOBA aBOMATHO ce nokaa8a
aktyanHATA temnpaTypa.CMBONbT b3 a rOHTHE nDOnHITe rpanHn HA Temnepatypata(,H" Lo") m3racBa.(Noka3Ba ce CMBoT,CBOTBEHO ,UOMce AKTHBnPa
temnpaTpHaTana anapMa.)
6.3aHnKTHBnPAHHe TEMTNEPATHPATA anapMA HsIKAKAe JEAHATA HINJKAUNH HAM TEmNepaTPHaTAPAn aIAPMA n HATNCHEte BEdhXb 6yTOHa [-]. Cera anapMeHATA yHKUe e NkIOHHe NCMBOJIb"CBOTBEHO "IIRACBA.
TEXMHNECKN DAHHN TlabeH ypeI