MPX40DMP - Mixer Monacor - Free user manual and instructions
Find the device manual for free MPX40DMP Monacor in PDF.
User questions about MPX40DMP Monacor
0 question about this device. Answer the ones you know or ask your own.
Ask a new question about this device
Download the instructions for your Mixer in PDF format for free! Find your manual MPX40DMP - Monacor and take your electronic device back in hand. On this page are published all the documents necessary for the use of your device. MPX40DMP by Monacor.
USER MANUAL MPX40DMP Monacor
Before switching on ...
We wish you much pleasure with your new "img Stage Line" unit. Please read these operating instructions carefully prior to operating the unit. Thus, you will get to know all functions of the unit, operating errors will be prevented, and yourself and the unit will be protected against any damage caused by improper use. Please keep the operating instructions for later use.
The English text starts on page 8.
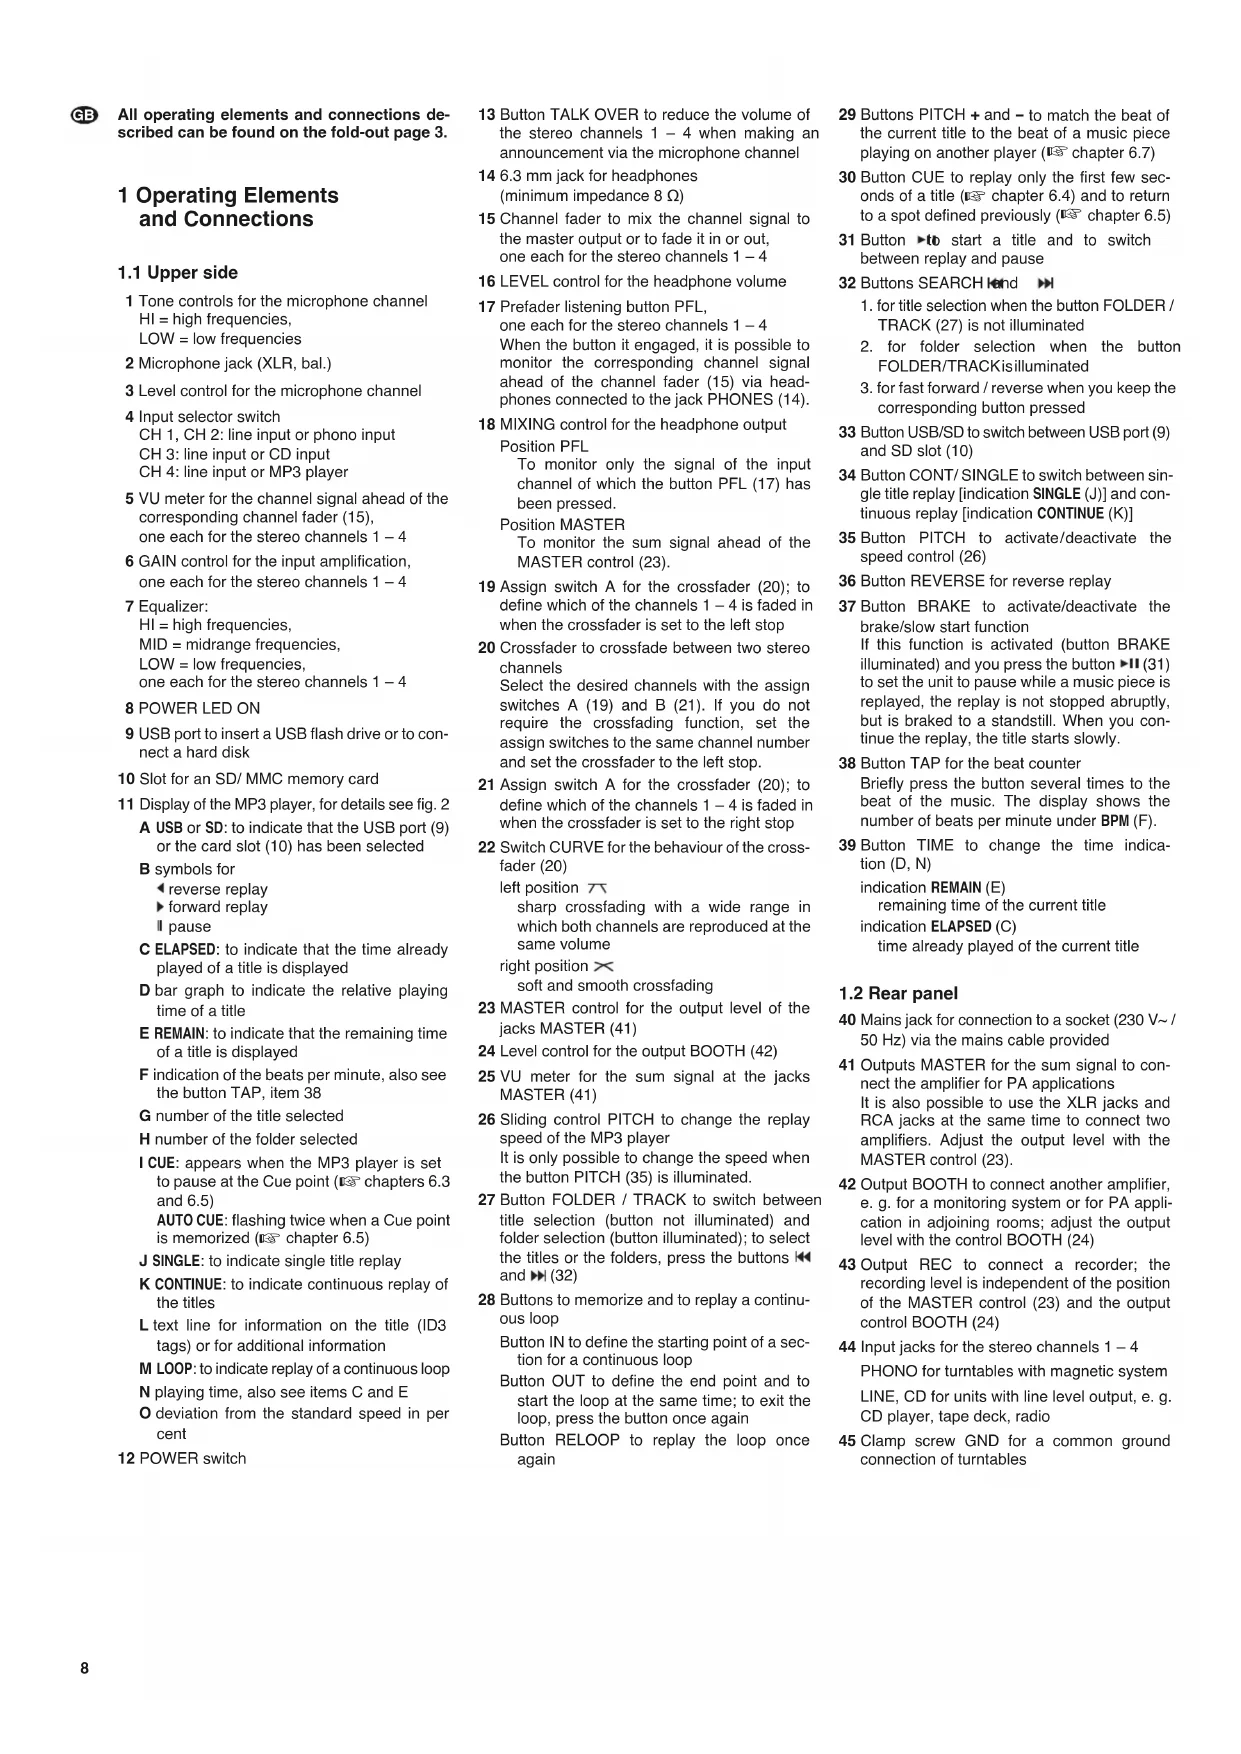
All operating elements and connections described can be found on the fold-out page 3.
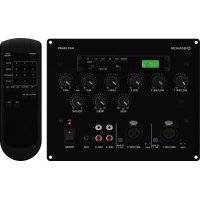
1 Operating Elements and Connections
1.1 Upper side
1 Tone controls for the microphone channel HI = high frequencies, LOW = low frequencies
2 Microphone jack (XLR, bal.)
3 Level control for the microphone channel
4 Input selector switch
CH 1, CH 2: line input or phono input
CH 3: line input or CD input
CH 4: line input or MP3 player
5 VU meter for the channel signal ahead of the corresponding channel fader (15), one each for the stereo channels 1-4
6 GAIN control for the input amplification, one each for the stereo channels 1-4
7 Equalizer: HI = high frequencies, MID = midrange frequencies, LOW = low frequencies, one each for the stereo channels 1 - 4
8 POWER LED ON
9 USB port to insert a USB flash drive or to connect a hard disk
10 Slot for an SD/ MMC memory card
11 Display of the MP3 player, for details see fig. 2 A USB or SD: to indicate that the USB port (9) or the card slot (10) has been selected
B symbols for
一 reverse replay
forward replay
pause
C ELAPSED: to indicate that the time already played of a title is displayed
D bar graph to indicate the relative playing time of a title
E REMAIN: to indicate that the remaining time of a title is displayed
F indication of the beats per minute, also see the button TAP, item 38
G number of the title selected
H number of the folder selected
I CUE: appears when the MP3 player is set to pause at the Cue point (15 chapters 6.3 and 6.5) AUTO CUE: flashing twice when a Cue point is memorized (15 chapter 6.5)
J SINGLE: to indicate single title replay
K CONTINUE: to indicate continuous replay of the titles
L text line for information on the title (ID3 tags) or for additional information
M LOOP: to indicate replay of a continuous loop
N playing time, also see items C and E
0 deviation from the standard speed in per cent
12 POWER switch
18 MIXING control for the headphone output Position PFL
13 Button TALK OVER to reduce the volume of the stereo channels 1 - 4 when making an announcement via the microphone channel
14 6.3 mm jack for headphones (minimum impedance 8 Ω)
15 Channel fader to mix the channel signal to the master output or to fade it in or out, one each for the stereo channels 1-4
16 LEVEL control for the headphone volume
17 Prefader listening button PFL, one each for the stereo channels 1-4 When the button it engaged, it is possible to monitor the corresponding channel signal ahead of the channel fader (15) via headphones connected to the jack PHONES (14).
To monitor only the signal of the input channel of which the button PFL (17) has been pressed.
Position MASTER
To monitor the sum signal ahead of the MASTER control (23).
19 Assign switch A for the crossfader (20); to define which of the channels 1-4 is faded in when the crossfader is set to the left stop
20 Crossfader to crossfade between two stereo channels
Select the desired channels with the assign switches A (19) and B (21). If you do not require the crossfading function, set the assign switches to the same channel number and set the crossfader to the left stop.
21 Assign switch A for the crossfader (20); to define which of the channels 1 - 4 is faded in when the crossfader is set to the right stop
22 Switch CURVE for the behaviour of the cross-fader (20)
left position
sharp crossfading with a wide range in which both channels are reproduced at the same volume
right position ×
soft and smooth crossfading
23 MASTER control for the output level of the jacks MASTER (41)
24 Level control for the output BOOTH (42)
25 VU meter for the sum signal at the jacks MASTER (41)
26 Sliding control PITCH to change the replay speed of the MP3 player It is only possible to change the speed when the button PITCH (35) is illuminated.
27 Button FOLDER / TRACK to switch between title selection (button not illuminated) and folder selection (button illuminated); to select the titles or the folders, press the buttons and (32)
28 Buttons to memorize and to replay a continuous loop
Button IN to define the starting point of a section for a continuous loop
Button OUT to define the end point and to start the loop at the same time; to exit the loop, press the button once again
Button RELOOP to replay the loop once again
29 Buttons PITCH + and - to match the beat of the current title to the beat of a music piece playing on another player (123 chapter 6.7)
30 Button CUE to replay only the first few seconds of a title (U chapter 6.4) and to return to a spot defined previously (U chapter 6.5)
31 Button start a title and to switch between replay and pause
32 Buttons SEARCH knd
- for title selection when the button FOLDER / TRACK (27) is not illuminated
- for folder selection when the button FOLDER/TRACKisilluminated
- for fast forward / reverse when you keep the corresponding button pressed
33 Button USB/SD to switch between USB port (9) and SD slot (10)
34 Button CONT/ SINGLE to switch between single title replay [indication SINGLE (J)] and continuous replay [indication CONTINUE (K)]
35 Button PITCH to activate/deactivate the speed control (26)
36 Button REVERSE for reverse replay
37 Button BRAKE to activate/deactivate the brake/slow start function
If this function is activated (button BRAKE illuminated) and you press the button (31) to set the unit to pause while a music piece is replayed, the replay is not stopped abruptly, but is braked to a standstill. When you continue the replay, the title starts slowly.
38 Button TAP for the beat counter
Briefly press the button several times to the beat of the music. The display shows the number of beats per minute under BPM (F).
39 Button TIME to change the time indication (D, N)
indication REMAIN (E)
remaining time of the current title
indication ELAPSED (C)
time already played of the current title
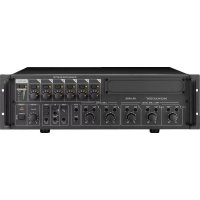
1.2 Rear panel
40 Mains jack for connection to a socket (230 V~/50 Hz) via the mains cable provided
41 Outputs MASTER for the sum signal to connect the amplifier for PA applications It is also possible to use the XLR jacks and RCA jacks at the same time to connect two amplifiers. Adjust the output level with the MASTER control (23).
42 Output BOOTH to connect another amplifier, e.g. for a monitoring system or for PA application in adjoining rooms; adjust the output level with the control BOOTH (24)
43 Output REC to connect a recorder; the recording level is independent of the position of the MASTER control (23) and the output control BOOTH (24)
44 Input jacks for the stereo channels 1-4 PHONO for turntables with magnetic system LINE, CD for units with line level output, e. g. CD player, tape deck, radio
45 Clamp screw GND for a common ground connection of turntables
2 Safety Notes
This unit corresponds to all relevant directives of the EU and is therefore marked with
WARNING

The unit uses dangerous mains voltage. Leave servicing to skilled personnel only. Inexpert handling may result in electric shock.
Please observe the following items in any case:
The unit is suitable for indoor use only. Protect it against dripping water and splash water, high air humidity and heat (admissible ambient temperature range: 0 - 40^ ).
- Do not place any vessel filled with liquid on the unit, e. g. a drinking glass.
- Do not operate the unit and immediately disconnect the mains plug from the socket
- if the unit or the mains cable is visibly damaged,
-
if a defect might have occurred after the unit was dropped or suffered a similar accident,
-
if malfunctions occur. In any case the unit must be repaired by skilled personnel.
-
Never pull the mains cable to disconnect the mains plug from the socket, always seize the plug.
For cleaning only use a dry, soft cloth; never use water or chemicals. - No guarantee claims for the unit and no liability for any resulting personal damage or material damage will be accepted if the unit is used for other purposes than originally intended, if it is not correctly connected or operated, or if it is not repaired in an expert way.
- Important for U. K. Customers!
The wires in this mains lead are coloured in accordance with the following code:
blue = neutral
brown = live
As the colours of the wires in the mains lead of this appliance may not correspond with the coloured markings identifying the terminals in your plug, proceed as follows:
- The wire which is coloured blue must be connected to the terminal which is marked with the letter N or coloured black.
- The wire which is coloured brown must be connected to the terminal which is marked with the letter L or coloured red.

If the unit is to be put out of operation definitively, take it to a local recycling plant for a disposal which is not harmful to the environment
3 Applications
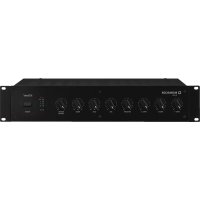
The mixer MPX-40DMP, featuring four stereo channels and an additional DJ microphone channel, is specially designed for professional DJ applications. The integrated MP3 player will replay MP3 audio files from a USB storage medium (e.g. USB flash drive) or from an SD/ MMC card. Many additional features of the MP3 player have precisely been matched to DJ applications, e.g. single title replay, change of replay speed (± 16%) , replay of a loop, brake effect and reverse replay.
The mixer is designed for installation into a rack for units of a width of 482mm (19^ ) .For rack installation, 4 RS (rack spaces) = 177~mm are required; however, the mixer can also be placed as desired.
4 Connection
Prior to making or changing any connections, switch off the MPX-40DMP and the units to be connected.
1) Connect the stereo audio sources to the corresponding RCA input jacks (44) of the channels 1-4 (white jack L = left channel; red jack R = right channel):
- units with line level output (e.g. CD player, tape deck, radio) to the jacks LINE or CD;
- turntables with magnetic system to the jacks PHONO. The clamp screw GND (45) is provided as a common ground point: Connect the ground connections of the turntables to the clamp screw.
2) Connect a DJ microphone to the XLR jack MIC (2) on the upper side.
3) Several stereo outputs are available to connect amplifiers:
- outputs MASTER (41): to connect the amplifier for PA application. It is also possible to use the XLR jacks and RCA jacks at the same time to connect two amplifiers.
output BOOTH (42): e. g. to connect an amplifier for a monitoring system or for PA application in adjoining rooms
4) For audio recordings, connect the recorder to the output REC (43). The recording level is independent of the position of the output controls MASTER and BOOTH.
5) For prefader listening to the input channels or for monitoring the sum signal ahead of the output controls MASTER and BOOTH, connect headphones (minimum impedance 8 Ω) to the 6.3mm jack PHONES (14).
6) Connect the mains cable provided to the mains jack (40) first, and then connect it to a mains socket (230V /50Hz)
5 Operation of the Mixer
Prior to switching on, set the output controls MASTER (23) and BOOTH (24) to minimum to prevent switching noise. Switch on the mixer with the POWER switch (12). The power LED ON (8) lights up; the display (11) and some buttons are illuminated.
CAUTION Never adjust the audio system or the headphones to a very high volume. Permanent high volumes may damage your hearing! Your ear will get accustomed to high volumes which do not seem to be that high after some time. Therefore, do not further increase a high volume after getting used to it.
After operation, switch off the mixer with the POWER switch.
5.1 Mixing the audio sources
Crossfading between two channels
The following operating steps are merely an aid; you may also proceed differently.
1) For basic setting:
a) Set all channel faders (15) and the control MIC LEVEL (3) to minimum.
b) Set all tone controls (1, 7) to mid-position.
c) Deactivate the crossfading function. For this purpose, set the two assign switches CROSSFADER ASSIGN A (19) and B (21) to the same channel number and slide the crossfader (20) to the left stop.
d) Make sure to deactivate the talkover function: The button TALK OVER must not be illuminated; disengage the button, if necessary.
e) Use the input selector switches (4) to select the desired signal input for each stereo channel:
CH 1, CH 2: line input or phono input
CH 3: line input or CD input
CH 4: line input or MP3 player
f) Open the MASTER control (23) to such an extent that the subsequent settings are reproduced well via the audio system connected.
g) Feed an audio signal (e.g. music piece) each to the stereo channels. Use the GAIN controls (6) to control the channels one after another to an optimum level via the VU meters of the channels (5) so that the red LED "3" lights up with level peaks. To monitor a stereo channel and to adjust the sound, open the corresponding channel fader (15) accordingly. Adjust the sound with the controls HI, MID and LOW. Then readjust the level control with the GAIN control, if necessary, and close the channel fader.
2) After the basic setting, mix the input signals with the channel faders or fade them in or out.
3) Use the MASTER control (23) to adjust the definitive volume of the sum signal. The signal level is indicated on the VU meter (25). Usually there is an optimum level control at 0 dB: However, if the output level of the mixer is too high or too low for the amplifier connected to the jacks MASTER (41), increase or decrease the sum signal accordingly.
For an amplifier connected to the jacks BOOTH (42), adjust the volume with the control BOOTH (24).
4) For a microphone announcement, adjust the volume with the control MIC LEVEL (3) and the sound with the controls HI and LOW (1). To make it easier to understand the announcement, press the button TALK OVER (13) to reduce the volume of the stereo channels by 15 dB.
5) The crossfader (20) is used to crossfade between two stereo channels. For this purpose, select the two channels to be used for cross fading with the assign switches CROSSFADER ASSIGN A (19) and B (21). Adjust the behaviour of the crossfader (20) with the switch CURVE (22):
left position sharp crossfading with a wide range in which both channels are reproduced at the same volume
right position × soft and smooth crossfading
5.2 Prefader listening to the channels 1-4 and to the sum signal
It is possible to monitor the stereo input channels 1 - 4 individually via headphones, even if the corresponding channel fader (15) has been set to minimum. This feature is used, for example, to select the next title to be replayed.
With the prefader listening function, it is also possible to monitor the master channel via headphones, even if the MASTER control (23) has been set to minimum.
1) For prefader listening to an input channel, press the corresponding button PFL (17).
2) Set the MIXING control (18) to the position PFL.


3) Adjust the headache volume with the control LEVEL (16).
4) To monitor the sum signal, set the MIXING control to the position MASTER. In the intermediate positions, a mixed signal from the input channel signal and the sum signal is reproduced.
6 Operation of the MP3 Player
After switching on the unit, the MP3 player will load the USB storage medium connected to the USB port (9). If no USB storage medium has been connected, the display (11) will show "NO USB" after a while.
6.1 Replaying music pieces
1) Insert a USB flash drive into the USB port (9) or connect a hard disk (with separate power supply, if necessary) to the USB port and/or insert an SD/ MMC memory card into the slot SD (10), the notched corner of the card facing to the left. To remove the card, slightly press it to eject it.
2) Select the memory card or the USB storage medium with the button USB / SD (33), if necessary. Accordingly, the display (11) shows USB or SD (A) on the top left.
3) After loading, the first title in the first folder is selected. To start the first title, press the button (A1). To pause and continue the replay at any time, press the button
4) To select another title, use the buttons (32). The display shows the title number under TRACK (G).
Button go to the next title
Button go to the beginning of the current title. Each time you press the button, you go back another title.
5) To select another folder, press the button FOLDER / TRACK (27) first so that it is illuminated. Now select another folder with the buttons and . The display shows the number of the folder under FOLDER (H).
To use the buttons and title selection again, press the button FOLDER / TRACK once again so that it no longer illuminated.
6) For fast forward, keep the button pressed; for fast reverse, keep the button pressed. (The button FOLDER / TRACK must not be illuminated.)
Note: You will not be able to trace the fast forward / reverse function acoustically, only by means of the time indication on the display. Fast reverse always stops at the beginning of the title.
7) To change the replay speed and thus the pitch, the button PITCH (35) must be illuminated. If it is not illuminated, press the button once. To change the speed by ± 16% in steps of 1% , press the button PITCH (26). The display shows the deviation from the standard speed under PITCH (O).
6.2 Indication of title information
The display (fig. 2) indicates a variety of information:
- The number of the folder selected under FOLDER (H).
- The number of the title selected under TRACK (G). In each folder, the titles are numbered separately.
- The playing time of the title selected: relative as a bar graph (D) and absolute in minutes and seconds (N); the seconds are divided into 75 frames
To select the playing time indication, press the button TIME (39):
ELAPSED (C) to indicate that the time already played of the title is displayed
REMAIN (E) to indicate that the remaining time of the tile is displayed
- The file name scrolling through the text line (L); if there is additional information on the title (ID3 tags), e.g. name of the title, artist and album, this information is also indicated in the text line
6.2.1 Graphic indication of playing time
In addition to the numerical time indication (N), the bar graph (D) indicates the playing time graphically by its length, in relation to the title duration (relative time indication). To indicate the last 30 seconds of a title, the bar graph starts flashing in its full length.
6.2.2 Number of beats per minute
To determine the number of beats per minute of a title, briefly press the button TAP (38) several times to the beat of the music. The display shows the number of beats under BPM (F).
6.3 Selecting continuous replay or single title replay
To switch between continuous replay [indication CONTINUE (K)] and single title replay [indication SINGLE ()] , press the button CONT/ SINGLE (34).
- For single title replay the unit is always set to pause at the end of a title.
This mode is specially provided for DJ applications. After selecting a title, the MP3 player is set to pause precisely on the spot where the music starts (usually not at the time index 0:00:00 but some frames later, e.g. 0:00:15). This spot is automatically memorized as a starting point (Auto Cue point). On the display, it is indicated as CUE (I). After starting the title, press the button CUE (30) to return to this starting point. After replaying a title, the unit is set to pause precisely on the spot where the music of the next title starts. This spot is then memorized as a new starting point. - For continuous replay all titles are played continuously one after the other, i.e. after the last title, the first title starts again.
6.4 Replaying only the first few seconds of a title
For replaying only the first few seconds of a title, keep the button CUE (30) pressed. After releasing the button, the MP3 player returns to the beginning of the title and is set to pause.
1) Set the player to single title replay: indication SINGLE (J). If CONTINUE (K) is indicated, press the button CONT/ SINGLE (34).
2) Select the title (chapter 6.1, steps 4 and 5).
3) When the display shows CUE (I) and the button CUE is illuminated in red, keep the button pressed to replay only the first few seconds of the title.
4) To replay the title, press the button (31).
6.5 Return to a certain spot defined previously (Cue point)
To quickly return to a certain spot within a title, memorize a starting point (Cue point) with the button CUE (30).
1) While replaying, when you have reached the spot to which you wish to return to later, set the unit to pause with the button × 81
2) Restart the replay with the button The spot is memorized as a Cue point. To confirm, the indication AUTO CUE (I) and the button CUE start flashing twice.
Caution: Do not set the player to pause again now; otherwise the spot memorized as a Cue point will be replaced by the spot where the player was set to pause when the replay is continued.
3) To return to the Cue point, press the button CUE. After returning, the button is illuminated and the display shows CUE (I). The MP3 player is set to pause.
4) Start the replay with the button Ior keep the button CUE pressed as long as the title is to be played. After releasing the button CUE, the MP3 player returns to the Cue point and is set to pause.
Note: When you have reached or selected the next title, the Cue point that has been memorized will be replaced by the beginning of the next title.
6.6 Effects
Various effects are available for a creative music programme.
- Brake: This effect simulates the slow start and braking of a turntable.
To activate the effect, press the button BRAKE (37) so that it is illuminated. When a music piece is replayed and you set the unit to pause with the button (31), the replay is not stopped abruptly, but is braked to a standstill. When you continue the replay, the title starts slowly.
- Reverse: reverse replay
Press the button REVERSE (36) when a title is replayed.
Note: For technical reasons, you will only be able to replay a title in reverse mode for the same time that it has been replayed in forward mode.
- Loop: A certain section of a title can be repeated as a seamless loop as many times as desired.
1) Press the button (81) to start the replay. When you have reached the desired starting point of the loop, press the button IN (28).
2) When you have reached the desired end of the section while replaying, press the button OUT (28). The title section is continuously repeated. As long as the loop is replayed, the display shows LOOP (M).
3) To exit the loop and to continue the title, press the button OUT for a second time. To restart the loop, press the button RELOOP (28) again.
6.7 Pitch Bend - Matching the beat between two music pieces
When using a second MP3 player, it is possible to synchronize the beat of two music pieces with the same speed. Thus, the dancing rhythm is not interrupted when crossfading from one music piece to the other one.
1) First use the speed control (26) to match the speed of the music piece to which cross-fading is desired to the speed of the current music piece. The easiest way to do this is to adjust the same number of beats per minute with the sliding control, see chapter 6.2.2.
2) Synchronize the beats of the music piece to which crossfading is desired to the beats of the current music piece with the buttons PITCH + and - (29):
- As long as you keep the button + pressed, the title is faster.
- As long as you keep the button - pressed, the title is slower.
Thus, the beats are displaced in relation to the beats of the current music piece.
7 Specifications
Inputs
Sensitivity/Impedance
MIC, mono: 4 mV/1 kΩ
PHONO, stereo: . . . . . 6 mV/56 kΩ
LINE and CD, stereo: .300 mV/25 kΩ
Outputs
MASTER, stereo: .870 mV
BOOTH, stereo: .950 mV
REC, stereo: .800 mV
Headphones, stereo: ≥ 8
Frequency response: .20 - 20 000 Hz
THD: <0.04%
S/N ratio: 60 dB
Tone control MIC
Low frequencies: . . . ±12 dB at 70 Hz
High frequencies: . . . ±12 dB at 7 kHz
Equalizer CH 1-4
Low frequencies: . . . +12 dB, -24 dB
at 30Hz
Midrange frequencies: +12 dB, -24 dB
at 1.2kH
High frequencies: . . . . +12 dB, -24 dB
at 15 kHz
Talkover: -15 dB
Power supply: 230 V~/50 Hz
Power consumption: . . . . 20 VA max.
Ambient temperature: .0-40°C
Dimensions: 482 x 177 x 115 mm, 4 RS
Weight: 3.4 kg
Subject to technical modification.
6.3 Lecture continue
enheten skull kasseras skull den has till atervinning.