
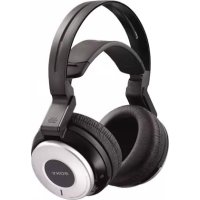
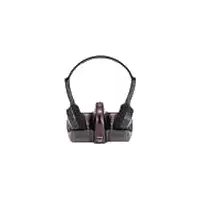
MDRIF630RK - Earphones SONY - Free user manual and instructions
Find the device manual for free MDRIF630RK SONY in PDF.

| Product Type | Infrared wireless stereo headphones |
| Brand | Sony |
| Model | MDR-IF630RK |
| Modulation System | Frequency Modulation |
| Carrier Frequency | Right: 2.8 MHz, Left: 2.3 MHz |
| Driver | 30 mm diameter, neodymium magnet |
| Frequency Response | 12 - 24,000 Hz |
| Transmitter Dimensions | 130 x 135 x 150 mm (w/h/d) |
| Transmitter Weight | Approx. 200 g |
| Headphone Type | Closed, dynamic |
| Headphone Weight | 310 g |
| Transmitter Power Supply | Supplied AC adaptor (AC depending on country) |
| Headphone Power Supply | Built-in rechargeable Ni-MH batteries (2.4 V) |
| Battery Life | Approx. 33 hours after 14 hours of charging |
| Charging Time | Approx. 14 hours |
| Main Functions | Noise reduction, voice enhancement mode, auto power on/off, volume control |
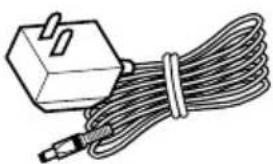
| Included Accessories | AC adaptor, unimatch plug adaptor, connection cord (1 m), AC outlet adaptor (Japan only) |
| Maintenance and Cleaning | Clean with a dry cloth; do not expose to moisture |
| Safety | Do not use at high volume to prevent hearing damage; avoid exposure to rain |
| Spare Parts and Repairability | Replaceable ear pads (contact Sony dealer) |
| General Information | Battery recycling according to local regulations; CE marking |
Frequently Asked Questions - MDRIF630RK SONY
User questions about MDRIF630RK SONY
0 question about this device. Answer the ones you know or ask your own.
Ask a new question about this device
Download the instructions for your Earphones in PDF format for free! Find your manual MDRIF630RK - SONY and take your electronic device back in hand. On this page are published all the documents necessary for the use of your device. MDRIF630RK by SONY.
USER MANUAL MDRIF630RK SONY
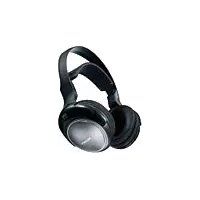
Cordless Stereo Headphone System
Operating Instructions ____ GB
Mode d'emploi FR
Bedienungsanleitung ____ DE
Manual de instrucciones ____ ES
MDR-IF630RK
WARNING
To prevent fire or shock hazard, do not expose the unit to rain or moisture.
To avoid electrical shock, do not open the cabinet. Refer servicing to qualified personnel only.
For the customers in the U.S.A. WARNING
You are cautioned that any changes or modifications not expressly approved in this manual could void your authority to operate this equipment.
Owner's Record
The model and serial numbers are located at the bottom of the transmitter and the left inner side of the head band.
Record these numbers in the spaces provided below. Refer to them whenever you call upon your Sony dealer regarding this product.
Model No.
Transmitter TMR-IF630R
Headphones MDR-IF630R
Serial No.
Transmitter ____
Headphones ____
For the customers in the U.S.A. and Canada
RECYCLING NICKEL METAL HYDRIDE BATTERIES
Nickel Metal Hydride batteries are recyclable.
You can help preserve our environment by returning your used rechargeable batteries to the collection and recycling location nearest you.

For more information regarding recycling of rechargeable batteries, call toll free 1-800-822-8837, or visit http://www.rbrc.org/.
Caution:
Do not handle damaged or leaking Nickel Metal Hydride batteries.
Welcome!
Thank you for purchasing the Sony MDR-IF630RK Cordless Stereo Headphone System. Before operating the unit, please read this manual thoroughly and retain it for future reference.
Some features are:
- Cordless system that allows you to listen to a program free from the restriction of a cord
- The infrared rays from the transmitter cover a broad horizontal listening area with a maximum distance of 10 m (32.8 ft.).
- Comfortable Circum-aural headphones with self adjusting head band
- Noise reduction system to reproduce a clear sound with minimum transmission noise
- The voice enhance mode of the audio mode switch allows clear hearing of the human voice.
• Automatic ON/OFF function on headphones to preserve battery power - The VOL control adjusts the volume level of both channels.
- Powered by built-in Ni-MH (nickel-hydrogen) rechargeable batteries.
Note
This headphone system cannot be used with the headphones or transmitter of cordless headphone systems which do not employ the noise reduction system.
Table of contents
Getting started
Unpacking 4
Setting up the transmitter 4
Charging the headphone batteries...... 7
Operating the system
Listening to a program 8
The effective areas of the transmitter .. 9
Additional information
Precautions 10
Disposing of the headphones ...... 10
Troubleshooting.... 11
Specifications 13

Getting started
Unpacking
Check that you have the following items:
• The headphones

natural_image
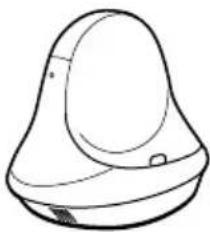
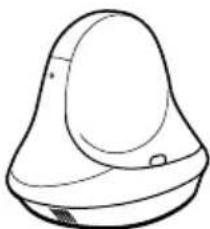
Line drawing of a pair of earbuds tied together (no text or symbols)- The transmitter
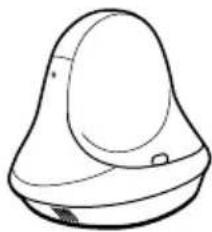
natural_image
Simple line drawing of a bell-shaped object with no text or symbols- AC power adaptor

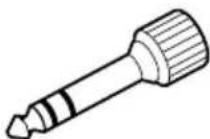
natural_image
Illustration of a cable with a plug and connector, no text or symbols present- Unimatch plug adaptor (stereo mini jack stereo phone plug)
- Connecting cord (phono plugs stereo mini plug), 1 m

• AC plug adaptor (tourist model in Japan only)

Setting up the transmitter
1 Connect the transmitter to audio/video equipment. Select one of the hookups below depending on the jack type:
ⒶTo connect to a headphones jack
Set the INPUT SOURCE selector to PHONES.
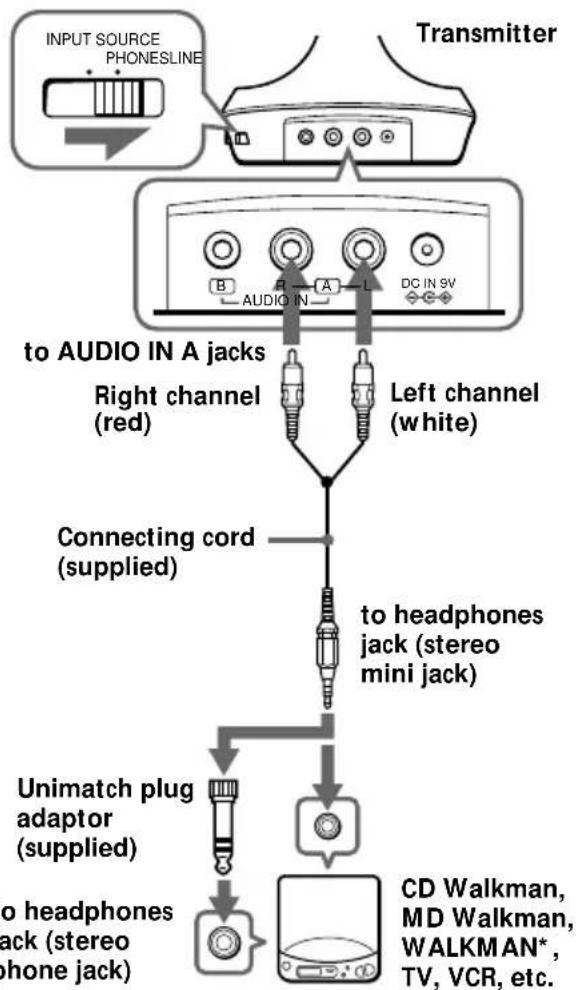
flowchart
graph TD
    A["Transmitter"] --> B["to AUDIO IN A jacks"]
    B --> C["Right channel (red)"]
    B --> D["Left channel (white)"]
    C --> E["Connecting cord (supplied)"]
    D --> E
    E --> F["to headphones jack (stereo mini jack)"]
    F --> G["Unimatch plug adaptor (supplied)"]
    G --> H["to headphones jack (stereo phone jack)"]
    H --> I["CD Walkman, MD Walkman, WALKMAN*, TV, VCR, etc."]
    J["INPUT SOURCE PHONESLINE"] --> K["Input Source"]
* WALKMAN is a registered trademark of Sony Corporation.
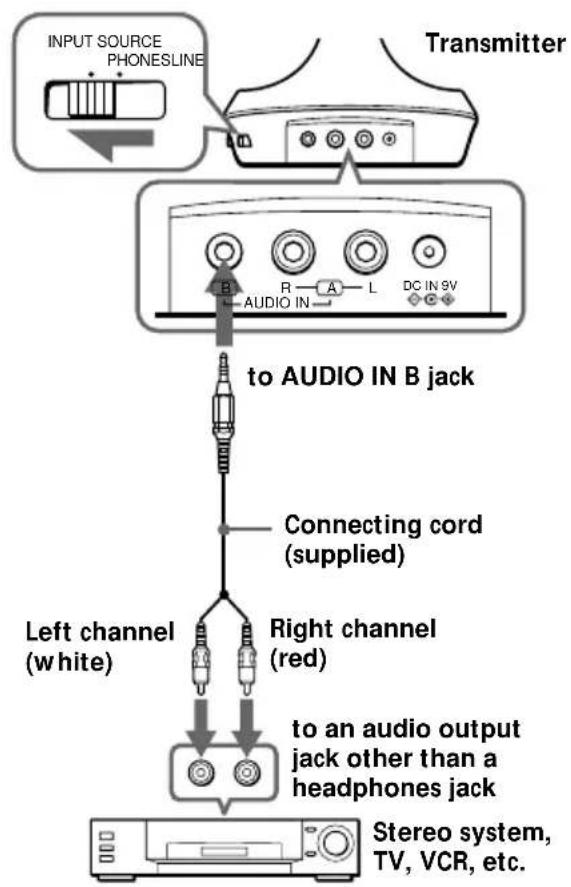
⑧To connect to an audio output jack other than a headphones jack
Set the INPUT SOURCE selector to LINE.
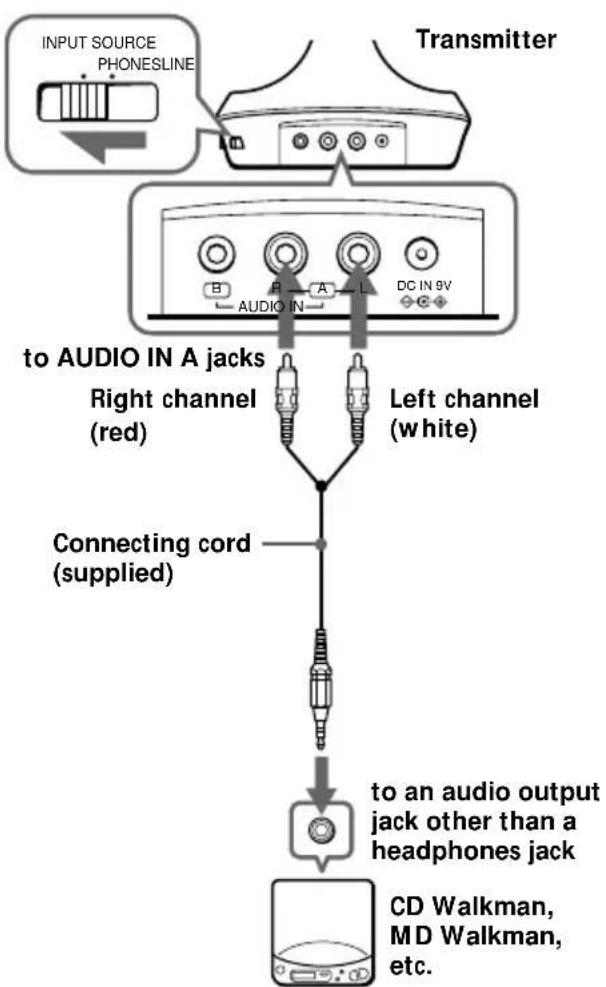
flowchart
graph TD
    A["Transmitter"] --> B["to AUDIO IN A jacks"]
    B --> C["Right channel (red)"]
    B --> D["Left channel (white)"]
    C --> E["Connecting cord (supplied)"]
    D --> E
    E --> F["to an audio output jack other than a headphones jack"]
    F --> G["CD Walkman, MD Walkman, etc."]
flowchart
graph TD
    A["INPUT SOURCE PHONESLINE"] --> B["Transmitter"]
    B --> C["to AUDIO IN B jack"]
    C --> D["Connecting cord (supplied)"]
    D --> E["Left channel (white)"]
    D --> F["Right channel (red)"]
    E --> G["to an audio output jack other than a headphones jack"]
    F --> G
    G --> H["Stereo system, TV, VCR, etc."]
Continued
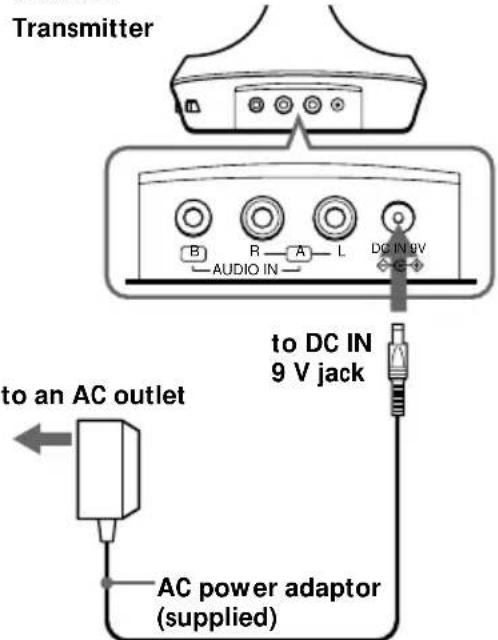
2 Connect the supplied AC power adaptor to the transmitter.
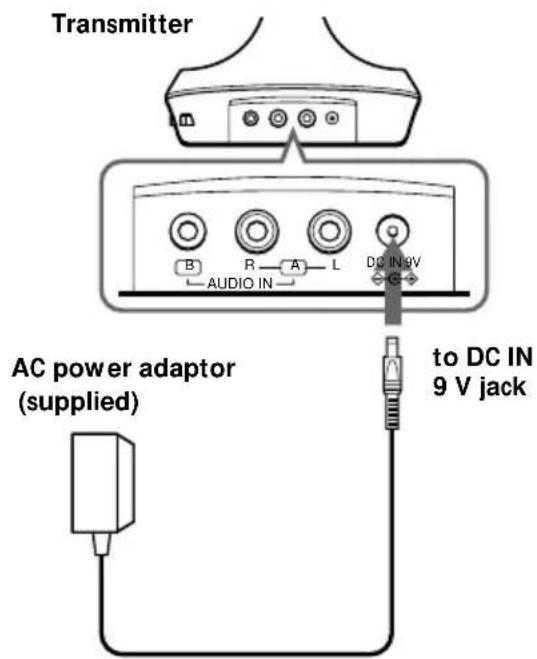
3 If your AC power adaptor is equipped with a voltage selector, before connecting the AC power adaptor to an AC outlet, set it to the operating voltage in your area with a screwdriver.

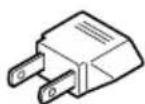
If the plug of the AC power adaptor does not fit in the AC outlet, use the supplied AC plug adaptor.
4 Connect the AC power adaptor to an AC outlet.
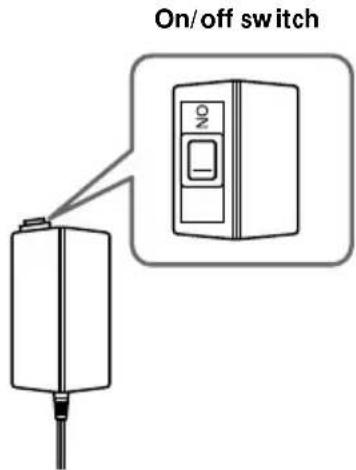
5 If your AC power adaptor is equipped with an on/off switch, set it to ON. The power is supplied to the transmitter.
Notes
- Do not connect to the AUDIO IN A and B jacks at the same time. If you do so, the audio signals may be mixed. - Use only the supplied AC power adaptor. Do not use any other AC power adaptor.
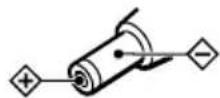
Polarity of the plug
- Keep the AC power adaptor cord as far away from the transmitter as possible. If the cord is positioned near the transmitter, noise may occur.
- When you connect the transmitter directly to a monaural earphone jack, the audio signal will not be output through the right channel. In such a case, use the separately sold PC-236HG plug adaptor.
- If the connected equipment has the AVLS (Automatic Volume Limiter System) function, be sure to turn the function off when using the transmitter. Otherwise, you will have to turn up the volume of the headphones, and that may cause noise.
Charging the headphone batteries
Using the headphones for the first time
When you use the headphones for the first time, charge the batteries in the following manner.
1 Connect the transmitter to a power source.
2 Place the headphones on the transmitter so that the charging pins on the transmitter engage the charging contacts on the bottom of the headphones.
The CHG (charge) indicator on the transmitter will light in green to indicate that the batteries are being charged.
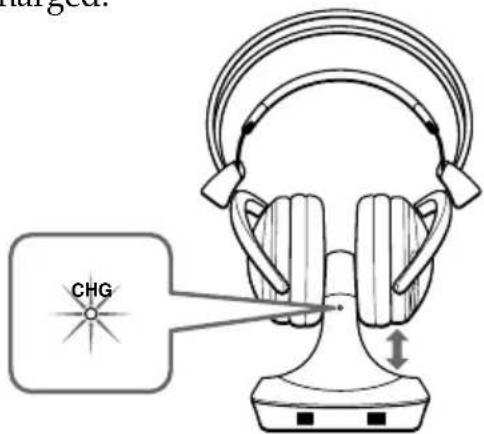
The charge indicator goes off after about 14 hours when the charging is completed.
When the charge indicator is not lit
Check the connection to make sure that the contact pins are properly fitted into the contact holes on the headphones, or if the headphones are rested on the transmitter correctly.
To recharge the headphone batteries after use
This system automatically stops charging by the built-in timer to prevent the risk of damage to the headphones due to overcharging. For this reason, we recommend that you rest the headphones on the transmitter whenever you do not use the headphones.
Charging and using hours
| Approx. charging hours | Approx. using time* |
| 1 | 3 hours |
| 14** | 33 hours |
* at 1 kHz, 1 mW + 1 mW output
** The hours required to fully charge empty batteries
Check the remaining power of the headphone batteries
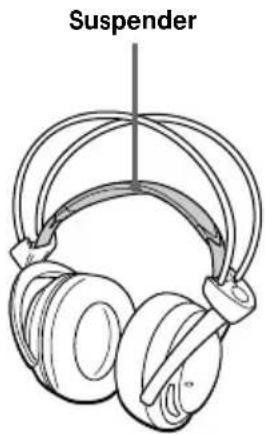
Pull up the suspender, and check that the headphones' power indicator lights in red. You can now use the headphones.
Charge the batteries or install new batteries, if the power indicator light is weak or turned off and the sound become distorted or has a lot of noise.
Note
During recharging, the transmitter is turned off automatically.
Listening to a program
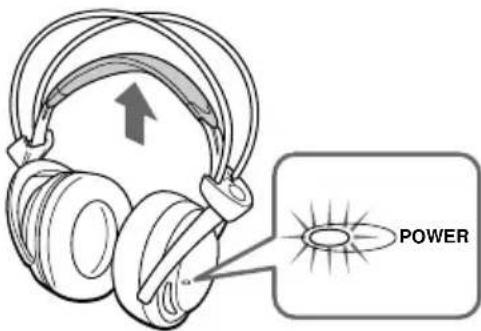
1 Turn on the audio/video equipment connected to the transmitter.
When the audio signal is input, the transmitter turns on automatically and the infrared emitters glow. If the transmitter is connected to the headphones jack, set the volume control of the audio source equipment as high as possible but not so high that the audio signal gets distorted.
2 Put on the headphones and the power turns on automatically. The power indicator glows red when the power turns on.

natural_image
Line drawing of a person wearing headphones (no text or symbols)3 Adjust the volume.
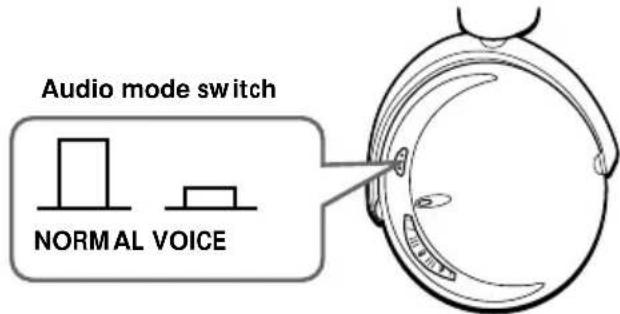
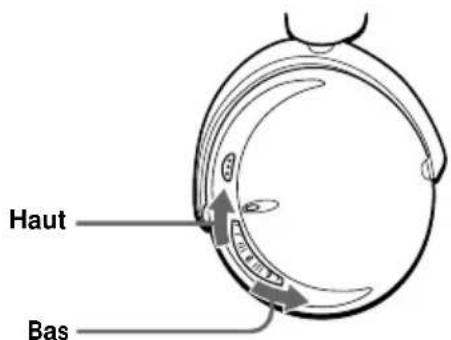
Audio mode switch
Depress the audio mode switch (VOICE mode) to emphasize the human voice. Press to release it (NORMAL mode) for normal tone quality.
ATT (attenuator) selector
If a loud sound is distorted when the transmitter is connected to an audio output jack other than the headphones jack, set the ATT selector on the transmitter to -12 dB. The default setting of the ATT selector is 0 dB.

Auto power on/off function
When you remove the headphones, the power turns off automatically. Do not allow the suspender to be pulled up, otherwise the headphones will be switched on.
Mute function
If a hissing noise is heard when the infrared rays are obstructed, or the headphones are used outside of the effective range (see right column), the mute function will be activated and the sound will not be heard from the headphones. To restore the sound, move nearer toward the transmitter or remove the obstruction.
When no audio signal is received for more than approximately five minutes
The transmitter will be turned off automatically.
When an audio signal is intermittent or a low-level audio signal continues for more than approximately five minutes
The transmitter may be turned off automatically. In this case, turn up the volume of the connected equipment while turning down the volume of the headphones.
After listening to a program
Take the headphones off and rest them on the transmitter. Then turn off the connected audio/video equipment. The transmitter power will be turned off automatically if no audio signal is input from the audio/video equipment for more than approximately five minutes.
Note
The infrared emitters light up when the transmitter is turned on. The brightness of the emitters may not be uniform, however, this is not a malfunction.
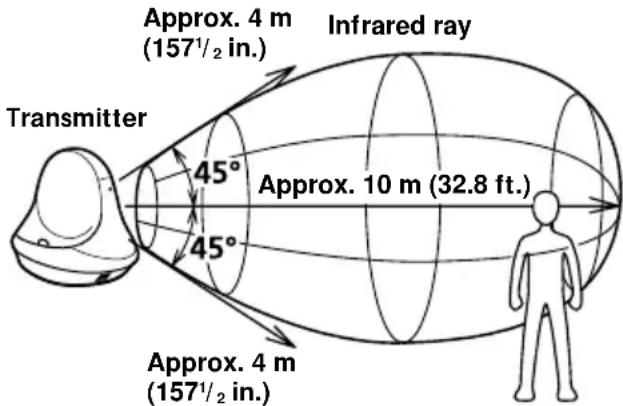
The effective areas of the transmitter
The illustration below shows the approximate area covered by the infrared rays emitted from the transmitter.
Notes
- This system utilizes infrared rays for communication so noise (hissing) can be heard from the headphones as you move farther away from the transmitter. The sound will also be cutoff and noise will be heard if the infrared rays are blocked. These are characteristics of infrared ray communication and do not indicate malfunction.
- The infrared rays will not penetrate walls or opaque glass, therefore, be sure to stay within sight of the transmitter.
- When you use the headphones inside the area illustrated in the diagram, the transmitter can be placed in the front, behind or by the side of the listener.
- The sound you hear varies according to your position and the transmitter position. Try finding a position which yields the best sound.
- Do not cover the infrared sensors with your hands or hair.

Additional information
Precautions
- The CE mark on the unit is valid only for products marketed in the European Union.
- When the transmitter is not to be used for a long period of time, disconnect the AC power adaptor from the AC outlet holding the plug. Do not pull on the cord. If your AC power adaptor is equipped with an on/off switch, set it to off.
- Do not leave the cordless stereo headphone system in a location subject to direct sunlight, heat or moisture.
Notes on headphones
Preventing hearing damage
Avoid using headphones at high volume.
Hearing experts advise against continuous, loud and extended play. If you experience a ringing in your ears, reduce the volume or discontinue use.
Caring for others
Keep the volume at a moderate level. This will allow you to hear outside sounds and to be considerate to the people around you.
If you have any questions or problems concerning the system that are not covered in this manual, please consult the nearest Sony dealer.
Be sure to bring the headphones and the transmitter to the Sony dealer when requiring repair work.
Replacing the ear pads
When the ear pads become dirty or damaged, you can get replacements from your Sony dealer.
Disposing of the headphones
For environmental conservation, be sure to remove the built-in rechargeable batteries from the headphones before you dispose of the headphones, and dispose of the batteries appropriately.
1 Remove the left headphone's ear pad. Then remove the four screws from the housing and open the housing.
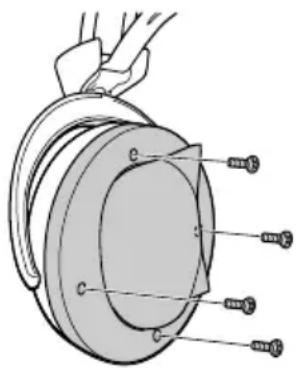
natural_image
Technical diagram of a mechanical component with threaded fasteners and a central housing (no text or symbols)2 Remove the three screws from the battery box and circuit board, and take out the battery box together with the circuit board from the housing.

3 Push to remove the batteries from the rear of the battery box.
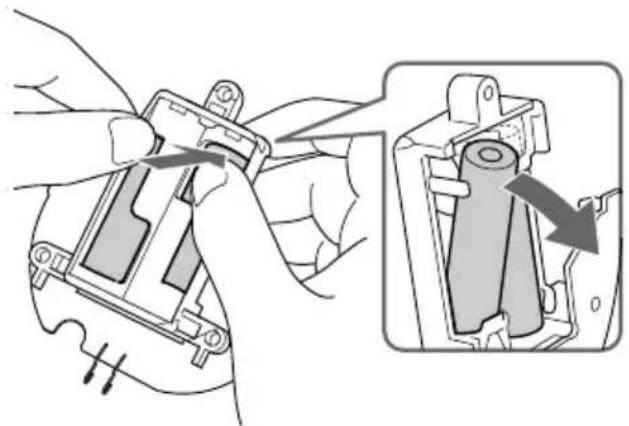
natural_image
Illustration of a hand using a clamp to adjust or install a mechanical component, with an inset showing the same part (no text or symbols present)Note
Be careful not to touch the circuit board attached to the battery box. Hold the battery box (black plastic box) when you remove them.
Troubleshooting
| Problem | Solution |
| No sound/Muffled sound | Check the connection of the audio/video equipment or the AC power adaptor. If your AC power adaptor is equipped with an on/off switch, check that the switch is set to ON. |
| Check that the audio/video equipment is turned on. | |
| Turn up the volume on the connected audio/video equipment, if the transmitter is connected to the headphones jack. | |
| The mute function is activated.• Check if there is any object between the transmitter and the headphones.• Use the headphones near the transmitter.• Change the position and angle of the transmitter. | |
| The headphones' power indicator light is weak or turned off.• Charge the headphone batteries or if the power indicator is still off after charging the headphone batteris, take the headphones to a Sony dealer for replacements of the batteries. | |
| Check if the INPUT SOURCE selector is set to the correct position. | |
| Weak sound | Set the ATT selector on the transmitter to 0 dB. |
| Distortion | If the transmitter is connected to the headphones jack, turn down the volume of the connected audio/video equipment. |
| If the transmitter is connected to an audio output jack other than the headphones jack, set the ATT selector to -12 dB. | |
| The headphones' power indicator light is weak or turned off.•Charge the headphone batteries or if the power indicator is still off after charging the headphone batteries, take the headphones to a Sony dealer for replacements of the rechargeable batteries. | |
| Check if the INPUT SOURCE selector is set to the correct position. | |
| The headphones of another headphone system which does not employ the noise reduction system are used with the transmitter of this system.•Use the headphones of this system. | |
| The transmitter of another headphone system which does not employ the noise reduction system is used with the headphones of this system.•Use the transmitter of this system. | |
| Loud background noise | Move closer to the transmitter. As you move away from the transmitter, more noise is likely to be heard. This is inherent to infrared ray communication and does not mean that there is a problem with the unit itself. |
| Check that there is no object between the transmitter and the headphones. | |
| Check that the infrared sensors are not covered with your hands or hair. |
| Problem | Solution |
| Loud background noise | Change the position or angle of the transmitter.• The headphones are used by a window where the sunlight is too strong.→Draw the curtains/blind to shut out the direct sunlight, or use the headphones away from the sunlight. |
| If the transmitter is connected to the headphones jack, turn up the volume of the connected audio/video equipment. | |
| The headphones' power indicator light is weak or turned off.• Charge the headphone batteries or if the power indicator is still off after charging the headphone batteries, take the headphones to a Sony dealer for replacements of the batteries. | |
| When using more than two transmitters, turn off the power of the second transmitter or move it so that the area covered by the infrared rays does not overlap each other. | |
| Noise is heard from the connected audio equipment.• Check if the INPUT SOURCE selector is set to the correct position.• Disconnect the connecting cord with the power of the transmitter on and check if the noise is heard from the headphones. If the noise disappears, the connected equipment is the cause to make that noise. | |
| The batteries cannot be charged. | Check if the charge indicator lights on. If not, put the headphones on the transmitter correctly so that the charge indicator lights on. |
Specifications
General
Modulation system
Frequency modulation
Carrier frequency
Right 2.8 MHz
Left 2.3 MHz
Transmitter
Power source DC IN 9V jack accepts power supplied from the AC power adaptor for use on the following voltages:
| Where purchased | Operating voltage |
| U.S.A. | 120 V AC, 60 Hz |
| U.K. | 220 – 230 V AC, 50 Hz |
| European countries | 220 – 230 V AC, 50 Hz |
| Japan (except for Japanese domestic model) | 110 V/120 V/220 V/240 V AC, 50/60 Hz |
| Other countries | 220 – 230 V AC, 50/60 Hz or 120 V AC, 60 Hz |
Audio input Phono jacks/stereo mini jack
Dimensions Approx. 130 x 135 x 150 mm
(5^1 / 4× 5^3 / 8× 6 in) (w / h / d)
Mass Approx. 200 g (7 oz)
Headphones
Type Closed, dynamic
Driver unit 30 mm dia. with neodymium magnet
Frequency response
12 - 24,000 Hz
Power source DC 2.4 V: Built-in rechargeable batteries
Mass Approx. 310 g (10.9 oz)
Built-in rechargeable batteries
Model name NH-AAC
Type Ni-MH
Voltage 1.2 V
Capacity 1000 mAh
Optional accessories
Plug adaptor PC-236HG
(phono plug x 2 ↔ phono plug x 2)
RK-G136HG
Design and specifications are subject to change without notice.
AVERTISSEMENT
natural_image
Line drawing of a pair of earbuds with straps (no text or symbols)- Transmetteur
natural_image
Line drawing of a stylized bell-shaped object with no text or symbolsnatural_image
Illustration of a cable with connectors and a small plug, no text or symbols presentnatural_image
Coiled audio/video cable with two connectors and a connector pin (no text or symbols visible)natural_image
Diagram of a device with a close-up inset showing a control panel labeled 'N' (no text or symbols on the device itself)Remarques
natural_image
Line drawing of a person wearing headphones (no text or symbols)3 Réglez le volume.
Silencieux
natural_image
Technical diagram of a mechanical component with threaded fasteners and a curved housing (no text or symbols)natural_image
Illustration of a hand using a mechanical clamp to adjust a component, with an inset showing the close-up of the internal structure (no text or symbols present)Remarque
natural_image
Line drawing of a pair of audio headphones with earbuds (no text or symbols)- Sendeeinheit
natural_image
Line drawing of a stylized bell-shaped object with no text or symbols- Netzadapter
natural_image
Illustration of a cable with connectors and a small plug, no text or symbols presentnatural_image
Coiled audio cable with two connectors and a string, no text or symbols visible- Netzadapterstecker (nur Touristenmodell in Japan)
natural_image
Line drawing of a person wearing headphones (no text or symbols)natural_image
Technical diagram of a mechanical component with threaded fasteners and a central housing (no text or symbols)natural_image
Illustration of a hand using a clamp to adjust a mechanical component, showing a close-up view with arrows indicating motion (no text or symbols present)Hinweis
natural_image
Line drawing of a pair of earbuds with black straps (no text or symbols)- Transmisor

natural_image
Simple line drawing of a bell-shaped object with no text or symbolsnatural_image
Illustration of a cable with a plug and connector, no text or symbols presentnatural_image
Line drawing of a person wearing headphones (no text or symbols)natural_image
Technical illustration of a mechanical component with bolts and a handle (no text or symbols)natural_image
Mechanical assembly diagram showing a hand turning a component into a device with an inset view of the internal structure (no text or symbols present)Nota

- Cordless Stereo Headphone System
- WARNING
- For the customers in the U.S.A. WARNING
- Owner's Record
- RECYCLING NICKEL METAL HYDRIDE BATTERIES
- Welcome!
- Note
- Table of contents
- Getting started
- Operating the system
- Additional information
- Unpacking
- Setting up the transmitter
- Continued
- Notes
- Polarity of the plug
- Charging the headphone batteries
- Using the headphones for the first time
- Connect the transmitter to a power source.
- Place the headphones on the transmitter so that the charging pins on the transmitter engage the charging contacts on the bottom of the headphones.
- When the charge indicator is not lit
- To recharge the headphone batteries after use
- Check the remaining power of the headphone batteries
- Listening to a program
- Audio mode switch
- ATT (attenuator) selector
- Auto power on/off function
- Mute function
- When no audio signal is received for more than approximately five minutes
- When an audio signal is intermittent or a low-level audio signal continues for more than approximately five minutes
- After listening to a program
- The effective areas of the transmitter
- Precautions
- Notes on headphones
- Preventing hearing damage
- Caring for others
- Replacing the ear pads
- Disposing of the headphones
- Push to remove the batteries from the rear of the battery box.
- Troubleshooting
- Specifications
- General
- Transmitter
- Headphones
- Built-in rechargeable batteries
- Optional accessories
- AVERTISSEMENT
- Remarques
- Silencieux
- Remarque
- Hinweis
- Nota
Brand : SONY
Model : MDRIF630RK
Category : Earphones