
HR4342 - Air purifier PHILIPS - Free user manual and instructions
Find the device manual for free HR4342 PHILIPS in PDF.

User questions about HR4342 PHILIPS
0 question about this device. Answer the ones you know or ask your own.
Ask a new question about this device
Download the instructions for your Air purifier in PDF format for free! Find your manual HR4342 - PHILIPS and take your electronic device back in hand. On this page are published all the documents necessary for the use of your device. HR4342 by PHILIPS.
USER MANUAL HR4342 PHILIPS
- Keep page 3 open when reading these operating instructions.
Français Page 9
- Read the instructions carefully before you start using the appliance.
- Never immerse the appliance in water or any other liquid.
- Do not use the appliance outside or in a humid environment.
- The appliance influences the air circulation in the room in which it is used. It is recommended not to use the appliance next to an open fire.
- Always remove the plug from the wall socket before you open the appliance or before you start cleaning it.
- Do not touch any moving parts when you open the appliance. Let the fan come to a halt by itself.
- Keep the cord away from hot objects.
- If the cord of this appliance is damaged, it may only be replaced by an authorised Philips service centre, since repair requires special tools and/or parts.
Your Philips air cleaner is a very effective appliance which improves the quality of the air you breathe in your house or office. The appliance significantly reduces indoor air pollution caused by pollen, dust, bacteria, viruses, moulds, smoke and all kinds of other smells, such as cooking odours and traffic or industry smells from outside.
When comparing air cleaners you will notice that a number of terms are used by suppliers as an indication of the effectiveness of their appliances. The standard that best reflects the effectiveness of an air cleaner is CADR (Clean Air Delivery Rate). In general, an air cleaner with a high CADR will remove particles from the air more quickly than an air cleaner with a low CADR.
How does the Philips air cleaner work?
The air cleaner sucks in air though its front and both sides. The sucked-in air is filtered by the air cleaner. After filtering, clean air is blown out from the top of the appliance.
To be able to remove even the smallest particles from the air, the air cleaner has been equipped with a unique three-stage filter system.
1 Prefilter
The washable prefilter catches the larger airborne particles, such as fluff, hairs, etc.
HEPA filter
The HEPA filter removes the smaller particles from the air. The filter is made of glass fibres which are packed so closely together that they prevent even very small particles from passing through the filter. The same type of filter is also used in most operating rooms in hospitals.
Active carbon filters
The final stage consists of two active carbon filters. Active carbon is the only filter material that effectively absorbs most gases that cause, among other things, odour nuisance.
General description (fig. 1)
Air inlets
B Prefilter
HEPA filter
Active carbon filters
Active carbon replacement indicator
Hepa filter replacement indicator
Speed control
O = off
1 = low speed
2 = normal speed
turbo = high speed
On' pilot light
Air outlet
0 Handle
Cord storage facility
Placing the air cleaner
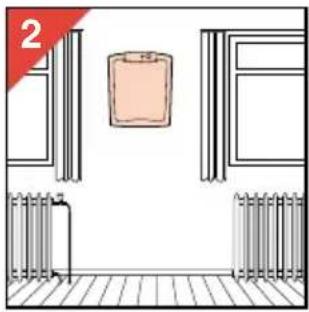
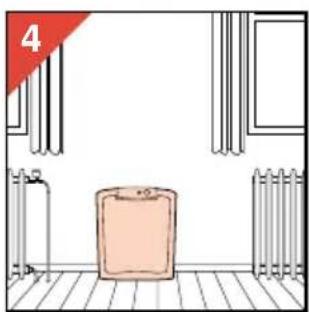
- As a rule, the air cleaner should be given a central position and should be placed on the floor with its back against the wall or or hung on the wall (fig. 2-4).
- Excess cord can be stored at the back (K) of the appliance (fig. 1).
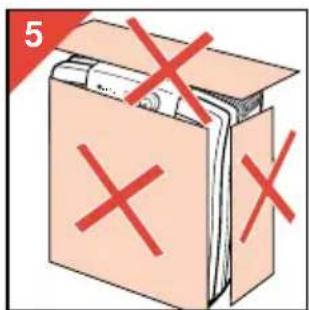
- Never cover the air inlets or outlet (fig. 5).
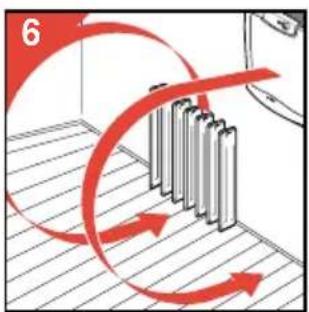
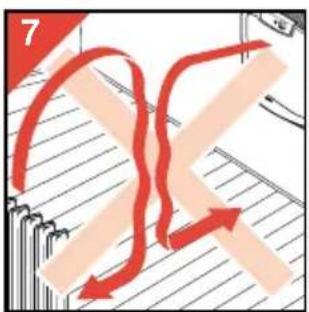
- When you are using a heating device:
position the air cleaner in such a way that the airflow caused by the appliance coincides with the convective airflow of the heating device. You should therefore place the air cleaner next to the radiator or other heating appliance (fig. 6-7).
- It is also possible to use more than one air cleaner in a room. This is advisable if the room is very big and/or has an irregular shape. In this case it is best to put both appliances against the same wall, yet as far removed from each other as possible.
- For proper cleaning of the air in a room, we advise you to use one HR 4342 air cleaner for
rooms with a surface area of up to 40m^2 (100m^3)
- Particularly people who suffer from a respiratory allergy are advised to put an air cleaner in the living room as well as in the bedroom and to let both air cleaners run continuously.
Using the air cleaner
- Before you use the appliance for the first time: Fill the active carbon filters with the supplied carbon granules (see 'Checking/replacing the active carbon').
- Stick the white sticker that comes with the granules onto one of the filters (fig. 8) and write the date on which you replaced the carbon granules on it.
- For a continuous supply of fresh, clean air in your room, run the applian or normal (2) speed.
- For quick air cleaning, set the speed control (G) to the turbo setting and switch to speed 1 or 2 after approximately 30 minutes.
- Check regularly if the filters need to be cleaned and/or replaced, particularly if the appliance starts to produce more noise. If necessary, clean the prefilter and/or replace the HEPA filter and the active carbon.
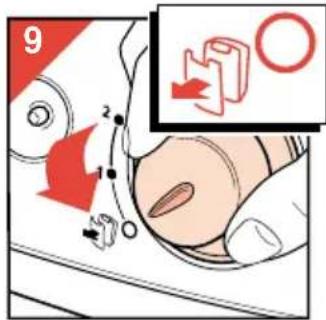
Opening the air cleaner
Note that the front of the air cleaner has been provided with an automatic safety lock which makes it impossible for you to open the appliance while it is running. The automatic safety lock also ensures that you cannot switch the appliance on when the front has been removed.
- Set the speed control to O (fig. 9).
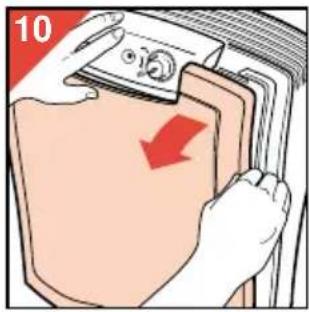
- Remove the plug from the wall socket.
- Remove the front of the appliance by pulling it towards you on one side (fig. 10).
Cleaning the prefilter
Clean the prefilter at least once every two months and more often if the appliance becomes noisier and if it is used in a room in which people smoke.
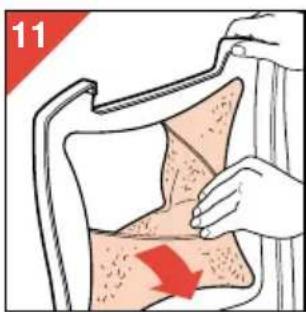
- Remove the prefilter (fig. 11).
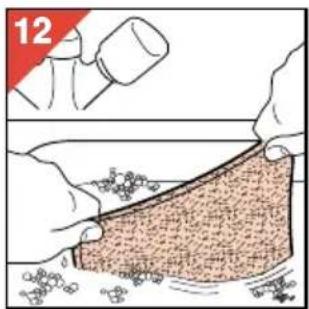
- Clean the prefilter by washing it (fig. 12) or vacuum cleaning it.
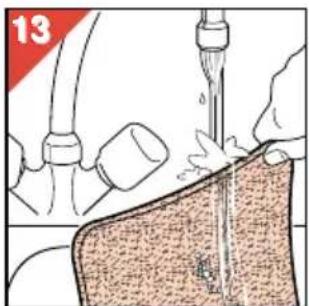
- If you have used washing-up liquid, rinse the filter with clean water (fig. 13).
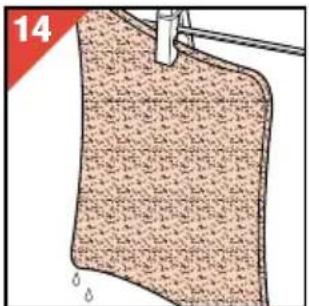
- Let the filter dry naturally (fig. 14) before you put it back into the appliance.
Checking/replacing the HEPA filter
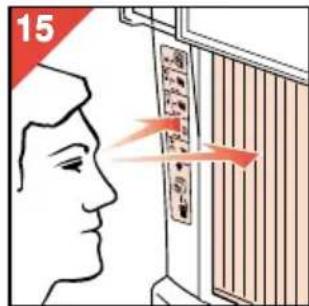
- To check if the HEPA filter needs to be replaced, compare the colour of the HEPA filter with the shades on the HEPA filter replacement indicator (F) (fig. 15).
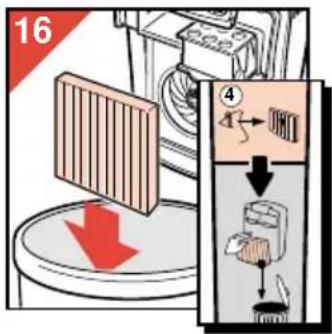
- If the colour of the filter corresponds to the darkest shade on the HEPA filter replacement indicator, replace the HEPA filter (fig. 16).
- New HEPA filters are available from your retailer under number HR 4940.
Checking/replacing the active carbon
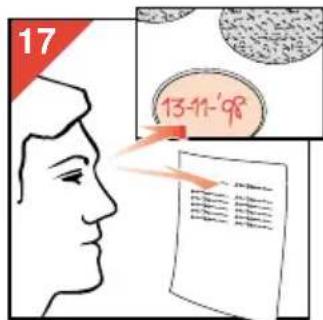
Check if the carbon granules need to be replaced by checking the date on the white sticker (fig. 17) and comparing it with the recommended replacement interval that applies to your individual use of the appliance (see table below).
| If used against tobacco smoke: replace every: ery: |
| average of 5 cigars/cigarettes a day 6 months average of 10 cigars/cigarettes a day 3 months average of 20 cigars/cigarettes a day 1.5 month |
| If used against pet, cooking, replace every: painting and other smells or gases: |
| average use of 5 hours a day 8 months average use of 10 hours a day 4 months average use of 20 hours a day 2 months |
The table shows that, depending on the level of air pollution in the room in which the air cleaner has been placed, the carbon granules should be replaced every 1.5 to 8 months.
NB: when you use the air cleaner against tobacco smoke as well as pet, cooking, paint and other smells or gases, you should stick to the replacement interval recommended for tobacco smoke.
To replace the carbon granules:
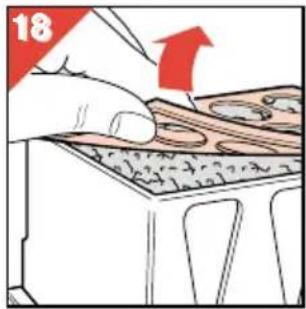

- Carefully open the top side of the active carbon filter (fig. 18).
- Throw the foam pad and the used carbon in the dustbin (fig. 19).
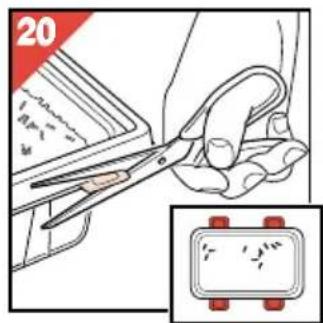
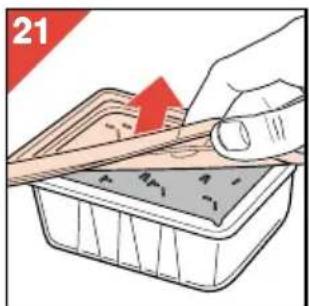
- Take a new container of carbon granules, cut off the plastic projections (fig. 20) and remove the lid (fig. 21).
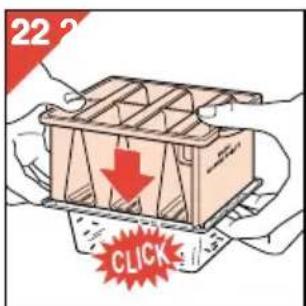
- Place the filter upside down onto the new container of carbon granules and snap the corners onto each other (fig. 22).
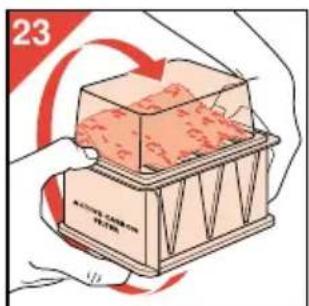
- Turn the container with the filter on top
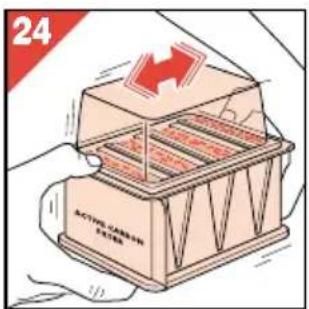
of it around with both hands (fig. 23). Shake the granules into the filter and make sure they are distributed evenly (fig. 24).
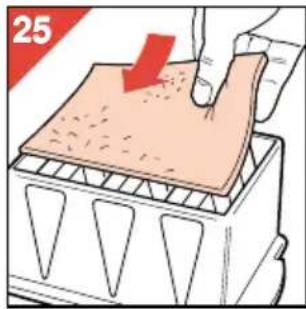
- Remove the plastic container and put a new foam pad onto the active carbon (fig. 25).
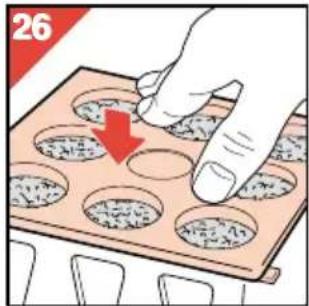
- Close the top of the filter again (fig. 26).
Put the white sticker on one of the filters
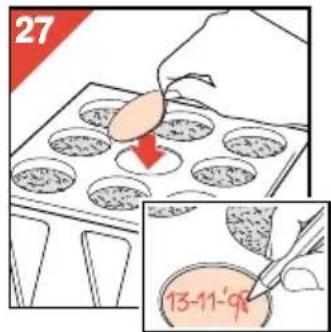
and write the date on which you replaced the carbon granules on it (fig. 27).
- New carbon granules are available from your retailer under number HR 4941.
Automatic cut-out to prevent overheating
To prevent damage to the appliance due to overheating and to limit the risks, the automatic cut-out ensures that the motor is switched off when it becomes too hot.
To indicate that the appliance is still switched on and connected to the mains, the pilot light will continue to burn.
If this happens:
- Set the speed control to position O (= off).
- Unplug the air cleaner.
- Allow the appliance to cool down (approx. 15 minutes).
- Open the appliance. Make sure that the filters are not covered or blocked and that the airflow is not obstructed.
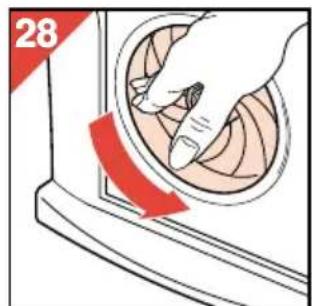
- Check if the fan is able to rotate freely by turning it with your hand (fig. 28).
- Close the appliance. Put the plug in the wall socket and switch the appliance back on.
If the automatic cut-out is activated time and again, we advise you to take your appliance to your dealer for a technical inspection.
Specifications/technical data
HR 4342
Power consumption
(highest setting) 60 Watt
CADR (highest setting)
- tobacco smoke 89 m
3/hour
-dust 91 m
3/hour
-pollen 93 m
3/hour
Filter system:
- Pfilter 1
-HEPA filter 1 - Active carbon filters 2
HEPA replacement filter HR 4940
Active carbon
replacement set HR 4941
Maximum size of room 40m
7100m3
Français
Important
Specification techniques
HR 4342
Puissance (maxi) 60 watts
CADR (hoyeste innstilling)
-tobakksroyk 89 m
3/time
- stov
3/time
-pollen 93 m
3/time
Filtersystem
- grovfilter 1
-HEPA-filter 1 - aktive kullfiltre 2
Delenr. HEPA-filter HR 4940
Delenr. aktivt kull HR 4941
Maksimum romstørelse 40m 2 / 100m^3
91
m


