MCG250 Pro - Microwave Oven CASO - Free user manual and instructions
Find the device manual for free MCG250 Pro CASO in PDF.
| Product type | Combination microwave oven (microwave, grill, hot air) |
| Brand | CASO |
| Model | MCG250 Pro |
| Microwave power | 900 W (10 levels from 90 to 900 W) |
| Grill power | Not specified (max duration 95 minutes) |
| Hot air mode | 10 temperature levels (110 °C to 200 °C) |
| Combinations | Microwave + grill (2 combinations), Microwave + hot air (4 settings) |
| Automatic programs | 9 menus (hot drinks, popcorn, reheat, pasta, pizza, poultry, cake, defrost) |
| Automatic defrost | Yes, time-based (up to 45 min) |
| Multi-level function | Up to 3 programmable successive steps |
| Included accessories | Glass turntable, roller ring, baking tray, pizza tray |
| Power supply | 230 V / 50 Hz, 16 A (recommended fuse) |
| Display | LED (time, power, function, clock) |
| Safety lock | Yes, child safety and door lock |
| Overheat protection | Yes, shutdown at 300 °C (code E01) |
| Cleaning | Damp cloth, dishwasher for turntable and ring (if suitable) |
| General information | Household use, do not install in a cabinet, required clearances (20 cm above, 10 cm back, 5 cm sides) |
Frequently Asked Questions - MCG250 Pro CASO
User questions about MCG250 Pro CASO
0 question about this device. Answer the ones you know or ask your own.
Ask a new question about this device
Download the instructions for your Microwave Oven in PDF format for free! Find your manual MCG250 Pro - CASO and take your electronic device back in hand. On this page are published all the documents necessary for the use of your device. MCG250 Pro by CASO.
USER MANUAL MCG250 Pro CASO
natural_image
Exterior view of a Coso Design microwave oven with control knobs and a digital display (no readable text or symbols beyond branding)
8 Operating Manual....44
8.1 General....44
8.2 Information on this manual 44
8.3 Warning notices 44
8.4 Limitation of liability 45
8.5 Copyright protection....45
9 Safety....45
9.1 Intended use....45
9.2 General Safety information 46
9.3 Sources of danger....47
9.3.1 Danger due to microwaves 47
9.3.2 Danger of burns 47
9.3.3 Danger of fire 48
9.3.4 Danger of explosion....49
9.3.5 Dangers due to electrical power....49
9.4 Commissioning 49
9.5 Safety information....50
9.6 Delivery scope and transport inspection....50
9.7 Unpacking....50
9.8 Disposal of the packaging....50
9.9 Setup 51
9.9.1 Setup location requirements: 51
9.9.2 Avoiding radio interference ....51
9.10 Assembling the accessories....52
9.10.1 Glass turntable....52
9.10.2 Baking Sheet / pizza baking tray 52
9.11 Electrical connection....52
10 Design and Function....53
10.1 Complete overview ....53
10.2 Operating elements and displays....54
10.3 Signal tones....54
10.4 Safety equipment 55
10.4.1 Warning notices on device....55
10.4.2 Door latch....55
10.4.3 Child-proof lock 55
10.4.4 Overheating protection....55
10.5 Rating plate....56
11 Operation and Handing ....56
11.1 Principles of microwave cooking ....56
11.2 Operating modes: 56
11.3 Information on microwave cookware 57
*both, Microwave+grill and microwave+hot air....58
11.4 Opening / closing door 58
11.5 Switch on/off sound....58
11.6 Activation after selecting the programme....58
11.7 Quick start 58
11.8 De-activation: 59
11.9 Setting the clock 59
11.10 “Microwave” mode....60
11.11 “Grill” mode....60
11.12 “Microwave and Grill” mode 61
11.12.1 “Combination 1”....61
11.12.2 “Combination 2”....61
11.12.3 "Convection" mode....62
11.12.4 "Preheating and Convection cooking" mode 62
11.13 “Microwave and Convection” mode....63
11.14 "Multi-stage Cooking" Mode 64
11.15 “Cooking Program” Mode 65
11.15.1 "Automatic defrost" mode....66
11.15.2 Table with thawing times....67
12 Cleaning and Maintenance....68
12.1 Safety information....68
12.2 Cleaning....68
13 Troubleshooting....69
13.1 Safety notices....69
13.2 Fault indications....69
13.3 Causes and rectification of faults....70
14 Disposal of the Old Device....71
15 Mode d'emploi....73
15.1 Généralités....73
15.2 Informations relatives à ce manuel ....73
15.3 Avertissements de danger ....73
15.4 Limite de responsabilités....74
15.5 Protection intellectuelle....74
16 Sécurité....74
16.1 Utilisation conforme 74
16.2 Consignes générales de sécurité ....75
16.3 Sources de danger....76
16.3.1 Danger émanant des micro-ondes....76
16.3.2 Risque de brûlure....77
16.3.3 Danger d'incendie 77
16.3.4 Risque d'explosion....78
natural_image
Black oval tray with four legs and a label pointing to the top-left corner (no text or symbols on the tray itself)
natural_image
Circular metallic baking pan with a label '11' on the left side (no other text or symbols visible)HINWEIS
text_image
8:00 Power / Sound Time / Weight Grill Micro. & Grill Preheat / Convection Micro. & Convection Start / Quickstart Stoptext_image
Time / WeightOriginal Operating Manual
Microwave, Grill and Convection Oven & active pizza backing tray MCG250 Pro
natural_image
Exterior view of a CosO design microwave oven with control panel and digital display (no readable text or symbols beyond branding)
text_image
CE SGS GS geprüfte Sicherheit No Dredicated HouseItem No. 3352
8 Operating Manual
8.1 General
Please read the information contained herein so that you can become familiar with your device quickly and take advantage of the full scope of its functions.
Your microwave will serve you for many years if you handle it and care for it properly.
We wish you a lot of pleasure in using it!
8.2 Information on this manual
These Operating Instructions are a component of the microwave (referred to hereafter as the Device) and provide you with important information for the initial commissioning, safety, intended use and care of the device.
The Operating Instructions must be available at all times at the device. This Operating Manual must be read and applied by every person who is instructed to work with the device:
- Commissioning, • Operation • Troubleshooting and/or • Cleaning
Keep the Operating Manual in a safe place and pass it on to the subsequent owner along with the device.
8.3 Warning notices
The following warning notices are used in the Operating Manual concerned here.
▲GEFAHR DANGER
A warning notice of this level of danger indicates a potentially dangerous situation.
If the dangerous situation is not avoided, this can lead to death or serious injuries.
▶ Observe the instructions in this warning notice in order to avoid the danger of death or serious personal injuries.
▲WARNUNG WARNING
A warning notice of this level of danger indicates a possible dangerous situation.
If the dangerous situation is not avoided, this can lead to serious injuries.
▶ Observe the instructions in this warning notice in order to avoid the personal injuries.
▲VORSICHT ATTENTION
A warning notice of this level of danger indicates a possible dangerous situation.
If the dangerous situation is not avoided, this can lead to slight or moderate injuries.
▶ Observe the instructions in this warning notice in order to avoid the personal injuries.
HINWEIS
PLEASE NOTE
A notice of this kind indicates additional information, which will simplify the handling of the machine.
8.4 Limitation of liability
All the technical information, data and notices with regard to the installation, operation and care are completely up-to-date at the time of printing and are compiled to the best of our knowledge and belief, taking our past experience and findings into consideration.
No claims can be derived from the information provided, the illustrations or descriptions in this manual. The manufacturer does not assume any liability for damages arising as a result of the following:
• Non-observance of the manual
- Uses for non-intended purposes
- Improper repairs
• Technical alterations, modifications of the device
- Use of unauthorized spare parts
Modifications of the device are not recommended and are not covered by the guarantee.
All translations are carried out to the best of our knowledge. We do not assume any liability for translation errors, not even if the translation was carried out by us or on our instructions. The original German text remains solely binding.
8.5 Copyright protection
This document is copyright protected.
Braukmann GmbH reserves all the rights, including those for photomechanical reproduction, duplication and distribution using special processes (e.g. data processing, data carriers, data networks), even partially. Subject to content and technical changes.
9 Safety
This chapter provides you with important safety notices when handling the device. The device corresponds with the required safety regulations. Improper use can result in personal or property damages.
9.1 Intended use
This device is only intended for use in households in enclosed spaces for defrosting, warming up, cooking, grilling, reducing, baking of foods and beverages. Uses for a different purpose or for a purpose which exceeds this description are considered incompatible with the intended or designated use.
⚠️WARNUNG
Warning
Danger due to unintended use!
Dangers can emanate from the device if it is used for an unintended use and/or a different kind of use.
▶ Use the device exclusively for its intended use.
⚠️WARNUNG
Warning
▶ Observe the procedural methods described in this Operating Manual.
Claims of all kinds due to damages resulting from unintended uses are excluded.
The User bears the sole risk.
9.2 General Safety information
HINWEIS
Please note
Please observe the following general safety notices with regard to the safe handling of the device.
▶ Read all these instructions before using the appliance.
▶ Examine the device for any visible external damages prior to using it. Never put a damaged device into operation.
▶ The device is not intended for drying, warming up or heating up living animals.
▶ Food thermometers are unsuitable to be used when the microwave is in operation.
▶ Only qualified electricians, who have been trained by the manufacturer, may carry out any repairs that may be needed. Improperly performed repairs can cause considerable dangers for the user.
▶ Only customer service departments authorized by the manufacturer may carry out repairs on the device during the guarantee period, as otherwise the guarantee entitlements will be null and void in the event of any subsequent damages.
▶ Defective components must always be replaced with original replacement parts. Only such parts will guarantee that the safety requirements are fulfilled.
▶ Use this appliance only for its intended use as described in this manual. Do not use corrosive chemicals or vapors in this appliance. This type of oven is specifically designed to heat, cook or dry food. It is not designed for industrial or laboratory use.
▶ Do not operate this appliance if it has a damaged cord or plug, if it is not working properly or if it has been damaged or dropped. If the supply cord is damaged, it must be replaced by the manufacturer or its service agent or a similarly qualified person in order to avoid a hazard.
This appliance can be used by children aged 8 years and above and persons with reduced physical, sensory or mental capabilities or lack of experience and knowledge if they have been given supervision or instruction concerning use of the appliance in a safe way and understand the hazards involved.
▶ Children shall not play with the appliance.
▶ Cleaning and user maintenance shall not be made by children without supervision.
This product is a Group 2 Class B ISM equipment. The definition of Group 2 which contains all ISM (Industrial, Scientific and Medical) equipment in which radio-frequency energy is intentionally generated and/or used in the form of electromagnetic radiation for the treatment of material, and spark erosion equipment. For Class B equipment is equipment suitable for use in domestic establishments and in establishments directly connected to a low voltage power supply network which supplies buildings used for domestic purpose. for domestic purpose.
HINWEIS
Please note
▶ The microwave oven is only used when it is freestanding.
▶ Warning: Do not install the oven over a range cooktop or other heat-producing appliance. If it is installed it could be damaged and the warranty would be void.
▶ The microwave oven may not be placed in a cabinet.
▶ The appliance shall be placed against a wall.
▶ The appliance is not intended to be operated by means of an external timer or separate remote-control system.
▶ The microwave oven is for household use only and not for commercial use.
▶ Never remove the distance holder in the back or on the sides, as it ensures a minimum distance from the wall for air circulation.
▶ Please secure the turn table before you move the appliance to avoid damages.
The microwave oven is intended for defrosting, cooking and steaming of food only.
9.3 Sources of danger
9.3.1 Danger due to microwaves
⚠️WARNUNG
Warning
Exposure to microwaves on the human body can result in injuries.
Please observe the following safety notices in order not to expose yourself or others to microwaves.
▶ Never operate the device when the door is open. Having a faulty or manipulated safety switch results in the danger of exposing oneself directly to the microwaves.
▶ Caution: It is dangerous to repair or maintain the appliance by anyone other than a specialist because under these circumstances the cover would have to be removed which ensures protection against microwave radiation. This applies to changing the power cord or the lighting as well. Send the appliance in these cases to our service centre.
▶ Warning: If the door or door seals are damaged, the oven must not be operated until it has been repaired by a competent person
9.3.2 Danger of burns
⚠️WARNUNG
Warning
The culinary items being heated up in this device as well as the cookware that being used and the surface of the device can become very hot.
Please observe the following safety notices in order not to burn or scald yourself or others.
▶ Warning: When the appliance is operated in the combination mode, children should only use the oven under adult supervision due to the temperatures generated.
▶ Microwave heating of beverage can result in delayed eruptive boiling, therefore care has to be taken when handle the container.
⚠️WARNUNG
Warning
▶ Do not fry food in the oven. Hot oil can damage oven parts and utensils and even result in skin burns.
The contents of feeding bottles and baby jars should be stirred or shaken and the temperature should be checked before serving in order to avoid burns.
▶ Cooking utensils may become hot because of heat transferred from the heated food. Potholders may be needed to handle the utensil.
▶ The accessible surface may be hot during operation.
▶ The door or the outer surface may get hot when the appliance is operating.
▶ The temperature of accessible surfaces may be high when the appliance is operating.
▶ Use gloves if you remove any heated food.
▶ Caution! Steam will escape, when opening lids or wrapping foil.
9.3.3 Danger of fire
⚠️WARNUNG
Warning
There is a danger of fire due to the ignition of the content in the event the device is not used properly.
Observe the following safety notices to avoid dangers of fire:
▶ Never use the device to store or dry flammable materials.
▶ Do not warm up any alcohol in an undiluted state.
▶ Do not operate the oven when empty.
▶ To reduce the risk of fire in the oven cavity:
▶ a) When heating food in plastic or paper container, keep an eye on the oven due to the possibility of ignition.
▶ b) Remove wire twist-ties from paper or plastic bags before placing bag in oven.
▶ c) If smoke is observed, switch off or unplug the appliance and keep the door closed in order to stifle any flames.
▶ d) Do not use the cavity for storage purposes. Do not leave paper products, cooking utensils or food in the cavity when not in use.
▶ Utensils should be checked to ensure that they are suitable for use in microwave oven.
▶ Disposable containers made of plastic must have the properties shown under the heading “Notices on microwave cookware”.
▶ If smoke emits, switch off or unplug the appliance and keep the door closed in order to stifle the smoke.
9.3.4 Danger of explosion
⚠️WARNUNG
Warning
There is a danger of explosion due to excess pressure that is created in the event the device is not used properly.
Observe the following safety notices to avoid dangers of an explosion:
▶ Warning: Liquid or other food must not be heated in sealed containers since they are liable to explode.
▶ Eggs in their shell and whole hard-boiled eggs should not be heated in microwave ovens since they may explode even after microwave heating has ended.
▶ Pierce foods with heavy skins such as potatoes, whole squashes, apples and chestnuts before cooking.
9.3.5 Dangers due to electrical power
⚠GEFAHR
Danger
Mortal danger due to electrical power!
Mortal danger exists when coming into contact with live wires or subassemblies!
Observe the following safety notices to avoid dangers due to electrical power:
▶ Do not open the housing on the device under any circumstances. There is a danger of an electrical shock if live connections are touched and the electrical or mechanical structure is altered. In addition, functional faults on the device can also occur.
▶ Do not operate this appliance if it has a damaged cord or plug, if it is not working properly or if it has been damaged or dropped. If the supply cord is damaged, it must be replaced by the manufacturer or its service agent or a similarly qualified person in order to avoid a hazard.
▶ Caution: It is dangerous to repair or maintain the appliance by anyone other than a specialist because under these circumstances the cover would have to be removed which ensures protection against microwave radiation. This applies to changing the power cord or the lighting as well. Send the appliance in these cases to our service center.
9.4 Commissioning
This chapter provides you with important safety notices during the initial commissioning of the device. Observe the following notices to avoid dangers and damages:
9.5 Safety information
▲WARNUNG Warning
Personal and property damages can occur during commissioning of the device!
Observe the following safety notices to avoid such dangers:
▶ Packaging materials may not be used for playing. There is a danger of suffocation.
▶ Transport, unpack and use two persons to set down the device because of the heavy weight of the device.
9.6 Delivery scope and transport inspection
As a rule, the MCG 250 Microwave is delivered with the following components:
- MCG 250 Microwave • Rolling ring • pizza baking tray
- Glass turntable
- Baking sheet
- Operating Instructions
HINWEIS Please note
▶ Examine the shipment for its completeness and for any visible damages.
▶ Immediately notify the carrier, the insurance and the supplier about any incomplete shipment or damages as a result of inadequate packaging or due to transportation.
9.7 Unpacking
To unpack the device, proceed as follows:
- Remove the device out of the carton and remove the packaging material.
- Remove the accessories located in the cooking chamber and remove the packaging material.
- Remove the red coloured safety adhesive strip on the floor of the cooking chamber.
- Do not remove the film on the oven ventilation opening!
- Remove the blue protective film on the device itself.
HINWEIS Please note
▶ Only remove the blue protective film shortly before setting up the device in the location where it will be used, to prevent scratches and dirt accumulations.
▶ Please don't remove the protective film from the inside of the door (if equipped), since this makes the cleaning of the device easier.
9.8 Disposal of the packaging
The packaging protects the device against damages during transit. The packaging materials are selected in accordance with environmentally compatible and recycling-related points of view and can therefore be recycled.
Returning the packaging back to the material loop saves raw materials and reduces the quantities of accumulated waste.
Take any packaging materials that are no longer required to "Green Dot" recycling

collection points for disposal.
HINWEIS
Please note
▶ If possible, keep the original packaging for the device for the duration of the guarantee period of the device, in order that the device can be re-packaged properly in the event of a guarantee claim.
9.9 Setup
9.9.1 Setup location requirements:
In order to ensure the safe and trouble-free operation of the device, the setup location must fulfil the following prerequisites:
- The device must be set up on a firm, flat, horizontal and heat-resistant surface with sufficient load-bearing capacity for the oven and the maximum weight of the expected food that is to be prepared in the oven.
- Choose the setup location in such a way that children cannot reach any hot surfaces on the device.
- The device is not intended to be installed in a wall or a built-in cupboard.
- Do not set up the device in a hot, wet or extremely damp environment or near flammable material.
- The device requires an adequate flow of air in order to operate correctly. Leave a clearance of 20 cm above the oven, 10 cm around the back and 5 cm on both sides.
- Do not cover up any openings on the device and do not block these off.
- Do not remove the device's adjustable feet.
- The electrical socket must be easily accessible so that the power lead can be disconnected easily, in the case of an emergency.
- The installation and assembly of this device in non-stationary setup locations (e.g. on ships) must be carried out by specialist companies / electricians, provided they guarantee the prerequisites for the safe use of this device.
9.9.2 Avoiding radio interference
The device can cause the occurrence of interference in radios, televisions or similar devices.
Such faults can be rectified or reduced as a result of employing the following measures:
- Clean the door and the sealing surfaces of the device.
- Set the radio, the television, etc as far as possible away from the device.
- Connect the device to a different electrical outlet, so that various power circuits are used for the device and the receiver with the interference.
- Use a properly installed antenna for the receiver, to ensure good reception.
9.10 Assembling the accessories
HINWEIS
Please note
▶ The device can be operated with the glass turntable or the baking sheet, as well as with grating.
▶ Use the baking sheet only when the grill is in operation.
9.10.1 Glass turntable
Assemble the glass turntable as follows:
- Remove the baking sheet (if in use)
- Insert the rolling ring
- Insert the glass turntable so the groove on the underneath side of the glass turntable catch in the drive shaft.
HINWEIS
▶ When operating the grill, the baking sheet can also be used in order to grill the food evenly as a result of the rotation.
9.10.2 Baking Sheet / pizza baking tray
Attach the baking sheet as follows:
- Place the baking sheet / pizza baking tray on the glass turntable.
9.11 Electrical connection
In order to ensure the safe and trouble-free operation of the device, the following instructions must be observed for the electrical connection:
- Before connecting the device, compare the connection data (voltage and frequency) on the rating plate with those of your electrical network. This data must agree in order that no damages occur in the device If in doubt, ask your qualified electrician.
- The electrical outlet must be protected by a 16A safety cut-out switch, separately from other electricity consumers.
- The connection between the device and the electrical network may employ a 3 meter long (max.) extension cable with a cross-section of 1.5 ~mm^2 . The use of multiple plugs or gangs is prohibited because of the danger of fire that is involved with this.
- Make sure that the power cable is undamaged and has not been installed under the oven or over hot or sharp surfaces.
- The electrical safety of the device is only guaranteed if the device is connected to a properly installed protective conductor system. Operations using an electrical outlet without a protective conductor are prohibited. If in doubt, have the house installation checked over by a qualified electrician.
The manufacturer cannot be made responsible for damages that are caused by a missing or damaged protective conductor.
10 Design and Function
This chapter provides you with important safety notices on the design and function of the device.
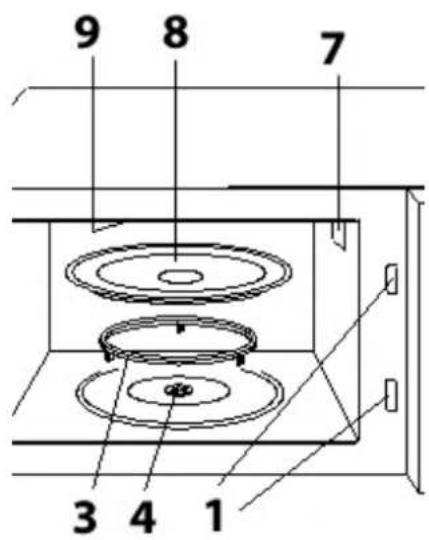
10.1 Complete overview

text_image
9 7 1 2 8 6 MCO25B PRO 2:00° 5(1) Protective door latch
(2) Oven window
(3) Rolling ring
(4) Drive shaft
(5) Door opener
(6) Operating panel
(7) Oven ventilation opening
(Do not remove film!)
(8) Glass turntable
(9) Grill heater
(10) Baking sheet
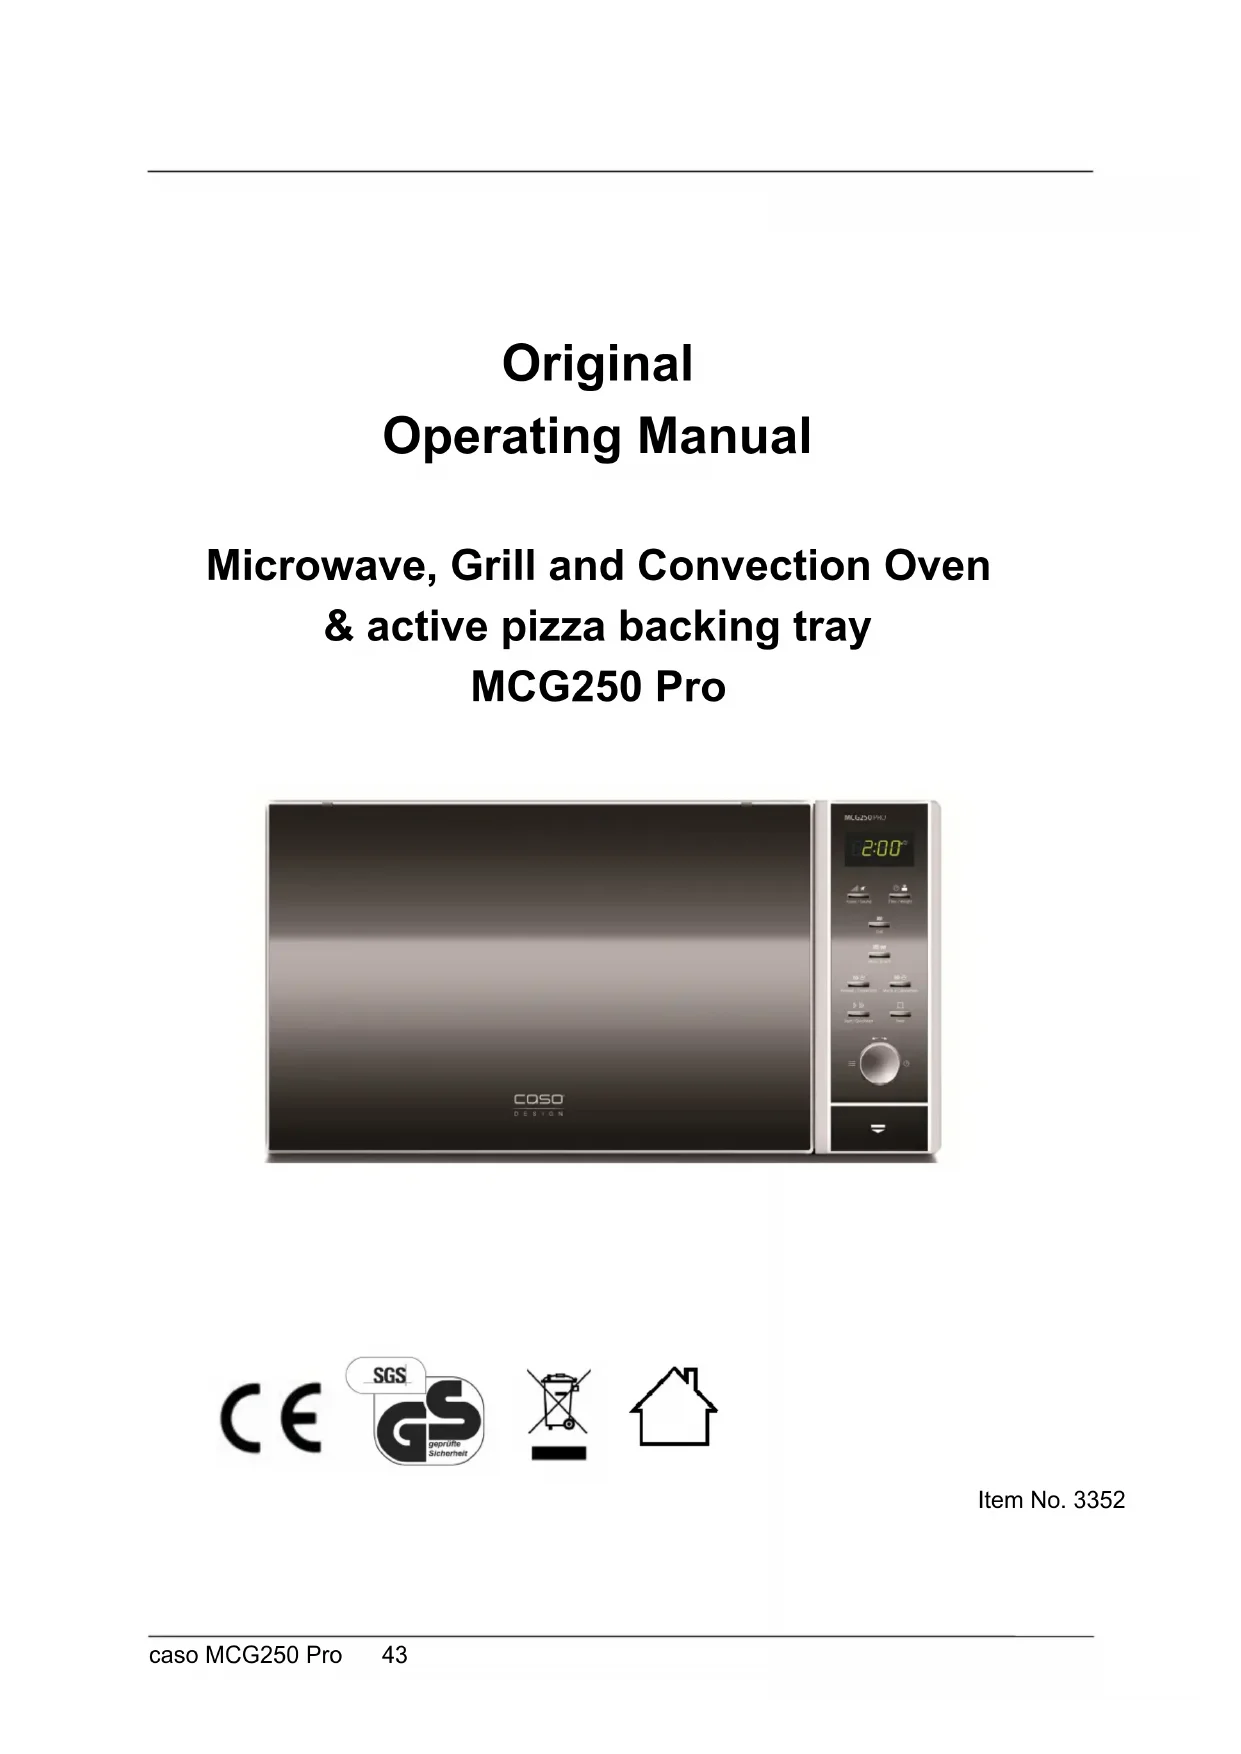
(11) Pizza baking tray

text_image
9 8 7 3 4 1
natural_image
Black circular object with four legs and a label pointing to the number 10 (no other text or symbols)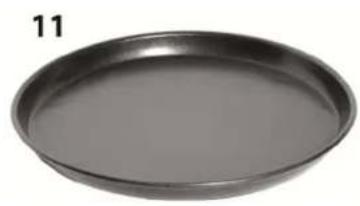
natural_image
Circular metallic baking pan with label '11' on the left side (no other text or symbols)HINWEIS PLEASE NOTE
The ventilator can continue running afterwards to cool down the device.
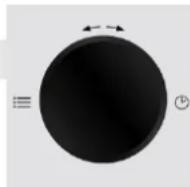
10.2 Operating elements and displays

flowchart
graph TD
    A["Power / Sound"] --> B["Time / Weight"]
    B --> C["Grill"]
    C --> D["Micro. & Grill"]
    D --> E["Preheat / Convection"]
    E --> F["Micro. & Convection"]
    F --> G["Start / Quickstart"]
    G --> H["Stop"]
    H --> I["Feedback to Time"]
    style A fill:#f9f,stroke:#333
    style B fill:#ccf,stroke:#333
    style C fill:#cfc,stroke:#333
    style D fill:#fcc,stroke:#333
    style E fill:#cff,stroke:#333
    style F fill:#ffc,stroke:#333
    style G fill:#cfc,stroke:#333
    style H fill:#fcc,stroke:#333
    style I fill:#fff,stroke:#333
Display panel: Cooking time, output, function display and actual time are displayed.
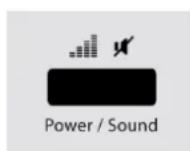
Power/Sound: Press to set the power level of the microwave or to switch on/off the sound.
Time/Weight: Press to set the clock or the weight of the food.
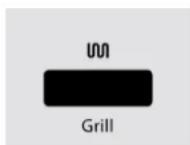
Grill: Press to set a grill cooking programme.
Mikro.+Grill: Press to set a microwave and grill combination cooking programme.
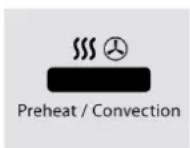
Pre-Heat/Convection: Press to program the hot air temperature and pre-heat function.
Micro+Convection: Press to select one of four settings for combination cooking.
Start/Quick start: Press to start the cooking programme or to set the Quick Start cooking
Stopp: Press to stop the cooking program and to delete all previous settings prior to starting the cooking procedure.
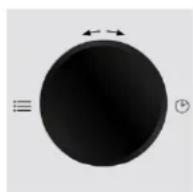
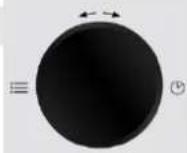
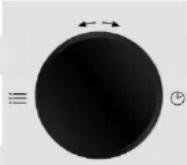
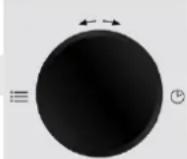
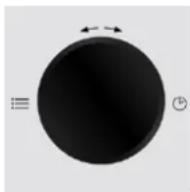
Time/Menu (control dial): Turn to set the cooking time or to choose the automatic menu programme.
10.3 Signal tones
The device transmits the following signal sounds as an acoustic feedback signal:
- One signal tone: The device has accepted the entry.
- Two signal tones: The device has not accepted the entry. Check the entry and try again.
- Four signal tones: The cooking time has ended.
10.4 Safety equipment
10.4.1 Warning notices on device

▲VORSICHT ATTENTION
Danger due to hot surface!
There is a warning notice referring to dangers due to hot surfaces located on the back upper side of the housing. The surfaces of the device can become extremely hot.
▶ Do not touch the hot surfaces of the device. Danger of burns!
▶ Do not set or lay any items on the device.
10.4.2 Door latch
A safety switch is installed in the door latch of the device, which prevents the device from being operated when the door is open.
▲VORSICHT ATTENTION
Danger due to microwaves!
If this safety device is defective or if this safety device is bypassed, you can directly expose yourself and others to microwave radiation.
▶ Do not operate the device if the safety switch is defective.
▶ Do not disable this safety device.
10.4.3 Child-proof lock
The child-proof lock prevents children from using the device without supervision.
◆ Activating the child-proof lock:
Press the Stop button for three seconds until a signal tone is heard and the function display "Lock" lights up. In the locked state, all the buttons are disabled.

◆ De-activating the child-proof lock:
Press the Stop button for three seconds until a signal tone is heard and the illumination on the function display goes out. In the locked state, all the buttons are disabled.
10.4.4 Overheating protection
The device is equipped with overheating protection.
If the temperature in the cooking chamber exceeds 300^ C, E 01 appears on the display and a buzzer can be heard.
The device switches off the programme that is in use for safety reasons Press the Stop button to cancel this fault. The device can be re-activated after the cool down phase.
10.5 Rating plate
The rating plate with the connection and performance data can be founded on the back of the device.
11 Operation and Handing
This chapter provides you with important notices with regard to operating the device.
Observe the following notices to avoid dangers and damages:
⚠️WARNUNG Warning
▶ Do not leave the device unsupervised when it is in operation, so that you can intervene quickly in the event of dangers.
11.1 Principles of microwave cooking
- The power levels and time required for cooking / warming up food items depends on the starting time, the quantity and the type and consistency of the food, etc. Use the shortest indicated cooking time and extend the cooking procedure as necessary.
- Arrange the food carefully. Position the thickest areas on the external edge of the bowl.
- Cover the food while it is cooking. Lids protect against spatters and also contribute towards cooking/warming up the food evenly.
- During warming, the food should be turned, rearranged or stirred repeatedly, in order for the temperature to be distributed evenly.
- Any existing germs in the food are only killed off if the temperature is sufficiently high enough (> 70°C) and if the time used is sufficiently long enough (> 10 m in).
- Foods with a firm skin or shell, such as tomatoes, sausages, potatoes in the skin, eggplants must be pierced or punctured repeatedly so that any developing steam can escape and so that the food does not burst.
- Eggs without their shell may only be cooked in the microwave if the skin of the egg yoke has been pierced repeatedly first. Otherwise, the egg yoke can squirt out with excessive pressure after cooking.
- Rearrange layers of foods such as meat balls from top to the bottom and from the middle to the outside edge.
11.2 Operating modes:
The unit is to be operated in various operating modes. The following list shows the operating modes that are possible with the device:
◆ “Microwave” mode
This operating mode is suitable for the normal reheating of food.
◆ “Grill” mode
This operating mode is suitable for frying and browning food.
◆ “Microwave and Grill” mode
This operating mode is suitable for simultaneous microwave cooking and grilling.
Combination 1
In this operating mode, the device works in microwave mode for 30% of the cooking time and in grill mode for 70% of the cooking time.
Combination 2
In this operating mode, the device works in microwave mode for 55% of the cooking time and in grill mode for 45% of the cooking time.
◆ “Convection” mode
In this operating mode, the hot air in the cooking chamber circulates in order to warm the food quickly and evenly.
◆ “Microwave and Convection” mode
This operating mode is suitable for simultaneous microwave cooking and convection operations.
◆ „Multi-Stage Cooking“ Mode
This mode allows you to program up to three automatic sequences. It is possible to set the sequence and duration of defrosting, microwave cooking and grilling or hot air mode.
♦ „Cooking Program“ Mode
This mode allows you to select the cooking program from 9 different menus.
◆ Automatic defrost
This operating mode is suitable for defrosting frozen food.
11.3 Information on microwave cookware
The ideal material for microwave cookware is permeable for microwaves and allows the energy to penetrate the container and warm up the food.
Please observe the following tips when selecting the correct cookware:
Microwaves cannot penetrate metal. Therefore, you should not use utensils made of metal or cookware with metal trim.
For microwave cooking, do not use any products made from recycled paper, as they could contain tiny metal fragments, which could cause sparks and/or result in fire.
▶ Use round or oval instead of square or rectangular cookware, as otherwise the food could tend to overheat in the corners.
▶ You can use narrow strips of aluminium foil to protect sensitive areas against excessive heating. But do not use too much foil and maintain a distance of approx 2.5 cm between the foil and the walls of the cooking chamber.
▶ Do not use any aluminium foil when using the microwave or combinations with the microwave (see following table).
The following table is intended as a basis for selecting the correct cookware:
| Cookware | Micro-wave | Grill | Convection | Combination* |
| Heat-resistant glass dishes | ✓ | ✓ | ✓ | ✓ |
| Non heat-resistant glass dishes | ✕ | ✕ | ✕ | ✕ |
| Heat-resistant ceramic dishes | ✓ | ✓ | ✓ | ✓ |
| Microwave-resistant plastic container | ✓ | ✕ | ✕ | ✕ |
| Kitchen roll | ✓ | ✕ | ✕ | ✕ |
| Metal sheet | ✕ | ✓ | ✓ | ✕ |
| Metal rack | ✕ | ✓ | ✓ | ✕ |
| Aluminium foil and container | ✕ | ✓ | ✓ | ✕ |
*both, Microwave+grill and microwave+hot air
11.4 Opening / closing door
Open door
Push the door opener to open the door of the device. If the device is switched on, the current cooking programme will be interrupted.
HINWEIS
Please note
Leave the door open for a moment before reaching into the cooking chamber, to allow the accumulated heat to escape.
◆ Close doors

Close the door until the door latch audibly locks in place. If a current cooking programme was interrupted as a result of opening the door, the current cooking programme will be continued after pressing the button Start/Quick Start.
11.5 Switch on/off sound

Press the button Power/Sound for three seconds in order to switch on or off the sound (beep tone).
You can hear messages of the programme ending and warning signals even if the sound has been switched off.
11.6 Activation after selecting the programme

After selecting the program, press the Start /Quick start button, to start the preset cooking programme.
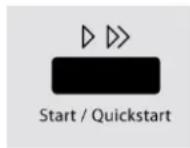
11.7 Quick start
Utilise this function to programme the oven for comfortable cooking at 100% microwave performance.

Press the Start/Quick start button in quick sequence to set the cooking time. If you press the button Start/Quick once, the oven will work for 30 sec., if you press it twice, it works for 1 min. The oven starts automatically after 2 seconds.
Once the end of the cooking time is reached, four signal tones will be emitted and END will appear in the display.
11.8 De-activation:
In order to interrupt an ongoing cooking programme, you can proceed as follows:
Pres the Stop button once. The cooking programme that is in use will be stopped.
Open the door of the device. The cooking programme that is in use will be stopped.
HINWEIS
Please note
To continue the interrupted cooking program, press the button Start/Quick start after closing the door.
To terminate the interrupted program, press the button Stop a second time.


HINWEIS
Please note
Before beginning a different cooking process you must delete the display and reset the system by pressing the button Stop.
11.9 Setting the clock
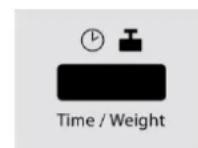
To set the clock on the device, proceed as follows:
◆ Activating setup mode
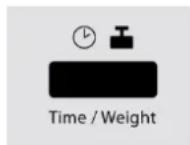
Press button Time/Weight.
Press the button once again to switch the oven from the 24 hour system to the 12 hour system.
Setting the hours
Turn the control dial Time/Menu until the correct hour is displayed.

Press the Time/Weight button to save the set hour.
Setting the minutes
Turn the control dial Time/Menu until the correct minute is displayed.

Press the Time/Weight button to save the set time.

11.10 "Microwave" mode
When microwaving you can adapt the power setting and the cooking time (maximum 95 minutes).

Power / Sound
Adjusting the Power Setting
Select the desired power setting by pressing the Power/Sound button as often as necessary to get the setting you want (see table below).
Setting the cooking time
Set the cooking time by turning the Time/Menu control dial.

Start / Quickstart
Starting the cooking programme
After selecting the program, press the button Start /Quick start, to start the preset cooking programme.
◆ End of the cooking programme
Once the end of the cooking time is reached, four signal tones will be emitted and END will appear in the display.
| Display | Watt | Power level |
| P9 00 900 100% | High | |
| P8 10 810 90% | ||
| P7 20 720 80% | ||
| P6 30 630 70% | Medium high | |
| P5 40 540 60% | ||
| P4 50 450 50% | Medium | |
| P3 60 360 40% | ||
| P2 70 270 30% | Medium low / Defrost | |
| P1 80 180 20% | ||
| P0 90 90 10% | Low | |
| P0 00 Low | ||
11.11 "Grill" mode
The “Grill” operating mode is especially suitable for thin slices of meat, steaks, chops, kebabs, sausage and chicken pieces.
HINWEIS
Please note
In this mode the system selects the highest power setting for the grill. The maximum grilling time is 95 minutes.

Grill
◆ Selecting the cooking programme
Select the cooking programme "Grill" by pressing the button Grill once.
Setting the cooking time
Set the cooking time by turning the Time/Menu control dial.


Starting the cooking programme
After selecting the program, press the button Start /Quick start, to start the preset cooking programme.
◆ End of the cooking programme
Once the end of the cooking time is reached, four signal tones will be emitted and END will appear in the display.
11.12 "Microwave and Grill" mode
This function allows you to employ combination microwave cooking and grilling with two different settings.
HINWEIS
Please note
The system selects the highest power level for the grill in this operating mode.
11.12.1 "Combination 1"
In this operating mode, the device works in microwave mode for 30% of the cooking time and in grill mode for 70% of the cooking time.

◆ Selecting the cooking programme
Select the cooking programme "Combination 1" by pressing the button Mikrowave+Grill once.

Setting the cooking time
Set the cooking time by turning the Time/Menu control dial.

Starting the cooking programme
After selecting the program, press the button Start /Quick start, to start the preset cooking programme.
◆ End of the cooking programme
Once the end of the cooking time is reached, four signal tones will be emitted and END will appear in the display.
11.12.2 "Combination 2"
In this operating mode, the device works in microwave mode for 55% of the cooking time and in grill mode for 45% of the cooking time.

◆ Selecting the cooking programme
Select the cooking programme "Combination 2" by pressing the button Mikrowave+Grill twice.
The remaining operation is identical with the operating mode “Combination 1” described above.
11.12.3 "Convection" mode
In this operating mode, the hot air in the cooking chamber circulates in order to warm and brown the food quickly and to cook it so it is crispy. This oven can be set to ten different cooking temperatures. The maximum cooking time is 9 hours 30 minutes.

Setting the cooking time
Select the temperature you require by pressing the Preheat/Convection button until you reach the level you require (see following table).
Setting the cooking time
Set the cooking time by turning the Time/Menu control dial.


Starting the cooking programme
After selecting the program, press the button Start /Quick start, to start the preset cooking programme.
◆ End of the cooking programme
Once the end of the cooking time is reached, four signal tones will be emitted and END will appear in the display.
HINWEIS
Please note
▶ You can check the hot air temperature during cooking by pressing the button Preheat/Convection.
| Button presses | Temperature | Button presses | Temperature |
| 1 110 °C | 6 160 °C | ||
| 2 120 °C | 7 170 °C | ||
| 3 130 °C | 8 180 °C | ||
| 4 140 °C | 9 190 °C | ||
| 5 150 °C | 10 200 °C |
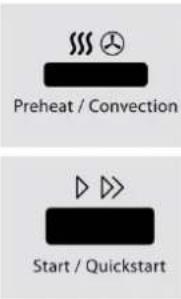
11.12.4 "Preheating and Convection cooking" mode
The device can be programmed for combination preheating and convection cooking.
text_image
Preheat / Convection Start / QuickstartSetting the temperature
Select the temperature you require by pressing the Pre-heat/Convection button until you reach the level you require.
◆ To start heating the oven
After selecting the temperature, press the button Start /Quick start. A signal ton is emitted and the PREH display blinks until the oven has reached the programmed temperature.
Food setting
Set the food you wish to cook in the device.
Setting the cooking time
Set the cooking time by turning the Time/Menu control dial.

Start / Quickstart
Starting the cooking programme
After selecting the program, press the button Start /Quick start, to start the preset cooking programme.
◆ End of the cooking programme
Once the end of the cooking time is reached, four signal tones will be emitted and END will appear in the display.
11.13 "Microwave and Convection" mode
The device offers four pre-programmed settings, which facilitate combination cooking using hot air (convection) and microwaves.
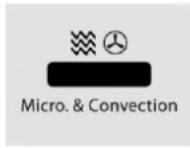
Setting the temperature
Select the temperature you require by pressing the Micro + Convection button until you reach the level you require (see following table).
Setting the cooking time
Set the cooking time by turning the Time/Menu control dial.

Starting the cooking programme
After selecting the program, press the button Start /Quick start, to start the preset cooking programme.
◆ End of the cooking programme
Once the end of the cooking time is reached, four signal tones will be emitted and END will appear in the display.
HINWEIS
Please note
▶ You can check the hot air temperature during cooking by pressing the button Micro + Convection.
| Button presses | Display | Temperature |
| 1 110 110 °C | ||
| 2 140 140 °C | ||
| 3 170 170 °C | ||
| 4 200 200 °C |
11.14 "Multi-stage Cooking" Mode
In this mode you can program up to up to three automatic cooking sequences. The sequence and duration of defrosting, microwave cooking and grilling or hot air mode is adjustable.
The example below describes the settings for a multi-stage cooking program in the sequence:
- Defrost
- Microwave cook
- Grill or hot-air cooking (without preheating function)
◆ Selecting Automatic Defrosting
Turn the Time/Menu knob anticlockwise in order to select the „Automatic Defrosting“ program (09).

◆ Activating input mode
Select input mode by pressing the button Time/Weight once.
Setting the defrost time
Set the new defrosting time by turning the Time/Menu control dial until the defrosting time you require is displayed.
Setting the power level for microwave cooking
Select the temperature you require by pressing the Power level/sound button until you reach the level you require.

Setting the power level for microwave cooking
Set the cooking time by turning the Time/Menu control dial.
◆ Selecting „Grill“ Mode
Select the „Grill“ cooking program by pressing the Grill button once.
Adjusting the Grilling Time
Set the grilling time by turning the Time/Menu knob.
or
Adjusting the Power Setting for Hot-Air Cooking
Select the desired temperature by pressing the Pre-heat/Convection button as often as necessary until the desired temperature is displayed.
Setting the Cooking Time for Hot-Air Cooking
Set the cooking time by turning the Time/Menu knob.


Starting the multi-level cooking programme
After selecting the program, press the button Start /Quick start, to start the preset the multi-level cooking programme.
◆ End of the cooking programme
Once the end of the cooking time is reached, four signal tones will be emitted and END will appear in the display.
11.15 "Cooking Program" Mode
In this operating mode, the cooking programme can be selected from 9 different menus. Please refer to the table on the next page for more detailed information.
◆ Selecting the Program
First turn the Time/Menu knob briefly anticlockwise and then clockwise to select the desired program.

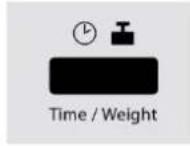
Setting the quantity / weight
Select the quantity/weight you require by pressing the Time/Weight button until you reach the level you require (see following table).

Starting the cooking programme
After selecting the program, press the button Start /Quick start, to start the preset cooking programme.
◆ End of the cooking programme
Once the end of the cooking time is reached, four signal tones will be emitted and END will appear in the display.
| Cooking Program | Function | Button presses Time/Weight | ||||||
| 1 2 3 4 5 6 7 | ||||||||
| Potatoes (each 230 g) | 1 2 3 - - - - | |||||||
| Hot drink (200 ml/cup) | 1 2 3 - - - - | |||||||
| Popcorn | 99 g – 3 minutes - - - - | |||||||
| reheat (g) | 200 g | 300 g | 400 g | 500 g | 600 g | 700 g | 800 g | |
| Pasta (g) | 100 g | 200 g | 300 g | - | - | - | - | |
| Fresh dough Pizza | 150 g | 300 g | 450 g | - | - | - | - | |
| Poultry (g) |  | 800 g 1000 g 1200 g 1400 g - - | |||
| Cake |  | 475 g – 50 minutes - - - | |||
| Defrost | 10 sec. up to 45 minutes | ||||
HINWEIS
Please note
When cooking in grill or combination mode, you may need to turn the food after half the cooking time has elapsed to ensure it is evenly cooked.
▶ With some menus, the device stops after half of the cooking time has elapsed, so that you can stir the food, so it will be evenly cooked. After selecting the temperature, press the button Start /Quick start.

Start / Quickstart
11.15.1 "Automatic defrost" mode

You can gently defrost frozen food with the help of the “Automatic defrost” (09) menu. To set the defrost time, proceed as follows:
- Selecting the menu
Turn the control dial Time/Menu counter-clockwise to select the programme "Automatic defrost" (09).
◆ Activating input mode
Select input mode by pressing the button Time/Weight twice.
Setting the defrost time
Set the new defrosting time by turning the Time/Menu control dial until the defrosting time you require is displayed.
Starting automatic defrost
After setting the defrost time, press the button Start /Quick start, to start automatic defrosting.

HINWEIS
Please note
▶ Stop the oven occasionally to remove the unthawed frozen food or to separate it. If the frozen food has not been defrosted at the end of the estimated defrosting time, proceed as follows:
▶ Programme the oven in 1 minute increments, until the frozen food is completely defrosted.
▶ When using plastic containers out of the deep-freeze, the defrosting process should only last long enough to be able to remove the frozen food out of the container, after which it can be placed into a microwave-resistant container.
11.15.2 Table with thawing times
| Food Quantity Power | level | Time/min. | Time to wait after thawing | |
| Unsliced meat | 1000 g | low | 25 - 30 | 20 - 25 |
| Unsliced meat | 500 g | low | 14 - 18 | 10 - 15 |
| Unsliced meat | 200 g | low | 4 - 6 | 5 - 10 |
| Mince | 250 g | low | 6 - 8 | 5 - 10 |
| Sausages | 200 g | low | 4 - 6 | 5 - 10 |
| Cold cuts | 300 g | low | 4 - 6 | 5 - 10 |
| Chicken | 1000 g | low | 20 - 25 | 10 – 15 |
| Chicken pieces | 500 g | low | 12 - 15 | 5 - 10 |
| Saddle of venison | 100 g | low | 20 - 35 | 20- 30 |
| Saddle of rabbit | 500 g | low | 12 - 13 | 10 - 20 |
| Prawns, shrimps | 250 g | low | 5 - 7 | 5 – 10 |
| Trout | 340 g | low | 4 - 6 | 5 – 10 |
| Whole fish | 500 g | low | 7 - 10 | 10 – 15 |
| Fillet of fish | 250 g | low | 5 - 7 | 5 - 10 |
| Strawberries, raspberries | 250 g | low | 4 - 6 | 5 – 10 |
| Cherries, plums | 250 g | low | 5 - 7 | 5 – 10 |
| Apple puree | 500 g | low | 9 - 12 | 5 – 10 |
| Bread roll | 4 Stück | low | 1 | 3 – 5 |
| Bread | 1000 g | low | 13 - 15 | 8 – 10 |
| Toast bread | 500 g | low | 5 - 6 | 5 – 10 |
| Sponge cake | 500 g | low | 6 - 8 | 5 – 10 |
| Fruit flan | 1 Stück | low | 2 - 3 | 2 – 3 |
| Gateau | 1200 g | low | 10 - 12 | 30- 60 |
| Cream | 200 g | low | 4 - 6 | 2 – 3 |
| Quark | 250 g | low | 6 - 8 | 5 – 10 |
| Butter | 250 g | low | 6 - 8 | 10 - 15 |
12 Cleaning and Maintenance
This chapter provides you with important notices with regard to cleaning and maintaining the device. Please observe the notices to prevent damages due to cleaning the device incorrectly and to ensure trouble-free operation.
12.1 Safety information
▲VORSICHT Attention
Please observe the following safety notices, before you commence with cleaning the device:
The oven must be cleaned and food residues must be removed at regular intervals. If the oven is not maintained in a clean condition, this will have a detrimental effect on the service life of the device and can also result in a dangerous condition in the device as well as in the growth of fungus and bacteria.
▶ Switch the oven off prior to cleaning it and unplug the plug from the wall power outlet.
The cooking chamber is hot after it is used. There is a danger of burns! Wait until the device has cooled down.
▶ Clean the cooking chamber after use as soon as it has cooled down. Extended waiting unnecessarily complicates cleaning and can make it impossible in extreme cases. Excessive accumulations of dirt can even damage the device under certain circumstances.
▶ If dampness penetrates into the device, this can damage the electronic components. Please ensure that no liquid can enter the interior of the device through the ventilation slots.
▶ Do not use any aggressive or abrasive cleaning agents or solvents.
▶ Do not scrape off stubborn dirt with hard items.
12.2 Cleaning
◆ Cooking chamber and inside of door
- Keep the cooking chamber of the oven clean. Wipe off any spattered or spilt food from the walls of the cooking chamber with a damp cloth. If the oven is excessively dirty, you can use a mild cleaning agent.
- Wipe the door, window and the door gaskets with a damp cloth, to remove any spatters and spilt food. Residues on the door gasket can mean that the door does not close properly any more, which will cause the microwaves to escape.
- Wipe off any steam, which has settled on the oven door, with a soft cloth. This may be the case if the device is used in an extremely damp environment and is normal.
- Smells can be removed from the oven by mixing a cup of water with the juice and the skin of a lemon, pouring this into a deep microwave-proof bowl and allowing it to cook in Microwave mode for five minutes. Then, dry off the oven thoroughly with a soft cloth.
- After cleaning the interior space, leave the oven door open until the interior of the device is completely dry.
◆ Front of device and operating panel
- Clean the front of the device and the operating panel with a soft, slightly damp cloth.
- Please bear in mind that the operating panel does not get wet. Use a soft, damp cloth for cleaning.
HINWEIS
Please note
▶ Leave the oven door open to prevent the device from being re-started accidentally.
◆ Exterior housing
- Clean the exterior surfaces of the device with a damp cloth.
◆ Rotating plate, baking sheet / pizza baking tray and rolling ring
- The glass turntable and baking sheet / pizza baking tray must be removed and cleaned occasionally. Wash the plate in a warm soapy solution or in the dishwasher.
- The rolling ring should be cleaned regularly to prevent excessive noise development or a rotational malfunctions.
The rolling ring can be washed in a mild soapy solution or in the dishwasher. Please remember to put the rolling ring back again properly after cleaning it. - Wipe the bottom of the oven with a mild cleaning agent. If the floor of the oven is excessively dirty, you can use a mild cleaning agent.
13 Troubleshooting
This chapter provides you with important notices with regard to operating the device. Observe the following notices to avoid dangers and damages:
13.1 Safety notices
▲VORSICHT
Attention
▶ Only qualified electricians, who have been trained by the manufacturer, may carry out any repairs on electrical equipment.
▶ Improperly performed repairs can cause considerable dangers for the user and damages to the device.
13.2 Fault indications
In the event of a fault, an error code will appear in the display; it describes the cause of the fault.
Error code Description
E01 Excessive temperature within cooking chamber
The overheating cut-out terminated the current program at a cooking chamber temperature of 300^ C. Press the Stop button to acknowledge this fault. The device can be re-activated after the cool down phase.
E03 Sensor fault
The device has detected an error on a sensor and has terminated the current programme. Press the Stop button to acknowledge this fault.
HINWEIS
Please note
▶ If error messages continue to appear after an extended waiting period and restarting the device, then the device will need to be sent to Customer Service to be inspected.
13.3 Causes and rectification of faults
The following table assists in localizing and rectifying minor faults.
| Error | Possible cause | Action |
| The selected program will not start. | Device door is not closed Close device door | |
| Power plug is not plugged in Plug in mains plug! | ||
| Fuse is not activated Activate fuse | ||
| The turntable turns jerkily. | Dirt between the turntable and the base of cooking camber | Remove dirt |
| Dirt on rolling ring | ||
| Cooking vessel too large Use different cooking vessel | ||
| Food is not sufficiently defrosted, warmed up or cooked after preset time has elapsed. | Incorrectly selected time or power level | Re-set time and power level Repeat process |
| The device functions but the cooking chamber lighting does not work. | Defective cooking chamber light. | Have Service dept repair cooking chamber light. |
| Abnormal noises can be heard during operation of microwave. | Food is covered with aluminium foil | Remove aluminium foil |
| The cookware contains metal and sparks are being created within the cooking chamber | Observe information on cookware! | |
| The time in the display field is not correct. | Power failure Re-set time | |
▲VORSICHT
Attention
▶ If you are unable to solve the problem with the steps shown above, please contact Customer Service.
14 Disposal of the Old Device
Old electric and electronic devices frequently still contain valuable materials. However, they also contain damaging substances, which were necessary for their functionality and safety.
If these were put in the non-recyclable waste or were handled incorrectly, they could be detrimental to human health and the environment. Therefore, do not put your old device into the non-recyclable waste under any circumstances.
HINWEIS
Please note
▶ Utilise the collection point, established in your town, to return and recycle old electric and electronic devices. If necessary, contact your town hall, local refuse collection service or your dealer for information.
▶ Ensure that your old device is stored safely away from children until it is taken away.
natural_image
Front view of a COSO Design microwave oven with control knobs and a digital display (no readable text or symbols on main body)
text_image
CE SGS gsprüfte Sicherheit -N°. d'art. 3352
15 Mode d'emploi
15.1 Généralités
natural_image
Black circular object with a label pointing to the number 10, no other text or symbols visible.
natural_image
Circular metallic baking pan with label '11' on top left (no other text or symbols)(4) Entraînement
text_image
9 8 7 3 4 1text_image
8:00 Power / Sound Time / Weight Grill Micro. & Grill Preheat / Convection Micro. & Convection Start / Quickstart Stoptext_image
Time / Weight
natural_image
Exterior view of a CosO kitchen appliance with digital display and control knobs (no readable text or symbols)
text_image
CE SGS GS geprüfte Sicherheit — — — — — —Articolo-N. 3352
23 Istruzione d'uso
23.1 In generale
natural_image
Black circular tray with a label pointing to the number 10, no other text or symbols visible.
natural_image
Circular metallic baking pan with label '11' on top left (no other text or symbols)HINWEIS NOTA
text_image
Time / Weighttext_image
COSO DESIGN MCC250/MU 2:00"
natural_image
Black circular object with a label pointing to the number 10, no other text or symbols visible.
natural_image
Circular metallic baking pan with label '11' on top left (no other text or symbols)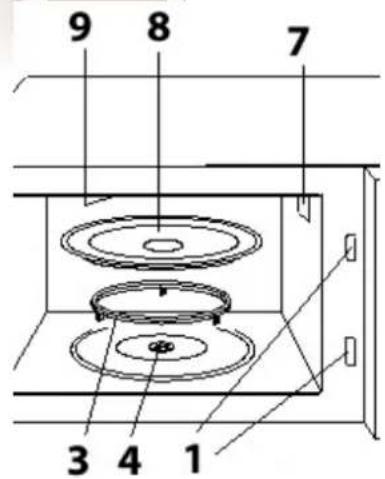
text_image
9 8 7 3 4 1HINWEIS
AVISO
text_image
Preheat / Convection Start / Quickstartnatural_image
Front view of a Coso design microwave oven with control panel and digital display (no readable text or symbols beyond branding)
text_image
CE SGS GS geprüfte Sicherheit — — — — — —Artikelnummer 3352
natural_image
Black oval-shaped object with a label pointing to the number 10, no other text or symbols visible.