DO220SR - Steam cleaner DOMO - Free user manual and instructions
Find the device manual for free DO220SR DOMO in PDF.



| Product Type | Steam Cleaner |
| Brand | DOMO |
| Model | DO220SR |
| Power Supply | 220-240 V, 50/60 Hz |
| Tank Capacity | 500 ml maximum |
| Heating Time | 8 to 10 minutes (cold water) |
| Steam Type | Dry Steam |
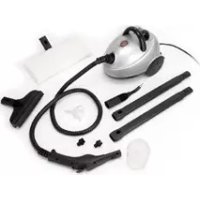
| Included Accessories | Flexible hose, extension tubes (2), squeegee, nylon bristle brush (2), extended concentrator, funnel, measuring cup, steam frame and cover, corner adapter |
| Recommended Use | Hard surfaces (tile, marble), windows, fabrics, joints, bathroom, kitchen |
| Safety | Safety cap, manual stop, avoid contact with hot steam |
| Maintenance | Descaling every 10-15 fills with vinegar (100 ml) and water (300 ml) |
| Warranty | 2 years |
Frequently Asked Questions - DO220SR DOMO
User questions about DO220SR DOMO
0 question about this device. Answer the ones you know or ask your own.
Ask a new question about this device
Download the instructions for your Steam cleaner in PDF format for free! Find your manual DO220SR - DOMO and take your electronic device back in hand. On this page are published all the documents necessary for the use of your device. DO220SR by DOMO.
USER MANUAL DO220SR DOMO
natural_image
White and black Shark vacuum cleaner with coiled hose (no visible text or symbols)GARANTIEVOORWAARDEN
CONDITIONS DE GARANTIE
This appliance has a two year warranty period. During this period the manufacturer is responsible for any failures which are the direct result of construction failure. When these failures occur the appliance will be repaired or replaced if necessary. The warranty will not be valid when the damage to the appliance is caused by wrong use, not following the instructions or repairs executed by a third party. The warranty will only be valid if the warranty application has been completed by the dealer at the time of purchase. All parts, which are subject to wear, are excluded from the warranty.
Type nr. Apparaat
RECYCLING INFORMATIONEN
RECYCLING INFORMATION
The symbol ☒ on the product or on its packaging indicates that this product may not be treated as household waste. Instead it shall be brought to the applicable collection point for recycling of electrical and electronic equipment. By ensuring this product is disposed of correctly, you will help prevent potential negative consequences for the environment and human health, which could otherwise be caused by inappropriate waste handling of this product. For more detailed information about recycling of this product, please contact your local city office, your household waste disposal service or the shop where you purchased the product.
If the supply cord is damaged, it must be replaced by manufacturer of its service agent or a similarly qualified person in order to avoid a hazard.
BELANGRIJKE VEILIGHEIDSVOORSCHRIFTEN
Technische specificaties:
Voltage: 220-240 volt, 50 Hz
Vermogen: 1500 watt
Specification techniques
Tension : 220-240 Volts, 50Hz
Puissance : 1500 W
Capacité : 500 ml
CONCEIL D'UTILISATION
Technische Daten
Spannung:230 V 50Hz
Leistung:1500 Watt
IMPORTANT SAFETY INSTRUCTIONS
When using your Steam Cleaner, basic safety precautions should always be observed, including the following:
- Read all instructions before using your steam cleaner.
- Use the system only for its intended use.
- To protect against a risk of electric shock, do not immerse any part of the system in water or other liquids.
- Never yank cord to disconnect from outlet; instead, grasp plug and pull to disconnect.
- Do not allow cord to touch hot surfaces. Let the system cool completely before putting away or opening water tank (removing the safety cap). Wrap cord loosely around system when storing.
- Always disconnect system from electrical outlet when filling with water or emptying and when not in use. Always turn the safety cap slowly when opening the water tank. This will allow any remaining steam to escape gradually.
- Do not operate the system with a damaged cord or plug, or if the appliance or any other part of the system has been dropped or damaged. To avoid the risk of electric shock, do not disassemble or attempt to repair the steam cleaner. Return the system to your original point of purchase for examination and repair. Incorrect re-assembly or repair can cause a risk of electrical shock or injury to persons when the steam cleaner is used.
- Close supervision is necessary for any appliance being used by or near children. Do not leave the system unattended while connected to electrical outlet or when hot.
- Burns can occur from touching hot metal parts, hot water or steam. Use caution when draining unit after use as there may be hot water in the unit. Never direct steam at any person. The steam is very hot and can cause burns.
- Do not operate in the presence of explosive and/or flammable fumes.
- This appliance is intended only for household use. Follow all user instructions in this manual.
- Never use any chemicals or substance other than tap water in the machine. Use of chemicals may damage the machine. Use of chemicals will automatically void your warranty.
- Do not use in a swimming pool containing water. ^14 . The filling aperture must NOT be opened during use.
- This appliance is not intended for use by persons (including children) with reduced physical, sensory or mental capabilities, or lack of experience and knowledge, unless they have been given supervision or instruction concerning use of the appliance by a person responsible for their safety.
- Children should be supervised to ensure that they do not play with the appliance.
To reduce the risk of fire, electric shock, or injury:
- Do not leave the steam cleaner plugged in when unattended. Unplug the electrical cord when not in use and before servicing or refilling water tank.
- Do not allow to be used as a toy. Close attention is necessary when used by or near children, pets or plants.
- Use only as described in this manual. Use only manufacturer's recommended accessories.
- Do not pull cord, use cord as a handle, close a door on cord, or pull cord around sharp edges or corners. Keep cord away from heated surfaces.
- Do not use extension cords or outlets with inadequate current carrying capacity.
- Do turn off all controls as applicable before unplugging from electrical outlet.
- Do not unplug by pulling on cord. To unplug, grasp the plug, not the cord.
- Do not handle plug or steam cleaner with wet hands or operate without shoes.
- Do not put any objects into openings. Do not use with any opening blocked.
- ALWAYS STORE YOUR APPLIANCE INDOORSin a cool, dry area.
- Do keep your work area well lit.
- Do Not turn the appliance over or on its side. Never direct steam towards people, animals or plants.
- Do not immerse the steam cleaner into water or other liquids. Always unplug the power cord from the electrical socket when filling the steam cleaner.
- Do NOT add cleaning solutions, scented perfumes, oils or any other chemicals to the water used in this appliance as this may damage the unit or make it unsafe for use. Use tap water or distilled/purified water if the tap water in your area is very hard.
- The steam should not be aimed directly at parts containing electrical components such as the electrical components inside an oven.
- If the supply cord is damaged, it must be replaced by the manufacturer or its service agent or similarly qualified person in order to avoid a hazard.
SAVE THESE INSTRUCTIONS For Household Use Only
ADDITIONAL IMPORTANT SAFEGUARDS
-
To avoid circuit overload, do not operate another appliance on the same socket (circuit) as the steam cleaner.
-
If an extension cord is absolutely necessary, an extension cord rated a minimum of 10 ampere, 14 gage cord should be used. Cords rated for less amperage may overheat. Care should be taken to arrange cord so that it cannot be pulled or tripped over.
-
Do not leave unattended when the system is connected to a power supply/electrical outlet.
WARNING: This appliance is equipped with a grounded, Type G, 3-pin power supply cord. This is a safety feature. Do not attempt to defeat the safety purpose of this plug.
CAUTION: Always drain condensed water from hose before use or if unit has been left idle for a period of time. To drain hose, direct nozzle into an appropriate container or sink and depress hand grip steam trigger. Once hose has been drained, normal use may be resumed. Never direct nozzle towards people, animals or plants.
WARNING: Your Steam Cleaner is designed to clean hard surfaces and upholstery that will withstand high heat. Do not use on softplastics and cold glass. On surfaces that have been treated with wax or some no wax floors, the sheen may be removed by the heat and steam action. Do not use on unsealed wood. This could cause the wood grain to rise. It is therefore recommended to test an isolated area of the surface tube cleaned before proceeding.
IMPORTANT: Do NOT add cleaning solutions, scented perfumes, oils or any other chemicals to the water used in this appliance. Use regular water or distilled/purified water if the tap water in your area is very hard.
WARNING:
Danger of Scalding. Please use caution when using the steam cleaner. The steam emitted from this aperture is very hot.
SAVE THESE INSTRUCTIONS
Technical Specifications
Voltage:22-2400V. 50Hz.
Power:1500 Watts
Water Capacity: 500 ml.
FEATURES OF STEAM CLEANER
1. Multipurpose Steam Cleaner:
Bathrooms, kitchens, living areas, pet areas and appliances.
Automotive, patio and windows.
2. Versatile, quick-change accessories
3. Heavy-duty crush-resistant
OPERATING INSTRUCTIONS
Components
On/Off Power Switch:
The On/Off switch has a light that will illuminate when the unit is plugged into the 230 V wall outlet and the switch turned to the “On” position.
Steam Ready Light:
The steam ready light located on the handle will turn “On” when the steam is ready.
CAUTION: Read the instructions for “Filling the Water Tank” before opening the Safety Cap.
CAUTION: Always unplug before filling.
ALLOW UNIT TO COOL FOR FIFTEEN (15) MINUTES BEFORE REFILLING.
IMPORTANT: Do NOT add cleaning solutions, scented perfumes, oils or any other chemicals to the boiler in this appliance. Use tap water or distilled/purified water if the tap water in your area is very hard.
Filling or Refilling Your Steam Cleaner With WaterIMPORTANT:
Always insure that the unit is “UNPLUGGED” from the wall receptacle prior to initial filling or re-filling the water tank and has been allowed to cool for 15 minutes. Never attempt to fill this unit under awater tap, always use the filling funnelprovided.
-
Before filling or refilling the steam cleaner, make sure that the unit is NOT plugged in and has been allowed to cool for fifteen (15) minutes.
-
Press the steam trigger on the hand grip to vent any residual steam that is in the boiler.
-
Place the unit on a flat, stable surface. Push down firmly on the safety cap and
slowly turn the safety cap counter clockwise until it is removed.
- Place the funnel in the tank opening. Fill with a maximum of one filling flask or 2 cups (500 ml) of water. Do Not Overfill. Turn the safety cap clockwise to replace.
NOTE: To remove or replace the safety cap, push down on it firmly and rotate it clockwise to tighten or counter clock-wise to loosen. If not depressed the cap will rotate freely without advancing.
NOTE: Filling the unit with hot water will shorten the heat up time.
WARNING: Extreme care should be taken when refilling the unit. Allow unit to cool for 15 minutes before refilling. When refilling the steam cleaner while the boiler is still hot, there is a risk that water will squirt back during filling and cause scalding. Extreme care should be taken when refilling the unit. Use caution when opening the Safety Cap as cap may become hot during use and escaping steam can cause scalding.
- Connect desired attachments onto the Flexible Steam Hose.6. Plug the unit into a standard (230 volt, grounded) wall receptacle and switch the On/Off switch to the "On" position. Allow approximately 8-10 minutes for vapor to reach its working temperature and pressure. When the unit is ready for use, the steam ready light will turn "On". Always point nozzle outlet in a safe direction. At the start, some water will come out from the nozzle. This is normal.
NOTE: When the steam cleaner has run out of water, steam output will cease.
- When finished using the unit turn off and unplug. WARNING: This appliance is under pressure. After every use, press steam trigger button until all pressure has been released before removing safety cap. Allow unit to cool for fifteen (15) minutes before refilling.
Using Your Steam Cleaner with Steam Pocket
Step 1. Connect the steam pocket accessory to the steam handle with two extension tubes. To attach the extension tubes one onto the other or onto the hand grip, press the locking button ensuring that it fits into the hole and press the two sections together. To disconnect, repeat the operation by pressing the locking button and pulling the two sections apart.
- Bring the towel all the way to the top of the steam pocket frame.
Attaching the Steam Pocket Towel to the Frame
1.Slide the steam pocket towel over the steam pocket frame.
WARNING: Always insure the unit is “UNPLUGGED” from the wall receptacle prior to attaching or removing accessories.
- Bring the velcrostrips that are on the back side of the steam pocket towel over the steam pocket frame and attach to the inside of the front side of the steam pocket towel.
NOTE: If replacing the steam pockettowel, make sure that the steam pocket frame has been allowed to cool before removing or attaching a new steam pocket towel.
4 NOTE: Fit the steam pocket frame with the angle adapter onto the extension tube.
Step 2. If the angle adapter is not attached to the steam pocket frame, attach as follows: Hold the steam pocket frame in one hand and the angle adapter in the other. Insert the angle adapter steam into the opening of the steam pocket frame as shown in Fig. 4. Note that the flat on the nozzle must face toward the side of the frame with the brass pin. Once inserted, rotate it 90°
Step 3. Insert the electrical power cord into the outlet. Heating time is approximately 8-10 minutes with cold water. Filling the steam generator with hot water will shorten the heat up time.
Care & Maintenance of the Steam Pocket Towel
Due to the unique cleaning ability of this cloth, proper care of your micro-fiber towel is required to ensure long life and continued cleaning ability.
- The first thing you should do when you get a new micro-fiber towel is to wash and dry it. During the manufacturing process the fabric has a tendency to become flat as it picks up contaminants from the air and machinery. There will also be a number of loose threads that, while they cause no harm, can be annoying the first time you use the towel.
- To clean the towel, simply wash it in your washing machine using the warm water setting.
- Always wash your towels separately from other fabrics. They have a tendency to pick up lint and other particles from other fabrics and the next time you use your towel, this lint will transfer to the surface being cleaned.
- ONLY USE LIQUID DETERGENTS, never use dry detergents as many times the granules do not fully dissolve and become trapped in the towel. This can scratch the surface that you are cleaning.
- NEVER USE BLEACH OR FABRIC SOFTENERS! Bleach will damage the micro-fiber fabric and fabric softeners deposit a coating on the micro-fiber fabric what will not allow the cloth to clean efficiently.
- Air dry the towel. Do not put in a clothes dryer as high heat will cause the towel to shrink and the micro-fibers to break down.
- If you wash your towel on a regular basis and don’t let them get too dirty, they will last much longer. As with any fabric, dirt particles, grease and other contaminants can cause the fibers to break down, therefore regular cleaning will help preserve your micro-fiber towels. As you use the micro-fiber towel, you will notice that sometimes a thread will loosen or pull out. This is normal and you should NEVER PULL AT THE LOOSE
THREAD! Pulling the thread can cause the weave to come undone. Instead, simply trim the thread with a pair of sharp scissors.
Attaching the Accessories to the Flexible Steam Hose
Allow the unit to cool for 5 minutes before changing accessories.
Window SqueegeeThis attachment is very useful for cleaning large windows, plastic material, ceramic, tiled or marble surfaces.
IMPORTANT: When cleaning windows, always avoid any sudden changes in temperature to prevent glass breakage or cracks. To use: Connect the windowsqueegee to the hand grip or use with extension tube for hard to reach surfaces. Apply steam abundantly, then remove excess water and dirt with the glass wiping edge.
Extended Concentrator Use the extended concentrator to clean under toilet rims and hard to reach places.
To use: Attach the extended concentrator to the handgrip or to the extension tubes.
CAUTION: Be aware of hand placement and take care not to actuate the steam discharge switch while installing or removing accessories.
Nylon Bristle Brush (x2) It is best for cleaning grout in-between the tiles, ceramic and marble. To use: Screw on the nylon bristle brush on to the end of the extended concentrator, which then may be used directly on the hand grip or with extension tubes.
Care and Maintenance
If you consistently use demineralized or distilled water, cleaning the tank is unnecessary.
Rinsing Out the Steam Cleaner
Normally, a periodic rinse of your steam cleaner will free it from deposits. This is recommended every 10-15 tankfulls, to free up any scale deposits from the tank. Fill the boiler with 400 ml of water and shake the cleaner vigorously. Tilt the cleaner upside down to empty the boiler of water and any scale deposits.
Descaling Your Steam Cleaner
If the tap water in you area contains a high level of calcium deposits and you have been using tap water to do your steam cleaning, you should descale your unit after 10-15 tankfulls.
-
Unplug the steam cleaner from the power source before you descalethe boiler. Allow to cool.
-
Fill the boiler with 100ml vinegar and 300 ml of water and leave overnight or for a period of approximately 8 hours. Do not screw the safety/filler cap onto the steam cleaner while you are descaling the boiler. Do not use the steam cleaner while descaling solution is inside the boiler.
-
After the period of soaking, turn the steam cleaner upside down to empty solution from the boiler. Due to the fact that a small amount of solution will be left in the boiler, it is necessary to rinse the boiler out with clean water 2 or 3 times. Your steam cleaner is now ready for use.
Water
- Use tap water for all your cleaning needs. However, if you live in an area with hard water, use de-mineralized / distilled water when steaming light colored fabrics to eliminate the possibility of hard water stains.
IMPORTANT: Do NOTadd cleaning solutions, scented perfumes, oils or any other chemicals to the water used in this appliance. Use tap water or distilled/purified water if the tap water in your area is very hard.
Efficient Work
- For vertical surfaces, wipe with a towel from the top down, in this way the dirty water will not soil surfaces already cleaned. Avoid changing brushes back and forth while cleaning.
- Start with the smallest brush to clean tight spots and corners first.
- Use a towel to wipe dirt as soon as possible, otherwise it will dry and re-adhere to the surface.
TIPS ON HOW TO USE YOUR SYSTEM
Wood, Vinyl and Marble Floors
Use the steam pocket. Move the steam pocket across the floor as if you are mopping. When one side of the towel is soiled, turn the steam pocket frame and use the other side. If you are working on a very dirty area, you can move the steam pocket over the area slowly, several times. If it is a wood floor, move fast to avoid heat or moisture buildup in the wood.
To Clean Waxed Floors: Use the steam pocket with quick strokes. This will cause the dirt to be removed but not the wax.
Vinyl Floors: Do not allow heat to buildup in any kind of vinyl, since it can soften it enough to affect its texture. Work fast on vinyl.
Tile Floors: Use the concentrator with the bristle brush attached to an extension. Have the steam pocket ready as well. Clean the grout between the tiles with the bristle brush. Remove the bristle brush and attach the steam pocket, move the steam pocket across the floor to clean the tile and remove excess moisture and residue. Do not let the area dry before you wipe with a towel.
Spot Cleaning (Carpets)
Use the concentrator with or without the bristle brush. Move slowly over the soiled area, allowing the steam to penetrate. Agitate with bristle brush or clean towel. Dab the spot with the towel (do not rub). Repeat as necessary to remove stain. Vacuum only after the carpet has completely dried. Always test color fastness of carpet in an inconspicuous area before cleaning. If your steam cleaner fails to remove stubborn
DO220SR
stains a commercially available carpet shampoo may be required. Do NOT add cleaning solutions, scented perfumes, oils or any other chemicals to the water used in this appliance as this may damage the unit or make it unsafe for use.
CAUTION: Always determine the color-fastness of any fabric-especially with reds or blues -by taking a clean, moist, warm towel and gently rubbing a small area as far down on the back or other out of the way place on the furniture as possible. If color comes off on the towel, you may need to have the piece dry cleaned.
Window, Glass Surfaces and Mirrors
Use the window squeegee. Work with the vapor jet on using the top to bottom movements. Use the squeegee with the vapor off to clear the water from the glass. To do this without leaving streaks, use lateral movements from the top to the bottom of the surface.
CAUTION: When cleaning windows, always avoid any sudden changes in temperature to prevent glass breakage or cracks.
Fiberglass or Stainless Steel Surfaces
Use the bristle brush. Slowly move the brush over the surface to be cleaned. The vapor will emulsify the dirt and grease on the surface. Follow behind with a terry cloth towel over the brush to remove excess moisture and residue.
Tip: An old idea for polishing stainless steel is to wipe it down with seltzer soda water after it is cleaned.
Bathroom Areas
To clean the bathtub or shower area, use the bristle brush for grout, shower door tracks, hard to get areas and heavily soiled areas. The window squeegee will be the most efficient way to clean the rest of the area. Allow plenty of time for the heat to penetrate the surface. This is especially helpful in the shower area if there is tile or grout. Wipe with towel.
Removal of soap scum on tile, grout, and shower doors is also easier with the steam cleaner.
To clean sanitary fixtures, use the concentrator with or without bristle brush.
Use a terry cloth towel or paper towel to wipe up excess moisture and residue.
To clean the sink and faucets, use bristle brush then finish by wiping with a towel.
Soap Scum
Soap scum dissolves almost immediately under a combination of heat and moisture. Rinse the surface with a small amount of water afterwards or go back over it once more with a clean terry cloth towel.
Note: Soap scum sometimes will develop a hard surface from waterborne minerals. If this is the case, use the bristle brush to break up this surface -or spray or wipe first with lemon, vinegar or seltzer soda water to soften the minerals.
Moving too slowly can dry out the soap scum and cause it to granulate on the surface. The surface will have a gritty feel. If this happens, apply vapor to the surface with the bristle brush again and re-clean.
Garden Furniture
Use the brushes depending on the surface area. Work quickly when cleaning resin outdoor furniture. Finish by wiping with a towel.
Blinds
Use the nylon bristle brush to clean blinds. Move the brush over the surface, allowing enough time for the vapor to penetrate. Work quickly on PVC blinds. Test for color fastness on fabric blinds before using. Finish by wiping with a towel.
Automotive
For detailing the wheels, use the concentrator and the bristle brush. Exterior windows are cleaned best by applying the vapor with the concentrator and following with a paper towel.
To clean bicycles, use the bristle brush.
To clean equipment, use the bristle brush, depending on the surface area. Finish by wiping down with a towel.
Artificial Plants
Use the concentrator without a brush attached to blow off the dust and dirt.
Clothing
A vapor cleaning system is excellent for removing wrinkles from fabrics. Simply “vaporize” the surface from a distance (30-45 cm). The dry vapor removes wrinkles without leaving the fabric wet like ordinary fabric steamers do.
Nicotine and Tar
Nicotine and tar dissolves at high temperatures and becomes a light yellow oil that has the consistency of sewing machine oil. When the nicotine/tar film is touched by steam pocket, it immediately dissolves and flows into the steam pocket towel. You can remove it from flat surfaces as fast as you can move the steam pocket over the surface.
Removing Wax, Tar, Etc.
Many stains are only stuck on the surface of materials and can be easily and quickly removed by “blowing” excess material away from the surface from the side. This is accomplished by using the concentrator. Hold the terry cloth towel to the side to catch the loose residue as it is blown by the concentrator. Note: Always vacuum any loose residue off the surface before you apply vapor to it.
ALWAYS FINISH CLEANING BY WIPING DOWN THE CLEANED SURFACE WITH A TOWEL
Hints
The steam cleaner has many uses that have not been mentioned. This was meant only to give you a general idea of what can be achieved with the unit. However, the ways in which to use the attachments and brushes are in most cases universal. It is most helpful to always have a terry cloth towel or paper towel ready to use for removal of moisture and residue. 100% white cotton towels work best.
You can clean the brushes with your steam cleaner. When cleaning the bristle brushes, use a pair of pliers to hold and blow dirt as above or place in the basket of your dishwasher.
Note: Wipe with a towel immediately before the cleaned area dries. When cleaning the oven, use the bristle brush to clean around the elements and drip trays. Use the bristle brush for cracks, crevices, and hard to reach areas.
Refrigerator-Use the concentrator to blow away dirt in the ice machine and on door seals. The vapor will not dry out or crack the seals as chemicals often do. Can openers and other kitchen equipment can be easily cleaned with the bristle brush to get into all the nooks and crannies. Mold stains around door gaskets can be removed with the bristle brush.
Note: When cleaning small electrical appliances always unplug them from outlet before cleaning. Do not direct steam into any openings of the appliances or onto any electrical connections
To clean counter tops, use the bristle brush first in order to loosen the debris, then wipe with a terry cloth towel to finish.
- GARANTIEVOORWAARDEN
- CONDITIONS DE GARANTIE
- RECYCLING INFORMATIONEN
- RECYCLING INFORMATION
- BELANGRIJKE VEILIGHEIDSVOORSCHRIFTEN
- Technische specificaties:
- CONCEIL D'UTILISATION
- Technische Daten
- IMPORTANT SAFETY INSTRUCTIONS
- To reduce the risk of fire, electric shock, or injury:
- SAVE THESE INSTRUCTIONS For Household Use Only
- ADDITIONAL IMPORTANT SAFEGUARDS
- WARNING:
- SAVE THESE INSTRUCTIONS
- Technical Specifications
- FEATURES OF STEAM CLEANER
- Multipurpose Steam Cleaner:
- Versatile, quick-change accessories
- Heavy-duty crush-resistant
- OPERATING INSTRUCTIONS
- Components
- On/Off Power Switch:
- Steam Ready Light:
- ALLOW UNIT TO COOL FOR FIFTEEN (15) MINUTES BEFORE REFILLING.
- Filling or Refilling Your Steam Cleaner With WaterIMPORTANT:
- Using Your Steam Cleaner with Steam Pocket
- Attaching the Steam Pocket Towel to the Frame
- Care & Maintenance of the Steam Pocket Towel
- Attaching the Accessories to the Flexible Steam Hose
- Care and Maintenance
- Rinsing Out the Steam Cleaner
- Descaling Your Steam Cleaner
- Water
- Efficient Work
- TIPS ON HOW TO USE YOUR SYSTEM
- Wood, Vinyl and Marble Floors
- Spot Cleaning (Carpets)
- DO220SR
- Window, Glass Surfaces and Mirrors
- Fiberglass or Stainless Steel Surfaces
- Bathroom Areas
- Soap Scum
- Garden Furniture
- Blinds
- Automotive
- Artificial Plants
- Clothing
- Nicotine and Tar
- Removing Wax, Tar, Etc.
- ALWAYS FINISH CLEANING BY WIPING DOWN THE CLEANED SURFACE WITH A TOWEL
- Hints
Brand : DOMO
Model : DO220SR
Category : Steam cleaner