Coupe Special - Vacuum Cleaner NILFISK - Free user manual and instructions
Find the device manual for free Coupe Special NILFISK in PDF.
| Product type | Vacuum cleaner |
| Brand | Nilfisk |
| Model | Coupe Special |
| Category | Canister vacuum with bag |
| Filtration system | HEPA filter + pre-filter |
| Bag fill indicator | Mechanical: red when full |
| Cable rewinder | Yes |
| Parking position | Yes, two positions (under appliance and on the back) |
| Power adjustment | Variable: regulator on appliance and on curved tube |
| Included accessories | Round brush, hard floor nozzle, combination nozzle, Turbo nozzle (depending on model) |
| Thermal fuse | Yes, automatic shut-off in case of overheating |
| Warranty | 2 years (motor, rewinder, switches, casing) |
| HEPA filter maintenance | Not washable, must be replaced |
| Pre-filter replacement | Every 4 bag changes |
| Recommended use | Indoor, dry, temperature 0°C to 60°C |
| Floor type | Hard floors, carpets, furniture, curtains |
| Materials not to vacuum | Water, liquids, hot or sharp objects, ashes |
| Spare parts | Dust bags, filters, original Nilfisk accessories |
| Repairs | Authorized service center only |
Frequently Asked Questions - Coupe Special NILFISK
User questions about Coupe Special NILFISK
0 question about this device. Answer the ones you know or ask your own.
Ask a new question about this device
Download the instructions for your Vacuum Cleaner in PDF format for free! Find your manual Coupe Special - NILFISK and take your electronic device back in hand. On this page are published all the documents necessary for the use of your device. Coupe Special by NILFISK.
USER MANUAL Coupe Special NILFISK
text_image
Exploded view diagram of a vacuum cleaner with numbered parts for identification and assembly reference.English 1
Deutsch 9
Français 17
Español 25
Português 33
Italiano 41
Nederlands 49
Svenska 57
Norsk 65
Dansk 73
Suomi 81
Welcome!
Thank you for choosing a Nilfi sk Coupé vacuum cleaner.
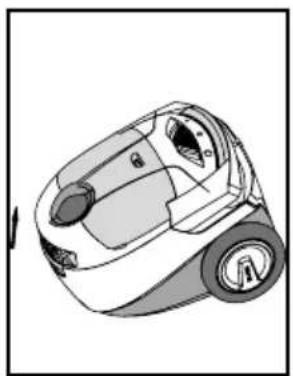
Overview
1 Parking bracket
2 HEPA fi Iter
3 Handle
4 Cable rewinder
5 On/off button
6 Power level
7 Dust bag indicator, mechanical
8 Accessory lid
9 Open/close button, dust container
10 Rating plate
11 Parking bracket
12 Upholstery nozzle
13 Brush nozzle
14 Prefi Iter
15 Dust bag
16 Hard floor nozzle
17--18 Combination nozzle
19 Sliding valve
Table of contents
Overview 1
Display symbols 1
Safety instructions 2
Instructions for use 3
Cleaning tips 6
Trouble shooting 7
Service and maintenance etc. 7
Guarantee and service 8
Display symbols

The dust bag is full and needs to be changed when the indicator is completely red.
Safety instructions
- Do not use the machine without-dust bag and fi Iters properly fitted.
- This machine is not intended for the suction of hazardous materials or gas, doing so may expose people to serious health risks.
- The machine must not be used for the suction of water or other liquids.
- Do not pick up sharp objects such as needles or pieces of glass.
- Do not pick up anything that is burning or smoking such as cigarettes, matches or hot ashes.
- Use and store this machine indoors and in a dry environment, 0 °C to 60 °C.
- Do not use the machine outdoors.
- Do not handle the machine with wet hands.
- Turn off the machine before unplugging.
- To unplug, grasp the plug, not by pulling on the cord. Do not carry or pull the machine by the cord.
- The machine must not be used if the cord shows any sign of damage. Regularly inspect the cord for damage, in particular if it has been crushed, shut in a door or run over.
- Do not use the machine if it appears faulty. Have the machine inspected by an authorized service center if the machine has been dropped, damaged, left outdoors or has been exposed to water.
- No changes or modifications to the mechanical or electrical safety devices should be made.
- All repairs must be carried out by an authorized service center.
- Use only original dust bags, original fi Iters and original accessories from your local dealer. Use of unauthorized dust bags and fi Iters will void the warranty.
- Turn off the machine and unplug before starting dust bag or fi lter change, grasp the plug, not by pulling on the cord.
- Do not use the machine as a toy. Do not leave children with the machine without supervision.
- This appliance is not intended for use by young persons or infi rm persons without supervision unless they have been adequately supervised by a responsible person to ensure that they can use the appliance safely. Young children should be supervised to ensure that they do not play with the appliance.
- If the supply cord is damaged, it must be replaced by the manufacturer or its service agent or similar qualified person in order to avoid a hazard.
Instructions for use
Before using the machine make sure that the voltage shown on the rating plate underneath the machine corresponds with the mains voltage.
1
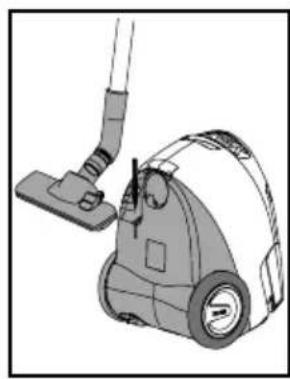
Connecting hose, tube and nozzles
Start and stop
Start
Pull out the cord and plug the machine to a wall socket.
On/off button and power level.
Stop
Turn off the machine and unplug. Unplug by grasping the plug, not by pulling on the cord.
Change of dust bag and fi Iters
The size and quality of the dust bag and fi Iters affect the machine effi cien-cy. Use of non original dust bags or non original fi Iters can cause restricted air flow which may lead to machine overload. Using non-original dust bag or fi Iters will void the warranty.
3 Changing the dust bag
The dust bag indicator shows completely red when to change the dust bag.
Always use original dust bags.
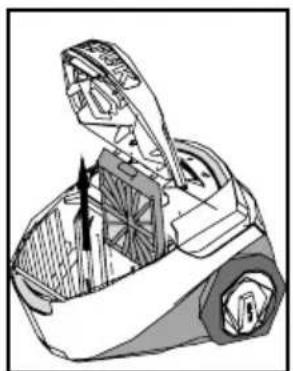
4 Changing the prefi Iter
The prefi Iter protects the motor by absorbing micro-particles that the dust bag can not keep. Change the prefi Iter with every fourth dust bag. The prefi Iter is located behind the dust bag. Always use original fi Iters.
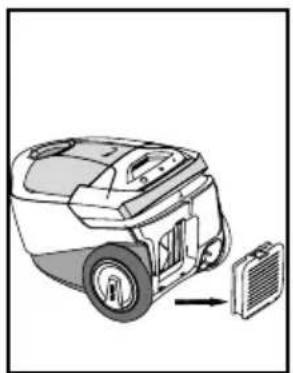
5 Changing the HEPA fi Iter
The HEPA fi Iter cleans the exhaust air from micro particles the dust bag can not keep. The HEPA fi Iter can not be brushed or washed clean.
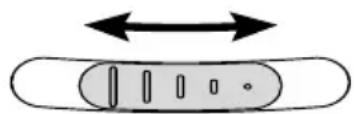
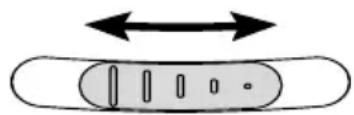
Adjust the suction power
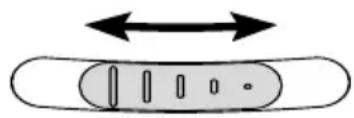
Sliding valve on the bent tube
The suction power is maximal with the sliding valve closed and minimal when all open. Adjust the suction power by putting the sliding valve in the desired position.

natural_image
3D rendering of a curved pipe or duct with an arrow indicating direction (no text or symbols)Power regulation
The suction power is adjusted with the slider on the machine.
natural_image
Simple diagram of a device with bidirectional arrows indicating movement or force (no text or symbols)6 Parking the tube and nozzle
There are two grooves for parking. One located on the underside to use when machine stands on the back, and the other on the back to use when the machine is standing on its wheels.
Thermal fuse
The machine is fitted with a thermal fuse, which prevents the machine from overheating. If the thermal fuse blows, the machine automatically switches off the motor and must cool before it can be started again.
Restart
- Turn off the machine and unplug from the wall socket.
- See to that nothing blocks the air flow through the bent tube, hose, tube, nozzle, dust bag or fl iters.
- Let the machine cool.
- Plug in the machine again and push the start button. The machine will not start until cool enough. If the machine does not start turn it off and unplug. Try again in a while.
Cleaning tips
Adjust the suction power by means of the power regulation or the sliding valve on the bent tube.
8 Upholstery nozzle
Use the upholstery nozzle for upholstered furniture.
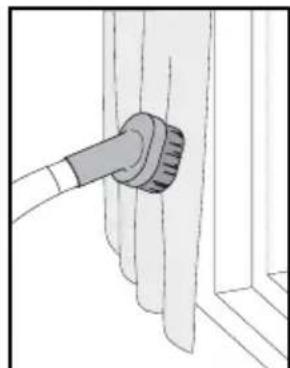
9 Brush nozzle
Use the brush nozzle for curtains and window sills.
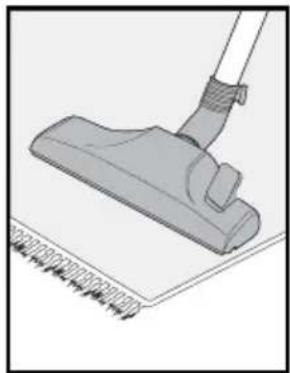
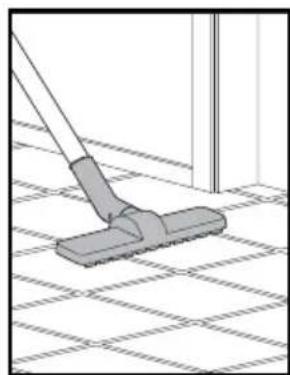
10 Hard floor nozzle
Use the nozzle for hard floors.
11 Combination nozzle
Adjust the combination nozzle depending on type of floor.
12 Turbo nozzle
Use the turbo nozzle for effi cient carpet cleaning.
The models can include different nozzles.
Trouble shooting
Repair or service of electrical components such as cord or motor, must only be carried out by an authorized service center.
| If the machine does not start | Check that the plug is correctly fitted to the wall socket. |
| A fuse in the building may have blown and needs to be changed. | |
| The cord or plug may be damaged and must be repaired by an authorized service center. | |
| Reduced suction power | The dust bag may be full and needs to be changed, see instructions. |
| The prefi lter, HEPA fi lter can be blocked and have to be changed, see instructions. | |
| The bent tube, hose, tube or nozzle may be blocked and needs to be cleaned. | |
| If the machine stops | The thermal fuse may have blown, see instructions. |
Service and maintenance
- Store the machine indoors and in a dry environment.
- Change the prefi Iter with every fourth dust bag. The dust bag package includes four dust bags and one prefi Iter.
- Clean the machine surface with a dry cloth or a damp cloth with a little cleaning agent.
- Order original accessories from a local dealer.
• Service – contact your local dealer.
Recycling and scrapping
Recycle the wrapping and scrap the machine according to recommendations from the local authorities. Cut the cord as short as possible to avoid someone getting injured on the scrapped machine.
Environmental commitment
This machine is designed with the environment in mind. All plastic parts due marked for recycling.
Responsibility
Nilfi sk disclaim all responsibility for all damage caused by incorrect use or modification of the machine.
Guarantee
The warranty can vary between different countries. Contact your local dealer for information.
Guarantee and service
This Nilfi sk Coupé Series vacuum cleaner is covered by a two (2) year guarantee on the machine, which covers the motor, cable rewinder, switch and casing. The nozzles, fl iters, hoses, tubes and other accessories are covered twelve months due to manufacturing fault only and excludes wear and tear.
The guarantee includes spare parts and labour costs, and covers manufacturing and material defects that may occur during normal domestic use.
Service under the guarantee will only be performed if it can be proven that the defect occurred within the product's guarantee period (a correctly completed guarantee certifi cate or printed/stamped cash register receipt with date and product type) and on the condition that the vacuum cleaner was bought as a new product in Great Britain/Ireland/Australia/New Zealand and distributed by Nilfi sk-Advance. In the event of the repair of defects, the customer must contact Nilfi sk-Advance to be directed to a service agent at the customers own expense. Upon completion of any repairs necessary, the vacuum cleaner will be returned to the customer at the risk and expense of Nilfi sk-Advance.
The guarantee does not cover:
- Normal wear and tear of accessories and filters.
- Defects or damage occurring as a direct or indirect result of incorrect use - such as the vacuuming of rubble, hot ashes or carpet deodorant powder.
- Abuse, loss or lack of maintenance as described in Instructions for use.
- If the machine has been used for home renovations.
- If the machine has been used for suction of water, plaster dust or sawdust.
Nor will it cover incorrect or poor confi guration, i.e. setting up or connection, nor fi re-damage, fi re, lightning strike or unusual voltage fl uctuations or any other electrical disturbances such as defective fuses or defective electrical installations on the supply grid, and defects or damage in general that Nilfi sk-Advance consider to be the result of causes other than manufacturing and material defects.
The guarantee becomes void:
- If a defect is caused by the use of non-original Nilfi sk dust bags and fi lters.
- If the identity number is removed from the vacuum cleaner.
- If the vacuum cleaner has been repaired by a non-Nilfi sk authorized dealer.
- If the machine is used in a commercial environment, i.e. building contractors, cleaning contractors, professional trades or any other non-domestic usage.
The guarantee is valid in:
Denmark, Sweden, Norway, Great Britain, Ireland, Belgium, Holland, France, Germany, Poland, Russia, Austria, Switzerland, Spain, Portugal, Australia and New Zealand, Estonia, Latvia, Lithuania, Hungary, Greece, Slovenia, Slovakia, The Czech Republic, Italy, Finland.
Australia Customer Care helpline: Telephone 1300 733 171
natural_image
3D rendering of a curved pipe or duct with directional arrows indicating flow or movement (no text or symbols)Leistungsregler
natural_image
Simple diagram of a rectangular object with internal vertical lines and dots, no text or symbols present.natural_image
Curved pipe segment with directional arrow indicating movement (no text or symbols)natural_image
Simple diagram of a rectangular object with internal vertical lines and an upward arrow, no text or symbols present.natural_image
3D rendering of a curved pipe or duct with a directional arrow indicating left motion (no text or symbols)natural_image
Simple diagram of a rectangular object with internal vertical lines and bidirectional arrows above it (no text or symbols)natural_image
3D rendering of a curved pipe or duct with an arrow indicating direction (no text or symbols)Ajuste da potência
natural_image
Simple diagram of a device with bidirectional arrows indicating movement or force (no text or symbols)6 Colocar o tubo e o bocal no descanso
natural_image
3D rendering of a curved pipe or duct with an arrow indicating direction (no text or symbols)natural_image
Simple diagram of a cell with double-headed arrows indicating direction (no text or symbols)natural_image
3D rendering of a curved pipe or duct with directional arrows indicating movement (no text or symbols)Vermogensafstelling
natural_image
Simple diagram of a rectangular object with internal vertical lines and two dots, separated by bidirectional arrows (no text or symbols)natural_image
3D rendering of a curved pipe or duct with an arrow indicating direction (no text or symbols)Effektreglering
Sugeffekten regleras med skjutreglaget på maskinen.
natural_image
Simple diagram of a rectangular object with internal vertical lines and two dots, separated by bidirectional arrows (no text or symbols)natural_image
3D diagram of a curved pipe or duct with directional arrows indicating movement (no text or symbols)Effektregulering
Sugeeffekten justeres med falskluftventilen på støvsugeren.
natural_image
Simple line drawing of a rectangular object with internal vertical lines and an upward arrow above it (no text or symbols)natural_image
3D rendering of a curved pipe or duct with an arrow indicating direction (no text or symbols)Effektregulering
natural_image
Simple diagram of a rectangular object with internal vertical lines and two dots, separated by bidirectional arrows (no text or symbols)natural_image
3D rendering of a curved pipe or duct with an arrow indicating direction (no text or symbols)Tehon säätö
natural_image
Simple diagram of a rectangular object with internal vertical lines and an upward arrow, no text or symbols present.natural_image
Diagram of a car's electrical plug being inserted into a socket (no text or symbols present)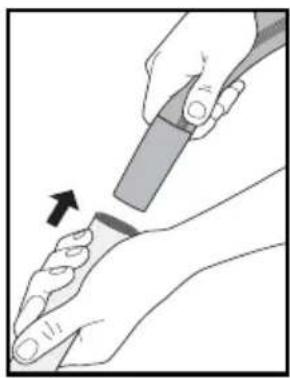
natural_image
Illustration of a hand holding a pen or stylus, with an arrow indicating the point of change (no text or symbols present)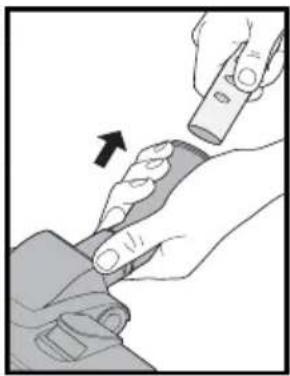
natural_image
Illustration of hands performing a medical procedure on a wrist (no text or symbols visible)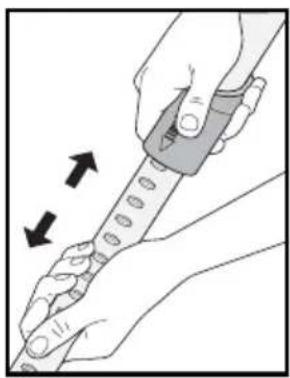
natural_image
Illustration of hands using a tool to interact with a device, showing motion arrows (no text or symbols)3
natural_image
Line drawing of a vacuum cleaner (no text or symbols)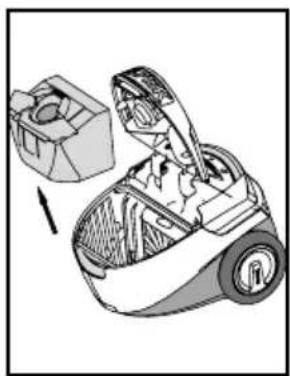
natural_image
Diagram of a robotic vacuum cleaner with open lid and internal components (no text or symbols)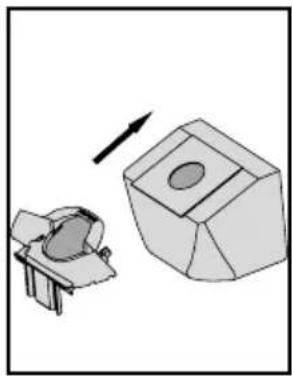
natural_image
Diagram showing a mechanical component with a circular feature and an arrow indicating direction (no text or symbols)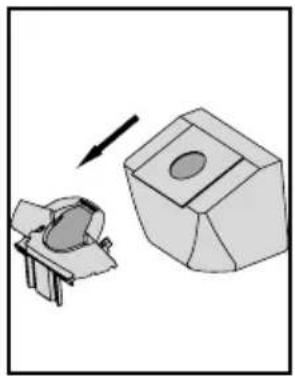
natural_image
3D mechanical component diagram showing a cylindrical part and a rectangular block with a hole, with an arrow indicating direction (no text or symbols)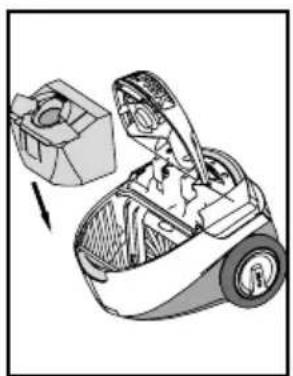
natural_image
Diagram of a robotic vacuum cleaner with open lid and internal components, showing mechanical assembly (no text or symbols)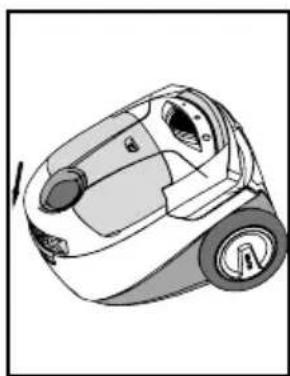
natural_image
Line drawing of a small vacuum cleaner (no text or symbols)4
natural_image
Technical illustration of a mechanical device with internal components and directional arrows (no text or symbols)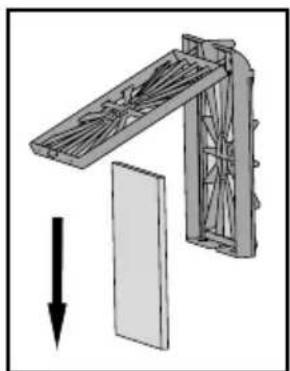
natural_image
Diagram of a structural frame with an arrow indicating downward motion (no text or symbols present)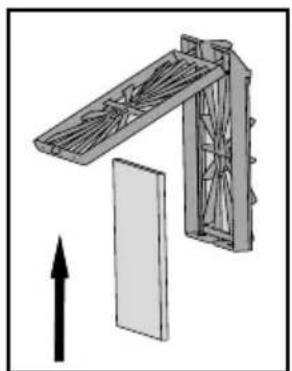
natural_image
3D diagram of a structural frame with an upward arrow indicating direction (no text or symbols)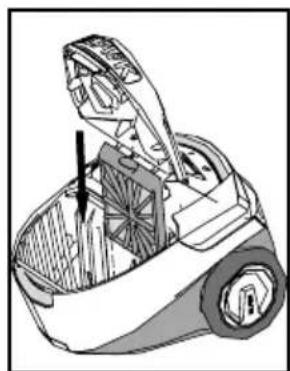
natural_image
Technical illustration of a mechanical device with internal components and an arrow indicating direction (no text or symbols)5
natural_image
Diagram of a robotic vacuum cleaner with a mounted device, showing no text or symbols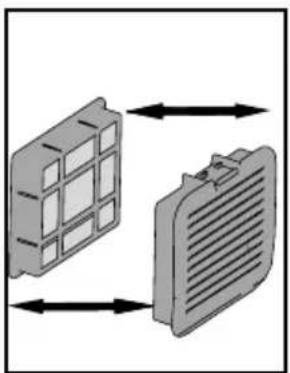
natural_image
Diagram showing two 3D components with directional arrows indicating movement or flow (no text or symbols)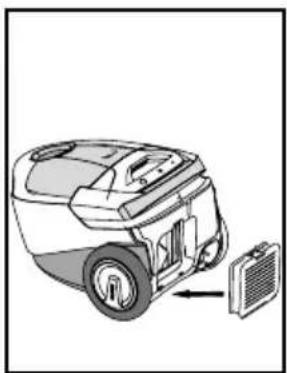
natural_image
Illustration of a robotic vacuum cleaner with a mounted device (no text or symbols visible)6
natural_image
Illustration of a vacuum cleaner with a handle and attached blade (no text or symbols)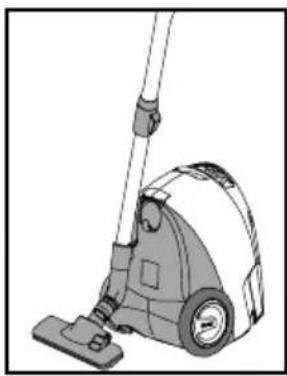
natural_image
Illustration of a vacuum cleaner with handle and wheels (no text or symbols)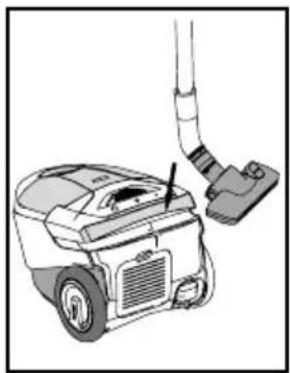
natural_image
Illustration of a vacuum cleaner with a hose and attached plug (no text or symbols)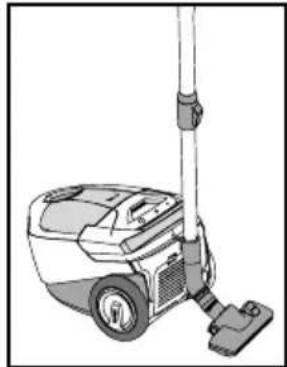
natural_image
Line drawing of a vacuum cleaner with attached lever (no text or symbols)8
natural_image
Illustration of a cleaning brush applying paint to a surface (no text or symbols)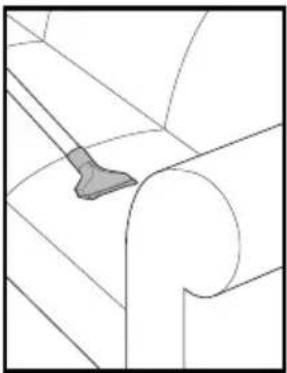
natural_image
Pure technical line drawing of a mechanical component without any text, numbers, or symbols9
natural_image
Diagram of a pipe inserted into a wall corner, showing a circular component inserted (no text or symbols present)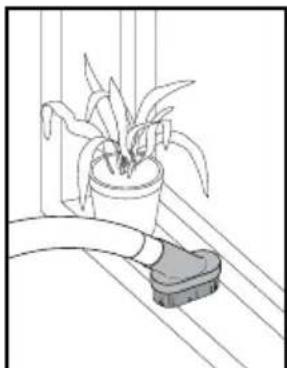
natural_image
Line drawing of a potted plant with a curved pipe attached to a small rectangular object on a wooden floor (no text or symbols)10
11
12
natural_image
Illustration of a mop cleaning a tiled floor (no text or symbols)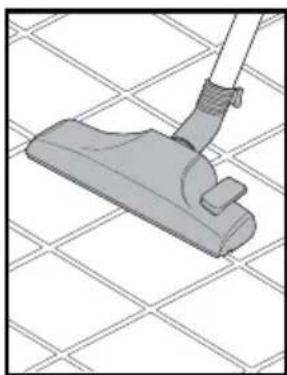
natural_image
Illustration of a hand cleaning a tiled floor with a broom (no text or symbols)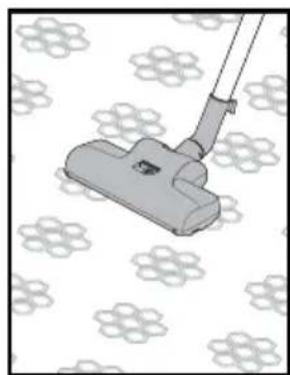
natural_image
Illustration of a vacuum cleaner on a patterned fabric background (no text or symbols)www.nilfi sk-advance.com
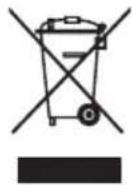
WHEELIE Symbol Information
English
Correct Disposal of This Product (Waste Electrical & Electronic Equipment)
(Applicable in the European Union and other European countries with separate collection systems) This marking shown on the product or its literature, indicates that it should not be disposed with other household wastes at the end of its working life. To prevent possible harm to the environment or human health from uncontrolled waste disposal, please separate this from other types of wastes and recycle it responsibly to promote the sustainable reuse of material resources. Household users should contact either the retailer where they purchased this product, or their local government office, for details of where and how they can take this item for environmentally safe recycling.
Business users should contact their supplier and check the terms and conditions of the purchase contract. This product should not be mixed with other commercial wastes for disposal.
Deutsch