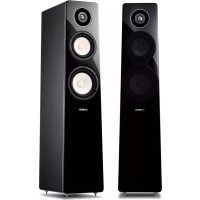
NSP160 - Haut-parleur YAMAHA - Free user manual and instructions
Find the device manual for free NSP160 YAMAHA in PDF.
Download the instructions for your Haut-parleur in PDF format for free! Find your manual NSP160 - YAMAHA and take your electronic device back in hand. On this page are published all the documents necessary for the use of your device. NSP160 by YAMAHA.
USER MANUAL NSP160 YAMAHA
Инструкция По Эксплуатацииi En
Please read the following operating precautions before use. Yamaha will not be held responsible for any damage and/or
injury caused by not following the cautions below.
1. To assure the finest performance, please read this
manual carefully. Keep it in a safe place for future
2. Install the speakers in a cool, dry, clean place – away
from windows, sources of heat, sources of excessive
vibration, dust, moisture or cold. Avoid sources of
electrical humming (e.g., transformers and motors). To
prevent fire or electric shock, do not expose the
speakers to rain or water.
3. To prevent the enclosure from warping or discoloring,
do not expose the speakers to direct sunlight or
4. Avoid installing the speakers where foreign objects may
fall onto them and/or where they may be exposed to
liquid dripping or splashing.
5. Do not place the following objects on top of the
– Other components, as they might damage or discolor
the surface of the speakers.
– Burning objects (e.g., candles), as they might cause
fire, damage to the speakers or personal injury.
– Containers of liquid, as they might spill and cause
electric shock to the user or damage to the speakers.
6. Do not place the speakers where they are liable to be
knocked over or struck by falling objects. Stable
placement will also ensure better sound performance.
7. Placing the speakers on the same shelf or rack as the
turntable can result in feedback.
8. Any time you note distortion, reduce the volume control
on your amplifier to lower setting. Never allow your
amplifier to be driven into “clipping”. Otherwise, the
speakers may be damaged.
9. When using an amplifier with a rated output power
higher than the nominal input power of the speakers,
care should be taken not to exceed the maximum input
10. Do not attempt to clean the speakers with chemical
solvents as this might damage the finish. Use a clean,
11. Do not attempt to modify or fix the speakers. Contact
qualified Yamaha service personnel when service is
needed. The cabinet should never be opened for any
12. Secure placement or installation is the owner’s
responsibility. Yamaha is not liable for accidents
caused by improper placement or installation of
Information for Users on Collection and Disposal
This symbol on the products, packaging,
and/or accompanying documents means
that used electrical and electronic
products should not be mixed with
general household waste.
For proper treatment, recovery and
recycling of old products, please take
them to applicable collection points, in
accordance with your national legislation
and the Directives 2002/96/EC.
By disposing of these products correctly,
you will help to save valuable resources
and prevent any potential negative effects
on human health and the environment
which could otherwise arise from
inappropriate waste handling.
For more information about collection
and recycling of old products, please
contact your local municipality, your
waste disposal service or the point of sale
where you purchased the items.
[Information on Disposal in other
Countries outside the European Union]
This symbol is only valid in the European
Union. If you wish to discard these items,
please contact your local authorities or
dealer and ask for the correct method of
Taking care of the speaker
When you wipe this unit, do not use chemical solvents
(e.g., alcohol or thinners, etc.): this might damage the
finish. Use a clean, dry cloth. For difficult soils,
dampen a soft cloth in water, wring it out, and then
wipe with the cloth.1 En
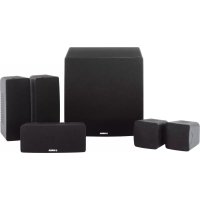
Make sure the package contains the following items.
Installing the center speaker2
Wall-mounting the speakers3
Connecting the speakers 4
(for center speaker)
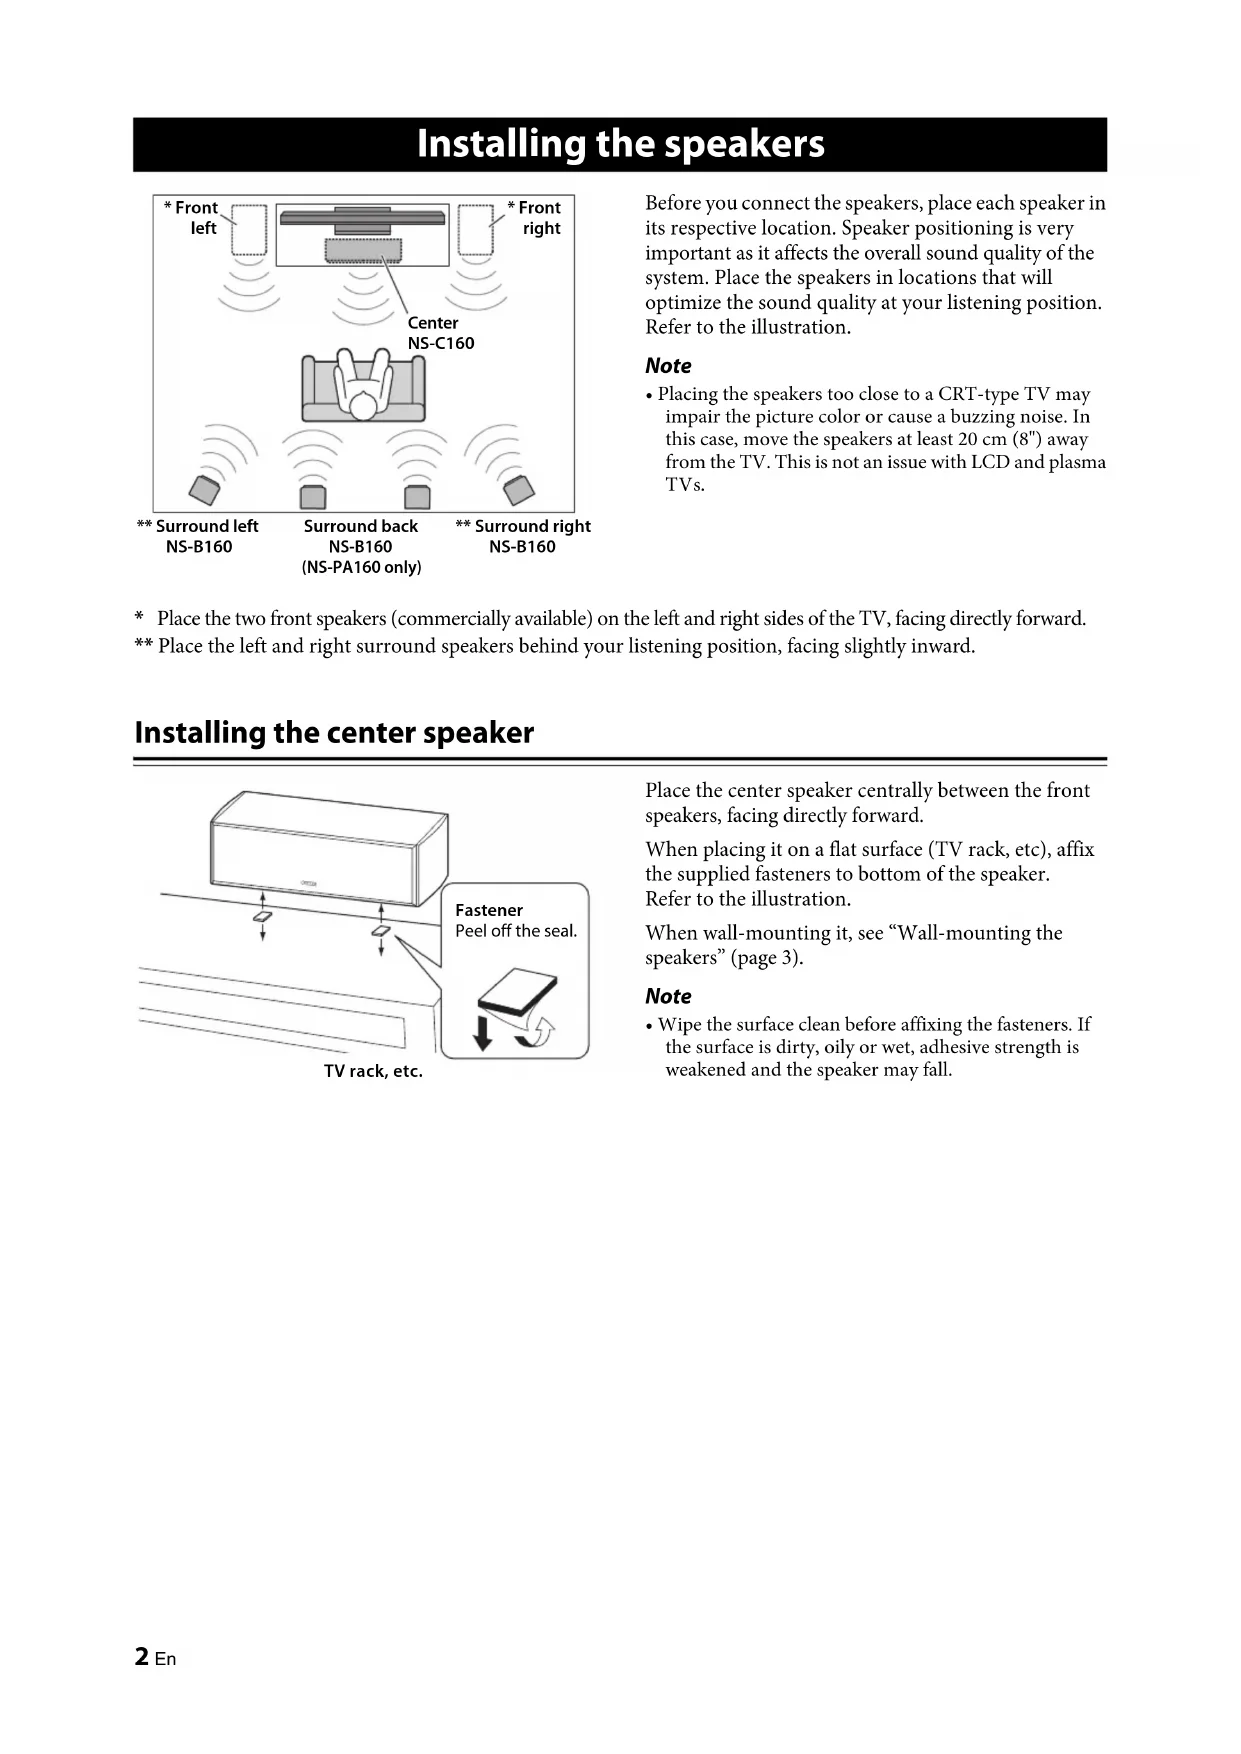
Before you connect the speakers, place each speaker in
its respective location. Speaker positioning is very
important as it affects the overall sound quality of the
system. Place the speakers in locations that will
optimize the sound quality at your listening position.
Refer to the illustration.
Note • Placing the speakers too close to a CRT-type TV may impair the picture color or cause a buzzing noise. In this case, move the speakers at least 20 cm (8") away from the TV. This is not an issue with LCD and plasma TVs.
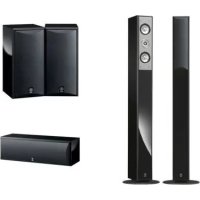
Place the two front speakers (commercially available) on the left and right sides of the TV, facing directly forward.
** Place the left and right surround speakers behind your listening position, facing slightly inward.
Installing the center speaker
Place the center speaker centrally between the front
speakers, facing directly forward.
When placing it on a flat surface (TV rack, etc), affix
the supplied fasteners to bottom of the speaker.
Refer to the illustration.
When wall-mounting it, see “Wall-mounting the
Note • Wipe the surface clean before affixing the fasteners. If the surface is dirty, oily or wet, adhesive strength is weakened and the speaker may fall. Installing the speakers
CenterNS-C160* FrontrightSurround back NS-B160 (NS-PA160 only)* Front left ** Surround rightNS-B160** Surround leftNS-B160
FastenerPeel off the seal.TV rack, etc.3 En Installing the speakers English
Wall-mounting the speakers You can mount the speakers on the wall as follows. 1 Install screws into a solid wall or wall support as shown in the illustration. Use 3.5 to 4 mm (1/8") diameter self-tapping screws. 2 Hang each speaker by its keyhole slots onto the protruding screws. Note • Make sure the shaft of the screw is seated in the narrow part of the keyhole slot. Otherwise, the speaker may fall. Warnings • Do not mount the speakers on thin plywood or on a wall with a soft surface material. Otherwise, the screws may pull out of the surface and the speakers may fall, possibly damaging the speakers or causing personal injury.• Do not affix the speakers to a wall using nails, adhesives, or unstable hardware. Long-term use and vibration may cause the speakers to fall.• To avoid accidents resulting from tripping over loose speaker cables, affix the cables to the wall.• Mount the speakers in a wall location that will be unlikely to result in injury to an individual’s head. • When using speaker brackets (commercially available) to mount the speakers on the wall or ceiling, we strongly recommend using safety wire (may be supplied with the bracket) between the speaker and bracket to prevent the speaker from falling.• When installing these speakers on a wall mounted bracket, it is essential that they are firmly secured. Be sure to consult a reliable source about the best type of fastener for your particular wall/ceiling’s construction. ■ Mounting the center speaker on the Yamaha YTS-F500/YTS-T500 TV stand
You can use the screw holes [diameter: 6 mm (1/4"), hole depth: 16 mm (5/8")] on the rear of this unit to mount the
speaker on the YTS-F500/YTS-T500. For installation details, please refer to the owner’s manual that came with the YTS-F500/YTS-T500. Notes • Be careful not to pinch the speaker cables between the speaker and the speaker bracket or speaker stand.• Do not lean or place any object on the speaker. Otherwise, the TV stand bracket may be deformed. 26 mm (1")Wall/wall support 3mm (1/8")Minimum 20 mm (3/4")NS-B1601.8 kg (4.0 lbs.)NS-C1602.9 kg (6.4 lbs.)210 mm (8-1/4")
290 mm (11-1/2")95 mm(3-3/4")Insert screws “D (M6 x 16)” that came with the YTS-F500/YTS-T500 into the screw holes.Rear viewNS-C160
Use speaker bracket “B” that came with the YTS-F500/YTS-T500.NS-C160(Installation example using YTS-F500)4 En
Caution: Make sure the power cables for your other AV components are disconnected from the AC wall outlets before making any connections. Connection diagram
■ Preparing the speaker cables Once you’ve positioned the speakers, you’ll need to prepare the speaker cables for connecting the speakers. 1 Remove about 15 mm (5/8") of insulation from the end of each speaker cable. 2 Twist the bare wires tightly. Notes • Do not bundle or roll up excess cable.• Twist the bare wires tightly so the individual strands are not splayed.• Be careful not to injure yourself while preparing the speaker cables. Connecting the speakers
Center speakerAmplifierFront speakersRight LeftNote: The exact layout of the speaker terminals depends on your amplifier.Surround speakersRight LeftSurround back speakers (NS-PA160 only)Right Left
Good No Good15 mm (5/8")5 En Specifications English
■ Operating the speaker terminals
1 Rotate the speaker terminal counterclockwise to loosen it.
2 Insert the bare wire.
3 Rotate the speaker terminal clockwise to tighten it.
4 Test the security of the connection by pulling gently on the cable. Notes • Make sure the terminal is gripping the bare wire, not the insulation.• Make sure the bare wires do not touch each other, as this could damage the speaker or amplifier.• If the connections are faulty, you will hear no sound from the speakers. ■ Connecting to an amplifier Connect each speaker to the appropriate speaker terminals on your amplifier by using the cables you prepared earlier. For details, see the “Connection diagram” (page 4).For the surround and surround back speakers only, connect one speaker to the left (marked L) terminals of your amplifier or receiver, and another speaker to the right (marked R) terminals. Please refer to the owner’s manual that came with your amplifier or receiver. Notes • Make sure you connect the speakers with the correct polarity—positive (+) terminals to positive (+) terminals, and negative (–) terminals to negative (–) terminals. If you get them crossed over, the sound will be unnatural and lack bass. • In your AV receiver’s speaker size settings, specify small (or “S”) for all of the speakers.• The speaker may be damaged if certain sounds are continuously output at high volume level. For example, if sine waves from a test disc, bass sounds from electronic instruments, etc., are continuously output, or when the stylus of a turntable touches the surface of a disc, reduce the volume level to prevent the speaker from being damaged.• Once you have connected all of the speakers, plug the amplifier and other AV components into suitable AC wall outlets.• When using an amplifier with a rated output power higher than the nominal input power of the speaker, care should be taken never to exceed the speaker’s maximum input. ■ When using a banana plug
1 Tighten the terminal knob.
2 Simply insert the banana plug into the terminal.
■ Center speaker (NS-C160) Type2-way acoustic suspensionNon-magnetic shielding type Driver Woofer 8 cm (3-1/4") cone type x 2
Tweeter 1.4 cm (1/2") balanced dome typeNominal input power 30 W Maximum input power 80 W Impedance Nominal 6 Ω
Frequency response 60 Hz - 38 kHz (–10 dB) - 100 kHz (–30 dB) Sensitivity 86 dB/2.83 V, 1 m
■ Surround speakers (NS-B160) Type2-way acoustic suspensionNon-magnetic shielding type Driver Woofer8 cm (3-1/4") cone type Tweeter1.4 cm (1/2") balanced dome type
Nominal input power 20 W Maximum input power 60 W Impedance Nominal 6 Ω
Frequency response 60 Hz - 38 kHz (–10 dB) - 100 kHz (–30 dB) Sensitivity 82 dB/2.83 V, 1 m
Dimensions (W x H x D) 150 x 265 x 152 mm (5-7/8" x 10-3/8" x 6") Wei ght 1.8 kg (4.0 lbs) Specifications are subject to change without notice. Positive (+)Negative (–)LoosenTighten
© 2013 Yamaha Corporation