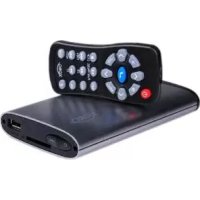
HMB 2100 - Media player XORO - Free user manual and instructions
Find the device manual for free HMB 2100 XORO in PDF.


| Product Type | HD Media Player |
| Brand | Xoro |
| Model | HMB 2100 |
| Internal Hard Drive | Compatible SATA 2.5" up to 1 TB (sold separately) |
| Ports | USB 3.0 (compatible USB 2.0), USB 2.0 HOST, HDMI 1.3, composite A/V output (CVBS) |
| Card Reader | SDHC |
| Supported File Systems | FAT32, NTFS |
| Video Formats | AVI, MKV, TS, MPG, MP4, MOV, VOB, ISO, IFO, DAT, WMV, RMVB; resolutions up to 1080p |
| Video Codecs | MPEG1, MPEG2, MPEG4 SP/ASP/AVC (H.264), WMV9 (VC-1), RealNetworks (RMVB) 8/9/10 |
| Audio Formats | MP3, OGG, WMA, WAV, FLAC |
| Audio Codecs | MP2/3, OGG Vorbis, WMA Standard, PCM, LPCM, RA, DTS, Dolby Digital, Dolby Digital Plus, Dolby TrueHD |
| Photo Formats | JPG, BMP, GIF, PNG, TIF |
| Power Supply | DC 5V, 2.4A power adapter |
| Remote Control | Infrared, CR2025 battery (included) |
| Included Accessories | Remote control, power adapter, USB 3.0 cable, user manual |
| Care and Cleaning | Unplug before cleaning. Use a dry cloth. Do not use any liquids. |
| Safety | Do not open the casing. Protect from moisture and extreme temperatures. Use only the supplied adapter. |
| Repairability | For any repairs, contact the authorized after-sales service. Do not attempt to repair yourself. |
| After-Sales Service | Hotline: +33 171 63 70 45, email: info@xoro.fr |
Frequently Asked Questions - HMB 2100 XORO
User questions about HMB 2100 XORO
0 question about this device. Answer the ones you know or ask your own.
Ask a new question about this device
Download the instructions for your Media player in PDF format for free! Find your manual HMB 2100 - XORO and take your electronic device back in hand. On this page are published all the documents necessary for the use of your device. HMB 2100 by XORO.
USER MANUAL HMB 2100 XORO
USB 3.0 Device port (compatible to USB 2.0)
USB 2.0 Host Port
Composite (CVBS) A/V jack
HDMI V1.3 interface
DC-IN 5V 2.4A
AVI/MKV/TS/MPG/MP4/MOV/VOB/ISO/IFO/DAT/WMV/RMVB, resolution up to 720p/1080i/1080p
MP3/OGG/WMA/WAV/FLAC
HD JPEG/BMP
RealNetworks (RMVB) 8/9/10, up to 720p
SRT, SMI, SSA,SUB, IDX+SUB
- All the safety and operating instructions should be read before the product is operated.
- Retain Instructions - The safety and operating instructions should be retained for future reference.
- All warnings on the product and in the operating instructions should be adhered to
- All operating and use instructions should be followed.
Operation
- Playback of Video, Music, Pictures files from USB storages.
- Playback of Video. Music. Pictures files from Card storages.
- Playback of Video, Music, Pictures files from internal Hard Drive.
Power Supply
- Never touch the plug with wet hands.
- If you want to pull the plug out of the plug socket, always pull directly on the plug. Never pull on the cable as it could tear.
- Make sure that the power cable is not bent, caught or run over and that it does not come into contact with heat sources.
- Make sure that the power cable is not wound around the device while in operation.
- Never place the machine on the power cable while it is being operated.
- Only use extension cables that are designed for the power consumption level of the machine.
- Keep the appliance away from rain and any moisture.
- Only operate the machine if the electrical voltage stated on the type plate beneath the machine agrees with the voltage on your plug socket. The wrong voltage can destroy the machine.
- Do not stand vases etc. on the appliance. Water could seep into the appliance.
- Do not open the appliance.
- Pull out the mains plug if the appliance is not to be used over a longer period of time.
- Take care that nobody can trip over the power supply cable.
Card Reader
The Card Reader off the HMB 2100 support SD, and SDHC memory cards.
Safety Information
Operation and Position
- Do not connect accessories on the player which are not defined by the manufacture.
- Do not place this product on an unstable cart, stand, tripod, bracket, or table. The product may fall, causing serious injury to a child or adult, and serious damage to the product. Use only with a cart, stand, tripod, bracket, or table recommended by the manufacturer, or sold with the product. Any mounting of the product should follow the manufacturer's instructions, and should use a mounting accessory recommended by the manufacturer.
- A product and cart combination should be moved with care. Quick stops, excessive force, and uneven surfaces may cause the product and cart combination to overturn.
- The player is able to show a still image on the TV screen or monitor over an unlimited period of time. This can cause damage to the screen. It is therefore advisable to activate the screen saver. Or switch the player off, if the device is not in use.
- Do not uses the player permanent in the 4:3 mode. This may cause damage to the screen.
- Do not increase the volume when the player is just playing very quiet sections. This cold damage the speaker if very loud passages starts all of a sudden after the quiet section.
- Switch the player off by the POWER button if it is not going to used for a longer period of time.
- Disconnect the main plug during thunderstorms.
- Slots and openings in the cabinet are provided for ventilation and to ensure reliable operation of the product and to protect it from overheating, and these openings must not be blocked or covered.
- The openings should never be blocked by placing the product on a bed, sofa, rug, or other similar surface.
- This product should not be placed in a built-in installation such as a bookcase or rack unless proper ventilation is provided or the manufacturer's instructions have been adhered to.
- Protect the device against weather influences, moistures and high temperature.
- Never spill liquid of any kind on the product.
- Do not expose the device and the remote control to direct sunlight.
USB Port
Due to the legal requirements of CE-conformity, the customer is asked to only connect USB-Sticks to the USB port.
English
Safety Information
Defect
-
Servicing - Do not attempt to service this product yourself as opening or removing covers may expose you to dangerous voltage or other hazards. Refer all servicing to qualified service personnel.
-
Damage Requiring Service - Unplug this product from the wall outlet and refer servicing to qualified service personnel under the following conditions:
a. When the power-supply cord or plug is damaged.
b. If liquid has been spilled, or objects have fallen into the product.
c. If the product has been exposed to rain or water.
d. If the product does not operate normally by following the operating instructions. Adjust only those controls that are covered by the operating instructions as an improper adjustment of other controls may result in damage and will often require extensive work by a qualified technician to restore the product to its normal operation.
e. If the product has been dropped or damaged in any way, and
- When the product exhibits a distinct change in performance this indicates a need for service.
- When replacement parts are required, be sure the service technician has used replacement parts specified by the manufacturer or have the same characteristics as the original part. Unauthorized substitutions may result in fire, electric shock, or other hazards.
- Please read in the section Troubleshooting our service address and phone number.
Notes
Recycling Information
Recycling of electronic devices
This product is designed and manufactured with high quality materials and components which can be recycled and reused.
This symbol means that electrical and electronic equipment, at their end-of-life, should be disposed of separately from your household waste.
Please, dispose of this equipment at your local community waste
collection/recycling centre. In the European Union there are separate collection systems for used electrical and electronic product. Please, help us to conserve the environment we live in!
Recycling of paper and carton
The material recycling symbol on the carton and user manual denotes that they are recyclable. Dispose them not with the normal household waste.

Recycling of plastic parts
The material recycling symbol on the plastic parts denotes that they are recyclable. Dispose them not with the normal household waste.

Green Dot
When opening the package of this Mini HD-Media Player please make sure that the following accessories are included:
HMB 2100
Remote Control
- AC/DC power adapter
USB 3.0 cable
- User Manual
Notes:
If any item should be damaged or missing, please contact your dealer without delay.
- Keep the packaging materials, you may need them to transport your player in the future.
- Always transport or send the player in its original packing.
- Do not change or modify any components of the device or accessories.
Features
- Mini HD Multimedia Player, support for 2,5" SATA HDD up to 1TB
Advanced Chipset Technology, supports Full HD-Video - USB 3.0 Port provides super high transfer rates
HDMI 1.3 - up to 1080p Output resolution
Supports a large number of Audio- and Video Codec s MPEG1, Xvid, MPEG 2, MPEG 4 SP/ASP H.264 (up to 1080p) - Compatible to AVI, MKV, MP4, TS, VOB, RM etc. container format
- Simply press the Copy-Button to backup your USB-Storage to HDD
- SDHC Cardreader
Supports NTFS and FAT32 file systems

English
HIIβ 2100
Main Unit
The elements of the front side
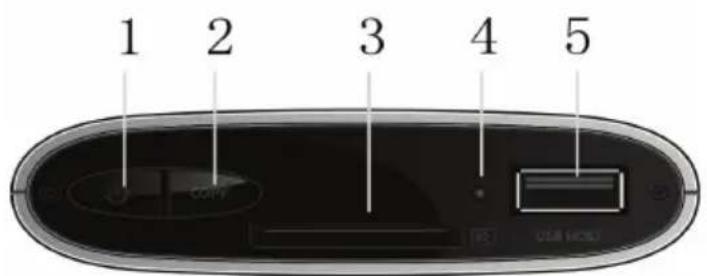
- POWER button
- Copy button
3 Memory Card slot. - indicator
- USB 2.0 HOST port
The elements of the rear side
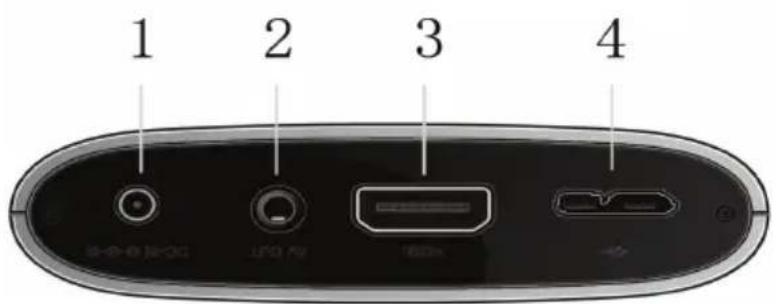
-
DC-IN Jack
-
A/V OUT Jack
-
HDMI Jack
-
USB 3.0 DEVICE port
Remote Control
Insert battery
- Prior to shipping, a separating film was applied to the battery. Remove this film.
- Please uses battery only with the type of CR2025 (3V).
- Open the battery cover. Move the clip (I) to the right and pull the battery cover (II) down.
- Insert the battery into the receptacle. Please pay attention on the polarity and the right position of the battery.
- Insert the receptacle into the remote.
- For the best results, aim the remote towards at the player. Stay within 5 metre and angles of 60 degrees or less.
- Under normal use the battery will last for one year.
- Remove battery during storage or when you are not using the Multimedia player for a long time.
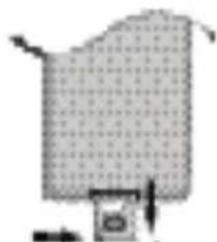
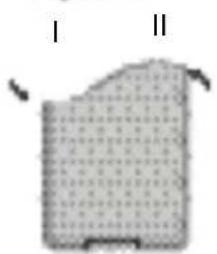
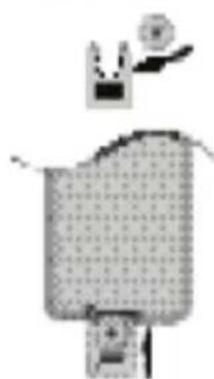
Notes:
- Weak batteries can leak and several damage by the remote control.
- Leaking out battery acid can damage your health.
- Remove the battery from the battery compartment as soon as it is exhausted or if the remote control is not going to be used for a longer period of time.
- Wipe up leaked out battery acid with a cloth.
- In case of skin contact immediately wash the affected area.
- Seek medical advice if battery acid has been swallowed. In case of contact with your eyes wash out the eyes and seek medical advice.
Installation of Hard Disc Drive
The HMB 2100 is prepared for the Installation of a Hard Drive. Following HDD are supported:
Interface:
Serial
ATA
Storage Capacity: up to 1TB
Form Factor: 2.5 inch (ca. 9.5 × 100.2 × 69.85 ~mm )
Note:
- max. supported height for Hard Drive is 9.5mm
- unplug all cables before you open the cabinet!
Static electricity can damage electronic parts. Before touching any electronic parts, drain static electricity from your body (for example, by touching grounded metal, for example the frame of your computer or a heater).
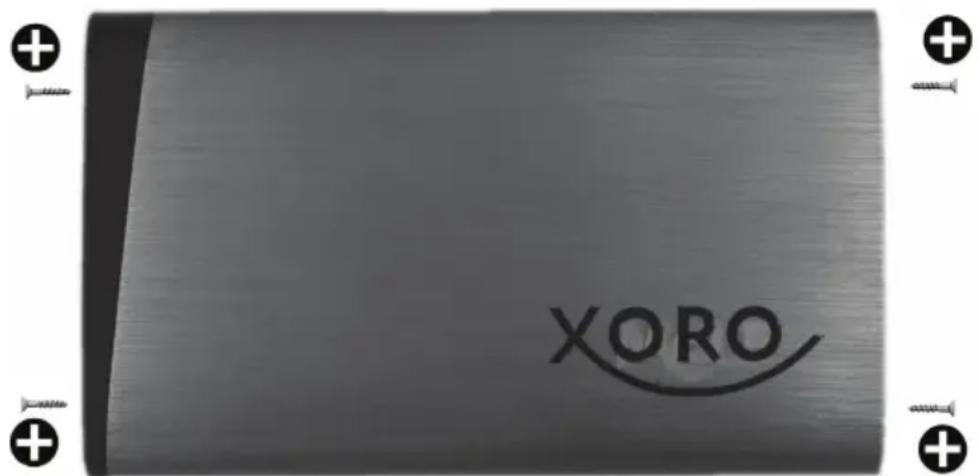
STEP 1: Remove the screws that fits the cabinet
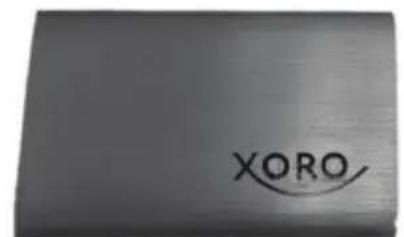
STEP 2: Lift up the Top Cover
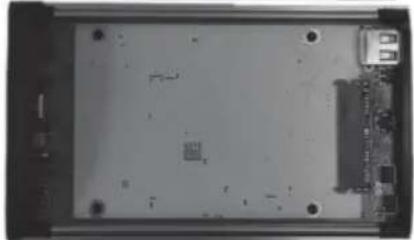
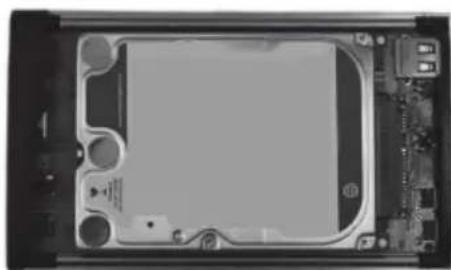
STEP 3: Plug in the Hard Drive
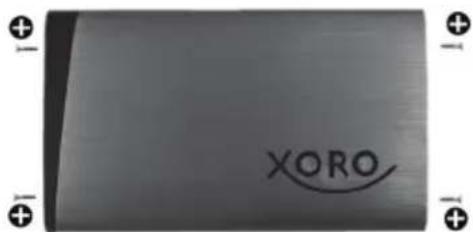
STEP 4: Close the Cabinet and tighten the screws.
If you install an empty Hard Drive or a HDD with an unsupported file system, the HMB 2100 will format it when you power on the media player the first time. See page 19 how to format the hard drive manually. All Data on the Hard Drive are deleted during this process.
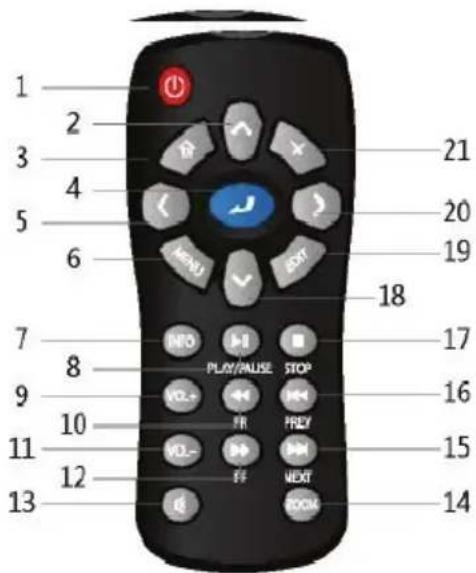
Buttons of the Remote Control
| 9 VOL+ Press to increase the volume. |
| 10 FR Press to fast rewind the current playback. Press repeatedly to select speeds |
| 11 VOL- Press to decrease the volume. |
| 12 FF Press to fast forward the current playback. Press repeatedly to select speeds. |
| 13 MUTE Press to mute audio output, and press again to resume. |
| 14 ZOOM Press to zoom the image (photo or video). |
| 15 NEXT Press to view the next file / page down. |
| 16 PREV Press to view the previous file / page up. |
| 17 STOP Press to stop playback; |
| 18 DOWN Navigational button. Press the arrow buttons to select menu options. |
| 19 EDIT Press to enter file editing menu in file manager,which can process :copy /delete / move / Rename / multiple select ;Press to enter file copying menu in media library. |
| 20 RIGHT Navigational button. Press the arrow buttons to select menu options. |
| 21 RETU RN Press to return to the previous screen while navigating menus. |
Connection
- Connecting the power supply.
connect the AC adaptor to the Player's DC IN jack .Plug the AC adaptor into the power outlet .
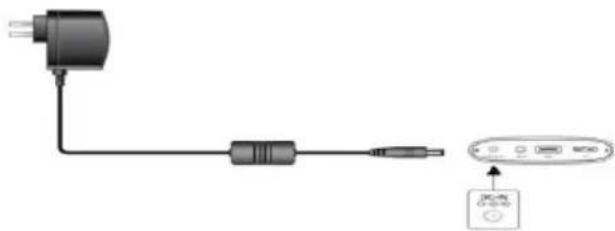
2. Connect to Computer
In order to access the contents of the internal hard disk (purchased separately): Make sure the player's power is on.
Plug in the connector of the USB 3.0 cable to the player's USB DEVICE port. Plug the rectangular connector of the USB 3.0 cable into the computer.
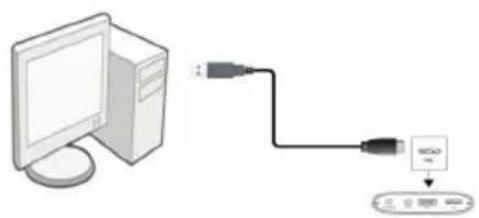
- TV Connection
AV out
Plug the composite cable connector into the Player's A/V OUT jack. Plug the other end of the composite cable into your TV's A/V IN jack.
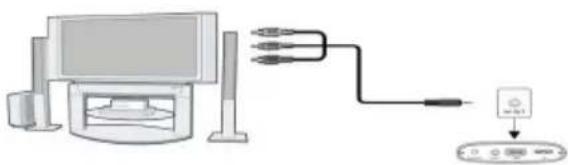

Connection
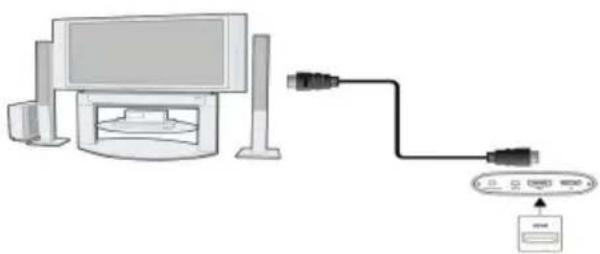
HDMI OUT
Plug one connector from your HDMI cable to the Player's HDMI jack.
Plug the other connector from your HDMI cable into the TV's HDMI jack.
Notes: HDMI cable is not an accessory in the Packaged.
eannnnnne
Connection
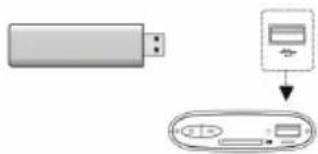
USB Storage Device
Make sure the Player's power is on. Plug the USB storage devices into the USB HOST port of this Player.
You can then browse the contents of the connected USB devices.
Notes:
Due to the legal requirements of CE-conformity, the customer is asked to only connect USB-Sticks to the USB port.
Connecting a Memory Card
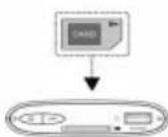
The Player has a built-in memory card slot, which enables you to view the contents of the memory card. To do this, please follow these instructions: Insert the memory card into the memory card slot on the Player's front panel. Make sure to properly orient the memory card before insertion. And remember that the memory card can only be inserted from one direction, so don't try to force it in from another.
Setup Menu
The Setup menu allows you to personalize and configure the preferences for your player.
To select a Setup option:
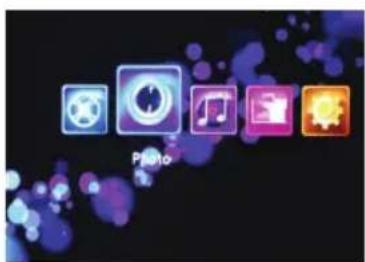
Select the Setup icon on the home screen.
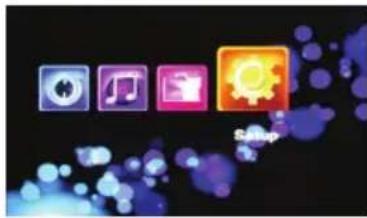
There are four Setup options, including System, Audio, Video, and MISC. Use the UP/DOWN navigational buttons to select a menu. Press ENTER to confirm. Press RETURN to cancel and display the previous menu screen.
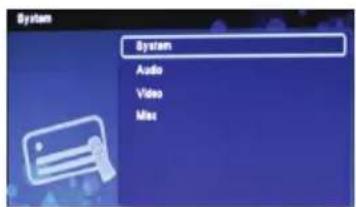
Use this menu to configure system settings.
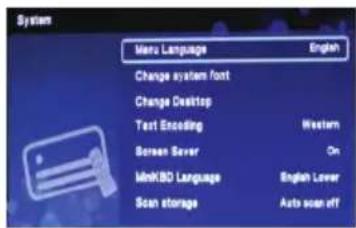
Setup Menu
Menu Language
Select to choose the OSD (On-Screen Display) language.
Change system font
Create a folder named "Resource" in the root directory of your USB or HDD, and rename your font file as "font.ttf" and then copy it to the folder.
Change desktop
Create a folder named "Resource" in the root directory of your USB or HDD, rename your PNG-File as "desktop.png" and then copy it to the folder.
Text Encoding
Select to set the text encoding option (subtitle display)
Screen Saver
Select to turn on / off screen saver.
Mini KBD Language
Select to change the language of the mini keyboard.
Scan storage
Select to set the scan mode of media library. The storage will be scanned and the files (video, music, photo) will be automatically categorized.
Resume Play
Select to turn on / off resume playback (auto-bookmarking) feature for movies. Format
Select to format the HDD.
Note: HDD format will remove all data stored on the hard disk drive. Please take care and backup your data in advance!
Restore Default
Select to restore factory defaults.
Setup Menu
Changing Audio Settings.
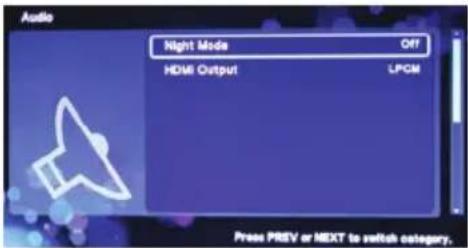
Use this menu to configure audio settings.
Night Mode
Choose between OFF / ON / COMFORT. Choosing the ON option will enable you to decrease the audio output volume.
HDMI Output
Choose among HDMI LPCM (Stereo) / HDMI RAW/ LPCM Multi-ch.
Note: HDMI RAW and LPCM Multi-Ch requires a compatible TV or Hifi-Receiver! Select LPCM if you her no sound from your TV.
Changing Video Settings
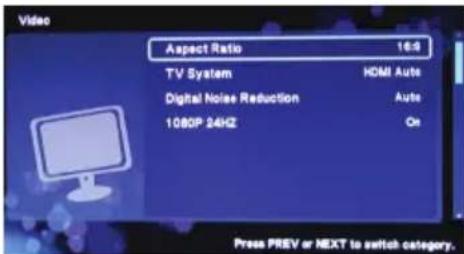
Use this menu to configure video settings
Aspect Ratio
Pan Scan 4:3: Displays a wide format picture on screen while cutting off the left and right portions; select when a standard 4:3 TV is connected.
Setup Menu
Movie
Letter Box 4:3: Displays a wide format picture with two black borders on the top and bottom of the screen; select when a standard 4:3 TV is connected.
16:9: Displays the 4.3 format picture onscreen; select when a 16:9 TV is connected.
16:10: select when a 16:10 TV is connected
TV System
Select to adjust video output resolution: NTSC / PAL / 480P / 576P / 720P 50HZ / 720P 60HZ / 1080I 50HZ / 1080I 60HZ / 1080P 50HZ / 1080P 60HZ/HDMI Auto.
Digital Noise Reduction
Choose AUTO
1080P 24FPS
Choose this option to enable or disable 1080P 24Hz support.
Notes: A TV set with 1080P 24HZ (24P) mode is required.
Miscellaneous
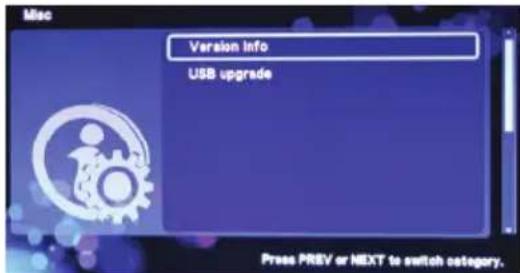
Use this menu to adjust miscellaneous settings.
Version Info
This tab gives you information about the software installed and about the material components of your player.
USB upgrade
This setting is used to update the firmware or extension package via a USB stick. In order to upgrade the device to the new firmware; Copy 'install.img' to the root directory of a USB stick, and then connect it to the USB HOST port of the player.
Press ENTER to confirm.
Movie Playback
Select the Movies tab off the home menu to view your video files. Only files that are supported by this device will be displayed. The device supports following formats:AVI/MKV/TS/MPG/MP4/MOV/VOB/ISO/IFO/DAT/WMV/RMVB, resolution up to 720p/1080i/1080p
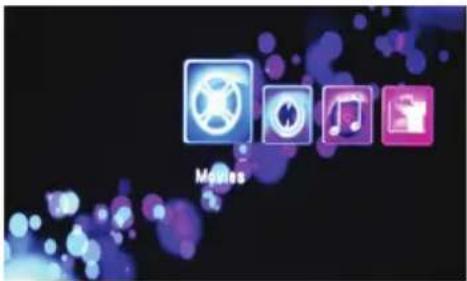
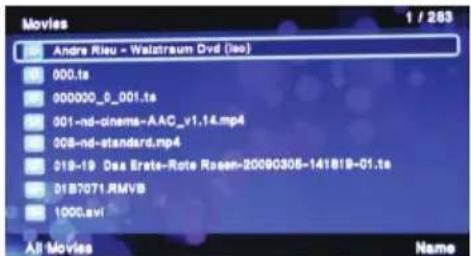
Movie Library Options In the Movie library, press the MENU button to display the option menu and its functions.
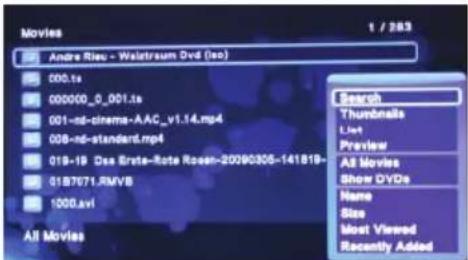
You can choose Search to turn on a Search bar at browsing files in the library. You can choose a view mode among Thumbsnails, List and Preview. You can choose to sort by Name, Size, Most Viewed or Recently Added.
Function of the buttons on the remote control in movie playback mode:
PLAY/PAUSE: Pause or resume the current playback
PREV/NEXT: View the previous or next file/chapter
FR/FF: Fast rewind or fast forward. Press repeatedly to select the speed
MENU: Display or hide the option menu during playback. Pop-up window displays: subtitle.audio/go to/repeat title/repeat all/repeat off/video setting
STOP: stop playback
VOL+/-: Increase/decrease the volume
ZOOM: Zoom in/out the image
INFO: View the media information
MoviePlayback
Movie
MoviePlaybackoptions
During movie playback, press the MENU button to display or hide the option menu at the bottom of the screen.
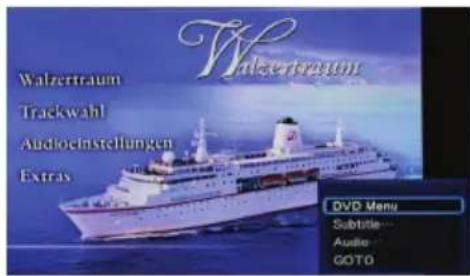
DVD Menu:
Select to return to the navigation menu during DVD IFO or ISO playback.
GOTO: Select to jump to a specific point in a title. Specify the point using Title
Chapter and/or Time.
Video Setting:Select to adjust the value of Brightness, Contrast, Saturation and Hue
Photo Playback
Photo
Select the Photos tab off the home menu to view your images. Only files that are supported by this device will be displayed. This player supports JPEG/BMP/GIF/PNG/TIF files.
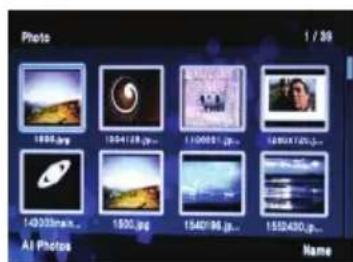
In the photo library, press the MENU button to display the option menu and its functions.
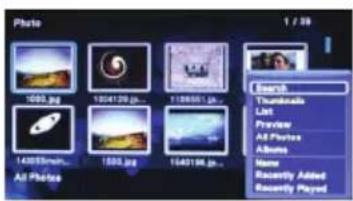
You can choose Search to turn on a Search bar at browsing photo files in the library. You can choose a review mode among Thumbsnails, List and Preview. You can choose to sort by Name, Size, Most Viewed or Recently Added.
Function of the buttons on the remote control in movie playback mode:
PREV/NEXT: View the previous or next photo
UP/DOWN: Rotate a photo in any angle.
MENU: Display or hide the option menu during playback.
STOP: Stop playback
ZOOM: Zoom in/out the image
Photo Playback
Photo
PhotoPlayback Options
During photo playback, press the MENU button to display or hide the option menu at the bottom of the screen.
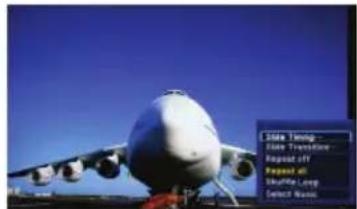
Slideshow Control
Select to choose the Interval and Transition effect of the slideshow.
Repeat Mode
Choose a repeat mode among Repeat off, Repeat all and Shuffle Loop from the option menu.
Select Music
Select to turn on/off background music during slideshow playback.
Select a specific audio file as the background music during photo playback.
Video Setting
Select to adjust the value of Brightness, Contrast, Saturation and Hue.
MusicPlayback
Music
Select the Music tab off the home menu to view your audio files. This player supports MP3, WMA, and OGG audio files. Only these files will be displayed.
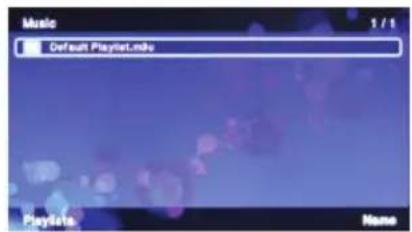
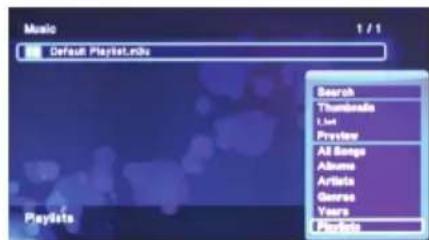
Music Library Options
In the music library, press the MENU button to display the option menu and its capable functions
Quick-Search
You can also press the Search button to turn on a Quick-Search bar while browsing photo files in the library.
Review Mode
Choose a review mode among Thumbsnails, List, and Preview from the option menu.
Sorting Mode
Choose to sort by Name, Size, Most Viewed or Recently Added from the option menu.
Filter options
Choose Albums to search for music files by album.
Choose Artists to search for music files by artist.
Choose Genres to search for music files by genre.
Choose Years to search for music files by modified year.
Function of the buttons on the remote control in music playback mode
PLAY/PAUSE: Start /Pause Playback
FR/FF: Fast rewind/fast forward. Press repeatedly to select the speed.
MENU: Display or hide the option menu during playback
VOL+/-: Increase/Decrease the volume
REPEAT: Set the repeat option
UP/DOWN: Select an music file
MusicPlayback/FileManager
Music/File Manager
MusicPlayback Options
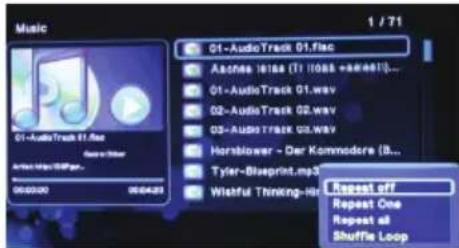
During music playback, press the MENU button to display or hide the option menu at the bottom of the screen. You can get the following functions through the option menu during music playback. Yon can choose a repeat mode among Repeat off, Repeat one, Repeat all and Shuffle Loop from option menu.
File Manager
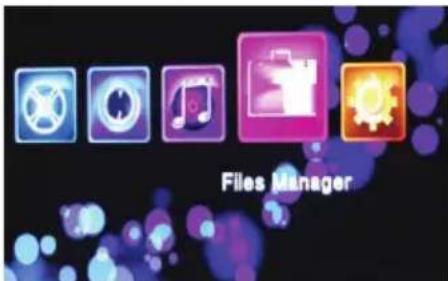
The file manager enables you to browse and play music, photo and movie files stored on an internal HDD, external USB or a memory card.
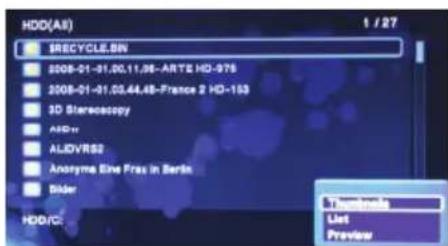
File Manager Options
In the file manager, press the MENU button to display the option menu and its capable functions. Choose a review mode among Thumbsails, List and Preview from the option menu.
[ \text{Playlist Manager} ]
[ \text{Listing Management} ]
Music Play list
Select music files you want to add to the play list. Press PLAY/PAUSE to add files to the list. Press EDIT to save the play list.
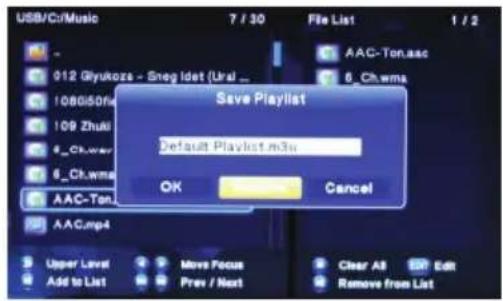
Open your music library, press the MENU button, and choose Playlists to show your saved music playlists.

Photo Album
Select photo files you want to add to the photo album. Press PLAY/PAUSE to add files to the list. Press EDIT to save the photo album.
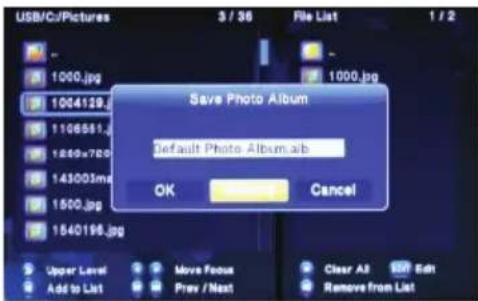
Open your photo library, press the MENU button and choose Albums to show your photo albums.
Copy Function
Copy Function
Copy under Media Library
Press the Edit button to enter the file select menu.
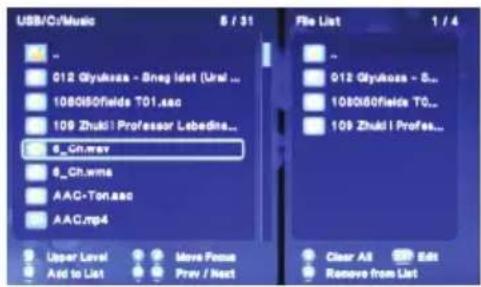
Press the play/pause button to select a file or folder that you want to copy to the file list.
Press the edit button to enter multi-file editing menu.
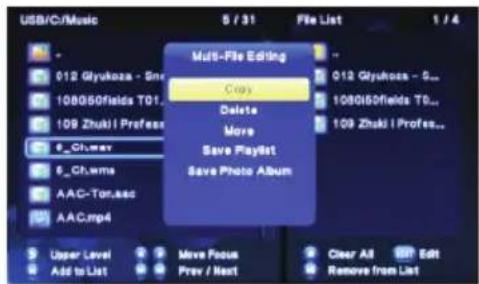
Select your destination folder to copy the files and press OK.
Press play/pause to confirm the copying of your files and wait till the process completes.
Copy under File Manager
Press the Edit button to enter the file editing menu. Choose Copy and follow the prompt on the screen to finish the process. If you want to select more files and folders, please choose Multiple Select to enter the file select menu.
Specification
Specifications:
INTERFACES SUPPORTED
2.5" SATA HDD
USB 3.0 Device port (compatible to USB 2.0)
Composite (CVBS) A/V jack
HDMI V1.3 interface
DC-IN 5V 2.4A
FILE SYSTEM SUPPORTED
FAT32/NTFS
CONTENT FORMATS SUPPORTED:
AVI/MKV/TS/MPG/MP4/MOV/VOB/ISO/IFO/DAT/WMV/RMVB, resolution up to
720p/1080i/1080p
MP3/OGG/WMA/WAV/FLAC
HD JPEG/BMP
VIDEO CODECS SUPPORTED:
MPEG-1
HD MPEG-2
HD MPEG-4 SP/ASP/AVC (H.264)
WMV9 (VC-1)
RealNetworks (RMVB) 8/9/10, up to 720p
AUDIO CODECS SUPPORTED:
MP2/3, OGG Vorbis, WMA Standard, PCM, LPCM, RA, DTS, Dolby Digital,
Dolby Digital Plus, Dolby TrueHD
SUBTITLE FORMS SUPPORTED:
SRT, SMI, SSA,SUB, IDX+SUB
Note: The specifications and design of this product are subject to change without notice.
Troubleshhoting
Check the following guide for the possible cause of a problem before contacting service. Technical Support of Xoro/MAS:
Phone: +49 40 77 11 09 17
- Internet: www.xoro.de/support.htm
| Symptom | Correction |
| No power | Check if AC adapter of power is connected securely. Press the POWER button on the remote control |
| No playback | Please control the file system of the external storage. Only FAT32, FAT and NTFS are supported. Control the storages for playable files Disconnect the storage from the device and connect again Please try another storages Please pay attention to the supported file formats |
| No remote control | Check the batteries in the remote control Are the polarities correct? Batteries are depleted. Please uses new one. Point the remote control unit at the Infrared sensor and operate. Remove the obstacles between the remote control and the Infred snesor Operate the remote control unit at a distance of not more than 5 meters from the Infrared sensor. |
| No button works | Switch the player completely off. Disconnect the player from the power supply. Connect after some minutes again and try any button. |
Troubleshooting
| Symptom | Correction |
| No picture | ·Pay attention to the cable connection. ·Turn on the LCD and choose the relevant input. |
| No sound | ·Pay attention to the cable connection. ·Are the settings of the LCD is correct? ·Please make sure, that the audio track exists. ·Please control the settings by external sound system o amplifier, so that the correct sound input is in use. |
| USB / Card Reader: Does not work | ·Pay attention to the right fitting of the external storages. ·Please uses storages from other brand and smaller capacity. ·Pay attention on the size of the storages. |
| No subtitles | ·Wrong MPEG-4 subtitle format ·Please rename the MPEG-4 subtitle to the same movie file name. Movie.avi and Movie.srt ·Press the SUBTITLE button ·Only one external subtitle is supported. Please pay attention by the notification of movie and subtitle file. |
| No Files in the library | ·After Power on the HMB2100, it may take some time until connected Storage Devices are entirely scanned. ·Check Setting "SCAN STORAGE" (see page 19) |
Limited Warranty
In case the products delivered are not free from defects in material or workmanship, MAS Elektronik AG has the right to either repair or replace the defective product at its choice. MAS Elektronik AG manufactures and repairs goods
using components which are new or equivalent to new in accordance with industry standards and practice. The warranty for wearing parts (e.g. rechargeable batteries) is limited to 6 months.
In case the device is equipped with internal data storage (e.g. hard disc drive, Flash drive), the customer is responsible to backup his data before sending the device. MAS Elektronik AG is not liable for any data loss on returned devices. MAS Elektronik AG reserves the right to reset returned devices to factory defaults. Please note your personal settings for this reason.
MAS Elektronik AG is not liable for any accessories not belonging to original package content such as DVDs, hard disc drives, Flash storage devices, batteries, etc.
This limited warranty covers the warranty requirements set by authorities in your country. This limited warranty only is valid in the country the product was purchased.
This limited warranty does not cover finishes, accessories or batteries, nor does it cover damage resulting from accident, misuse, abuse, dirt, water, battery leakage, tampering, servicing performed or attempted by unauthorized service agencies. This limited warranty does not cover damages resulting from firmware upgrades. Only in case of firmware upgrades needed to add functions promised at time of purchase, such damages are covered by this limited warranty. For a correct and frictionless completion of warranty or repairs you need a RMA No. You may obtain a RMA on the internet at www.mas.de/FAQ or by telephone.
Please send the device in its original packing material, all standard accessories and a copy of the invoice, a description of defect and the RMA No. to following address. Please note the RMA number clear and in large numbers on the outer package.
MAS Elektronik AG
Pollhornbogen 19
21107 Hamburg
Germany
Support
e-mail: support@ersservice.de
Hotline: +49 (0) 40 - 77 11 09 - 17
Fax: +49 (0) 40 - 76 73 35 - 15
FREE TO CHOOSE INNOVATIO

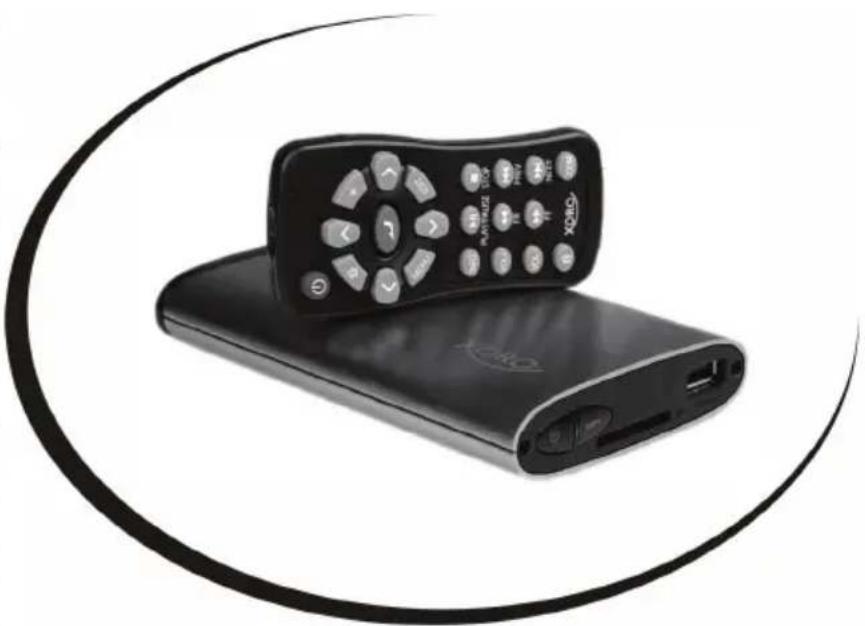
Mini HD Media-Player
HΠβ 2100
MANUEL D'EMPLOI
Table des Matieres
Options lecture film
STOP: Arreter la lecture.
SRT, SMI, SSA,SUB, IDX+SUB


- Operation
- Power Supply
- Card Reader
- Safety Information
- Operation and Position
- USB Port
- English
- Defect
- Notes
- Recycling Information
- Recycling of electronic devices
- Recycling of paper and carton
- Recycling of plastic parts
- Green Dot
- Notes:
- Features
- Main Unit
- The elements of the front side
- The elements of the rear side
- Remote Control
- Insert battery
- Installation of Hard Disc Drive
- Note:
- Connection
- Connect to Computer
- HDMI OUT
- USB Storage Device
- Connecting a Memory Card
- Setup Menu
- Menu Language
- Change system font
- Change desktop
- Text Encoding
- Screen Saver
- Mini KBD Language
- Scan storage
- Resume Play
- Select to format the HDD.
- Restore Default
- Changing Audio Settings.
- Night Mode
- HDMI Output
- Changing Video Settings
- Aspect Ratio
- Movie
- TV System
- Digital Noise Reduction
- 1080P 24FPS
- Miscellaneous
- Version Info
- USB upgrade
- Movie Playback
- Function of the buttons on the remote control in movie playback mode:
- MoviePlayback
- MoviePlaybackoptions
- DVD Menu:
- Photo Playback
- Photo
- PhotoPlayback Options
- Slideshow Control
- Repeat Mode
- Select Music
- Video Setting
- MusicPlayback
- Music
- Quick-Search
- Review Mode
- Sorting Mode
- Filter options
- Function of the buttons on the remote control in music playback mode
- MusicPlayback/FileManager
- Music/File Manager
- MusicPlayback Options
- File Manager
- File Manager Options
- [ \text{Playlist Manager} ]
- [ \text{Listing Management} ]
- Music Play list
- Photo Album
- Copy Function
- Copy under File Manager
- Specification
- Specifications:
- INTERFACES SUPPORTED
- FILE SYSTEM SUPPORTED
- CONTENT FORMATS SUPPORTED:
- VIDEO CODECS SUPPORTED:
- AUDIO CODECS SUPPORTED:
- SUBTITLE FORMS SUPPORTED:
- Troubleshhoting
- Limited Warranty
- Options lecture film
Brand : XORO
Model : HMB 2100
Category : Media player