HMT 350 - Media player XORO - Free user manual and instructions
Find the device manual for free HMT 350 XORO in PDF.


| Product Type | Media Player |
| Brand | Xoro |
| Model | HMT 350 |
| Screen | 3.5 inches (8.9 cm), resolution 320×240, 4:3 format |
| Dimensions | 199 × 84 × 84 mm |
| Weight | 0.4 kg (without batteries) |
| Power supply | 5.2 V DC, 1 A via USB port (power adapter included) |
| Power consumption | 5 W max, standby 0.02 W |
| Network | Wi-Fi IEEE 802.11 b/g, encryption WEP/WPA1/WPA2 |
| Connections | Composite video output (CVBS), component video output (YUV), stereo audio input (LINE IN), SD/SDHC card reader |
| Speakers | 2 × 2 Watts |
| FM Radio | Frequency 86-106 MHz, FM antenna included |
| Main functions | Internet TV, internet radio, podcast, shoutcast, UPnP, FM radio, media player (video/music/photo), alarm clock |
| Video formats | AVI, MKV, FLV, MP4, WMV (max resolution 720×576) |
| Audio formats | MP3, WMA, AAC, FLAC, WAV |
| Photo formats | JPEG, BMP, PNG, GIF (max resolution 1600×1200) |
| Remote control | Included, CR2032 battery |
| Device batteries | 4 AA batteries (not included) |
| Care and cleaning | Clean with a soft, dry cloth. Do not use liquids. |
| Safety | Do not open the device. Unplug during storms. Keep away from moisture. |
| Spare parts and repairability | Repair by qualified technician only. Use parts specified by the manufacturer. |
Frequently Asked Questions - HMT 350 XORO
User questions about HMT 350 XORO
0 question about this device. Answer the ones you know or ask your own.
Ask a new question about this device
Download the instructions for your Media player in PDF format for free! Find your manual HMT 350 - XORO and take your electronic device back in hand. On this page are published all the documents necessary for the use of your device. HMT 350 by XORO.
USER MANUAL HMT 350 XORO
FREE TO CHOOSE INNOVATIONS
XORO®
Internet TV and Radio with 3.5 inch LCD, WiFi, FIII Radio, SD Card Reader & Multimedia-Player HMT 350
natural_image
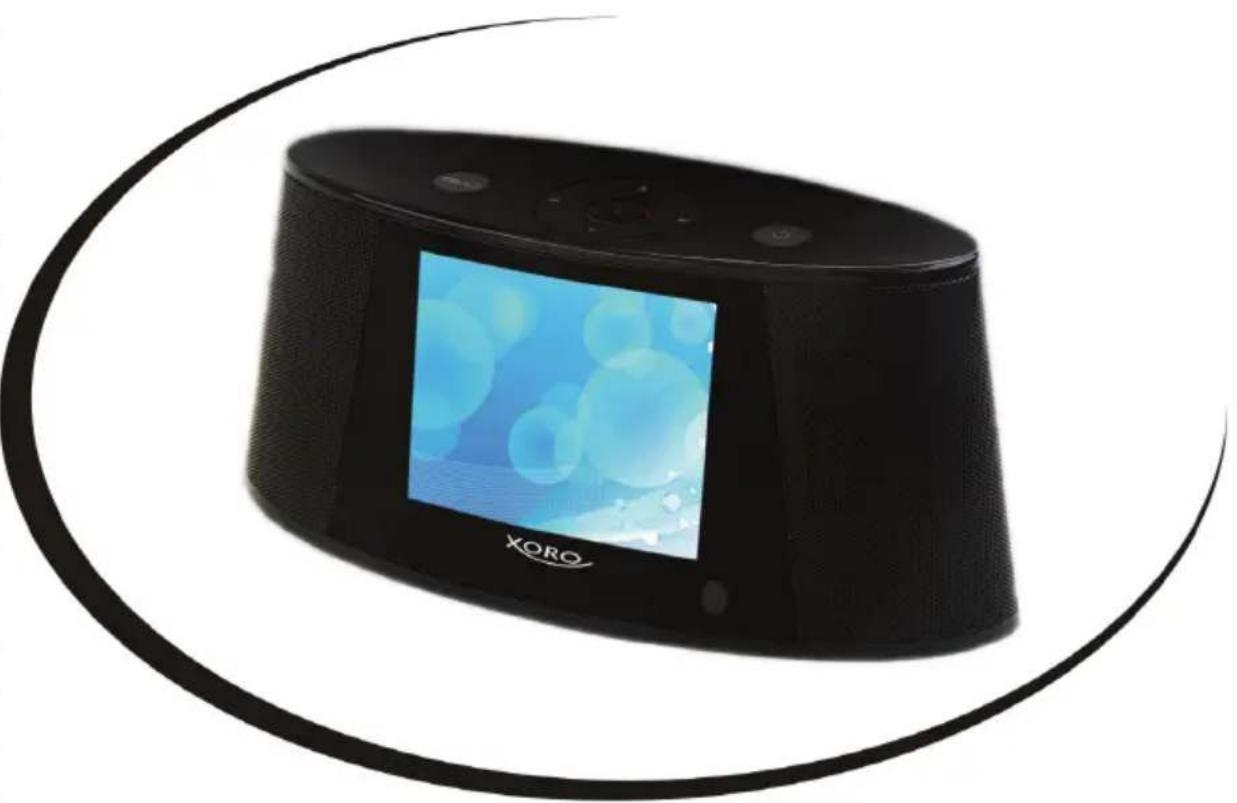
Black XORO portable electronic device with a screen displaying blue water and bubbles (no visible text or symbols on the device body)natural_image
Top-down schematic of a vehicle or platform with four side panels and a central rectangular block (no text or symbols)flowchart
graph TD
    A["Step 1: Box with grid pattern"] --> B["Step 2: Box with grid pattern"]
    B --> C["Step 3: Box with grid pattern"]
    C --> D["Step 4: Box with grid pattern"]
| A<-a | Back | Enter | Exit | |||||
| 0 | 1 | 2 | 3 | 4 | 5 | 6 | 7 | 8 |
| 9 | a | b | c | d | e | f | g | h |
| i | j | k | l | m | n | o | p | q |
| r | s | t | u | v | w | x | y | z |
| * | ( ) | - | + | | | - | = | \ | |
| / | < | > | ||||||
SHOUTCAST
Multimedia-Player
natural_image
Close-up of a black analog clock face showing time, hour, minute, and second hands (no text or symbols)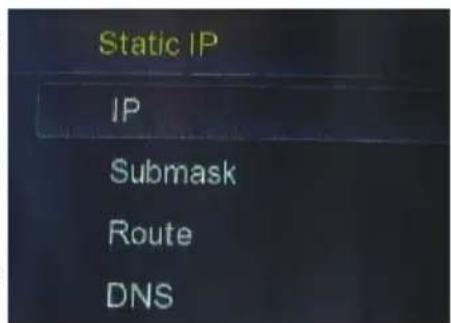
FM Suche
Datum und Zeit
(GMT-12:00)Kwajalein
(GMT-11:00)MidwayIslan
(GMT-10:00)Hawaii
(GMT-09:00)Alaska
(GMT-08:00)PacificTime(
Ausschaltzeit
Compatibility of Card Reader....7
Recycling 7
WLAN network....7
Service 8
In the box 9
Features....9
Connectors
Rear connection panel 10
Front Side....10
Top Side....11
Bottom Side.... 11
The Remote Control
Insert Battery 12
Operation range 12
Buttons....13
Connection
Power....14
Antenna 14
YUV 14
CVBS 15
LINE IN 15
Card Reader 15
First Time Installation
Install WLAN connection.... 16
Internet
Internet TV 17
Internet Radio 18
Podcast....20
Shoutcast.... 22
FM Radio
Search Run....24
Using.... 25
LINE IN
Port 26
Using.... 26
Multimedia-Player
Insert SD or SDHC Card.... 27
Navigation into the File Browser 28
Video Files 29
Music Files 30
Picture Files 31
Favorites
Define a favorite.... 31
Favorite list and Using 31
Date and Time
Display 32
Alarm Function.... 32
Settings
General 33
Language 33
Network Setting....33
Video output 34
Alarm....35
Slide Setting 36
FM Search Run.... 36
Screen Saver 36
Date & Time 36
Time Zone 37
Off Time 37
Calendar 37
Troubleshooting....38
Specifications 40
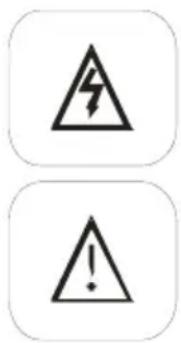
The lightning flash with an arrowhead symbol within an equilateral triangle is intended to alert the user of the presence of un-insulated "dangerous voltage" within the product's enclosure that may be of sufficient magnitude to constitute a risk of electric shock to persons.
The exclamation point within an equilateral triangle is intended to alert the user of the presence of important operating and maintenance (servicing) instructions in the literature accompanying the appliance.
THIS DEVICE COMPLIES WITH PART 15 OF THE FCC RULES. OPERATION IS SUBJECT TO THE FOLLOWING TWO CONDITIONS: (1) THIS DEVICE MAY NOT CAUSE HARMFUL INTERFERENCE, AND (2) THIS DEVICE MUST ACCEPT ANY INTERFERENCE RECEIVED. INCLUDING INTERFERENCE THAT MAY CAUSE UNDESIRED OPERATION.
User Manual
- All the safety and operating instructions should be read before the product is operated.
- Retain Instructions - The safety and operating instructions should be retained for future reference.
- All warnings on the product and in the operating instructions should be adhered to.
- All operating and use instructions should be followed.
Operation
- Connection to the Internet through a wireless antenna. The prerequisite is one's own stable wireless connection with valid credentials.
- Watching Internet TV via wireless connection.
- Listening to Internet radio stations via wireless connection.
- Watch or listen to the podcast and Shoudcast offers via wireless connection.
- Listen to FM radio stations through the connected FM antenna.
- Playback of media content (video, pictures and music).
- Connection with external devices via YUV full screen or AV output.
- Any other use is prohibited.
Notes:
- Connect to not unprotected and private networks. This is illegal and punishable by the legislature.
- Use only with a DSL Faltrate (no time deal, not a volume rate), as may otherwise arise with long use unexpectedly high telephone costs.
Antenna
The device can be connected to an antenna.
- This device contains an internal antenna for a local network. The effective radiated power corresponds to the IEEE 802.11 b/g standard.
- For the FM radio you must connect the external FM antenna.
USB
The USB port is only suitable for connecting the power adapter. Do not connect any other devices e.g. USB memory.
Power Supply
- Never touch the plug with wet hands.
- If you want to pull the plug out of the plug socket, always pull directly on the plug. Never pull on the cable as it could tear.
- Make sure that the power cable is not bent, caught or run over and that it does not come into contact with heat sources.
- Make sure that the power cable is not wound around the device while in operation.
- Never place the machine on the power cable while it is being operated.
- Only use extension cables that are designed for the power consumption level of the machine.
- Keep the appliance away from rain and any moisture.
- Only operate the machine if the electrical voltage stated on the type plate beneath the machine agrees with the voltage on your plug socket. The wrong voltage can destroy the machine.
- Do not stand vases etc. on the appliance.
- Water could seep into the appliance.
- Do not open the appliance.
- Pull out the mains plug if the appliance is not to be used over a longer period of time.
- Take care that nobody can trip over the power supply cable.
Operation and Position
- Do not connect accessories on the device which are not defined by the manufacture.
- Do not place this product on an unstable cart, stand, tripod, bracket, or table. The product may fall, causing serious injury to a child or adult, and serious damage to the product. Use only with a cart, stand, tripod, bracket, or table recommended by the manufacturer, or sold with the product.
- Any mounting of the product should follow the manufacturer's instructions, and should use a mounting accessory recommended by the manufacturer.
- A product and cart combination should be moved with care. Quick stops, excessive force, and uneven surfaces may cause the product and cart combination to overturn.
- Do not increase the volume when the device is just playing very quiet sections. This cold damage the speaker if very loud passages starts all of a sudden after the quiet section.
- Switch the device off by the Off/On switch if it is not going to used for a longer period of time.
- Disconnect the main plug during thunderstorms.
- Slots and openings in the cabinet are provided for ventilation and to ensure reliable operation of the product and to protect it from overheating, and these openings must not be blocked or covered.
- The openings should never be blocked by placing the product on a bed, sofa, rug, or other similar surface.
- This product should not be placed in a built-in installation such as a bookcase or rack unless proper ventilation is provided or the manufacturer's instructions have been adhered to.
- Protect the device against weather influences, moistures and high temperature.
- Never spill liquid of any kind on the product.
- Do not expose the device and the remote control to direct sunlight.
- If an outside antenna or cable system is connected to the product, be sure the antenna or cable system is grounded so as to provide some protection against voltage surges and built-up static charges.
Compatibility of the integrated Card Reader
- SD card support up to 2 GB. Unfortunately, there are a number of different SD cards and can not all be supported.
- SDHC cards are supported up to 16 GB. Unfortunately, there are a variety of different SDHC cards and not all can be supported.
- Please note that is supported in any storage medium only FAT 32. If a media is formatted using NTFS, then it will not be recognized.
Recycling of electronic devices
This product is designed and manufactured with high quality materials and components which can be recycled and reused.
This symbol means that electrical and electronic equipment, at their end-of-life, should be disposed of separately from your household waste.
Please, dispose of this equipment at your local community waste collection/recycling centre. In the European Union there are separate collection systems for used electrical and electronic product. Please, help us to conserve the environment we live in!
Recycling of paper and carton
The material recycling symbol on the carton and user manual denotes that they are recyclable. Dispose them not with the normal household waste.

Recycling of plastic parts
The material recycling symbol on the plastic parts denotes that they are recyclable. Dispose them not with the normal household waste.

Green Dot
Wireless network (WLAN)
- We would like to use a wireless network stress the following points:
- Never use illegal alien and unsecured networks. This is illegal and can / will be punished by the legislature.
- We recommend a full Internet / DSL flat rate in the use of this device, as it may cause unpredictable costs in continuous operation.
Defect
- Servicing - Do not attempt to service this product yourself as opening or removing covers may expose you to dangerous voltage or other hazards. Refer all servicing to qualified service personnel.
- Damage Requiring Service - Unplug this product from the wall outlet and refer servicing to qualified service personnel under the following conditions:
a. When the power-supply cord or plug is damaged.
b. If liquid has been spilled, or objects have fallen into the product.
c. If the product has been exposed to rain or water.
d. If the product does not operate normally by following the operating instructions.
Adjust only those controls that are covered by the operating instructions as an improper adjustment of other controls may result in damage and will often require extensive work by a qualified technician to restore the product to its normal operation.
e. If the product has been dropped or damaged in any way, and
- When the product exhibits a distinct change in performance this indicates a need for service.
- When replacement parts are required, be sure the service technician has used replacement parts specified by the manufacturer or have the same characteristics as the original part. Unauthorized substitutions may result in fire, electric shock, or other hazards.
- Please read in the section Troubleshooting our service address and phone number.
- Nicotine can be destroyed the electronically components and can pollute the LCD TFT panel.
Pixel error
The terms defined in the specifications of defective pixels (bright and dark pixels, line defects and differences in brightness) describe the maximum allowed amount and type of defects, which are excluded from the guarantee.
In the box
Following accessories should be in the box:
• Xoro HMT 350
- Remote Control with Batteries
- FM Antenna
- AV Cable
- Manual
- Warranty card
If any of the accessories are missing, then contact your dealer as soon as possible. Keep all the original packaging in case you need to return the set to the dealer.
Features
- Internet Radio
- Internet TV
• WLAN with IEEE 802.11 b/g
• Supports WEP; WPA1 and WPA2 encryption - UPnP
• 3.5 inch LCD screen - FM Radio
- Clock with Alarm Function
• Card Reader for SD or SDHC cards - Stereo audio input (LINE IN)
• Audio-Video output (Composite + Stereo)
• Video component output (Y Pb Pr) - Stereo Speakers with 2x 2 Watts power
- Integrated Multimedia-Player
- Plays Video (AVI, MKV, FLV, MP4), Music (MP3, FLAC, AAC, WMA) and Picture (JPEG, PNG, GIF) files form SD or SDHC cards
• Color: Black with piano finish
Rear Side
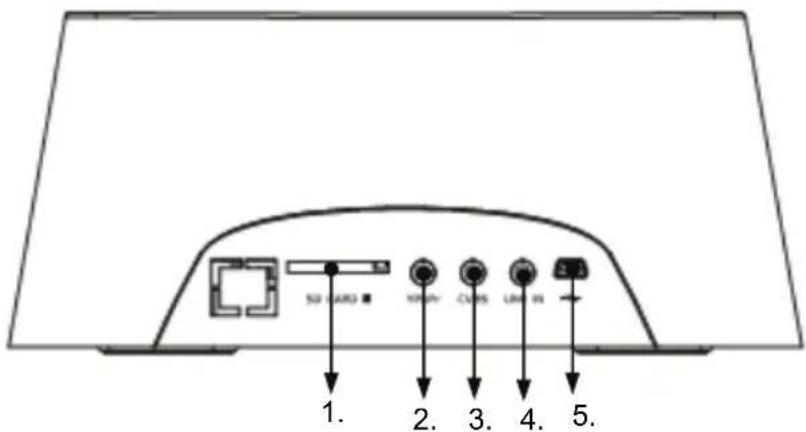
| No. | Name | Function | Description |
| 1 | SD | SDARSDHC Card Reader | |
| 2 Y Pb Pr | Video components output (Y Pb Pr) | ||
| 3 | CVBS | AV output (Composite and Stereo) | |
| 4 | LINE | Steren Audio Input | |
| 5 | USB | USB port for power adapter |
Front Side
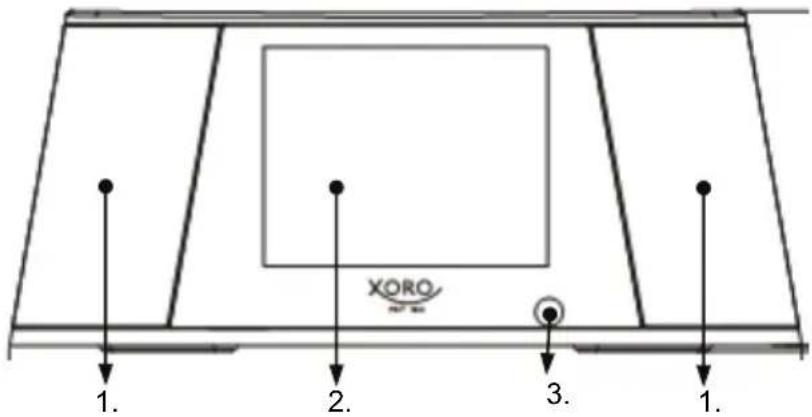
| No. | Function | Description |
| 1 | Speaker Left and Right | |
| 2 | 3.5 inch (8.9 cm) LCD screen | |
| 3 | Infra Red Receiver |
Top Side
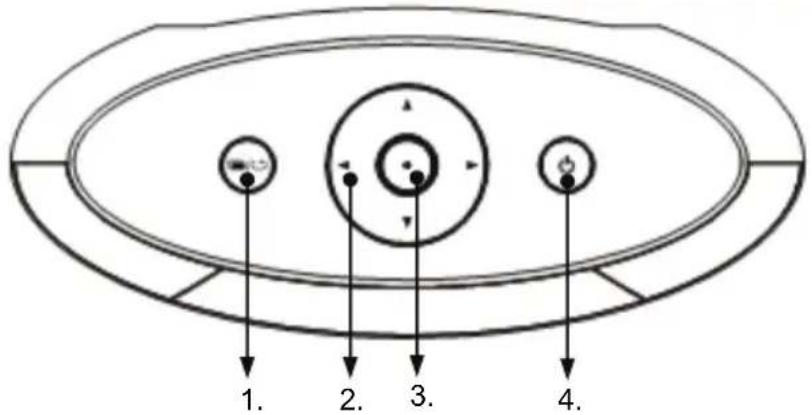
| No. | Function |
| 1 Menu | or Return button |
| 2 Navigation cross (UP, DOWN, LEFT, RIGHT) - Also for changing Volume | |
| 3 ENTER or PLAY button | |
| 4 Power On/Off button (Stand-By) | |
Bottom Side
On the bottom is the battery compartment. You can use four AA batteries.
- Open the battery compartment
- Insert four AA batteries and make sure the correct orientation of polarity.
- Close the battery compartment.
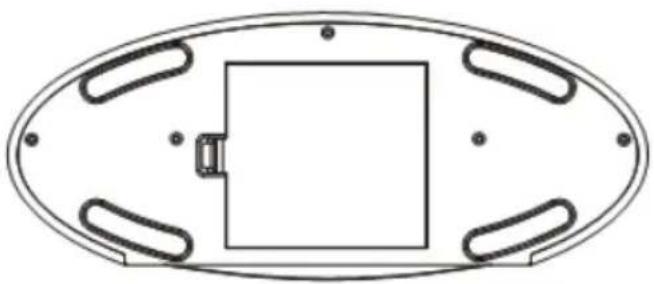
natural_image
Top-down schematic of a vehicle or platform layout with four side panels and a central rectangular block (no text or symbols)Notes on batteries:
- Incorrect treatment of the batteries may cause battery fluid leakage. This leads to corrosion and potentially harmful to a permanent defect of the device.
- Always make sure the correct battery polarity. Set this only as shown in the battery compartment using the symbols + and −.
- Do not mix two different types of batteries and never mix old and new batteries. Use only 1.5 V AA batteries.
- If you use the device not for a long time, take the batteries from the battery compartment. To prevent possible damage from corrosion.
- The device do not works correctly or a message appears on the screen, replace the batteries with new ones.
- If batteries leaks, carefully wipe out the battery compartment and insert new batteries.
- Do not litter used batteries into the garbage. Return used batteries to an authorized collection point (in the trade or service stations from).
Insert battery into the remote control
Insert the batteries in the remote control:
- Open the cover.
- Insert the battery. Make sure to match - and +.
- Close the cover
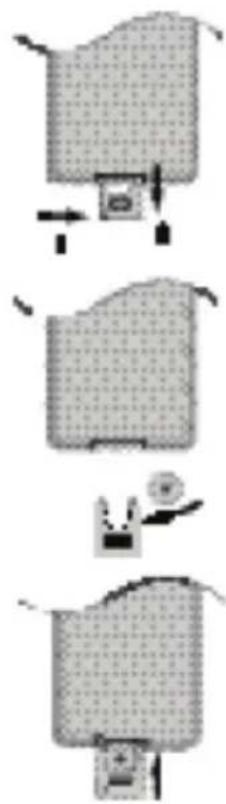
flowchart
graph TD
    A["Initial State"] --> B["Step 1: Arrow to Top"]
    B --> C["Step 2: Arrow to Bottom"]
    C --> D["Step 3: Arrow to Right"]
    D --> E["Final Output"]
Notes on batteries:
Improper use may cause battery leakage and corrosion.
Please follow the instructions below:
- Do not insert the batteries in the wrong direction
- Do not use different types of batteries together
- If you do not use the remote control for a long time, remove the batteries
- If the remote control operates not correctly, replace the batteries
- If battery leakage occurs, wipe the battery liquid from the battery compartment, then insert new batteries
- Make sure that the used batteries are disposed properly according to you local regulations.
Operation range
Point the remote control at the IR:
- Within about 5 m with angle about 30 grade in both direction.
Notes:
- Do not expose the IR of the device to a strong light source or direct sunlight.
- Direct the remote control at the infrared receiver (IR) of the player
- Do not drop the remote control.
- Do not spill water or put anything wet on it.
- Do not disassemble the remote control.
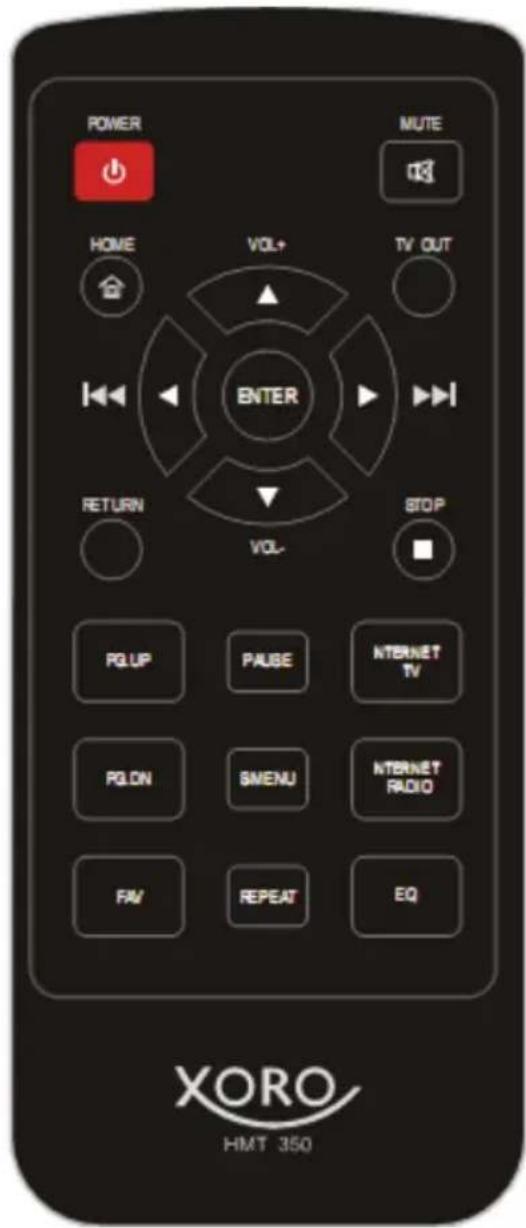
Buttons of the remote control:
POWER Power button (Stand-By)
MUTE Mute button
HOME Main Menu button
TV OUT Video Output button
▲ (Top) Navigation button to TOP
▼ (Bottom) Navigation button to Bottom
▶ (Right) Navigation button to Right
◀ (Left) Navigation button to Left
ENTER ENTER or PLAY button
RETURN Return button (one level)
STOP (■) Stop button
PG.UP Page Up button
PAUSE Pause button
INTERNET TV Internet TV button
PG.DN Page Down button
S.MENU Sub Menu button
INTERNET RADIO Internet Radio button
FAV Favourite button
REPEAT Repeat button
EQ Equalizer button
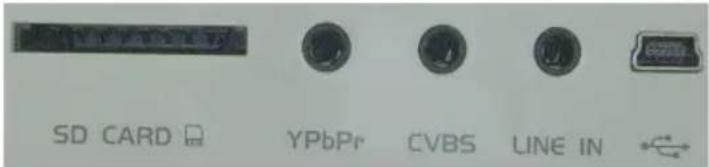
The connectors of the HMT 350 are:
- Card Reader
- Y Pb Pr / Antenna
- CVBS / AV output
- LINE IN
• USB for Power connection
Power connection
Connect the USB mini connector of the AC/DC power adapter with the Mini USB port of the device. Connect the power plug of the AC/DC adapter with the wall outlet.
Antenna
-
The HMT 350 has a FM radio. For radio reception connect the supplied antenna cable to the YPbPr plug.
-
The HMT 350 has an integrated WLAN antenna.
Note:
Look here on the orientation of the antenna and check the reception quality of FM radio or the wireless local area network (WLAN).
Component video output (YPbPr)
You can connect to the HMT 350 an external larger screen by the video component input. Connect the three-pin video cable to the "Y Pb Pr / YUV" input of a TV. Please pay attention to the colour coding on the TV.
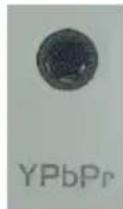
Now connect the 3.5 mm jack to the HMT 350 by the YPbPr plug.
Select the video output to the TV OUT button or by the Settings menu (Settings -> Video Output -> TV output -> YPbPr) and start the feature with the ENTER key. The image on the small screen switched off and on the TV appears the picture. The sound is still spent on the speakers of the HMT 350.
Repeatedly pressing the TV OUT button ends the video output of the HMT 350 and on the small screen of the HMT 350 back is an image visible.
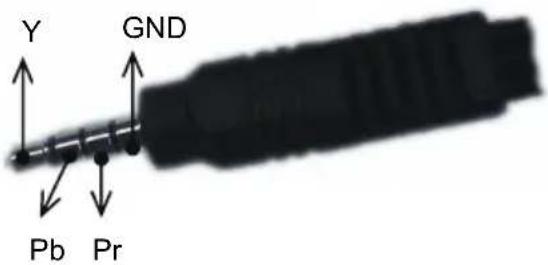
The PIN assignment of the cable is shown as follows:
Y Y Video Channel
Pb Pb Video Channel
Pr Pr video signal
GND Ground
AV output (CVBS)
You can connect an external larger screen on the component input of the TV set. Connect the three-pin video cable to the "AV" input of a TV. Please pay attention to the colour coding on the TV (Yellow = Video / WHITE & RED and = Left and Right audio channel). Now, connect the 3.5 mm jack with the CVBS connection to the HMT 350.
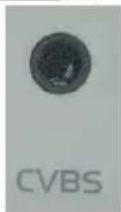
Select the video output to the TV OUT button or by using the settings (Settings -> Video Output -> TV output -> CVBS) and start the function with the ENTER key. Picture and sound switches off and an image appears on a television complete with sound.
Repeatedly pressing the TV OUT button ends complete the video output of the HMT 350 and on the small screen of the HMT 350 again is a visible image / sound audible.
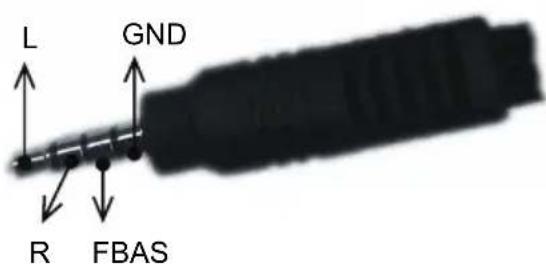
The PIN assignment of the cable is shown as follows:
L Left audio channel
R Right audio channel
CVBS Composite video (CVBS) video signal
GND Ground
Stereo input (LINE IN)
You have the possibility to connect an external MP3 player or iPod for music playback at the HMT 350. Use an appropriate adapter cable (3.5mm jack) and connect it on to the LINE IN port. Connect to the other of the adapter cable to the MP3 player or iPod.
Jump the main menu of the HMT 350 to the setting LINE IN and confirm the selection with the ENTER key. The unit will now go into the stereo input.
Card Reader
- The card reader supports SD memory cards up to a size of 2 GB.
- SDHC memory cards are supported up to a size of 16 GB.
- Place the SD or SDHC card to show, so the contacts to the top and show the label down.
- Insert the card with the notch left (view from back) ahead in the slot.
- Push the card gently into it completely until it is tight.
Unfortunately, many of the different memory cards are not supported.
Note:
Make sure that the notched corner of the SD card and you can not take this the wrong way.
The HMT 350 offers a variety of functions, such as Internet TV, Internet Radio retrieve Shoutcast order of podcast offerings. You need to set up and establish a wireless Internet connection.
- You need a wireless router with valid and active account to access the Internet. Read the information and manuals of the wireless router to set up this connection.
- Connect the 350 HMT to the mains and start the unit with the POWER button.
- After booting the device, go to the Main Menu option Setting and confirm the selection with the ENTER key.
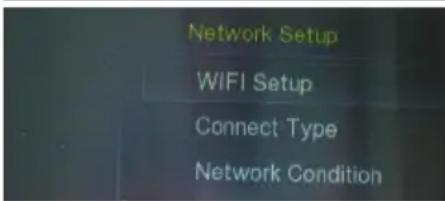
- Use the ▼ button to select Network settings and start it with the ENTER key.
- Navigate with the ▼ button to select the connection type and check the option DHCP settings. These should be selected.
- Press to go to the RETURN key to advance to the menu.
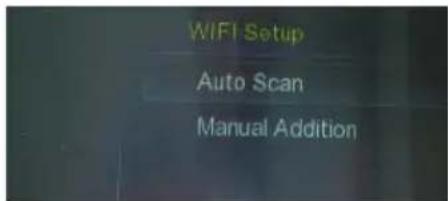
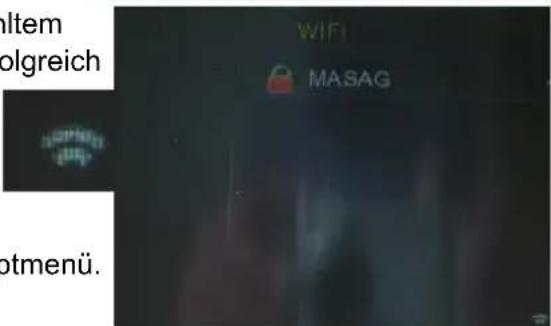
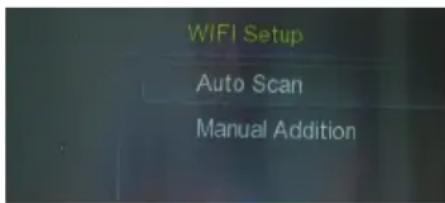
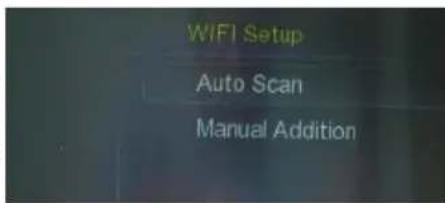
- Scroll with the ▲ button to select the WIFI settings and start the setup using the ENTER key.
- Select the option AUTO SCAN and start the search run with the ENTER key.
- The device will search for available wireless networks.
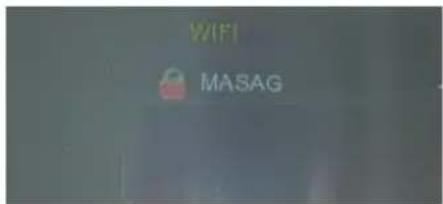
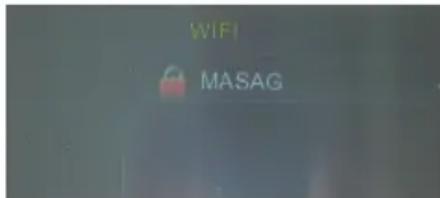
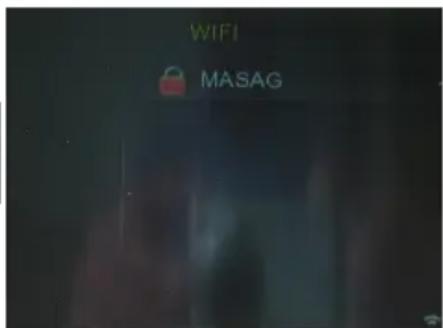
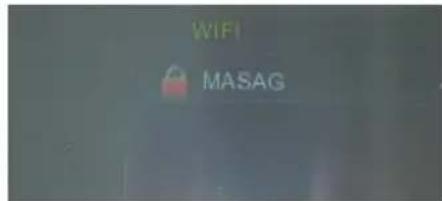
- All found wireless connections will be shown a list. Secured networks are shown with a lock icon.
- Select remove the arrow keys ▲ / ▼ your network connection (the exact name for the wireless router device.
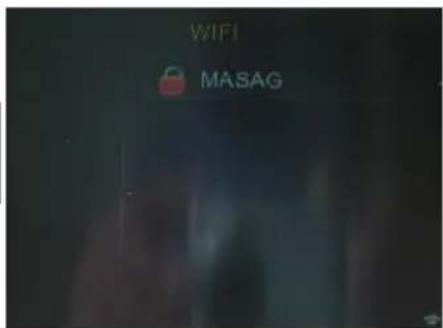
- Press the ENTER button after selecting your wireless network. There now appears a password prompt. Then enter the password on the OSD keypad. Use the arrow keys to control the individual letters and confirm each selection with the ENTER key.
- After you type each letter of your password and confirm them. Navigate to the field ENTER and press the ENTER button.
- The HMT 350 connects with the selected wireless network. If the connection is successfully established, then the lower right connection icon. This shows the "strength" and to a successful access. The more bars there are, the stronger the receiving wireless signal.
- With the HOME button to go directly to the main menu.
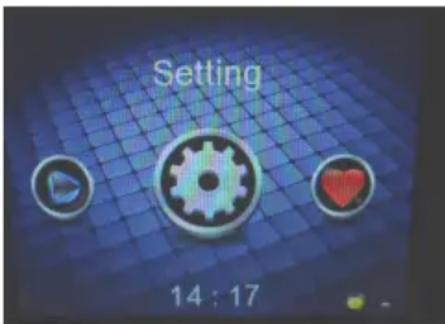
| A<-->a | Back | Enter | Exit | |||||
| 0 | 1 | 2 | 3 | 4 | 5 | 6 | 7 | 8 |
| 9 | a | b | c | d | e | f | g | h |
| i | j | k | l | m | n | o | p | q |
| r | s | t | u | v | w | x | y | z |
| * | ( | ) | - | + | | | - | = | \ |
| / | < | > | , | . | ||||
After successful access to the wireless network, you can listen to the different websites. These are:
- Internet TV
- Internet Radio
- Podcast
- Shoutcast
Use the arrow keys ▶ / ◀ the desired offer and confirm it with the ENTER key.
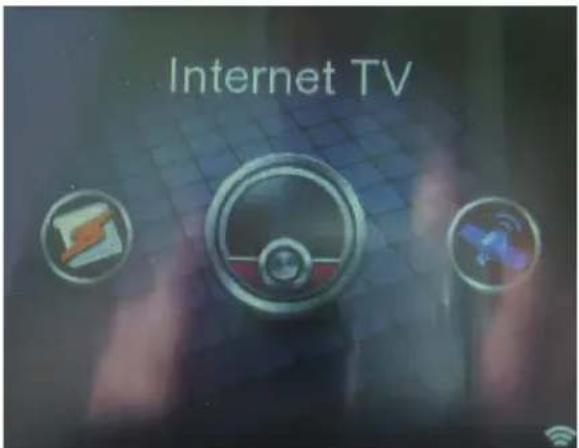
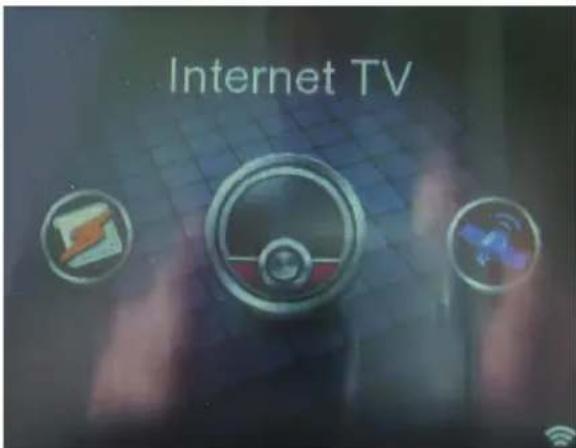
Internet TV
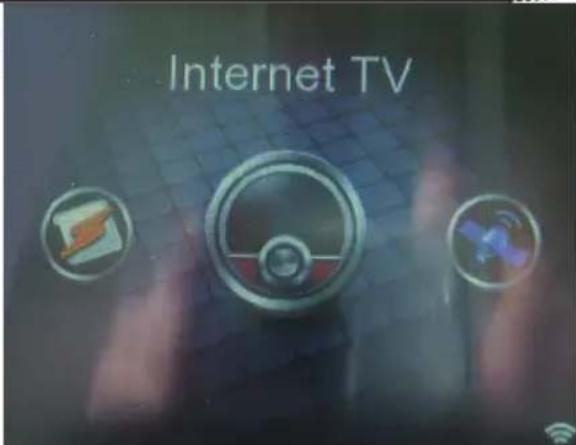
Use the arrow keys ▶ / ◀ to select Internet TV and start the function with the ENTER key.
You now have access to more than 600 TV programs. These are now listed by region or genre.
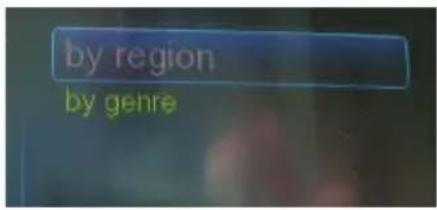
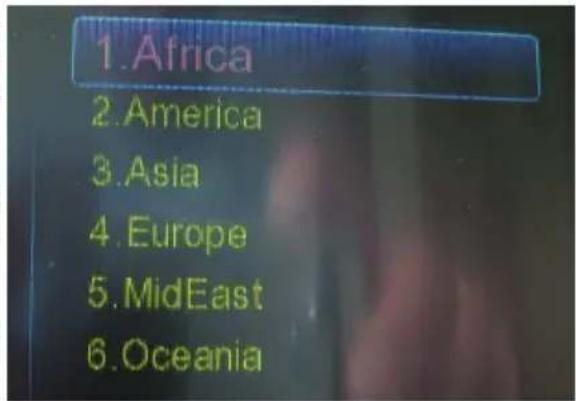
Use the arrow buttons ▲ / ▼, the region and confirm the selection with the ENTER key. A list of countries appears on the screen. Select a location (for long lists, you can now use PG.DN and PG.UP keys) and press the ENTER key.
Then a list of proposed television program will appear in a list on screen. Select a TV program and activate it with the ENTER button.
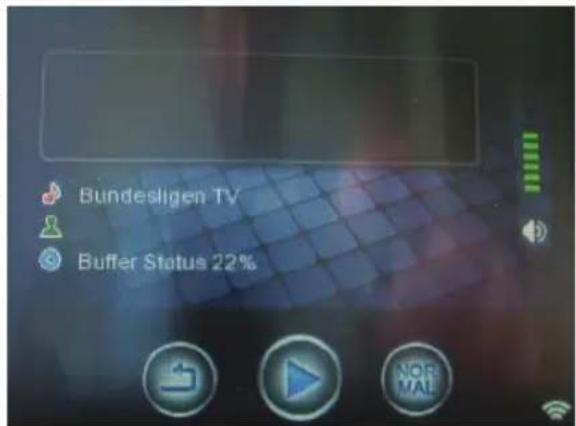
The HMT 350 connects now to the IP address of the TV program (see right). After sufficient data has been buffered (in this case by the display "buffer state"), the image of the television program displayed.
Stop this TV program with the STOP or RETURN key and you get back in the TV program list.
Stop the TV program with the HOME button, you can reach directly to the main menu.
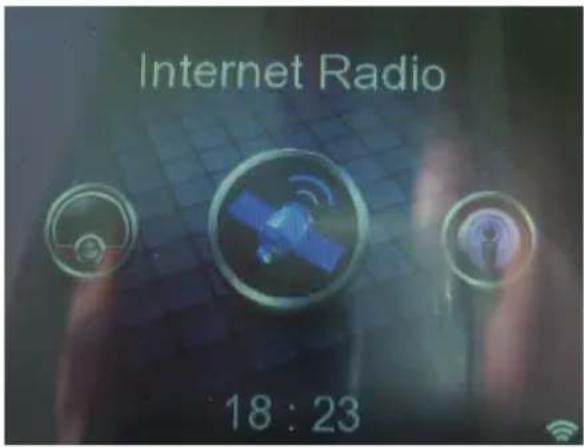
Internet Radio
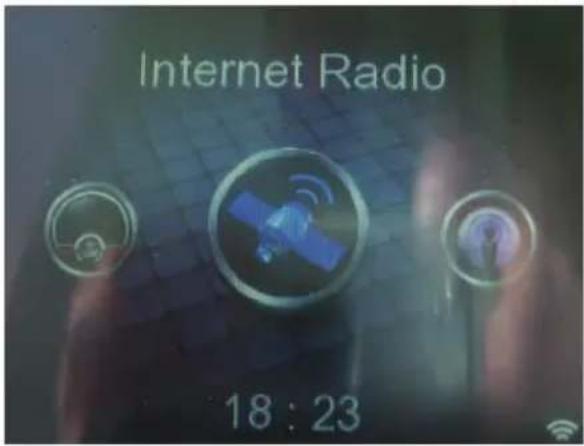
Use the arrow buttons ▶ / ◀ to select Internet Radio and start the function with the ENTER key.
Now you have access to over 20,000 radio programs. These are now listed by region or genre.
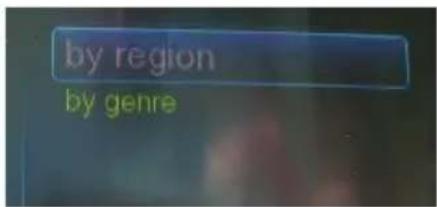
Use the arrow buttons ▲ / ▼, the region and confirm the selection with the ENTER key.
A list of countries appears on the screen. Select a location (for long lists, you can now use PG.DN and PG.UP keys) and press the ENTER button.
Then a list of available radio stations appear in a list on the screen.
Select a radio program and activate the Radio station with the ENTER key. You can now PG.UP and PG.DN use buttons to quickly navigate through long lists.
The HMT 350 connects now to the IP address of the radio program (see right). After sufficient data has been buffered (in this case by the display "buffer state"), the sound of the radio program, issued through the speakers.
Stop this radio program with the RETURN or STOP button and you get back in the TV program list.
Stop the radio program with the HOME button, then directly reach the main menu.
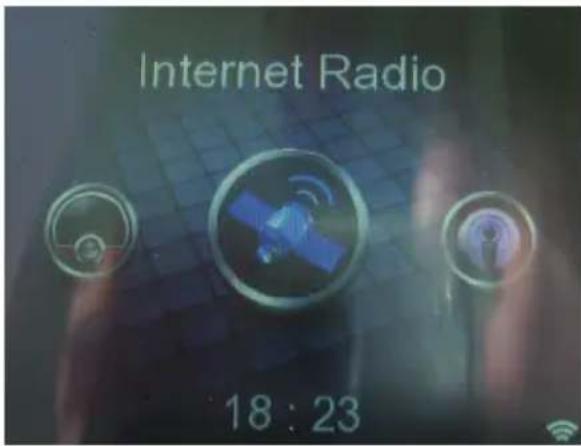
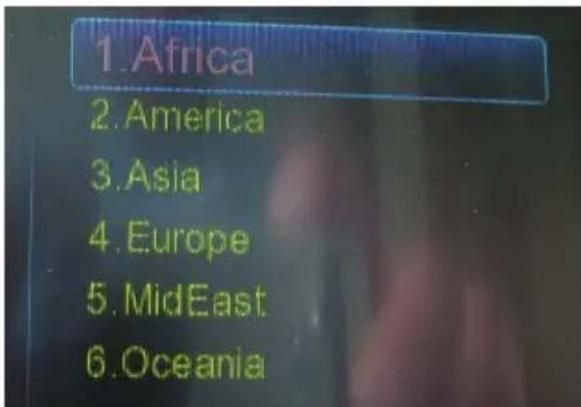
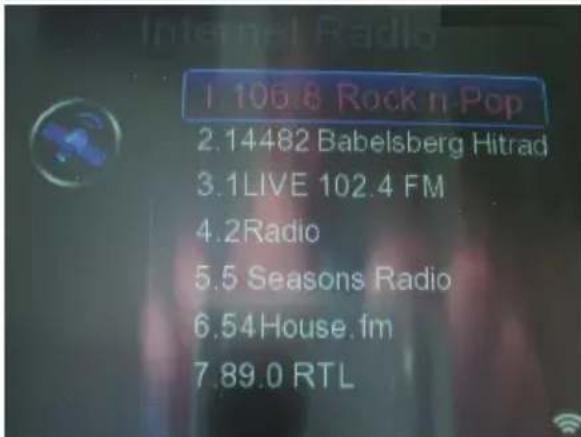
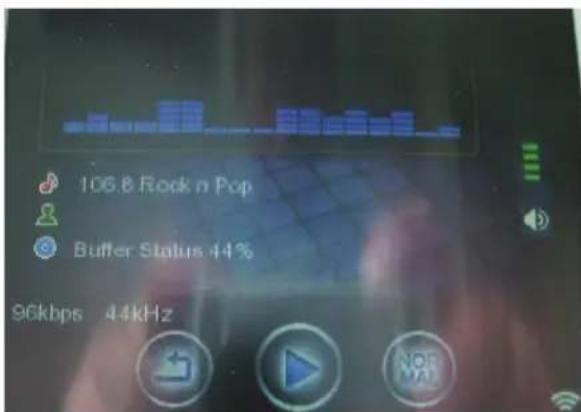
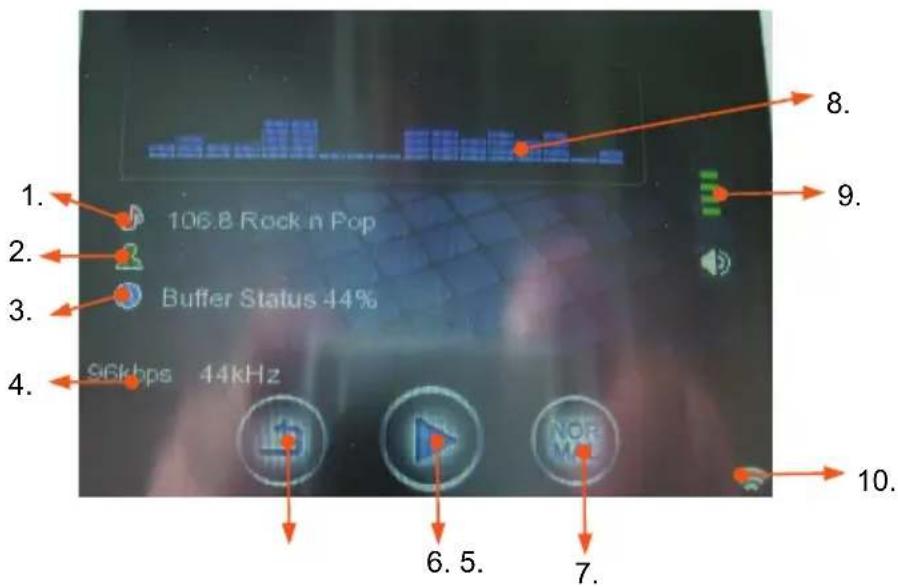
The window during the connection to the related server are for Internet TV and Internet Radio nearly the same.
| No. | Description |
| 1 TV | program or Radio Program |
| 2 Title display or ID Tag display (during playback of music files) | |
| 3 | Buffer status |
| 4 Bit rate and Sampling frequency during Internet Radio and Music files | |
| 5 Repetition modes for Music files (no function by Internet Radio or TV) | |
| 6 Play display for the Multimedia-Player | |
| 7 | Normal |
| 8 Equalizer display for Internet Radio and Music files | |
| 9 | Volume display |
| 10 WLAN signal strength display | |
When you playback Music files than the same window appears on the screen.
Podcast
Podcasting refers to the production and provision of subscription-media files (audio or video) over the Internet. The portmanteau word composed of the two English words iPod and broadcasting. A single podcast (German: a radio play, and moving closer Audio Book file) is thus a series of media articles (episodes), over a feed (usually RSS) can be obtained automatically.
One can understand podcasts as radio shows, which can consume, regardless of air time. In the case of television broadcasts or other video material, which is distributed in this way, we speak of Vodcast, video podcast or Vidcast. Podcasting would be regarded as part of video / audio-on-Demand. However, the latter terms are more searchable and for paid services, while "channel" (in English "feeds" referred to) podcasts, usually free, and provide for a selected set of consumers gradually into new episodes.
Any participant on the provider side (podcaster) establish such media files and then put them through a "news feeds" available on a server on the Internet. A subscriber can subscribe to this so-called feed with a special software".
Schematic representation of an audio podcast that provides the episode in MP3 format
A subscription means here that the software checks periodically the feed of the podcast to new posts and then down invites. Podcasting is not just the headlines, but media files are aggregated.

Unlike a magazine subscription, there is no contractual relationship between providers and subscribers. One can thus offer a broad public podcasts. The media file can have a quote, any content, including recordings of radio broadcasts, interviews, automatically read aloud newspaper articles, musical programs, etc.
Most of these are for podcasts to private programs, similar to radio shows dedicated to a particular topic. Increasingly, however, also be professionally produced podcasts, available for some special-interest news and issues. Podcasts provide the content focus of a particular category are often with an English category codes and the words "cast" means bear. Examples are names such as Astronomycast, Howcast, Porncast, Sportcast or Educast dar. Educast, a portmanteau of "educational podcast called" podcasts with the aim of imparting knowledge.
The use of music in their podcasts, the copyright must be observed. A growing trend is the use of Podsafe music, so royalty or Creative Commons licensed music.
In the area of specialized music scenes of a podcast-like functionality is used so that the scene's about new music from various labels are always up to date and that digital can audition. It is here to podcasts in the broader sense, as they are music-related and there is no moderation. It simply uses the same technical basis.
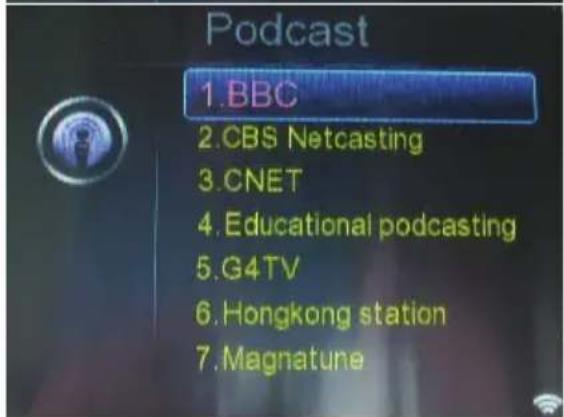
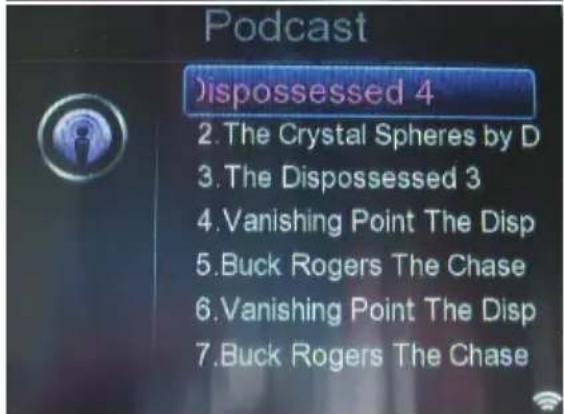
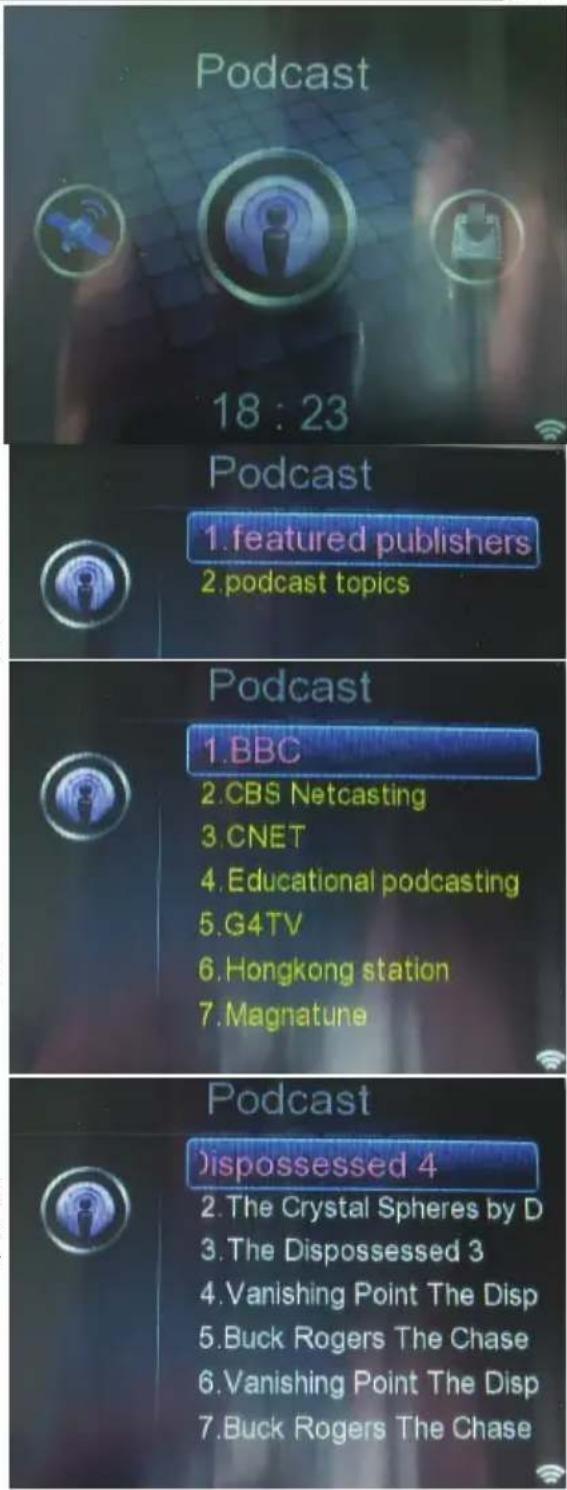
Use the arrow keys ▶ / ◀ to select PODCAST and start the function with the ENTER key.
Press the arrow buttons ▲ / ▼ to the options Topics or Publishers and confirm the selection with the ENTER key.
A list appears on screen. Select a location (for long lists, you can now use PG.DN and PG.UP keys) and press the ENTER button.
Then a list of available Podcast appears on the screen.
Select a Podcast from the list and activate it with the ENTER key. You can use PG.UP and PG.DN buttons to quickly navigate through long lists.
The HMT 350 connects to the IP address of the selected Podcast. After sufficient data has been buffered (in this case by the display "buffer state"), the sound and / or picture of the podcast's speakers.
Stop the Podcast with the RETURN or STOP button and you get back to the list.
Stop the podcast with the HOME button, then directly reach the main menu.
Shoutcast
Shoutcast is a free streaming server for Nullsoft audio streams / TV streams from the company. Shoutcast uses MP3 for audio compression, AAC + audio files, and HTTP as the transport protocol to contact the stream.
A Shoutcast stream can, as it runs over HTTP, can be accessed directly through a web browser (HTTP GET command). The server's response contains the header information on the stream, allowing the playback in a suitable media player. Furthermore, there is a possibility that is announced in changing streaming audio files, such as during radio, the listeners the title of the current track.
In the Internet directory of SHOUTcast Radio is structured several thousand different web radio stations of various genres registered.
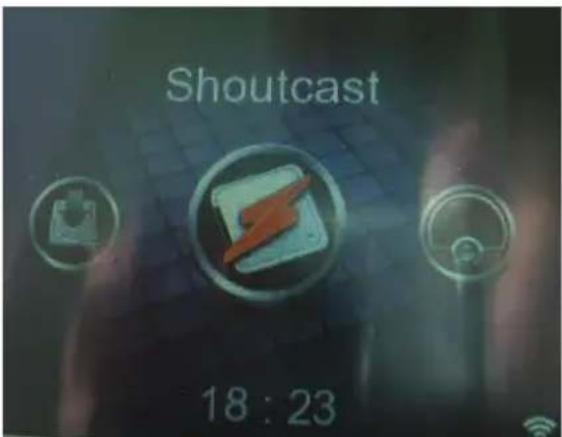
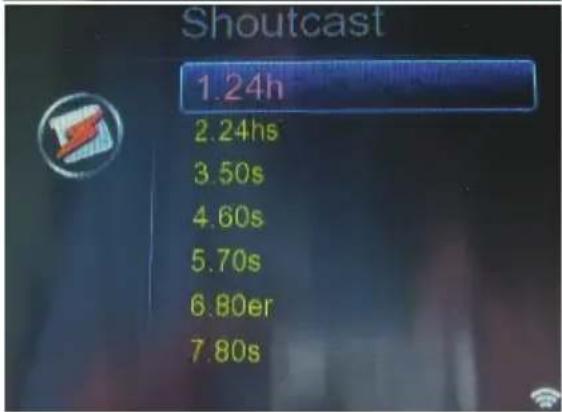
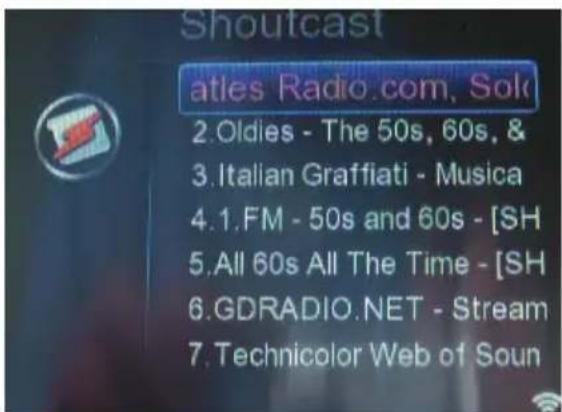
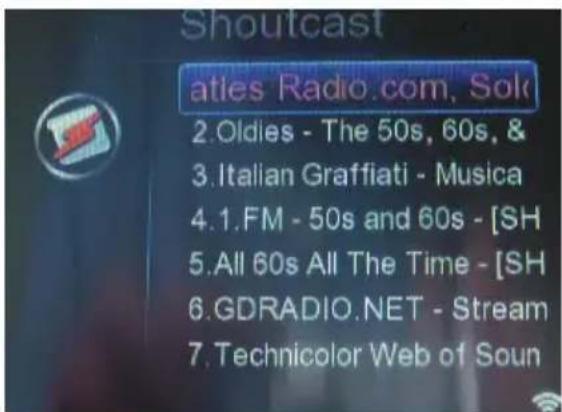
Use the arrow keys ▶ / ◀ to select Shoutcast and start the function with the ENTER key.
Choose to navigate using the arrow buttons ▲ / ▼ or PG.UP and PG.DN keys to the long. Confirm your selection with the ENTER key.
Another list appears on the screen. Choose from a Shoutcast (for long lists, you can now use PG.DN and PG.UP keys) and press the ENTER key.
Podcast
The HMT 350 connects to the IP address of the selected podcast. After sufficient data has been buffered (in this case by the display "buffer state"), the sound and / or picture of the podcast's speakers.
Stop the Shoutcast to the RETURN or STOP button and go back to the list.
Stop the Shoutcast with the HOME button, then get straight to the main menu.
UPnP
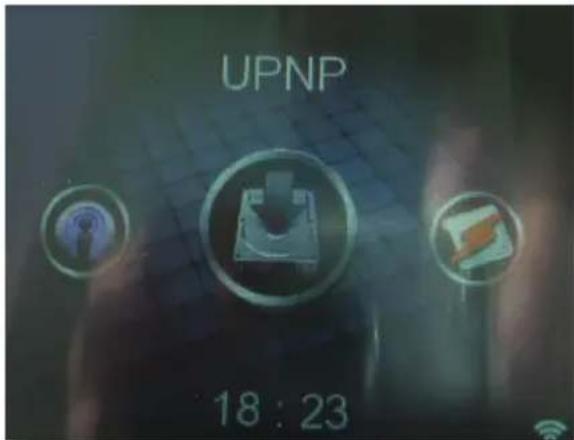
This feature allows you to share your favorite list with your friends or relatives. Install to the UPnP function on all computers which are involved.
Use the arrow keys ▶ / ◀ to select UPnP and start the function with the ENTER key.
The HMT 350 connects to the network and shares / accesses the Favorites list.
Stop access to the RETURN or STOP button and you get back to the Internet list.
Stop access to the HOME button, then get straight to the main menu.
To use the FM radio you must connect the supplied antenna. Connect the 3.5 mm connector to the YPbPr connection.
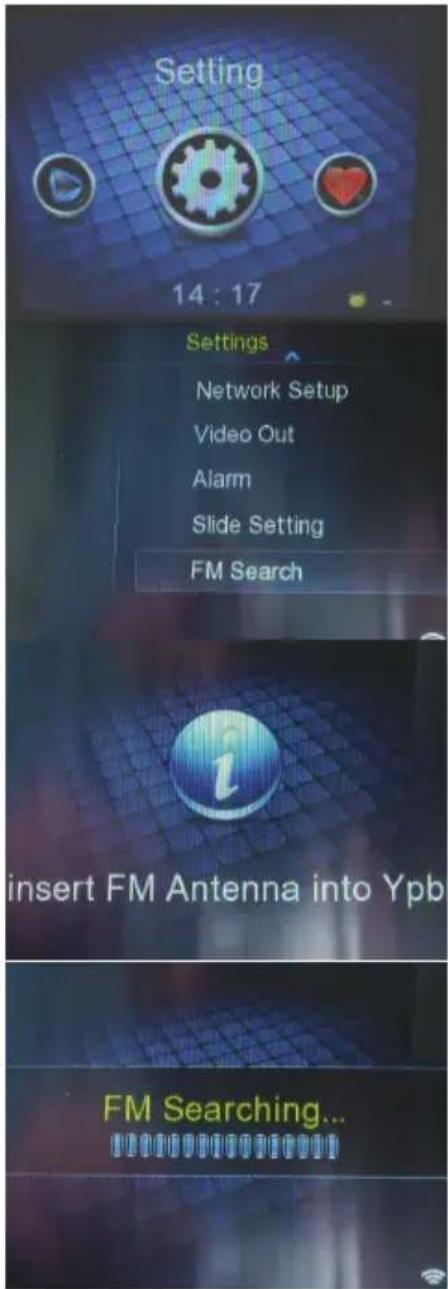
In the main menu select the option Settings and then opens with the ENTER key.
Use the arrow buttons ▲ / ▼ to select FM Search and start the menu with the ENTER key.
Now appears an information, that the FM antenna must be connected. Otherwise, no radio station to be found. If the antenna is not connected, connect the antenna to the YPbPr port.
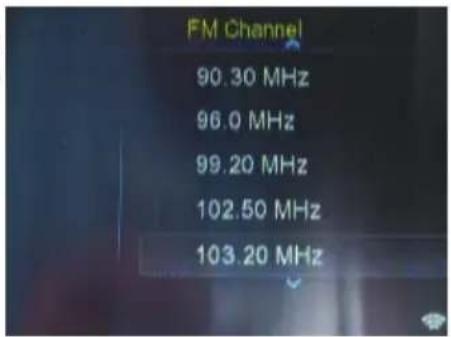
The scan will start automatically.
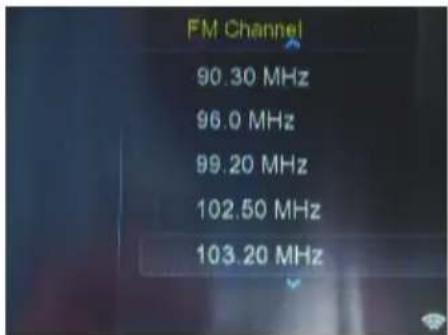
The found frequencies are then listed. Confirm the result with the ENTER key and the send is stored.
Press the HOME button to go back to the main menu.
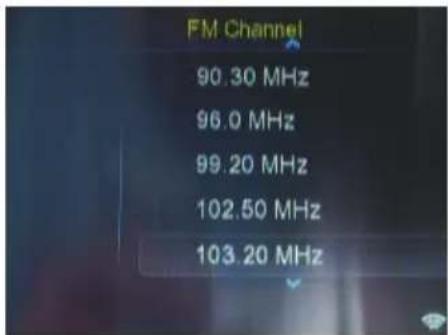
Choose in the Main Menu the category FM Radio. Start the FM radio with the ENTER key.
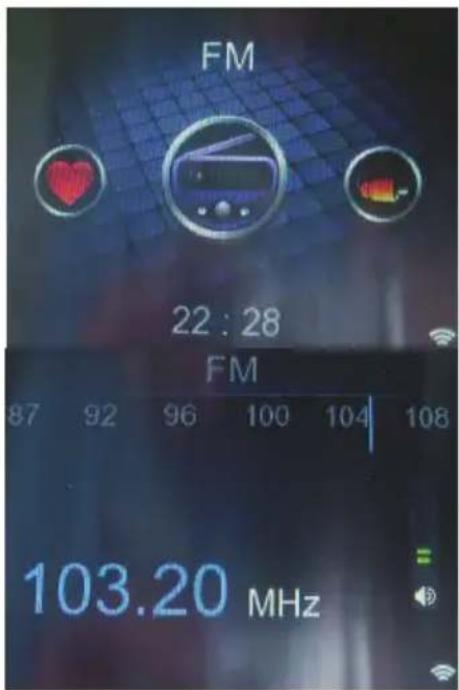
Use the arrow keys ▶ / ◀ change the channels found.
Press the HOME button to go back to the main menu.
Note:
Realign the antenna if necessary, until you get a good reception.
To want to use the stereo input, connect a 3.5 mm to 3.5 mm adapter cable to the LINE IN port.
In the main menu choose the category LINE IN. Turn on the stereo input with the ENTER key.
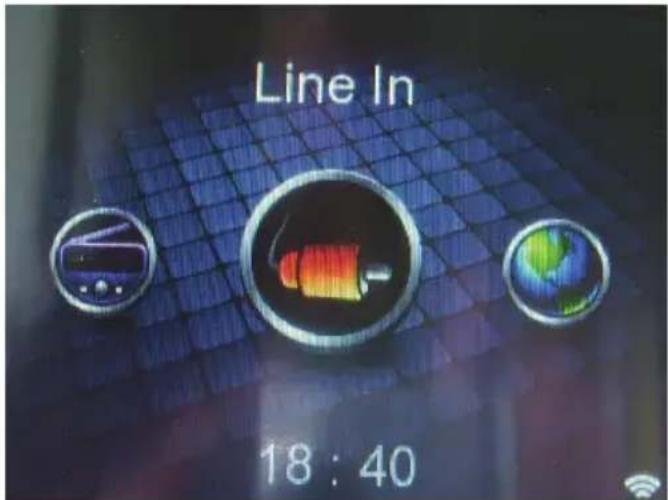
After that, the stereo input is active, and outputs the receiving audio signals.
The volume can be either via the arrow buttons ▲ / ▼ on the remote control / devices at the top or connected device.
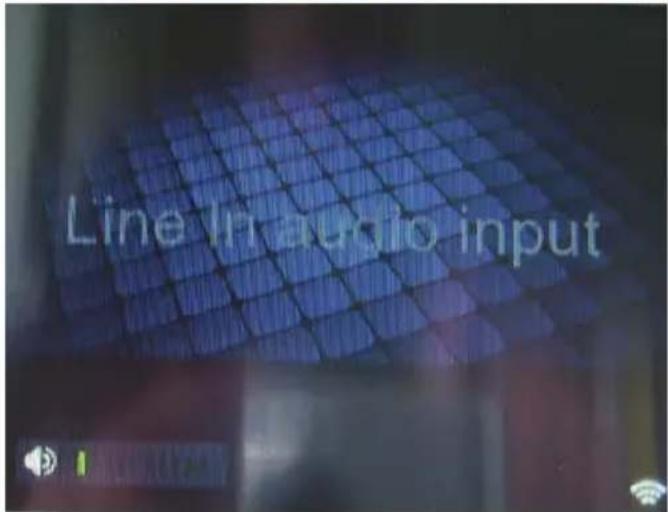
Press the RETURN key to navigate back to the main menu.
To use the Multimedia-Player connect any SD or SDHC memory card with the card reader of the HMT 350.
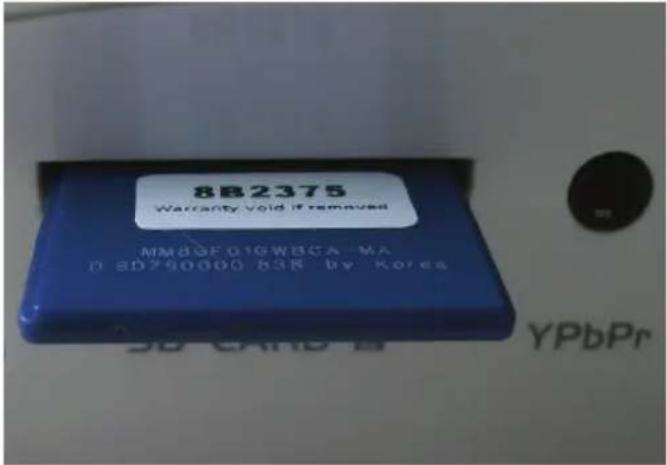
Place the SD or SDHC card so that the golden contact point to the top and the label of the card down. The groove of the SD card is at the top left (see picture).
Slide carefully the card into the card reader until you feel resistance. The memory card should be about 50% in the device.
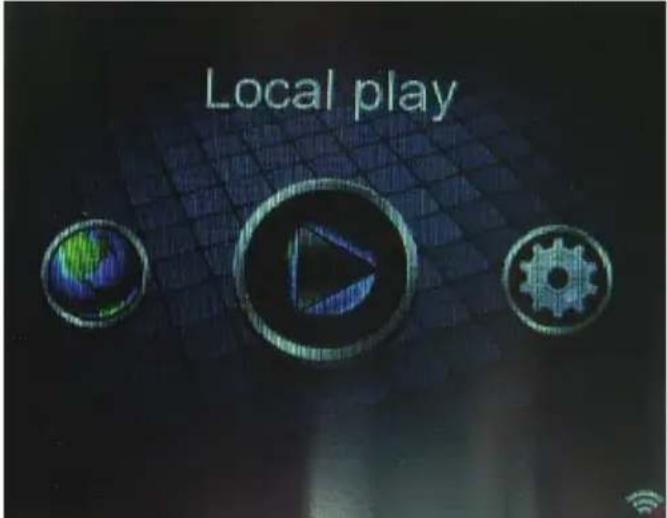
From the main menu from the PLAY category. Start the Multimedia-Player by pressing the ENTER button.
When connected, the subordinate image appears. Press the ENTER button and the contents of the memory card can be read.
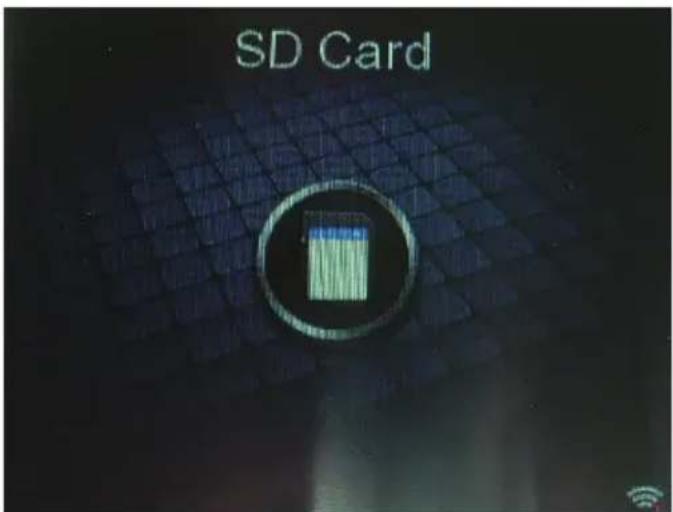
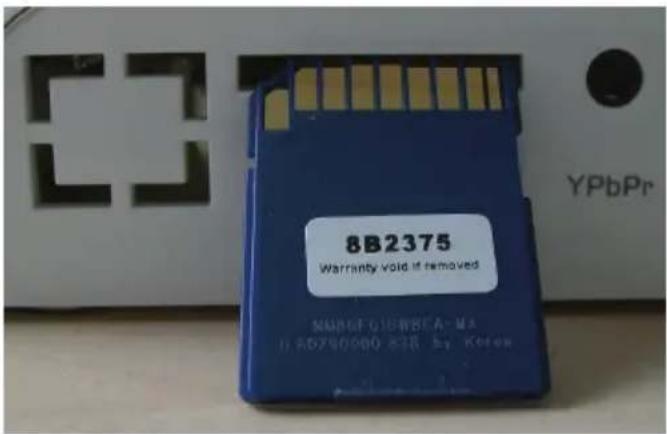
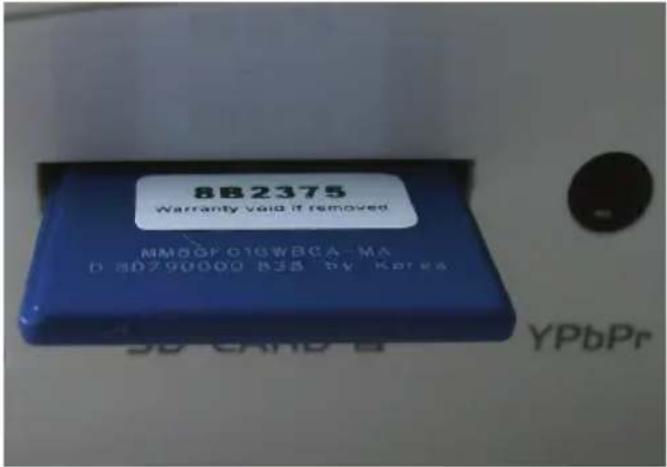
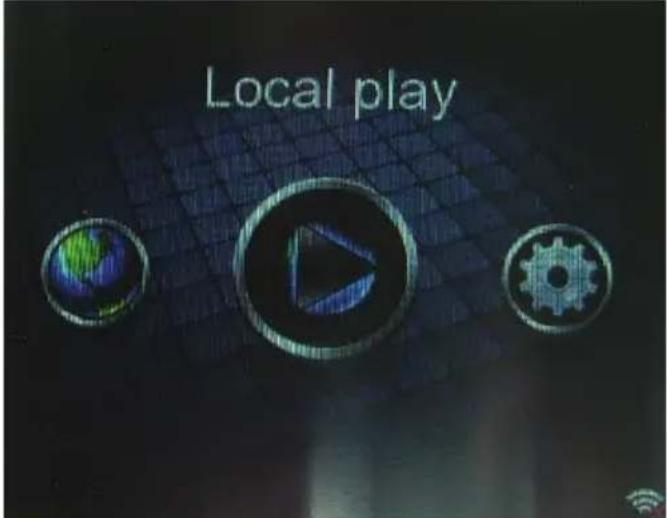
After reading the contents of the memory is displayed. Either a folder structure located in front (left image) or a file structure (right), each after you have organized the memory card.
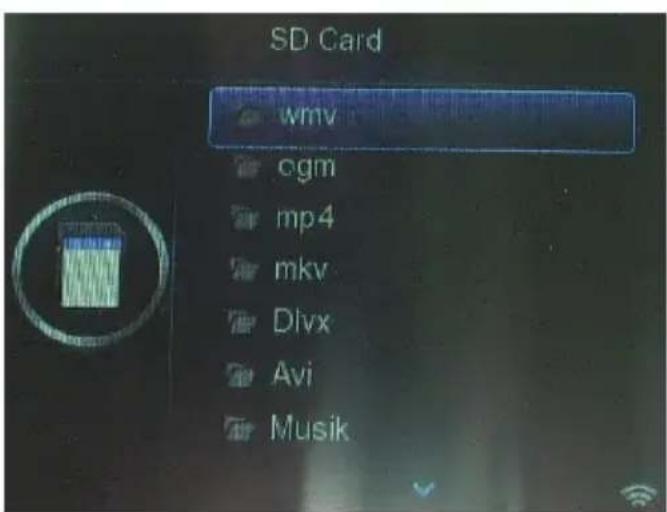
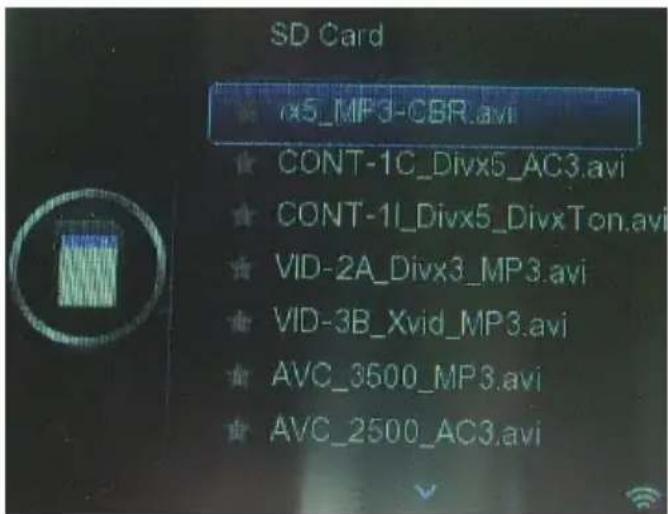
The multimedia player supports playback of video files (AVI, MKV, MP4, FLV, and WMV), music (MP3, WMA, AAC, FLAC and WAV) and image files in formats (JPEG, PNG, GIF and BMP).
Video
Given the large number of possible combinations between the video codec, audio codec and containers must note the following rules:
- The resolution of the movie files should be a maximum of 720 x 576 pixels.
- The file name should not contain more than 20 characters.
- If a character is not recognized properly (e.g. signs), will appear at the point of this "_" characters.
- The following video container are supported: AVI, MKV, MP4, WMV, and FLV.
- Different codes are supported. You will have / should have been prepared in accordance with accepted standards. You must / should have been prepared in accordance with the approved standard MPEG-4 Part 2 (MPEG-4 SP / ASP). Otherwise, there may be errors in the presentation.
- H.264 codec is only supported in the Baseline profile and one reference image.
- It supports only one audio track in the video container.
- There are no subtitles in the video container are not supported.
- Supported Audio formats into the MPEG-4 files are AC3, MP3 and AAC, depending on the video container.
Start playing when you select a video file, with the ENTER key. Break the playback, you can use the PAUSE button.
The playback is stopped with the STOP button and you return back in the browser view.
With the RETURN button to return to the up-menu and press this button several times until the main menu.
Music
Music files are supported in the formats MP3, WMA, AAC, FLAC and WAV.
Sampling Frequency: 8-48 kHz (MP3) or 32-48 kHz (WMA)
MP3 bit rate: 8 - 320 kbps
AAC bit Rate: 8 - 320 kbps
WMA bit rate: 32 - 192 kbps
FLAC bit rate: up to 800 kbps
WAV bit rate: up to 1400 kbps
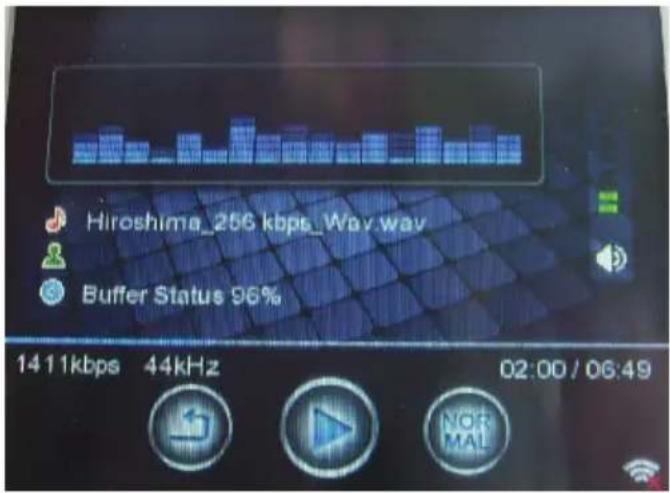
Start playback of music file with the ENTER key. During playback, the following screen appears.
To break the playback, you can use the PAUSE button.
With the REPEAT button to switch the various repeat functions.
Constant repetition of the current file
Playback of music files in the folder
Random
playback
The playback is stopped with the STOP button and you get back in the browser view.
Other navigation aids include:
| Next song |<< Previous song
With the RETURN button to return to the up-menu and press this button several times until the main menu.
Multimedia-Player
Image files are supported in the JPEG, BMP, PNG and GIF. The maximum resolution in any format is not exceeding than 1600 x 1200 pixels.
There are no animated GIF images shown, and here is only the first image appears.
Start playback of the image with the ENTER key.
The playback is stopped with the STOP button, and you get back in the browser view.
Other navigation aids include:
| Next Image |<< Previous Image
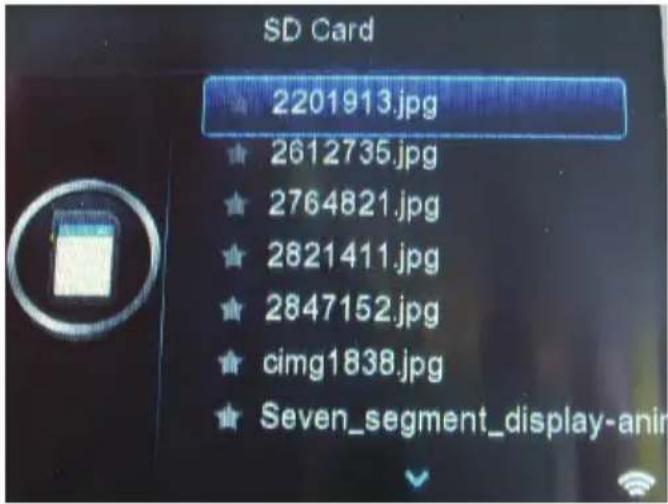
With the RETURN button to return to the up-menu and press this button several times until the main menu.
You have of course also possible to define a Slide show. This more active while you have to define how long each image is displayed. Scroll back to the RETURN key to the main menu and search on the option Setting.
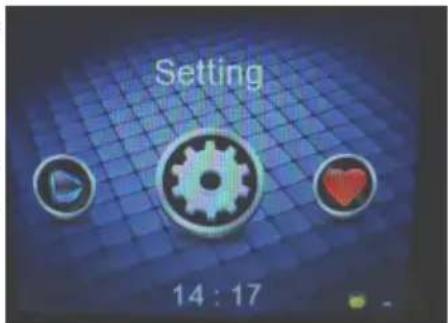
Search the option Slide and start the option with the ENTER key.
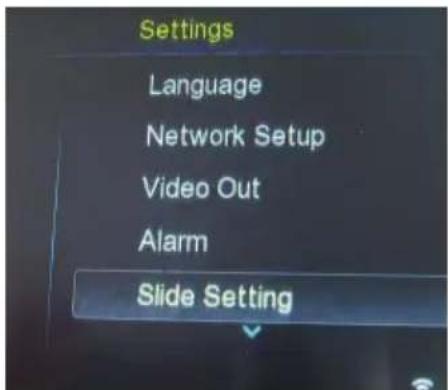
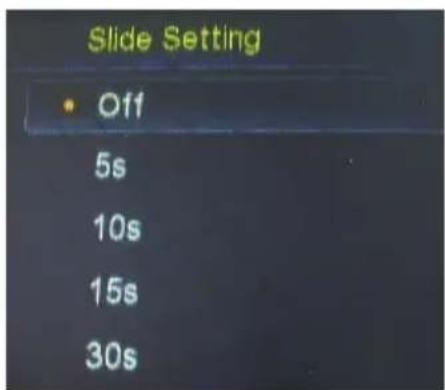
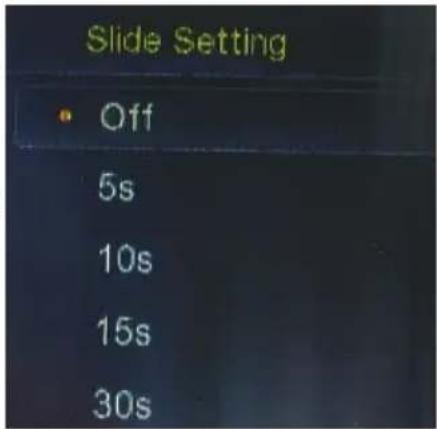
Here you can activate the Slide show and define the display time of each image. The options are 5 sec., 10 sec., 15 sec. and 30 sec..
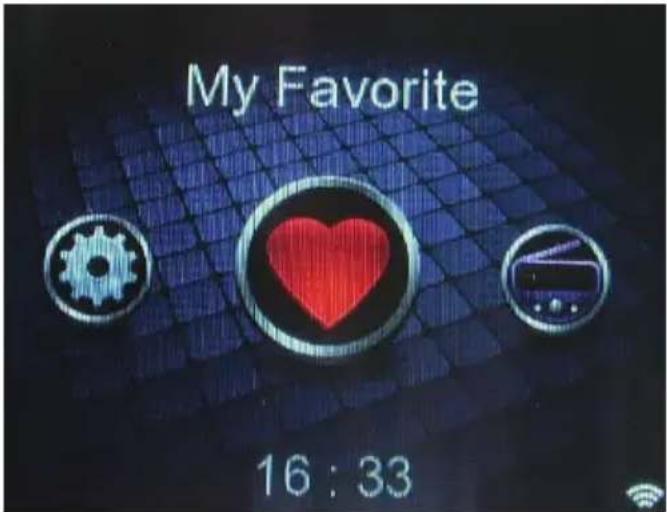
You can define Favourites of Internet TV and Internet Radio.
Choose in the two categories a certain broadcaster (TV or radio) and press the FAV button. All defined Favourites are stored in your favourites list.
Note:
If the broadcaster still playback, than you can not define as a favourite. The FAV button has now no function.
You get access to the favourites list, when you navigate in the main menu to the Favourites icon. Open the list with the ENTER key.
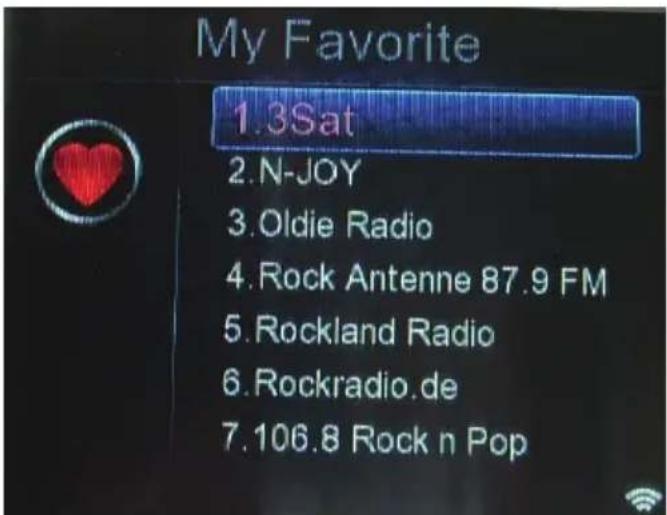
The Favourite list appears on the screen.
There you can quickly gain access to your favourite TV or radio station. Use the arrow buttons ▲ / ▼ on the remote control / top panel and select a "broadcaster". Start them by the ENTER key.
To delete a favourite from the list, select them with the arrow buttons ▲ / ▼ on the remote and then press the S.MENU key. Confirm the prompt by pressing the ENTER key or break off the process with the RETURN key.
Time & Date
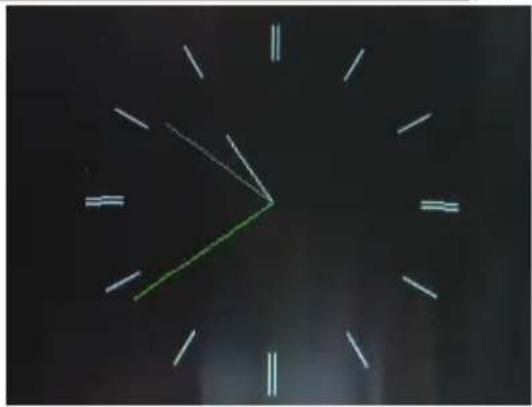
If you want to display an analogue clock, then press in the main menu the ▼ button. An analogue clock appears on the screen.
Stop the time display by pressing the STOP or RETURN key.
natural_image
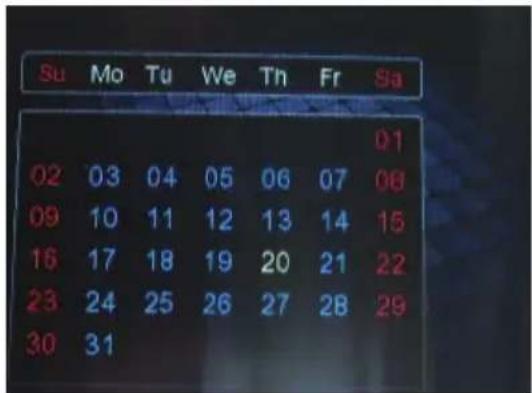
Close-up of a black analog clock face showing time near 9:30 (no text or symbols)If you want display the date, then press in the main menu the ▲ button.
End the date display by pressing the STOP or RETURN key.
Wecker
- Navigate in the main menu the option Setting. Choose the function Alarm and select the alarm by pressing the ENTER button. You have to define the two possible alarm time.
- Choose Alarm 1
- The picture shows the options for alarms.
Alarm switch
Turn out all the alarm on or off.

Alarm Time
Set the time.
- Press the ▲ button and the time changes colour from white to yellow. Now you can change the time.
- Select a point with the arrow keys ▶ / ◀.
- Change the time using the arrow buttons ▲ / ▼.
- Confirm the new time with the ENTER key.
Snooze
Here you can define the snooze time (5, 7, 10 or 15 minutes).
Set Alarm Tone
Here you can select the alarm tone. Choose from a radio, local file and standard sound.
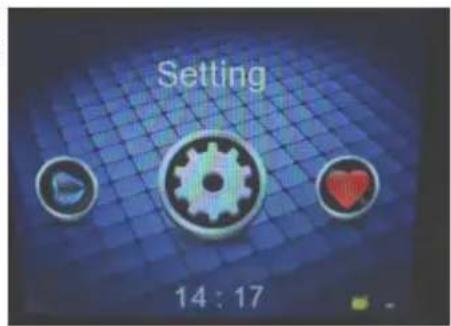
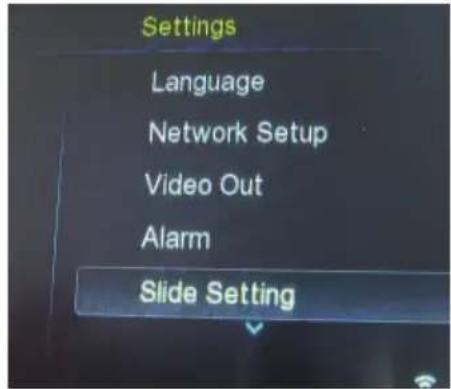
If you want to configure the HMT 350, then look for the settings menu on the main menu. Press the ENTER key to get to the submenu. The configuration options are:
- Language
• Network Settings - Video output
- Alarm
- Slide Show Setting
- FM Search
- Screen saver
- Time and date
- Time zone
• Automatic shutdown - Calendar
- About
Language
Select the language option with the ENTER button and select your preferred language. After pressing the ENTER button, the OSD switch to this language and returns you to the settings menu.
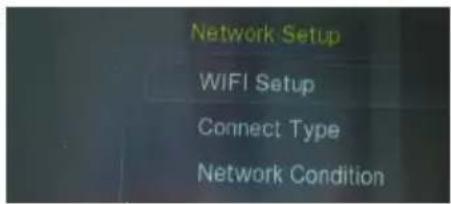
Network Setup
The network settings consist of the categories WIFI Setup, Connect Type and Network condition.
WiFi Setup
The WiFi setuo are described in detail already on page 16.
Connect Type
Here you can choose between the options DHCP, Static IP and PPPoE.
DHCP
This option automatically obtain an IP address from the wireless router is based.
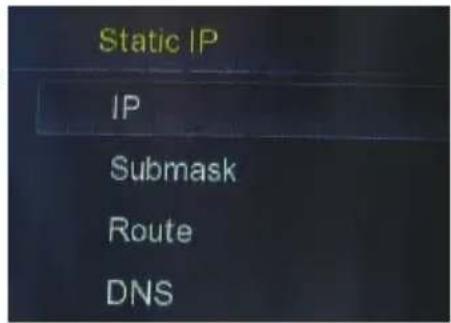
Static IP
This allows you to perform a manual configuration. Enter the addresses for IP, submask, route and DNS.
Take this information to the configuration tool of your router.
Network Setup
PPPoE
Enter the username and password.
Take this information to the configuration tool of your router.
Network Condition
With this option you can display the information on your current setup.
PPPoE
UserName
Password
Network Condition
SSID: 3AG
IP : 0.0.0.0
Mask : 0.0.0.0
Route:0.0.0.0
DNS 1:0.0.0.0
DNS 2:0.0.0.0
Video Output
The set contains two video output options:
- LCD Out
• TV Out
LCD Out
Use to define the image output to the internal 3.5 inches.
Video Out
LCD Out
TV Out
LCD Out
CVBS
YUV
TV Out
Allows you to define the video output of the image on an external monitor. Confirm your selection with the ENTER key from TV and you get to a submenu with the options CVBS and YUV.
Depending on the connection you should select one of two options:
CVBS Connection with an adapter cable to the CVBS output
YUV Connection with an adapter cable to YUV output
Alarm
Of course you can use beside times and date the alarm function.
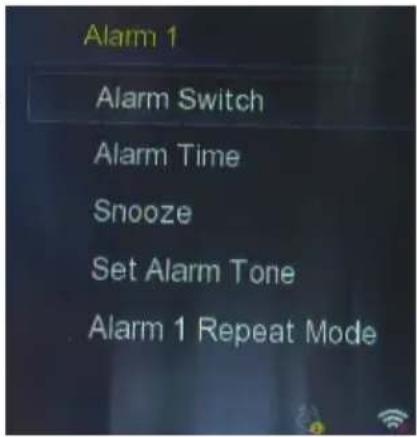
- From the Setting menu, select the Alarm by pressing the ENTER button. You have to define the two possible alarm time.
- Select for example Alarm 1
- The picture shows the options for alarms.
Alarm switch
Turn out all the alarm on or off.
Alarm Time
Set the time.
- Press the ▲ button and the time changes colour from white to yellow. Now you can change the time.
- Select a point with the arrow keys ▶ / ◀.
- Change the time using the arrow buttons ▲ / ▼.
- Confirm the new time with the ENTER key.
Snooze
Here you can define the snooze time (5, 7, 10 or 15 minutes).
Set Alarm Tone
Here you can select the alarm tone. Choose from a radio, local file and standard sound.
Select an option with the ENTER key.
Radio
Select an Internet radio channel. So that the alarm actually work, you must have a stable wireless connection to the alarm time. Otherwise, the alarm will not work.
Local File
If an SD memory card is connected, you can also define a music file as the alarm tone.
Navigate in the file browser to the file and confirm the selection with the ENTER key. The settings are then saved.
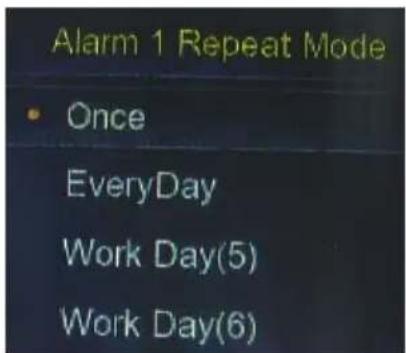
Alarm Repeat Mode
Allows you to set the alarm repeat cycle. The options are:
- Once
• Every day -> Every day from Monday to Sunday
• Work Day 5 -> Monday to Friday
• Work Day 6 -> Monday to Saturday
Slide Setting
Allows you to define the display time of images during the Slide show. The Slide show will only become active when you have chosen one of the time options. These are 5 sec., 10 sec., 15 sec., And 30 sec.
Select an option using the arrow keys and define it with the ENTER key.
FM Suche
The FM search has been described in detail on page 24.
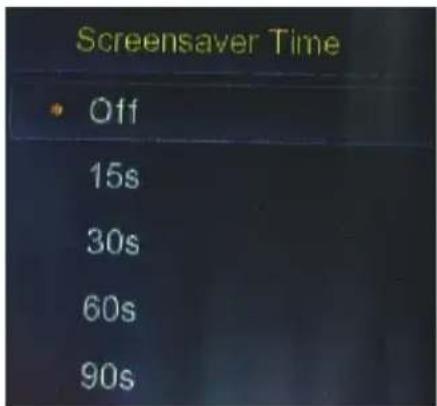
Screen Saver Time
This allows you to activate a screen saver and set the time when this will start after inactive time of the device.
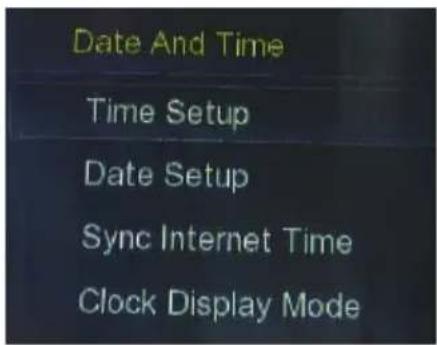
Date and Time
With this option you can set the date and time.
Time Setup
Press the ▲ arrow key to set the time. The colour varies from white to yellow.
- Select a point with the arrow keys ▶ / ◀.
- Change the time using the arrow buttons ▲ / ▼.
- Set the new time with the ENTER key.
Date Setup
Press the ▲ arrow key to set the date. The colour changes from white to yellow.
- Select a point with the arrow keys ▶ / ◀.
- Change the digit with the arrow buttons ▲ / ▼.
- Put the new date with the ENTER key.
Note:
The notation of the date is year (four digits) / month (two digits) / day (two digits)
Date and Time
Synchronization with Internet time (Sync Internet Time)
With this option, you can compare on the condition of a stable wireless connection, the time with Internet time.
Clock Display (clock display mode)
Here you can specify whether you want to display the time in the main menu.
Date and Time
To ensure that your time is set correctly, you should exchange the time zone (time zone) check on the correct setting.
Use the arrow buttons ▲ / ▼ to select for Germany GMT +1, and set this setting by pressing the ENTER key.
Time Zone
(GMT-12:00)Kwajalein
(GMT-11:00)MidwayIslan
(GMT-10:00)Hawaii
(GMT-09:00)Alaska
(GMT-08:00)PacificTime(
Auto Off
Here you can define whether the HMT 350 off automatically after a certain period of inactivity. The settings min 5th min, 7th, 10 min. and 15 min.
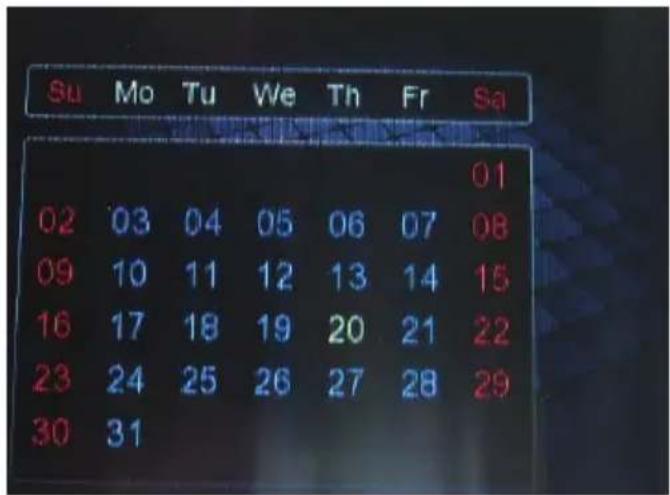
Calendar
The calendar can also be used for date input.
Check the following guide for the possible cause of a problem before contacting service.
Technical Support of Xoro/MAS:
| Problem Solution | |
| Device won't switch on | Check the mains cable is connected properly to both the mains supply and the mains adapterCheck the cable from the mains adapter is connected properly to the set (USB port).The electronic circuit may have reset. Pull the plug out, wait for 60 seconds, then plug back again. |
| No picture | Press more than none times the TV OUT button and wait every time a couple of seconds. Maybe you used last time the Video Out function or you had pressed the TV OUT button.Disconnect the device from the wall outlet and delete the insert four AA batteries and wait one minute. Plug and start again the device. |
| No sound | Check that the VOLUME isn't turned down, or the MUTE button pressed.Press the VOL+ button |
| Picture from Video output has wrong colour | Check for the correct settings CVBS or YUV depending on the video connection to the lager screen. |
| No WLAN connection | Control your Router, that they work properly and has access to the internet.Double check the settings on the HMT 350. Please pay attention to the setting DHCP.Run the automatic search for WLAN network.Insert the correct password if you want to connect by your own WLAN network.Do not uses foreign networksThe internet server (where all list are stored) is actually not online.Please try later again. |
| Pixel Errors on the 3.5 inch screen | LCD Screens often shows some pixel defects. Please pay attention to the describes specifications, where the allowed pixel errors are noted. |
| Date and Time are wrong | Control the settings Time Zone and choose your region.Set Date and Time again |
| Alarm function does not work with Internet Radio | During the Alarm function there was no internet connection.Internet Radio are not 24h online.Choose the standard tone. |
| No search run by FM Radio successful | Insert the FM antenna into the YPbPr portRealign the FM antennaStart the FM search run again. |
| JPEG, BMP ect. does not play or needs a long time to display | ·Pay Attention to the resolution of the picture. Higher resolution of 1600 x 1200 Pixel are not allowed.·Pay attention to the supported file formats. |
| Music playback does not start | ·Pay attention on the parameter of the music file, like format (incl. Suffix), sampling frequency and supported bit rate.·Refer page 29 in this manual. |
| Video playbavk does not start or shows jitter effects | ·Pay attention on the parameter of the video file, like format (incl. Suffix), container format, audio track and supported bit rate.·Refer page 28 in this manual. |
| No sound during video playback | ·DTS sound tracks are not supported.·Pay attention to popular combination of video codec, container and sound format.·Combine AVI container with MP3 or AC3·Combine MP4 container with AAC·Combine MKV container with MP3 or AC3 |
| No subtitle display during video playback | The device does not support any internal or external subtitles. |
Specifications
| Model | HMT |
| Screen Size 3.5 Inch (8.9 cm) | |
| Resolution / Aspect Ratio 320 x 240 Pixel / 4:3 | |
| Brightness / Contrast 250 cd per sqm / | 400:1 |
| LCD Backlight LED | |
| TV System (only playback) PAL / NTSC | |
| WLAN 3.5 ms | |
| Antenna Internal WLAN antenna | |
| Standard IEEE 802.11 b/g (up to 54 Mbits) | |
| Standard decryptions WEP, WPA1 and WPA2 | |
| Protocol IP v4 | |
| Connectors | |
| Video Composite (CVBS), Video Component (YUV) | |
| Audio Stereo out by AV output (CVBS), LINE IN | |
| FM Antenna Connection by YPbPr port | |
| Card Reader | SD up to 2 GB, SDHC up to 16 GB |
| Speaker | Max. 2 x 2 Watts |
| FM Radio Input Frequency | 86 to 106 MHz |
| Power by USB port AC 100 - 240 V by 50/60 HzDC 5.2 V by max. 1 A | |
| Power Consumption | Max. 5 Watt / Stand-By: 0.02 Watt |
| Dimension | 199 x 84 x 84 mm |
| Weight | 0.4 kg (without four AA batteries) |
| Pixel Error | |
| Bright Pixel | ≤ 2 |
| Dark Pixel (Dark Dot) | ≤ 3 |
| Bright + Dark Pixel | ≤ 4 |
| Line Defects | No |
| Differences in Brightness (Mura) | No (with 6% ND filter) |
natural_image
Top-down schematic of a vehicle or platform with four side slots and a central rectangular component (no text or symbols)flowchart
graph TD
    A["Initial State"] --> B["Step 1: Arrow to Top"]
    B --> C["Step 2: Arrow to Bottom"]
    C --> D["Step 3: Arrow to Right"]
    D --> E["Final Output"]
| A<-->a | Back | Enter | Exit | |||||
| 0 | 1 | 2 | 3 | 4 | 5 | 6 | 7 | 8 |
| 9 | a | b | c | d | e | f | g | h |
| i | j | k | l | m | n | o | p | q |
| r | s | t | u | v | w | x | y | z |
| * | ( | ) | - | + | | | - | = | \ |
| / | < | > | , | . | ||||
Shoutcast
natural_image
Close-up of a black analog clock face showing time near 9:30 (no text or symbols)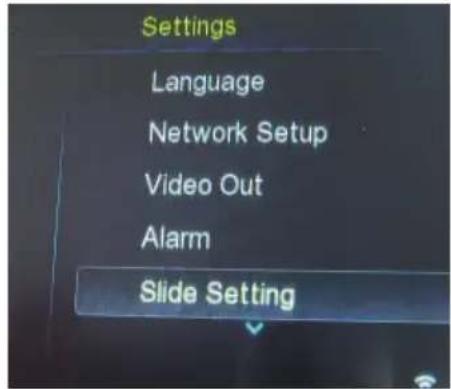
Langue
Type de connexion
Recherche FM
Date et heure
Arrêt automatique
FREE TO CHOOSE INNOVATIONS

XORO by MAS Elektronik AG
Pollhornbogen 19
21107 Hamburg
Deutschland
Tel: +49(040) 77 11 09 17
Fax: + 49(040) 76 73 33 15
xoro@mas.de
www.xoro.de

natural_image
Green recycling symbol with three chasing arrows forming a triangle (no text or labels)


- XORO®
- SHOUTCAST
- Multimedia-Player
- FM Suche
- Datum und Zeit
- Ausschaltzeit
- Connectors
- The Remote Control
- Connection
- First Time Installation
- Internet
- FM Radio
- LINE IN
- Favorites
- Date and Time
- Settings
- User Manual
- Operation
- Notes:
- Antenna
- USB
- Power Supply
- Operation and Position
- Compatibility of the integrated Card Reader
- Recycling of electronic devices
- Recycling of paper and carton
- Recycling of plastic parts
- Green Dot
- Wireless network (WLAN)
- Defect
- Pixel error
- In the box
- Features
- Rear Side
- Front Side
- Top Side
- Bottom Side
- Notes on batteries:
- Insert battery into the remote control
- Operation range
- Buttons of the remote control:
- Power connection
- Component video output (YPbPr)
- AV output (CVBS)
- Stereo input (LINE IN)
- Card Reader
- Note:
- Internet TV
- Internet Radio
- Podcast
- UPnP
- Video
- Music
- Time & Date
- Wecker
- Alarm switch
- Alarm Time
- Snooze
- Set Alarm Tone
- Language
- Network Setup
- WiFi Setup
- Connect Type
- DHCP
- Static IP
- PPPoE
- Network Condition
- Video Output
- LCD Out
- TV Out
- Alarm
- Radio
- Local File
- Alarm Repeat Mode
- Slide Setting
- Screen Saver Time
- Time Setup
- Date Setup
- Auto Off
- Calendar
- Specifications
- Langue
- Type de connexion
- Recherche FM
- Date et heure
- Arrêt automatique
- XORO by MAS Elektronik AG
Brand : XORO
Model : HMT 350
Category : Media player