Praxis N1107 - Laptop AIRIS - Free user manual and instructions
Find the device manual for free Praxis N1107 AIRIS in PDF.
| Product Type | Laptop (Notebook) |
| Brand | Airis |
| Model | Praxis N1107 |
| Power Supply | AC adapter and rechargeable Lithium-Ion battery |
| Battery | Lithium-Ion, rechargeable internally via AC adapter |
| Display | Color LCD panel with backlight |
| Keyboard | Full-size with dedicated Windows keys |
| Pointing Device | TouchPad with left, right buttons and scroll bar |
| Built-in Camera | 0.3 or 1.3 megapixels (depending on configuration) |
| Microphone | Integrated microphone array (omnidirectional audio input) |
| Speakers | Built-in stereo speakers |
| Ports | LAN (RJ-45), HDMI, combo e-SATA/USB, external monitor, modem (RJ-11), USB 2.0, headphone jack, microphone jack |
| Optical Drive | DVD/CD drive (depending on configuration, may be rewritable) |
| Wireless Connectivity | Wi-Fi (wireless LAN) and Bluetooth (via FN+Esc key) |
| Expansion Slot | PC Express Type II card |
| Memory Card Reader | Yes, for flash cards (camera, MP3, etc.) |
| Maximum Memory | Up to 8 GB (SDRAM DIMM module) |
| Hard Drive | Internal, accessible via dedicated bay |
| Security | Kensington lock slot |
| Maintenance | Do not obstruct ventilation openings; avoid heat, dust, liquids; use a dry cloth for the screen |
| Replaceable Parts | Battery, memory module, hard drive (accessible under the cover) |
Frequently Asked Questions - Praxis N1107 AIRIS
User questions about Praxis N1107 AIRIS
0 question about this device. Answer the ones you know or ask your own.
Ask a new question about this device
Download the instructions for your Laptop in PDF format for free! Find your manual Praxis N1107 - AIRIS and take your electronic device back in hand. On this page are published all the documents necessary for the use of your device. Praxis N1107 by AIRIS.
USER MANUAL Praxis N1107 AIRIS
natural_image
Illustration of a laptop with a yellow abstract screen and keyboard (no text or symbols visible)MANUAL DEL USUARIO
ESPAÑOL
natural_image
Line drawing of a flat electronic device with a small rectangular cutout on top (no text or symbols)Septiembre 2009
CONTENIDO
ANTES DE COMENZAR .... 5
natural_image
Cartoon illustration of a sad laptop with a flower icon on its screen (no text or symbols)natural_image
Illustration of a hand pressing down on a laptop screen with sound waves (no text or symbols)natural_image
Illustration of a cartoon-style open laptop with motion lines indicating speed (no text or symbols)NO lo coloque en superficies desiguales o inestables.
natural_image
Cartoon illustration of a sad laptop with falling raindrops and lightning bolts (no text or symbols)natural_image
Illustration of stacked books with a starburst effect, no text or symbols presentnatural_image
Cartoon illustration of a computer with a sad face and a lightning bolt connected to a U-shaped magnet (no text or symbols)natural_image
Cartoon illustration of a laptop with a sad face and sun symbol above it (no text or symbols)natural_image
Cartoon illustration of a sad laptop with sun, snow, and snowflakes above it (no text or symbols)natural_image
Illustration of a laptop with sad face, surrounded by sun and snow symbols (no text or labels)natural_image
Illustration of a laptop with a sad face and flames next to it, symbolizing energy or fire (no text present)natural_image
Cartoon illustration of a computer monitor with a sad face and sweat drops, surrounded by clouds (no text or symbols)natural_image
Simple line drawing of a laptop with a spray bottle and a screen showing a diagram (no text or symbols)natural_image
Cartoon illustration of a sad laptop with falling raindrops and lightning bolts (no text or symbols)natural_image
Simple line drawing of a smiling smartphone with battery and sparkles, next to a hand holding a droplet (no text or symbols)natural_image
Illustration of two laptops with a hand holding the top panel, showing a change in the screen (no text or symbols present)natural_image
Simple line drawing of a mechanical component or bracket with no text or symbolsnatural_image
Line drawing of a smartphone showing front and back views with an arrow indicating the fold change (no text or symbols present)VISTA PREVIA FRONTAL
natural_image
Technical line drawing of a cylindrical device with internal components and a mounting bracket (no text or symbols)Ranura de bloqueo Kensington
Ranura de bloqueo Kensington
natural_image
Line drawing of a laptop case with cable strap, shown in two views (no text or symbols)VISTA PREVIA INFERIOR
natural_image
Line drawing of a laptop with a magnified inset showing the screen and keyboard (no text or symbols)Hacer clic
natural_image
Technical line drawing of a laptop chassis with internal components and a directional arrow indicating movement (no text or symbols)natural_image
Line drawing of a flat electronic device with a small rectangular cutout on top (no text or symbols)September 2009
CONTENTS
BEFORE YOU START 5
Make sure you have everything 5
Familiarize yourself with the computer 6
OPENING THE DISPLAY PANEL 6
FRONT OVERVIEW 7
Identifying the Problem 21
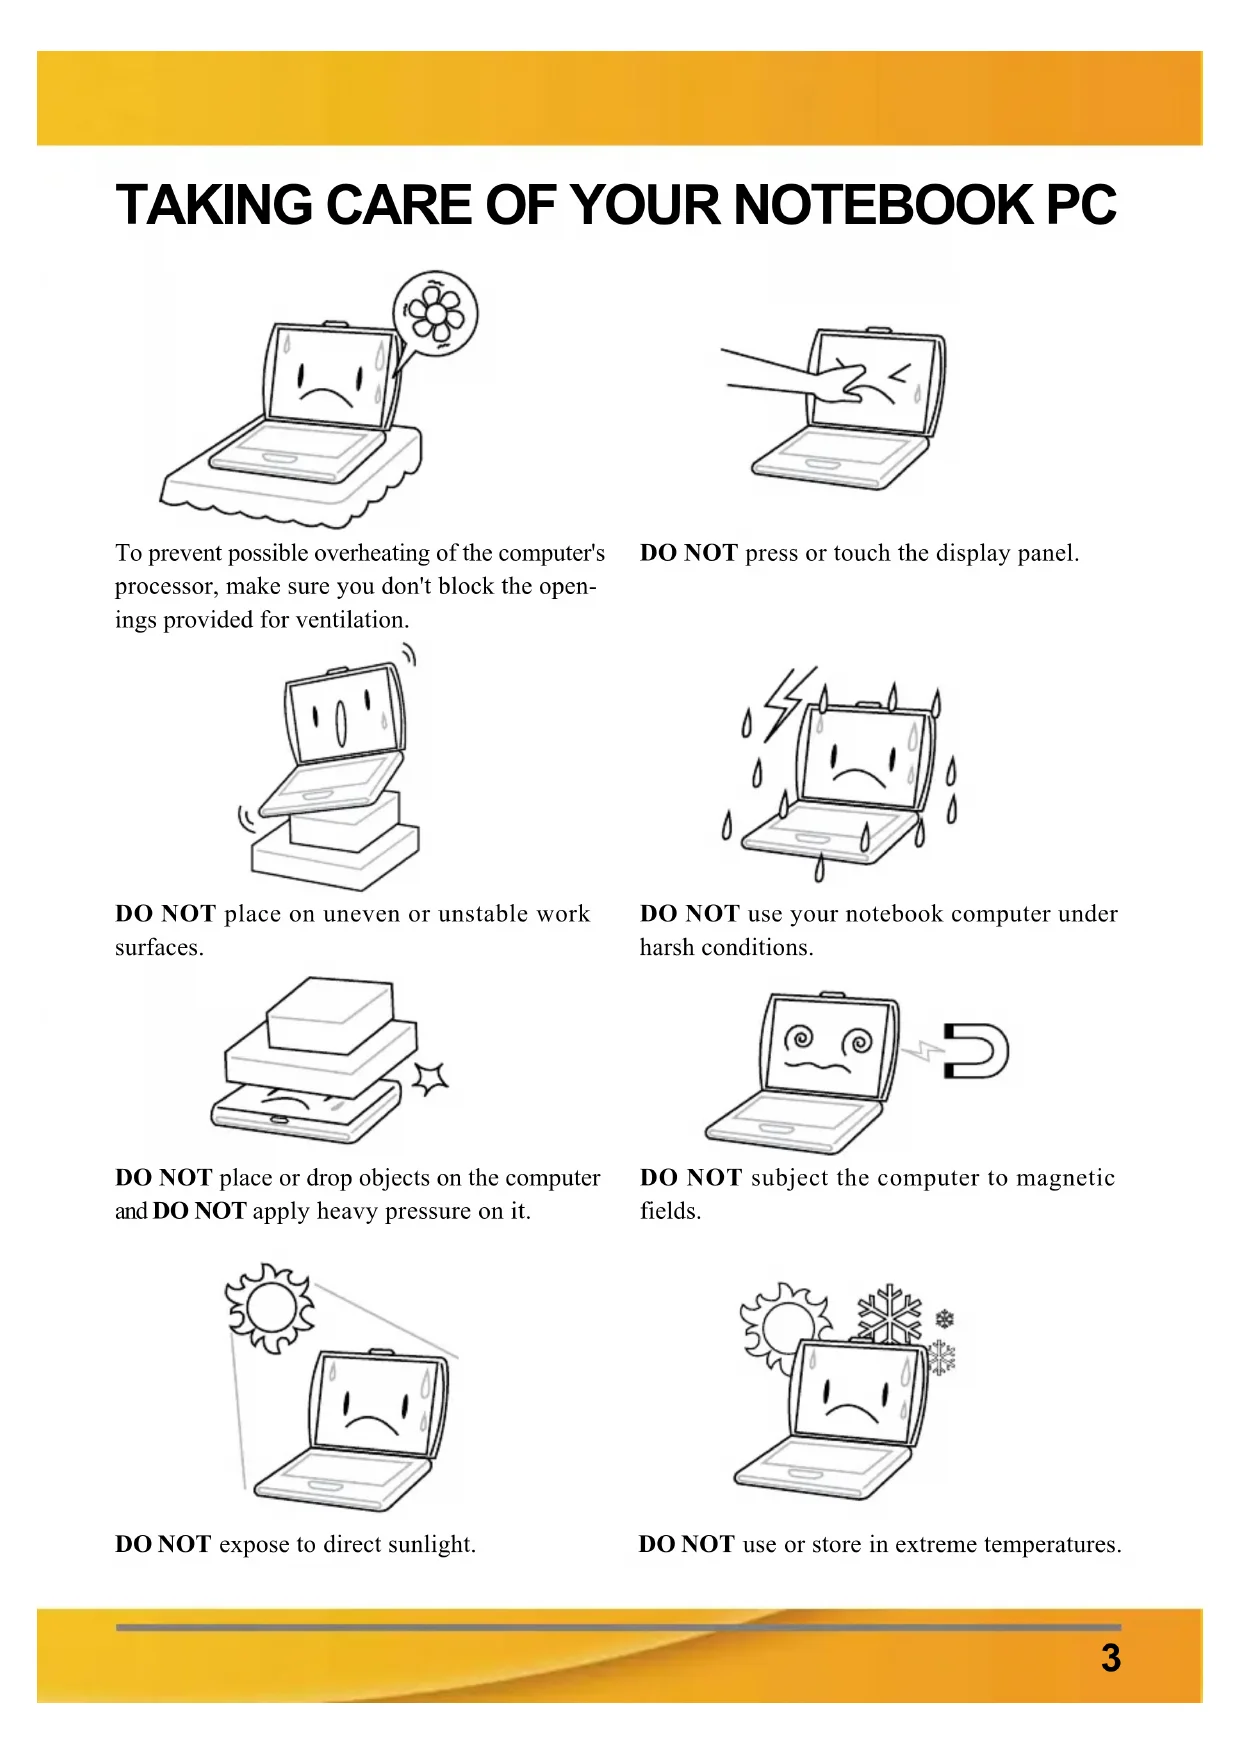
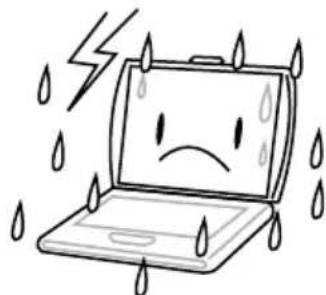
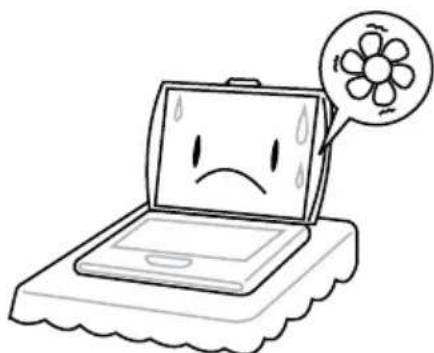
TAKING CARE OF YOUR NOTEBOOK PC
natural_image
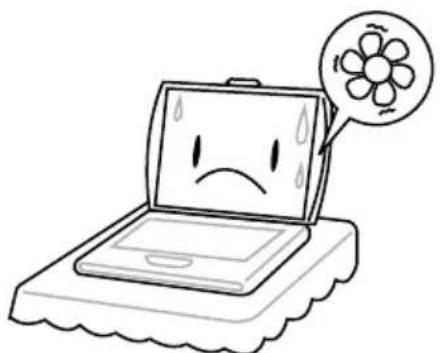
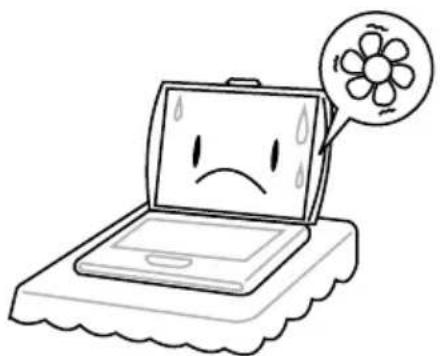
Cartoon illustration of a sad laptop with a flower icon on its screen (no text or symbols)To prevent possible overheating of the computer's processor, make sure you don't block the openings provided for ventilation.

natural_image
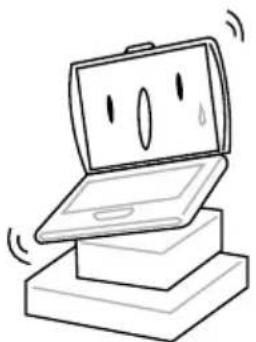
Illustration of a cartoon-style laptop with a smiling face emerging from its side, supported by stacked books (no text or symbols)DO NOT place on uneven or unstable work surfaces.

natural_image
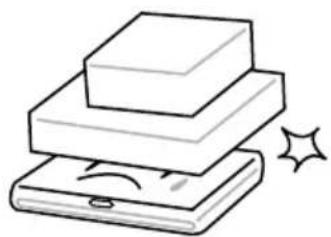
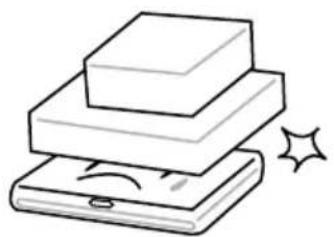
Illustration of stacked books with a starburst effect (no text or symbols)DO NOT place or drop objects on the computer and DO NOT apply heavy pressure on it.
natural_image
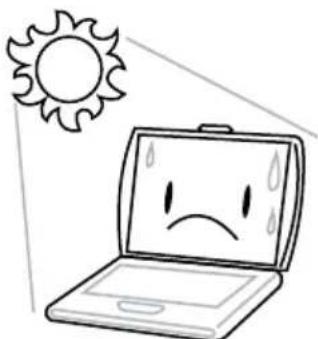
Cartoon illustration of a laptop with a sad face and sun symbol above it (no text or symbols)DO NOT expose to direct sunlight.
natural_image
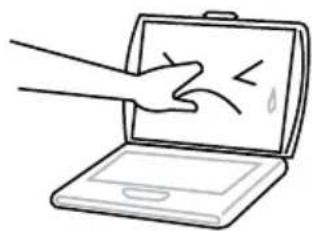
Line drawing of a hand pressing down on a laptop screen with abstract symbols (no text or labels)DO NOT press or touch the display panel.
natural_image
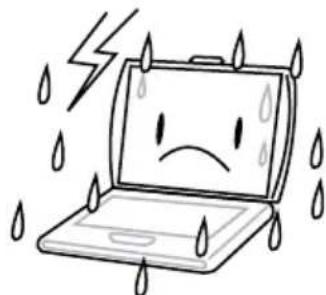
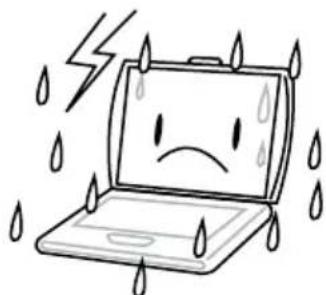
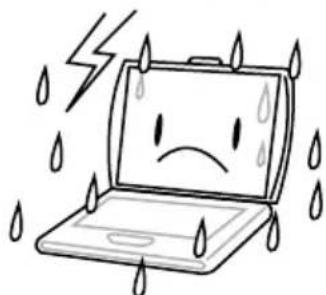
Cartoon illustration of a sad laptop with falling raindrops and lightning bolts (no text or symbols)DO NOT use your notebook computer under harsh conditions.
natural_image
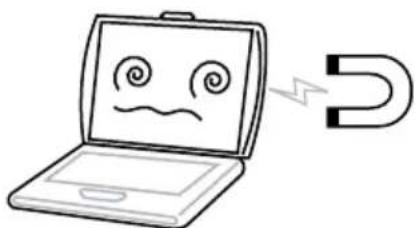
Simple line drawing of a laptop with a sad face and a lightning bolt connected to it (no text or symbols)DO NOT subject the computer to magnetic fields.

natural_image
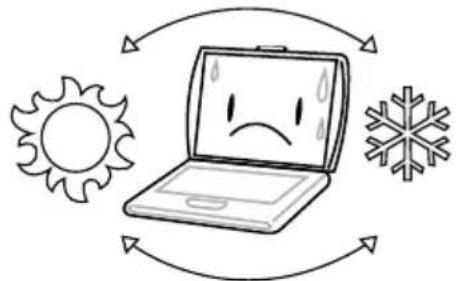
Cartoon illustration of a sad laptop with sun, snowflake, and snowflakes above it (no text or symbols)DO NOT use or store in extreme temperatures.

natural_image
Illustration of a laptop with sad face, surrounded by sun and snow symbols (no text or labels)Avoid sudden changes in temperature or humidity by keeping it away from A/C and heating vents.

natural_image
Cartoon illustration of a laptop with a sad face and flames beside it (no text or symbols)DO NOT place near fire or other sources of heat.

natural_image
Cartoon illustration of a computer monitor with a sad face and sweat drops, surrounded by clouds (no text or symbols)DO NOT expose to dust and/or corrosive chemicals.

natural_image
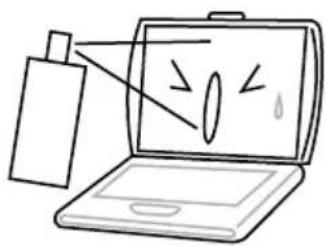
Simple line drawing of a laptop with a spray bottle and a screen showing abstract symbols (no text or labels)DO NOT spray water or any other cleaning fluids directly on the display.
natural_image
Cartoon illustration of a sad laptop with falling raindrops and lightning bolts (no text or symbols)DO NOT expose the computer to rain or moisture.

natural_image
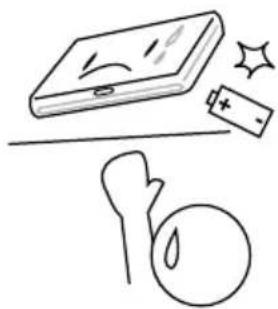
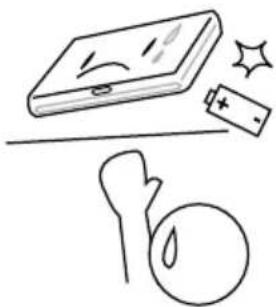
Simple line drawing of a smiling book, battery, and abstract shapes (no text or symbols)DO NOT tamper with the batteries. Keep them away from children.
natural_image
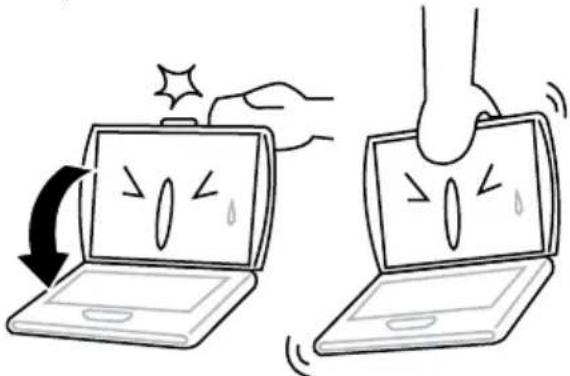
Illustration of two laptops with different expressions and hand gestures, showing change in motion (no text or symbols)DO NOT slam your notebook shut and never pick up or hold your notebook by the display.
natural_image
Simple line drawing of a mechanical component or bracket with no text or symbolsIf you are traveling with your computer, remember to carry it as hand luggage. Do not check it in as baggage.
BEFORE YOU START
Make sure you have everything
When you receive your notebook PC, unpack it carefully, and check to make sure you have all the items listed below. For a pre-configured model you should have the following:
- Notebook Computer
- Lithium-Ion battery
• AC adapter with power cord - Driver and Applications CD
- Quick Start Guide or User Guide
Depending upon the configuration of your notebook, you may also need the following items:
• DVD / CD-RW Combo Application CD
- Dual DVD+/-RW Application CD
• Super Multi DVD RW Application CD
Once you have checked and confirmed that your notebook system is complete, read through the following pages to learn about all of your notebook components.
Depending on the model you purchased, the actual appearance of your notebook may vary from that shown in this manual.
Familiarize yourself with the computer
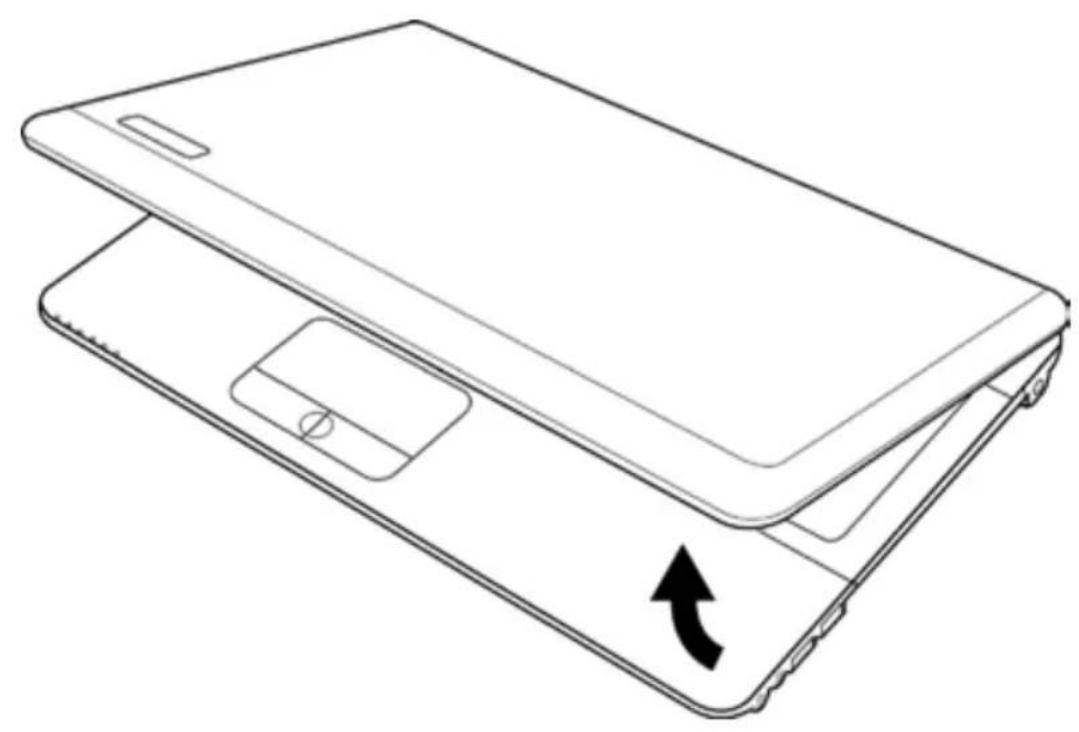
OPENING THE DISPLAY PANEL
To open the display panel, simply lift the lid up.
When closing it, be sure not to slam it shut.
natural_image
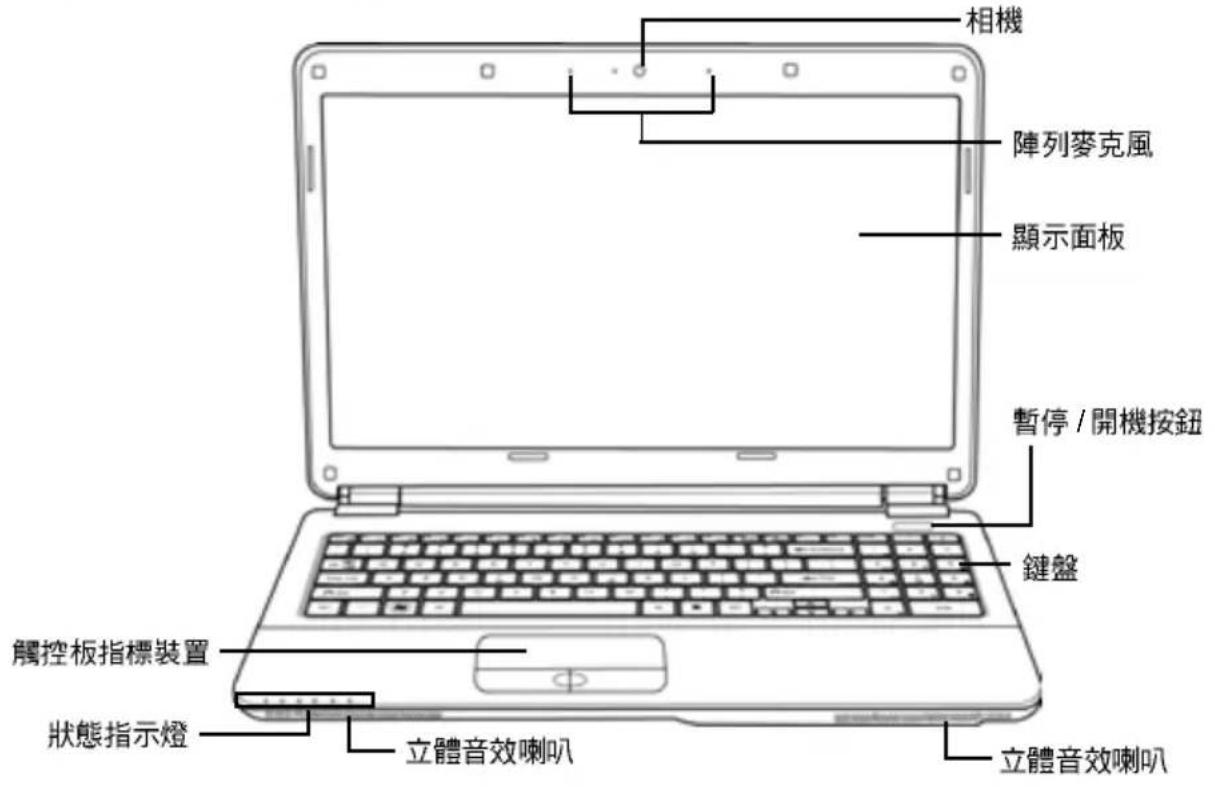
Line drawing of a smartphone showing front and back views with an arrow indicating the fold change (no text or symbols present)FRONT OVERVIEW
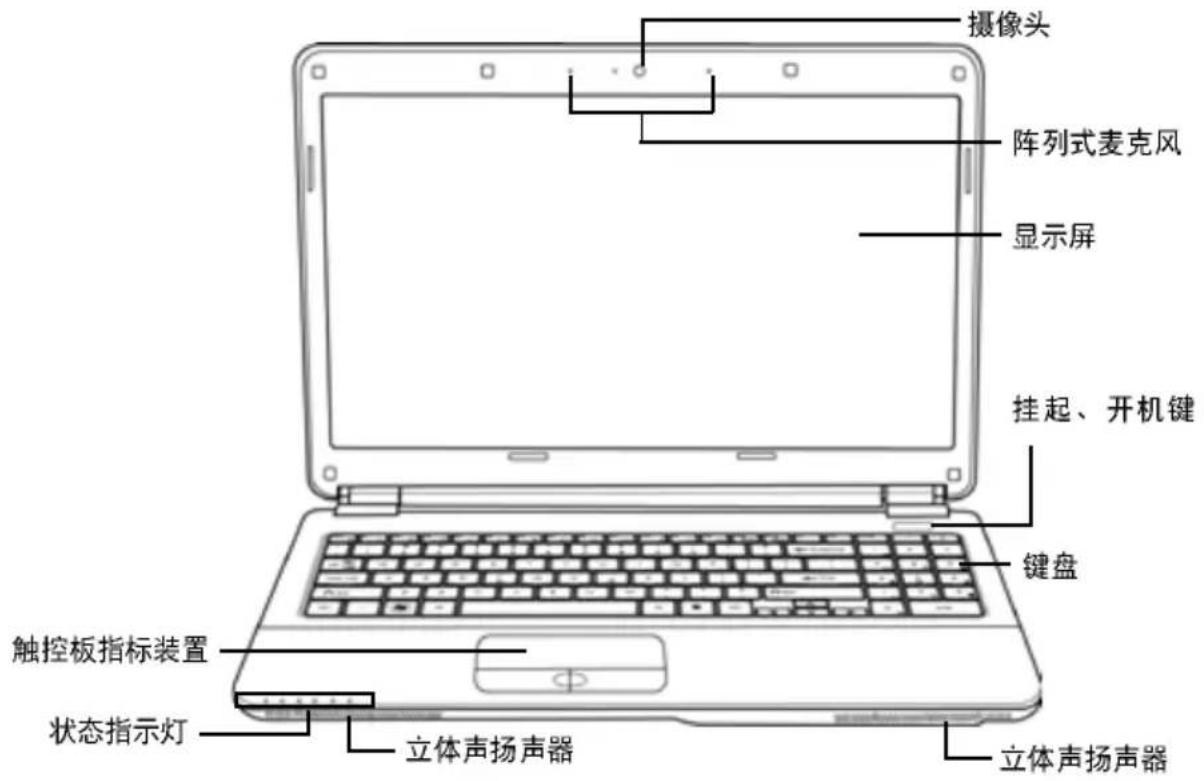
The following is an overview of the front of the notebook.
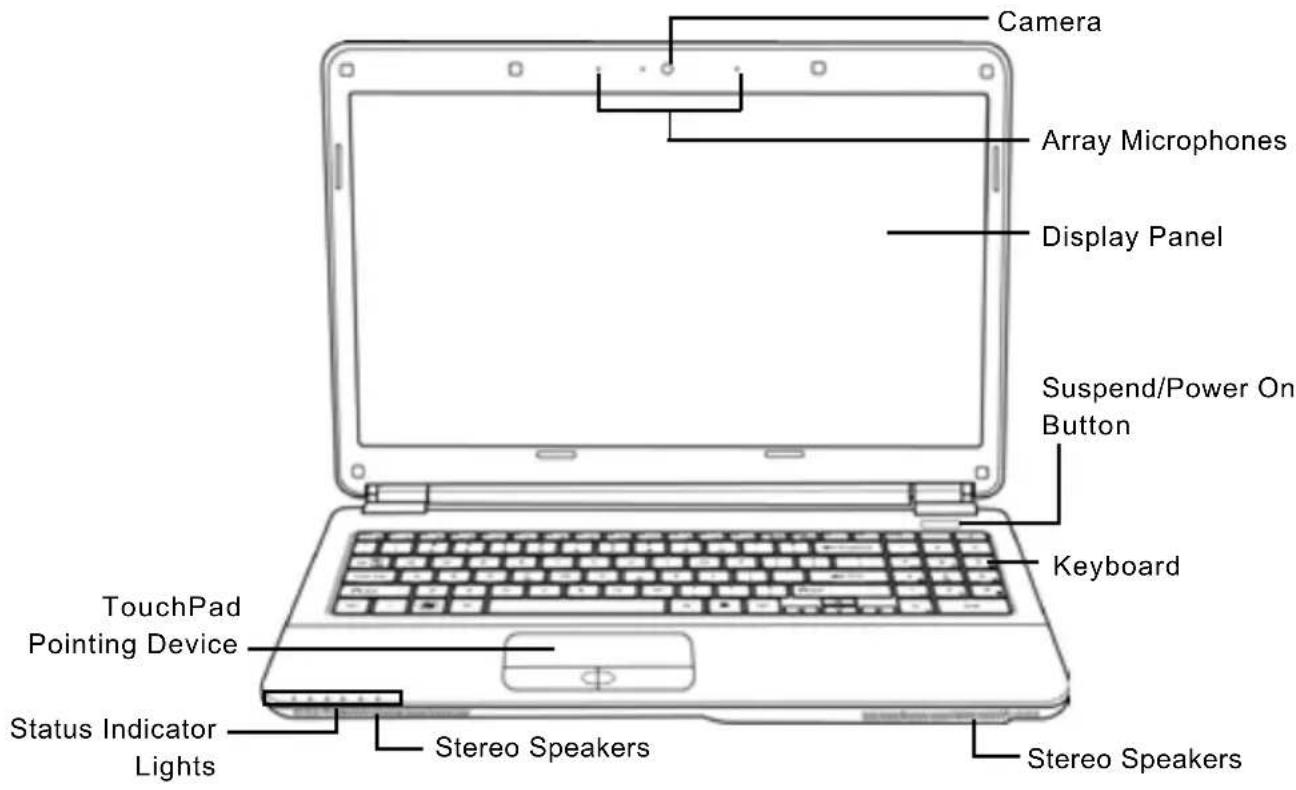
Array Microphones
The built-in array microphones are omni-directional audio input devices. They allow for the stereo reception and transmission of voice and/or other audio data to any program capable of accepting such input.
Camera
The built-in 0.3 or 1.3 megapixel camera (1 or 2 digital microphones) allows you to snap a photo or create a video chat or video conference with just a click. (Not available in all configurations.)
Display Panel
The display panel is a color LCD panel with back lighting for the display of text and graphics.
Suspend/ Power On Button
This button turns your notebook on and off or puts it to sleep. (See Suspend/Power On Button in the Power On section for more information.)
Stereo Speakers
The built-in dual speakers allow for stereo sound.
Keyboard
A full-size keyboard with dedicated Windows ^® keys.
TouchPad Pointing Device
The TouchPad pointing device is a mouse-like cursor control with two buttons and a touch sensitive movement pad.
Status Indicator Lights
The Status indicator lights correspond to specific operating modes. These modes are: Power on/Suspend status, battery/AC adapter status, hard drive activity (HDD), Num Lock, Caps Lock, and Wireless LAN activity.
LEFT SIDE OVERVIEW
The following is a brief description of the left side of the notebook.
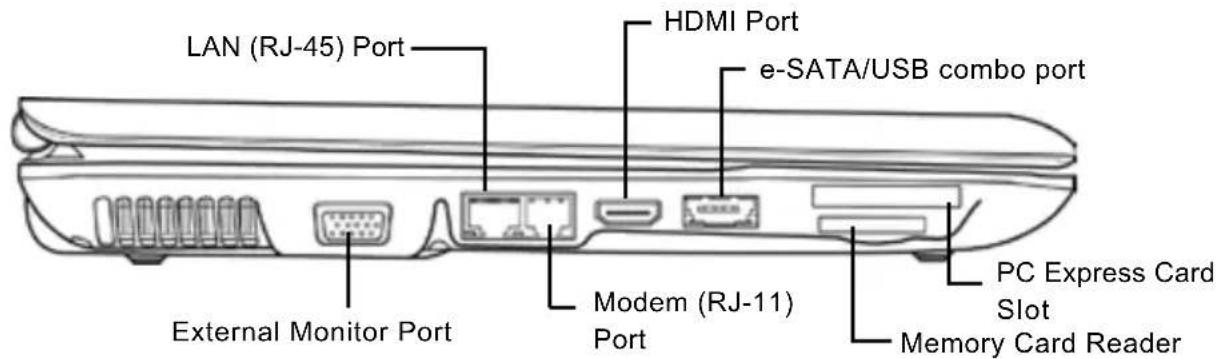
External Monitor Port
The external monitor port allows you to connect an external monitor.
LAN (RJ-45) Port
The LAN port is designed to support a 10/100/1000 Base-T standard RJ-45 plug.
Modem (RJ-11) Port
The modem (RJ-11) port is used to attach a telephone line to the internal 56k modem. (Not available in all configurations.)
HDMI Port
The HDMI port allows you to connect a video device such as a television, a projector, or a VCR to your computer.
e-SATA/USB combo port
The e-SATA/USB combo port allows you to connect an external device such as an external hard disk drive or optical drive.
PC Express Card Slot
The PC Express Card Slot allows you to install one Type-II PC Express Card.
Memory Card Reader
The memory card reader offers the fastest and most convenient method to transfer pictures, music and data between your notebook and flash compatible devices such as digital cameras, MP3 players, mobile phones, and PDAs.
RIGHT SIDE OVERVIEW
The following is a brief description of the right side of the notebook.
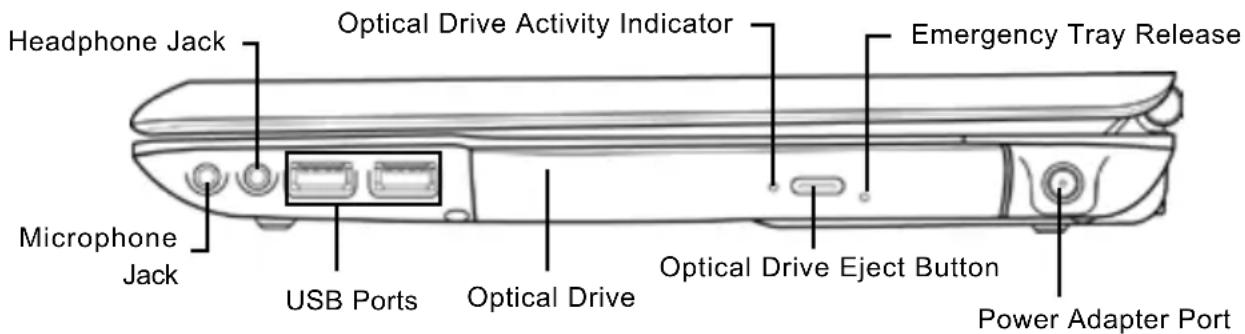
Microphone Jack
The microphone jack allows you to connect an external mono microphone.
Headphone Jack
The headphone jack allows you to connect headphones or external speakers and amplifiers.
USB Ports
The USB ports allow you to connect Universal Serial Bus devices. They support v2.0 of the USB standard, which allows data exchange rates as high as 480 Mb/s.
Optical Drive
The optical drive allows you to play back media discs such as CDs and DVDs. Depending on the configuration of your notebook, it may also allow you to burn CDs and DVDs.
Optical Drive Activity Indicator
This light flickers to indicate activity when the ODD is playing a media disc or is being accessed by the operating system.
Optical Drive Eject Button
The optical drive eject Button allows you to open the optical drive tray to remove or insert a DVD or CD.
Emergency Tray Release
The emergency tray release allows you to open the optical drive tray without powering on your notebook.
Power Adapter Port
The power adapter port allows you to plug in the AC adapter to power your notebook and charge the internal Lithium-Ion battery.
BACK OVERVIEW
The following is an overview of the back of the notebook.

natural_image
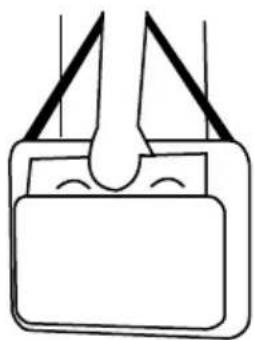
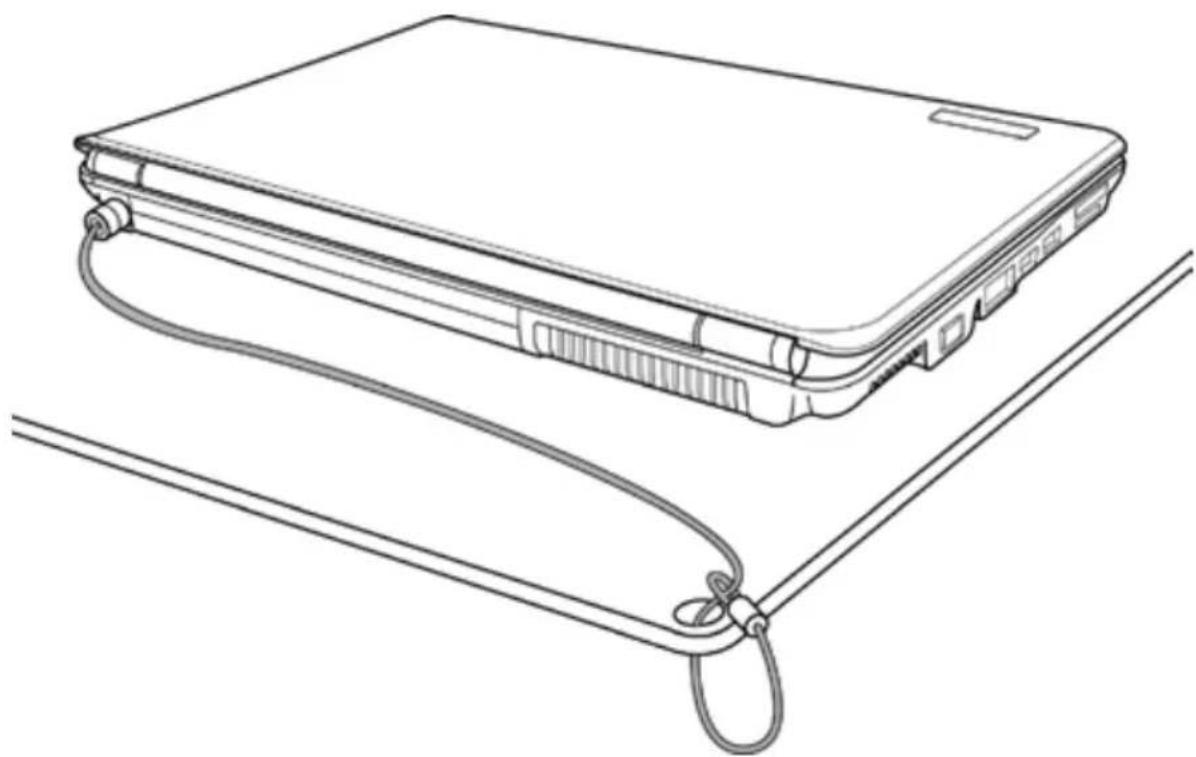
Technical line drawing of a cylindrical device with internal components and a mounting bracket (no text or symbols)Kensington Lock Slot
Kensington Lock Slot
The Kensington lock slot allows you to secure your notebook to an immovable object with an optional security cable.
natural_image
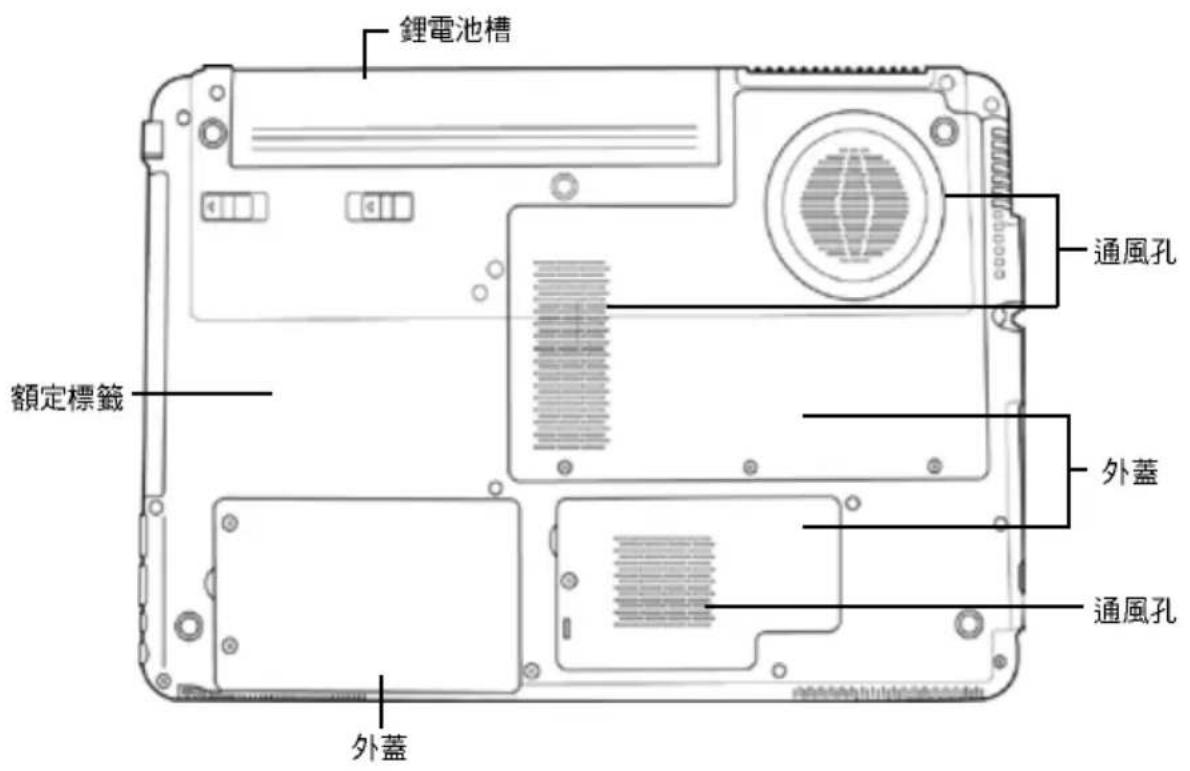
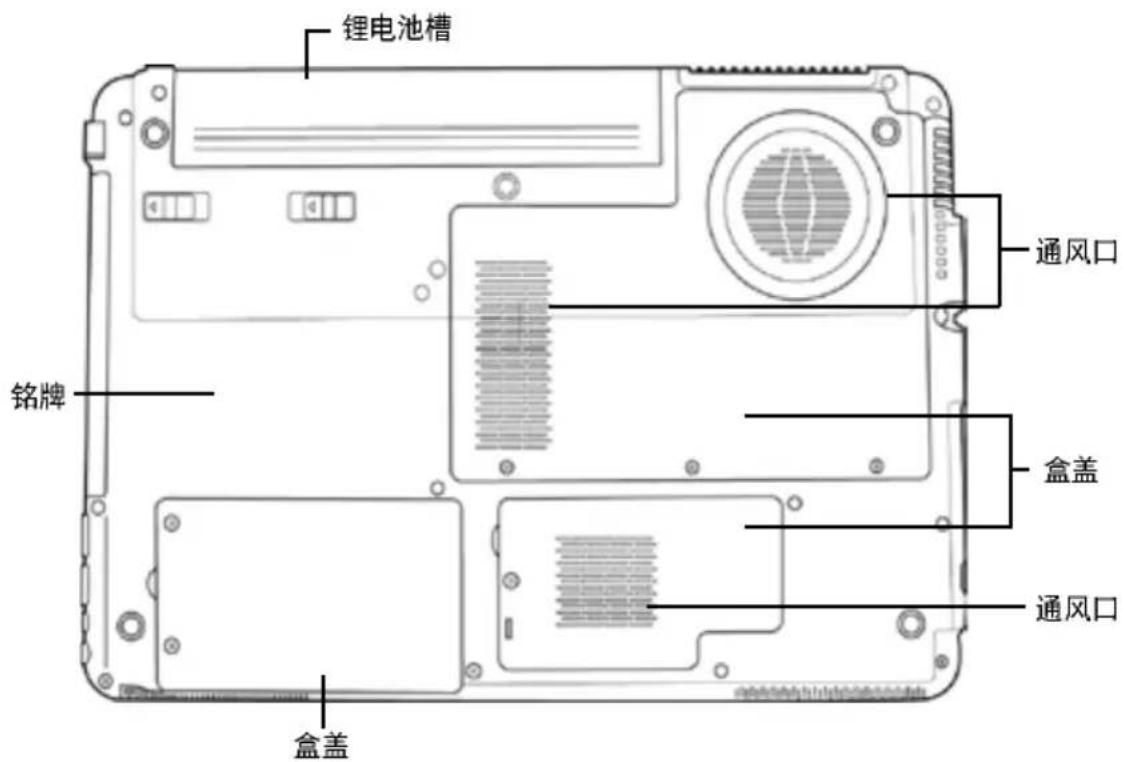
Line drawing of a laptop case with cable strap, shown in two views (no text or symbols)BOTTOM OVERVIEW
The following is an overview of the bottom of the notebook.
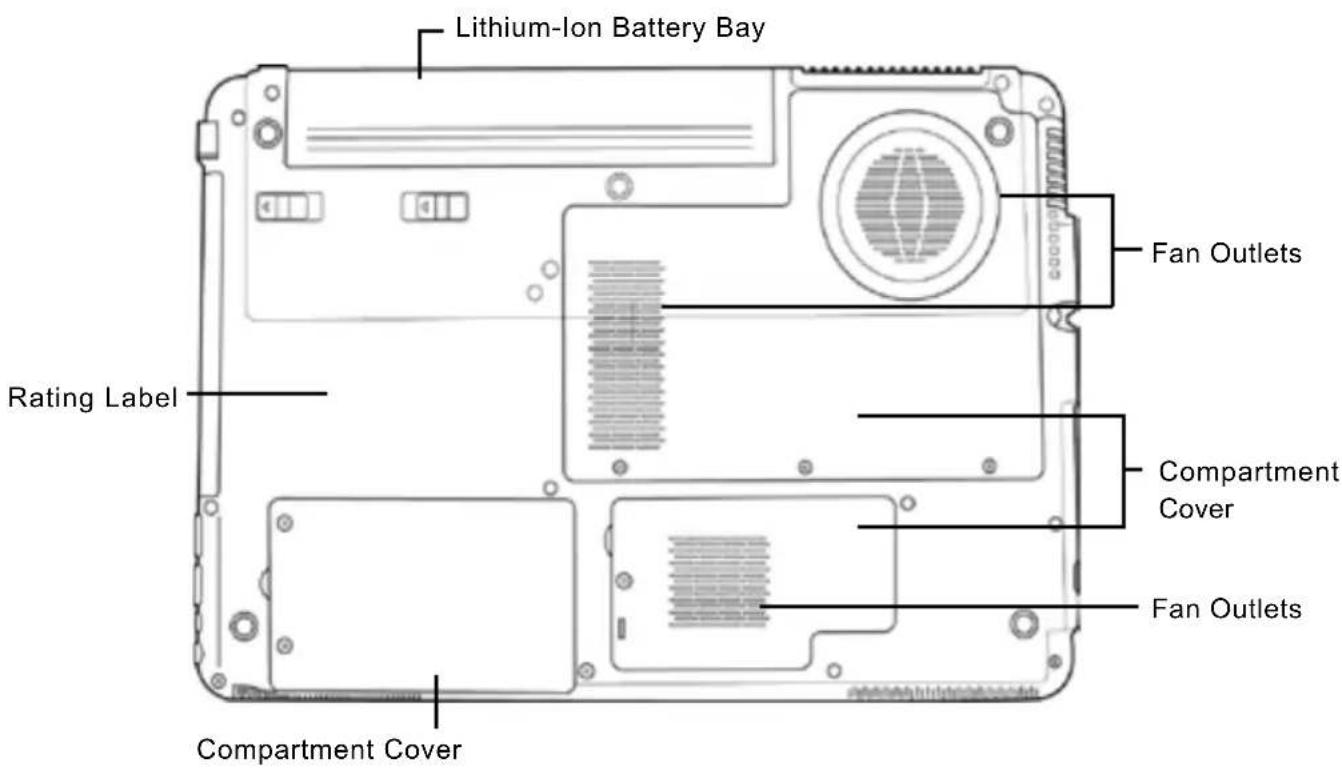
Lithium-Ion Battery Bay
The battery bay contains the internal Lithium-Ion battery. It can be opened for the removal of the battery when stored over a long period of time or for swapping a discharged battery with a charged Lithium-Ion battery.
Fan Outlets
These are open ports for the fan to dissipate heat from the computer's internal components. Do not block or place the computer in such a position that you inadvertently allow the outlets to become blocked.
Compartment Covers
The Wi-Fi compartment contains the Wireless LAN card (Not available in all configurations). The memory compartment contains the computer's memory modules. The internal hard disk drive is accessible through the hard disk drive bay. The CPU sits in the CPU bay.
Rating Label
The label shows the model number and other information about your notebook.
GETTING STARTED
Power Sources
Your computer has two types of power source: a Lithium-Ion battery or an AC adapter.
CONNECTING THE POWER ADAPTERS
The AC adapter provides power for operating your notebook PC and charging the battery.
Connecting the AC Adapter
- Plug the DC output cable into the DC power jack of your notebook PC.
- Plug the AC adapter into an AC electrical outlet.
Switching from AC Adapter Power to Battery Power
- Be sure that you have at least one charged battery installed.
- Remove the AC adapter. Your notebook will automatically switch from DC power to battery power.
The Lithium-Ion battery is not charged upon purchase. Initially, you will need to connect the AC adapter to use your notebook PC.
RECHARGING THE BATTERY
The Lithium-Ion battery is recharged internally using the AC adapter. To recharge the battery, make sure the battery is installed and the computer is connected to the AC.
There is no "memory effect" in Lithium-Ion batteries; therefore you do not need to discharge the battery completely before recharging. The charge times will be significantly longer if your notebook PC is in use while the battery is charging. If you want to charge the battery more quickly, put your computer into Suspend mode, or turn it off while the adapter is charging the battery.
Low Battery State
When the battery charge is low, a notification message appears. If you do not respond to the low battery message, the battery continues to discharge until it is too low to operate. When this happens, your notebook PC goes into Suspend mode. There is no guarantee your data will be saved once the notebook reaches this point.
To protect your computer from damage, use only the power adapter that came with it because each power adapter has its own power output rating.
Once your note computer goes into Suspend mode as a result of a dead battery you will be unable to resume operation until you provide a source of power either from an adapter, or a charged battery. Once you have provided power, you can press the Suspend/Resume button to resume operation. In Suspend mode, your data is maintained for some time, but if a power source is not provided promptly, the Power indicator stops flashing and the goes out, in which case you have lost the data that was not saved. Once you provide power, you can continue to use your computer while an adapter charges the battery.
Battery Replacement
There is danger of explosion if an incorrect battery type is used for replacement. For computers equipped with a replaceable lithium-ion battery pack, the following applies:
- if the battery is placed in an OPERATOR ACCESS AREA, there shall be a marking close to the battery, or a statement in both the operating and the servicing instructions;
- if the battery is placed elsewhere in the computer, there shall be a marking close to the battery or a statement in the servicing instructions.
The marking or statement shall include the following or similar text:
Risk of explosion if battery is replaced with an incorrect type. Dispose of used batteries according to the instructions.
Starting Your Notebook
POWER ON
Suspend/Power On Button
The suspend/power on switch is used to turn on your notebook from its off state. Once you have connected your AC adapter or charged the internal Lithium-Ion battery, you can power on your notebook by pressing the suspend/power on button located above the keyboard. If you need to take an extended break press the button again to turn it off.

Do not carry your notebook around with the power on or subject it to shocks or vibration, as you risk damaging the hard disk.
When you power on your notebook, it will perform a Power On Self Test (POST) to check the internal parts and configuration for correct functionality. If a fault is found, your computer emits an audio warning and or displays and error message.
Depending on the nature of the problem, you may be able to continue by starting the operating system or by entering the BIOS setup utility and revising the settings.
After satisfactory completion of the Power On Self Test (POST), your notebook loads the installed operating system.
Never turn off your notebook during the Power On Self Test (POST), or an unrecoverable error may occur.
Status Indicators
The status indicator lights correspond to specific operating modes. These modes are: Power on/Suspend status, Battery/AC Adapter status, hard drive activity (HDD), Num Lock, Caps Lock, and Wireless LAN activity.
Power On Indicator
This light on the power button illuminates when the computer is powered on.
Suspend Status Indicator
This light flashes when the computer is in the Suspend mode.
Battery Indicator
The Battery indicator tells you whether the Lithium-Ion battery is charging or is already fully charged.
- If you are charging your battery, the Battery indicator remains on even if your notebook is shut off.
- If there is no battery activity, the power adapters are not connected, or the power switch is Off, the Battery indicator will also be off.
- Batteries subjected to shocks, vibrations or extreme temperatures can be permanently damaged.
Hard Disk Drive (HDD) Activity Indicator
The Hard Disk Drive (HDD) Activity indicator tells you whether your internal hard drive is being accessed and, if so, how fast.
The Num Lock Indicator
This indicator shows when the internal keyboard is in ten-key numeric keypad mode.
The Caps Lock Indicator
This indicator tells you that the keyboard is set to type in all capital letters.
Wireless LAN Activity Indicator
The Wireless LAN Activity indicator tells you whether your computer is connected to a wireless network or not.
Using Function Keys
Your computer has 12 function keys, F1 through F12. The functions assigned to these keys differ for each application. You should refer to your software documentation to find out how these keys are used.
The [FN] key provides extended functions for the notebook and is always used in conjunction with another key.
- FN+F1: Places the notebook in Suspend mode. Pressing the Power button returns it to active mode.
- FN+F2: Enables or disables the wireless network connection.
- FN+F3: Allows you to change your selection of where to send your display video. Each time you press the combination of keys you will step to the next choice. The choices, in order, are: built-in display panel only, both built-in display panel and external monitor, or external monitor only.
- FN+F4: Decreases the screen Brightness.
- FN+F5: Increases the screen Brightness.
- FN+F6: Mutes the computer's volume.
- FN+F7: Decreases the computer's volume.
- FN+F8: Increases the computer's volume.
• FN+F9: Plays or pauses the current multimedia track. - FN+F10: Stops the current multimedia track.
- FN+F11: Goes to the previous multimedia track.
• FN+F12: Goes to the next multimedia track. - FN+Esc: Enables or disables the Bluetooth function.
Using the TouchPad
A TouchPad pointing device comes built into your computer. It is used to control the movement of the pointer to select items on your display panel.
The TouchPad consists of a cursor control, a left and right button, and a scroll bar. The cursor control works the same way a mouse does, and moves the cursor around the display. It only requires light pressure from the tip of your finger. The left and right buttons function the same as mouse buttons. The actual functionality of the buttons may vary depending on the application that is being used. Finally, the scroll bar allow you to navigate quickly through pages, without having to use the on-screen cursor to manipulate the up and down scroll bars.
natural_image
Line drawing of a laptop computer with a magnified inset showing the screen and keyboard (no text or symbols)Clicking
Clicking means pushing and releasing a button. To left-click, move the cursor to the item you wish to select, press the left button once, and then immediately release it. To right click, move the mouse cursor to the item you wish to select, press the right button once, and then immediately release it. You also have the option to perform the clicking operation by tapping lightly on the TouchPad once.
Double-Clicking
Double-clicking means pushing and releasing the left button twice in rapid succession. This procedure does not function with the right button. To double-click, move the cursor to the item you wish to select, press the left button twice, and then immediately release it. You also have the option to perform the double-click operation by tapping lightly on the TouchPad twice.
Dragging
Dragging means pressing and holding the left button, while moving the cursor. To drag, move the cursor to the item you wish to move. Press and hold the left button while moving the item to its new location and then release it. Dragging can also be done using the TouchPad. First, tap the TouchPad twice over the item you wish to move making sure to leave your finger on the pad after the final tap. Next, move the object to its new location by moving your finger across the TouchPad, and then release your finger. Using the Scroll bar allows you to navigate through a document quickly without using the window's scroll bars. This is particularly useful when you are navigating through on-line pages.
Memory Module Upgrade
To increase your notebook's memory capacity (up to 8 GB maximum), additional memory modules may be installed. The memory upgrade must be a dual-in-line (DIMM) SDRAM module.
Do not remove any screws from the memory upgrade module compartment except for the ones specifically shown in the directions here.
Installing a Memory Module
The following steps describe how to install a memory upgrade module. We do not recommend that you do this yourself.
- Turn off power to your notebook using the power switch, disconnect the power adapter, and/or remove the battery pack.
- Place your notebook upside-down on a clean work surface.
- Open the top cover all the way, so that it is lying flat on the work surface.
- Remove the five screws securing the compartment cover.
The memory upgrade module can be severely damaged by electrostatic discharge (ESD). Be sure you are properly grounded when handling and installing the module. - Align the connector edge of the memory upgrade module, chip side up, with the connector slot in the compartment.
natural_image
Technical line drawing of an open laptop case with internal components and a black arrow indicating a specific area (no text or symbols present)-
Insert the memory upgrade module at a 45 ° angle and press it firmly onto the connector.
-
Press the memory upgrade module down into the compartment until it locks into the retaining clips on either side. You will hear a click when it is properly in place.
-
Replace the cover and screws that were removed previously. Installation of the new memory module is now complete.
-
Insert the memory upgrade module at a 45 ° angle and press it firmly onto the connector.
- Press the memory upgrade module down into the compartment until it locks into the retaining clips on either side. You will hear a click when it is properly in place.
- Replace the cover and screws that were removed previously. Installation of the new memory module is now complete.
The memory upgrade module is not something you routinely remove from your notebook PC. Once it is installed, you should leave it in place unless you want to increase system memory capacity.
TROUBLESHOOTING
Your notebook PC is sturdy and subject to few problems in the field. However, you may encounter simple setup or operating problems that you can solve on the spot, or problems with peripheral devices, that you can solve by replacing the device. The information in this section helps you isolate and resolve some of these straightforward problems and identify failures that require service.
Identifying the Problem
If you encounter a problem, go through the following procedure before pursuing complex troubleshooting:
- Turn off your notebook.
- Make sure the AC adapter is plugged into your notebook and to an active AC power source.
- Make sure that any card installed in the PC Card slot is seated properly. You can also remove the card from the slot, thus eliminating it as a possible cause of failure.
- Make sure that any devices connected to the external connectors are plugged in properly. You can also disconnect such devices, thus eliminating them as possible causes of failure.
- Turn on your notebook. Make sure it has been off at least 10 seconds before you turn it on.
- Go through the boot sequence.
- If the problem has not been resolved, contact your support representative.
Before you place the call, you should have the following information ready so that the customer support representative can provide you with the fastest possible solution:
- Product name
• Product configuration number
• Product serial number - Purchase date
- Conditions under which the problem occurred
- Any error messages that have occurred
- Hardware configuration
• Type of device connected, if any
See the Configuration Label on the bottom of your notebook for configuration and serial numbers.
Copyright-protected technology
This product incorporates copyright protection technology that is protected by U.S. patents and other intellectual property rights. Use of this copyright protection technology must be authorized by Macrovision, and is intended for home and other limited viewing uses only unless otherwise authorized by Macrovision. Reverse engineering or disassembly is prohibited.
使用手册
繁體中文

natural_image
Line drawing of a flat electronic device with a small rectangular cutout on top (no text or symbols)2009年 月
目錄
開始使用前 5
確認應有品項 5
熟悉您的電腦 6
打開顯示面板 6
前視圖 7
左視圖 9
右視圖 10
後視圖 11
底視圖 12
開始使用筆記型電腦 13
電源 13
連接電源變壓器 13
電池重新充電 14
啟動您的筆記型電腦 15
開機 15
狀態指示燈 16
使用功能鍵 18
使用觸控板 19
記憶體模組升級 20
問題檢測 21
找出問題 21
筆記型電腦的日常維護

natural_image
Cartoon illustration of a sad laptop with a flower icon on its screen (no text or symbols)natural_image
Line drawing of a hand pressing down on a laptop screen with abstract lines (no text or symbols)請勿用手觸摸或按壓顯示面板。

natural_image
Illustration of a stack of books with a smiling open book and floating pages (no text or symbols)natural_image
Cartoon illustration of a sad laptop with falling raindrops and lightning bolts (no text or symbols)請勿在極端嚴酷的環境下使用筆記型電腦。
natural_image
Illustration of stacked books with a smartphone and starburst symbol (no text or symbols)請勿在電腦上置放物品或施以重壓。
natural_image
Simple line drawing of a laptop with a sad face and a lightning bolt connected to a U-shaped magnet (no text or symbols)請勿將電腦置放在磁性物質附近。
natural_image
Simple line drawing of a laptop with a sad face and sun icon above it (no text or symbols)natural_image
Cartoon illustration of a sad laptop with sun and snowflakes above it (no text or symbols)natural_image
Illustration of a laptop with sad face, surrounded by sun and snow symbols (no text or labels)natural_image
Cartoon illustration of a laptop with a sad face and a flame beside it (no text or symbols)請勿靠近火源或其他熱源。

natural_image
Cartoon illustration of a computer monitor with a sad face and sweat drops, surrounded by clouds (no text or symbols)natural_image
Simple line drawing of a laptop with a spray bottle and a screen showing a diagram (no text or symbols)請勿直接對顯示器噴水或噴灑其他清潔劑。
natural_image
Cartoon illustration of a sad laptop with falling water droplets and lightning bolts (no text or symbols)請勿讓電腦暴露於雨水或溼氣中。
natural_image
Simple line drawing of a smiling smartphone on a desk with battery and magnifying glass nearby (no text or symbols)natural_image
Illustration of two laptops with a hand holding the top panel, showing a change in the screen (no text or symbols present)natural_image
Simple line drawing of a mechanical component or bracket with no text or symbolsnatural_image
Line drawing of a smartphone showing front and back views with an arrow indicating the fold change (no text or symbols present)前視圖
以下所示為本筆記型電腦的前視圖。
natural_image
Technical line drawing of a cylindrical device with internal components and a mounting bracket (no text or symbols)Kensington 安全鎖插槽
Kensington 安全鎖插槽
natural_image
Line drawing of a laptop with attached cable, shown in two views (no text or symbols)底視圖
下列為本筆記型電腦的底視圖。
natural_image
Line drawing of a laptop with a magnified inset showing a screen and keyboard (no text or symbols)點一下
natural_image
Technical line drawing of an open laptop case with internal components and a black arrow indicating a location (no text or symbols present)natural_image
Line drawing of a flat electronic device casing (no text or symbols)Septembre 2009
TABLE DES MATIÈRES
AVANT DE COMMENCER .... 5
natural_image
Cartoon illustration of a sad laptop with a flower icon on its screen (no text or symbols)natural_image
Illustration of a cartoon-style open laptop with a smiling face, floating on a stack of books (no text or symbols)natural_image
Illustration of stacked books with a starburst symbol on the right page (no text or symbols present)natural_image
Cartoon illustration of a laptop with a sad face and sun symbol above it (no text or symbols)natural_image
Line drawing of a hand pressing down on a laptop screen with abstract symbols (no text or labels)natural_image
Cartoon illustration of a sad laptop with falling raindrops and lightning bolts (no text or symbols)natural_image
Simple line drawing of a laptop with a sad face and a lightning bolt connected to a U-shaped magnet (no text or symbols)natural_image
Cartoon illustration of a sad laptop with sun and snowflakes above it (no text or symbols)natural_image
Illustration of a laptop with sad face, surrounded by sun and snow symbols (no text or labels)natural_image
Illustration of a laptop with a sad face and flames next to it, symbolizing energy or fire (no text present)natural_image
Cartoon illustration of a computer monitor with angry faces and sweat drops, surrounded by clouds (no text or symbols)natural_image
Illustration of a laptop with a spray bottle and a screen showing abstract symbols (no text or labels)natural_image
Cartoon illustration of a sad laptop with falling water droplets and lightning bolts (no text or symbols)natural_image
Simple line drawing of a smiling smartphone on a desk with battery and hand gesture (no text or symbols)natural_image
Illustration of two laptops with a hand holding the top panel, showing a change in the screen (no text or symbols present)natural_image
Simple line drawing of a mechanical component with no text or symbolsnatural_image
Line drawing of a smartphone showing front and back views with an arrow indicating the fold change (no text or symbols present)PRÉSENTATION DE LA FACE AVANT
Bouton Suspension/Marche
natural_image
Technical line drawing of a cylindrical device with internal components and a mounting bracket (no text or symbols)natural_image
Line drawing of a laptop case with cable strap, shown in two views (no text or symbols)VUE DE DESSOUS
Bouton Suspension/Marche
natural_image
Line drawing of a laptop with a magnified inset showing a screen and keyboard (no text or symbols)Cliquer
natural_image
Technical line drawing of an electronic device interior with no visible text or symbolsnatural_image
Line drawing of a flat electronic device with a small rectangular cutout on top (no text or symbols)September 2009
INHALT
ZUM BEGINN 5
natural_image
Cartoon illustration of a sad laptop with a flower icon speech bubble (no text or symbols)natural_image
Illustration of a cartoon-style laptop with a smiling face emerging from its side, stacked on top (no text or symbols)natural_image
Illustration of stacked books with a smartphone and starburst symbol (no text or symbols)natural_image
Cartoon illustration of a laptop with a sad face and sun symbol above it (no text or symbols)natural_image
Line drawing of a hand pressing down on a laptop screen with a droplet (no text or symbols)natural_image
Cartoon illustration of a sad laptop with falling raindrops and lightning bolts (no text or symbols)natural_image
Simple line drawing of a laptop with a sad face and a lightning bolt connected to a U-shaped magnet (no text or symbols)natural_image
Cartoon illustration of a sad laptop with sun, snowflake, and frost symbols (no text or labels)natural_image
Illustration of a laptop with sad face, surrounded by sun and snow symbols (no text or labels)natural_image
Illustration of a laptop with a sad face and flames next to it, symbolizing energy or fire (no text present)natural_image
Cartoon illustration of a computer monitor with sad faces and sweat drops, surrounded by clouds (no text or symbols)natural_image
Simple line drawing of a laptop with a spray bottle and a screen showing abstract symbols (no text or labels)
natural_image
Cartoon illustration of a sad laptop with falling water droplets and lightning bolt above it (no text or symbols)natural_image
Simple line drawing of a smiling book, battery, and circular object (no text or symbols)natural_image
Simple line drawing of a mechanical component or bracket with no text or symbolsnatural_image
Line drawing of a smartphone showing front and back views with an arrow indicating the fold change (no text or symbols present)VORDERSEITE
natural_image
Technical line drawing of a cylindrical device with internal components and a mounting bracket (no text or symbols)natural_image
Line drawing of a laptop case with cable strap, shown in two views (no text or symbols)UNTERSEITE
natural_image
Line drawing of a laptop computer with a magnified inset showing the screen and keyboard (no text or symbols)Klicken
natural_image
Technical line drawing of a laptop interior showing internal components and a highlighted area (no text or symbols)natural_image
Line drawing of a flat electronic device casing (no text or symbols)Settembre 2009
INDICE
OPERAZIONI PRELIMINAR 5
natural_image
Cartoon illustration of a sad laptop with a speech bubble showing a flower (no text or symbols)natural_image
Illustration of a smiling battery with a mouth, partially stacked on top (no text or symbols)natural_image
Illustration of stacked books and a smartphone with sparkles (no text or symbols)natural_image
Cartoon illustration of a laptop with a sad face and sun symbol above it (no text or symbols)natural_image
Line drawing of a hand pressing down on a laptop screen with a droplet (no text or symbols)natural_image
Cartoon illustration of a sad laptop with falling raindrops and lightning bolts (no text or symbols)natural_image
Cartoon illustration of a computer with a sad face and a lightning bolt connected to a U-shaped magnet (no text or symbols)natural_image
Cartoon illustration of a sad laptop with sun, snowflake, and frost symbols (no text or labels)natural_image
Illustration of a laptop with sad face, surrounded by sun and snow symbols (no text or labels)natural_image
Illustration of a laptop with a sad face and flames next to it (no text or symbols)natural_image
Cartoon illustration of a computer monitor with a sad face and sweat drop, surrounded by clouds (no text or symbols)natural_image
Simple line drawing of a laptop with a spray bottle and a screen showing abstract symbols (no text or labels)natural_image
Cartoon illustration of a sad laptop with falling water droplets and lightning bolts (no text or symbols)natural_image
Simple line drawing of a smiling smartphone with battery and coins, no text or symbols presentnatural_image
Illustration of two laptops with a hand holding their screens, showing a change in the screen (no text or symbols present)natural_image
Simple line drawing of a mechanical component or bracket with no text or symbolsnatural_image
Line drawing of a smartphone showing front and back views with an arrow indicating the fold change (no text or symbols present)PANORAMICA FRONTALE
Slot PC Card Express
natural_image
Technical line drawing of a cylindrical device with internal components and a mounting bracket (no text or symbols)natural_image
Line drawing of a laptop with attached cable, shown in two views (no text or symbols)PANORAMICA INFERIORE
natural_image
Line drawing of a laptop computer with a magnified inset showing the screen and keyboard (no text or symbols)Clic
natural_image
Technical line drawing of a laptop chassis with internal components and a black arrow indicating a specific area (no text or symbols present)natural_image
Line drawing of a flat electronic device with a small rectangular cutout on top (no text or symbols)2009년 9월
목록
시작하기 전에 5
포장 풀기 5
컴퓨터 살펴보기 6
디스플레이 패널 열기 6
앞면 개요 7
좌측면 개요 9
우측면 개요 10
뒷면 개요 11
밀면 개요 12
시작하기 13
전원 13
전원 어댑터 연결 13
배터리 충전 14
노트북 시작하기 15
전원 켜기 15
상태 표시등 16
기능키 사용 18
터치패드 사용 19
메모리 모듈 업그레이드 20
문제 해결 21
문제 식별 21
노트북 PC의 올바른 취급법
natural_image
Cartoon illustration of a sad laptop with a flower icon on its screen (no text or symbols)natural_image
Line drawing of a hand pressing down on a laptop screen with a sad face (no text or symbols)natural_image
Illustration of a stack of books with a smiling face on top, no text or symbols presentnatural_image
Cartoon illustration of a sad laptop with falling raindrops and lightning bolts (no text or symbols)열악한 환경에서 사용하지 마십시오.
natural_image
Illustration of stacked books with a smartphone and sparkles (no text or symbols)natural_image
Simple line drawing of a laptop with a sad face and a lightning bolt connected to a U-shaped magnet (no text or symbols)자기장에 노출되지 않도록 하십시오.

natural_image
Cartoon illustration of a laptop with a sad face and sun symbol above it (no text or symbols)직사광선을 피하십시오.

natural_image
Cartoon illustration of a laptop with sad face, surrounded by sun and snowflakes (no text or symbols)natural_image
Illustration of a laptop with sad face, surrounded by sun and snow symbols (no text or labels)natural_image
Cartoon illustration of a laptop with a sad face and flames beside it (no text or symbols)natural_image
Cartoon illustration of a computer monitor with angry faces and sweat drops, surrounded by clouds (no text or symbols)natural_image
Simple line drawing of a laptop with a spray bottle and a screen showing abstract symbols (no text or labels)natural_image
Cartoon illustration of a sad laptop with falling raindrops and lightning bolts (no text or symbols)natural_image
Simple line drawing of a smiling book, battery, and hand holding a coin (no text or symbols)natural_image
Illustration of two hands holding a laptop with a smiling face, showing a change in the image (no text or symbols present)natural_image
Simple line drawing of a mechanical component or bracket with no text or symbolsnatural_image
Line drawing of a smartphone showing front and back views with an arrow indicating the fold change (no text or symbols present)앞면 개요
natural_image
Technical line drawing of a cylindrical device with internal components and a mounting bracket (no text or symbols)전원 어댑터 포트
전원 어댑터 포트
natural_image
Line drawing of a laptop computer case with cable strap (no text or symbols)밑면 개요
natural_image
Line drawing of a laptop with a magnified inset showing the screen and keyboard (no text or symbols)클릭
natural_image
Technical line drawing of an electronic device interior showing internal components and a black arrow indicating a specific area (no text or symbols present)natural_image
Line drawing of a flat electronic device with a small rectangular cutout on top (no text or symbols)2009年9月
目录
使用前 5
请确定您已经有了以下物品 5
熟悉您的笔记本电脑 6
打开显示屏 6
前视图 7
左视图 9
右视图 10
后视图 11
底视图 12
开始使用 13
电源 13
连接电源适配器 13
给电池充电 14
启动您的笔记本电脑 15
打开电源 15
状态指示灯 16
使用功能键 18
使用触控板 19
内存升级 20
故障排除指南 21
识别问题 21
维护好您的个人笔记本电脑
natural_image
Cartoon illustration of a sad laptop with a flower icon on its screen (no text or symbols)natural_image
Line drawing of a hand pressing down on a laptop screen with abstract lines (no text or symbols)请勿按压或触摸显示屏。
natural_image
Illustration of a stack of books with a smiling open book on top, no text or symbols presentnatural_image
Cartoon illustration of a sad laptop with falling water droplets and lightning bolts (no text or symbols)请勿在恶劣的条件下使用您的笔记本电脑。
natural_image
Illustration of stacked books with a smartphone and starburst symbol (no text or symbols)natural_image
Cartoon illustration of a laptop with a sad face and a lightning bolt connected to a U-shaped magnet (no text or symbols)请勿将笔记电脑本置于磁场下。

natural_image
Cartoon illustration of a laptop with a sad face and a sun symbol above it (no text or symbols present)请勿暴露于阳光的直射下。

natural_image
Cartoon illustration of a sad laptop with sun, snowflake, and stars around it (no text or symbols)请勿在过热的地方使用或储存笔记本电脑。
natural_image
Illustration of a laptop with sad face, surrounded by sun and snow symbols (no text or labels)natural_image
Illustration of a laptop with a sad face and flames next to it (no text or symbols)请勿将其置于火源边或其它热源边。

natural_image
Cartoon illustration of a computer monitor with a sad face and sweat drops, surrounded by clouds (no text or symbols)请勿将其暴露于灰尘或腐蚀性化学物品中。
natural_image
Illustration of a laptop with a spray bottle and a screen showing a diagram (no text or symbols)请勿直接向显示屏上喷水或其它清洁剂。

natural_image
Cartoon illustration of a sad laptop with falling raindrops and lightning bolts (no text or symbols)请勿将计算机暴露于雨水或露气中。
natural_image
Simple line drawing of a smiling phone with battery and sparkles above a hand holding a droplet (no text or symbols)natural_image
Illustration of two laptops with a hand holding the top panel, showing a change in the screen (no text or symbols present)natural_image
Simple line drawing of a mechanical component or bracket with no text or symbolsnatural_image
Line drawing of a smartphone showing front and back views with an arrow indicating the fold change (no text or symbols present)前视图
下图为笔记本电脑的前部视图。
natural_image
Line drawing of a laptop computer case with cable strap (no text or symbols)底视图
下面为笔记本电脑的底部视图。
natural_image
Line drawing of a laptop with a magnified inset showing a screen and key (no text or symbols)单击
natural_image
Technical line drawing of an open laptop case with internal components and a black arrow indicating a specific area (no text or symbols present)natural_image
Line drawing of a laptop case with a flat top and side panel (no text or symbols)2009 年 9 月
目次
はじめる前に 5
セット 内容の確認 5
natural_image
Illustration of a cartoon-style open laptop with a smiling face and motion lines, placed on a stack of books (no text or symbols)不安定な場所に設置しないでください。

natural_image
Illustration of stacked books with a starburst symbol on the right page (no text or symbols present)natural_image
Cartoon illustration of a laptop with a sad face and a sun symbol above it (no text or symbols present)natural_image
Line drawing of a hand pressing down on a laptop screen with a droplet (no text or symbols)natural_image
Cartoon illustration of a sad laptop with falling raindrops and lightning bolts (no text or symbols)natural_image
Simple line drawing of a laptop with a sad face and a lightning bolt connected to a U-shaped magnet (no text or symbols)natural_image
Cartoon illustration of a sad laptop with sun, snow, and frost symbols (no text or labels)natural_image
Illustration of a laptop with sad face, surrounded by sun and snow symbols (no text or labels)natural_image
Illustration of a laptop with a sad face and flames next to it, symbolizing energy or fire (no text present)natural_image
Cartoon illustration of a computer monitor with a sad face and sweat drop, surrounded by clouds (no text or symbols)natural_image
Simple line drawing of a laptop with a spray bottle and a screen showing abstract symbols (no text or labels)natural_image
Cartoon illustration of a sad laptop with falling water droplets and lightning bolts (no text or symbols)natural_image
Simple line drawing of a smiling smartphone on a desk with battery and hand holding a coin, no text or symbols present.natural_image
Illustration of two cartoon laptops with expressive faces and a hand holding the screen (no text or symbols)natural_image
Simple line drawing of a mechanical component with no text or symbolsnatural_image
Line drawing of a smartphone showing front and back views with an arrow indicating the fold change (no text or symbols present)前面图
natural_image
Technical line drawing of a cylindrical device with internal components and a mounting bracket (no text or symbols)Kersington ロックスロット
Kensington ロックスロット
natural_image
Line drawing of a laptop with attached cable, shown in two views (no text or symbols)底面図
以下はノートブックを下から見た図です。
natural_image
Line drawing of a laptop with a magnified inset showing a screen and keyboard (no text or symbols)クリック
natural_image
Technical line drawing of an electronic device interior showing internal components and a black arrow indicating a specific area (no text or symbols present)Fabricante/Manufacturer: INFINITY SYSTEM S.L.
PAÍS/Country: ESPAÑA
Ref. Modelo/ Model reference: AIRIS N1103 - N1107
a) Relatives to the Directive Directive2004/108/EC amended by 73/23/EEC and its amendment 93/68/EEC: EN60950-1 : (2001)
b) Relatives to the Directive 2004/108/EC amended by 89/336/EEC and its amendments 92/31/EEC and 93/68/EEC:
• EN 55024:1998+A1:2001+A2:2003
• EN 55022:2006, Class B
• EN 61000-4-2: 2001
• EN 61000-3-2: 2006 Class D
• EN 61000-4-3: 2002+A1:2002
• EN 61000-3-3:1995+A1:2001+A2:2005
• EN 61000-4-4: 2004
• EN 61000-4-5: 2001
• EN 61000-4-6: 2003:+A1:2004
• EN 61000-4-8: 2001
• EN 61000-4-11: 2004
c) Relatives to the Directive 1999/05/EEC
*EN 301 489-1 V.1.6.1:2005 *EN 301 489-17 V.1.2.1:2002