USER MANUAL SNO5080R SAMSUNG
Please check if your camera and accessories are all included in the product package.
| Appearance Item | Name Quantity Description | | |
 | User Manual, Installer S/W DVD, CMS S/W DVD | 2 | |
 | Quick Guide 1 | | |
 | Template 1 Product installation guide | | |
 | Tapping Screw 3 Used for installation on the wall or ceiling | | |
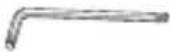 | L Wrench 1 Used to adjust the camera orientation | | |
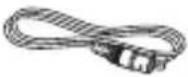 | Cable for the testing monitor | | Used to test the camera connection to a portable display device |
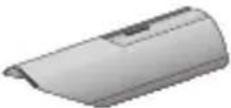 | Sunshield 1 | | It protects the camera from the direct sunlight. |
 | Sunshield Hold 1 It fixes the sunshield with the camera. | | |
2\_ English
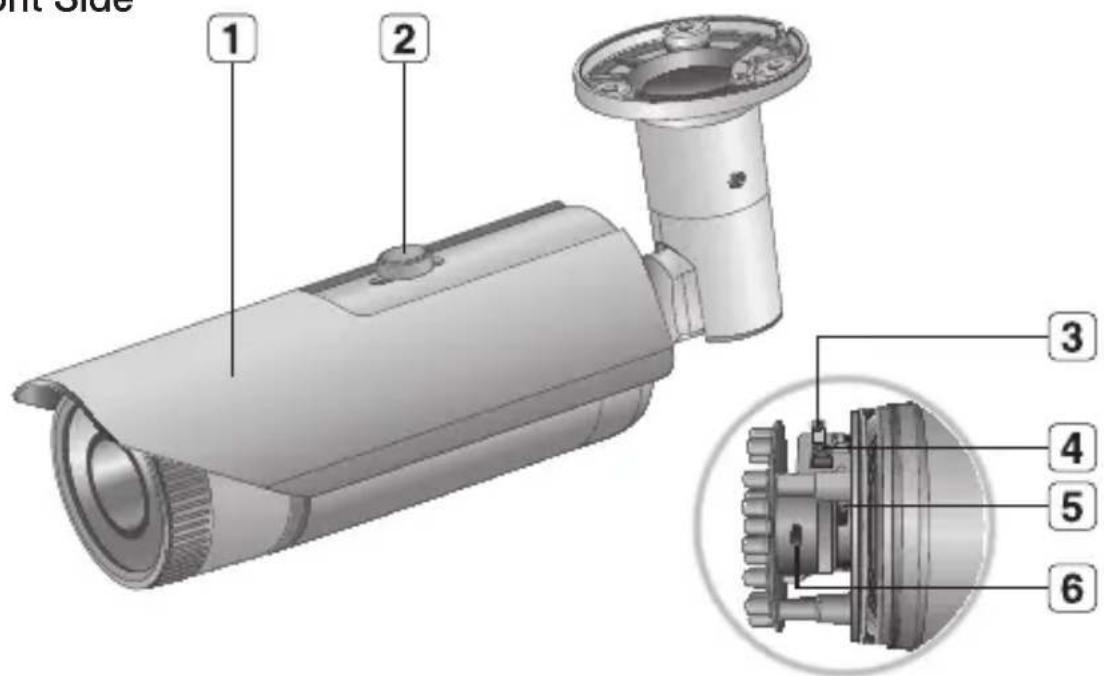
Front Side
| Item Description | |
| 1 Sunshield It protects the camera from the direct sunlight. |
| 2 Sunshield Hold It fixes the sunshield with the camera. |
| 3 Video Output Port Connected to the monitor so that you can check the video from the camera. |
| 4 Reset Button | Resets the camera settings to the default. Press and hold it for about 5 seconds to turn off the system indicator and restart the system. ! If you reset the camera, the network settings will be adjusted so that DHCP can be enabled. If there is no DHCP server in the network, you must run the IP Installer program to change the basic network settings such as IP address, Subnet mask, Gateway, etc., before you can connect to the network. |
| 5 Zoom Lever Turn left or right to adjust the size of an object. |
| 6 Focus Lever Turn left or right to fit the focus. |

- Wipe out a dirty surface of the lens softly with a lens tissue or cloth to which you have applied ethanol.
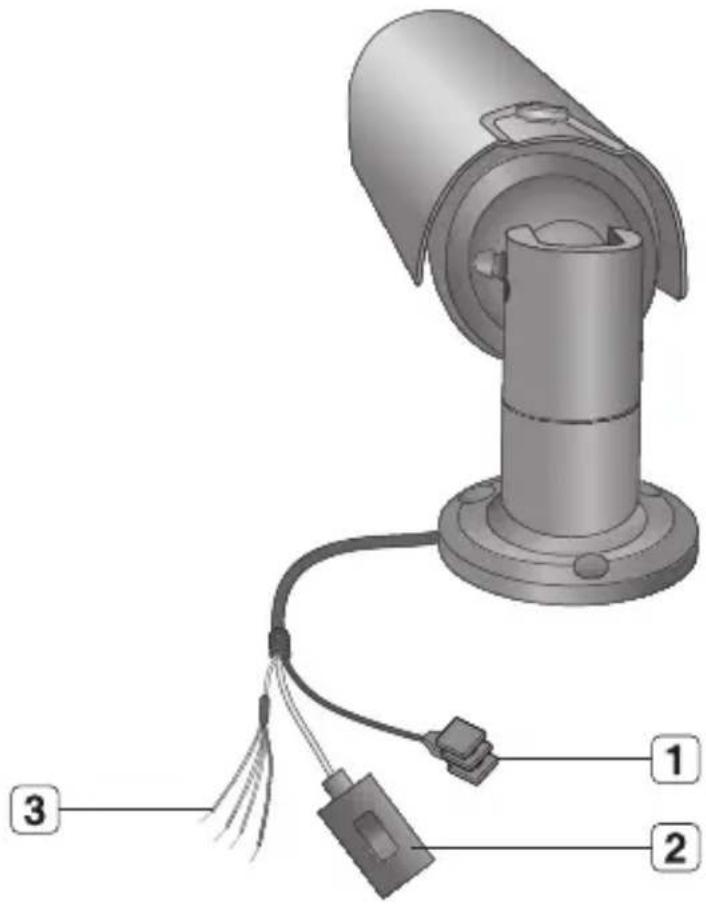
Rear side
natural_image
3D diagram of a security camera with labeled components (no text or symbols present)
| Item Description | |
| 1 Power Port Used to plug the power cable. |
| 2 Network Port Used to connect a PoE or LAN cable. |
| 3 I/O Port | ARM-OUT WHITE: Used to connect the alarm output signal. |
| ARM-IN BLUE: Used to connect the alarm input signal. |
| A-COM | GRAY: Common port where the alarm output signal is connected. |
| GND YELLOW: Used for earth-grounding. |
- Loosen the front cover as shown.
- Loosen the zoom/focus lever slightly.
- Position the zoom/focus lever to WIDE (NEAR) or TELE (FAR) as appropriate.
- Then, tighten the zoom/focus lever to fix the adjusted position.
- Turn the front cover to tighten it.
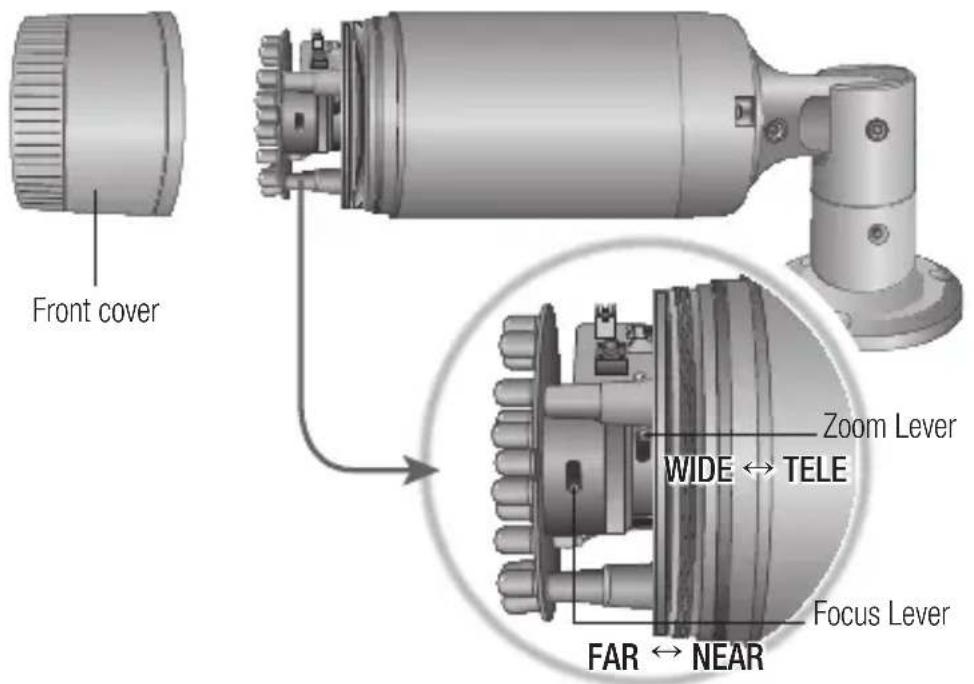

■ To ensure seamless waterproofing, tighten up the front cover by turning it to the end. When fixing the front cover, ensure that the triangle of the main body faces the triangle of the front cover.
■ Use the lever to adjust the zoom factor or focus, and turn the lever clockwise to fix it.
■ Before you can adjust the zoom factor/focus of the lens, loosen and remove the front cover.
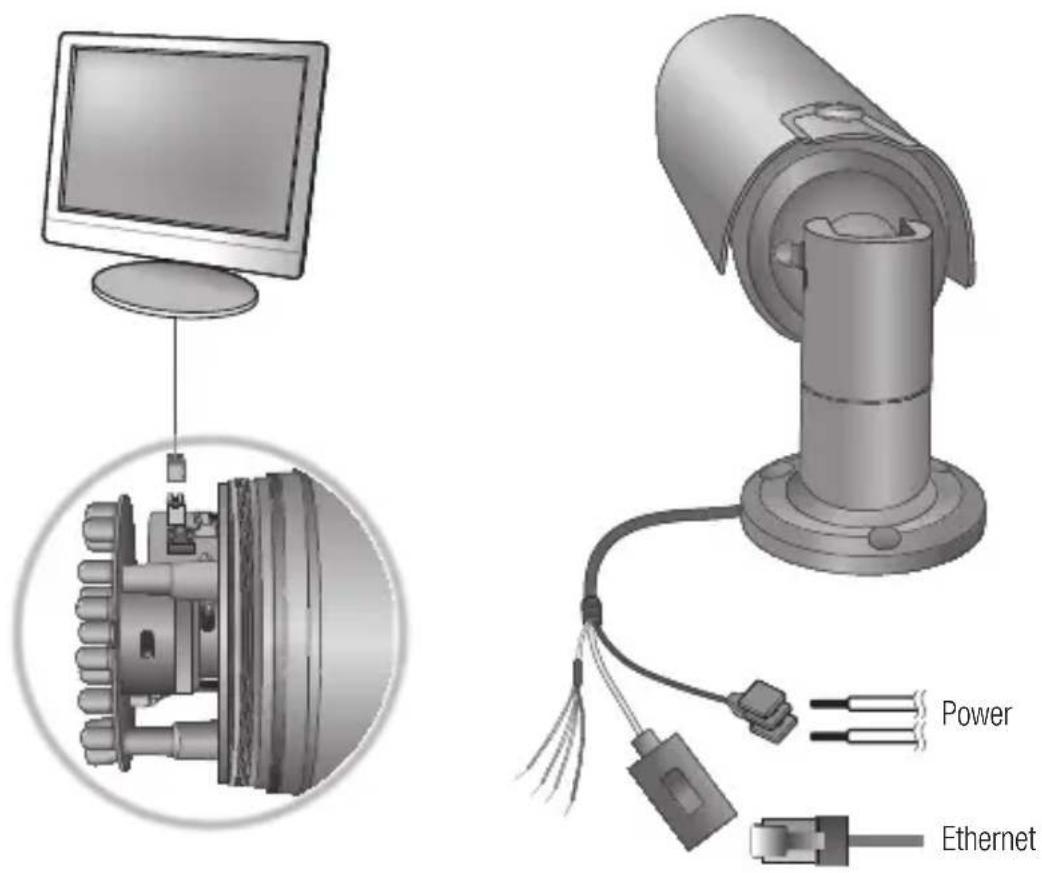
Connecting to the monitor
Use the test monitor cable to connect the video output port of the camera with the video input port of the monitor.

In the initial installation of the camera, you can connect the camera to the monitor for checking the connection status.
You must set

- The BNC Out terminal of the product is provided for easier installation, and is not recommended for monitoring purposes.
If you keep the BNC cable connected, a risk of lightening may cause damage or malfunction to the product.
Ethernet Connection
Connect the Ethernet cable to the local network or to the Internet.
Power Supply
Use the screwdriver to connect each line (+, -) of the power cable to the corresponding power port of the camera.

- Be careful not to reverse the polarity when you connect the power cable.
You can also use a router featuring PoE (Power over Ethernet) to supply power to the camera.
If PoE and DC 12V are both applied, this camera will get supplied with power from PoE.
- Please make sure the monitor and camera are turned off when connecting them.
Manual Network Setup
Run to display the camera search list.
At the initial startup, both [Auto Set] and [Manual Set] will be grayed out.

- For cameras found with the IPv6 setting, these buttons will be grayed out as the cameras do not support this function.
-
Select a camera in the search list.
Find the MAC (Ethernet) address
labeled on the rear of the camera.
Both the [Auto Set] and [Manual Set]
buttons will be activated.
-
Click [Manual Set].
The Manual Setting dialog appears.
The default values of ,
, , and of the camera will be displayed.
- In the pane, provide the necessary information.
- MAC (Ethernet) Address : The MAC (Ethernet) address of the applicable camera will be set automatically so you don't need to input it manually.

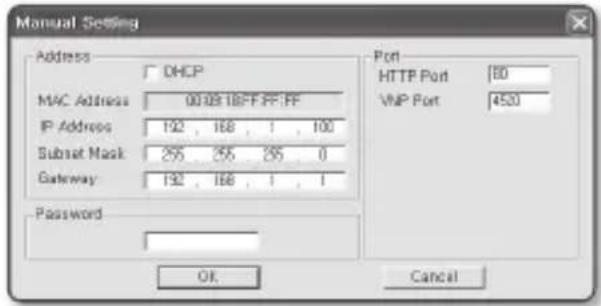

- You can configure the static IP settings only if the DHCP checkbox is unchecked.
-
In the pane, provide necessary information.
-
HTTP Port : Used to access the camera using the Internet browser, defaulted to 80. Use the spin button to change the HTTP Port value.
-
VNP Port : Used to control the video signal transfer, defaulted to 4520.
-
Enter the password.
This is the login password for the "admin" user who accesses the camera.
The default password is "4321".
- Click [OK].
Manual network setup will be completed.
- When the manual setup including IP is completed, the camera will restart.
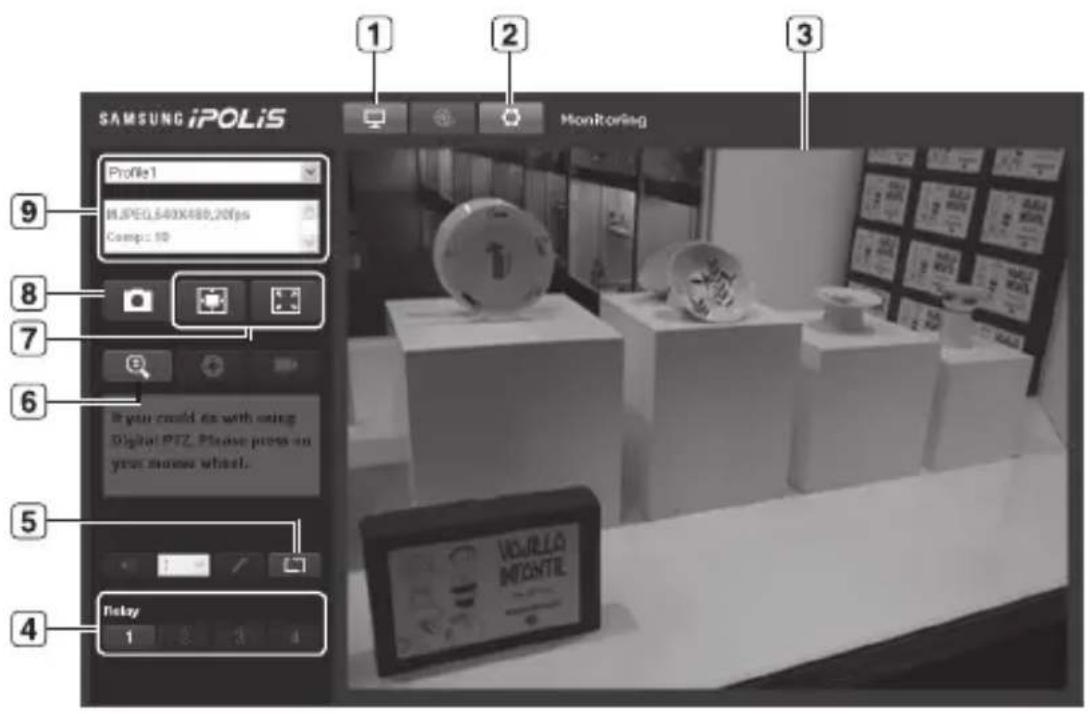
| Item Description |
| 1 | Monitoring Move to the monitoring screen. |
| 2 | Setup Move to the Setup screen. |
| 3 | Viewer Screen Displays the Live video on the screen. |
| 4 | Alarm Output Activate the Alarm Out port. |
| 5 | Hide the alarm indicator Hides the alarm indicator near the border of the viewer screen. |
| 6 | Digital zoom You can use the mouse wheel to activate the digital zooming. |
| 7 | Screen Optimization, Full Screen Adjust the screen to the optimal size, and display the Full Screen icon on the Live screen. |
| 8 Capture Saves the snapshot as an image file in the .bmp format. |
| 9 Video Format | You can select a profile type inunder thesetup menu.∅ If the “Invalid codec” message is displayed, select a profile type from the profile list again. |

If the temperature drops below the operational range, video signal may not be produced. In such cases, please wait for the video.

Samsung Techwin cares for the environment at all product manufacturing stages, and is taking measures to provide customers with more environmentally friendly products.
The Eco mark represents Samsung Techwin's devotion to creating environmentally friendly products, and indicates that the product satisfies the EU RoHS Directive.

SALES NETWORK
SAMSUNG TECHWIN CO., LTD.
Samsungtechwin R&D Center, 701, Sampyeong-dong, Bundang-gu, Seongnam-si, Gyeonggi-do, Korea, 463-400
TEL: +82-70-7147-8740\~60 FAX: +82-31-8018-3745
100 Challenger Rd. Suite 700 Ridgefield Park, NJ 07660
Toll Free : +1-877-213-1222 Direct : +1-201-325-6920
Fax: +1-201-373-0124
www.samsungcctvusa.com
SAMSUNG TECHWIN EUROPE LTD.
Samsung House, 1000 Hillswood Drive, Hillswood Business
Park Chertsey, Surrey, UNITED KINGDOM KT16 OPS
TEL: +44-1932-45-5300 FAX: +44-1932-45-5325
CAMÉRA RÉSEAU
Guide de prise en main rapide
SNO-5080R

Français
Contenu
natural_image
3D diagram of a security camera with labeled components (no text or symbols present)
Connexion à l'écran
100 Challenger Rd. Suite 700 Ridgefield Park, NJ 07660
Toll Free : +1-877-213-1222 Direct : +1-201-325-6920
Fax: +1-201-373-0124
www.samsungcctvusa.com
SAMSUNG TECHWIN EUROPE LTD.
Samsung House, 1000 Hillswood Drive, Hillswood Business
Park Chertsey, Surrey, UNITED KINGDOM KT16 OPS
TEL: +44-1932-45-5300 FAX: +44-1932-45-5325
ネットワークカメラ
クイックガイド
SNO-5080R

日本語
CE
SAMSUNG
キット内容
100 Challenger Rd. Suite 700 Ridgefield Park, NJ 07660
Toll Free: +1-877-213-1222 Direct: +1-201-325-6920
Fax: +1-201-373-0124
www.samsungcctvusa.com
SAMSUNG TECHWIN EUROPE LTD.
Samsung House, 1000 Hillswood Drive, Hillswood Business
Park Chertsey, Surrey, UNITED KINGDOM KT16 OPS
TEL: +44-1932-45-5300 FAX: +44-1932-45-5325
CÁMARA DE RED
natural_image
3D diagram of a surveillance camera with labeled components (no text or symbols present)
Conexión al monitor
- Haga clic en [Manual Set].
100 Challenger Rd. Suite 700 Ridgefield Park, NJ 07660
Toll Free : +1-877-213-1222 Direct : +1-201-325-6920
Fax: +1-201-373-0124
www.samsungcctvusa.com
SAMSUNG TECHWIN EUROPE LTD.
Samsung House, 1000 Hillswood Drive, Hillswood Business
Park Chertsey, Surrey, UNITED KINGDOM KT16 OPS
TEL: +44-1932-45-5300 FAX: +44-1932-45-5325
CÂMARA DE REDE
100 Challenger Rd. Suite 700 Ridgefield Park, NJ 07660
Toll Free : +1-877-213-1222 Direct : +1-201-325-6920
Fax: +1-201-373-0124
www.samsungcctvusa.com
SAMSUNG TECHWIN EUROPE LTD.
Samsung House, 1000 Hillswood Drive, Hillswood Business
Park Chertsey, Surrey, UNITED KINGDOM KT16 OPS
TEL: +44-1932-45-5300 FAX: +44-1932-45-5325