SurroundBar 3000 - Soundbar POLK - Free user manual and instructions
Find the device manual for free SurroundBar 3000 POLK in PDF.
Download the instructions for your Soundbar in PDF format for free! Find your manual SurroundBar 3000 - POLK and take your electronic device back in hand. On this page are published all the documents necessary for the use of your device. SurroundBar 3000 by POLK.
USER MANUAL SurroundBar 3000 POLK
5601 Metro Drive Baltimore, Maryland 21215 800-377-7655 (outside USA & CANADA: 410-358-3600) www.polkaudio.com HBP2732A3 Customer Service Hours of Operation: Monday-Friday, 9am-5:30pm est polkcs@polkaudio.com Important Safety Instructions This product was designed and manufactured to meet strict quality and safety standards. There are, however, some installation and operation precautions which you should be particularly aware of.
1. Read Instructions. All the safety and operating instruc
tions should be read before the system is operated.
2. Retain Instructions. The safety and operating instructions
should be retained for future reference.
3. Heed Warnings. All warnings on the appliances and in
the operating instructions should be adhered to.
4. Follow Instructions. All operating and use instructions
5. Cleaning. Unplug the appliance from wall outlet before
cleaning. Do not use liquid cleaners or aerosol cleaners. Use a damp cloth for cleaning.
6. Attachments. Do not use attachments not recommended
by the product manufacturer as they may cause hazards.
7. Water and Moisture. Do not use these appliances near
water: for example, near a bath tub, washbowl, kitchen sink, or laundry tub, in a wet basement, or near a swim
ming pool, and the like.
8. Accessories. Do not place these appliances on an
unstable cart, stand, tripod, bracket, or table. The audio/ video products may fall, causing serious injury to a child or adult, and serious damage to the products. Use only with a cart, stand, tripod, bracket, or table recommended by the manufacturer, or sold with the appliances. Any mounting of the appliances should follow the manufac
turer’s instructions, and should use mounting accessories recommended by the manufacturer.
9. Ventilation. Slots and openings in the cabinet are
provided for ventilation and to ensure reliable operation of the appliances and to protect them from overheating, and these openings must not be blocked or covered. The openings should never be blocked by placing the prod
ucts on a bed, sofa, rug, or other similar surface. This product should never be placed near or over a radiator or heat register. This product should not be placed in a built-in installation such as a bookcase or rack unless proper ventilation is provided or the manufacturer’s instructions have been adhered to. 10 . Power Sources. This product should be operated only from the type of power source indicated on the marking labels. If you are not sure of the type of power supply to your home, consult your appliance dealer or local power company.
11. Grounding or Polarization. This product is equipped
with polarized alternating-current line plugs (plugs having one blade wider than the other). This plug will fit into the power outlet only one way. This is a safety feature. If you are unable to insert the plug fully into the outlet, try reversing the plug. If the plug should still fail to fit, contact your electrician to replace your obsolete outlet. Do not defeat the safety purpose of the polarized plug.
12. Power Cord Protection. Power-supply cord should be
routed so that it is not likely to be walked on or pinched by items placed upon or against it, paying particular attention to cords at plugs, convenience receptacles, and the point where they exit from the appliances.
13. Lightning. For added protection for this audio/video prod
uct during a lightning storm, or when it is left un-attended and unused for long periods of time, unplug it from the wall outlet and disconnect the antenna or cable system. This will prevent damage to the product due to lightning and power-line surges.
14. Power Lines. An outside antenna system should not be
located in the vicinity of overhead power lines or other electric light or power circuits, or where it can fall into such power lines or circuits. When installing an outside antenna system, extreme care should be taken to keep from touching such power lines or circuits as contact with them might be fatal.
15. Overloading. Do not overload wall outlets and extension
cords as this can result in a risk of fire or electric shock.
16. Object and Liquid Entry. Never push objects of any kind
into this product through openings, as they may touch dangerous voltage points or short out parts that could result in a fire or electric shock. Never spill liquid of any kind on this audio/video product.
17. Servicing. Do not attempt to service this product yourself,
as opening or removing covers may expose you to dangerous voltage or other hazards. Refer all servicing to qualified service personnel.
18. Damage Requiring Service. Unplug this product from wall
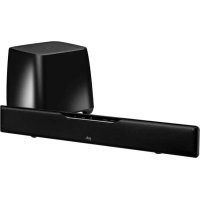
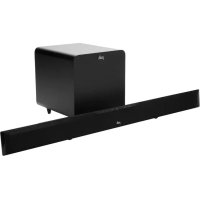
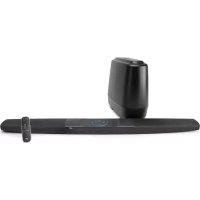
outlets and refer servicing to qualified service personnel under the following conditions: a. When the power supply cord or plug is damaged. b. If liquid has been spilled, or objects have fallen into the product. c. If the product has been exposed to rain or water. d. If the product does not operate normally by following the operating instructions. Adjust only those controls that are covered by the operating instructions, as an improper adjustment of other controls may result in damage and will often require extensive work by a qualified technician to restore the product to its normal operation. e. If the product has been dropped or the cabinet has been damaged. f. When the product exhibits a distinct change in performance this indicates a need for service. English4 5 Polk Customer Service 800-377-7655 (Outside USA & Canada: 410-358-3600) Customer Service Hours of Operation: Monday-Friday, 9am-5:30pm est polkcs@polkaudio.com 19. Replacement Parts. When replacement parts are required, be sure the service technician has used replacement parts specified by the manufacturer or that the parts have the same characteristics as the original part. Unauthorized substitutions may result in fire, electric shock or other hazards. CAUTION: Danger of EXPLOSION if battery is incorrectly replaced. Replace only with the same or equivalent type. (CR2025) WARNING: Do not expose batteries or battery pack to excessive heat such as sunshine, fire or the like.20. Safety Check. Upon completion of any service or repairs to this product, ask the service technician to perform safety checks to determine that the products are in proper operating condition.21. Carts and Stands. The appliances should be used only with a cart or stand that is recom mended by the manufacturer. An appliance and cart combination should be moved with care. Quick stops, excessive force, and uneven surfaces may cause the appliance and cart combination to overturn. Use caution when moving the cart/apparatus combination to avoid injury from tip-over.22. This product is not intended for use outdoors. The CAUTION marks shown here are located on the back of your SurroundBar Speaker System CAUTION: To prevent electric shock, match wide blade of plug to wide slot, insert fully. CAUTION: No naked flame sources, such as candles, should be placed on the apparatus.Radiation Exposure Statement This device complies with FCC radiation exposure limits set forth for an uncontrolled environment and it also complies with Part 15 of the FCC RF Rules. This equipment should be installed and operated with a minimum distance of 20 centimeters between the radiator and your body.OperationThis equipment complies with Part 15 of the FCC Rules and Industry Canada RSS-210. Operation is subject to the following two conditions: 1) This device may not cause interference, and 2) This device must accept any interference, including interference that may cause undesired operation of the device.Class B Emissions LimitsThis Class B digital apparatus meets all requirements of the Canadian Interference—Causing Equipment Regulations.The device meets the exemption from the routine evaluation limits in section 2.5 of RSS 102 and compliance with RSS-102 RF exposure, users can obtain Canadian information on RF exposure and compliance. Product DisposalCertain international, national and/or local laws and/or regulations may apply regarding the disposal of this product. For further detailed information, please contact the retailer where you purchased this prod uct or the Polk Importer/Distributor in your country. A listing of Polk Importer/ Distributors can be found on the Polk website: www.polkaudio.com or by contacting Polk at: 5601 Metro Drive, Baltimore, Maryland 21215, USA. Phone: 1-410-358-3600; in California: 1-800-377-7655.NOTE:This equipment has been tested and found to comply with the limits for a Class B digital device, pursuant to part 15 of the FCC Rules. These limits are designed to provide reasonable protection against harmful interference in a residential installation. This equipment generates, uses and can radiate radio frequency energy, and, if not installed and used in accordance with the instructions, may cause harmful interference to radio communications. However, there is no guarantee that interference will not occur in a particular installation. If this equipment does cause harmful interference to radio or television reception, which can be determined by turning the equipment off and on, the user is encouraged to try to correct the interference by one or more of the following mea sures: Reorient or relocate the receiving antenna. Increase the separation between the equipment and receiver. Connect the equipment into an outlet on a circuit different from that to which the receiver is connected. Consult the dealer or an experienced radio/TV technician for help. • Theantenna(s)usedforthistransmittermustbeinstalledto provide a separation distance of at least 20 cm from all persons and must not be co-located or operating in conjunction with any other antenna or transmitter. • Changesormodicationsnotexpresslyapprovedbytheparty responsible for compliance could void the user’s authority to operate the equipment. Inside Your SurroundBar 2000 IHT Carton: Important Note: If anything is missing or dam- aged, or if your Polk SurroundBar 2000 IHT fails to operate, please notify your dealer immediately. We recommend keeping your original carton and packing materials in case you need to ship the unit in the future. Specifications Dimensions 3 3/4" H x 31" W x 2 1/2" D (9.53 cm x 78.74 cm x 6.35 cm) Weight 4 lbs 14 oz (1.88 kg) Power Requirements 20 V, 2.7 A Model SurroundBar 2000 Instant Home Theater Remote Battery CR2025 Remote Control 6' Digital (Optical) Cable Remote Control (Battery Included) SurroundBar 20V Power Supply Owner’s Manual Quick Start Guide Online Registration Card Source 1 VOL BASS SOURCE Power Mute Source 2 Bass Volume Volume6 7 Polk Customer Service 800-377-7655 (Outside USA & Canada: 410-358-3600) Customer Service Hours of Operation: Monday-Friday, 9am-5:30pm est polkcs@polkaudio.com Controls
1. Learn—Puts the bar into “learning mode” so
you can program it to respond to commands from your TV’s IR remote control.
2. Source—Changes which input source
you are listening to.
3. Power ( )—Turns on the bar or puts
it in standby mode. LED—A light that shines green, orange or red to indicate operating status.
4. Mute—Mutes the sound coming from
the SurroundBar 2000 IHT.
5. Volume Up and Down ( / )—Adjusts
the volume of the SurroundBar 2000 IHT.
6. Audio Inputs (Source 1 or 2)—Where you
connect your TV (or other source) to the SurroundBar 2000. Use the 6’ optical cable (Source 1) provided or analog L/R audio cable (Source 2) not included.
7. Power Connection—The bar power supply
connects here. Power LED Normal Mode: Green Steady—Power is on; all is well. Red Steady—The bar is in standby mode. Green Two Blinks—A remote control signal is received successfully. Green Slow Blinking—System is muted. Green Fast Blinking (After pressing volume up button)—You have reached the maximum volume. Power LED Learning Mode: (See page 8 for instructions.) Orange Blinking—The bar is in learning mode. Orange Steady—The bar is in learning mode and a bar button has been selected. Green Blinking—The bar has successfully learned a remote control command. Red Blinking—The bar has failed to learn a remote control command. Red and Orange Blinking—Learned IR codes have been successfully erased.
Source 1 LED Source 2 LED Power LED
Where To Locate Your Bar For The Best Sound Note: The rubber feet are detachable and may be removed entirely (for wall-mounting the bar) or moved along the bottom surface of the bar, depending upon your installation. Overall Dimensions
Top of Bar to Keyhole Slots
Note: If you wall mount your SurroundBar, ensure that your wall anchors secure properly into the wall and that they can bear the weight of the SurroundBar, which is 4 lbs. 14 oz. (1.88 kg).
Table Mount Wall Mount8 9 Polk Customer Service 800-377-7655 (Outside USA & Canada: 410-358-3600) Customer Service Hours of Operation: Monday-Friday, 9am-5:30pm est polkcs@polkaudio.com How To Connect Your Bar Note: If your TV does not have an optical output, you can use the optical output from your DVD player or your cable/satellite box to connect to the optical input on the bar. Then simply use the other bar input for your other audio source. Check That Your TV Is In The Correct Audio Format The SurroundBar 2000 does not decode the Dolby Digital audio format. Check that the audio format of the input source (TV, DVD or Blu-ray) is set to PCM 2-channel audio. How To Optimize The Sound When TV Speakers Are On You should hear sound from the bar. If you don’t, turn up the volume on the bar using its volume control buttons. If your bar is connected to your TV, there’s a very good chance your TV speakers are also playing. It’s impossible to give specific instructions on how to turn off the speakers for every TV, but here’s a way to do it that covers many of the TVs out there.
2. Press this button. You should see
3. Next, look for an option to control audio
functions and select it. The setting to turn off your TV’s internal speakers should be here. If you can’t turn off your TV internal speakers, don’t worry. Your SurroundBar 2000 IHT will make your TV sound much better. To enjoy the best perfor- mance from your bar, you’ll want it to play louder than your TV. Use the following steps to adjust the volume balance between your TV and the bar:
1. If necessary, program your bar to respond to
the volume up and down control commands of your TV remote. (See “How To Setup A Remote Control For Your SurroundBar 2000 IHT” on pages 8-9.)
2. Turn your TV volume all the way down using
the control buttons on your TV.
3. Then, using the volume keys on your bar,
set the volume to a normal listening level (do not use the remote control). After you make these adjustments, your Surround- Bar 2000 IHT should always be louder than your TV speakers. Then use the TV remote control to adjust the volume as you normally do. 2.7A 20V
Note: Remove the protective cap prior to inserting cable. How To Set Up A Remote Control For Your SurroundBar IHT SmartBar™ Programming Note: For your SurroundBar to respond to your remote control, you MUST FIRST program the bar to respond to your television’s original IR (Infra-Red) remote. An RF (Radio Frequency) remote will not work. Other remotes (cable, satellite) will work only after you have programmed the bar to respond to the TV’s IR remote. Programming Instructions: Your SurroundBar IHT is currently programmed to respond to the remote control that is included with the product. However, we strongly recommend programming the SurroundBar to also respond to your existing remote control using the steps illustrated below. This will enable you to oper- ate all of your components using a single remote control. While programming the SurroundBar, ignore anything that may be displayed on the TV screen. Example: To teach your bar the “Volume Up” command of your remote control:
LED VOL LED Press and hold “LEARN” for 2 seconds, or until LED blinks orange, then release the “LEARN” button.
The SurroundBar is turned on and the LED is solid green. And you have sound coming from the bar. Hold TV remote 1' - 2' from SurroundBar. Press and release Volume Up “ ” LED turns solid orange. Solid orange LED Blinks orange LED blinks with each button press VOL LED LED blinks green, then turns solid green Tap “Volume Up” button on your TV’s remote control
4 - 8 times, once per second. Tap, do not hold.
When the LED blinks green quickly for 3 seconds, the command has been learned. The LED will become solid green. 1' - 2' Verify command works.10 11 Polk Customer Service 800-377-7655 (Outside USA & Canada: 410-358-3600) Customer Service Hours of Operation: Monday-Friday, 9am-5:30pm est polkcs@polkaudio.com Repeat steps 1-6 to program “Volume Down” ( ), Source, Mute and Power button ( ). Note: If your bar fails to learn certain IR remote codes, the power LED will blink red. Try erasing any previously programmed codes (see below) and carefully repeat steps 1-6 above. Code Erasing Procedure: If you have pro- grammed your SurroundBar IHT to respond to a remote control and you no longer want it to do so, erase the codes by pressing the LEARN key for about two seconds while the unit is in standby mode (power LED is red). You’ll know that previ- ously learned codes have been successfully erased when the power LED blinks orange twice. Note: This procedure removes ALL of your bar’s remote control programming. If you only need to change the programming for some of the bar buttons, follow the six steps in the sequence previ- ously described to redo any previous programming. The SurroundBar will continue to respond to the provided credit card remote control.
LED VOL LED Press and hold “LEARN” for 2 seconds, or until LED blinks orange, then release the “LEARN” button.
The SurroundBar is turned on and the LED is solid green. And you have sound coming from the bar. Hold TV remote 1' - 2' from SurroundBar. Press and release Volume Up “ ” LED turns solid orange. Solid orangeLEDBlinks orange LED blinks witheach button press VOL LED LED blinks green,then turns solid green Tap “Volume Up” button on your TV’s remote control
4 - 8 times, once per second. Tap, do not hold.
When the LED blinks green quickly for 3 seconds, the command has been learned. The LED will become solid green. 1' - 2' Verify command works. Troubleshooting The bar does not power on.
- Ensure you have plugged the power supply into a live wall outlet.
- Ensure that all components of the power supply are connected properly.
- Ensure the power supply is properly connected to the bar power input. No sound from the bar.
- Check that the TV or cable box is providing a signal.
- If necessary, check using an alternate source.
- Check that the bar is receiving power and is turned on.
- Turn up the volume of the bar.
- Check the input cables to make sure they are connected securely.
- Turn up the volume of your television or cable box.
- Audio processing (see FAQ’s on pages 10-11)—there may be audio processing occurring prior to reaching the bar. Disable this processing. The included remote control won’t work.
- Ensure the battery’s protective plastic tab has been removed.
- Replace the battery (CR2025). The bar won’t learn my remote control commands.
- Carefully follow the programming instructions on the previous page of this manual.
- Hold the remote steady and 1-2 feet from the front of the bar.
- Quickly “tap” the button on your existing remote until the status LED blinks green. Note: The bar learns almost all IR commands, but some IR protocols cannot be programmed. The volume of my television speakers gets louder than my SurroundBar 2000 system over time.
- Turn off your TV speakers per the instructions on page 7 of this manual.
- When the remote control volume button is held down, your television may change volume levels faster than the bar. Use the buttons on the bar to adjust the volume of the bar to the correct balance with the TV speakers. FAQ’s (Frequently Asked Questions) My TV does not have an optical output. How do I connect my audio? You have several options for connecting your audio:
- Use the optical output of your source unit (cable/satellite box, DVD player, etc.) and connect directly to the SurroundBar2000 using the supplied optical cable.
- Use the 1/8" (3.5mm) analog/headphone output of your TV (if available) and connect directly to the SurroundBar 2000 using 1/8" (3.5mm) to 1/8” (3.5mm) analog cable (cable not included).
- Use the RCA audio outputs (white/red pair) on your TV (if available) and connect directly to the SurroundBar 2000 using 1/8" (3.5mm) to 1/8” (3.5mm) analog cable and 1/8" (3.5mm) to RCA adapter (cables not included).12 13 Polk Customer Service 800-377-7655 (Outside USA & Canada: 410-358-3600) Customer Service Hours of Operation: Monday-Friday, 9am-5:30pm est polkcs@polkaudio.com What if my provided optical cable is too short?
- We did our best to provide a cable of adequate length; however, there might be a few setup instances in which the cable may be too short. If that is your situation, your local electronics store will have cables that meet your required length. My audio sounds strange and distorted.
- Your SurroundBar 2000 requires a clean, unaltered stereo signal for proper audio performance. If the sound from your SurroundBar 2000 is strange or distorted, then check the audio menus of whatever source(s) are connected to your SurroundBar 2000 and make sure any audio processing is turned off. Why can’t I successfully program the SurroundBar 2000 to respond to my remote control?
- There are many remote control formats, and we have done our best to make the SurroundBar 2000 compatible with the most popular brands. However, there are likely some cases in which the bar will not be able to learn your remote codes.
- In this case, please use the remote control provided with the SurroundBar 2000 product or try a different universal remote control. Note: RF only remotes will not work with this system. How do I control the SurroundBar 2000? There are three ways to control your SurroundBar 2000:
- Use the buttons on the front of the bar.
- Use the provided remote control.
- Program the SurroundBar 2000 to respond to your existing remote (see included instructions). My SurroundBar 2000 was responding to commands, but now it isn’t. What should I do?
- In this rare event, simply turn off the power (switch located on the back of the bar), wait a few seconds, and then turn the power back on. This should restore control. How do I erase previously learned remote control commands?
- If you have programmed your SurroundBar 2000 to respond to a remote control and you no longer want it to do so, then you can erase the codes by pressing the LEARN key for about two seconds while the unit is in standby mode (power LED is red). The SurroundBar 2000 will continue to respond to the provided credit card remote control. To contact Customer Service/ Technical Support:
- If you have a question or comment, please feel free to call us or email us. In North America and Canada, call Polk Customer Service: 800-377-7655 (M-F 9-5:30 EST) or via email polkcs@polkaudio.com. Outside the US, call 410-358-3600. Polk is a DEI Holdings, Inc. Company. Polk and SurroundBar are registered trademarks of Polk Audio, Inc. Products that have earned the Energy Star
are designed to protect the environment through superior energy efficiency. is a trademark of SRS Labs, Inc. TruSurround HD technology is incorporated under license from SRS Labs, Inc. Limited Warranty Polk Audio, Inc., warrants to the original retail purchaser only. This warranty will terminate automatically prior to its stated expiration if the original retail purchaser sells or transfers the Product to any other party. Polk Au- dio, Inc., warrants, to the original retail purchaser only, that the LOUDSPEAKER(S), PASSIVE CROSSOVER COMPONENT(S) and ENCLOSURE on this Polk Audio Loudspeaker Product will be free from defects in material and workmanship for a period of three (3) years from the date of original retail purchase from a Polk Audio Authorized Dealer. Furthermore, Polk Audio, Inc., warrants, to the origi- nal retail purchaser only, that any AMPLIFIER OR OTHER ELECTRONIC COMPONENT that may be included in this Polk Audio Loudspeaker Product will be free from defects in material and workmanship for a period of one (1) year from the date of original retail purchase from a Polk Audio Authorized Dealer. To allow Polk Audio to offer the best possible warranty service, please fill out the Product Reg- istration Card(s) and send it to the Factory at the address provided on the Product Registration Card(s) within ten (10) days of the date of original purchase. Defective Products must be shipped, together with proof of purchase, prepaid insured to the Polk Audio Authorized Dealer from whom you purchased the Product, or to the Factory at 1 Viper Way, Vista, California 92081. Products must be shipped in the original shipping container or its equivalent; in any case the risk of loss or damage in transit is to be borne by you. If upon examination at the Factory or Polk Audio Autho- rized Dealer it is determined that the unit was defective in materials or workmanship at any time during this Warranty period, Polk Audio or the Polk Audio Authorized Dealer will, at its option, repair or replace this Product at no additional charge, except as set forth below. All replaced parts and Products become the property of Polk Audio. Products replaced or repaired under this warranty will be returned to you, within a reasonable time, freight prepaid. This warranty does not include service or parts to repair damage caused by accident, disaster, misuse, abuse, negligence, inad- equate packing or shipping procedures, commercial use, voltage inputs in excess of the rated maximum of the unit, cosmetic appearance of cabinetry not directly attributable to defect in materials or workmanship, or service, repair, or modification of the Product which has not been authorized or approved by Polk Audio. This warranty shall terminate if the serial number on the Product has been removed, tampered with or defaced. This warranty is in lieu of all other expressed Warranties. If this Product is defective in materials or workmanship as warranted above, your sole remedy shall be repair or replacement as provided above. In no event will Polk Audio, Inc. be liable to you for any incidental or consequential damages arising out of the use or inability to use the Product, even if Polk Audio, Inc., or a Polk Audio Authorized Dealer, has been advised of the possibility of such dam- ages, or for any claim by any other party. Some states do not allow the exclusion or limitation of consequential dam- ages, so the above limitation and exclusion may not apply to you. All implied warranties on this Product are limited to the duration of this expressed Warranty. Some states do not allow limitation on how long an implied Warranty lasts, so the above limitations may not apply to you. This Warranty gives you specific legal rights, and you also may have other rights which vary from state to state. This Warranty applies only to Products purchased in the United States of America, its possessions, and U.S. and NATO armed forces exchanges and audio clubs. The Warranty terms and conditions applicable to Products purchased in other countries are available from the Polk Audio Authorized Distributors in such countries. Customer Service Thank you for your Polk Audio purchase. If you have a question or comment, please feel free to call us or email us. In North America and Canada, call Polk Audio Customer Service 800-377-7655 (M-F, 9-5:30 EST) or via email polkcs@polkaudio.com. Outside the US, call 410-358-3600.14 15 Polk Customer Service 800-377-7655 (Outside USA & Canada: 410-358-3600) Customer Service Hours of Operation: Monday-Friday, 9am-5:30pm est polkcs@polkaudio.com Consignes de Sécurité Importantes Ce produit a été conçu et fabriqué pour répondre à de strictes normes de qualité et de sécurité. Veuillez cependant porter attention aux consignes de sécurité suivantes se rapportant à son installation et à son utilisation.