
Photo Basr - Digital photo frame INTENSO - Free user manual and instructions
Find the device manual for free Photo Basr INTENSO in PDF.
User questions about Photo Basr INTENSO
0 question about this device. Answer the ones you know or ask your own.
Ask a new question about this device
Download the instructions for your Digital photo frame in PDF format for free! Find your manual Photo Basr - INTENSO and take your electronic device back in hand. On this page are published all the documents necessary for the use of your device. Photo Basr by INTENSO.
USER MANUAL Photo Basr INTENSO
- Secure Digital Card (SD™)
- Secure Digital High Capacity (SDHC™)
Multimedia Card (MMC™)
Memory Stick (MS)
Operating instructions for Intenso Digital Photo Frame
Please comply with the following instructions to be informed about the different functions of the Intenso digital photo frame.
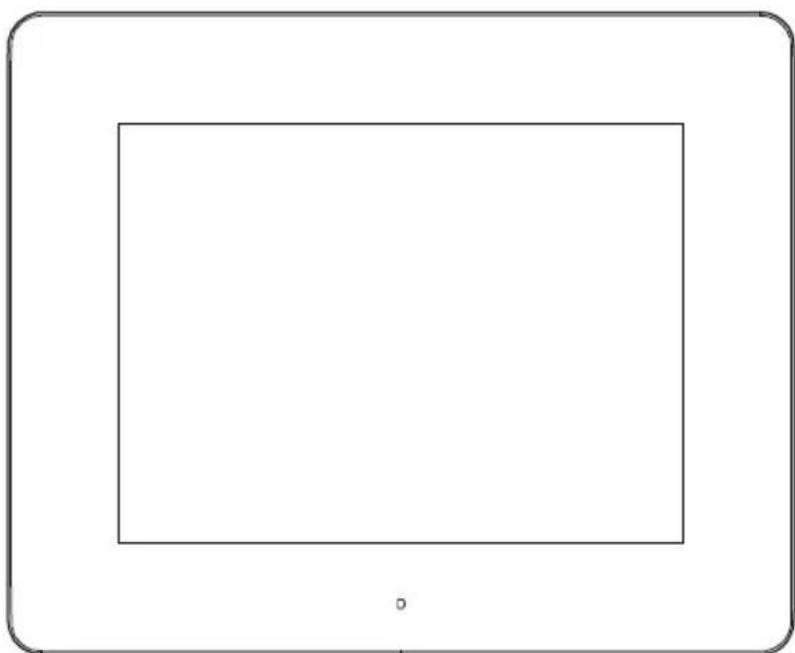
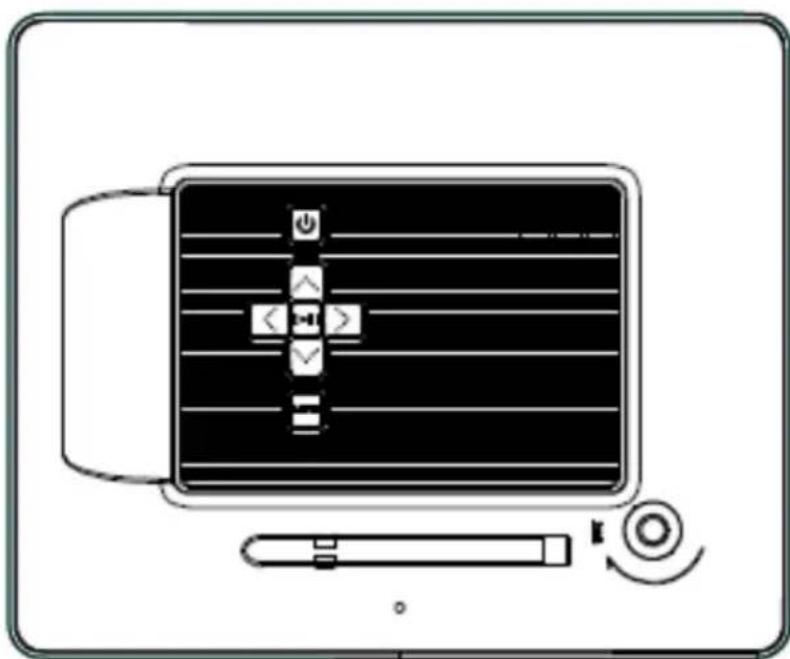
1) Assignment of keys rear of the unit
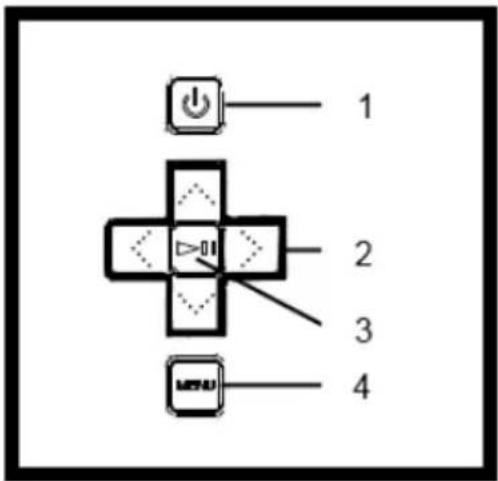
1 Power On / Off
2 Navigation keys
3 Play / Pause / OK key
4 Menu key
2) Remote control
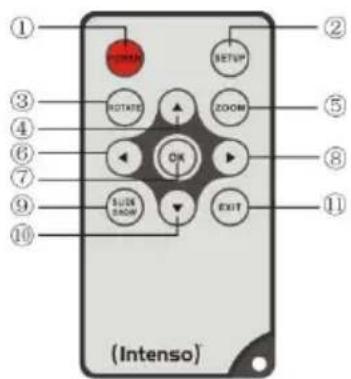
| 1 | POWER | Power On / Off |
| 2 | SETUP | Display of all settings |
| 3 | ROTATE | Rotating 90° clockwise |
| 4 | ▲ | Moves the cursor up |
| 5 | ZOOM | Enlarge the image in paused slide show |
| 6 | ← | Moves the cursor left |
| 7 | OK | Confirming the selected menu item |
| 8 | ▶ | Moves the cursor right |
| 9 | SLIDESHOW | Start slide show |
| 10 | ▼ | Moves the cursor down |
| 11 | EXIT | Return to superordinate menu |
3) Connect and switch on the digital photo frame
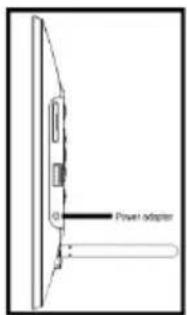
Connect the Power Adapter supplied with the frame (DCIN). Plug the other end of the Adapter into the Socket. The photo frame will now start automatically. Hold down the Power button briefly to turn it off or on again.
Please note:
- The plug must be placed next to the device so to be easily accessible.
Do not open the box of the line adapter. If the box is open, there is danger of life caused by electric shock. The product does not contain parts to be maintained.
Actuate the line adapter only with earthed plugs of AC 100-240V\~, 50 / 60Hz If you are not sure about the provision of electricity at the installation point, ask your energy provider. - Use the included line adapter and line connection cable Ktec KSAS0050500100VED only.
To interrupt the power supply of your equipment, unplug the adapter. While you are unplugging it, always hold the adapter. Do never pull the cable.
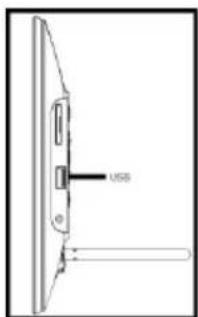
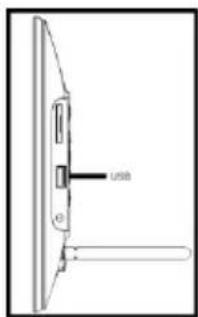
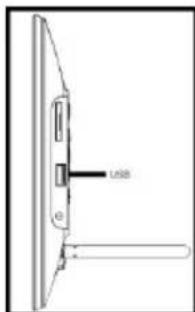
4) Insert memory cards | connect USB data carriers
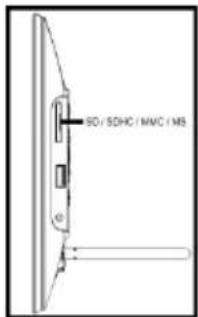
Insert memory cards into the card reader slot with the logo facing away from the display.
Caution: Please do not insert card with force!
The following memory card formats can be used with your digital photo frame:
- Secure Digital Card (SD™)
- Secure Digital High Capacity (SDHCTM)
Multimedia Card (MMC™)
Memory Stick (MS)
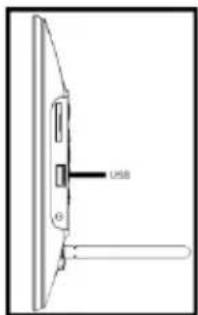
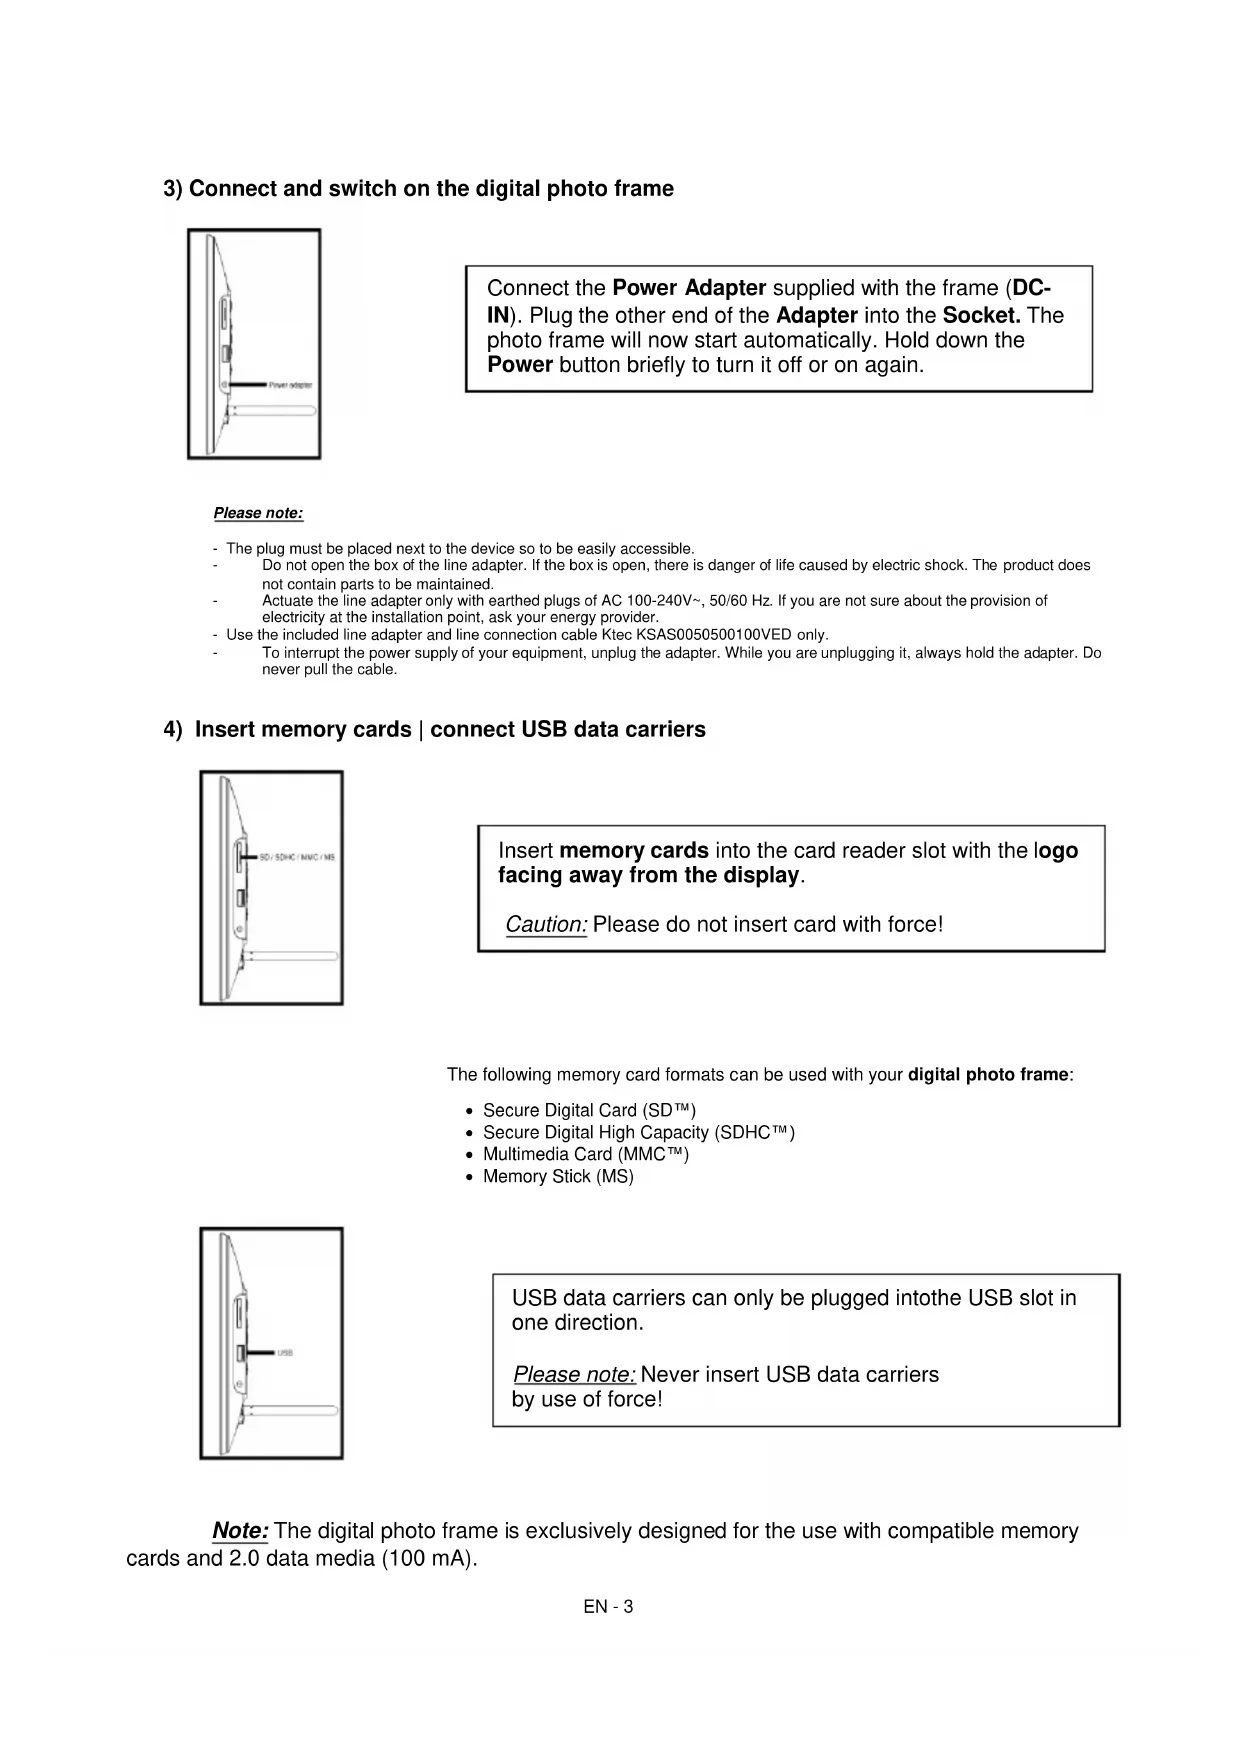
USB data carriers can only be plugged into the USB slot in one direction.
Please note: Never insert USB data carriers by use of force!
Note: The digital photo frame is exclusively designed for the use with compatible memory cards and 2.0 data media (100 mA).
5) General handling
Note: This device has an Eco Function. If it is activated (please open the settings for activation or deactivation), it automatically shuts down 4 hours after the last input. This function is already activated in the condition on delivery due to legal requirements.
a) Main menu
After starting up, the main menu appears.
In the main menu you can choose between multiple functions of the digital photo frame and the menu item settings. Press the cursor keys on the remote or the cursor keys on the unit to select a menu item. Confirm your selection with the Play / Pause / OK key on the remote or the OK key on the unit.
b) Selection of storage media
The EXIT key on the remote or the Menu key on the unit leads from the main menu to the selection of connected storage media. In this menu you can, if provided, choose between memory card and USB storage device. Confirm your selection with the OK key on the remote or the OK key on the unit. You then get back to the main menu automatically.
c) Displaying photos
If you already have inserted a storage medium with saved photos, the unit will automatically start a slide show of your photos. If no storage medium is inserted, the unit will start a slide show of pre-installed sample images (these cannot be changed). Press the menu key to get back to the main menu.
You can also start the slide show manually. To do that, navigate to the photo function in the main menu. Confirm your selection with the OK key on the remote or the Play / Pause key on the unit. The slide show will be started now. Alternatively you can press the Slideshow key on the remote to start a slide show from any other function directly.
Press the EXIT key on the remote or the RETURN key on the unit to leave the slide show and to call up the image preview menu. You can now navigate to a photo, confirm your selection with the OK key on the remote or the OK key on the unit and continue the slide show from this point directly. You can reach the respective super ordinate file folder by pressing the RETURN key in the image preview menu again. This is how you navigate easily between the various folders of your storage medium.
Functions during the slide show:
- You can switch a photo forward or back by pressing the cursor keys on the remote or the cursor keys on the unit right or left.
- You can stop a slide show by pressing the OK key on the remote or the Play / Pause key on the unit. The slide show is continued if you press the key again.
d) Calendar
Navigate to the calendar function in the main menu and confirm your selection with the OK key on the remote or the OK key on the unit.
In the calendar mode you can see the current time, the current calendar sheet and (with inserted storage medium with supported photo files) a slide show.
You can change the month and the year for the displayed calendar sheet by pressing the cursor keys on the remote or the cursor keys on the unit.
e) File system
Navigate to the file function in the main menu and confirm your selection with the OK key on the remote or the OK key on the unit.
Now all folders and files of the selected storage medium will be displayed. Navigate to a subfolder using the cursor keys on the remote or the unit and confirm your selection with the OK key on the remote or the OK key on the unit. Now all files and folders within the selected folder will be displayed. You can go back to the superordinate folder by pressing the EXIT key on the remote or the RETURN key on the unit.
In order to open a file directly from the file system, navigate to the desired file and confirm your selection with the OK key on the remote or the Play / Pause key on the unit. The file will now be played.
In order to delete a file or an entire folder from the selected storage medium, navigate to the desired file and then press the right cursor key on the remote. You can now see a dialogue field, in which you have to confirm the deletion to prevent accidental deletion. Press the OK key and the selected file or the selected folder will be deleted. Press the Menu / Exit key to get back to the file overview.
f) Changing the settings
Navigate to the settings function in the main menu and confirm your selection with the OK key on the remote or the OK key on the unit.
You now have the following setting options: Photo settings, calendar settings, and system settings. Navigate to the desired menu item and confirm your selection with the OK key on the remote or the OK key on the unit. Now all setting options will be displayed. You can navigate through the individual setting options with the Up / Down cursor keys on the remote or the cursor keys on the unit. You can customise the settings using the Left / Right cursor keys on the remote. To customise the settings without the remote please press the OK key on the unit. Now you can change the settings by pressing the cursor keys. Please confirm your selection with the RETURN key on the unit.
| Setting options | Description | |
| Photo Setup | Display Mode | Choose between slide show and thumbnail. |
| Photo Mode | Choose between original and full screen. | |
| Interval | Setting of display duration of individual slides during the slide show. | |
| Slideshow Show Repeat | Choose between a one-time display of an image or endless loop. | |
| Slideshow Effect | Select a specific transition effect or a random selection of transition effects. | |
| Slideshow Mode | Choose between displaying a single photo, or two, three, or four photos simultaneously. | |
| Play Mode | Choose between displaying the images in the order of storage on the medium or a random order. | |
| Calendar settings | Date | Setting the current date. |
| Set time format | Setting the time format: 12 (AM / PM) hours or 24 hours. | |
| Time | Setting the current time. | |
| System settings | Language | Select the desired language. |
| Brightness | Select the desired display brightness. | |
| Contrast | Select the desired display contrast. | |
| Saturation | Select the desired display chroma. | |
| Hue | Change the display colouring. | |
| Auto on | Activate/Deactivate automatic activation. | |
| Turn on time | Select the automatic activation time. | |
| Auto off | Activate/Deactivate automatic deactivation. | |
| Turn off time | Select the automatic deactivation time. | |
| Frequency | Set the frequency of automatic activation (every day, Monday to Friday, weekends, once). | |
| Eco | If you activate this function, the device will automatically shut down 4 hours after the last input. If you wish to use this device for an extended period of time, please deactivate this function. | |
| Default settings | Restore to factory settings. | |
| Version | The current version number will be displayed | |
| Update | Should a Firmware update be available on www.intenso.de, then you can install it in this menu item. | |
| Autostart Mode | Select the function that will start upon unit activation (photo and calendar). |
6) Product Specifications
| Display | Digital TFT LCD Display size: 8 inch (20,32 cm diagonal viewable image) Display modus: 4:3 Resolution: 800 x 600 Pixel |
| Power supply | Input: 100~240V AC, 50/60Hz Output: 5V 1A DC |
| USB port | USB Host 2.0 (High Speed) Supports USB storage mediums |
| Memory cards supported | • Secure Digital Card (SD™) • Secure Digital High Capacity (SDHC™) • Multimedia Card (MMC™) • Memory Stick (MS) |
| Picture size supported | JPEG, max. resolution: 9000*9000 pixels |
| Operating temperature | 0°C ~ +40°C |
| Dimensions | ~222*181*23 mm |
| Weight | ~395 gr. |
| Accessory | Remote control (incl. battery), Foot, Power supply (Ktec KSAS0050500100VED), multi-lingual operating instruction. |
You need help? Simply call our Technical Service Hotline at: +49 (0) 900 1 50 40 30 for 0.39 €/Min. with calls from the German telephone network. Different rates may apply to calls from mobile phones.
Enjoy Intenso's digital photo frame!
Service and Maintenance
Care
- In order to prevent danger from electric current do neither remove screws nor the case of the weather station.
- Do not operate this device near water. Do not expose the device to rain and moisture. Do not put any objects which store water or other fluids near the device.
- Do not install the picture near heaters, ovens or other heat issuing devices.
- Do not open the case. Do not try to repair the device yourself but have it repaired by qualified personnel only.
- Avoid using the device on sandy areas.
- Fully insert the power supply plug into the opening of the Intenso weather station. This will prevent electrostatic charge.
- Correctly and safely connect all ports.
- Do not push onto the display. Protect the display from direct sunlight.
- The picture frame only plays compatible data formats.
- Images may be protected by the rights of third persons. The play back without licence may infringe copyrights.
- When in operation, do not touch the Intenso weather station with metal objects.
- Avoid operating the device on pillows, sofas or other objects which support the development of heat as there is danger of overheating of the device.
- Do not remove memory cards during read operation. This may cause system crash or data loss.
- Do not switch off the device during an ongoing slide show.
- Do not wrap up the device directly after longer use. Ensure sufficient enough cooling. Otherwise, there is danger of overheating.
- In order to ensure a better service, changes of the operating instructions may be necessary.
Maintenance of the device
The device must be switched off.
Never spray or apply a fluid directly onto the display or case.
Cleaning the displays / case / frame
Carefully wipe the case, frame and LCD display with a soft cloth free from lint and chemicals. Only use cleaning agents which are specifically designed for LCD displays.
Disposal of electrical waste
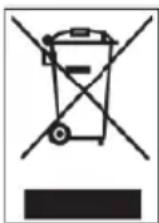
Devices marked with this symbol are subject to the EG Directive 2002/96/EG.
All electrical appliances and old appliances must be disposed off separately from the household waste and are to be returned to the state authorities designed for that purpose.
By correctly disposing of electrical old appliances environmental damage may be prevented.
(Intenso)
49377 Vechta
Germany
www.intenso.de

(Intenso) Warranty conditions

Dear Intenso customer,
Thank you for opting for a high-quality Intenso product. All Intenso products are subject to constant quality inspections and the legal warranty period applies, of course, from the date of purchase. Please be sure therefore to save the sales receipt as proof of purchase.
Warranty conditions
The warranty only covers material and production defects. Intenso GmbH is not liable for the loss of data in units sent to us. The free of charge warranty service covers the repair or replacement of defective parts. Please understand that we cannot render any warranty services, e.g. in case of:
- Misuse or improper handling, installation or use
- Damages, scratches or wear
- Modifications, manipulation or repairs by third parties
- Damages through force majeure or transport
Your Intenso GmbH
CLAIM PROCEDURE
In case of a claim, please proceed as follows:
- Only returns accompanied with all accessories and sales receipt are accepted.
- In addition, a RMA number is absolutely required for return shipments. You can request this RMA number via e-mail or through the service hotline.
- Please package the product including all accessories and the sales receipt safe for transport. Please stamp the package.
- Please affix the RMA number clearly visible on the outside of the package.
Please send to the following service address:
INTENSO GMBH
Service Hotline: +49 (0) 900 - 150 40 30
Service Center (your RMA-No.)
(0.39 €/min. from the landline in Germany. Usual costs apply.)
- Secure Digital Card (SD™)
- Secure Digital High Capacity (SDHCTM)
Multimedia Card (MMC™)
Memory Stick (MS)
- Secure Digital Card (SD™)
- Secure Digital High Capacity (SDHC™)
Multimedia Card (MMC™)
Memory Stick (MS)

Service Center (Votre referrerce RMA)
Service Hotline: +49 (0) 900 -150 40 30
- Secure Digital Card (SD™)
- Secure Digital High Capacity (SDHC™)
- Multimedia Card (MMC™)
Memory Stick (MS)
Tiene algo nua duda?
Nuestra linea hotline de serviceo专业技术e respondera con mucho gusto:
+49 (0) 900 1 50 40 30 a 0,39 €/min. desdela red telefónica fija de Alemania.Los precios para la Telefonía movableSEOSEOSEOSEOSEOSEOSEOSEOSEOSEOSEOSEOSEOSEOSEOSEOSEOSEOSEOSEOSEOSEOSEOSEOSEOSEOSEOSEOSEOSEOSEOSEOSEOSEOSEOSEOSEOSEOSEOSEOSEOSEOSEOSEOSEOSEOSEOSEOSEOSEOSEOSEOSEOSEOSEOSEOSEOSEOSEOSEOSEOSEOSEOSEOSEOSEOSEOSEOSEOSEOSEOSEOSEOSEOSEOSEOSEOSEOSEOSEOSEOSEOSEOSEOSEOSEOSEOSEOSEOSEOSEOSEOSEOSEOSEOSEOSEOSEOSEOSEO SEOEO SEOEO SEOEO SEOEO SEOEO SEOEO SEOEO SEOEO SEOEO SEOEO SEOEO SEOEO SEOEO SEOEO SEOEO SEOEO SEOEO SEOEO SEOEO SEOEO SEOEO SEOEO SEOEO SEOEO SEOEO SEOEO SEOEO SEOEO SEOEO SEOEO SEOEO SEOEO SEOEO SEOEO SEOEO SEOEO SEOEO SEOEO SEOEO SEOEO SEOEO SEOEO SEOEO SEOEO SEOEO SEOEO SEOEO SEOEO SEOEO SEOEO SEOEQ
- Secure Digital Card (SD™)
- Secure Digital High Capacity (SDHC™)
- Multimedia Card (MMC™)
Memory Stick (MS)
Service Center (Seu N° ADM)
- Secure Digital Card (SD™)
- Secure Digital High Capacity (SDHC™)
Multimedia Card (MMC™)
Memory Stick (MS)
BHumaHue: He BCTabnIte KapTy c cnNo!
LcnpoBa foTopamKa noDpeKnaeT cneDuOnne fOpMaBk Kapb naMnT:
- Secure Digital Card (SD™)
- Secure Digital High Capacity (SDHCTM)
Multimedia Card (MMC™)
Memory Stick (MS)
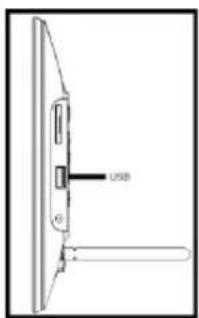
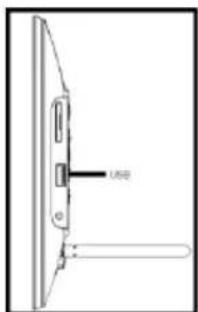
HocnteIb namrTn USB moKet BCTaBnTbcraB rHe3do USB TOIbKO ODNOM HAnpaBneHN.
BHumaHue: He npimehyTe cnny npn BCTabHeHH HocnteJn narnTn USB!
Bhumaue: LnpoBa npOpamka npedycmTopeHa TOnbko IInnncno3OBAHnC COBMeCTNMBIMKapTaMn nAmrTn HocnteJMyn nAmrTn USB 2 (100mA).
5) O6uHn nopAOK deiCTBn
Примechанe: Дадноусгостви IMeETФункцю 3Кo. Пpr eеakTNBaци (ДЯяakTNBaци ЛлбО OTKIQUЕнЯ Функци 3Ко пeрeДNTe B MeHIO HAcTpoiKu) ycTpoiCtBO aBTOMaTnueckN ВыКИЮЧаTeСячeз 4 Yaca nocne nocNeДHero BBOda DAHNbIX. CorlaCHO napaMeTpam прOn3BODInTeJIФункци 3Кo уxe akTNBИpoВаHa B ycTpoiCtBE B COOTBeTCTBn C ПравиЛами, yctahOBJIeHHbIMN 3aKOHOM.
a) TnaBHOe MeHIO
Pocne BkHueHH NOBJIeTcra NaBHO MeHo.
B rIaBHOM MeH y Bac ecTb Ha BbI6op pa3JnUHbIe cyHKuIN cIuΦpOBoN FOToPamKu INyHKT MeHIO "HaCTpoKn".ДЯ TOrO YTO6bI BbI6paTb ONpeJeHHbI NyHKT MeHIO, HAXIMaIte Ha KHOKN Co CTePKAMn, HaxoJaUeECAr Ha NylbTe INCtAHcUHOHORO ynpaBJIeHnA, INI Ha yCTpoIcTBe. IOnTBePdnte CBOB BbI6op KHOKN "Play / Pause / OK", HaxoJaUeCRA Ha NylbTe DInCTaHcUHOHOrO ynpaBJIeHnA INI HA yCTpoIcTBe.
b) Bb6op HocnteI INΦopMaun
KhoKa "EXIT", haoJaIaIcRaHa npIbTe nCTaHIOHO ynpaBHeHra, IIN K HONka "Menu", HaxoJaIaIcRa Ha ycToiCTBe, BbIBOHT Bac n3 rnaBHoro MeHIO K BbIbOpy npCoeHNHeHHbIX HocnteJe IHΦopMaUH. B daHHOM MeHIO Bbl MoKeTe BbIbPaTb KapTy NaMrtn IIN HocnteJe IHΦopMaUH c pa3bEmOM USB. NODTBepDNTe CBOB BblOp KHOKNOK "OK", HaxoJaIeICr Ha npJIbTe dNCTaHIOHO ynpaBHeHra, IIN KHOKNOK "OK", haoJaIeICr Ha ycToiCTBe. Nocne 3tOro Bbl ABTomAtnueckn ChOba nonaDaTe B rnaBHoe MeHIO.
c) ΠokazΦoTOrpaΦn
EcIn Bby yxe BCTaBnH NocHTeJIb NaMrtu C 3aNcAHbIMn foTOrpaFmN, To yCTpoiCTBO aBTOMaTHueckn HauHHaet nX noka3. EcIn HocHTeJIb NaMrtu He BCTaBHe, To yCTpoiCTBO HaunHaet noka3 3apaHee HcTaJInpoBaHHbIX o6pa3OuB N3o6paxeHn (Ohn He MOyT 6blb N3MeHeHbl).ДЯ TOTO YTO6bl Nonactb B rnaBHOe MeHou, HaxMNTe Ha KhoNky "Menu".
Bb mokeTe 3anyCTntb cnaD-woy taKKe BpyHyIO. Ira 3TO rBOuNTe B rNaBHOM MeHO B cyHKnIO FOTo. PoTBePdnte CBoi BB6Op KhoNkoi "OK", HaxoJaueenCra Ha Nylte DnCTaHcNoHHOrO ynpabHeHry, nn KhoNkoi "Play / Pause", HaxoJaueenCra Ha yctpoIcTbe. PnI 3Tom 3anyckaetc CnaI-d-woy. Ira TOrO uTo6bl 3anyCTntb cnaI-d-woy HeNoCpeIcTBENHO n3 Nlboi dpyrofoyHKnII, Bbl mokeTe aJIbTepeHaTubHO TaKKe HaxaTb Ha KhoNky "Slideshow", HaxoJaouocr Ha npIbTe DnCTaHcNoHHOrO ynpabHeHry.
Дя тоучобы ВьИТи n3 peжma сад-шоу N BьI3BaTb MeHIO npeDbapntelbHoro прocмOTpa n3obpaxeHn, HaxMITE Ha KhoNky "EXIT", HaxOJaUyOcR Ha nIbTe dInCTaHNoHHoro ynpabNeHn, nII KhoNky "Menu", HaxOJaUyOcR Ha yCtpoiCtBe. Tenepb Bbl MOxKTe npeHn K kakoi-Jn60 ФotorpaФHn, noDtbepdntb CBOI BbI6Op KhoNkoR "OK", HaxOJaSeHcR Ha nIbTe dInCTaHNoHHoro ynpabNeHn, nII KhoNkoR "Play / Pause", HaxOJaSeHcR Ha yCtpoiCtBe, n npoDoJnxHTb cnaI-D-woy HENOCpeDCTBENHO C 3TOrO MecTa. ПовТорнБIM HaxKatneM Ha KhoNky "EXIT" ри HaxOJaEHN B MeHIO npeDbapntelbHoro прocmOTpa n3obpaxeHn Bbl nonaJaTe B nAnKy phaIIOB 6OJIee BBICOKOrO nopArdka. TakIM obpa3OM, Bbl MOxKTe ocuueCTBJIaTb HabnraCuHIO no pa3JIuHbIM nankam BaWero HocHTeYnHΦopMaци.