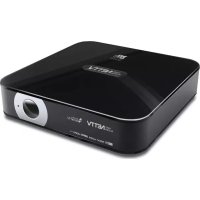
Easy Player Net TV - Digital decoder Best Buy - Free user manual and instructions
Find the device manual for free Easy Player Net TV Best Buy in PDF.



| Product Type | Multimedia digital decoder |
| Brand | Best Buy |
| Model | Easy Player Net TV |
| Operating System | Android 2.2 |
| Processor | ARM9 400 MHz (Overclock 600 MHz) |
| Maximum video resolution | Full HD 1080p (1920x1080) |
| Video connectivity | HDMI 1.3, composite AV |
| Audio connectivity | Coaxial audio output, optical SPDIF, HDMI |
| Network connectivity | Ethernet 10/100, Wi-Fi via USB dongle (optional) |
| USB connectivity | 2 USB 2.0 ports (front and rear) |
| Card reader | SD/MMC |
| Supported video formats | MKV, TS, M2TS, TP, AVI, VC1, WMV, RM/RMVB, MPEG, MPG, MP4, VOB, MOV, ISO, DAT, ASF |
| Supported audio formats | MP3, WMA, WAV, OGG, AAC, FLAC |
| Supported image formats | JPEG, BMP, GIF, PNG |
| Supported subtitles | SUB, SMI, SSA, SRT, TXT IDX+SUB, PGS |
| TV tuner | DVB-T (TNT) |
| Functions | Web browser, YouTube, media player, PVR recording, firmware update |
| Power supply | AC adapter included |
| Included peripherals | Remote control, AC adapter, user manual |
| Languages | Multilingual (French, English, Spanish, etc.) |
| Maintenance | Clean with a dry cloth, avoid moisture |
| Safety | Do not expose to moisture, do not obstruct ventilation slots |
Frequently Asked Questions - Easy Player Net TV Best Buy
User questions about Easy Player Net TV Best Buy
0 question about this device. Answer the ones you know or ask your own.
Ask a new question about this device
Download the instructions for your Digital decoder in PDF format for free! Find your manual Easy Player Net TV - Best Buy and take your electronic device back in hand. On this page are published all the documents necessary for the use of your device. Easy Player Net TV by Best Buy.
USER MANUAL Easy Player Net TV Best Buy

BESTBUY
smartTV
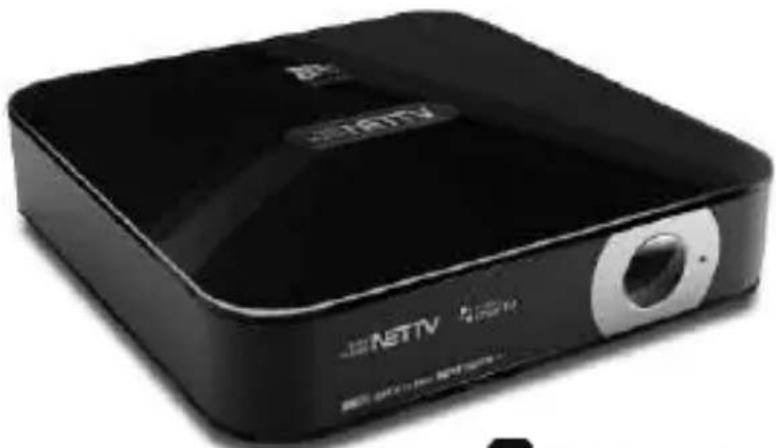
EASY PLAYER NETTV
BÚSQUEDA MANUAL (MANUAL SCAN)
Choose "Manual scan", input frequency and bandwidth, start scan and press "ok" to confirm the installation.

4.3.3 Editor de favoritos (Favorite editor)
4.3.5 PVR

4.4 Aplicaciones
4.5 Multimedia
OPERATIVA DEL MANDO A DISTANCIA

BESTBUY
smartTV
EASY PLAYER NETTV
User Manual
Índice
Safety precautions.... 34
List of elements.... 34
Main functions....34
- Connections.... 35
- Remote Control....36
- Usage tips....38
- Operation....38
4.1 Initial setup....38
4.2 Main menu....40
4.3 Digital TV....41
4.4 Applications....45
4.5 Multimedia....50
- Settings....53
FAQ....57
Specifications....59
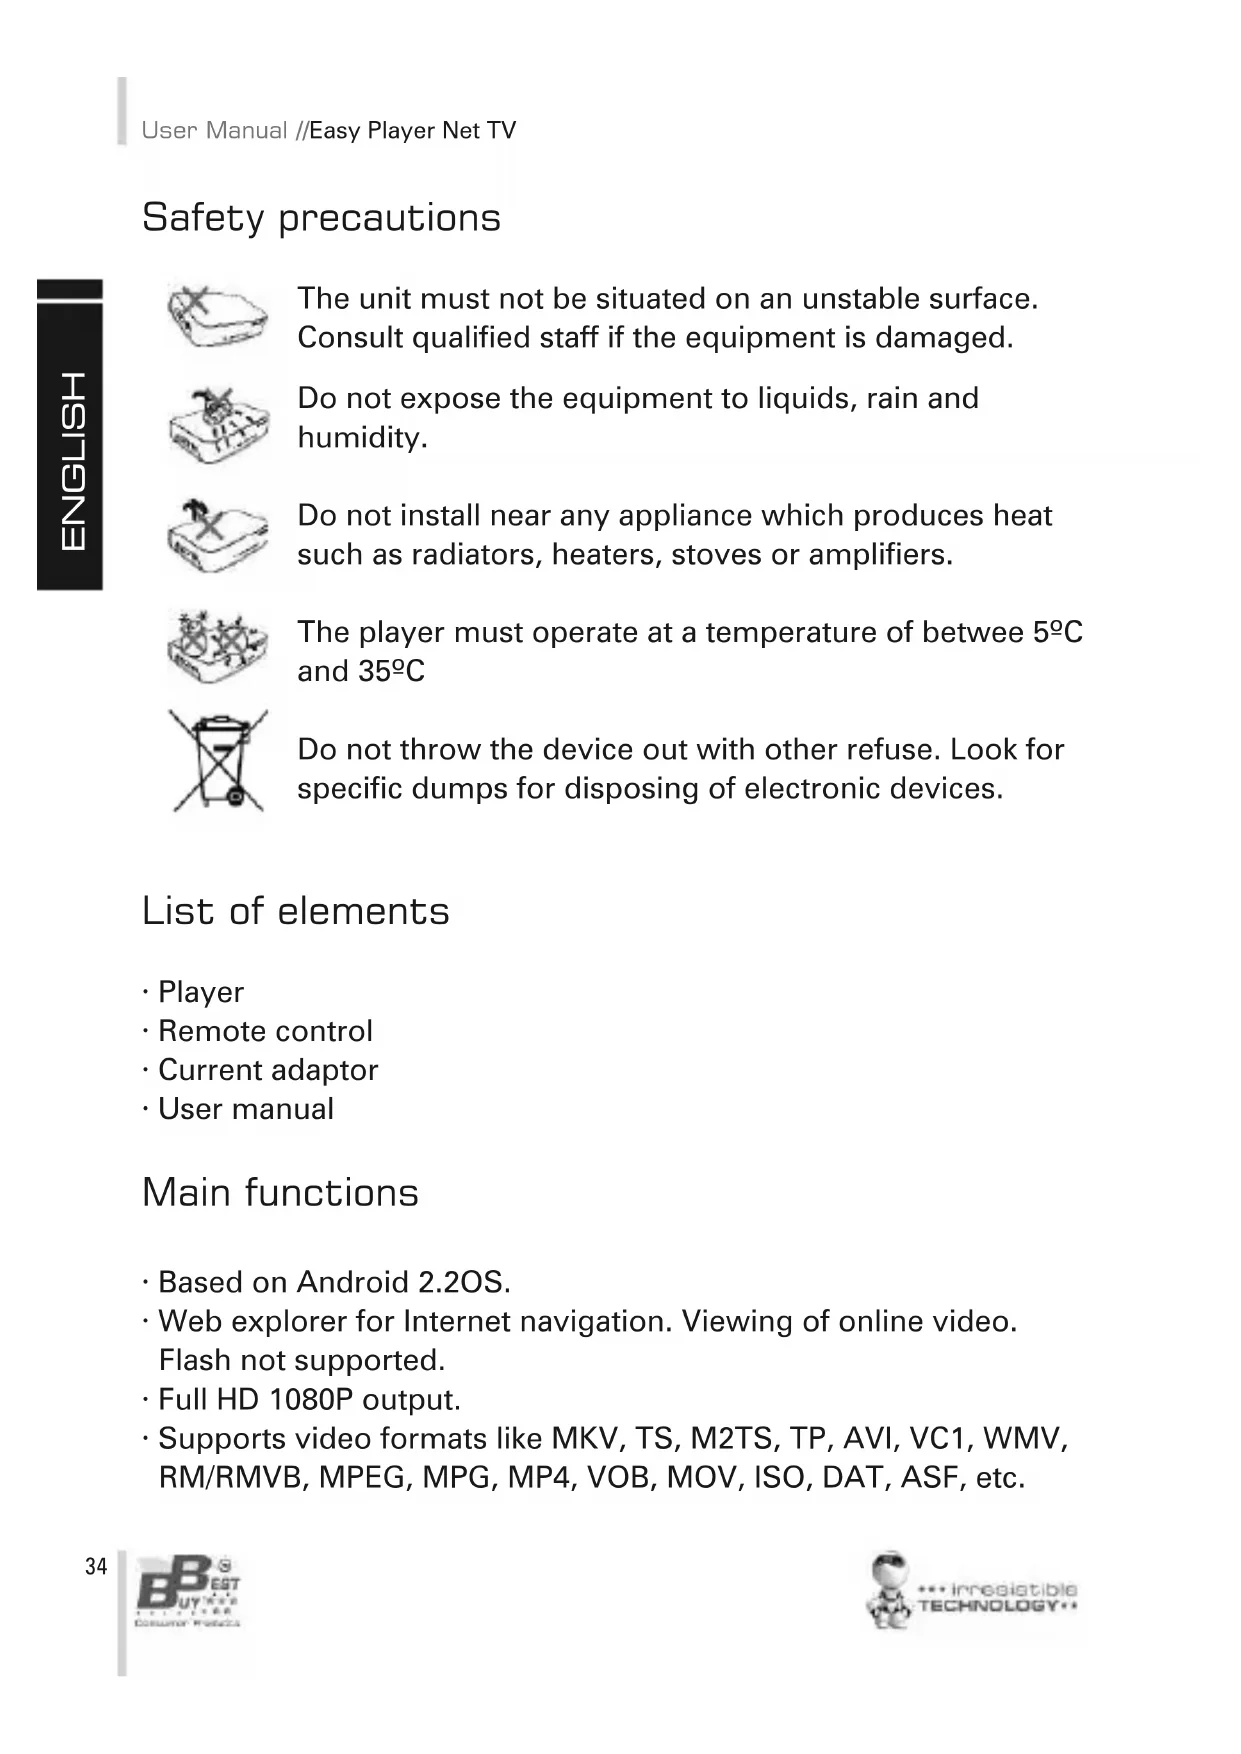
Safety precautions

The unit must not be situated on an unstable surface. Consult qualified staff if the equipment is damaged.

Do not expose the equipment to liquids, rain and humidity.

Do not install near any appliance which produces heat such as radiators, heaters, stoves or amplifiers.

The player must operate at a temperature of between 5° C and 35° C

Do not throw the device out with other refuse. Look for specific dumps for disposing of electronic devices.
List of elements
- Player
- Remote control
- Current adaptor
- User manual
Main functions
- Based on Android 2.2OS.
- Web explorer for Internet navigation. Viewing of online video. Flash not supported.
• Full HD 1080P output.
• Supports video formats like MKV, TS, M2TS, TP, AVI, VC1, WMV, RM/RMVB, MPEG, MPG, MP4, VOB, MOV, ISO, DAT, ASF, etc.
• Supports video formats like MP3, WMA, WAV, OGG, AAC, FLAC etc.
• Supports image formats like JPEG, BMP, GIF, PNG etc.
• Supports subtitle formats like SUB, SMI, SSA, SRT, TXT, IDX+SUB, PGS. Editing and changing functions available.
- HDMI 1.3 outputs and AV composite video. Coaxial sound output surround 5.1
• Supports hard drive in FAT32/ NTFS format and flash memory devices. SD/MMC slot.
• Supports WiFi Dongle and keyboard USB (optional)
- Multilanguage options
• Supports Firmware upgrading
1. Connections
Front panel

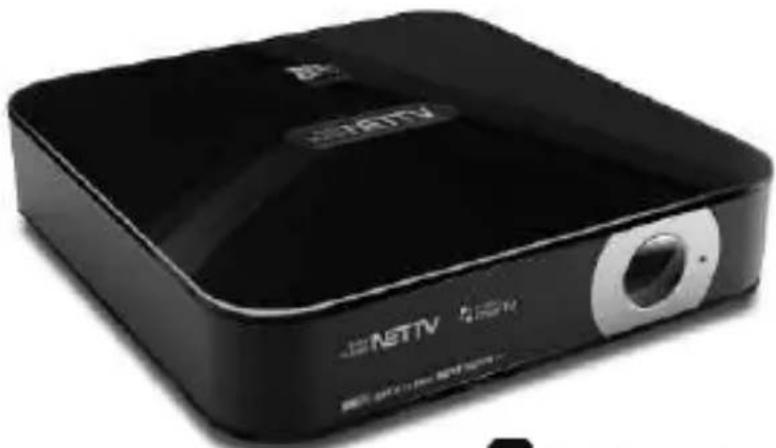
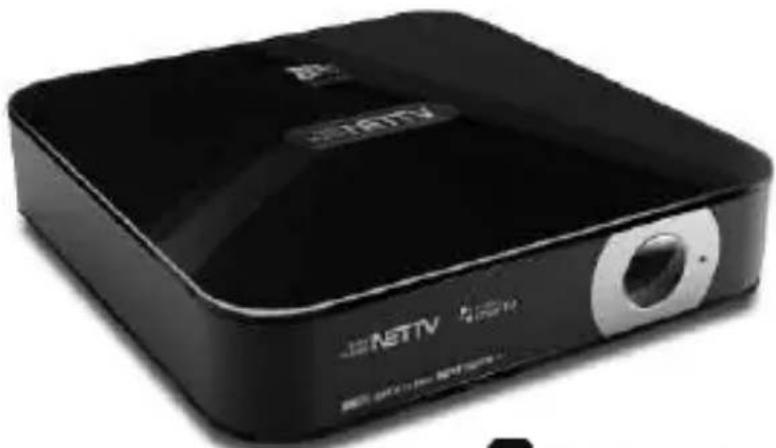
- LED Light: Indicates if the unit is powered on (Blue) or in standby mode (Red).
Side panel
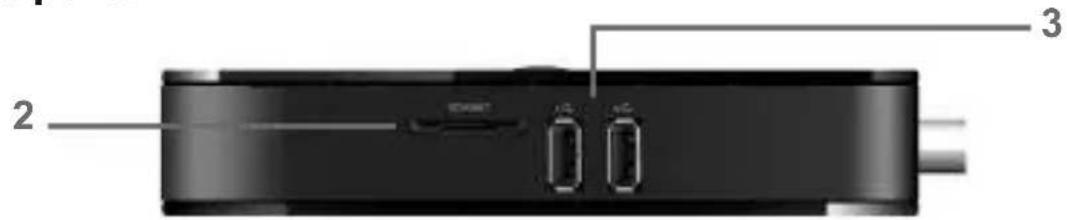
- SD / MMC slot for memory cards SD / MMC.
- USB Ports: USB ports to connect storage devices, external keyboards and mouse. Compatible with Wi-Fi dongles.
Rear panel
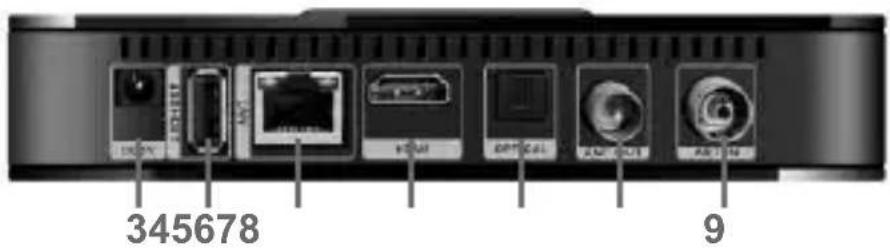
- Power: Connect the power adapter.
- USB Port: USB Port to connect storage devices and hosts.
- Ethernet Port: Connect the equipment to the local network or router, using Ethernet cable.
- HDMI connection: Connect the computer to your TV through this digital audio and video connection.
- Optical connection: Connect the computer to an audio amplifier with digital decoder via optical output.
- RF Output: Output to TV antenna.
- RF Input: Antenna input signal for the tuner of the device.
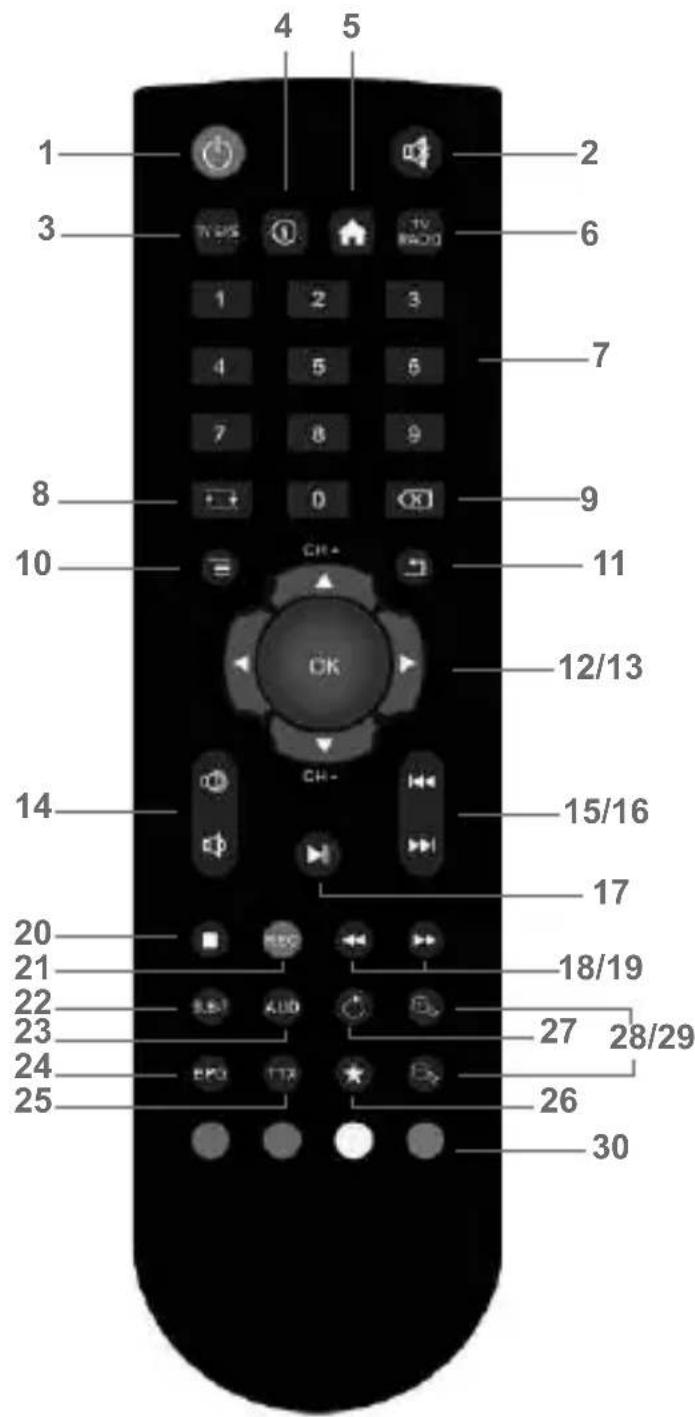
2. Remote control
- POWER: Press the button to go to Standby mode.
Standby Mode: Press the button to turn the unit on. - MUTE: Mute button.
- TV SYS: Goes to DVB-T mode.
- INFO: Shows current file information.
- HOME: Goes to the home page.
- TV/RADIO: Switches between TV/RADIO.
- Numerical buttons: For entering figures and also for entering search words on the Internet.
- RECALL: Returns to previous channel.
- DEL: Delete button.
- MENU: Options' menu.
- RETURN: Returns to previous menu.
-
OK: Selection button.
-
Directional buttons: Navigate between the menu options.
Up/down also used to change channel.
- VOL +/-: Increase / reduce audio volume.
15/16. Search: Next file / previous file. - Play/Pause: Plays or pauses video.
18/19. Fast search: Fast rewind / forward.
***irresistible TECHNOLOGY**

- Stop: Pauses and returns to the play list.
- REC: Records the current TV channel.
- SUB-T: Changes subtitle languages. Press the button on the Internet browser to access the address bar.
- AUD: Changes between the audio tracks available.
- EPG: Goes to EPG menu.
- TTX: Teletext.
- FAV: Access to favorite channels.
- REPEAT: Configures the file repetition mode.
28/29. ZOOM+/-: Changes the film or photo image. - Colour buttons: These have different functions depending on the mode used.
GOTO: When you are playing a video the Blue button displays Go To (Go to) function.

3. Usage tips
Power supply
- Before unplugging the unit, makes sure that the device is in standby mode.
- If the player is not going to be used for a long time period, please unplug it.
Remote control
- The remote control works over a range of 7 metres from the front panel at an angle of up to 30°
- The operating distance of the remote control depends on the environment in which it is used.
Connection to screen
- Before connecting the player and the TV via HDMI, make sure that both devices are off.
4. Operation
4.1 Initial set-up
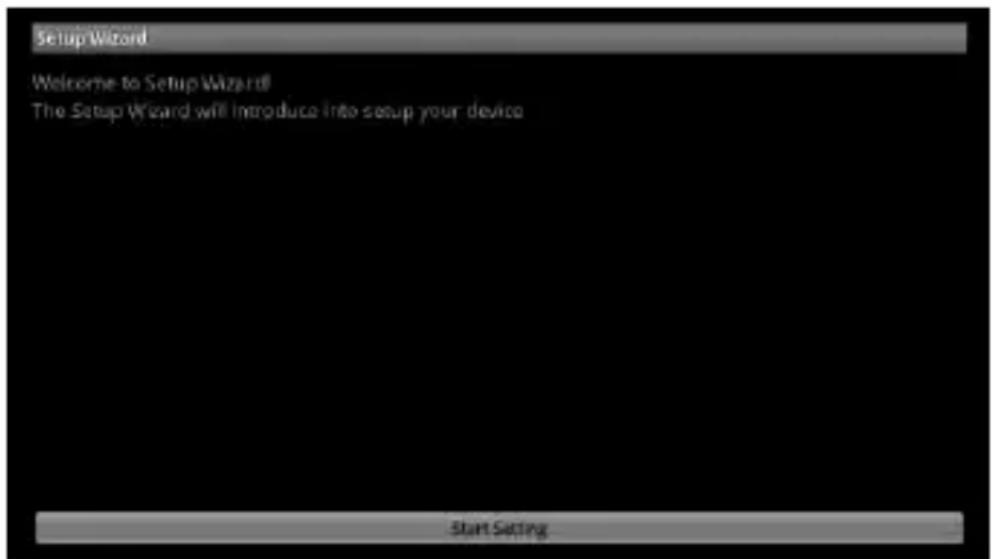
Turn the player on and wait for 40 seconds. The installation menu will appear. Follow its instructions.
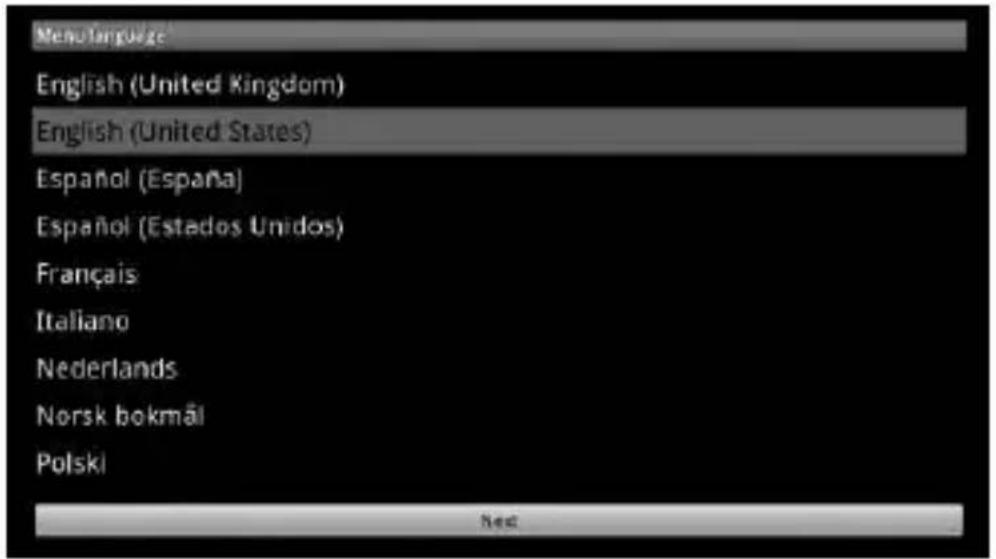
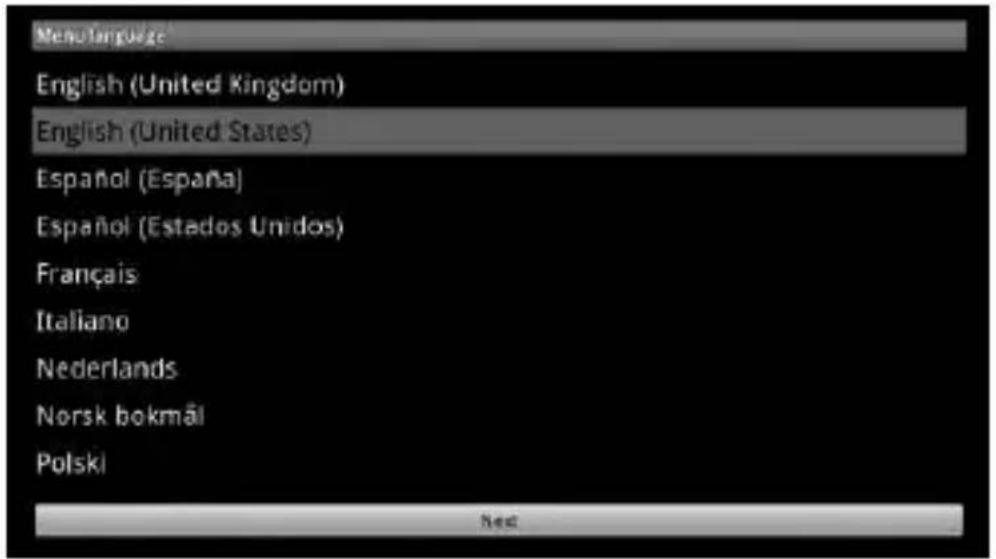
Language set-up
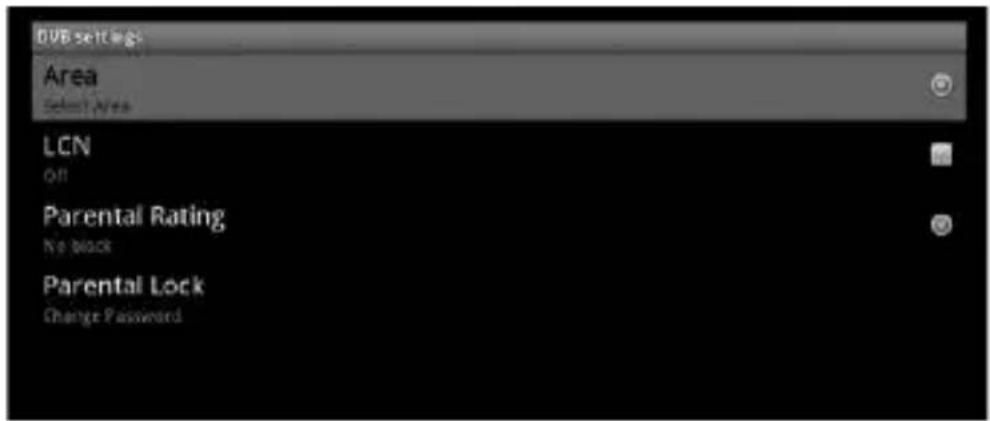
DVB settings (Area, LCN, Parental Rating, Paternal Lock)
Cable network or WiFi connection settings
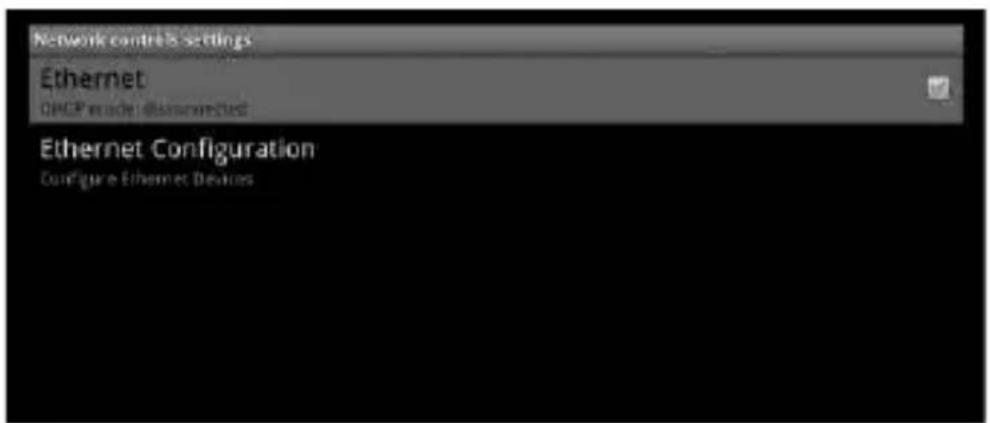
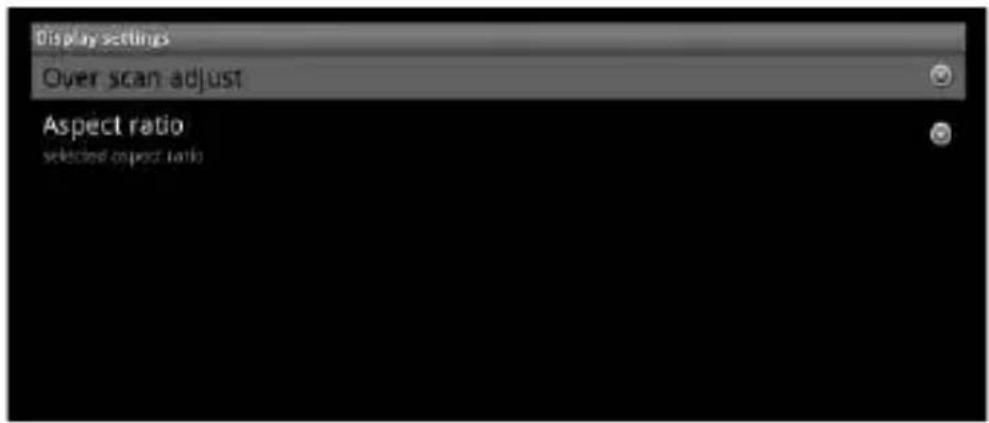
Display settings
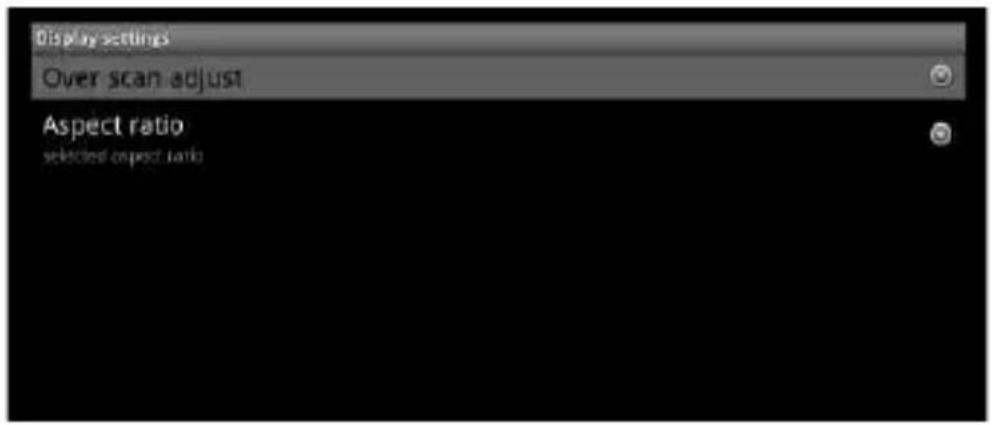
Finish settings to go to the channel scan

4.2 Main Menu
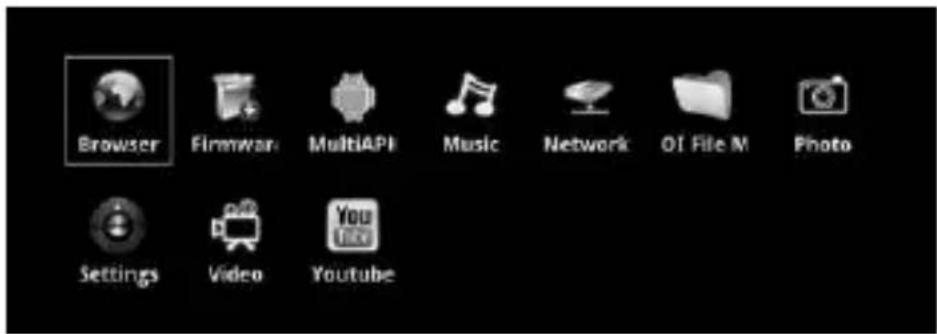
The main menu has the Digital TV, Multimedia, Applications and Settings sections. Once the unit has come on, the TV channels will appear automatically.
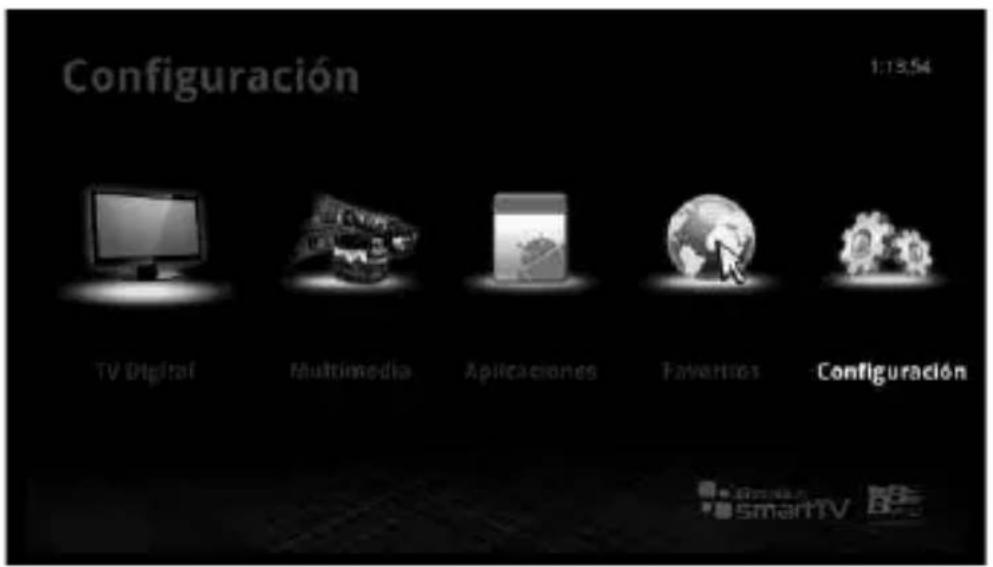
Enter the Digital TV section to access the channel organizer, the favorites' editor, the programming guide, the PVR recordings manager and the channel search options.
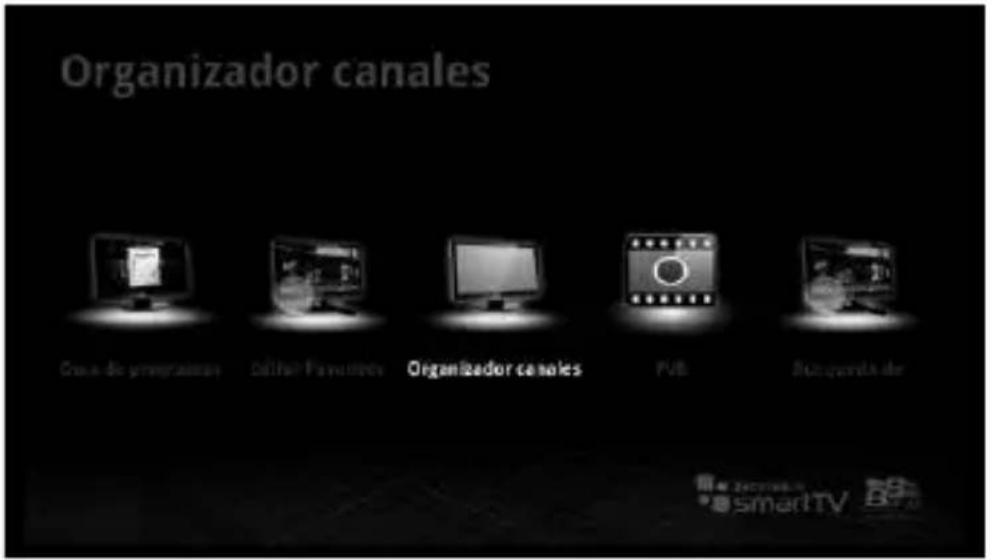
You can look for radio and TV channels using this function.
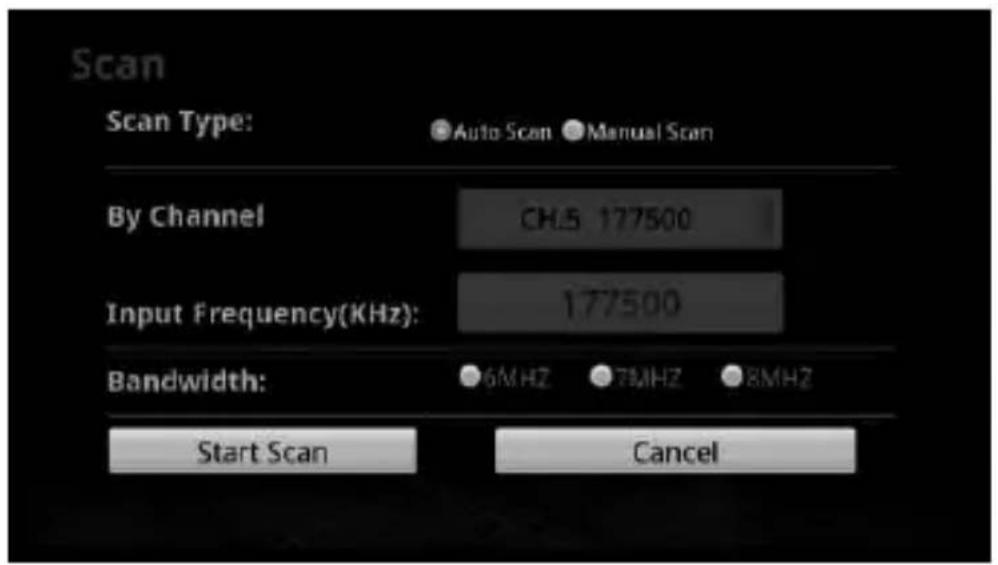
AUTO SCAN
Select the Auto Scan option and press OK to start looking for and installing channels.
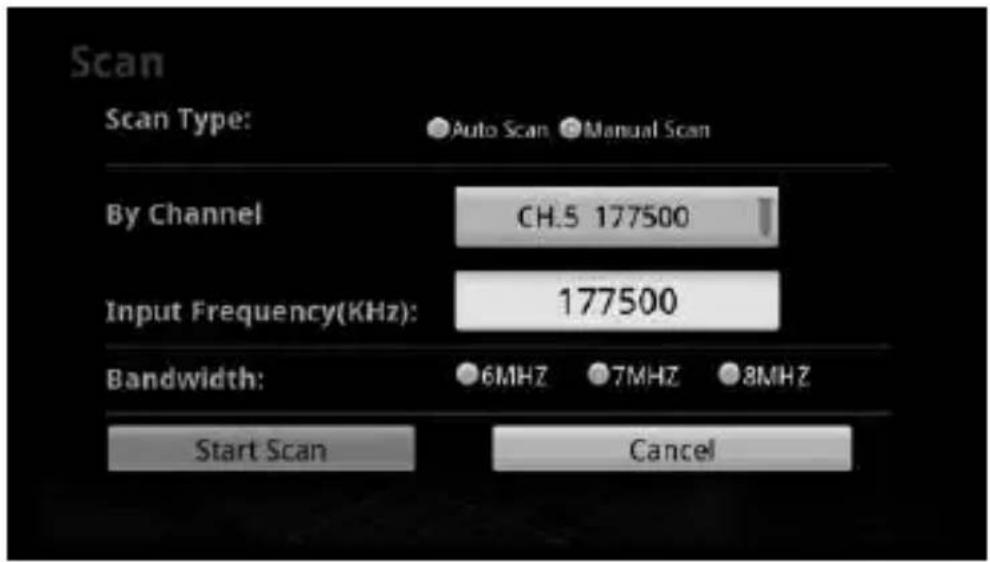
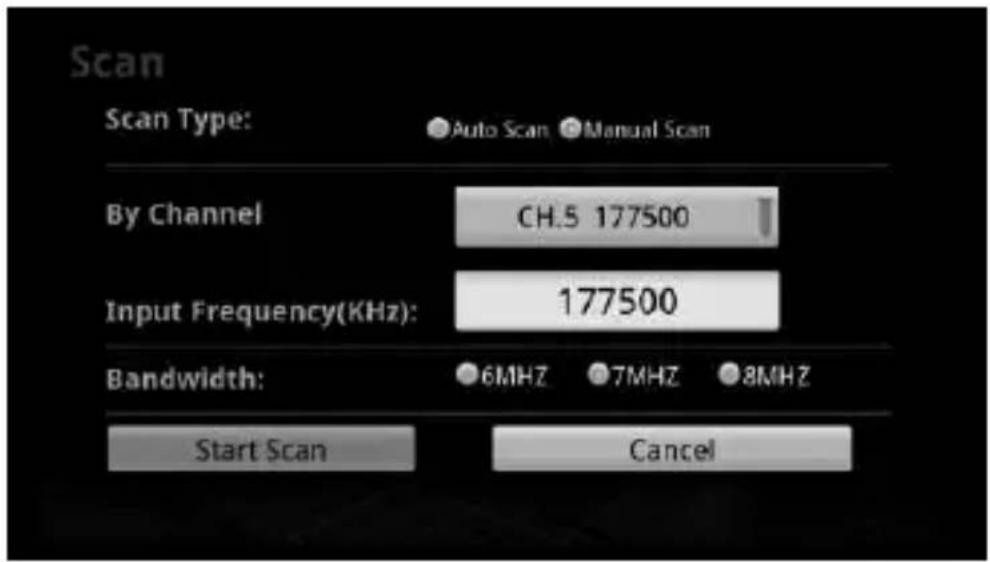
MANUAL SCAN
Choose "Manual scan", input frequency and bandwidth, start scan and press "ok" to confirm the installation.
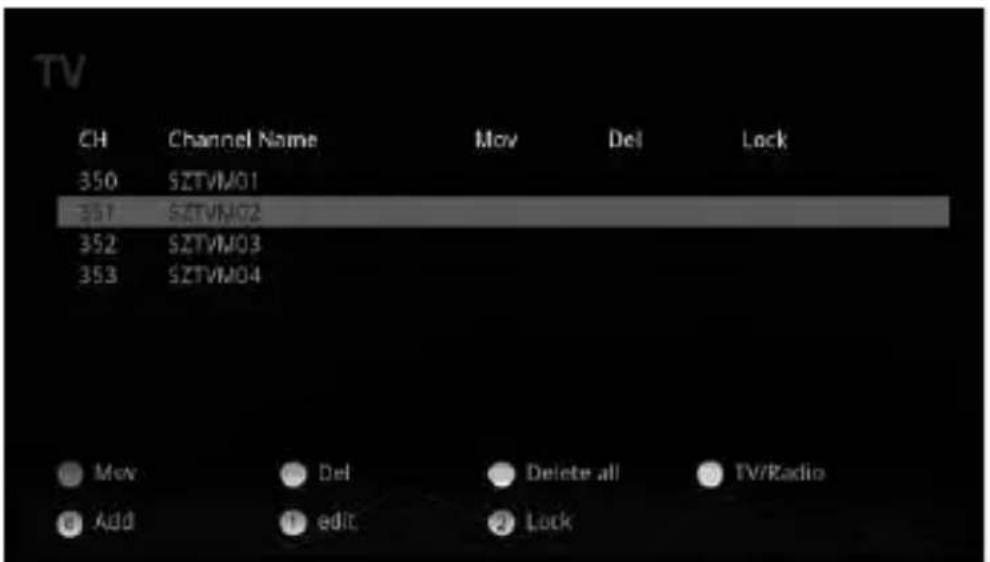
4.3.2 Channel organizer
Enter to the channel organizer. Select a channel using the Up/ Down buttons and then press OK to watch said channel. Use the colours buttons indicated on the screen to move, delete, add, edit or block channels.

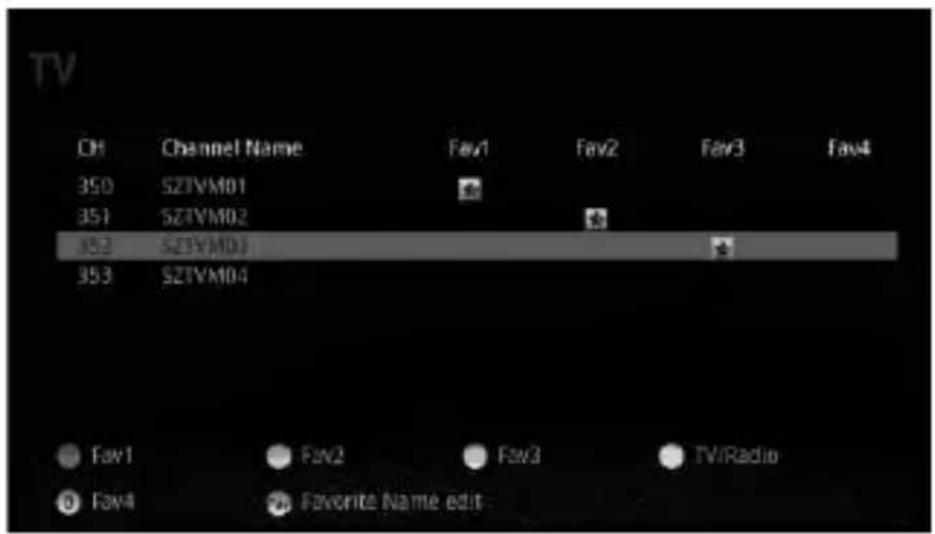
4.3.3 Favorite editor
Choose the favorite editor and select it.
Follow the indications on the screen about the functions of the colours buttons and add them to your favorites.
4.3.4 Program guide
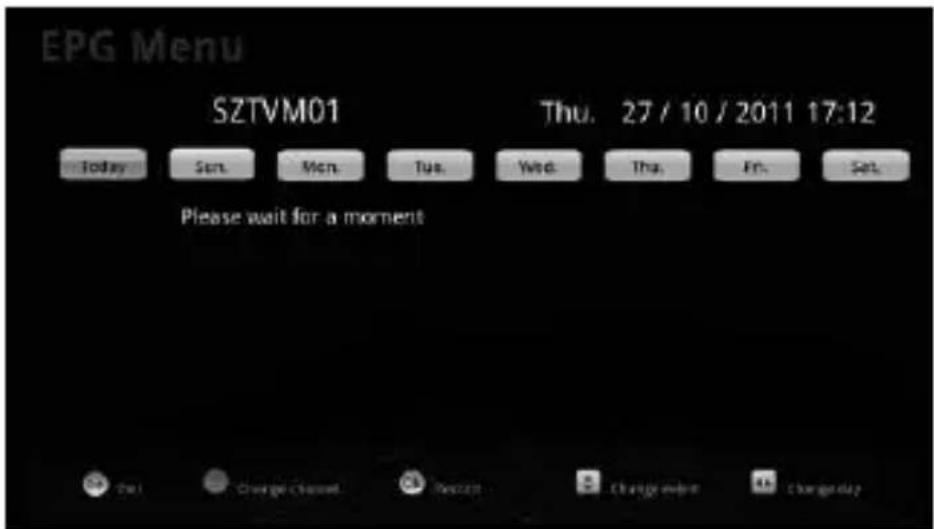
Highlight the program guide option and select it. You will access the electronic EPG programming menu.
4.3.5 PVR
Highlight the PVR option and select it.
You will see the PVR player and schedule record options. Enter the first.
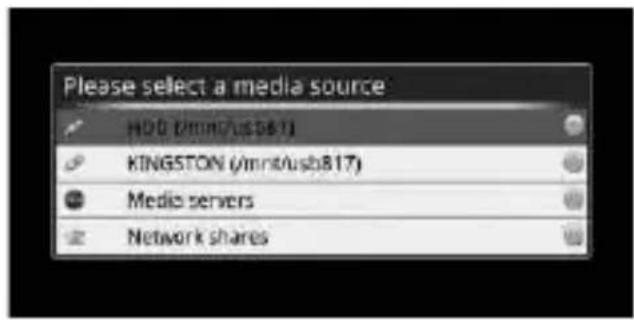
Choose the storage device where the file you are viewing is located and select it.

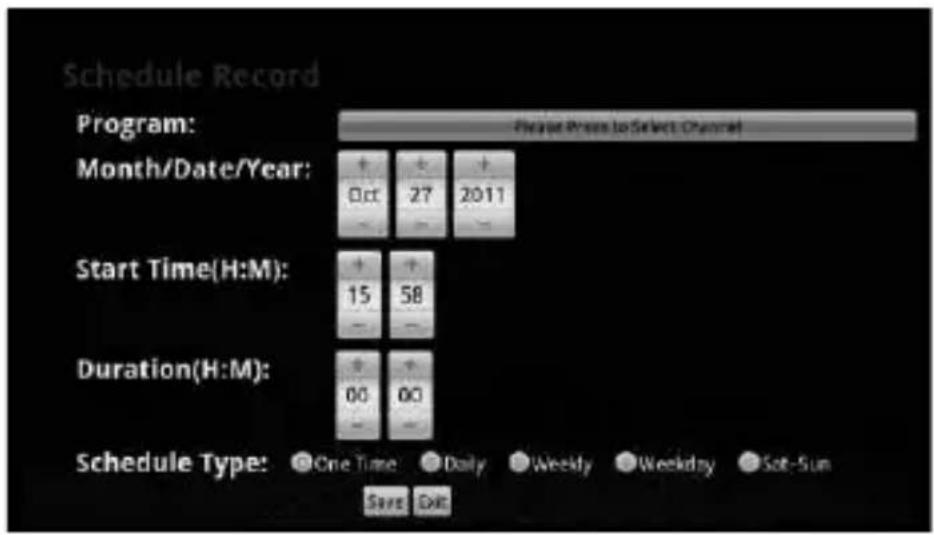
Enter the schedule record option.
Using the colour buttons shown on the screen you can add, edit and delete recordings.
4.4 Applications
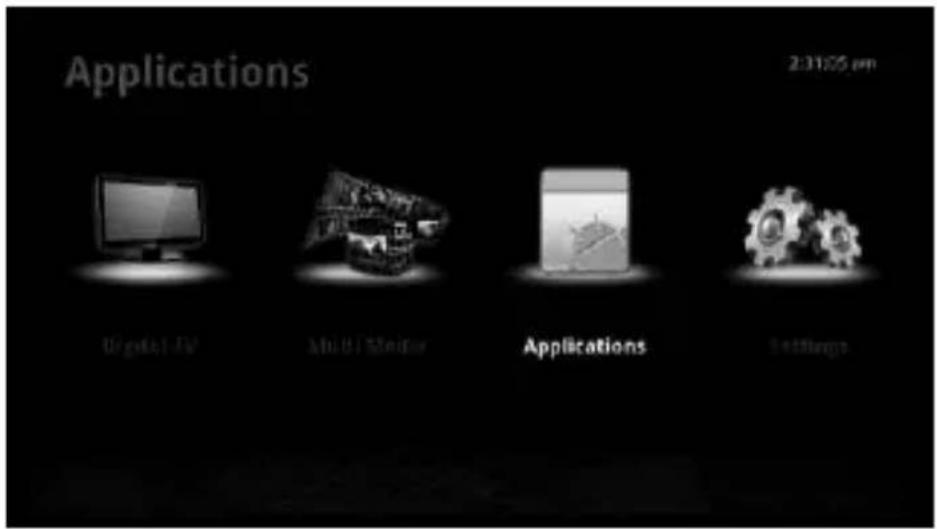
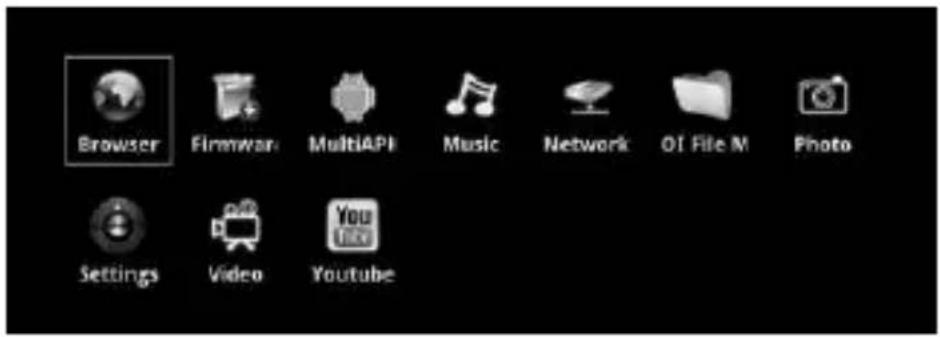
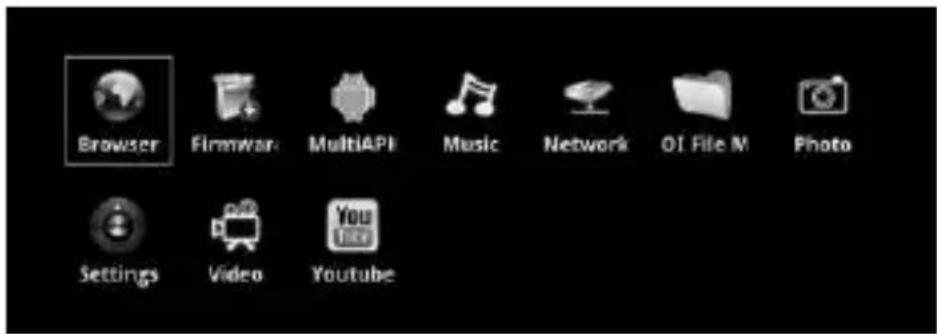
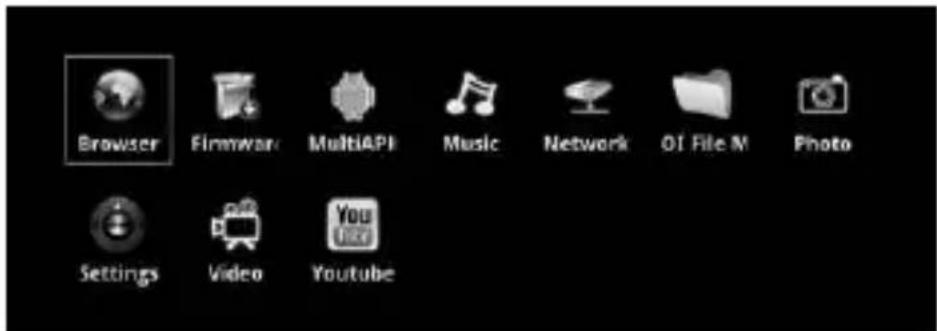
Highlight the applications option and select it. The available applications include: explorer, firmware upgrader, APK installer, music, photos, videos, OI or Youtube file manager.
4.4.1 Installation using Multi APK
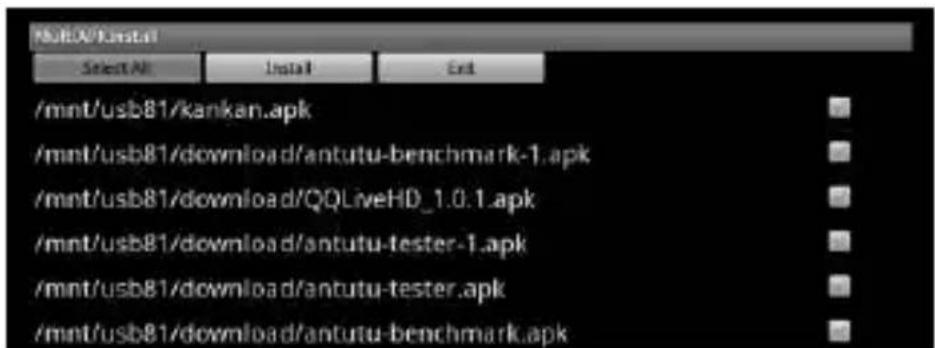
- Connect the USB device or enter the memory card. Press the Left/Right buttons to highlight the MultiAPK option. Press OK to select it.
-
Press the Up/ Down buttons to highlight the application or game you want and then press OK to download.
-
A dialogue box will appear in the event that downloads from unknown sources are not permitted.
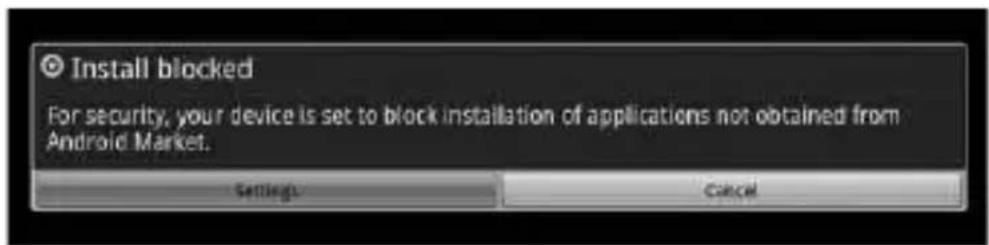
- Highlight and enter the application settings option.
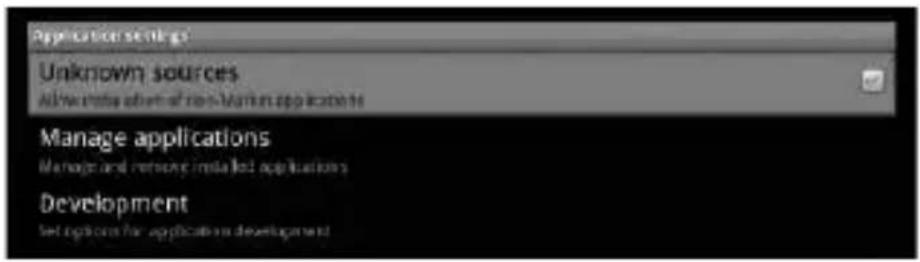
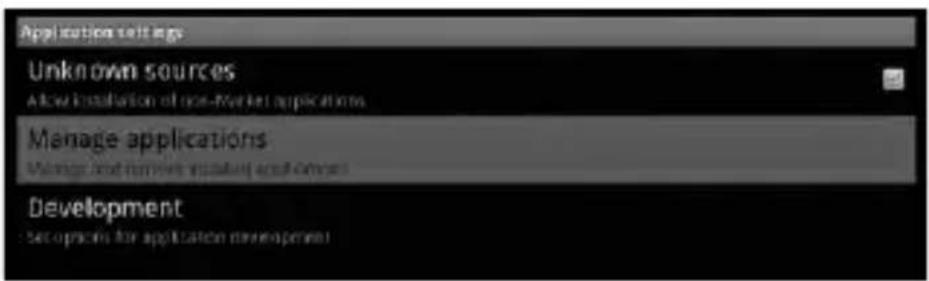
- Select Unknown Sources and mark the option as valid.
- Return to the download interface and confirm the installation.
- Select 'open' after installation.
Notas:
- You can visit Kudroid to download applications, copy them to your SD/MMC card and install them.
- You are advised to use a high-performance SD card to carry out the installation.
- You can also download applications from other Android applications pages, but, in view of the fact that there are incompatibilities between MID/ Mobile phones and multimedia players, we cannot ensure that every application available outside from Kudroid page will work on the device.
4.4.2 Uninstall applications
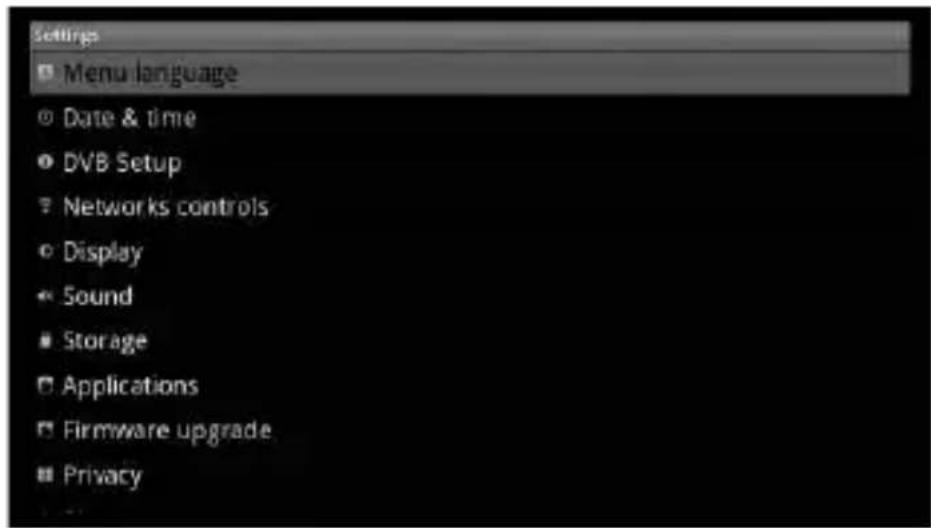
- Select the "settings" option and enter it.
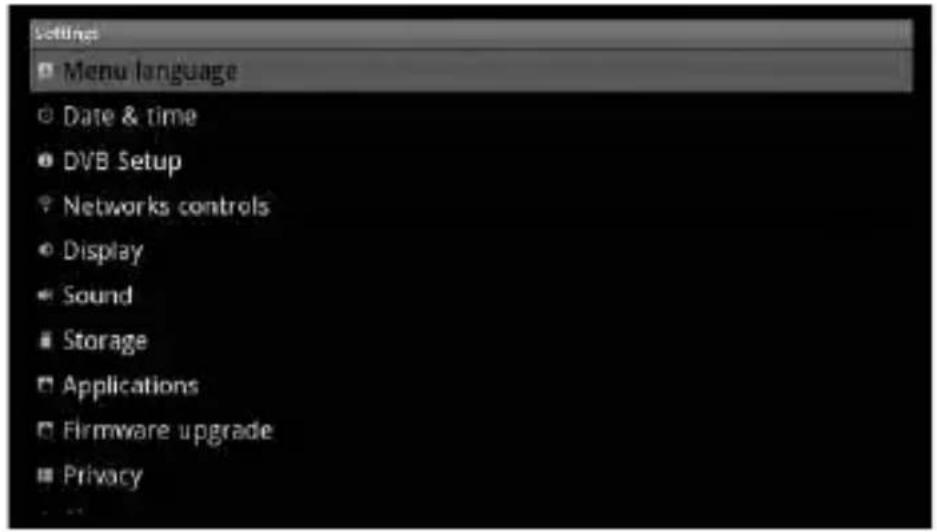
- Select the manage applications option and enter it.
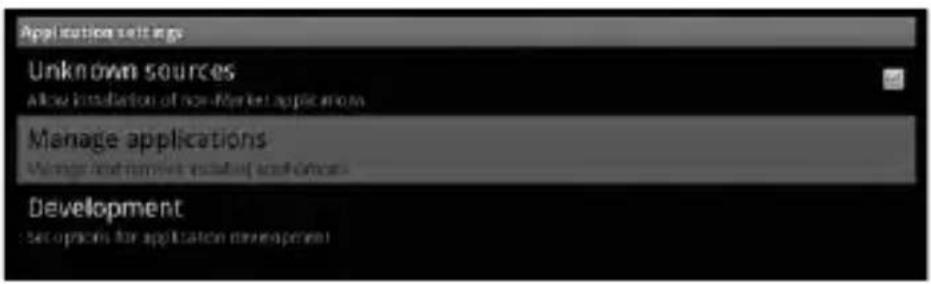
- Select the applications which have to be uninstalled and press OK to confirm.
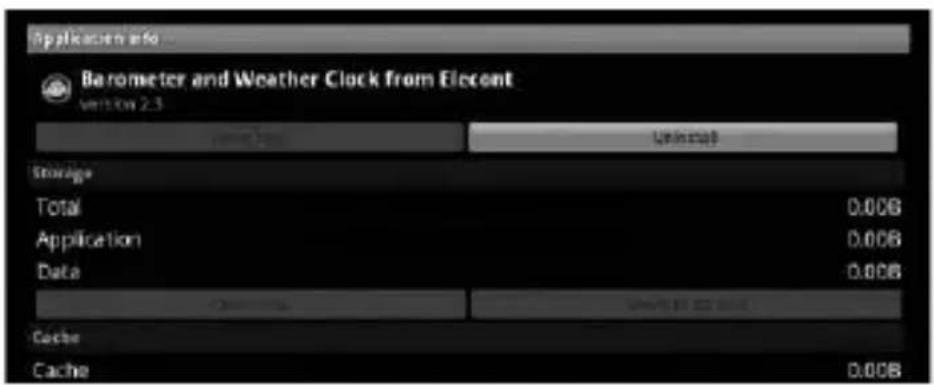
- Uninstall.
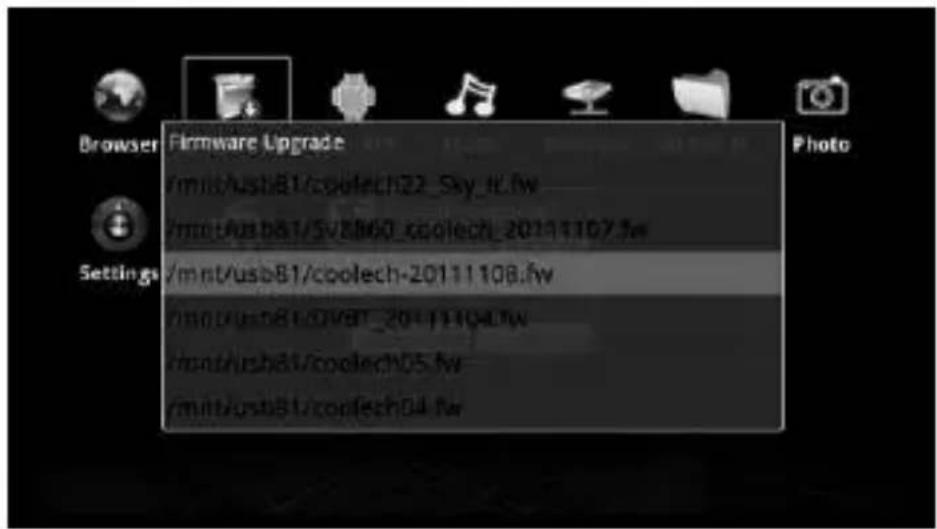
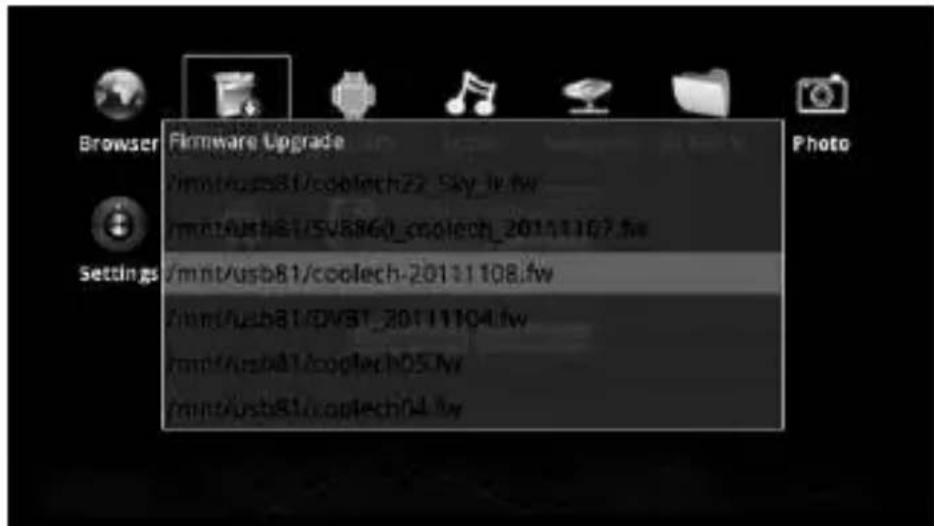
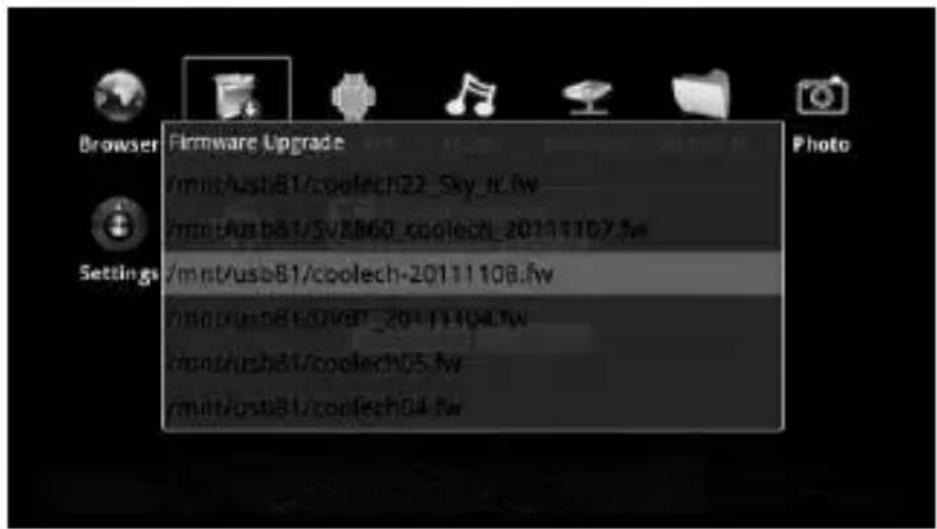
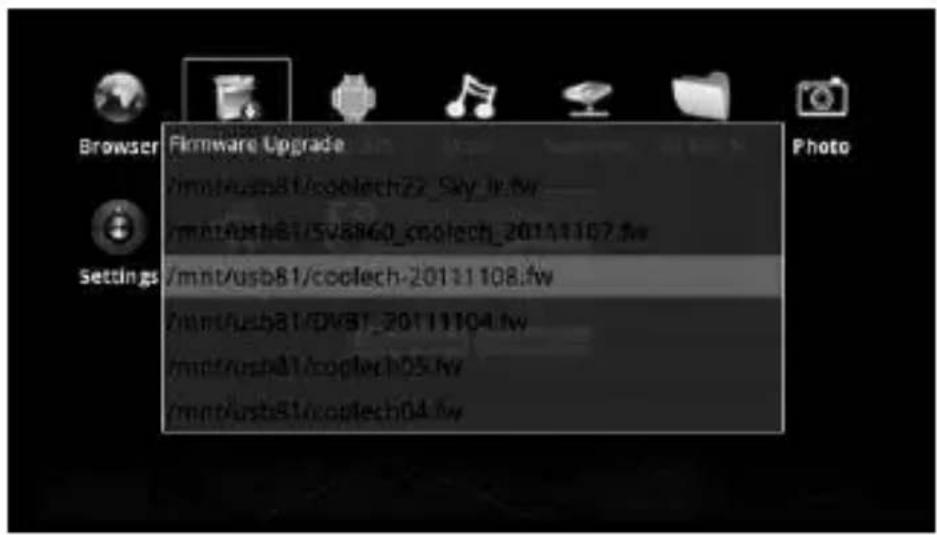
4.4.3 Firmware upgrading
- Copy the new firmware file onto the root directory of the storage device used.
- Select the upgrade firmware option and press OK.
- Select the browse option and use it to browse the file.
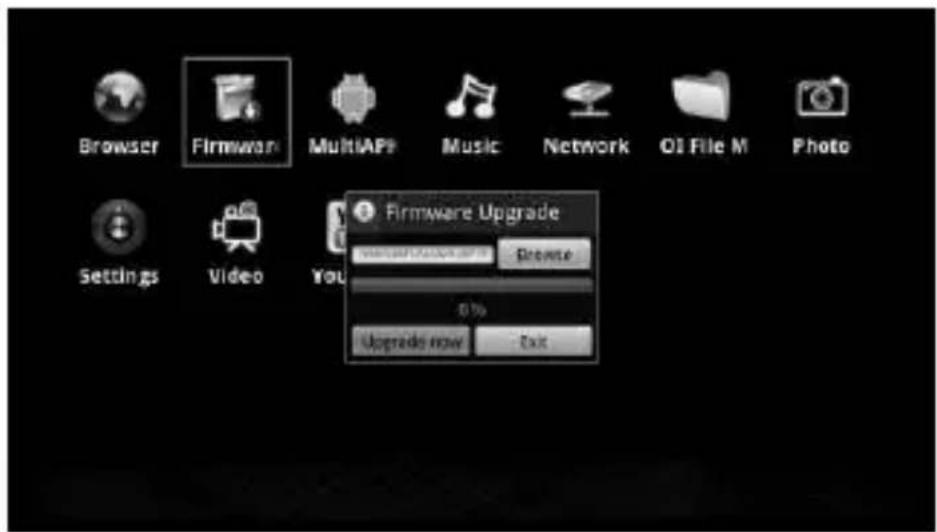

- Select the upgrade now option and confirm it.
- The system will ask you to re-confirm the upgrade.

- The system will read the new firmware and will start the buffering process.
- In the upgrading process the system will eliminate the settings and files. A progress bar will be shown on the screen.
- When it finishes, the player will be rebooted, thereafter showing the main user interface.
Note: Please do not turn the unit off during the upgrade process as you could cause a malfunction in the device.
4.4.4 Youtube
Select the Youtube application and enter it. You will have the options My Youtube, Top rated, Most viewed and Search.
Note: The program may not run smoothly depending on the circumstances of the network.
4.4.5 Browser
There is a network browser integrated with the Google browser by default. Move to the address bar and keep OK pressed. A virtual keyboard will appear which can be used to enter words and data. Note: To access the address bar and type in it, press SUB-T button when you are using the Internet browser.
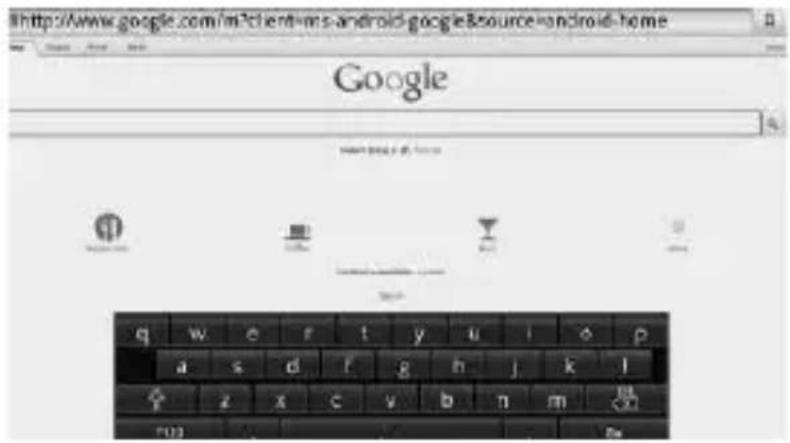
Then press "Go" to continue. Press "RETURN" to go back to the previous menu.

4.5 Multimedia
Select the Multimedia option to play videos, music and images.
4.5.1 Video Player
Enter the Video Player option.
Select the video source: HDD1(/mnt/usb81)(local), multimedia servers (UPNP), shared network files (LAN), etc. Press the OK or Play/Pause button to play it.
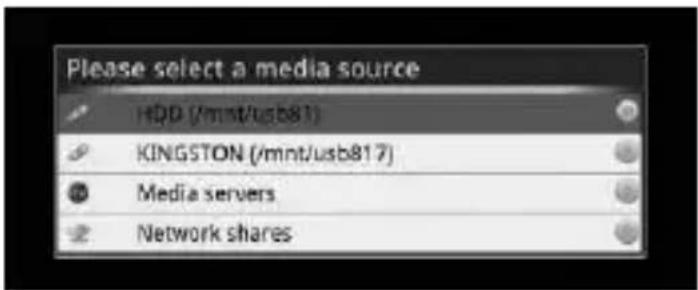
The system will show all the storage folders. Upon entering said folders, only the files which are in the formats supported will be shown.
![Video 2/17 (Lee.Hyuri)~[1..3_HDTV].mpg 175.04 MB Andrea._Hold...a_HD_2010.ts 187.47 MB Andrea._Nq..Tej720p.mkr 212.67 MB Big_Buck_Bun...HDChina.mky 890.21 MB Big_Buck_Bunny_1080p.avi 552.46 MB Coral_Reef_Ad...re_1080.wmy 102.27 MB G.NA+++Black_Jon+HDJ.mpd 258.74 MB](/content/2026/02/355208/images/29bcad01ce45cd4864813b89ff54a430c9a30967a0b12bcfc61aa707ccf25e97.jpg)
- Press the Up/down buttons to select the file to be played.
- Press VOL-/VOL+ to adjust the volume.
- Press Mute to mute or activate sound.
- Press the ← button for a fast rewind at the speeds 2/4/8/16/32/64.
- Press the ▶ button for fast forward at the speeds 2/4/8/16/32/64.
- Press the ▶ button to Play/ Pause the video.
- Press the 📄 button to select the previous video. Press the ➤ button to go to the next video.
files.
- Press the "INFO" button to see the file information.
- Press the "AUDIO" button to switch between different audio tracks.
- Press the "SUB-T" button momentarily to switch between the different subtitles, press this button for a while to enter the settings configuration.
- Press Home to return to the main menu.
- When you are watching a video or recording, press the Blue button to display the Go To feature. Here you can use the number buttons to specify a time point of the file, and clicking OK you will go straight to play point.
4.5.2 Music
Select one of the multimedia sources: HDD1(/mnt/usb81)(local), multimedia servers (UPNP), shared networks (LAN)... Press OK or Play/Pause to start playing.
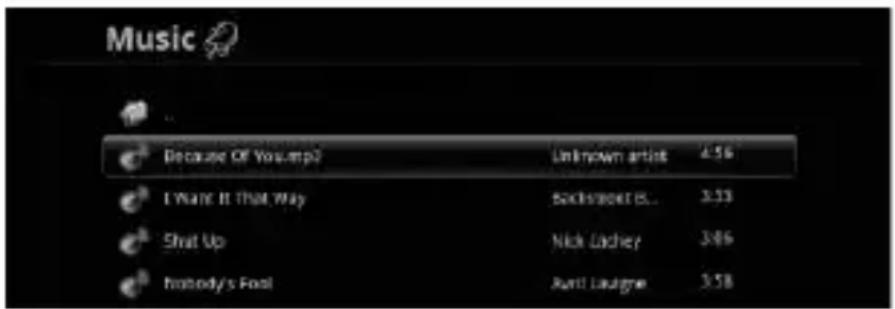
The system will provide a list of all the folders with files. When you enter them, you will only see those files which are in the formats supported.
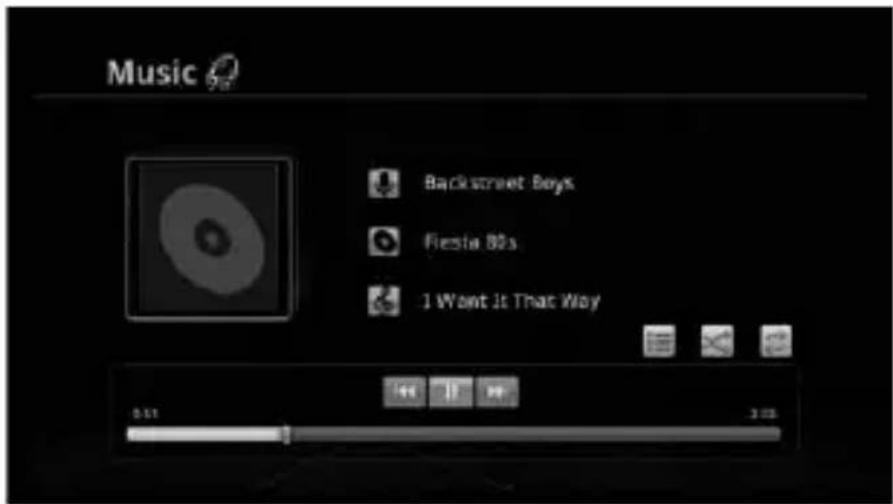
- Press the Up/down buttons to choose a music file.
- Press the "VOL-/VOL+" buttons to increase/ reduce the volume.
- Press the button to play/pause music.
- Press the 📄 button to go to the previous file. Press the button to go to the next file.
of files.
- Press the INFO button to see the file information.
- Press the MENU button to return to the main interface.
4.5.3 Photos
Select the multimedia source: HDD1(/mnt/usb81)(local), multimedia servers (UPNP), shared networks (LAN)... Press "OK" or Play/Pause to play the images.
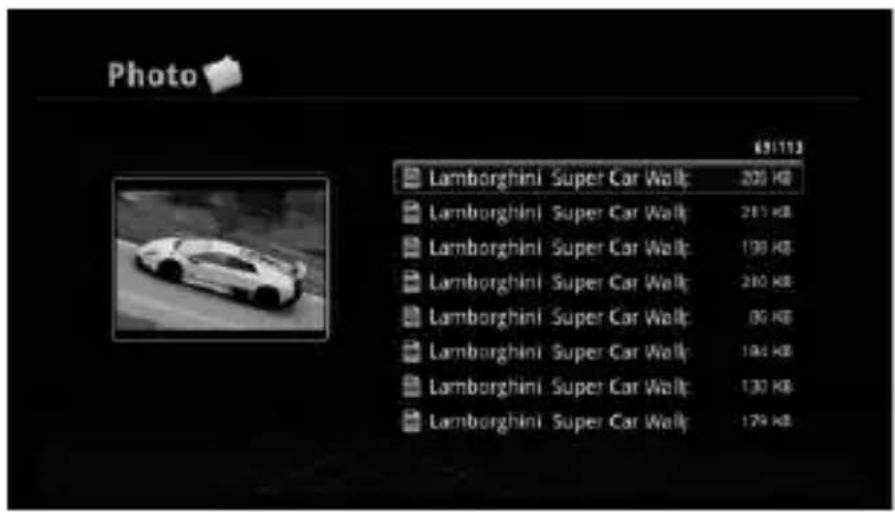
The system will show a list with all the folders. When you enter the folders, you will only see files with the format supported.
- Press the Up/down buttons to go to the previous or next photo.
- Press Play/ Pause to show the slideshow.
- Press the OK or Play/ Pause button to select the operating type.
- Press Stop / EXIT to leave the photo and return to the file list.
- Press the INFO button to see the file information.
- Press ZOOM to regulate the image scale.
- Press HOME to return to the main menu.
5. Settings
Highlight the Settings section and enter it.
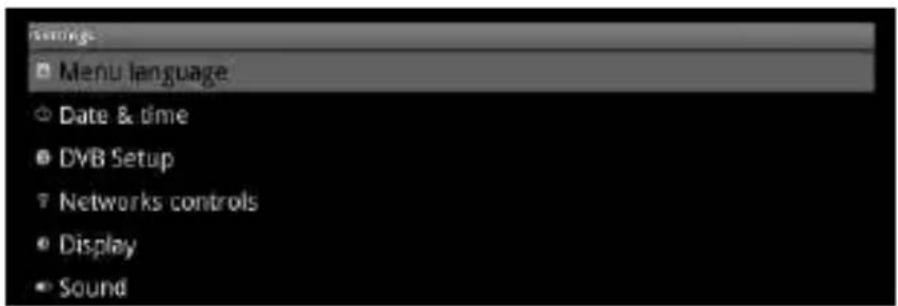
Enter the Language Menu to select a language.

Enter the Date & Time section. The options available are: set date, select time zone, set time, use the 24-hour format and select date format.

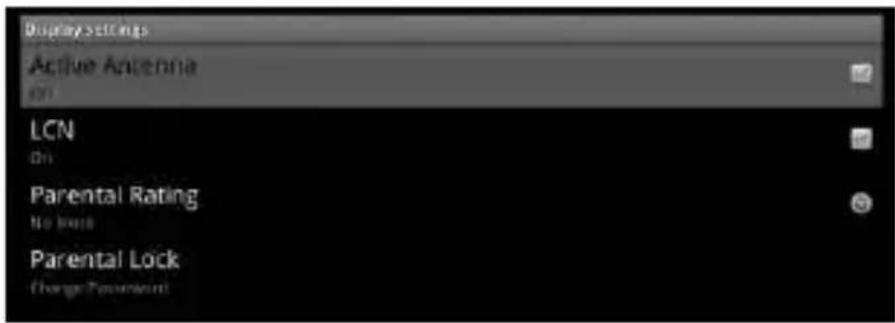
Enter the DVB-T setting section to access the options: Active antenna, LCN, Age rating and lock.
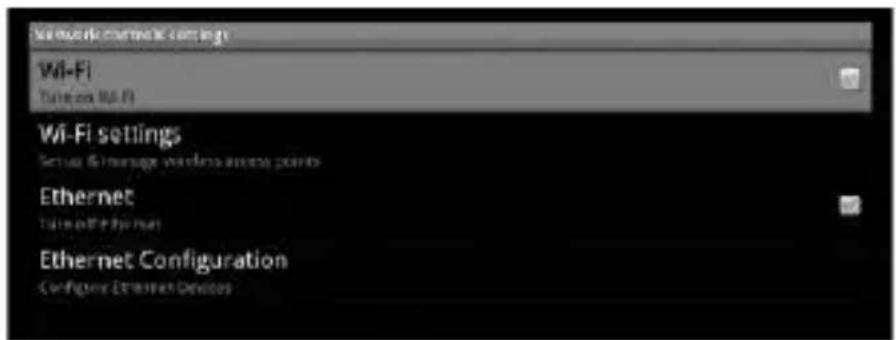
Enter the Network settings. You will find the options: Wi-Fi, Wi-Fi settings, Ethernet and Ethernet settings.
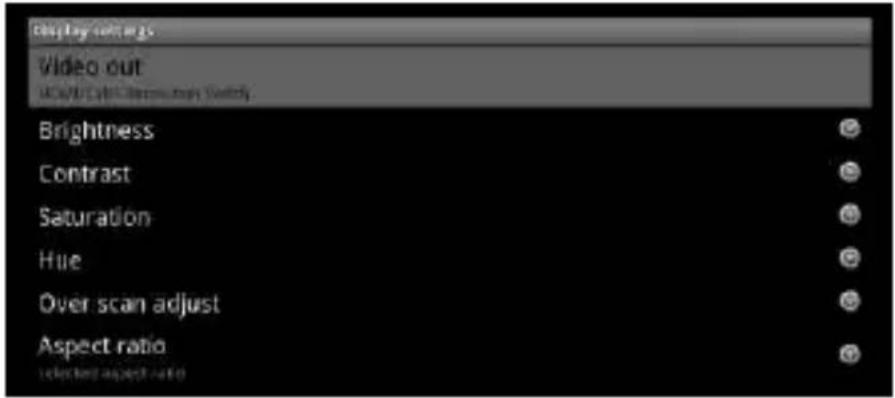
Go to the Display settings section. You will find the options: video output, brightness, contrast, saturation, hue, overscan adjust and Aspect Ratio.
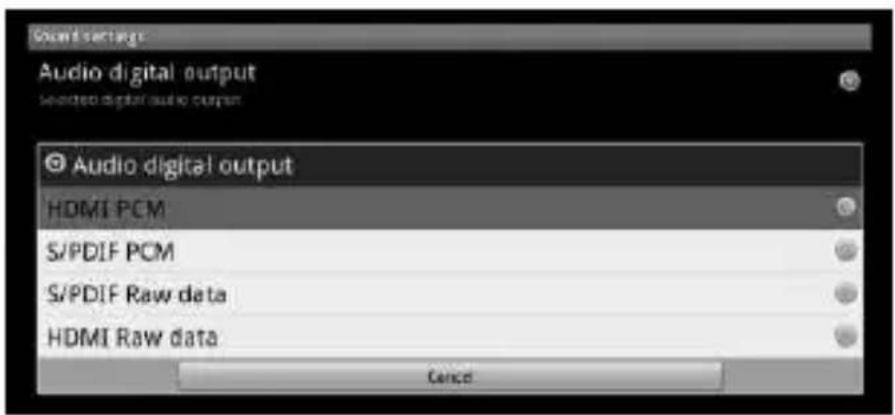
Enter the Sound settings. You will find the following Audio options: HDMI PCM, SPDIF PCM, SPDIF Raw and HDMI Raw.
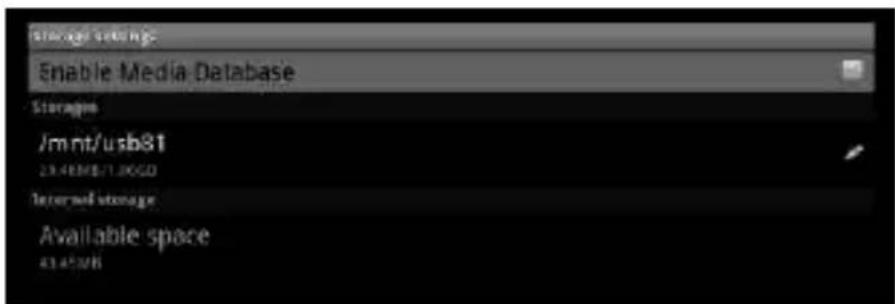
Enter the Storage settings. The options available are: activate the multimedia data base, available space data, access to SD cards and USB devices.
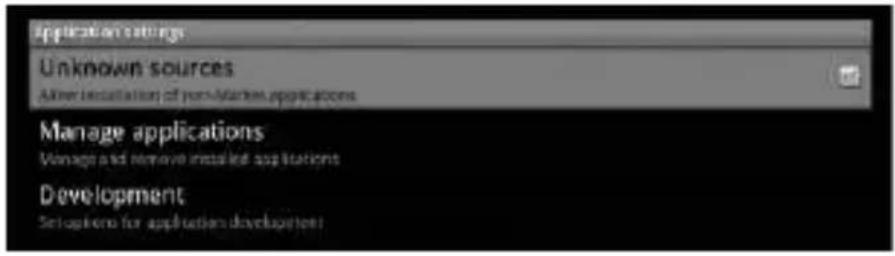
Go to the applications settings. You will find these options: unknown sources (allows the installation of applications which do not belong to Market), manage applications (for managing and removing installed applications) and development (setting options for application development).
Enter the privacy settings. Here you can restore the factory settings, deleting all the unit data.

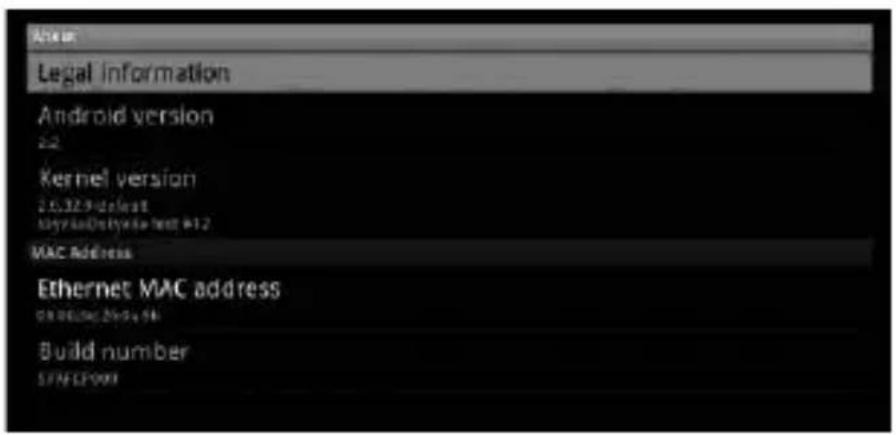
Enter the About option. Here you can consult the legal information, the Android version, the Kernel version, the Ethernet MAC address and the build number.
FAQ
No image with connection by composite video or HDMI?
- Make sure the cable is connected properly. Please follow the instructions of the instructions' manual.
- Please make sure that the screen receives the signal and configure an appropriate viewing mode here.
- The cable has not been plugged in correctly. Check the cable connection.
Why can't I go to Internet after an upgrade?
Please restart the network connection in the settings section.
Why is buffering used?
- To ensure the fluidity of the videos played on the ITV menu or other videos online.
- It can also be used when a relatively high band width is required.
How are applications installed?
- Copy the application file in your USB device or SD card.
- Select 'application on the main menu and inside this section select the OI file manager option.
- Select an external USB device or a SD card.
- Start the installation.
- For more detailed steps, please consult section 4.6.1 (installation of applications)
Why doesn't the software work on a full screen?
Because some programs have a preset resolution and this does not correspond to the player output resolution. This is why the whole screen cannot be shown.
How can web pages used frequently be shown easily?
Go to favorites on the main menu. Add the name and link as the next access.
You can also open the web page; press Menu on the remote control and highlight Add, then enter the page name and its address. Then press OK.
Specifications
Operating system: Android 2.2 O.S
CPU: ARM9 400MHZ (Overclock a 600MHZ)
Vide connections: HDMI1.3
Audio connections: HDMI1.3; Optica S/PDIF
Power input: 100-240V Output: 5V/2A
DDR2: 256MB
Nand Flash: 256MB
USB interface: USB 2.0 Host X3;
System requirements: PC:98SE/ME/2000/XP/Vista/ Win7
Video resolution: PAL 576i/576p; NTSC480i/480p; 720p; 1080i; 1080p(50/60Hz), 1080p 24FPS
Video playback: FLV/AVI / MKV / TS / TP / TRP / M2TS / MPG / MP4 / MOV / VOB / ISO / IFO / DAT / WMV / ASF / 3GP / RM / RMVB / BD-ISO
Subtitles: SAMI (smi); SRT; SUB, IDX+SUB, SSA, ASS
Photo formats: JPG (up to 20 megapixels); BMP; PNG; GIF Music slideshow and Zoom
Ethernet: RJ45 Jack (10/100M)
Wifi: (802.11b/g/n) optional
TS Stream codec: MPEG2,MPEG4,H264
Other functions: Samba, uPnP AV Free open source (.APK) based in Android, Webkite, YouTube, TDT, PVR, EPG.

Consumer Products
www.bestbuy-int.com

BESTBUY
smartTV
EASY PLAYER NETTV
Connection to screen

4.3.5 PVR
4.4 Applications
- You can visit Kudroid to download applications, copy them to your SD/MMC card and install them.
- You are advised to use a high-performance SD card to carry out the installation.
- You can also download applications from other Android applications pages, but, in view of the fact that there are incompatibilities between MID/ Mobile phones and multimedia players, we cannot ensure that every application available outside from Kudroid page will work on the device.
4.4.2 Uninstall applications
- Select the "settings" option and enter it.
- Select the manage applications option and enter it.
- Select the applications which have to be uninstalled and press OK to confirm.
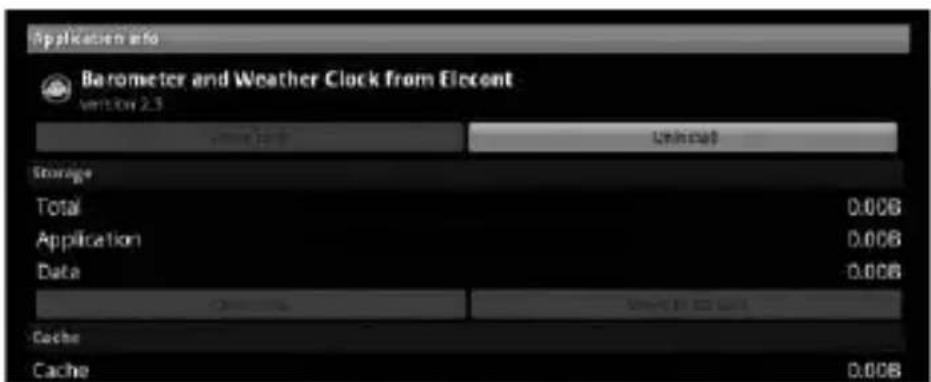
- Désinstaller.
4.4.3 Actualisation du Firmware
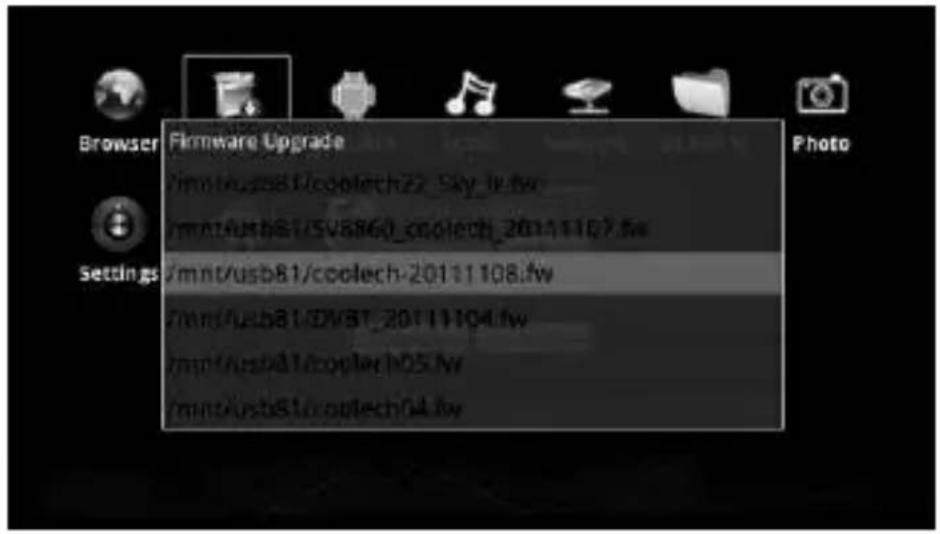
4.5 Multimédia
How are applications installed?
Connections Audio: HDMI1.3; Optica S/PDIF
Alimentation Entrée: 100-240V Output: 5V/2A
DDR2: 256MB
Nand Flash: 256MB
Interface USB: USB 2.0 Host X3;
Conditions du Système: PC:98SE/ME/2000/XP/Vista/ Win7
Video resolution: PAL 576i/576p; NTSC480i/480p; 720p; 1080i; 1080p(50/60Hz), 1080p 24FPS
Video playback: FLV/AVI / MKV / TS / TP / TRP / M2TS / MPG / MP4 / MOV / VOB / ISO / IFO / DAT / WMV / ASF / 3GP/ RM / RMVB / BD-ISO
Sous-titres: SAMI (smi); SRT; SUB, IDX+SUB, SSA, ASS
Formats photo: JPG (up to 20 megapixels); BMP; PNG; GIF Music slideshow and Zoom
Ethernet: RJ45 Jack (10/100M)
Wifi: (802.11b/g/n) optional
TS Stream codec: MPEG2,MPEG4,H264
Other functions: Samba, uPnP AV Free open source (.APK) based in Android, Webkite, YouTube, TDT, PVR, EPG.

Consumer Products
www.bestbuy-int.com
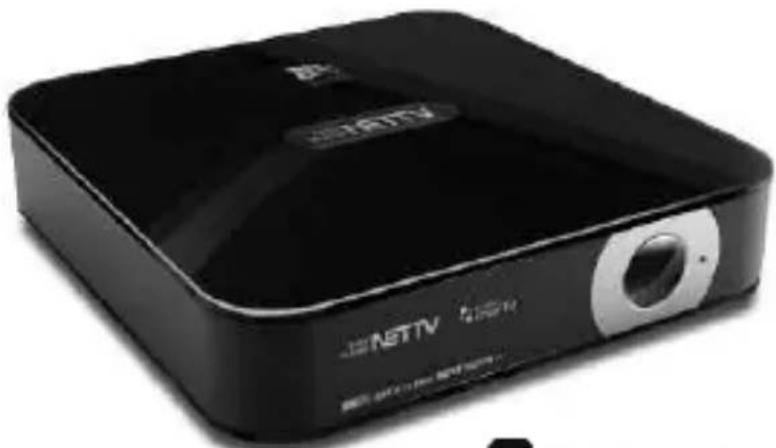

BESTBUY
smartTV
EASY PLAYER NETTV
Manuale dell'utente
Indice
RICERCA MANUALE (Manual Scan)

4.3.5 PVR
4.4 Applicazioni
- Disinstallazione.
4.5 Multimedia
Formati foto: JPG (up to 20 megapixels); BMP; PNG; GIF Music slideshow and Zoom
Ethernet: RJ45 Jack (10/100M)
Wifi: (802.11b/g/n) opzionale
TS Stream codec: MPEG2,MPEG4,H264
Altro: Samba, uPnP AV Free open source (.APK) based in Android, Webkite, YouTube, TDT, PVR, EPG.

Consumer Products
www.bestbuy-int.com

BESTBUY
smartTV
EASY PLAYER NETTV
Manual do Utilizador
Índice
PROCURA MANUAL (Manual Scan)
4.3.2 Organizador de canais (Channel organizer)

4.3.3 Editor de favoritos (Favorite editor)
4.3.5 PVR
4.4 Aplicações
4 Desinstalar
Note: The program may not run smoothly depending on the circumstances of the network.
4.4.5 Explorador (Browser)
4.5 Multimédia
OPERAÇÕES DO COMANDO À DISTÂNCIA
Video resolution: PAL 576i/576p; NTSC480i/480p; 720p; 1080i; 1080p(50/60Hz), 1080p 24FPS
Video playback: FLV/AVI / MKV / TS / TP / TRP / M2TS / MPG / MP4 / MOV / VOB / ISO / IFO / DAT / WMV / ASF / 3GP / RM / RMVB / BD-ISO
Subtitles: SAMI (smi); SRT; SUB, IDX+SUB, SSA, ASS
Photo formats: JPG (up to 20 megapixels); BMP; PNG; GIF Music slideshow and Zoom
Ethernet: RJ45 Jack (10/100M)
Wifi: (802.11b/g/n) optional
TS Stream codec: MPEG2,MPEG4, H264
Other functions: Samba, uPnP AV Free open source (.APK) based in Android, Webkite, YouTube, TDT, PVR, EPG.

Consumer Products
www.bestbuy-int.com

BESTBUY
smartTV
EASY PLAYER NETTV
Instrukcja Obsługi
Wskaźnik
Ustawienia języka
Ustawienia ekranu

4.4 Aplikacje
- Odinstalować.
4.5 Multimedia
Napisy: SAMI (smi); SRT; SUB, IDX+SUB, SSA, ASS
Formaty plików
- EASY PLAYER NETTV
- BÚSQUEDA MANUAL (MANUAL SCAN)
- 4.3.3 EDITOR DE FAVORITOS (FAVORITE EDITOR)
- 4.3.5 PVR
- 4.4 APLICACIONES
- 4.5 MULTIMEDIA
- OPERATIVA DEL MANDO A DISTANCIA
- ÍNDICE
- SAFETY PRECAUTIONS
- LIST OF ELEMENTS
- MAIN FUNCTIONS
- CONNECTIONS
- FRONT PANEL
- SIDE PANEL
- REAR PANEL
- REMOTE CONTROL
- USAGE TIPS
- POWER SUPPLY
- CONNECTION TO SCREEN
- OPERATION
- 4.1 INITIAL SET-UP
- LANGUAGE SET-UP
- DVB SETTINGS (AREA, LCN, PARENTAL RATING, PATERNAL LOCK)
- CABLE NETWORK OR WIFI CONNECTION SETTINGS
- DISPLAY SETTINGS
- 4.2 MAIN MENU
- AUTO SCAN
- MANUAL SCAN
- 4.3.2 CHANNEL ORGANIZER
- 4.3.3 FAVORITE EDITOR
- 4.3.4 PROGRAM GUIDE
- 4.4 APPLICATIONS
- 4.4.1 INSTALLATION USING MULTI APK
- NOTAS
- 4.4.2 UNINSTALL APPLICATIONS
- 4.4.3 FIRMWARE UPGRADING
- 4.4.4 YOUTUBE
- 4.4.5 BROWSER
- 4.5.1 VIDEO PLAYER
- 4.5.2 MUSIC
- 4.5.3 PHOTOS
- SETTINGS
- FAQ
- NO IMAGE WITH CONNECTION BY COMPOSITE VIDEO OR HDMI
- WHY CAN'T I GO TO INTERNET AFTER AN UPGRADE
- WHY IS BUFFERING USED
- HOW ARE APPLICATIONS INSTALLED
- WHY DOESN'T THE SOFTWARE WORK ON A FULL SCREEN
- HOW CAN WEB PAGES USED FREQUENTLY BE SHOWN EASILY
- SPECIFICATIONS
- 4.4.3 ACTUALISATION DU FIRMWARE
- 4.5 MULTIMÉDIA
- INDICE
- RICERCA MANUALE (MANUAL SCAN)
- 4.4 APPLICAZIONI
- PROCURA MANUAL (MANUAL SCAN)
- 4.3.2 ORGANIZADOR DE CANAIS (CHANNEL ORGANIZER)
- 4.4 APLICAÇÕES
- 4.4.5 EXPLORADOR (BROWSER)
- OPERAÇÕES DO COMANDO À DISTÂNCIA
- WSKAŹNIK
- USTAWIENIA JĘZYKA
- USTAWIENIA EKRANU
- 4.4 APLIKACJE
Brand : Best Buy
Model : Easy Player Net TV
Category : Digital decoder