SPD5121CC - Hard Drive PHILIPS - Free user manual and instructions
Find the device manual for free SPD5121CC PHILIPS in PDF.

| Product Type | External Hard Drive |
| Brand | Philips |
| Model | SPD5121CC |
| Capacity | Varies by model |
| Interface | USB 2.0 (High Speed) and eSATA |
| USB 2.0 transfer speed | Up to 480 Mb/s |
| eSATA transfer speed | Up to 2400 Mb/s |
| Rotational speed | 7200 rpm |
| Cache memory | Varies by model |
| System requirements | USB 1.1 (USB 2.0 for maximum speed), Windows 2000/XP/Vista |
| Power supply | External power adapter (included) |
| Package contents | Hard drive, vertical stand, power adapter, power cord, USB cable, eSATA cable, installation CD-ROM, manual |
| Main features | One-Click Backup, Safe Shutdown |
| Included software | Nero BackItUp |
| Care and cleaning | Avoid contact with water, clean with a dry cloth |
| Safety | Plastic bag dangerous for children, ensure proper ventilation |
| Warranty | Refer to the enclosed "Philips Warranty" leaflet |
| Recycling | Compliant with WEEE directive, do not dispose of with household waste |
Frequently Asked Questions - SPD5121CC PHILIPS
User questions about SPD5121CC PHILIPS
0 question about this device. Answer the ones you know or ask your own.
Ask a new question about this device
Download the instructions for your Hard Drive in PDF format for free! Find your manual SPD5121CC - PHILIPS and take your electronic device back in hand. On this page are published all the documents necessary for the use of your device. SPD5121CC by PHILIPS.
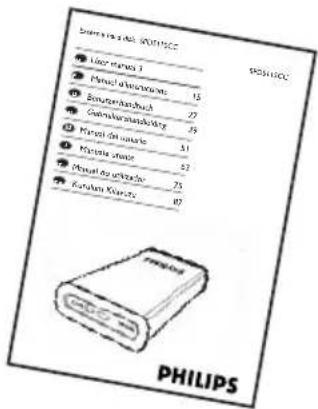
USER MANUAL SPD5121CC PHILIPS
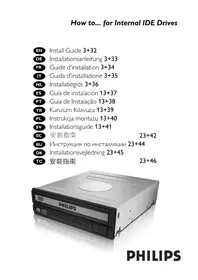
3 What's in the box?
4 How to connect this external hard disk to your computer?
5 How to safely disconnect and shut down using the Safe-Shutdown button?
6 How to make a back-up using the One-Click Back-Up button?
10 How to restore a back-up?
13 Warranty, Environment and Safety
14 Specifications
Important note
To use the One-Click Back-Up button and Safe-Shutdown button
(works only via USB connection), first install the Nero BackItUp software. For instructions and more information, see page 5-6.
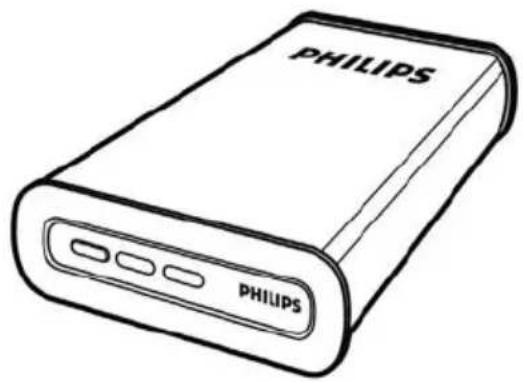
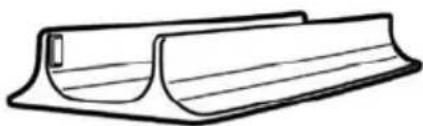
A:External hard disk B:Vertical stand
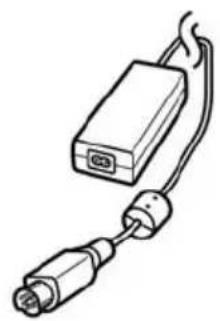
C:Poweradapter
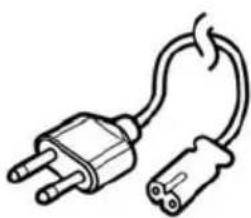
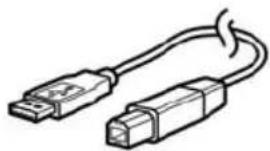
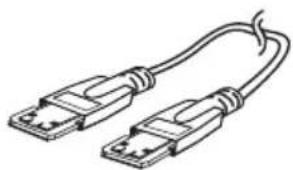
D:Power cord E:USB cable
F : eSATA cable G : Installation CD H : User manual
How to connect this external hard disk to your system?
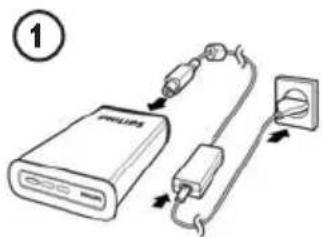
Put the Power adapter (C) and the Power cord (D) together and connect them to the external hard disk and a power outlet.
-
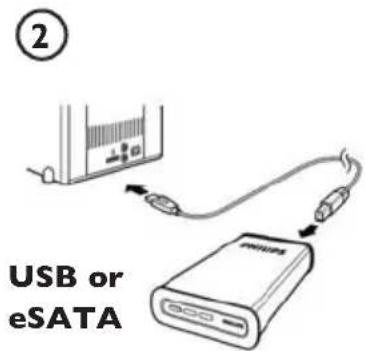
For USB: Connect the USB cable (E) to your external hard disk. Connect the other side of the USB cable to an empty USB port of your computer.
-
For eSATA: Plug the eSATA cable (F) in a eSATA port of the external disk. Connect the other side of the eSATA cable to an empty eSATA port of your computer.
A drive icon, Philips External Hard Disk, appears in Windows Explorer and the blue light should light up. (The computer sometimes needs to be restarted, before you can use the new hardware).
Your hard disk is now ready to use and you can save and copy data on the drive by moving files and folders to the drive, just as you do when using your internal hard disk.
Important note
To use the One-Click Back-Up button and Safe-Shutdown button (works only via USB connection), first install the Nero BackUp software. For instructions and more information, see page 5-6.
How to safely disconnect and shut down using the Safe-Shutdown button?
EN
How to use the Safe-Shutdown button? (Works only via USB connection)
The Nero software, supplied together with this product, has to be installed to enable the Safe-Shutdown functionality.
To install Nero BackItUp, insert the Nero installation CD, wait for a pop-up to appear and select Nero from the list of options.
When the pop-up screen doesn't appear, click on the Setup.exe file from the CD in the Windows Explorer to start the installation.
Please close Windows Explorer and Nero BackItUp.
2 Press the Safe-Shutdown button
3 Wait until the blue light on front of the hard disk is not functioning anymore.
4 You can now safely disconnect the hard disk from your computer.
How to safely disconnect without using the Safe-Shutdown button?
Double-click the Safely Remove Hardware icon in the task bar in the lower right part of the screen.
2 In the window that appears, select the name of the device that is to be removed, then click the Stop button.
3 When the Stop a hardware device screen appears, make sure the correct information is displayed, and then click the OK button.
4 When the message Safe to remove hardware appears, remove the drive from the computer's USB port.
How to make a back-up, using the One-Click Back-Up button?
(Works only via USB connection)
The Nero software, supplied together with this product, has to be installed to enable the One-Click Back-Up functionality.
To install Nero BackItUp, insert the Nero installation CD, wait for a pop-up to appear and select Nero from the list of options.
When the pop-up screen doesn't appear, click on the Setup.exe file on the CD in the Windows Explorer to start the installation.
If you push the One-Click Back-Up button for the first time after installation of the Nero software the following screen will appear:
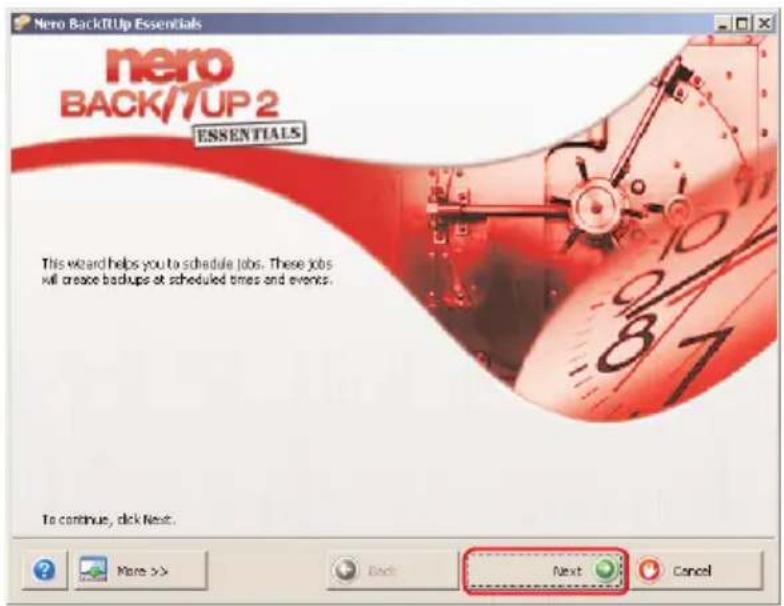
1 Click on the Next button to start the Job Wizard.
EN
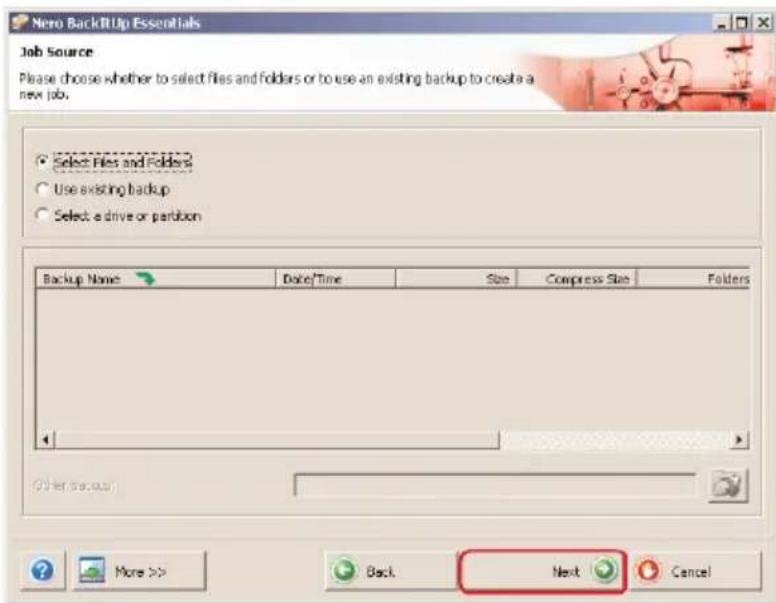
2 Click on the Next button in order to select the files you want to make a back-up of.
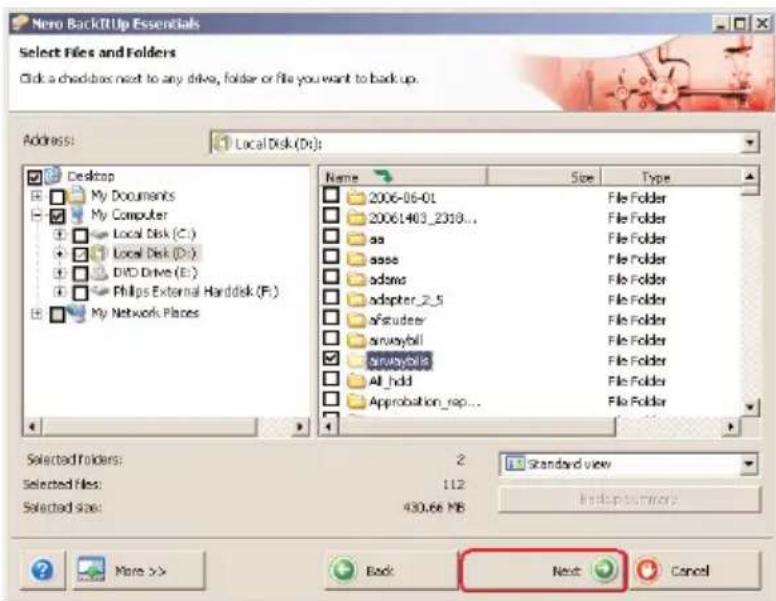
3 Select the files and folders you want to backup and click the Next button.

4 Select the Philips External Hard Disk as target using the dropdown function, then click the Next button.
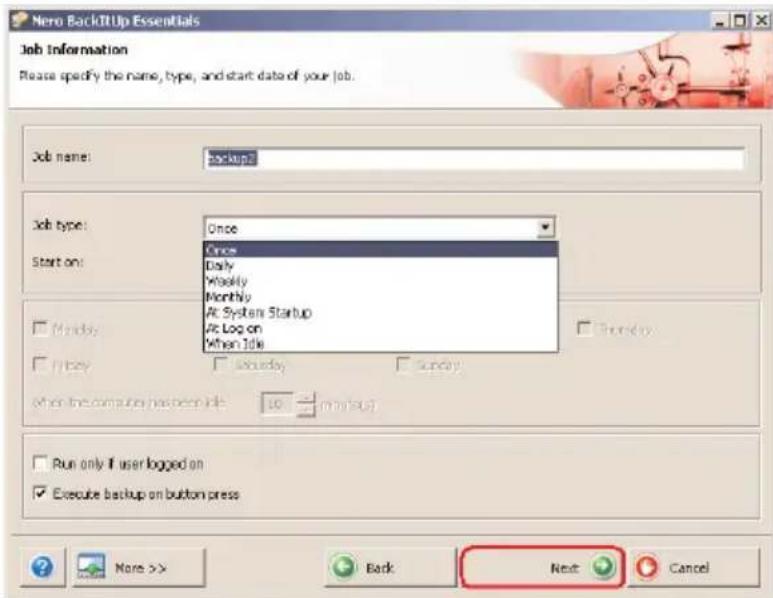
5 To execute the job only by using the One-Click Back-Up button, select Job type Once using the dropdown function.
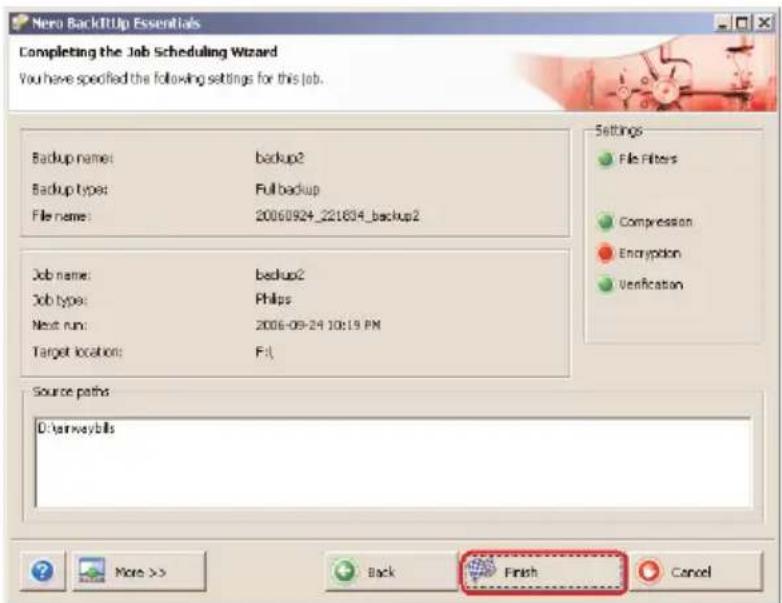
6 This screen gives you an overview of the job you have added. Click the Finish button to complete the wizard.
The next time you push the One-Click Back-Up button the back-up will start automatically.
See www.nero.com for additional information on Nero BackItUp
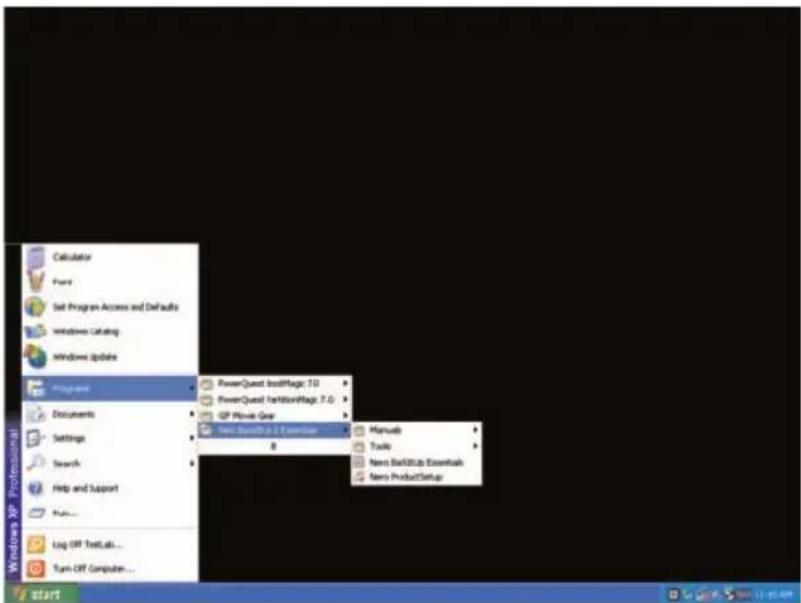
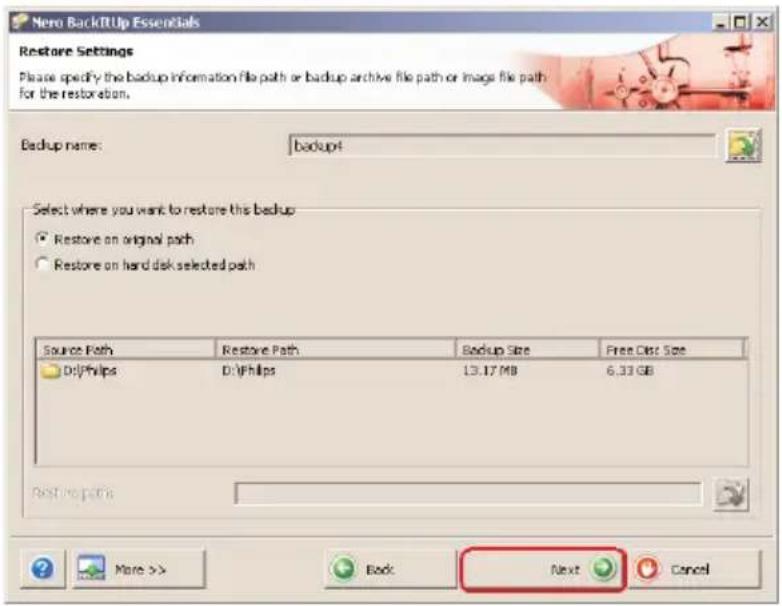
Start the Nero BackItUp software.
When the main screen of Nero BackUp opens, click on Restore back-up button.
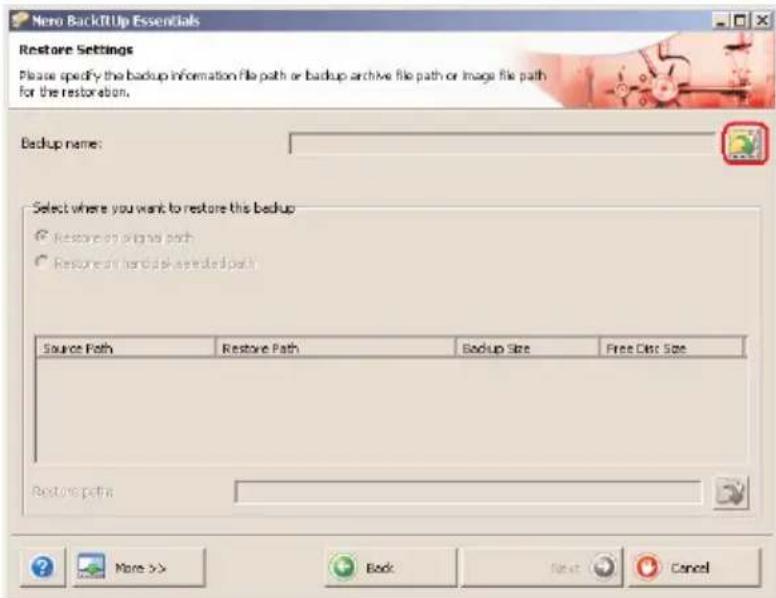
2 Select the file source and restore path.
Click on the Next button.
EN
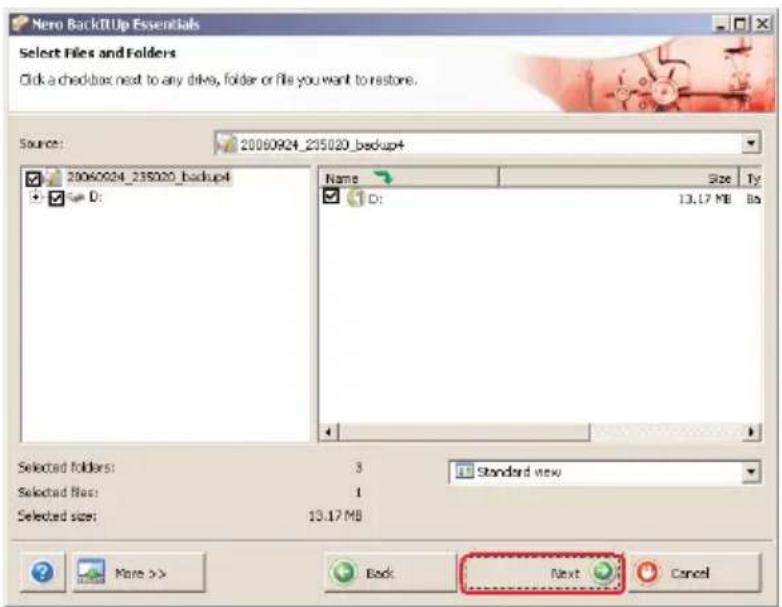
3 Click the Next button.
4 Click the Next button.
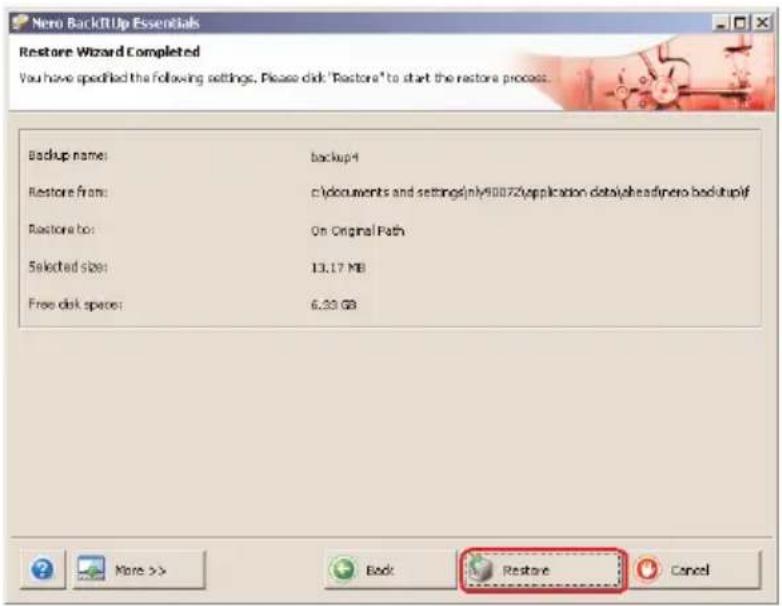
5 Click on the Restore button to finish the wizard. You now have successfully restored your back-up.
See www.nero.com for additional information on Nero BackltUp.
How to find warranty information?
Additional warranty information is available in the "Philips Warranty" folder on the Nero software disc.
You need Adobe Reader software to open these files. If you don't have Adobe Reader, you can download it for free on www.adobe.com.
The Philips warranty may not apply if damage is caused by accidents, shock, misuse or neglect.

Be responsible Respect copyrights
"The making of unauthorized copies of copy-protected material including computer programmes, files, broadcasts and sound recordings, may be an infringement of copyrights and constitute a criminal offence. This equipment should not be used for such purposes."
WEEE mark: "Information to the Consumer". Disposal of your old product
Your product is designed and manufactured with high quality materials and components, which can be recycled and reused. Please inform yourself about the local separate collection system for electrical and electronic products, including those marked by the crossed-out wheel bin symbol. Please act according to your local rules and do not dispose of your old products with your normal household waste.
WARNING
Plastic bags can be dangerous
To avoid danger of suffocation, keep this bag away from babies and small children.
Although this product has been designed with utmost care for long-lasting performance. Philips does advise you to handle electronics with good care: Avoid contact with water, exposure to extreme forces.
Please make sure you place the device in a well-ventilated environment, to ensure longest possible lifetime and optimal performance.
Philips does not provide any data recovery services and cannot under any circumstance be held responsible for loss of data. It is the customer's responsibility to back-up all data stored on the Philips disk. All data will be deleted when offering the product to Philips for service.
Specifications
Technical Specifications:
Capacity Depending on model
Interface Hi-Speed USB 2.0 and eSATA
Transfer speed USB 2.0 480 Mb/s, eSATA 2400 Mb/s
Rotational speed 7200 rpm
Cache memory Depending on model
System requirements USB 1.1 (USB 2.0 for max. transfer speed)
Windows 2000,Windows XP,Vista
Additional information available at our website:
www.philips.com/support
www.philips.com/storage
Be responsible Respect copyrights
www.philips.com/support
www.philips.com/storage
Be responsible Respect copyrights
www.philips.com/support
www.philips.com/storage
Inhoud
Be responsible Respect copyrights
www.philips.com/support
www.philips.com/storage
Contenido
Be responsible Respect copyrights
www.philips.com/support
www.philips.com/storage
Sommario
Be responsible Respect copyrights

www.philips.com/support
www.philips.com/storage
Conteudo
Be responsible Respect copyrights
www.philips.com/support
www.philips.com/storage
icindekiler
Be responsible Respect copyrights
www.philips.com/support
www.philips.com/storage
TR

Specifications subject to change without notice.
All dimensions shown are approximate. © 2007 Koninklijke Philips Electronics N.V.
0085100
All rights reserved.
Reproduction, copying, usage, modifying, hiring, renting, public performance, transmission and/or broadcasting in whole or part is prohibited without the written consent of Philips Electronics N.V.