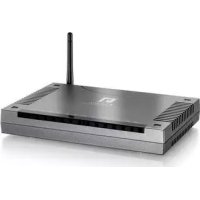
WBR3470B - Router LEVELONE - Free user manual and instructions
Find the device manual for free WBR3470B LEVELONE in PDF.



User questions about WBR3470B LEVELONE
0 question about this device. Answer the ones you know or ask your own.
Ask a new question about this device
Download the instructions for your Router in PDF format for free! Find your manual WBR3470B - LEVELONE and take your electronic device back in hand. On this page are published all the documents necessary for the use of your device. WBR3470B by LEVELONE.
USER MANUAL WBR3470B LEVELONE
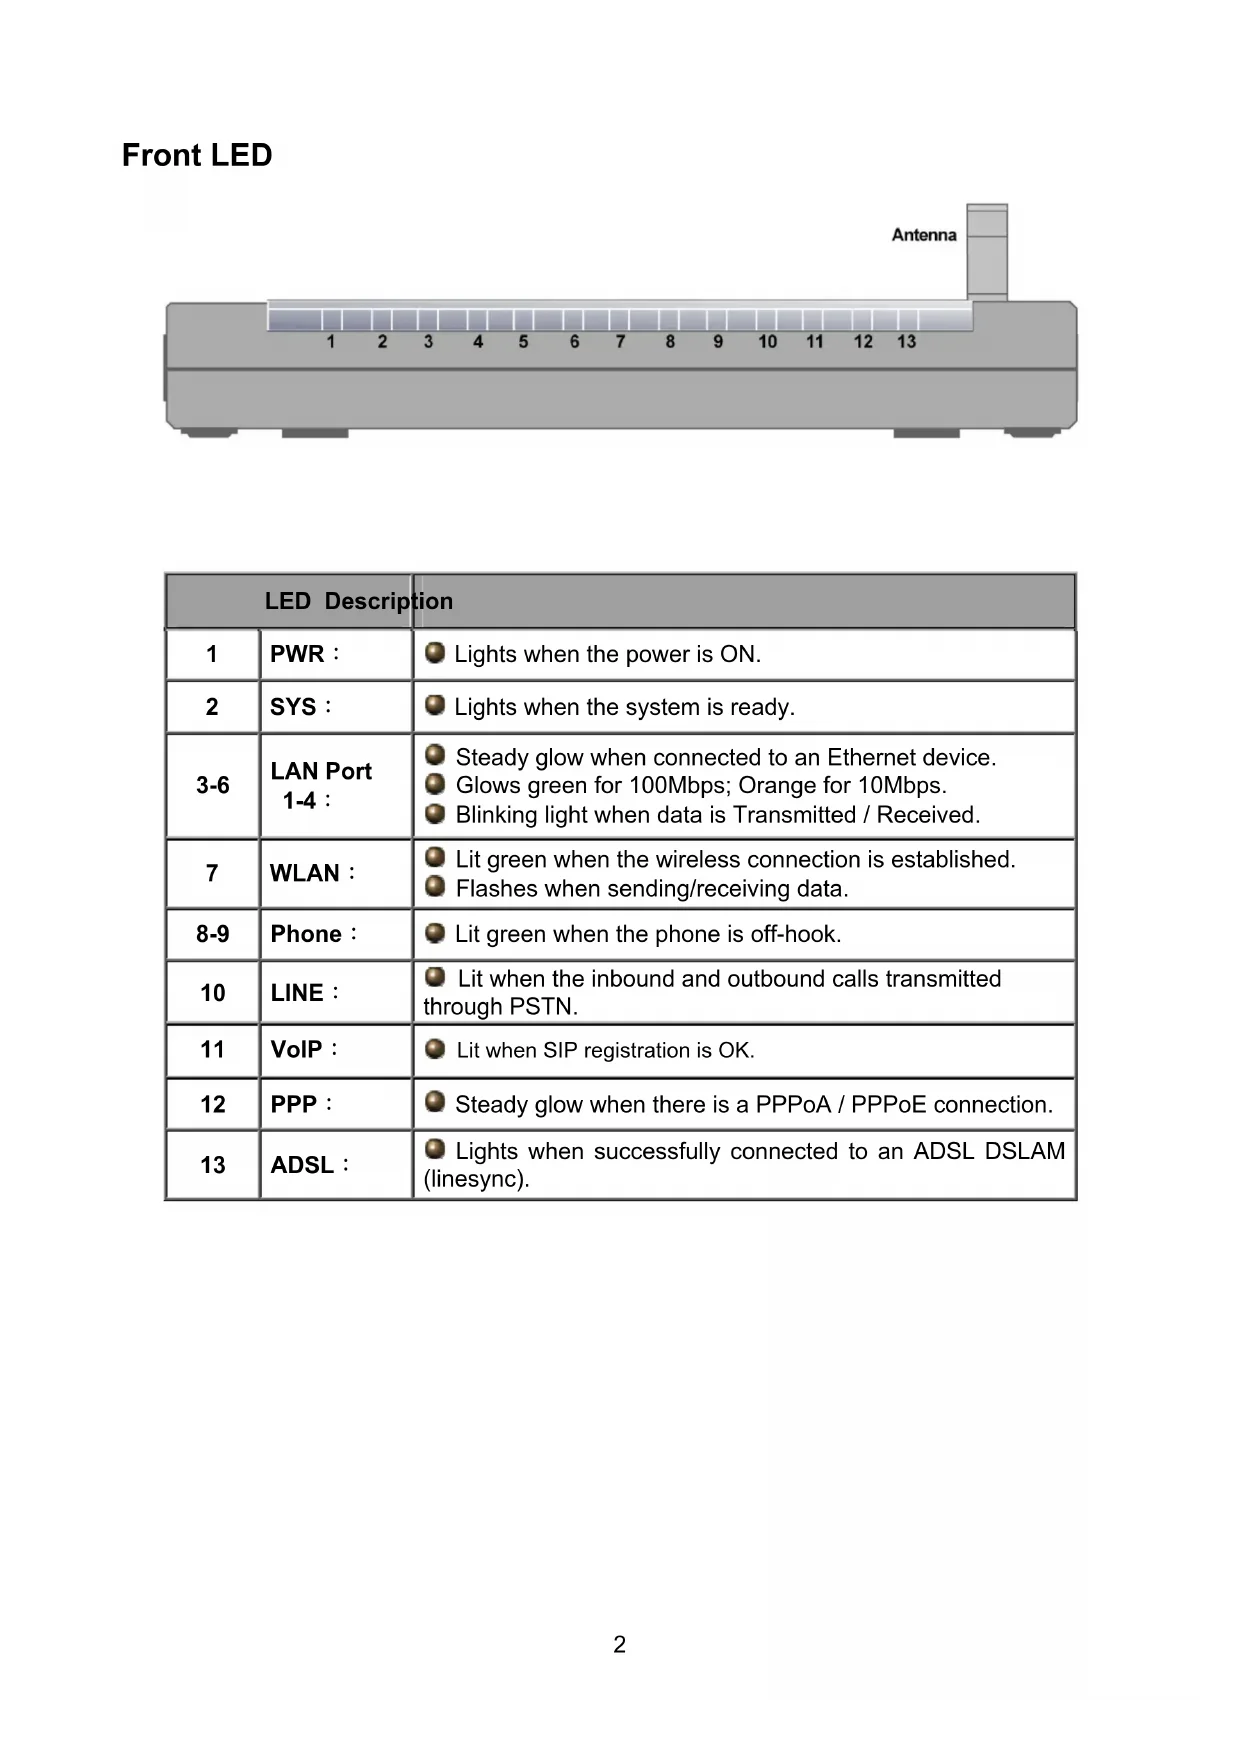
| LED Description | tion | |
| 1 | PWR : | ● Lights when the power is ON. |
| 2 | SYS : | ● Lights when the system is ready. |
| 3-6 | LAN Port 1-4 : | ● Steady glow when connected to an Ethernet device. ● Glows green for 100Mbps; Orange for 10Mbps. ● Blinking light when data is Transmitted / Received. |
| 7 | WLAN : | ● Lit green when the wireless connection is established. ● Flashes when sending/receiving data. |
| 8-9 | Phone : | ● Lit green when the phone is off-hook. |
| 10 | LINE : | ● Lit when the inbound and outbound calls transmitted through PSTN. |
| 11 | VoIP : | ● Lit when SIP registration is OK. |
| 12 | PPP : | ● Steady glow when there is a PPPoA / PPPoE connection. |
| 13 | ADSL : | ● Lights when successfully connected to an ADSL DSLAM (linesync). |
Rear Ports
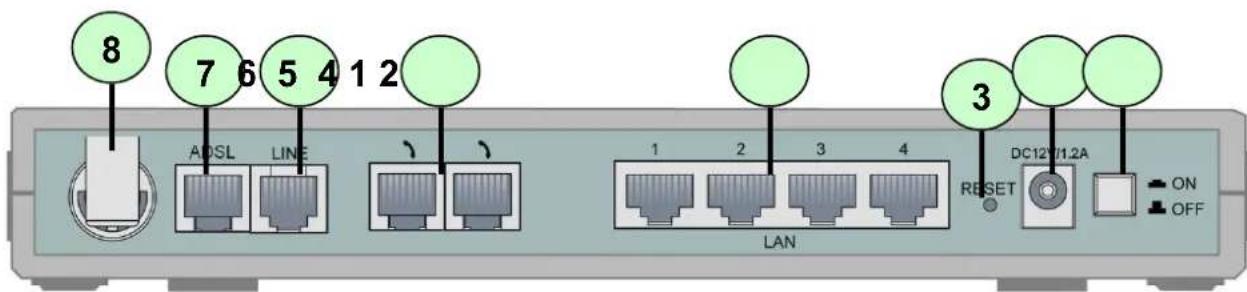
| Port Description | ||
| 1 | Power Switch | Power ON/OFF switch. |
| 2 | PWR | Connect the supplied power adapter to this jack. |
| 3 | RESET | After the router is powered on, press this recessed button using the end of paper clip or other small pointed object to reset the router or to restore it to factory default settings. 1. Recovery procedures for non-working routers (e.g. after a failed firmware upgrade flash): 2. Recovery procedures for a lost web interface password: |
| 4 | LAN | Connect a UTP Ethernet cable (Cat-5 or Cat-5e) to one of the four LAN ports when connecting to a PC or an office/home network of 10Mbps or 100Mbps. |
| 5 | Phone | Connect RJ-11 cable to this port when connecting to an analog phone set. |
| 6 | LINE | Connect RJ-11 cable to this port when connecting to the telephone wall jack |
| 7 | ADSL | Connect the supplied RJ-11 ("telephone") cable to this port when connecting to the ADSL/telephone network. |
| 8 | Antenna | Connect the detachable antenna to this port. |
Package Contents
WBR-3470
AC-DC Power Adapter (12VDC, 1.2A)
✓ RJ-11 ADSL/telephone Cable
√ Cat.5 Cable
√ CD Manual
Quick Installation Guide
Note
For more detailed instructions on configuring and using the ADSL2+ VoIP Router, please refer to the User Manual
Warning
Do not use the WBR-3470 in high humidity or high temperatures.
Do not use the same power source for the WBR-3470 as other equipment.
Do not open or repair the case yourself. If the WBR-3470 is too hot, turn off the power immediately and have it repaired at a qualified service center.
Avoid using this product and all accessories outdoors.
Attention
Place the WBR-3470 on a stable surface.
Only use the power adapter that comes with the package. Using a different voltage rating power adaptor may damage the router.
Connecting ADSL2+ VoIP Router
- Connect the Router to a LAN (Local Area Network) and the ADSL/telephone (LINE) network.
- Power on the device.
- Make sure the PWR and SYS LEDs are lit steadily and that the relevant LAN LED is lit.
- Connect an RJ11 cable to VoIP port when connecting to an analog phone set.
- Connect an RJ11 cable to LINE port when connecting to the telephone wall jack
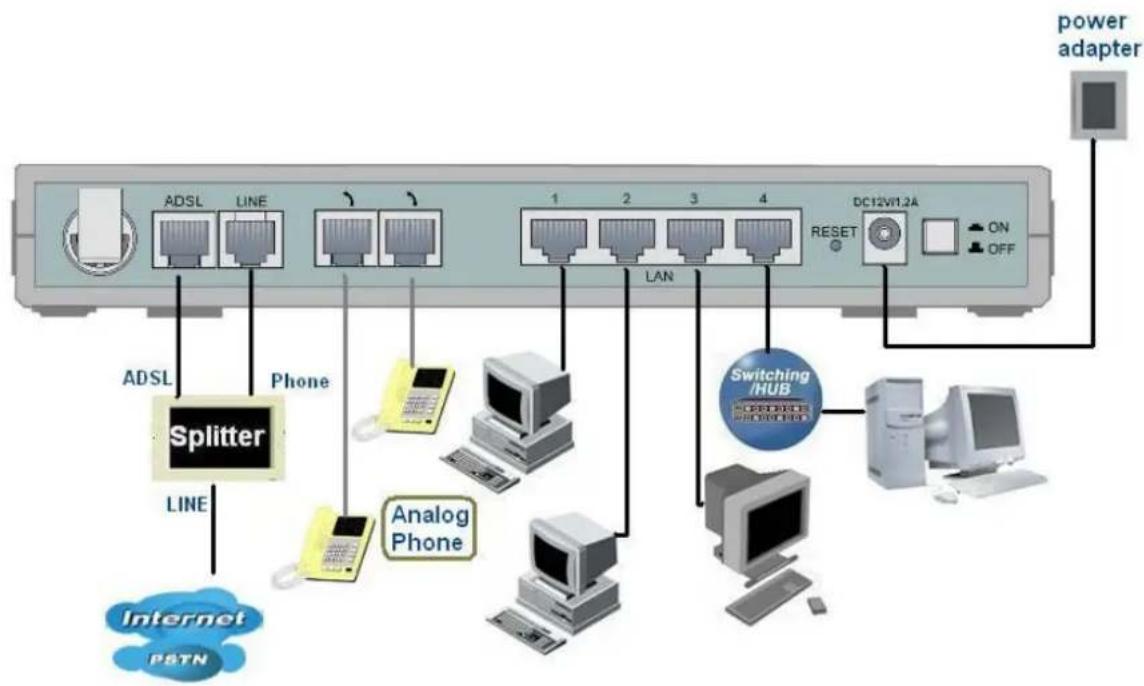
Configuring the Network Properties
Configuring PC in Windows XP
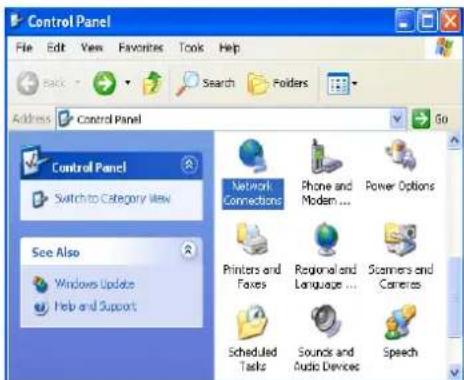
- Go to Start / Control Panel (in Classic View). In the Control Panel, double-click on Network Connections
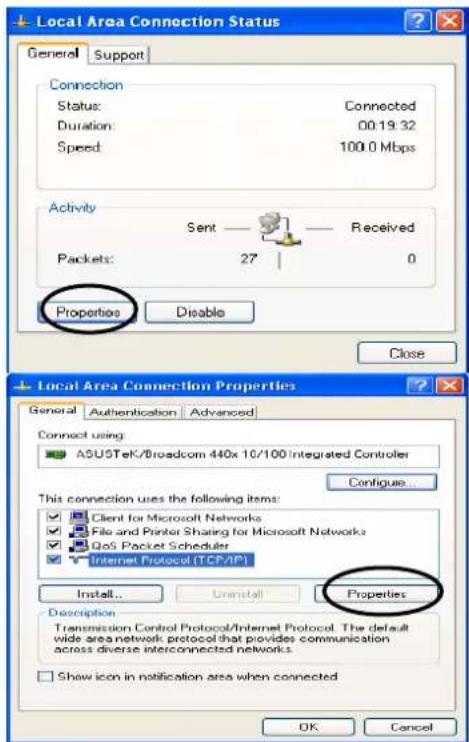
- Double-click Local Area Connection.
- In the Local Area Connection Status window, click Properties.
- Select Internet Protocol (TCP/IP) and click Properties.
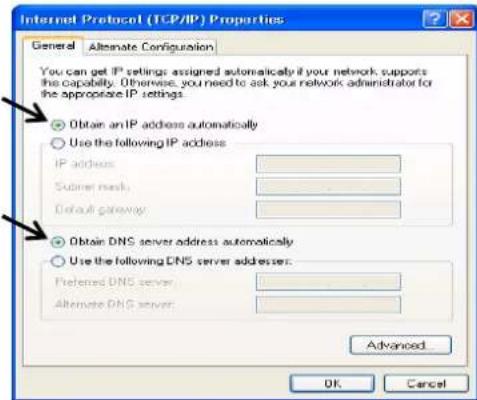
- Select the Obtain an IP address automatically and the Obtain DNS server address automatically radio buttons.
- Click OK to finish the configuration.
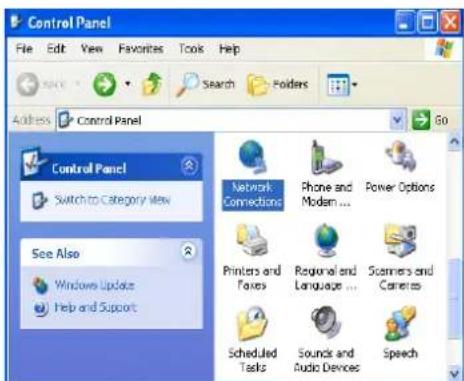
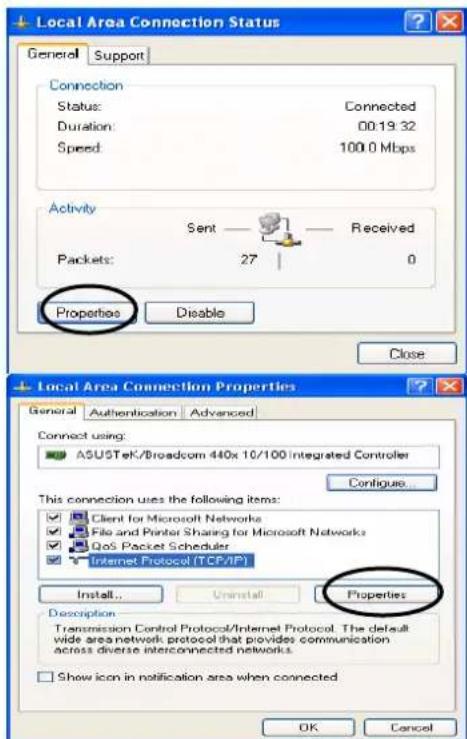
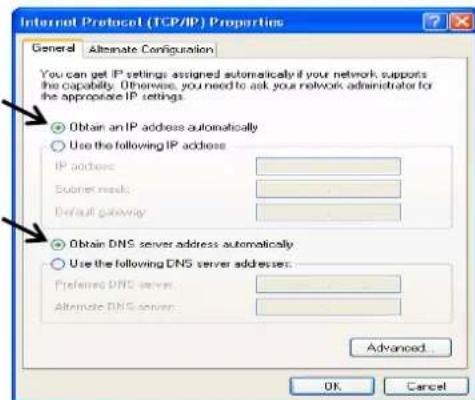
Configuring Your ADSL2+ VoIP Router
Note
To configure this device, you must have IE 5.0 / Netscape 4.5 or above installed
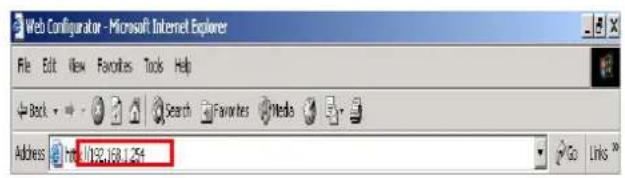
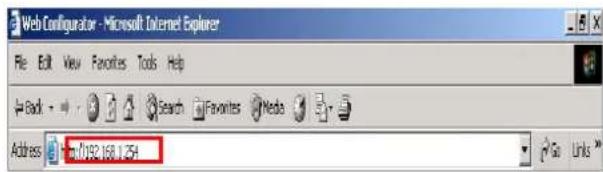
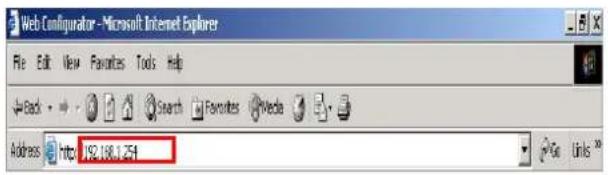
- Open the web browser and type http://192.168.1.254 in the browser's address box. This number is the default IP address for this router. Press Enter.
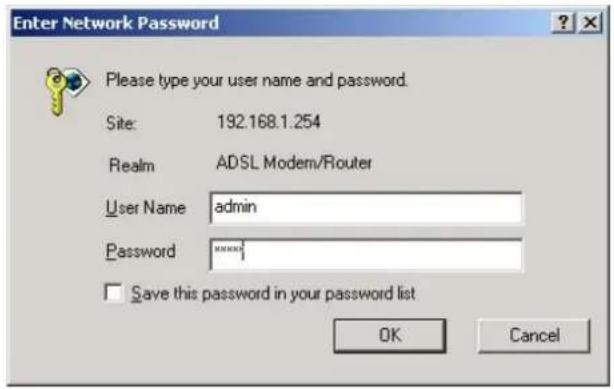
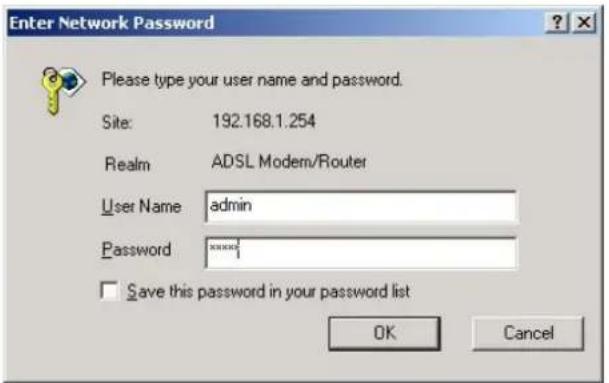
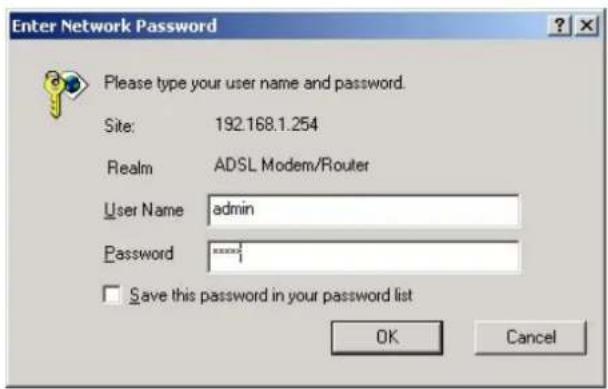
- A username and password window will appear. The default username and password are admin and admin. Press OK to proceed.
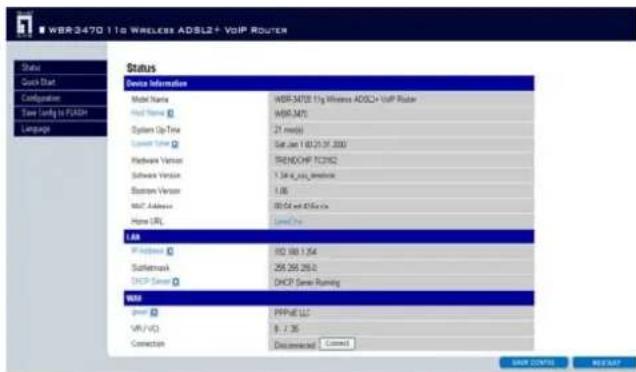
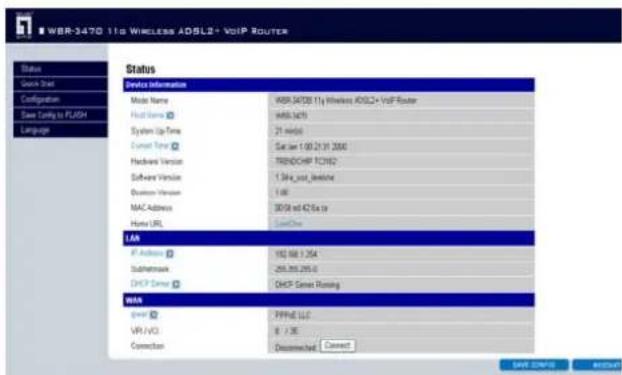
- You will get a status report on web page.

Verifying Your Local Network Connection with the Device
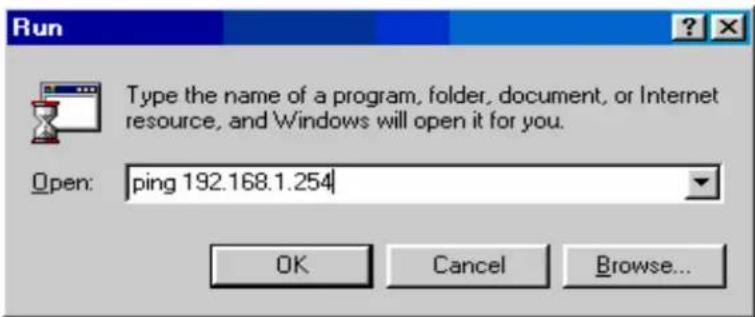
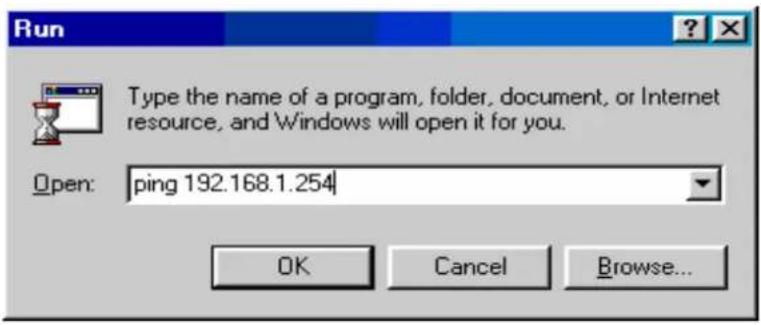
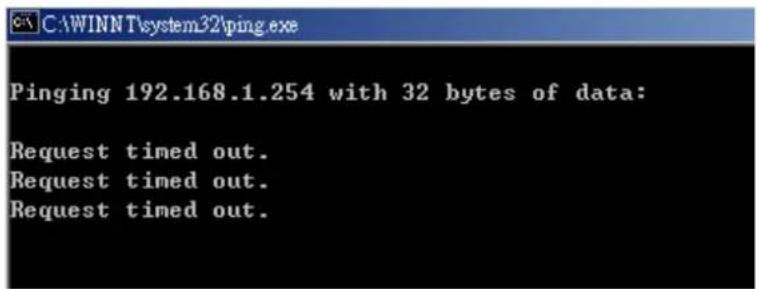
To see if this ADSL Router is visible on the local network, go to Start/Run. In the Run dialog box, type "ping 192.168.1.254" then presses OK.
A command prompt window will pop out. If your ping is successful which means your local network is able to reach to the device, then the command prompt window will close up automatically.
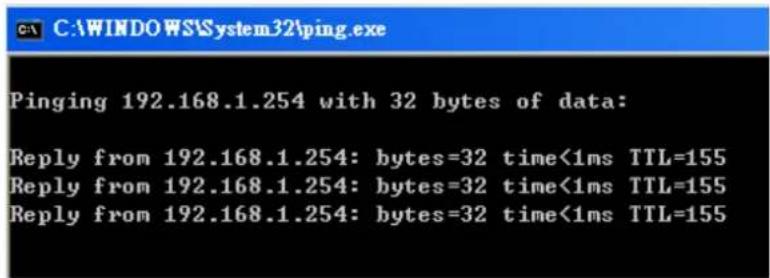
Connection fails, when you see "Request timed out" in the command prompt window. You may need to check your set up.
Lieferumfang
HacrtpoiKa moeMa ADSL2+ c mapwpyTu3aTopoM
PpumeyaHue.
Для настου ку усmpочсma mpe6yemc8 6pay3ep Internet Explorer 5.0, Netscape 4.5 uuu 6oJee Ho8bIe bepcuu
-
OTKpoIte Be6-6pay3ep IN BBeIInTe B cTpOKe aIpeca http://192.168.1.254. 3To cTaHdapTHbI IP-aIpec MapwpyTu3aTopa. HaxMnTe KHOJky «Enter» (BBoD).
-
OTo6pa3ntc8 OKHO, B KOTOpOM Heo6xoIMMO BBecTN IIMr NOnIb3OBaTeJI r napoiB. No ymoJUanHIO napoiB nIMr noIb3OBaTeJI - «admin» n «admin». ДЯ npOdoJIxKeHry NaXmITe «OK».
-
Ha Be6-CTpaHnue OTo6pa3ntc8 OTyEt O COCTOHN.
- Start / Control Panel (uunnuanana) u Control Panel Network Connections
- Local Area Connection
- Local Area Connection Status Properties
- Internet Protocol (TCP/IP) Properties
- Obtain an IP address automatically Obtain DNS server address automatically
- nON OK waiunr
nVnnnADSL2+ VoIP/Router
WJ7JIH
Control Panel (4) Start 1
Control Panel Network
Local Area Connection -2
()
) Local Area Connection Status -3
..(wai) Properties.
Internet Protocol (TCP/IP) -4
Properties (TCP/IP) (20
(2)
Obtain an IP address -5
(b) IPJgic (Jy) automatically
Obtain DNS server address automatically,
(1)
aagill clg (g) OK 6-6
ADSL2+
e 5.0 Netscape 4.5
http://192.168.1.254 1-1 IP jn jn jn jn jn jn jn jn jn jn jn jn jn jn jn jn jn jn jn jn jn jn jn jn jn jn jn jn jn jn jn jn jn jn jn jn jn jn jn jn jn jn jn jn jn jn jn jn jn jn j
pwl .a1lal 1e jor rall a5g pddiial 10 sdiy -2
g yraol als admin g yd jy d iy
.ajll (g) OK le biai alis admin
-3
jgeJy aJzol JIaJy aaJoo