MT1172B - Graphic tablet XP-Pen - Free user manual and instructions
Find the device manual for free MT1172B XP-Pen in PDF.
Download the instructions for your Graphic tablet in PDF format for free! Find your manual MT1172B - XP-Pen and take your electronic device back in hand. On this page are published all the documents necessary for the use of your device. MT1172B by XP-Pen.
USER MANUAL MT1172B XP-Pen
Deco Pro Series Drawing Tablet
(Gen 2)
Model: MT1172B
XPPEN TECHNOLOGY CO.
service@xp-pen.com
www.xp-pen.com
Contents
English 01-07
繁体中文 08-14
Deutsch 15-21
Espanol 22-28
Francais 29-35
Italiano 36-42
日本語 43-49
51-56
Pycckn 57-63
Portugues 64-70
Polski 71-77
Nederland 78-84
Cervena 85-91
4 92-98
Quick Guide
Deco Pro Series Drawing Tablet (Gen 2)
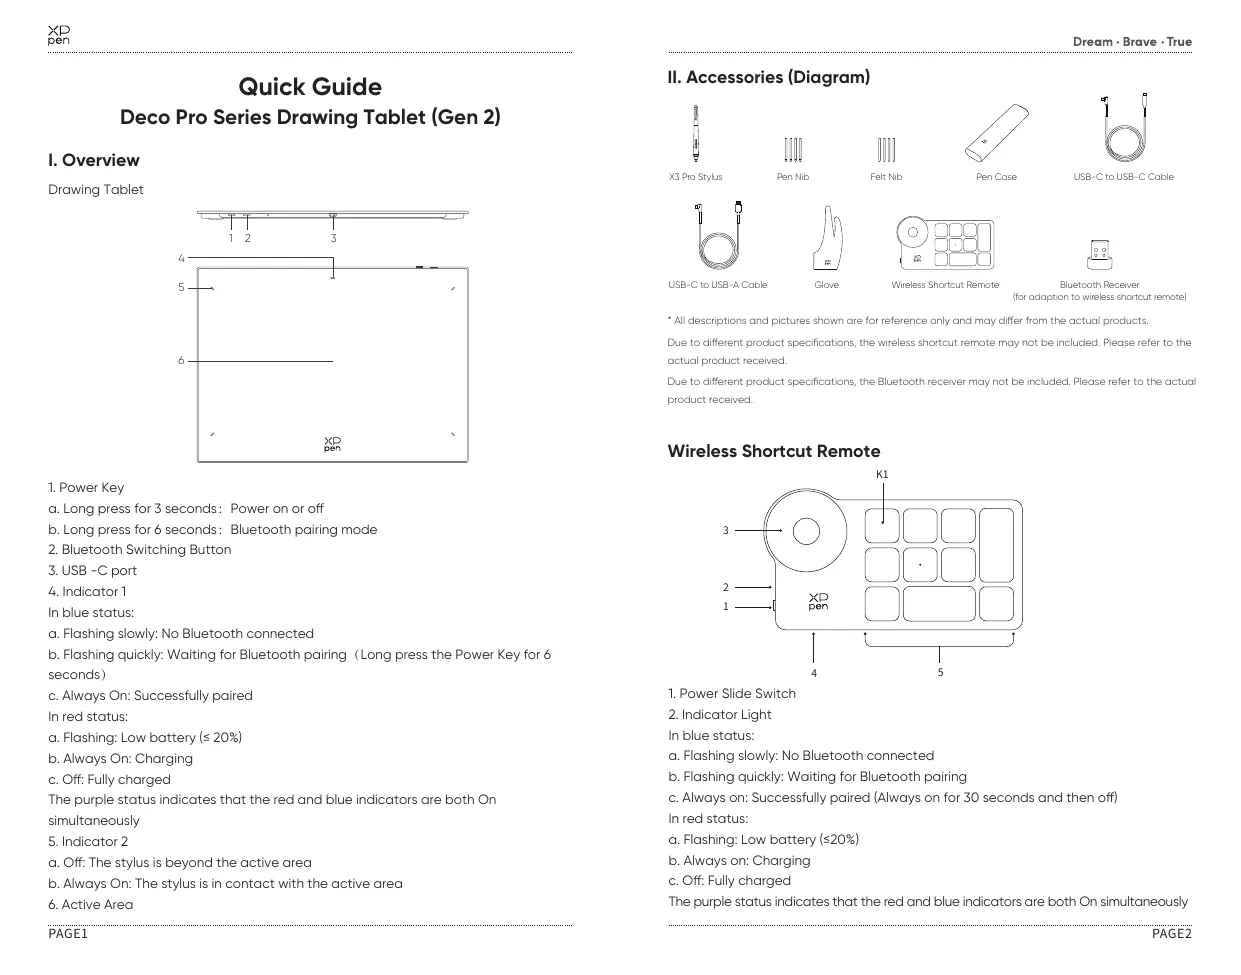
I. Overview
Drawing Tablet
- Power Key
a. Long press for 3 seconds: Power on or off
b. Long press for 6 seconds: Bluetooth pairing mode - Bluetooth Switching Button
- USB-C port
- Indicator 1
In blue status:
a. Flashing slowly: No Bluetooth connected
b. Flashing quickly: Waiting for Bluetooth pairing (Long press the Power Key for 6 seconds)
c. Always On: Successfully paired
In red status:
a. Flashing: Low battery (≤ 20%)
b. Always On: Charging
c. Off: Fully charged
The purple status indicates that the red and blue indicators are both On simultaneously
- Indicator 2
a. Off: The stylus is beyond the active area
b. Always On: The stylus is in contact with the active area - Active Area
II. Accessories (Diagram)

X3 Pro Stylus

Pen Nib

Felt Nib

Pen Case

USB-C to USB-C Cable

USB-C to USB-A Cable

Glove
Wireless Shortcut Remote

Bluetooth Receiver (for adaption to wireless shortcut remote)
- All descriptions and pictures shown are for reference only and may differ from the actual products.
Due to different product specifications, the wireless shortcut remote may not be included. Please refer to the actual product received.
Due to different product specifications, the Bluetooth receiver may not be included. Please refer to the actual product received.
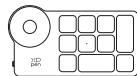
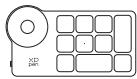
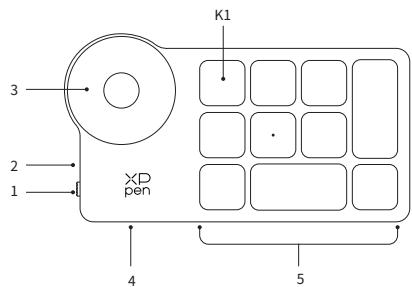
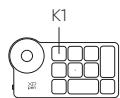
Wireless Shortcut Remote
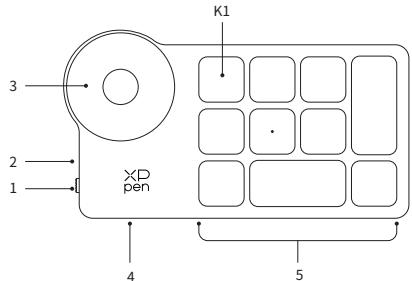
- Power Slide Switch
- Indicator Light
In blue status:
a. Flashing slowly: No Bluetooth connected
b. Flashing quickly: Waiting for Bluetooth pairing
c. Always on: Successfully paired (Always on for 30 seconds and then off) In red status:
a. Flashing: Low battery (≤20%)
b. Always on: Charging
c. Off: Fully charged
The purple status indicates that the red and blue indicators are both On simultaneously
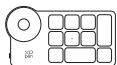
- Roller
- USB-C Port
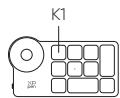
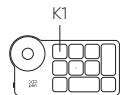
- Shortcut Key Group
The Wireless Shortcut Remote can be customized in four modes, with each mode customizing 10 keys. You can disable them if you don't need them.
One mode is enabled by default, and K1 is the toggle key. Click to switch between different key groups.
III. Connection
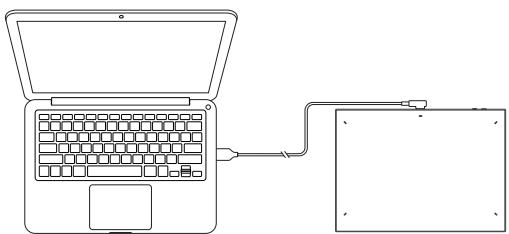
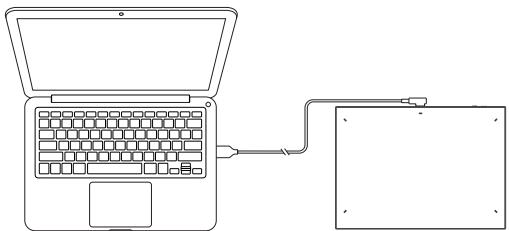
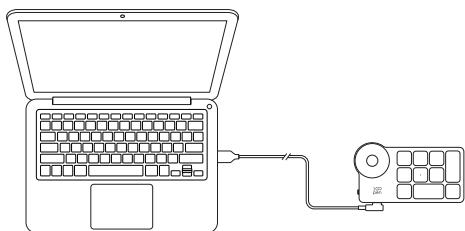
Wired Connection
Drawing Tablet
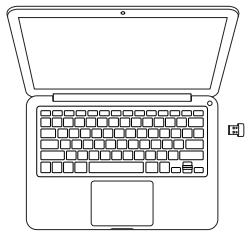
Please connect the USB-C to USB-C cable or the USB-C to USB-A cable to the USB port on the computer and the USB-C port on the tablet side respectively.
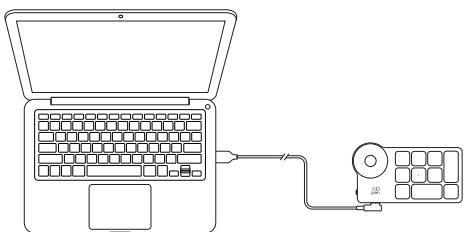
Wireless Shortcut Remote
Please connect the USB-C to USB-C cable or the USB-C to USB-A cable to the USB port on the computer and the USB-C port on the wireless shortcut remote respectively.

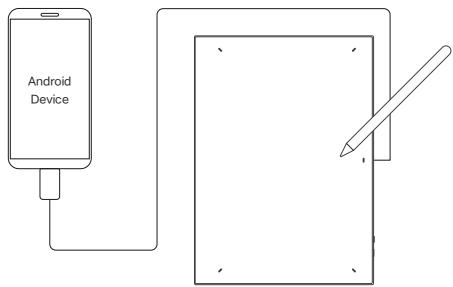
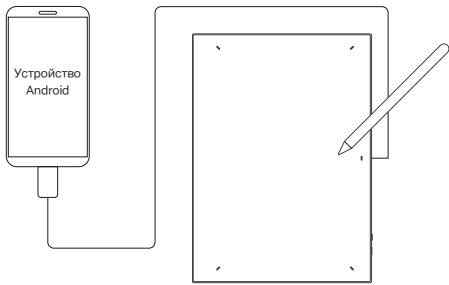
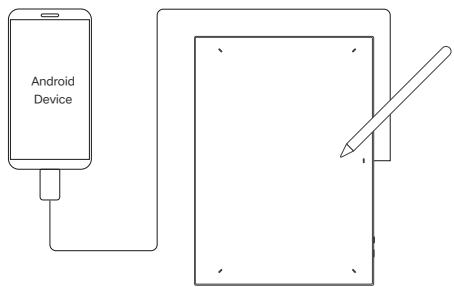
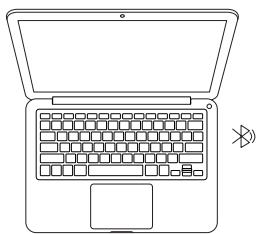
Connect to Android Phone or Tablet
- Please connect the USB-C to USB-C cable to the Android device and the drawing tablet respectively.
- Please place the XPPen drawing tablet and the Android device upright, and open an Android App with support for pressure sensing.
- Please disenable the auto-rotate function in the Android device, and keep the screen in portrait mode.
- Currently, the drawing tablet can only be used normally when the Android device is in portrait mode. It will not be used normally when in landscape mode.
Wireless connection
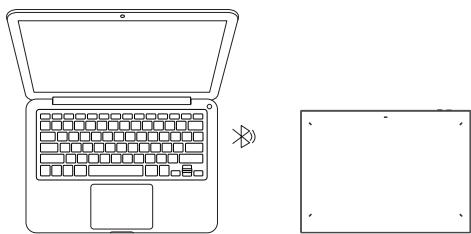
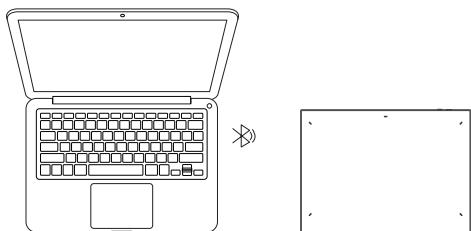
A. Direct Bluetooth Connection
Drawing Tablet
- Press and hold the power switch for 3 seconds to turn on the drawing tablet, and the indicator light 1 flashes in blue; then long press the power switch for 6 seconds to enter the waiting state for pairing, and the indicator light 1 flashes in blue quickly.
- Turn on the Bluetooth on the computer, add Bluetooth device, search for the device name "Deco Pro XX", and click to complete the Bluetooth pairing, with the blue indicator light 1 always on.
- Press and hold the power switch for 3 seconds to shut down.
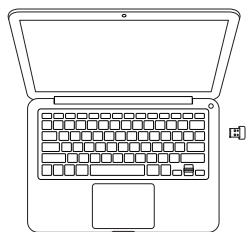
Wireless Shortcut Remote
- Slide the power switch and the blue indicator light flashes slowly. Then long press the K1 shortcut key for 3 seconds to enter Bluetooth pairing and the blue indicator light flashes quickly.
- Turn on the Bluetooth on the computer, add Bluetooth device, search for device name "Shortcut Remote" and complete Bluetooth pairing by clicking the device name "Shortcut Remote", with the blue indicator always on. The indicator will be off after 30 seconds.
- Slide the power switch again to turn off.
B. Bluetooth Receiver Connection
Only Wireless Shortcut Remote
Plug the Bluetooth receiver into the computer and slide the power switch, with the indicator light always on in blue. The blue indicator will be off after 30 seconds.
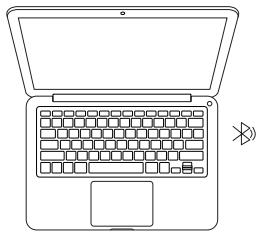
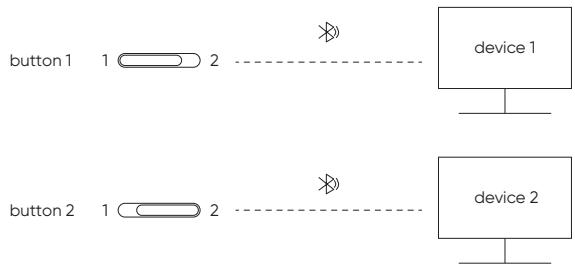
IV. Bluetooth Device Switching
The drawing tablet supports connection to two Bluetooth devices
- Toggle the Bluetooth switch button to button 1, long press the power button for 6 seconds, and the drawing tablet is paired with device 1.
- Toggle the Bluetooth switch button to button 2, press and hold the power key for 6 seconds, and the drawing tablet is paired with device 2.
- Toggle the Bluetooth switch button to switch the Bluetooth connection between the two devices.
V. Support System
Drawing Tablet
Wired Connection
Windows 7 (or later), macOS X 10.10 (or later), Android 10.0 (or later),
Chrome OS 88 (or later), Harmony OS, Linux.
Bluetooth Connection:
Windows 10 (or later), macOS X 10.10 (or later).
Wireless Shortcut Remote
Wired or Dongle Connection
Windows 7 (or later), macOS X 10.10 (or later), Linux.
Bluetooth Connection:
Windows 10 (or later), macOS X 10.10 (or later).
VI. Download and Install the Driver
- Make sure your equipment is connected correctly to the computer.
- Visit the XPPen website (www.xp-pen.com), click on the Support section and then Download. Choose a product model and download the latest driver according to your computer system.
- Follow the prompts to finish the driver installation.
Notes:
- Before installation, please close all anti-virus software and graphics software.
- If the computer has already installed the drivers of other brands, please uninstall them first.
- Please restart your computer after the installation is complete.
- For the best performance of your device, it is recommended that you use the latest version of the driver.
If you need any further assistance, please contact us at:
service@xp-pen.com
www.xp-pen.com
快速指南
USB-C to USB-C-Prime

USB-C to USB-A-4

g□一
FyraLsJohtfoH

15
(FyALESJH一力TOM一用)
- 直線、直線、直線、直線、直線、直線、直線、直線、直線、直線、直線、直線、直線、直線、直線、直線、直線、直線、直線、直線、直線、直線、直線、直線、直線、直線、直線、直線、直線、直線、直線、直線、直線、直線、直
a.301KJHJFJFJFJFJFJFJFJFJFJFJFJFJFJFJFJFJFJFJFJFJFJFJFJFJFJFJFJFJFJFJFJFJ
b.6竹釜総賊韋起:爛藥軌土軒號號號號號號號號號號號號號號號號號號號號號號號號號號號號號號號號號號號號號號號號號號號號號號號號號號號號號號號號號號號號號號號號號號號號號號號號號號號號號號號號號號號號號號號號號號號號號號號號號號號號 - 融网默态 端切前查用
- USB-C 串连
4.时士1
陝
USB-C to USB-A KeiIe

三龍皇宮
早源

早孕次超弓(孕早蒂超弓、超弓或已取经)
servicekr@xp-pen.com www.xp-pen.kr
BecnpoBOHOI npblT ynpabLeHnC 6bICTpbIM KhoNkAMN

- IpeekluoyateIb nHTaHn
2.LBETINHIDKATOPa
CnH:
a. MeIeHNO MInGaTe: HET Bluetooth-NoKJIouChEnn
b.Быстpo мигаet: охидане copяжени no Bluetooth
c.ПocToHnO rOpNT:copPaxeHo (NocToHnO rOpNT 30 c n BbIKNoUaETc) KpacHbI:
a. Muraet: Hn3kni 3aprd 6atapei (≤ 20%)
b. NocToaHHo rOpNT: BbInOnHReTc3apJaKa
c.BbIKIoueHO:NOHOCbIO3apJxhen
ΦIOJIeTOBbI O3HaueT, UTO KpachBn I CINHm INHIMKATOpbl OJHOBPemEHOBKJIIOUeHbI
- Kolencoynpablenia
- NopT USB-C
- pynnna 6bictpbix KhoNOK
BecnpoBDnoH npbTy npabLeHn MOeT pa60TaB b YeTpIpe pexpeximax, npn 3Tom B kaxdom pexime c 10 6blCTpbIMn KhoIkAM. PnO TcYtCTBn Heo6xoIMocTn IN MoxHO BvIKIOuHTb.
OINH peXIM BKNIOUeH NO yMOJUaHHIO, KHOPIKA K1 HAcTpoEHa KaK noI3yHok.
HaxmTeIJIpeKJIIOUeHnMEXkDy rpynnam6bICTpbIX KHOJOK
Bce onicaHn n3o6paKHeH npuOaTcT oIbKO IaI cnpAkn mOryt OTnUaTbcr O fakTNHeCKNX IpOdyKTOB.
III. Podknioyehne
IpoBoaHoe noKJIIOueHne
Планшетдя рисоваян.
Плклочп Кбь USB-CВUSB-CBUSB-AKUSB-nopTu ha komlbtopeи npTy USB-C Ha nlaanseTe.
BecnpoBOHOI npblyt npapBHeHn C 6bictpbIM KhoNkAMN
Плкюпг Te Ka6eNB USB-C B USB-C nIIN USB-C B USB-A K USB-NopTu ha КOMПьОтЕп И поТу USB-C Na 6ecnpoBoHOM ПиьTe ynpaBNeHЯ C b6ICTpbIMi KHONKAMN.
IopKJIoueHne K TepeOHy Android nnn nnahwety
- Пожклочп Кабелв USB-CВ USB-C K YсгposьAndroidи паншету дя рисовaning.
- PazmecTne pIaanwet dny pucobnna XPPen u yctpoiCtbo Android BepTKaJIbHO, OTKpOte npInoJxHeme Android c UyBCTBnteJbHocTbU K HaxaTIHO.
- Bbiklouhnte fynkunio ABTOIOBOPota Ha yctpoiCTBe Android n pa3mectne ekpanB BeptNKaJIbHOM NIOLOXEHNI.
*B HACTOUIE BPEM NIIANHET DIA PINCOBAHNIA MOKET KOPKEKTHo p6oTb, TOnkO eCIN yctpoCTBO Android HaxoJITcB BVEPTNKALNBHOM NIOXeHN. B roPn3OHaTNbHOM pEXIME NIIANHET MOKET p6oTbTb HekOPKEKTHo.
BecnpoBOHoe noKIOUeHne
A. Празмoe Bluetooth-норключени
Планшетдг рсоваян.
1.Haxmte H yedeXnBaTe KHONKY nTAHnB B TceHHe 3 ckyHd, YTO6bI BKJIOuHnB PnAhuWet dIy nPoCBaHnY, pNt 3OTM nIHnKATop 16ydet Mrratb CnHM CBETOM. 3aTeM Haxmte H yedeXnBaTe KHONKY nTAHnB B TceHHe 6 ckyHd, YTO6bI BOITN B PEXNM OxNDAne cOnpJxEnHn, pNt 3OTM nIHnKATop 16ydet bStpo Mrratb CnHM CBETOM.
2. BkIIOUHTe Bluetooth Ha KOMNbIOTpe, DObaBte YeCTPOUICTBO Bluetooth, HAIINTE NIMy UcTPOUICTBA Deco Pro XX' IN HAXMITE Ha KHONKy, YTO6bI 3ABepuNTb copjxHHe no Bluetooth. PnI ATOM CmHN INHINKATOp 16yDet NOCTOARHNO RopeTb.
3.HaxmTe uydepxNBaIe KHOIIky NITAHN B TeueHne 3 cKyH, yTO6bl BBIKIOHTb.
BecnpoBOHOI npblT ynpabNeHnC 6bICTpbIM KHOIIKAMN
- IpeMeCTHe nepeKLIQUATEB PIIATAHN, YTO6b CINH INHdIKATOp Hauan MedJeHMO rMIRatb. 3aTeM hAXMITE uHEpXIBaTE B6ICTpyo KHOKNy K1B TeEHNE 3 cekynD, YTO6b HauTb COPIREJENHe No Bluetooth. CINH INH dIKATOp 6ydet 8bCTPO mIRATb.
- BkIIOUHTe Bluetooth Ha kombItepepe,do6abTe yctpoiCTBo Bluetooth, hAIINITE mYcTPOCTBA «IyIbTy npABNeHnC 6bCTbIMn KHOKAMn» IN3aBepuNTe cOpnerHe nO Bluetooth, hXab Ha NIMy yctpoiCTBa «IyIbTy npABNeHnC 6bCTbIMN KHOKAMm», noka CsinHn HnDnKaTOp NOCTOHHo Ropnt. HnDnKaTOp BbIKIOUHTcCepe3 30 cekyHd.
- Nepemecnte nepekniouateJIb NiTahnIOBtOPHO, Yo6bl BbIKIouHTb.

ToIbKO 6ecnpoBOdHn npblT nppaBHeHn C 6bICTpbIM KNOHkAMN
BCTaBbTe pecnBep Bluetooth B KOMblToepипepeMeCTte pepeKlOuATEIb nITAHNIA, nOKa INHdkatop noctoHNO rOpNT cINHM. INHdkatop nOracHeT uepe3 30 cekynd
IV. IpekeJIIOUeHne yCTpOJIcTbA Bluetooth
BecnpobOdoHn npbT nprabHeNc 6bICtpbIMKHOKNKAMN
ПобODиhoe noДКЛIOUЧЕ ИИ NOДКЛIOUЧЕ Уретз moDEM:
Windows 7 (ДИЗ ВИSiе), macOS X 10.10 (ДИЗ ВИSie), Linux.
Bluetooth-ндклочен:
Windows 10 (nii BbIe), macOS X 10.10 (nii BbIe).
IV. 3arpy3ka u yctahOBka dpaBepa
- Y6eIHTecb, yTO yCTpoIcTBO npABINbHO NOKIIIOueHo K KOMNBIOTepy.
- Otkpoite Be6-cait XPPen (www.xp-pen.com), Haxmnte Ha pa3dien Pioepkka n 3aTeMaHa OnIIO 3aRpy3nB. Bb6epnte MoJeB npOyKta n 3aRpy3nTe nocIeHn IpaIBeB p 3aBcIMMOCTn OT cNCTeMb KOMNbIoTepa.
- 3aBepuTe yCTaHOBky dpaBepa corlacho noDcKa3kAm.
Приимechanical:
1.Пелед установков зakpoиTe BCE aHTNBpychьe и Графческne nporpamMbI.
2. EcnHa KOMMbIepe yxe yctaHOBJIebl IpaBbepbl dpyrrx 6peHIOB, cnaaIa ydaJIte IVX.
3. Ipe3aIpy3nTe KOMIbIOpTe nOcSe 3aBepSeHnY yCTaHOBVKn.
4.ДлганиушeroКачесТВа pa60ы yctpoiCTBa pekomeHnyetcЯ Исплььовать noclendHiIO BepCnIO dpaIbepa.
Ecn y BAC octanbc Bonpcb, CBXNTecb c HAMn no apecy:

serviceru@xp-pen.com

www.xp-pen.ru
*ailllll llllll 1i iii iie iie iie iie iie iie iie
a a a a a a a a a a a a a a a a a a a a a a a a a
*** kaiiell gaiil iaii iaii jyj yj yj yj yj yj yj yj yj
slll lJaiyI yai j
-
aolal y
-
= +
aai jlll
Juaia 1
gjgl jil jili:
30 30 12 12 12 12 12
all
20% ≥ a ≤ 1a - 1 或 b ≤ 1a - 1
jai:laiae
Jolliu juaia:
a 1 a
3.
-
USB-C
-
laishii liiie ia gao
10 2
Laijai jsi pi 13, Laijai dii
J 1
aill.
*aiaaii iiaii jie ciitici 1000000000000000000000000000
III. Jua
Shall Jua?
山
JUB USB-C USB-C USB-C USB-A USB

slll luiuaiy jia jia
USB-C USB-C USB-C USB-A aiaa aiaa jla USB-C jla
yJyJyJyJyJyJyJy
jgl jg jgdl jdl
- 1LSSUBS-CUSBC
-
- gllgllggl aall alglgglgglgglgglgglgglgglg
*Laeie aee eaae aeae aee aee aee aee aee aee aee aee aee aee aee aee
J
jia jia jia jia jia jia jia jia jia jia jia jia jia jia jia jia jia jia jia jia jia jia jia jia jia jia jia jia jia jia jia jia jia jia jia jia jia jia jia jia jia jia
y
- 15.15.15.15.15.15.15.15.15.15.15.15.15.15.15.15.15.15.15.15.15.15.15.15.15.15.15.15.15.15.15.15.15.15.
-
JuaaiyI Lg 1 ybaiai aai i aai baaa aai jai jai jai jai kai K1 sdd
-
kai jia" jiall paoe i yjgill jia caii gai lal jiegei jiy jaiy jay jaiy jaiy jaiy jaiy jaiy jaiy jaiy jaiy jaiy jaiy jaiy jaiy jaiy jaiy jaiy jaiy jaiy jaiy jaiy jaiy jaiy jaiy jaiy jaiy jaiy jaiy jaiy jaiy jaiy jaiy jaiy jaiy jaiy jaiy
30 30 jw jwll wjw lwl jw jw jw
- 1

j 1
baa slwll cll juaai Saa jia
Declaration of Conformity
Hereby, [Hanvon Ugee Technology Co., Ltd.] declares that the radio equipment type [MT1592B] is in compliance with Directive 2014/53/EU. The full text of the EU declaration of conformity is available at the following internet address: www.ugee.com/
This device complies with part 15 of the FCC Rules. Operation is subject to the following two conditions: (1) This device may not cause harmful interference, and (2) this device must accept any interference received, including interference that may cause undesired operation.
Warning: Changes or modifications not expressly approved by the party responsible for compliance could void the user's authority to operate the equipment.
FCC NOTE: This equipment has been tested and found to comply with the limits for a Class B digital device, pursuant to part 15 of the FCC Rules. These limits are designed to provide reasonable protection against harmful interference in a residential installation. This equipment generates, uses and can radiate radio frequency energy and, if not installed and used in accordance with the instructions, may cause harmful interference to radio communications. However, there is no guarantee that interference will not occur in a particular installation. If this equipment does cause harmful interference to radio or television reception,
which can be determined by turning the equipment off and on, the user is encouraged to try to correct the interference by one or more of the following measures:
—Reorient or relocate the receiving antenna.
Increase the separation between the equipment and receiver.
- Connect the equipment into an outlet on a circuit different from that to which the receiver is connected.
Consult the dealer or an experienced radio/TV technician for help
RF warning statement:
The device has been evaluated to meet general RF exposure requirement. The device can be used in portable exposure condition without restriction.
This device complies with Industry Canada licence-exempt RSS standard(s).
Operation is subject to the following two conditions:
(1) this device may not cause interference;
(2) this device must accept any interference, including interference that may cause undesired operation of the device.
MODIFICATION: Any changes or modifications not expressly approved by the grantee of this device could void the user's authority to operate the device.
Operation Frequency: 2402-2480MHz
Max power: 3.9dbm
Operating temperature: 0 45^ C
Manufacturer: Hanvon Ugee Technology Co., Ltd.
Address: 2/F, West of 3/F, 4/F, No.4 Building, Fulongte Industrial Park, Huaxing Road, Langkou Community,Dalang Street, Longhua District, Shenzhen, Guangdong China