RIVER 2 - Portable power station ECOFLOW - Free user manual and instructions
Find the device manual for free RIVER 2 ECOFLOW in PDF.



User questions about RIVER 2 ECOFLOW
0 question about this device. Answer the ones you know or ask your own.
Ask a new question about this device
Download the instructions for your Portable power station in PDF format for free! Find your manual RIVER 2 - ECOFLOW and take your electronic device back in hand. On this page are published all the documents necessary for the use of your device. RIVER 2 by ECOFLOW.
USER MANUAL RIVER 2 ECOFLOW
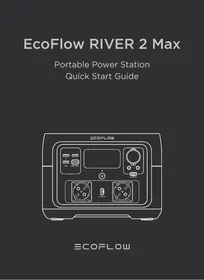
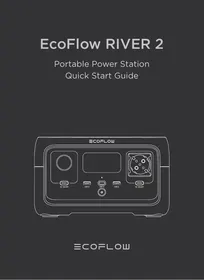
Portable Power Station Quick Start Guide
text_image
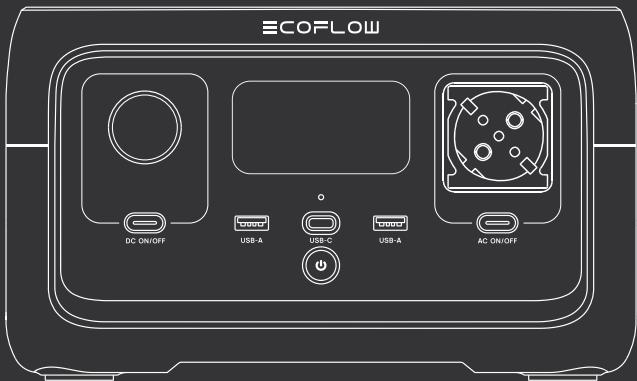
ECOFLOW DC ON/OFF USB-A USB-C USB-A AC ON/OFFDISCLAIMER
Read all safety tips, warning messages, terms of use, and disclaimers carefully. Refer to the terms of use and disclaimer at https://ecoflow.com/pages/terms-of-use and stickers on the product before use. Users take full responsibility for all usage and operations. Familiarize yourself with the related regulations in your area. You are solely responsible for being aware of all relevant regulations and using EcoFlow products in a way that is compliant.
ECOFLOW APP
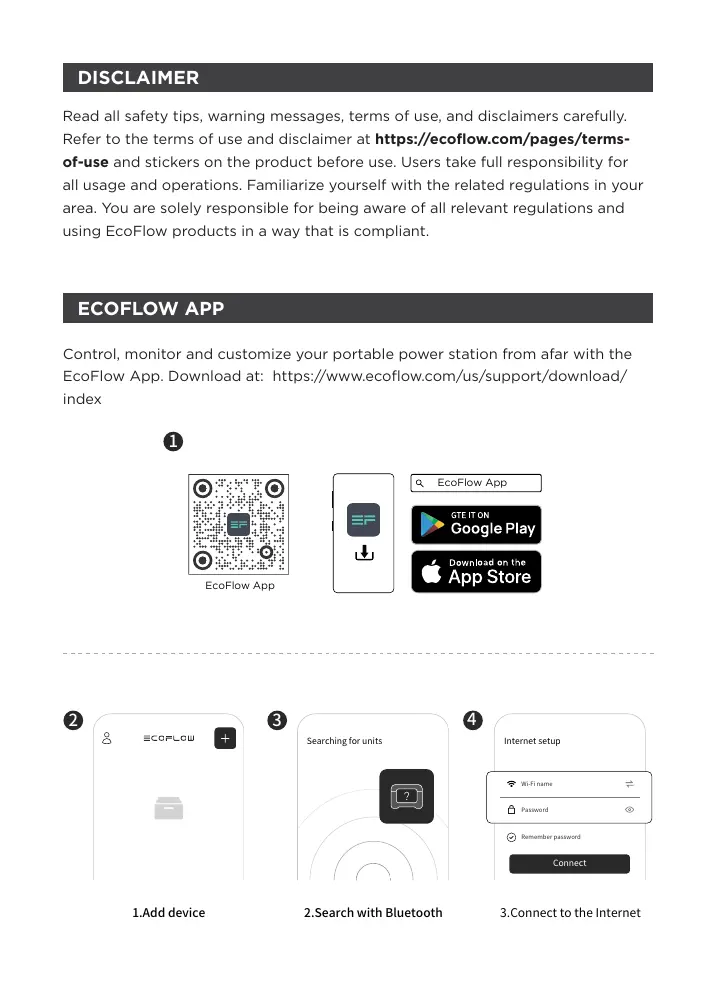
Control, monitor and customize your portable power station from afar with the EcoFlow App. Download at: https://www.ecoflow.com/us/support/download/index
1

text_image
QR code with embedded logo in center, likely linking to a digital resource or websiteEcoFlow App

text_image
EF ↓
text_image
EcoFlow App GTE IT ON Google Play Download on the App Store2
text_image
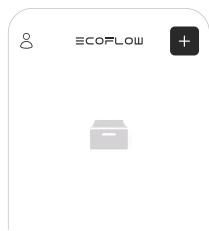
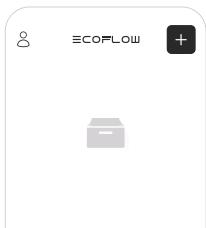
ECOFLOW1.Add device
3
text_image
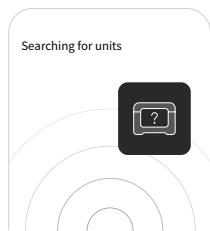
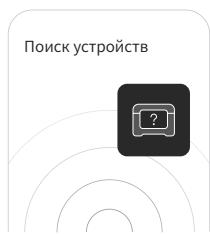
Searching for units- Search with Bluetooth
4
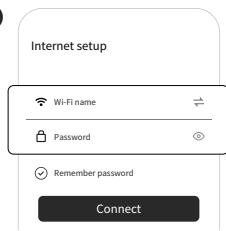
text_image
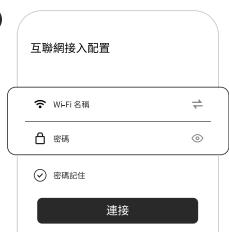
Internet setup Wi-Fi name Password Remember password Connect- Connect to the Internet
Privacy Policy
By using EcoFlow Products, Applications and Services, you consent to the EcoFlow Term of Use and Privacy Policy, which you can access via the “About” section of the “User” page on the EcoFlow App or on the official EcoFlow website at https://www.ecoflow.com/policy/terms-of-use and https://www.ecoflow.com/policy/privacy-policy.
For more information, Please go to EcoFlow Official Website to get the Complete Version of the User Manual.
www.ecoflow.com/pages/download
In compliance with laws and regulations, the company has the final right to interpret this document and all related documents of this product. If there is any update, revision or termination without notice, please visit EcoFlow official website for the latest product information.
GETTING STARTED
1. Product On
When switched off, press the main power switch briefly to turn on the power.
2. Product Off
Press and hold the main power switch to turn off the product. When there is a charging input source, the product will not be the turn off.
3. USB Output Port
The USB outlet (USB-A output/USB-C output) can be used after making sure that the main power is on.
4. 12V Car Output Port
After ensuring that the main power is turned on, press the DC output switch briefly to use the 12V DC output port. Press the DC output switch briefly again to turn it off.
5. AC Output Sockets
After ensuring that the main power is turned on, press the AC output switch briefly to use the AC output port. Press the AC output switch briefly again to turn it off(Switching frequency: With AC power on, press and hold the AC power button for 10 seconds to switch the frequency, or use the APP to switch the frequency).
6. APP Control
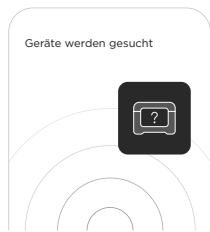
When the main power is switched on, the Wi-Fi module and Bluetooth module are turned on by default. The user can connect the product to the app through Bluetooth. If you want to use the app from a long distance and you have a router, you may choose Wi-Fi for network distribution.
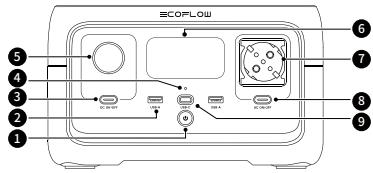
text_image
ECOFLow ⑤ ④ ③ ② ① ⑥ ⑦ ⑧ ⑨- Main power switch
- USB-A output port
- DC output switch
- Power Indicator
- Car charger outlet
- LCD
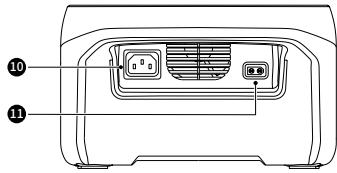
text_image
Technical diagram of a device rear panel with labeled ports and numbered annotations- AC output socket*
- AC output switch
- USB-C input/output port
- X-Stream AC Charging Input Port
- Solar/Car Charging Input Port
*Note: The type of AC socket varies in different countries or regions, the picture above is for illustration only, please refer to the actual product.
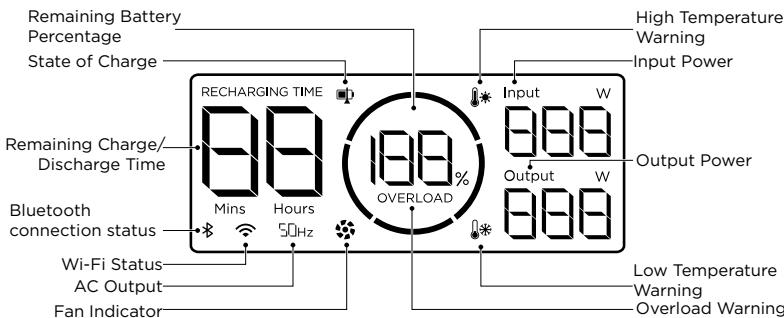
text_image
Remaining Battery Percentage State of Charge RECHARGING TIME 188% Mins Hours 50Hz Bluetooth connection status Wi-Fi Status AC Output Fan Indicator High Temperature Warning Input Power Output Power Low Temperature Warning Overload Warning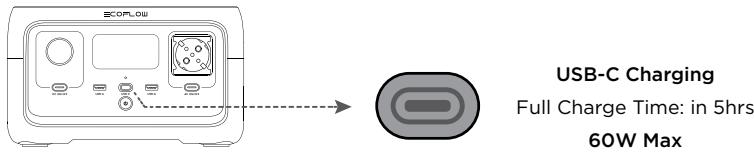
text_image
USB-C Charging Full Charge Time: in 5hrs 60W Max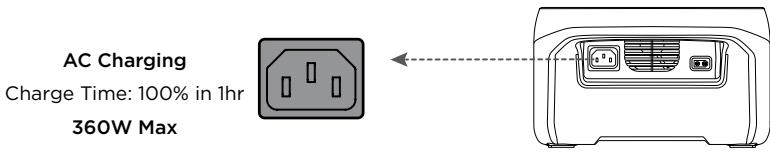
text_image
AC Charging Charge Time: 100% in 1hr 360W Max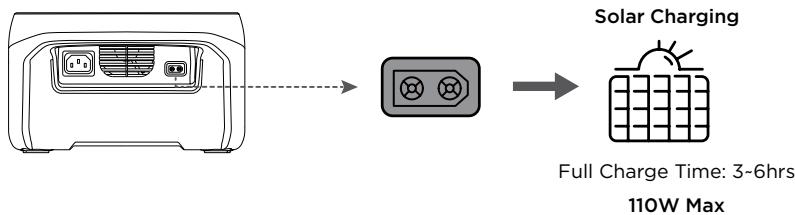
text_image
Solar Charging Full Charge Time: 3-6hrs 110W Max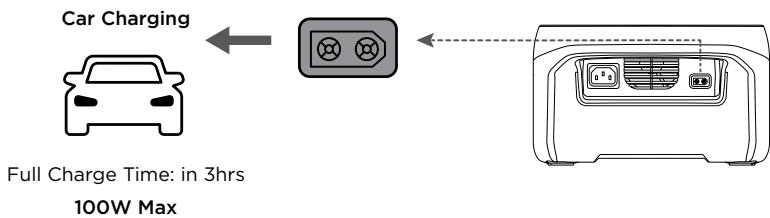
text_image
Car Charging Full Charge Time: in 3hrs 100W Max| Details of Error Icons | Error Type | Recovery Methods | ||
| icon flashes | Battery discharge low temperature protection | Normal operation will resume automatically when the battery warms up. | ||
| icon flashes | Battery discharge high temperature protection | Normal operation will resume automatically after the battery cools down. | ||
| RECHARGING TIME | icon flashes | Battery charging low temperature protection | Normal operation will resume automatically after the battery temperature is restored to above 3°C (37.4°F). | |
| RECHARGING TIME | icon flashes | Battery charging high temperature protection | Normal operation will resume automatically after the battery cools down. | |
| icon flashes | AC output low-temperature protection | Normal operation will resume automatically after the ambient temperature is restored. | ||
| icon flashes | AC output over-temperature protection | Please confirm that the air inlet and outlet of the product are unobstructed. Normal operation will resume automatically once the cause is eliminated and the temperature decreases. | ||
| OVERLOAD | icon flashes | USB-C or car charging overload protection | Normal operation will resume after removing the over-powered device and restarting the machine. | |
| OVERLOAD | icon flashes | AC output overload protection | Normal operation will resume after removing the over-powered device and restarting the machine. Electrical appliances must be used within the rated power (for the power limit of electrical appliances in the X-Boost mode, please refer to the X-Boost function introduction) | |
| RECHARGING TIME OVERLOAD | icon flashes | Charging overload protection | Remove the charger and normal operation will resume automatically after being restarted. | |
| icon flashes | Fan blocking | Please check whether the fan is blocked by foreign objects and remove the cause of the error. | ||
| icon flashes | Failure of communication between main control board and AC | Normal operation will resume automatically after being restarted. | ||

If any alert occurs during the use of this product and the alert icon does not disappear after the product is restarted, please stop using the product immediately (do not attempt to charge or discharge).
If the above information fails to resolve your problem, please contact customer service for further support.
SAFETY INSTRUCTIONS
- Do not use the product near a heat source, such as a fire source or a heating furnace.
- Avoid contact with any liquid. Do not immerse the product in water or get it wet. Do not use the product in rain or humid environments.
- Do not use the product in an environment with strong static electricity/magnetic fields.
- Do not disassemble the product in any way or pierce the product with sharp objects.
- Avoid using wires or other metal objects that may result in a short circuit.
- Do not use unofficial components or accessories. If you need to replace any components or accessories, please visit official EcoFlow channels to check relevant information.
- When using the product, please strictly follow the operating environment temperature specified in this user manual. If the temperature is too high, it may result in a fire or explosion; if the temperature is too low, the product performance may be severely reduced, or the product may cease to work.
- Do not stack any heavy objects on the product.
- Do not lock the fan forcibly during use or place the product in an unventilated or dusty area.
- Please avoid impact, falls, or severe vibrations when using the product. In case of a severe external impact, turn off the power supply immediately and stop using the product. Ensure the product is well fastened during transportation to avoid vibrations and impacts.
- If you accidentally drop the product into water during use, please place it in a safe open area, and stay away from it until it is completely dry. The dried product should not be used again, and should be properly disposed of according to the disposal guide in the user manual. If the product catches fire, we recommend that you use the fire extinguishers in the following order: water or water mist, sand, fire blanket, dry powder, and finally a carbon dioxide fire extinguisher.
- Use a dry cloth to clean off dirt on the product ports.
-
Do Not put into the Microwave.
-
Replacement of a battery with an incorrect type that can defeat a safeguard.
- Disposal of a battery into fire or a hot oven, or mechanically crushing or cutting of a battery, that can result in an explosion.
- Leaving a battery in an extremely high temperature surrounding environment that can result in an explosion or the leakage of flammable liquid or gas.
- A battery subjected to extremely low air pressure that may result in an explosion or the leakage of flammable liquid or gas.
FAQ
- What battery does the product use?
It uses high-quality lithium-ion battery.
- What devices can the product's AC output port power?
With 300W rated power and 600W peak power, most consumer electronics. Before you use it, we recommend that you confirm the power of the appliances first and ensure the power sum of all loaded appliances is lower than the rated power.
- How long can the product charge my devices?
The charging time is shown on the product's LCD Screen, which can be used to estimate the charging time of most appliances with stable power usage.
- How can I know if the product is charging?
When it's charging, the remaining charging time will be shown on the LCD Screen. Meanwhile, the charging indicator icon begins to rotate with the remaining battery percentage and the input power shown on the right of the circle.
- Can I bring the product on a plane?
No.
General Info
 | Capacity | 256Wh (20Ah 12.8V = ) |
 | Net Weight | Approximately 7.8lbs |
| [TXC6] | Dimensions | 9.6 x 8.5 x 5.7inches |
| [4e3s] | Model | EFR600 |
Output/Input Ports
| [X087] | AC Input | 220-240V~50Hz/60Hz, 8A Max |
| [3X06] | DC Input | 11-30V 110W, 8A Max |
| [DY5W] | USB-C Input/Output | 5/9/12/15/20V 3A, 60W Max |
| [DZ80] | USB-A Output | 5V 2.4A 12W Max per port |
| [XX5K] | DC Output | 12.6V 8A, 100W Max |
| [tw±1] | AC Output | Pure Sine Wave, 300W total (surge 600W), 230V~50Hz/60Hz |
Battery Info
| [50TD] | Cell Chemistry | LFP |
| [CX3A] | Cycle Life | 80%+ capacity after 3000 cycles |
Environmental Operating Temperature
| Discharge Temperature | -10°C to 45°C (14°F to 113°F) | |
| Charge Temperature | 0°C to 45°C (32°F to 113°F) | |
| Optimal Operating Temperature | 20°C to 30°C (68°F to 86°F) | |
| Storage Temperature | -10°C to 45°C (20°C to 30°C is best)/14°F to 113°F (68°F to 86°F is best) | |
- Please use or store the product in an environment temperature between 20^ C to 30^ C, away from water, heat, and other metal objects.
- For long-term storage, please recharge it to 60% every three months; If the product is left idle for a long time with severely low battery, irreversible damages may be caused to the battery cell and the product service life will be shortened. The product will not be covered by the warranty if it is not charged or discharged for more than 6 months.
- For safety, please do not store the product in an environment temperature higher than 45^ C or lower than -10^ C for a long time.
- If the product has been idle for too long and the battery is severely low, it will enter a deep sleep protection mode. In such case, please charge the product before using it again.
WHAT'S IN THE BOX
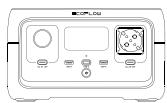
text_image
CCP-LOGRIVER 2
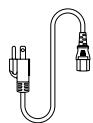
AC Charging Cable
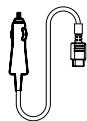
Car Charging Cable
Quick Start Guide
Users who use their universal solar panels with non-MC4 connector to power the equipment, please note: the solar panel should be in the voltage and current range (please find more information about the requirement in the User Guide). Connecting the wrong MC4 interface may damage the device. EcoFlow does not guarantee equipment failure caused by improper personal operation(For example, the open circuit voltage exceeds 60V).

We recommend that you use the EcoFlow solar panels.
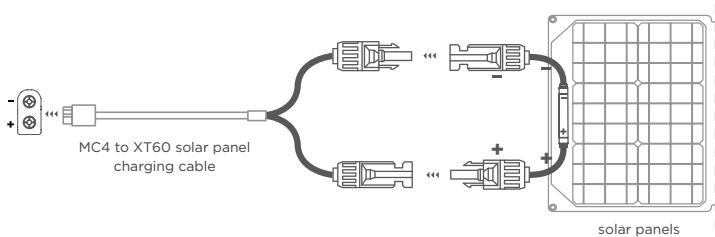
Please confirm the positive and negative direction of your solar panel(as shown in the figure below).
Please connect the positive pole of your solar panel to the MC4 Male head and the negative pole to the MC4 Female head(as shown in the figure below).
1 MC4 Port

MC4 Male connector

MC4 Female connector
② Please connect the positive pole to the MC4 Male head and the negative pole to the MC4 Female head.

natural_image
Pure electrical circuit lines without any symbolsSolar Panel positive pole +

natural_image
Pure electrical circuit lines without any symbolsSolar Panel negative pole -
3 Connect your solar panel to the MC4 to XT60 solar panel charging cable
Before connecting the solar panel, please make sure the positive pole of the solar panel connects to the MC4 Male head and negative pole to the MC4 Female head (as demonstrate in the figure below).
text_image
MC4 to XT60 solar panel charging cable solar panelsEcoFlow RIVER 2
Download unter: https://download.ecoflow.com/app.
1

text_image
QR code with embedded logo in center, likely linking to a digital resource or websiteEcoFlow App
text_image
EF ↓EcoFlow App


2
text_image
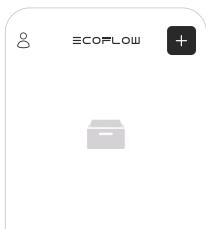
ECOFLOW- Gerät hinzufügen
3
www.ecoflow.com/pages/download
text_image
Technical diagram of a device rear panel with labeled ports and numbered annotationsnatural_image
Line drawing of a front view of a device with ventilation slots and buttons (no text or symbols)
natural_image
Line drawing of a front view of a device with ventilation slots and ports (no text or symbols)text_image
QR code with central logo and surrounding circular elements, likely for digital scanning or linking to online content.EcoFlow App
text_image
EF ↓
EcoFlow App

GTE IT ON Google Play

Download on the App Store
2
text_image
ECOFLOW +www.ecoflow.com/pages/download
text_image
Technical diagram of a device rear panel with labeled ports and internal componentsnatural_image
Line drawing of a device rear panel with ventilation slots and buttons (no text or symbols)
text_image
Charge solairenatural_image
Line drawing of a device rear panel with two internal compartments and a terminal block (no text or symbols)text_image
QR code image with a central logo, likely linking to a digital resource or website.EcoFlow App
text_image
EF ↓EcoFlow App

Download on the App Store
2
text_image
ECOFLOWwww.ecoflow.com/pages/download
text_image
Technical diagram of a device rear panel with labeled ports and numbered annotationsnatural_image
Line drawing of a front view of a device with ventilation slots and buttons (no text or symbols)
text_image
Ricarica solareTempo di ricarica
completo: 3-6 ore
110W max
Ricarica auto


natural_image
Front view diagram of a device rear panel with ventilation slots and buttons (no text or symbols)text_image
QR code with embedded logo in center, likely linking to a digital resource or websiteEcoFlow App
text_image
EF ↓
text_image
EcoFlow App GTE IT ON Google Play Download on the App Store2
text_image
ECOFLOWwww.ecoflow.com/pages/download
text_image
Diagram of a device rear panel with labeled ports and numbered annotationstext_image
QR code with embedded logo and text, likely for digital scanning and linking to online contentEcoFlow App
text_image
EF ↓
text_image
EcoFlow App GTE IT ON Google Play Download on the App Store2
text_image
ECOFLOWwww.ecoflow.com/pages/download
text_image
Technical diagram of a device rear panel with labeled ports and numbered annotationsnatural_image
Line drawing of a front view of a device with internal components (no text or symbols)
text_image
Opladen via zonne-energienatural_image
Front view diagram of a device rear panel with ventilation slots and buttons (no text or symbols)text_image
QR code with embedded logo in center, likely linking to a digital resource or websiteEcoFlow App
text_image
EF ↓EcoFlow App

text_image
GTE IT ON Google Play Download on the App Store2
text_image
ECOFLOW- Добавить устройство
3
www.ecoflow.com/pages/download
text_image
Technical diagram of a device rear panel with labeled ports and numbered annotationsnatural_image
Technical line drawing of a vehicle front panel with no text or symbols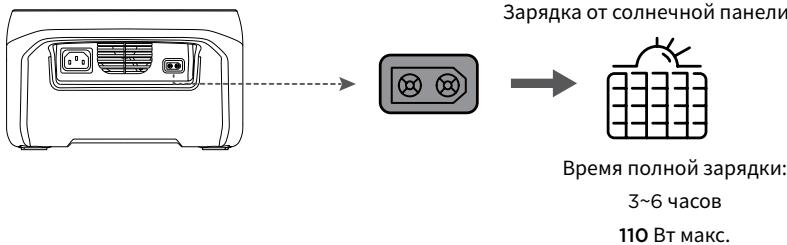
natural_image
Front view diagram of a device rear panel with ventilation slots and buttons (no text or symbols)https://www.ecoflow.com/us/support/download/index
1

text_image
QR code image with a central logo, likely linking to a digital resource or website.EcoFlow App
text_image
EF ↓EcoFlow App


2
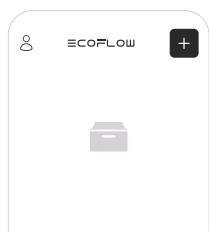
text_image
ecoFlow- 添加設備
3
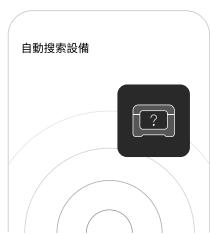
text_image
自動搜索設備- 使用蓝牙搜索
4
https://cn.ecoflow.com/downloads
natural_image
Diagram showing a device rear panel with ports and a close-up view of its internal components (no text or symbols)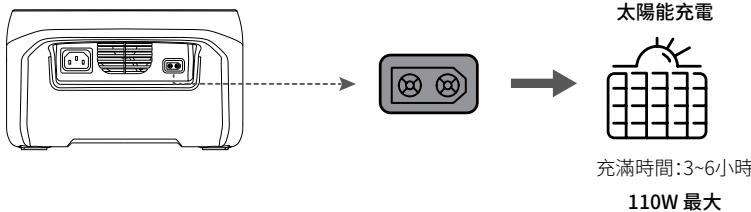
https://warranty.ecoflow.com/
Why register?
- Serve as proof for an insurance loss claim
- Get instant EcoFlow product support
- Get instant access to product release news
Contact us
+1 (800)-368-8604 Mon-Fri 9 am-9 pm (EST)
https://ecoflow.com/pages/contact-us

NA/LA/APAC/MEA: support@ecoflow.com,
EU: support.eu@ecoflow.com, AU: support.au@ecoflow.com