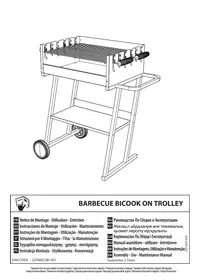
E B400 3 + 1 BURNERS - Barbecue Leroy Merlin - Free user manual and instructions
Find the device manual for free E B400 3 + 1 BURNERS Leroy Merlin in PDF.
User questions about E B400 3 + 1 BURNERS Leroy Merlin
0 question about this device. Answer the ones you know or ask your own.
Ask a new question about this device
Download the instructions for your Barbecue in PDF format for free! Find your manual E B400 3 + 1 BURNERS - Leroy Merlin and take your electronic device back in hand. On this page are published all the documents necessary for the use of your device. E B400 3 + 1 BURNERS by Leroy Merlin.
USER MANUAL E B400 3 + 1 BURNERS Leroy Merlin
natural_image
Line drawing of a portable electric grill with wheels and control panel (no text or symbols)
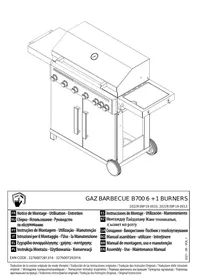
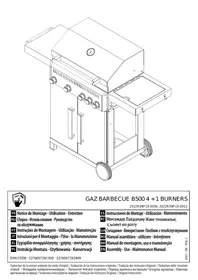
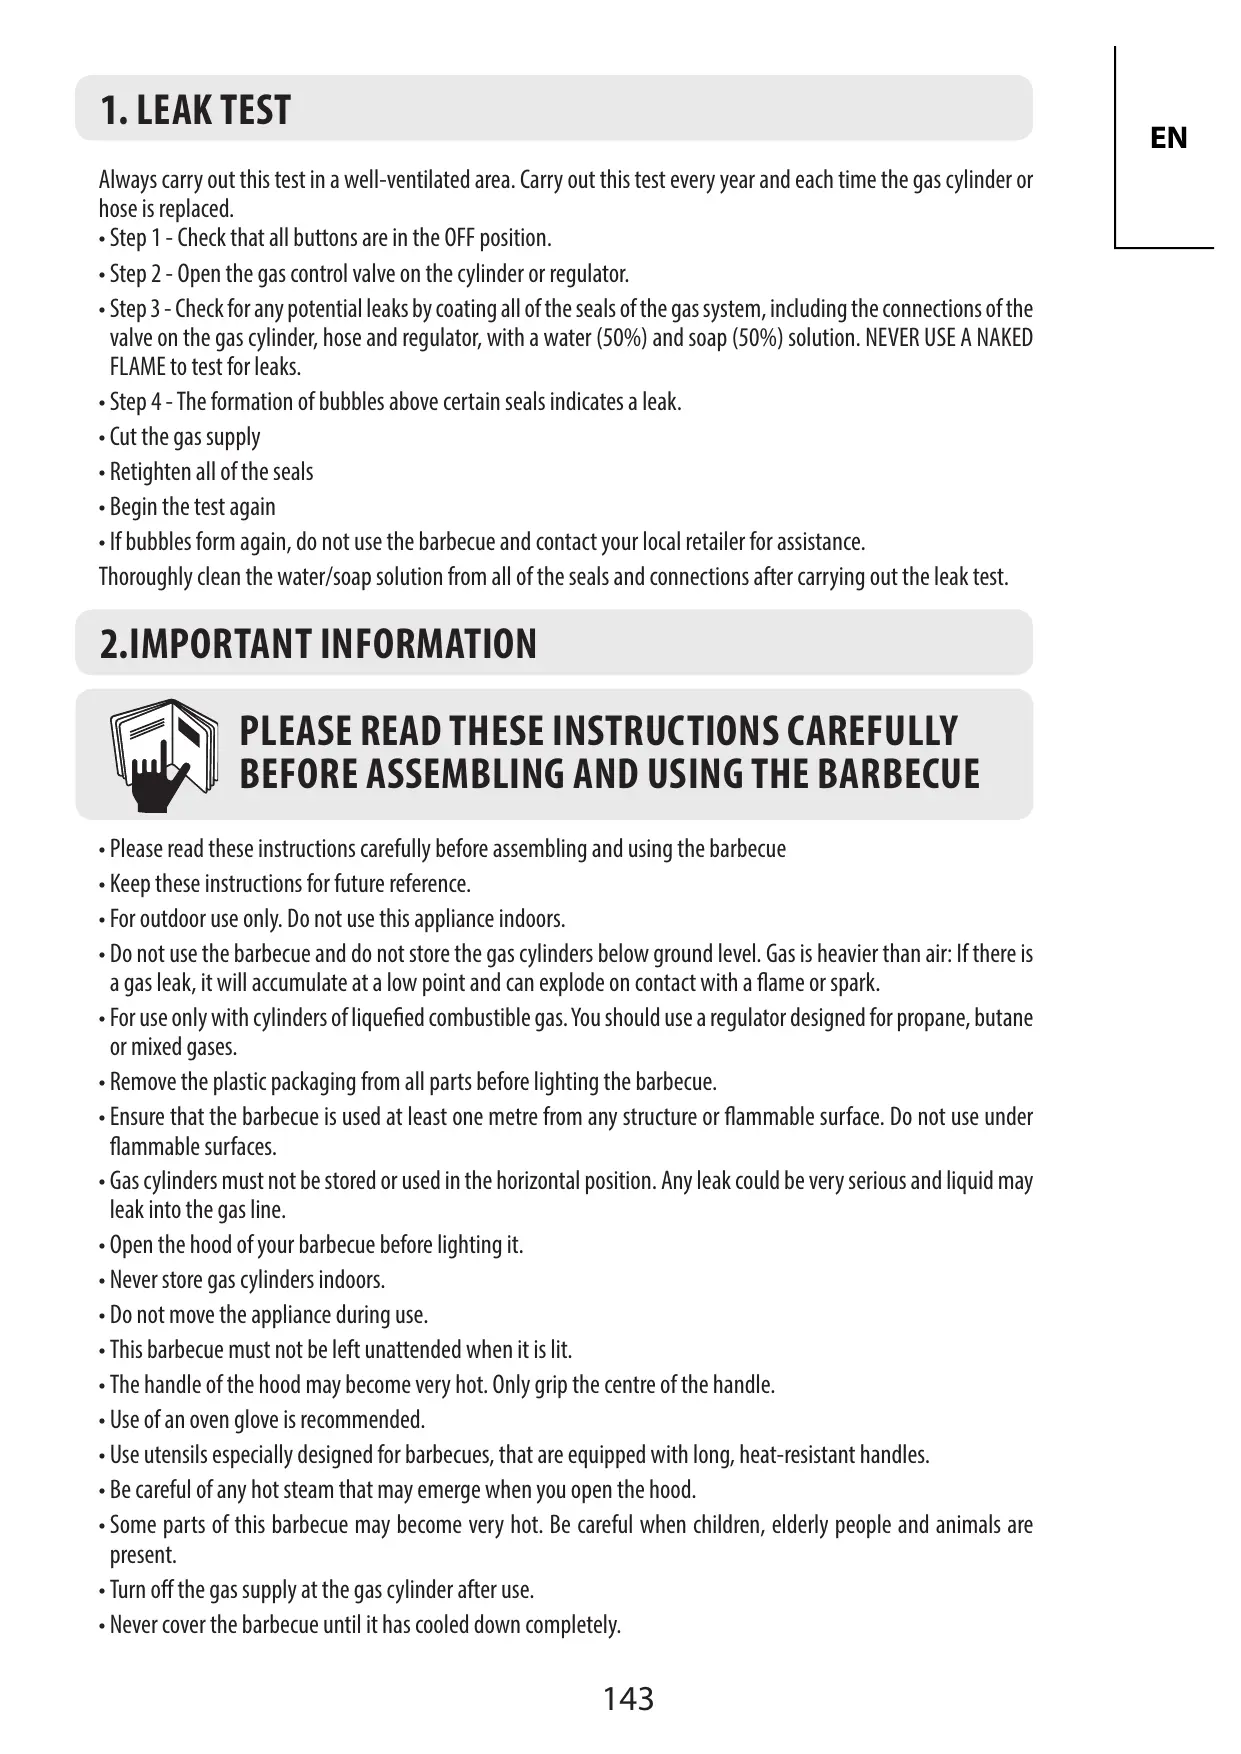
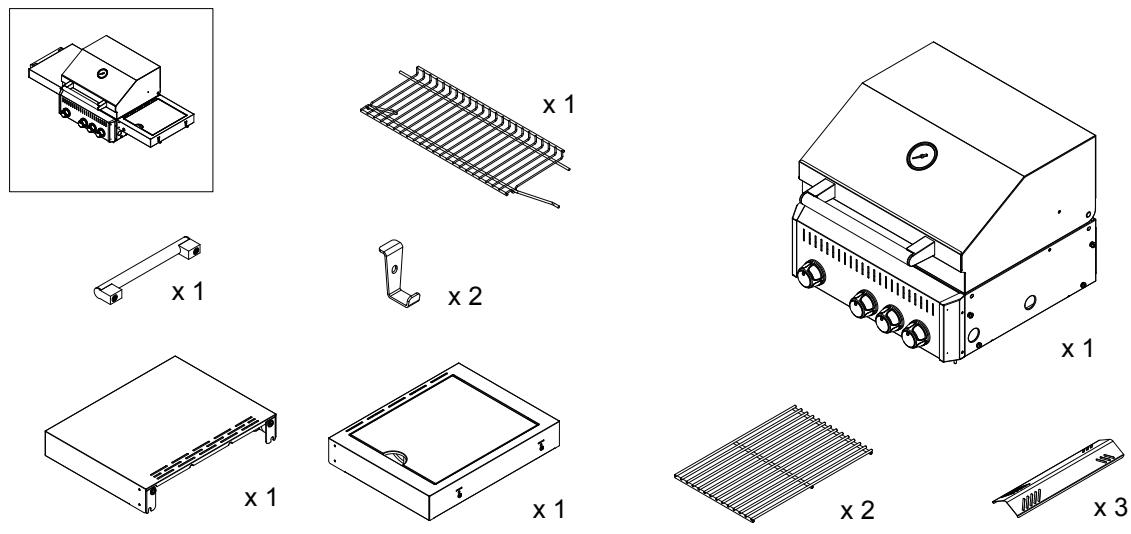
GAZ BARBECUE B400 3 + 1 BURNERS
2022R09P19-0008, 2022R09P19-0011
text_image
Exploded view diagram of a multi-case appliance with numbered parts for identification1
2
A

x 25
B

x 18
C

x 1
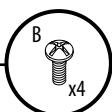
D

x 4
natural_image
Illustration of a switch tool and its corresponding electrical component (no text or symbols present)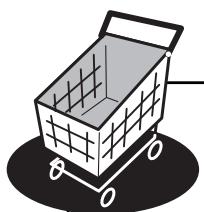


natural_image
Isometric technical drawing of a mechanical assembly with mounting brackets and a central circular component (no text or symbols)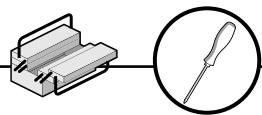
2
text_image
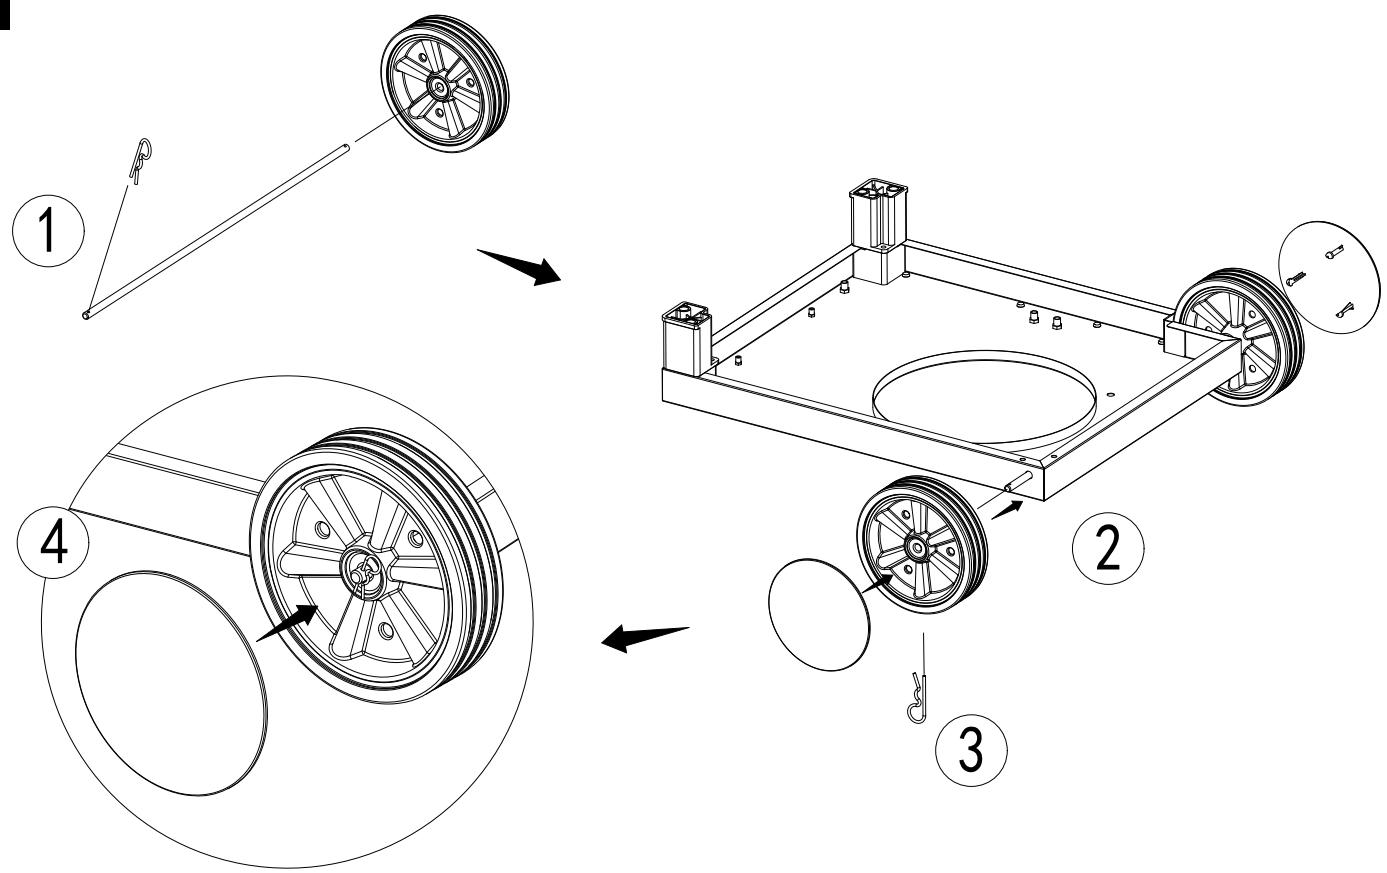
Technical diagram showing four stages of a vehicle wheel assembly with labeled components and directional arrows.natural_image
Technical line drawing of a mechanical support system with mounting brackets and wheels, showing close-ups of components (no text or symbols)
text_image
Technical diagram of a mechanical assembly with labeled parts and component annotations6
text_image
Technical diagram of a mechanical device with labeled parts and exploded view, including assembly details and component illustrations.natural_image
Technical line drawing of a mechanical cart with wheels and mounting hardware (no text or symbols)
8
natural_image
Technical line drawing of a portable gas stove with wheels and control panel (no text or symbols)
natural_image
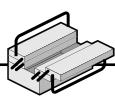
Technical line drawings of two rectangular electronic enclosure components with mounting hardware (no text or symbols)
10
text_image
Technical diagram of a portable electric motor with labeled parts and directional arrows indicating assembly steps.
text_image
Technical diagram of a mechanical device with labeled parts and an inset view showing assembly details.12
text_image
Technical diagram of a portable electric grill with labeled parts and warning indicatorstext_image
Technical diagram of a portable electric stove with labeled components and hand gestures indicating assembly or repair instructions.
16
text_image
Technical diagram of a portable air conditioner unit with labeled components and directional arrows indicating assembly steps.
natural_image
Technical line drawing of a portable grill with open chamber and side-mounted grilles (no text or labels)18
text_image
Technical diagram of a gas stove with numbered components and directional arrows indicating flow or movement.natural_image
Line drawing of a 3D model of a gas stove with wheels and internal grating (no text or symbols)FR Utilisation
ES Utilización
PT Utilização
IT Uso
EL χρήσης
PL użytkowania
RU Использование
KZ Пайдалану
UA Використання
RO utilizare
BR Uso
EN Use
natural_image
Diagram showing a mechanical component with an arrow indicating direction, alongside a separate circular component (no text or symbols)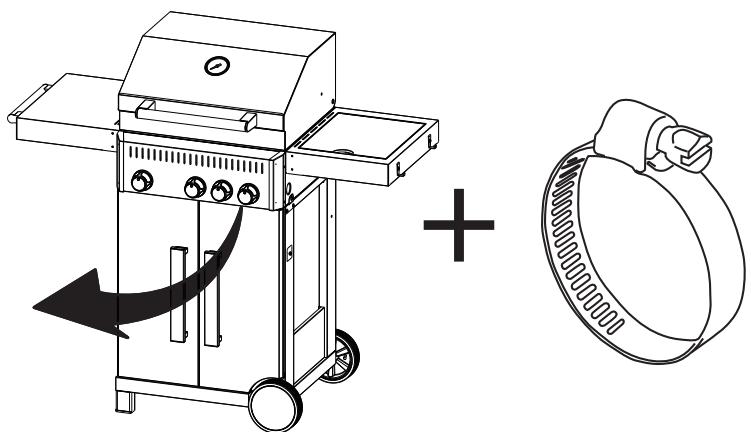
text_image
Diagram showing a gas stove with a mounted heater and a coiled hose, illustrating the concept of heating or safety.FR Utilisation
ES Utilización
PT Utilização
IT Uso
EL χρήσης
PL użytkowania
RU Использование
KZ Пайдалану
UA Використання
RO utilizare
BR Uso
EN Use
3
A
natural_image
Illustration of a hand using a tool to press a circular component into a trash bin, with no text or symbols present.B
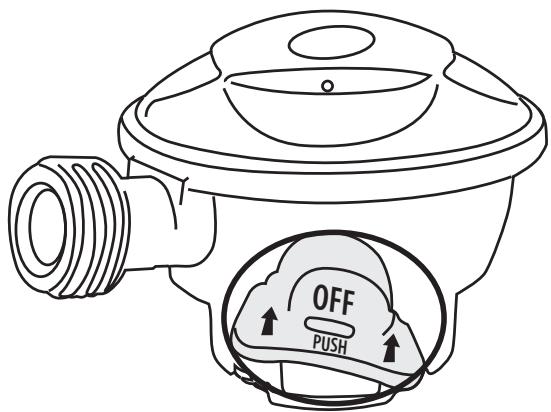
text_image
OFF PUSH4
A
natural_image
Diagram of a mechanical valve assembly with a black arrow indicating direction (no text or symbols present)B
natural_image
Diagram showing a device with a lid and a magnified inset of its internal structure (no text or symbols)FR Utilisation
ES Utilización
PT Utilização
IT Uso
EL χρήσης
PL użytkowania
RU Использование
KZ Пайдалану
UA Використання
RO utilizare
BR Uso
EN Use
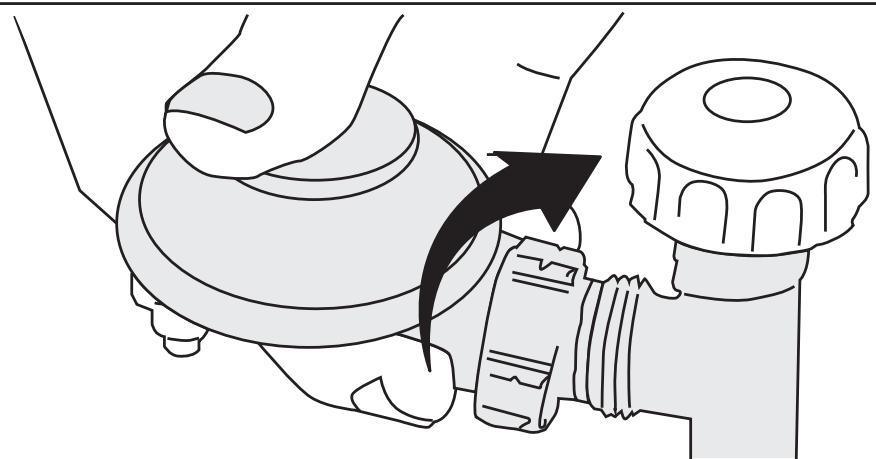
5
A
natural_image
Line drawing of a hand holding a small object inside a container (no text or symbols)B

text_image
Diagram illustrating a mechanical assembly process with labeled parts and directional arrows indicating motion or movement.6
B
natural_image
Technical line drawing of a mechanical assembly with a circular component and a base mount (no text or symbols)FR Utilisation
ES Utilización
PT Utilização
IT Uso
EL χρήσης
PL użytkowania
RU Использование
KZ Пайдалану
UA Використання
RO utilizare
BR Uso
EN Use
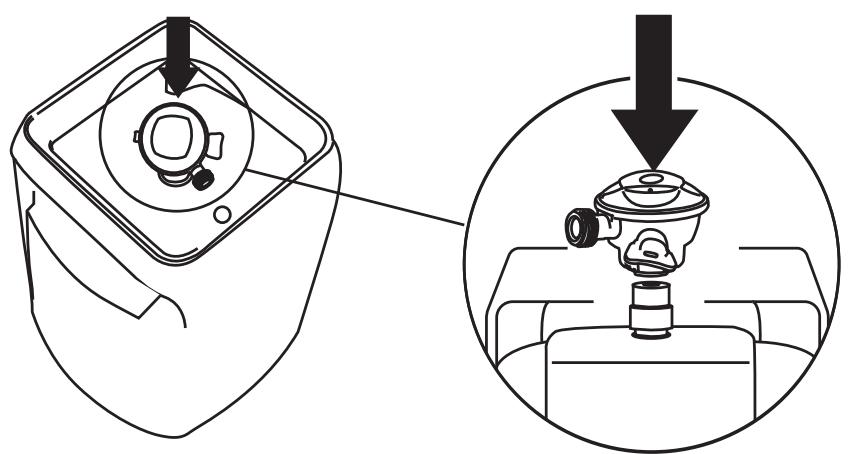
7

text_image
Diagram illustrating gas storage and heating process with numbered steps and control symbols3
50 %
+
50 %
+
+
8
text_image
Diagram of a gas stove setup with labeled components and airflow paths, including a gas cylinder, heater, and exhaust pipe.5
natural_image
Technical diagram of a mechanical assembly with no visible text or symbols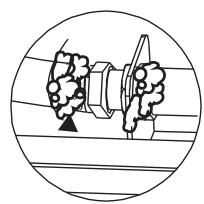

natural_image
Mechanical assembly diagram showing a bolt and nut assembly inside a circular frame (no text or labels)

FR Utilisation
ES Utilización
PT Utilização
IT Uso
EL χρήσης
PL użytkowania
RU Использование
KZ Пайдалану
UA Використання
RO utilizare
BR Uso
EN Use
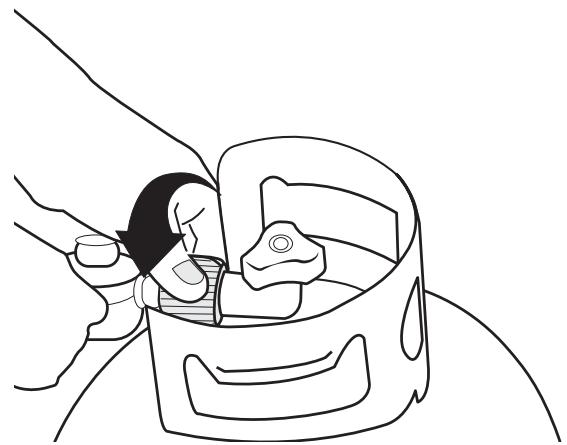
9
natural_image
Technical illustration of a gas stove with a hand gesture and internal components (no text or symbols)10
natural_image
Technical illustration of a gas stove with a hand adjusting a circular component, showing internal components and a magnified view (no text or symbols)11
natural_image
Line drawing of a hand pressing down on a mechanical component (no text or symbols)natural_image
Line drawing of a person using a tool to adjust or install a mechanical component, no text or symbols present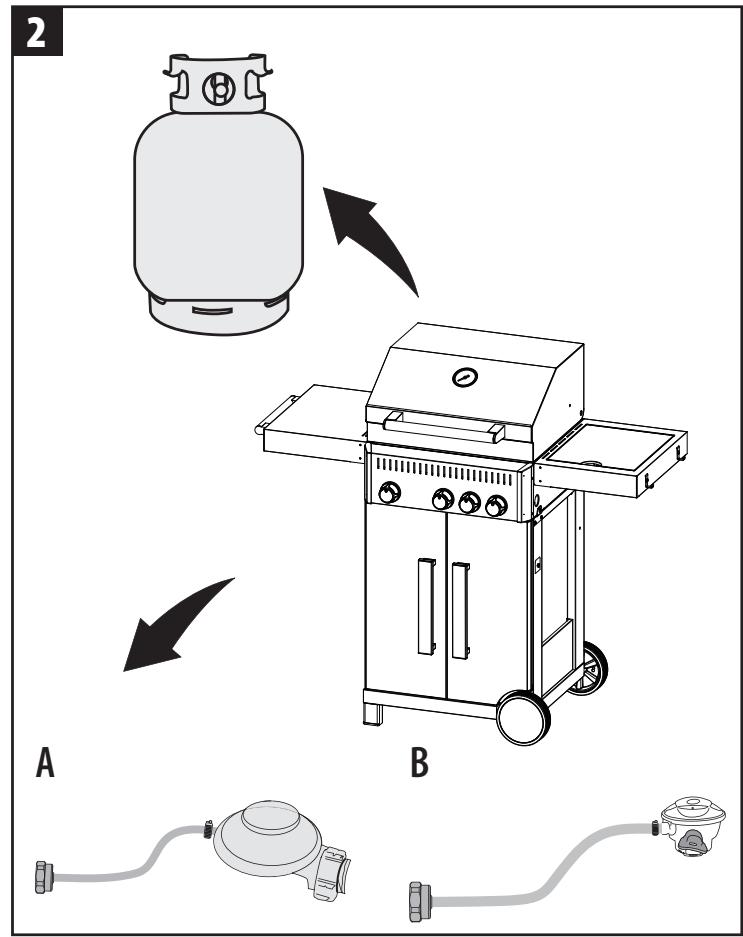
text_image
2 A B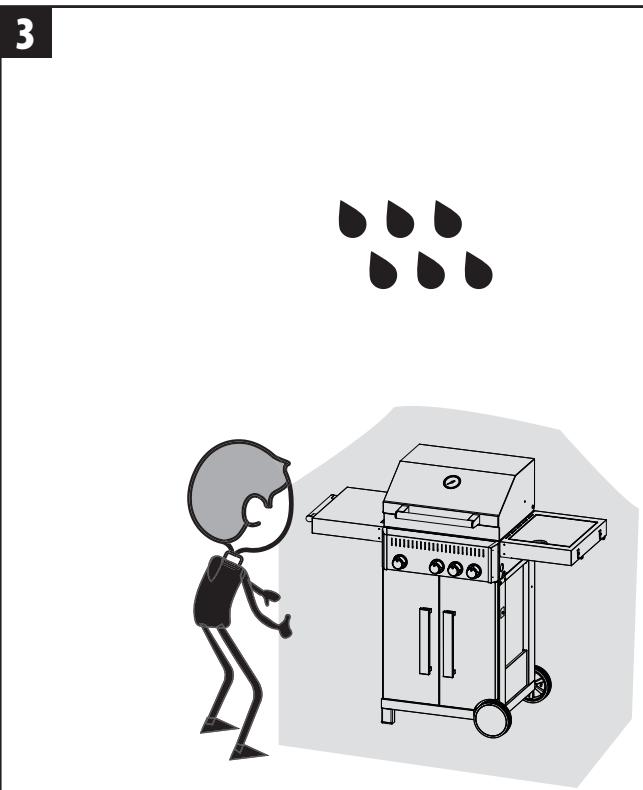
natural_image
Illustration of a person standing next to a gas stove with six droplets above (no text or symbols)
natural_image
Illustration of a person standing next to a gas stove under a roof, with snowflakes in the background (no text or symbols)1. TEST DE FUITE
International Project Quality Leader
International Project Quality Leader
International Project Quality Leader
International Project Quality Leader
International Project Quality Leader
International Project Quality Leader
Aprinderea grăsimilor
International Project Quality Leader
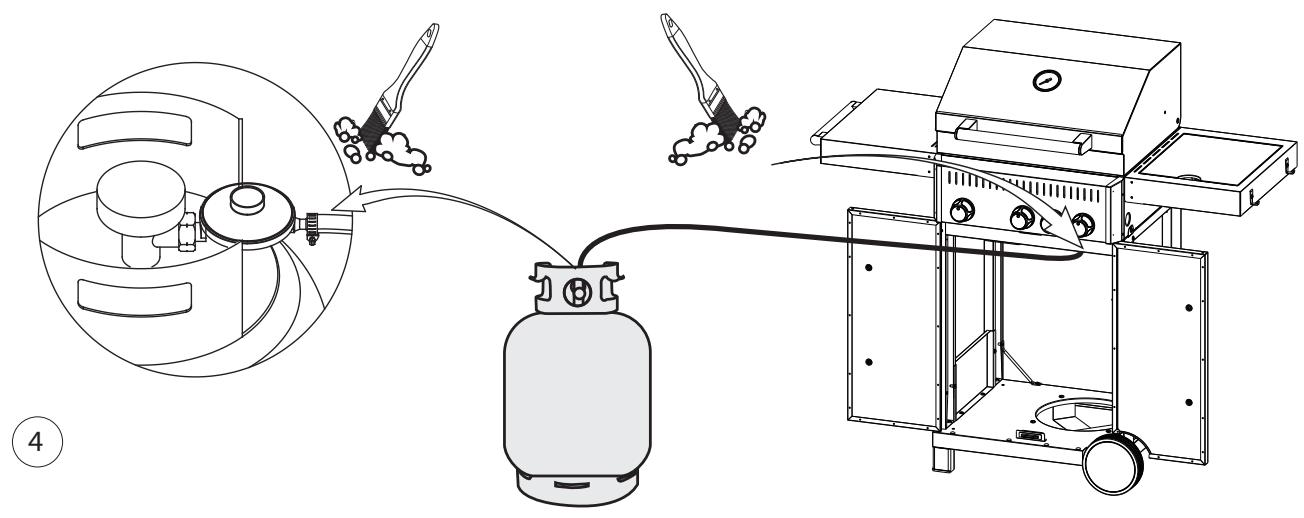
Always carry out this test in a well-ventilated area. Carry out this test every year and each time the gas cylinder or hose is replaced.
- Step 1 - Check that all buttons are in the OFF position.
- Step 2 - Open the gas control valve on the cylinder or regulator.
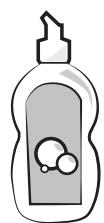
- Step 3 - Check for any potential leaks by coating all of the seals of the gas system, including the connections of the valve on the gas cylinder, hose and regulator, with a water (50%) and soap (50%) solution. NEVER USE A NAKED FLAME to test for leaks.
- Step 4 - The formation of bubbles above certain seals indicates a leak.
- Cut the gas supply
- Retighten all of the seals
- Begin the test again
- If bubbles form again, do not use the barbecue and contact your local retailer for assistance.
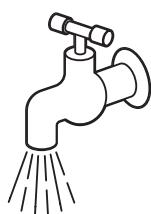
Thoroughly clean the water/soap solution from all of the seals and connections after carrying out the leak test.
2. IMPORTANT INFORMATION
PLEASE READ THESE INSTRUCTIONS CAREFULLY BEFORE ASSEMBLING AND USING THE BARBECUE
- Please read these instructions carefully before assembling and using the barbecue
- Keep these instructions for future reference.
- For outdoor use only. Do not use this appliance indoors.
- Do not use the barbecue and do not store the gas cylinders below ground level. Gas is heavier than air: If there is a gas leak, it will accumulate at a low point and can explode on contact with a flame or spark.
- For use only with cylinders of liquefied combustible gas. You should use a regulator designed for propane, butane or mixed gases.
- Remove the plastic packaging from all parts before lighting the barbecue.
- Ensure that the barbecue is used at least one metre from any structure or flammable surface. Do not use under flammable surfaces.
- Gas cylinders must not be stored or used in the horizontal position. Any leak could be very serious and liquid may leak into the gas line.
- Open the hood of your barbecue before lighting it.
- Never store gas cylinders indoors.
- Do not move the appliance during use.
- This barbecue must not be left unattended when it is lit.
- The handle of the hood may become very hot. Only grip the centre of the handle.
- Use of an oven glove is recommended.
- Use utensils especially designed for barbecues, that are equipped with long, heat-resistant handles.
- Be careful of any hot steam that may emerge when you open the hood.
- Some parts of this barbecue may become very hot. Be careful when children, elderly people and animals are present.
- Turn off the gas supply at the gas cylinder after use.
- Never cover the barbecue until it has cooled down completely.
2. IMPORTANT INFORMATION
- Use the barbecue only on a flat and stable surface.
- Carry out a leak test before using your barbecue. It is the only reliable way to detect a gas leak on seals or connections after assembly.
- Carry out the leak test every year and each time the gas cylinder or hose is removed or replaced.
- This appliance must be kept away from flammable materials during use.
- Do not use aerosols near the barbecue.
- Failure to follow the instructions in this manual could lead to serious injury or damage.
- Please contact your local retailer should you have any questions regarding the instructions.
- Any modifications to this barbecue could be dangerous. They are not permitted and will render the warranty null and void.
- Do not modify the appliance.
- 10 - 24cm is the minimum and maximum sizes of cooking vessels to be used.
3.INFORMATION ON THE GAS AND REGULATOR
This barbecue can be supplied by liquefied combustible propane or butane in cylinder form. Propane cylinders will provide gas all year round, even in winter, when it is cold. You may need a wrench (not included) to change the cylinders. Butane cylinders provide a sufficient gas supply during the summer, but the performance of the barbecue may be affected when the temperature of the gas falls below +10°C. Check that you have the correct gas cylinder and regulator for your barbecue.
- The hose must hang freely without being bent, fold s, cuts or excessive wear.
- Apart from the connection point, no part of the hose should touch the hot parts of the barbecue. If the hose is damaged, replace it with a suitable hose designed specifically for use with liquefied combustible gas and in accordance with the national standards of the country in which it is used.
- Use an appropriate hose that complies with standard ISO3821, the length of which should not exceed 1.5 m.
For optimal performance, we recommend using a 6-kg cylinder of butane or a 5-kg cylinder of propane. Use an appropriate regulator that complies with standard EN16129. YOU MUST HAVE A REGULATOR AND GAS CYLINDER THAT WILL ADEQUATELY ENSURE THE SAFETY AND EFFICACY OF YOUR BARBECUE. USING AN INAPPROPRIATE OR FAULTY REGULATOR IS DANGEROUS AND WILL VOID THE WARRANTY. Please consult your local gas retailer to determine which gas cylinders and regulators are most suitable.
Parts sealed by the manufacturer or his agent must not be altered by the user.

| BE,CH,ES,FR,GB,GR,IT, LU,MT,PT | Butane (G30) 28-30 mbar | I3+ |
| Propane (G31) 37 mbar | ||
| CZ,CY,DK,EE,FI,HU,IS,LT, LV,MT,NO,NL,SE,SI,SK,RO,TR | Butane (G30) 30 mbar | I3B/P |
| Propane (G31) 30 mbar | ||
| PL | Propane (G31) 37 mbar | I3P |
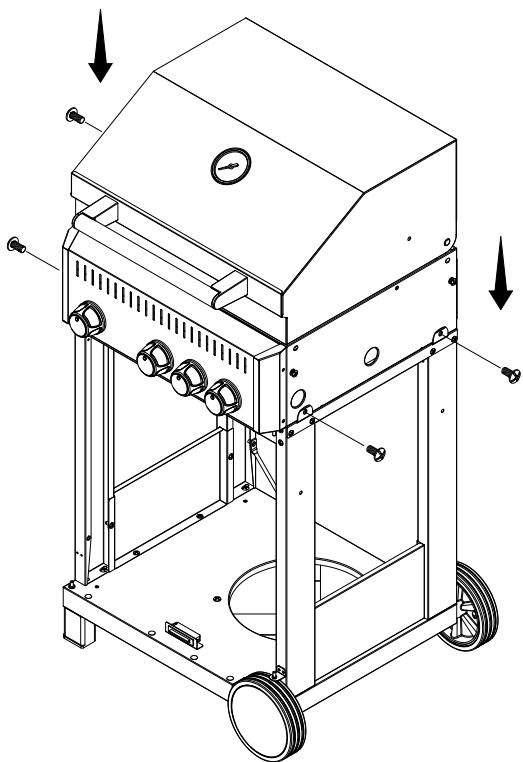
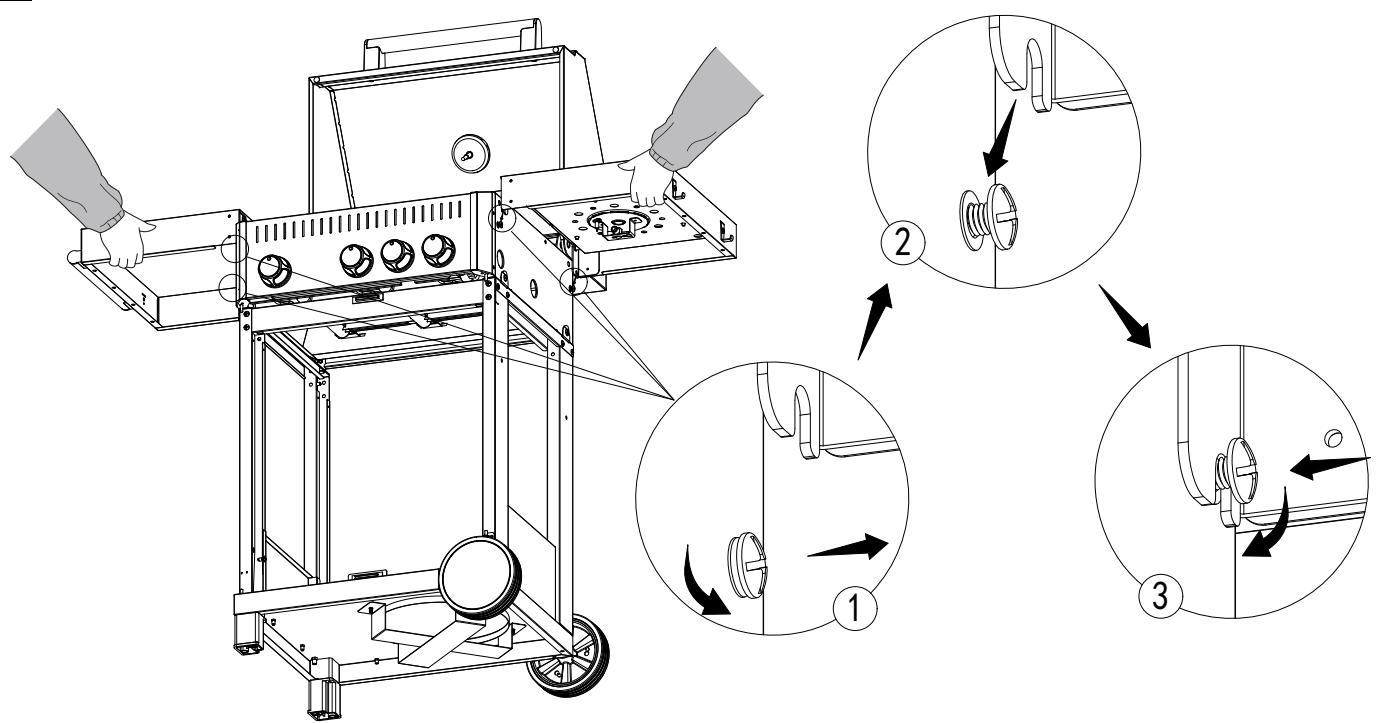
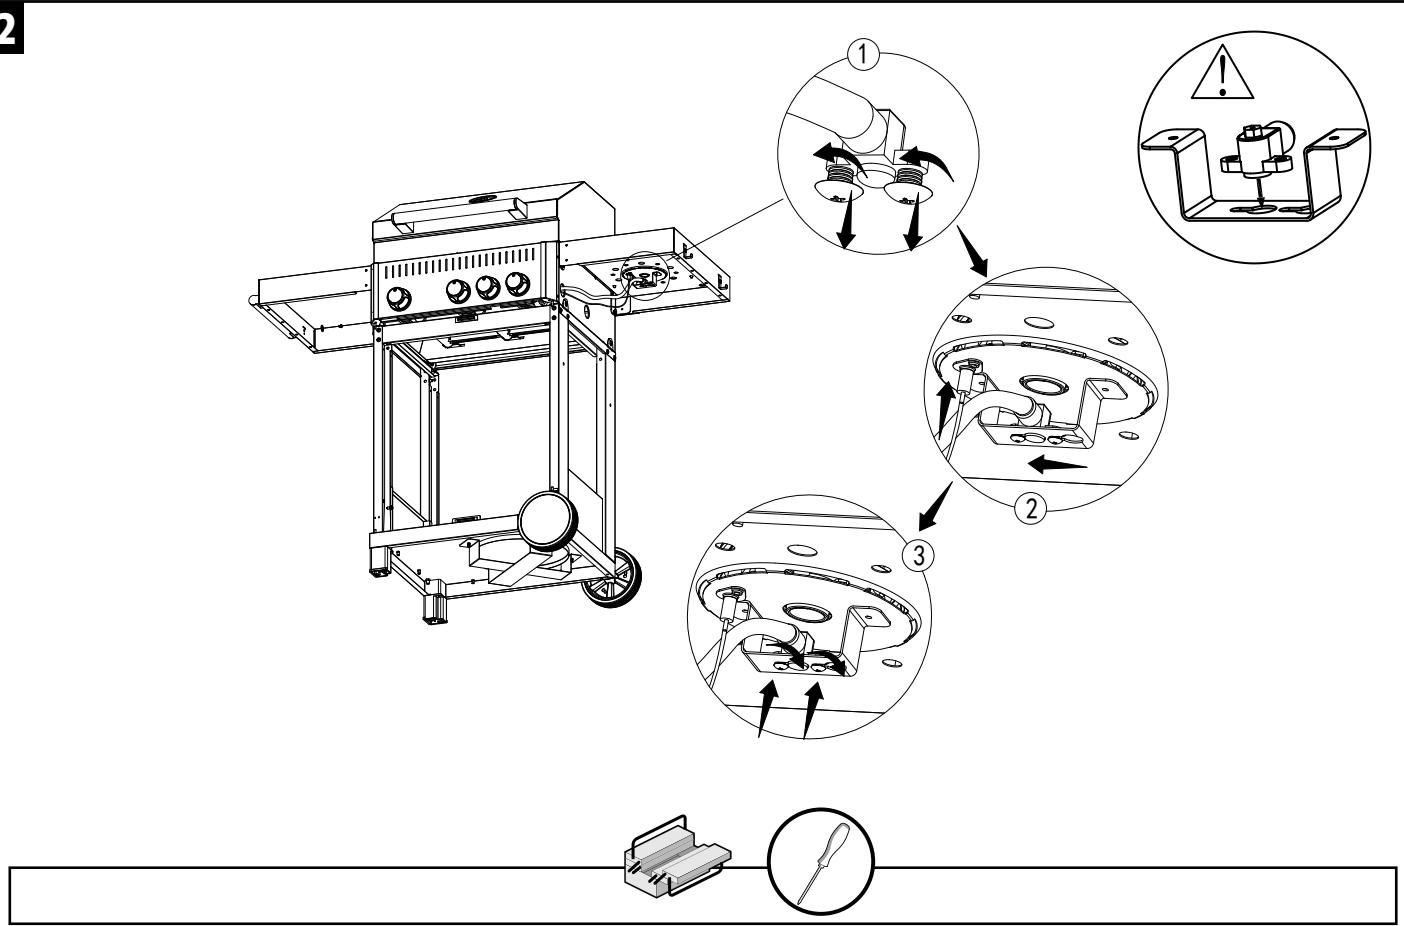
4.INSTALLATION
Selecting an area
- This barbecue must only be used outdoors and must be placed in a well-ventilated area. Take care never to place it UNDER a combustible surface. The sides of the barbecue must NEVER be less than one metre from any combustible surface. Keep this barbecue away from flammable materials!
- Carefully select the area in which to use the barbecue. It should be placed in an open but sheltered space away from trees and other objects that could catch fire.
Precautions
- Do not block the air intakes on the body of the barbecue.
- If you have to replace the cylinder, check that it is fully closed and that there are no ignition sources (cigarettes, naked flames, sparks, etc.) nearby before continuing.
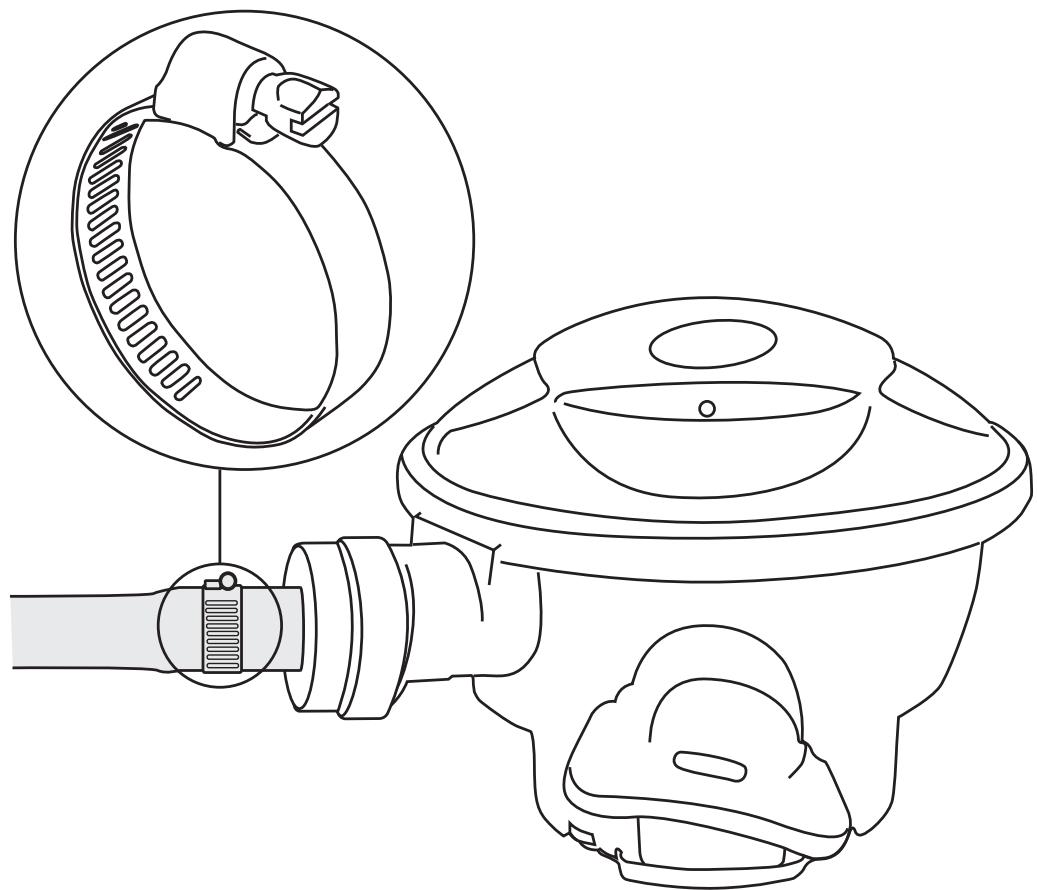
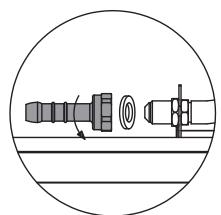
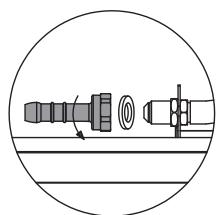
Connecting a gas hose to the barbecue
- Connect the gas hose at the gas intake point. Do not over-tighten it. Do not use adhesive tape or liquid adhesive on the connection. Tighten them by hand.
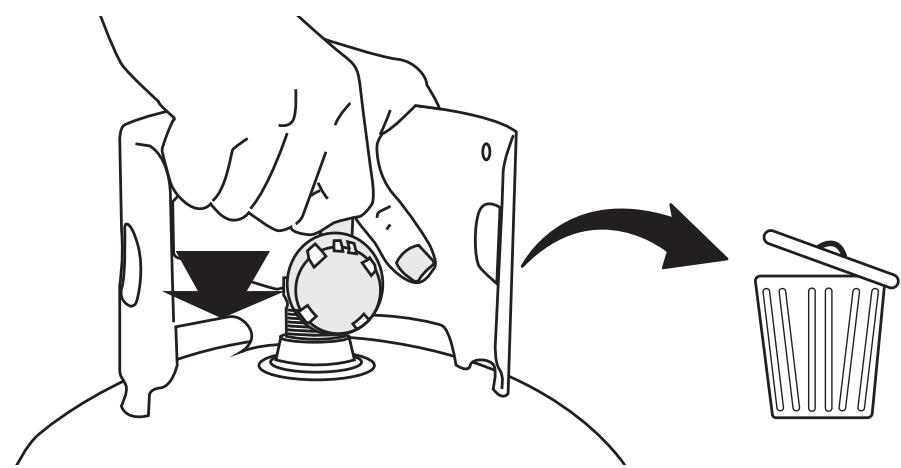
- IF A THREADED HOSE IS USED, THE PRE-INSTALLED NOZZLE MUST BE REMOVED.
- Check that all of the barbecue control buttons are in the OFF position. Connect the regulator to the gas cylinder, following the instructions provided by the regulator and cylinder retailer.
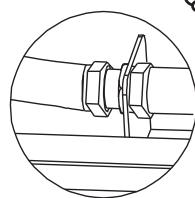
Affixing the regulator to the gas cylinder
- Check that all of the barbecue control buttons are in the OFF position. Connect the regulator to the gas cylinder, following the instructions provided by the regulator and cylinder retailer.
5.OPERATION
Warnings
- Before continuing, ensure that you have correctly understood the IMPORTANT INFORMATION section of this manual.
- The design of this barbecue prohibits the use of more than 50% of the cooking zone as a solid plate. If the plates are completely covered, the resulting excessive heat build-up could damage the barbecue, which the warranty does not cover.
Lighting the barbecue
- Open the hood of your barbecue before lighting it. NEVER light your barbecue with the hood closed.
- Ensure that all of the gas buttons are OFF. Open the gas control valve on the gas cylinder or regulator.
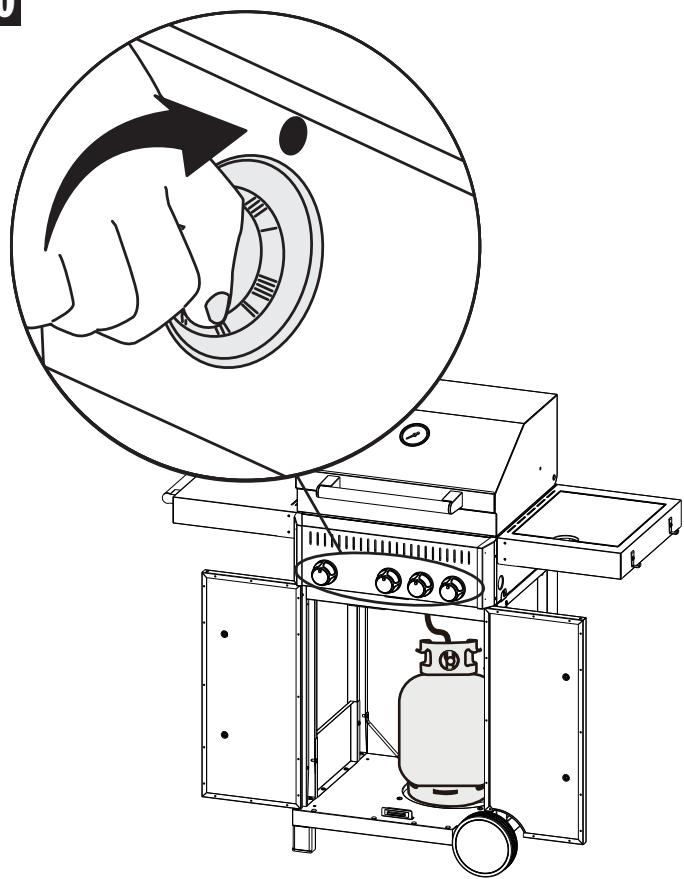
- Push the button of the burner that you want to light and turn it anti-clockwise until you feel a resistance to rotation. Wait 4 seconds, then continue to turn the knob until you hear a click (the burner will normally ignite). Repeat this operation several times until the burner ignites.
- Light the other burners in any order, depending on your needs. Check that each burner is lit before lighting the next.
5.OPERATION
- If the burner does not light after following the procedure above, turn the knobs to the off position. Close the gas valve on the gas cylinder. Wait five minutes. Repeat the steps above. If the barbecue still does not light, please refer to the manual lighting instructions below.
- After lighting, the burners must burn at the maximum position for 3 to 5 minutes to pre-heat the barbecue. This process must be carried out before each cooking session. The hood must remain open during pre-heating.
- Once pre-heating is finished, turn all of the burners to low heat to ensure the best cooking results.
Instructions for manual lighting
- Open the hood of your barbecue before lighting it. NEVER light your barbecue with the hood closed.
- Ensure that all of the gas buttons are OFF. Open the gas control valve on the gas cylinder or regulator.
- Insert a lit match through the rightmost ignition hole below the control panel and place it near the right burner hole.
- Push and turn the far right knob anti-clockwise to the maximum position.
- When the right burner is lit, turn on the remaining burners from right to left.
- Make sure that each burner is lit before lighting the next burner.
- If the far right burner does not light, contact your local retailer.
- After lighting, the burners must burn at the maximum position for 3 to 5 minutes to pre-heat the barbecue. This process must be carried out before each cooking session. The hood must remain open during pre-heating.
- Once pre-heating is finished, turn all of the burners to the minimum position to ensure the best cooking results.
Cooking on the grill
- The stainless steel burners heat the heat diffuser (or the basket with briquettes/lava stone) under the grill, which in turn heats the food placed on the grill. The natural juices produced by the food during cooking flow over the heat diffuser (or briquettes/lava stone) and evaporate. The resulting smoke envelops the food, escaping upwards, giving the food the unique aroma of a barbecue. To obtain a more even cooking, lower the barbecue hood, making sure the burners are on low heat.
Cooking on the plate
- The burners directly heat the plate, which cooks the food placed on it. The plates allow you to cook smaller foods, such as seafood, that could fall between the bars of the grill. They also cook foods that require a high temperature/short cooking times such as vegetables and small pieces of fish. Similarly, they can be used just like a kitchen hotplate to grill steaks, cook eggs, etc. They can also be used to heat pans or keep food warm.
Controlling flares \*Very Important\*
- Flares occur when the food is cooking and the juices and fats run over the hot heat diffusers. Smoke, of course, helps to give food that great barbecue taste, but it is better to avoid flares to prevent the food from burning. To control these flares, it is ABSOLUTELY ESSENTIAL to remove the excess fat from the food before cooking. Use a reasonable amount of marinades and cooking sauces. The burners must also be set to MIN for cooking.
- When flares occur they can normally be extinguished by putting baking powder or salt directly onto the heat diffusers. Always protect your hands when working near the barbecue surface, taking care to protect yourself against flames.
- In case of a grease fire please follow the instructions below.
Fat fires
- Empty and clean the grease trap of all cooking debris after each use.
- If the barbecue is used for large parties, it will need to be turned off every two hours and cleaned. It should be cleaned more often if you cook a lot of very fatty food (sausages, merguez, etc.). Failure to follow these guidelines can cause fat fires, which can cause injury and can damage the barbecue.
In the event of a fat fire/Warnings:
- If you can do so safely, turn off all of the gas knobs.
- Close the gas cylinder.
- Keep everyone away from the barbecue and wait for the fire to go out.
- Do not close the barbecue hood.
- NEVER SPRAY YOUR BARBECUE WITH WATER. IF YOU USE A FIRE EXTINGUISHER,
• IT MUST BE A POWDER EXTINGUISHER.
• DO NOT REMOVE THE GREASE TRAP. - If the fire does not appear to be diminishing or seems to be getting worse, contact the fire brigade for assistance.
After cooking
- After each cooking session, set the barbecue burners to the maximum position and allow them to burn for 5 minutes. This will burn off any cooking residue and consequently help cleaning. Make sure the hood is open during this operation.
- Always clean your barbecue after each use to prevent the build-up of grease that could catch fire.
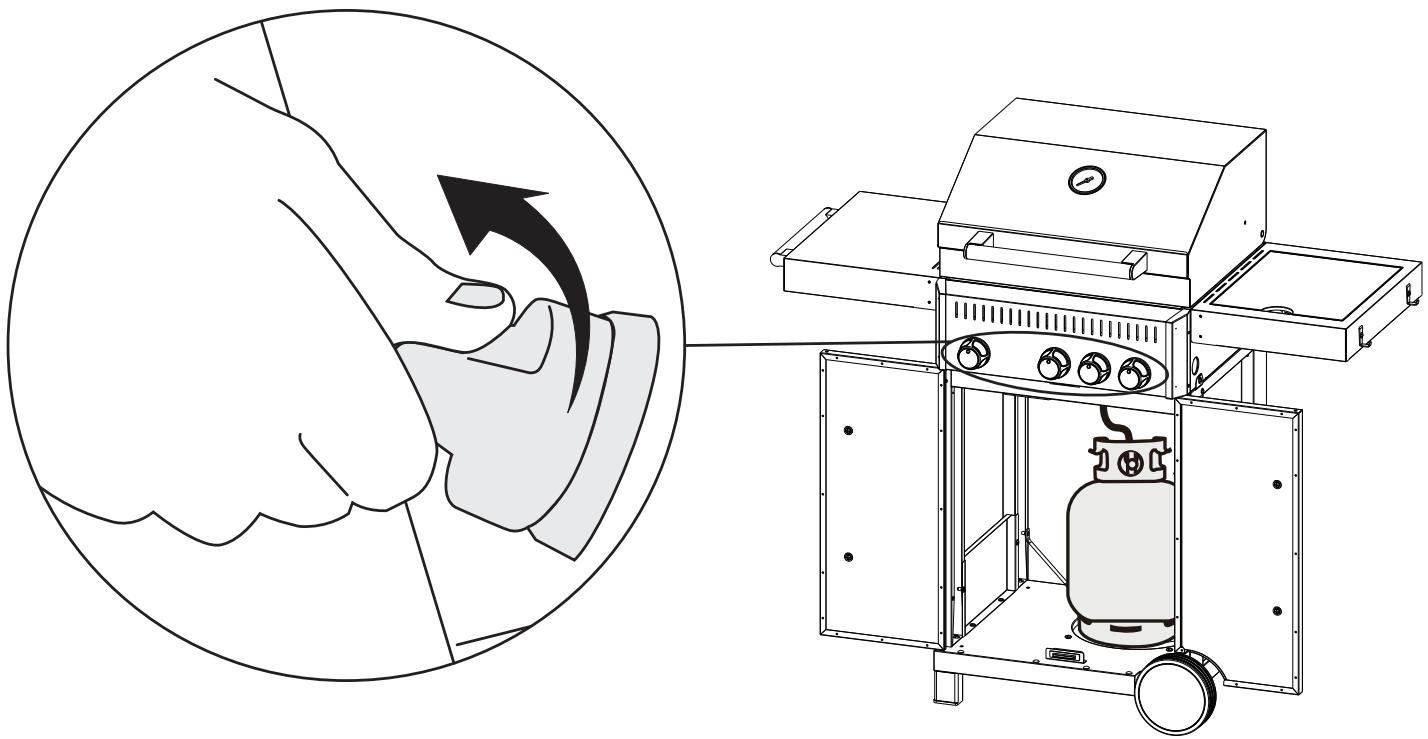
Switching off the barbecue
- When you have finished using the barbecue, turn all of the gas valves fully clockwise to the OFF position and turn off the gas supply to the cylinder.
- Wait until the barbecue is cold before closing the hood.
6.CARE AND MAINTENANCE
- Clean your barbecue regularly between uses and especially after extended periods of storage. Check that the barbecue and its components are cold enough before cleaning. Never leave the barbecue exposed to the elements and keep it away from moisture.
- Never spray the barbecue with water when its surfaces are hot.
- Never handle hot parts without protecting your hands.
- To prolong its life and maintain the condition of your barbecue, we strongly recommend that you cover it if left outdoors for extended periods, especially during the winter months. High-strength tarpaulins and other accessories for barbecues are available from your local retailer.
- Even if your barbecue is covered for protection, it should be inspected regularly as moisture or condensation may form, which could damage it. It may be necessary to dry the barbecue and the inside of its protective cover. Fat residues may mould on parts of the barbecue. This should be cleaned with very hot soapy water.
- Any rusty parts you find that are not in contact with the food should be treated with a rust inhibitor and repainted with a barbecue or heat-resistant paint.
6.CARE AND MAINTENANCE
Cooking surfaces
- When the barbecue has cooled down, clean it with warm, soapy water. To remove food residue, use a dish-washing detergent. Do not use abrasive sponges or scouring powders as they could permanently damage the finish of your barbecue. Rinse and dry well. We do not recommend cleaning the grills and plates in a dishwasher because of their weight.
- REMEMBER THAT THE USE OF ICECUBES, WHICH MAY CAUSE THERMAL SHOCK AND CRACK THE ENAMEL OF THE PLATE, MUST BE AVOIDED.
- IF RUST APPEARS ON THE COOKING SURFACE IN CONTACT WITH THE FOOD, IT MUST BE REPLACED.
Maintaining the burners
- Your burner has been set to provide maximum flame performance. You will normally see a blue flame, that maybe has a yellow end, when the burner is lit. If the flame tends to be more yellow, it could be due to debris or insects in the holes or tubes of the burner. This could cause a blockage or restriction of the gas flow, which could cause a fire behind the control panel, seriously damaging your barbecue. If this happens, and if possible, the gas must be switched off immediately.
- The burner must be inspected, removed and cleaned regularly, at least once a year, in addition to the following conditions:
- Removing your barbecue from storage.
- If one or more burners do not ignite.
- If the flame of the burner is too yellow.
- If the gas ignites behind the control panel.
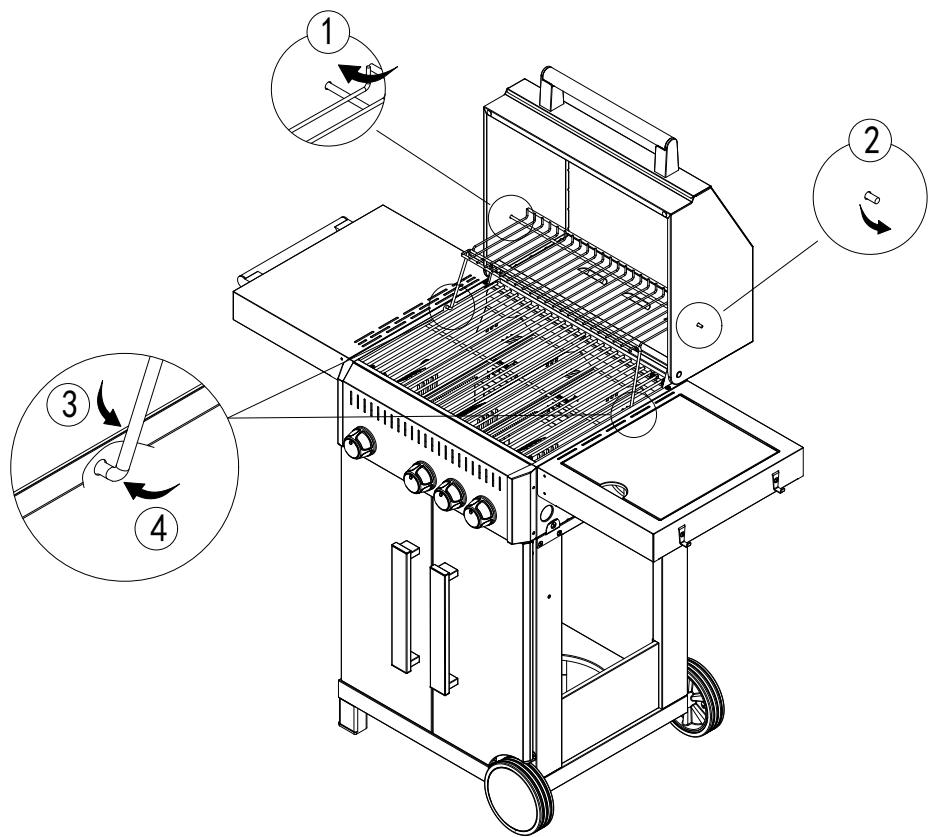
- To clean a burner completely, remove it from the barbecue. A lightweight wire brush can be used to remove rust from the burner surface. Use a pipe cleaner or a piece of wire to remove obstructions in the holes or tubes of the burner, taking care not to enlarge the burner holes.
- You may need a torch to ensure that the inside of the burner tube is clear. Turn the burner and tap it gently against a hard surface like a piece of wood to dislodge any debris from the inside.
- When replacing the burner, make sure that the tubes are facing the nozzles.
Heat diffuser
- Remove any food residue from the heat diffuser with a wooden or soft plastic scraper or with a brass brush. Do not use a steel scraper or brush. Clean with warm, soapy water and rinse thoroughly.
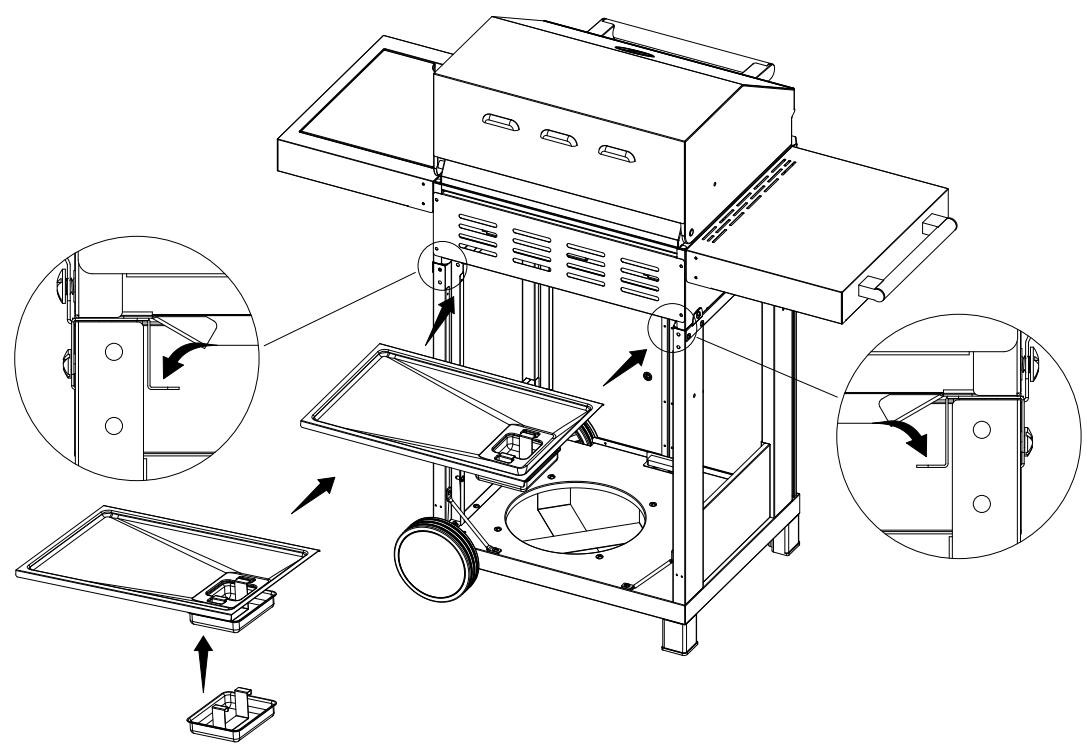
Grease collection tray
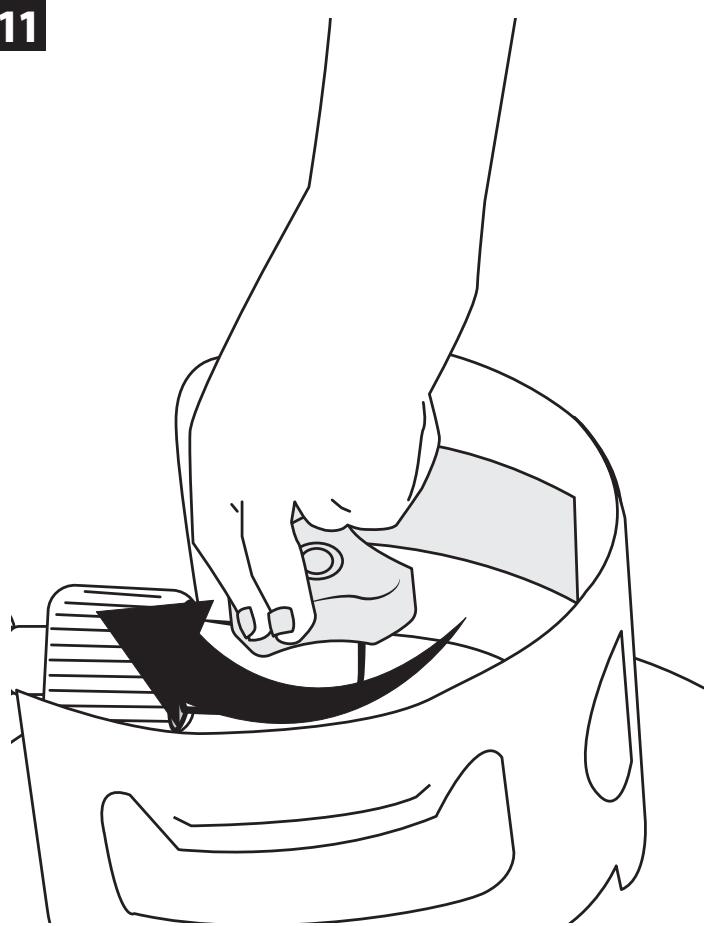
- After each use, remove and clean all food and fat deposits from the grease collection tray, using a wooden or plastic scraper if necessary.
- If you do not follow these instructions, it may cause a grease fire. This could result in serious damage to your barbecue that will not be covered by the warranty. If necessary, the grease collection tray can be cleaned with soapy water.
6.CARE AND MAINTENANCE
Barbecue body
- Regularly remove excess grease from the barbecue body using a cloth that has been soaked in soapy water and thoroughly wrung out. Excess fat and food deposits can be removed from the inside of the barbecue body using a wooden or soft plastic scraper. For ease of cleaning, you can add a sheet of aluminium foil that will be changed with each use. Be careful not to block the grease drain holes. If you need to clean it thoroughly, use a cloth and hot soapy water or a nylon brush. Do not use abrasive cleaning agents. Remove the grills and/or plates and burners before cleaning thoroughly. Do not immerse gas knobs or fuel lines in water. Check the ignition after carefully replacing the components in the barbecue body.
Barbecue hood
- Clean the barbecue hood with a non-abrasive cloth or pad and hot, soapy water. Do not use scouring pads or powders as this will permanently damage the finish of your barbecue. Dry thoroughly after cleaning to prevent rusting.
Trolley
- Wipe with a cloth soaked in hot soapy water, then dry.
- As with any stainless steel product and to guarantee the longevity of your product, particularly the appearance of the stainless steel, we recommend regularly maintaining the stainless steel parts of your barbecue using a protective oil, and to do this from first use. From time to time, you can also spray the surface with a stainless steel cleaner, then rub with a soft cloth and polish it. This will provide you with a thin layer of protection for your stainless steel surfaces.
Fittings
- We recommend that you check and tighten all screws, bolts, etc. at regular intervals.
Storage
- Make sure your barbecue is cool before covering or storing it. Store your barbecue in a cool and dry place.
- Cover the burners with aluminium foil to prevent insects and other debris from entering the burner orifices.
- If the barbecue is stored indoors, the gas cylinder must be disconnected and left outside. The gas cylinder should always be left outdoors in a dry, well-ventilated area away from heat or ignition sources. Do not let children play with this cylinder. Do not expose the gas cylinder to direct sunlight.
- Before using the barbecue after extended periods of storage, follow the installation procedures.
7.TROUBLESHOOTING
PROBLEM/SOLUTION
Burners
The burners do not ignite with the ignition system
• The gas cylinder is empty ^ ____ →
- Faulty regulator ____ →
- Burners clogged ____ →
- Gas hose or nozzles clogged ____ →
- The electrode cable is loose or disconnected from the electrode
- The electrode or cable is damaged ____ →
• The integrated igniter is faulty ____ →
- Incorrect electrode gap ____ →
Replace with a full cylinder
Check or replace the regulator
Clean the burners
Clean the gas hose or nozzles
Reconnect the cable
Replace the electrode and the cable
Replace it
The electrode must comply with the burner, with a distance of 3 to 4 mm between the end of the electrode and the port on the burner. Realign the electrode as required.
The burner does not ignite with a gas igniter
- The gas cylinder is empty ^ ____ →
- Faulty regulator ____ →
- Burners clogged ____ →
- Gas hose or nozzles clogged ____ →
Replace with a full cylinder
Check or replace the regulator
Clean the burners
Clean the gas hose or nozzles
Small flame or flashback (flame in the burner tube, whistling or perceptible whirring)
• The gas cylinder is too small ____ →
- Burners clogged ____ →
- Gas hose or nozzles clogged ____ →
• Wind ____ →
Use a bigger cylinder
Clean the burners
Clean the gas hose or nozzles
Use the barbecue in an area that is less exposed to wind
The gas valve knob is difficult to turn
- Integrated ignition system jammed ^ ____ →
• Gas valve jammed ____ →
Replace the gas valve
Have your retailer replace the gas valve
8.WARRANTY CONDITIONS
• 2 years (all parts) against rust.
This product is warranted, for the original purchaser, against original defects to materials and malfunction.
As with any stainless steel product and to guarantee the longevity of your product, particularly the appearance of the stainless steel, we recommend regularly maintaining the stainless steel parts of your barbecue using a protective oil, and to do this from first use.
Your retailer will ensure, free of charge during this period, the replacement of faulty parts for household use if the following conditions are met:
This warranty shall only apply to use by a single private residence and shall not apply to Nateral barbecues used in a commercial or communal environment, or to multiple residences such as restaurants, hotels, holiday centres and rented properties.
Under no circumstances shall compensation of any kind be in excess of the amount of the purchase price of the Material product sold under this voluntary guarantee.
You shall assume the risk and responsibility for any loss, damage or injury to you and your property and/or to others and their property resulting from the misuse or abuse of the product or failure to follow the instructions provided by Material in the attached owner's guide.
The product has not been subject to misuse or neglect, including grease fires or excess flame or use of a defective or incorrect gas regulator.
The product has not been damaged by foreign objects, substances or accidents.
The warranty is offered as an extra and is in addition to the legal rights of the consumer.
If you have any questions regarding the installation or use of your appliance, please contact your retailer's After-Sales service.
| ADEO Services | CE 2575-21 | ||||
| Product Name | Outdoor Gas Grill | ||||
| Model Number | B400 3+1B | ||||
| Gas Category | I_3+(28-30/37) | I_3B/P(30) | I_3B/P(37) | I_3B/P(50) | |
| Gas and Supply Pressure | Butane(G30) | Propane(G31) | Butane | Butane | Butane |
| 28-30 mbar | 37 mbar | 29 mbar | 37 mbar | 50 mbar | |
| Country of Destination | I_3+(28-30/37) : BE, CH, CY, CZ, ES, FR, GB, GR, IE, IT, LT, LU, LV, PT, SK, SI. I_3B/P(30) : CY, CZ, DK, EE, FI, FR, HU, LT, IT, NO, NL, SE, SI, SK, RO, HR, TR, BG, IS, LU, MT. I_3B/P(50) : AT, CH, CZ, DE, SK. I_3B/P(37) : PL | ||||
| Main Burner Injector Size | ∅ 0.76 mm | ∅ 0.76 mm | ∅ 0.72 mm | ∅ 0.68 mm | |
| Side Burner Injector Size | ∅ 0.88 mm | ∅ 0.88 mm | ∅ 0.79 mm | ∅ 0.75 mm | |
| Total Nominal Heat Inputs(Hs) | 10.5 kW (764 g/h) | ||||
| Serial Number | |||||
| Use outdoors only. | |||||
| Read the instructions before using the appliance. | |||||
| Warning: Accessible parts may be very hot. Keep young children away. | |||||
| Made in China | |||||
We : ADEO Services
135 Rue Sadi Carnot - CS 00001
59790 RONCHIN - France
Declare that the product detailed below: GAS BBQ
MODEL: 84516187, 84774361
Batch No.: 108544200721,108544200921,108544201121,108544100122,108544200322
Satisfies the requirement of the Council Regulations:
Gas Appliance Regulation (EU)2016/426
And conforms with the norms:
EN 498:2012
EN 484:2019+AC:2020
Eric LEMOINE
International Project Quality Leader
Last two numbers of the year CE
marking applied: 21
| CONTACT ADDRESS | CONTACT PHONE NUMBER | CONTACT MAIL | |
| Leroy Merlin France | LEROY MERLIN Francereue ChanzyLezennes 59712 Lille Cedex 9, France | (+33) 0 810 634 634 (service 0,05€/appel + prix appel) | https://www.leroymerlin.fr |
| Weldom | WELDOM FRANCEZI Breuil le Sec 60 608 Clermont Cedex | (+33) 03 44 77 82 60 | https://www.weldom.fr/ |
| Leroy Merlin Spain | Leroy Merlin Espagne SLUAvenida de la Vega, 228108 - Alcobendas. Madrid | (+34) 917496000 | http://www.leroymerlin.es |
| AKI Spain | AKI Bricolaje España, S.L.U.Edificio Cristal, planta 5a Centro Comercial BaricentroCtra Nacional 150, km. 6.7 08210 Barberà del Vallès Espagne | (+34) 91 644 79 00/ 91 644 79 01 | atencioncliente@aki.es |
| Leroy Merlin Portugal | LEROY MERLIN PORTUGALRua Quinta do Paizinho, 10/12 2790-237 - Carnaxide - Portugal | (+351) 800 108 005 | http://www.leroymerlin.pt |
| AKI Portugal | Serviços CentraisBRICODIS, S.A.Serviço de Apoio a ClientesRua Quinta do Paizinho, n° 10-122790-237 Carnaxide | (+351) 808 201 002. | https://www.aki.pt |
| Leroy Merlin Italy | LEROY MERLIN ITALIEStrada, 8 Palazzo, N 20089 Rozzano - Milano Italie | https://www.leroymerlin.it | |
| Bricocenter | BRICOCENTER ITALIEStrada 8, Palazzo, N 20089 Rozzano - Milano Italie | +39 02 399761 | http://contattaci.bricocenter.it |
| Leroy Merlin Greece Cyprus | LEROY MERLIN GREECE44, avenue Kifisias, Monumental Plaza Building A, 15125 Marousi Grèce | https://www.leroymerlin.gr/https://www.leroymerlin.gr/gr/epikoinoniste-mazi-mas/ | |
| Leroy Merlin Poland | Leroy Merlin PolskaUl. Targowa 72,03-734 Warszawa | JACKONETJacek SkwiecińskiTel: +48 664 045 745 | Email: skwiecinski@jackonet.plwww.jackonet.pl |
| Leroy Merlin Romania | Leroy Merlin Bricolaj Romania Sos. Chitilei, nr. 178, Et. 1, Ap. 2Sect. 1, 012403 Bucarest Roumanie | https://www.leroymerlin.ro/ | |
| Leroy Merlin Brazil | Leroy MerlinRua Domingas Galleteri Blotta, 315 Jd Consórcio04455 - 360 São Paulo/SP - Brésil | http://www.leroymerlin.com.br/ | |
| Leroy Merlin South Africa | http://www.leroymerlin.co.za/ |
FR Ce barbecue est recyclable. S'il ne peut plus être utilisé, veuillez l'apporter dans un centre de recyclage des déchets.
Es Esta barbacoa es reciclable. Si ya no se puede usar, llévela a un centro de reciclaje de residuos.
PT Este barbecue é reciclável. Se deixar de o utilizar, entregue-o no centro de reciclagem de resíduos.
Questo barbecue può essere reciclato. Se deve essere smaltitto, portalo presso un centro de reciclaggio.
ΕΛ Αυτό το μαρμεκιου είναι ανακυκλώσιμο. Αν δεν μορεί να χρησιμοποιηθεί περαιτέρω, μορείτε να το μεταφέρετε σε ένα κέντρο ανακύκλωσης απορριμμάτων.
PL Grill ten poddawany jest recyklingowi, kiedy przestaje byo użyteczny należy dostarczyło go do punktu zbiórki odpadów.
Это барбекю может перерабатываться, если оно больше не пригодно для пользования, сдайте его в утилизационный центр.
Бул Кактағыш қайта өңдеуге келеді. Оны әрі қолдануға болмайтын жағдайда, оны қайта өндейтін орталыққа тапсыруыңызды өтінеміз.
UA Це барбекю може перероблятися, якщо воно більше не є придатне для використування, здайте його в утилізаційний центр.
RO Acest barbecue este reciclabil. Dacu nu mai poate fi folosit, vú rugom su îl aduceți într-un centru de reciclare a deșeurilor.
BR Esta churrasqueira é reciclável. Se não puder mais ser usada, descarte em um centro de reciclagem de resíduos.
This barbecue is recyclable. If it cannot be used anymore, please take it to waste recycling centre.

text_image
Gara Εγγύ Γαρα ADEO 59790 UA TO BY RU 00 6* Garantie 2 ans / Garantía de 2 años / Garantia de 2 anos / Garanzia 2 Anni / Εγγύηση 2 ετών / Gwarancja 2 lata / Гарантия 2 года / Кепілдік – 2 жыл / Гарантія 2 років / Garanție 2 ani / 2 anos de garantia / 2-year guarantee
ADEO Services - 135 Rue Sadi Carnot - CS 00001 59790 RONCHIN - France
ZA Imported by Adeo South Africa (PTY) LTD T/A Leroy Merlin Stoneridge Centre, Shop 64 - 1 Stoneridge Drive, Cnr Modderfontein & Hereford Roads, Greenstone Park, Edenvale, 1610 - Johannesburg, Gauteng, South Africa.