USER MANUAL BDS C55 ATMOS EDENWOOD
This product is guaranteed against faults caused by defects in manufacturing or the materials used for a period of two years, starting from the date of purchase.* This warranty does not cover defects or damage caused by failure to install the device correctly, incorrect use of the product, or excessive wear and tear.
*proof of purchase required
CONDITION DE GARANTIE
FR
Thank you for choosing this EDENWOOD product. EDENWOOD products are chosen, tested, and recommended by ELECTRO DEPOT, so you can be sure you are getting a top-quality, easy-to-use product that won't let you down.
We're confident your new device will be a pleasure to use every day!
Welcome to ELECTRO DEPOT.
Table of Contents
| A Product overview | Parts
Product overview
Intended use
Specifications
Declaration of conformity |
| B Product usage | Install the soundbar / subwoofer
Install the remote control batteries
Connections
Operation |
| C Cleaning and maintenance | Cleaning and maintenance
Troubleshooting
Storage |
Parts
| Description | |
| Soundbar | |
| A | ON/OFF/standby button | |
| B | Source button | |
| C | -/+ Volume buttons | |
| D | Remote control receiver sensor | |
| E | Display screen with power indicator light | |
| F | Wall bracket screws
NOTE: Always keep the screws in place when the wall mount is not in use. | |
| G | Connection panel | |
| H | USB | USB socket (USB memory stick not included) |
| I | AUX | AUX input socket (cable not included) |
| J | OPTICAL | Optical input socket (cable not included) |
| K | COAXIAL | Coaxial input socket (cable not included) |
| L | HDMI OUT
(TV eARC/ARC) | HDMI Audio Return Channel (ARC) input socket (cable not included) |
| M | HDMI IN 1/2 | HDMI (cable not included) |
| N | AC ~ IN | AC power socket |
0
AC power cable (x2 - one for the soundbar and one for the subwoofer)
P
Wall mount bracket (x2)
Q
AAA battery{x2}
R
Wall mounting template
s
Subwoofer
T
AC power socket
U
PAIR
Subwoofer pairing button
V
Subwoofer pairing indicator light
W
Remote control
①

ON/OFF/standby button
2
AUX
AUX mode button
(3)
USB
USB mode button
4
HDMI 1/2
HDMI 1 or 2 mode button
(5)

USB and BLUETOOTH mode only:
6
BASS + / -
- Previous/next track buttons
7

Mute button
8
VERTICAL SURROUND
Vertical surround sound on/off button
| 9 | SOUND MODE | Equalizer (EQ) button |
| 10 | AV SYNC +/- | Audio sync button |
| 11 | × | Bluetooth mode button |
| 12 | OPT/COA | Optical/Coaxial mode button |
| 13 | HDMI eARC | HDMI/eARC/ARC mode button |
| 14 | II | USB and BLUETOOTH mode only:
• Play/pause button
In Bluetooth mode only
• Connects/disconnects Bluetooth |
| 15 | -/+ | Volume buttons |
| 16 | TREBLE +/- | Treble level buttons |
Product overview
- Unpack and remove all labels from the unit except the nameplate. Please check that all parts are included and intact. If the unit is damaged or faulty, do not use it and take it to your retailer or after-sales service centre.
- Keep all packaging out of the reach of children. There is a risk of accidents if children play with packaging materials.
Intended use
- This product has been designed exclusively for playing audio files and is intended for domestic use only. It may not be used for commercial purposes.
Any other use may damage the product or cause injury.
Specifications
| Model: | 993368 - BDS C55 ATMOS |
| Soundbar |
| Power supply: | 100-240V~, 50/60Hz |
| Power consumption: | 51W (<0.5W in standby mode) |
| Dimensions: | 1000 (W) x 67 (H) x 102 (D) mm |
| Net weight: | 3.6kg |
| Operating temperature: | 0°C to 40°C |
| Audio input sensitivity: | 700mV |
| Frequency response: | 120Hz to 20KHz |
| Storage temperature: | -20°C to 60°C |
| Speaker output power: | 30W x2 + 30W x2 + 30W x2 |
| Speaker impedance: | 8Ω x 2 |
| Amplifier (RMS output power): | 30W x 4 + 60W (Soundbar)
120W (Subwoofer) |
| Relative humidity: | 5 to ~90% |
| AUX input/RCA output: | 3.5mm AUX/RCA jack |
| HDMI eARC/ARC input: | HDMI connector cable |
| Optical input: | 6.35mm jack |
| Bluetooth name: | EDENWOOD BDS C55 ATMOS |
| Bluetooth version: | V5.3 (A2DP, AVRCP) |
| Bluetooth frequency: | 2402MHz to 2480MHz |
| Bluetooth transmitting power (max.): | <10dBm |
| Bluetooth range: | Up to 6 metres |
| 5.8G wireless frequency range: | 5729 MHz to 5819MHz |
| 5.8G wireless maximum power (EIRP): | <10dBm |
| USB connection: | Output: 5V — — 500mA |
| USB compatibility: | Up to 32GB (max.) |
| High speed USB (2.0) |
| Supports file types: FAT32/FAT16 |
| Compatible formats: | MP3 |
| Protection class: | Class II |
| Subwoofer |
| Power supply: | 100-240V~, 50/60Hz |
| Power consumption: | 30W (<0.5W in standby mode) |
| Subwoofer output power: | 120W |
| Subwoofer impedance: | 3Ω |
| Frequency response: | 40Hz to 120Hz |
| Amplifier (RMS output power): | 120W |
| Dimensions: | 240 (W) x 420 (H) x 240 (D) mm |
| Net weight: | 5.4kg |
| Protection class: | Class II |
| Operating range: | Up to 6 metres |
| Remote control |
| Battery: | 2 x 1.5V AAA (provided) |
| Operating range/angle: | 6m/30° |
Due to constant developments and improvements in the design of our products, changes to the specifications below are likely to occur without notice.
Dolby Atmos
Dolby, Dolby Atmos, and the double-D symbol are registered trademarks of Dolby Laboratories Licensing Corporation. Manufactured under license from Dolby Laboratories. Confidential unpublished works. Copyright © 2012-2024 Dolby Laboratories. All rights reserved.
The terms HDMI and HDMI High-Definition Multimedia Interface, and the HDMI Logo are registered trademarks of HDMI Licencing LLC in the United States and other countries.
HOMI
HIGH-DEFINITION MULTIMEDIA INTERFACE
Compatibility disclaimer
Wireless performance is dependent on your device's Bluetooth wireless technology. Please check with the manufacturer. ELECTRO DÉPÔT cannot be held responsible for any data loss or leaks resulting from the use of these devices.

Bluetooth®
A Product overview
In this document, ELECTRO DÉPÔT declares that this unit complies with the essential requirements and other relevant provisions of Directive 2014/53/EU. The declaration of conformity can be viewed on the following website: http://www.electrodepot.fr/sav/ notices/
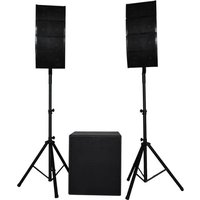
Install the soundbar / subwoofer

IMPORTANT!
- To prevent injury, the wall mount brackets must be securely attached to the wall and the soundbar must be correctly slotted into the wall mount brackets.
Only use the wall mount bracket and fixings supplied with this product.
Use an electronic stud finder to check the wall type before drilling and mounting.
- Make sure there are no electrical, plumbing or gas installations behind the wall where you wish to mount the soundbar and that the wall is strong enough to hold the soundbar.
Soundbar option A
Place the soundbar on a flat, stable surface directly in front of the TV.
Soundbar option B
If the TV is wall mounted, install the soundbar directly below the TV screen.
Subwoofer
Place the subwoofer at least 1 metre away from the soundbar and 10 centimetres away from the wall as shown in option A and option B.
To wall mount the soundbar:

NOTE: We recommend using screws that are 4mm × 32mm (x2) and wall plugs (x2), (if applicable to the wall type). These screws/wall plugs are not provided.
2 1 Place the paper wall mount template against the wall. Align the centre line in the centre of the installation area or if mounting below a TV, align with the centre of the TV.
Push a small, pointed object through the dot in the circle at each end of the wall mount template to mark the drill holes' position on the wall. Remove the wall mount template and then drill the holes (each hole should be approximately 5.5-6mm in diameter). The distance between the holes should be 962mm apart and 50mm below the TV.
② Insert the wall plugs [x2] into the drilled holes and then place the screws [x2 not provided] into the plugs. Leave a 3mm gap between the wall and screw head.
Loosen and remove the screws (x4) from the back of the soundbar and then fix the wall mount brackets onto the back of the unit using the 4 loosened screws.
Lift the unit onto the 2 protruding screws on the wall and slot into place.
B Product usage

NOTE:
If you are installing the wall mount onto a wooden wall, there is no need to drill the holes and use wall plugs, you can screw the screws directly into the wall.
Recommended wall mount height is up to 1.5 metres.
Install the remote control batteries


1) Remove the battery compartment cover.

Insert 2 batteries (provided) into the battery compartment making sure you match the polarity (+/-) as shown.

Close the battery compartment cover.
Once the batteries are installed, you can start using the remote control. The range of the remote control is up to 6 metres without obstacles.

NOTE: Other infrared sensors can interfere with the remote control's performance. Move such devices away from the remote control.
Connections

IMPORTANT!
- Before plugging in and starting the soundbar system, make sure that all connections are in place.

TIPS:
-
When using the HDMI eARC/ARC, OPTICAL or COAXIAL connections, the soundbar may not be able to decode all digital audio formats from the input source. In this case, the unit will mute. This is not a defect. Ensure that the audio setting of the input source (e.g. game console, DVD player or TV etc) is set to PCM or Dolby Digital. Refer to the input source device's user manual for more details.
-
When selecting a different audio format, the soundbar will advise as follows:
| Display | Audio format |
| DOLBY AUDIO | Dolby Digital |
| DOLBY AUDIO | Dolby True HD |
B Product usage
| DOLBY AUDIO | Dolby Digital Plus |
| DOLBY ATMOS | Dolby Atmos – Dolby TrueHD |
| DOLBY ATMOS | Dolby Atmos – Dolby Digital Plus |
This soundbar is equipped with Dolby Atmos® that supports Dolby Atmos audio format giving you an immersive listening experience by delivering sound in three dimensional spaces, and all the richness, clarity and power of Dolby sound. For more information, please visit: dolby.com/technologies/dolby-atmos
HDMI ARC connection
The HDMI eARC/ARC (Enhanced Audio Return Channel) connection is the optimal connection for audio sound from your TV to play through the soundbar.
To use the HDMI eARC/ARC connection you must check the following:
- Your TV has HDMI-CEC and ARC capabilities, and both of these functions are turned ON on the TV. Refer to the TV's user manual for how to do this.
- You must make sure that your HDMI cable is version 1.4 or higher.
4 1 Connect the HDMI cable (not provided) to the HDMI OUT (TV eARC/ARC) input socket on the soundbar.
② Connect the other end to the HDMI ARC socket on the TV.

NOTE: When correctly set up, you can use your TV remote control to adjust the volume and use the mute function.
Standard HDMI connection
If your TV is not HDMI eARC/ARC-compliant, use a standard HDMI cable (not provided).
- Connect an HDMI cable to the HDMI OUT (TVeARC/ARC) input socket on the soundbar.
- Connect the other end to the HDMI IN socket on the TV.
To connect HDMI external devices such as a DVD player, Blu-ray Disc^TM player or gaming console:
- Connect an HDMI cable (not provided) to either the HDMI IN 1 or 2 input socket on the soundbar.
- Connect the other end to the HDMI socket on the HDMI external device.
B Product usage
Optical connection
You can connect the soundbar to play audio from your TV using an optical cable (not provided).
Connect the optical cable (not provided) to the OPTICAL input socket on the soundbar. Connect the other end to the OPTICAL OUT socket on the TV.
Coaxial connection
You can connect the soundbar to play audio from your TV using a coaxial cable (not provided).
7 Connect the coaxial cable (not provided) to the COAXIAL input socket on the soundbar. Connect the other end to the COAXIAL OUT socket on the TV.
Aux connections
There are two ways to connect the TV to play audio through the soundbar or external device, such as a phone or laptop, to play audio via the AUX input socket.
8 1 Connect a 3.5mm audio cable (not provided) to the AUX input socket on the soundbar. Connect the other end (3.5mm jack) to the headphone socket on a TV or external device.
② Connect a 3.5mm audio cable to AUX input socket on the soundbar. Connect the two audio RCA output connectors on the other end of the cable to the TV or external device. (A 3.5mm cable with RCA output connector is not provided.)
USB
The soundbar can only play MP3 files via a USB memory stick.
Insert the USB memory stick into the USB socket. READ will display and the music will start to play. (If the USB memory stick is not in use or incorrectly inserted, NO USB will display.)

NOTE:
- Not all USB devices are compatible with the soundbar. This is not an indication of a problem with the unit.
- For best playback, make sure only compatible MP3 audio files are stored on the USB memory stick.

Tips:
The unit can support USB devices with up to 32GB of memory.
Supports file types: exFAT/FAT16/FAT32.
If you use a USB extension cable, USB hub, or USB multifunctional card reader, the USB device may not be recognized.
- Do not remove the USB device while it is reading files.
Pair a Bluetooth device
The Bluetooth device must support A2DP in order to play music through the soundbar. If your Bluetooth device supports AVRCP, you can use the remote control's playback buttons to play/
B Product usage
pause music or skip to the previous or next track.
To connect the soundbar to a Bluetooth device to listen to audio, you must first pair the soundbar with the device.
- Plug the soundbar AC power cable into the soundbar and the wall socket.
- Press the button on the soundbar or remote control to turn it on.
- Press the button repeatedly on the soundbar to select BLUETOOTH or press the button on the remote control. BLUETOOTH READY will display on the screen.
-
Turn on the Bluetooth device (such as your phone or tablet):
-
Go to settings on your device.
-
Select Bluetooth and turn it on.
-
When the Bluetooth device displays the soundbar's Bluetooth name, EDENWOOD BDS C55 ATMOS, select the name and confirm the connection. A sound prompt will play, and CONNECTED will display to confirm successful pairing of the Bluetooth device.
- If the Bluetooth name (EDENWOOD BDS C55 ATMOS) does not appear, in Bluetooth mode, press and hold the button on the remote control to start pairing and then follow step 5 above.
To pair with another device, you must first remove any existing Bluetooth connections.
- When the soundbar is in BLUETOOTH mode, press and hold the button on the remote control to disconnect previously paired devices. The soundbar will automatically remove the device and start searching for a new device. A sound prompt plays and BLUETOOTH READY displays on the screen to confirm the unit is searching for another device.
- Follow the steps 4-5 above to pair the device.

NOTE:
- If the soundbar's Bluetooth name does not appear on your Bluetooth device, move the devices closer together. If that does not work, turn the devices off and then on again before starting the pairing process again.
- When pairing the devices, make sure they are not more than 6 metres apart and there are no physical obstructions between the devices.
- Once you have paired a device, the units should remember the connection and you will not need to pair them again.
Disconnecting a Bluetooth device
- Press the + button to change to another mode.
- Disable the Bluetooth function on your Bluetooth device.
- In Bluetooth mode, press and hold the button on the remote control.
Connect power - soundbar and subwoofer

WARNING!
- Risk of product damage! Before plugging in and starting the soundbar/ subwoofer system, make sure that all controls are turned off or set to a low level on all connected devices and that all audio connections are in place.
- Check the power supply corresponds to the rating plate on the unit.
10 Soundbar
Connect the AC power cable to the AC~ socket on the soundbar and then connect the other end to the mains socket.
Subwoofer
Connect the AC power cable to the AC~ socket on the subwoofer and then connect the other end to the mains socket.
Pair the subwoofer with the soundbar
Automatic pairing:
The subwoofer and soundbar will automatically pair when both units are plugged into the mains socket and turned on.
The subwoofer pairing indicator light will show the pairing status:
| Subwoofer indicator light | Status |
| Fast blink | Pairing |
| Constant | Connected (pairing successful) |
| Slow blink | Not connected (pairing unsuccessful) |

NOTE:
- Do not press the PAIR button on the back of the subwoofer, except when pairing manually.
If the automatic pairing fails, pair the subwoofer with the soundbar manually.
Manual pairing:
- Make sure the subwoofer and soundbar are connected to the power and that the soundbar is in standby mode.
- Press and hold the PAIR button on the back of the subwoofer. The subwoofer will enter the pairing mode and subwoofer pairing indicator light will blink quickly.
- Press the button on the soundbar or on the remote control to switch the soundbar on.
- Press and hold the button on the remote control for a few seconds. The subwoofer pairing indicator light is constantly on when the pairing is successful.
- If the subwoofer pairing indicator light blinks slowly, the pairing was unsuccessful. Unplug the subwoofer from the power for 4 minutes. Then reconnect it and repeat the steps above.

NOTE:
- If the pairing is repeatedly unsuccessful, there may be interference from other wireless devices nearby. Turn off or remove these devices from the immediate vicinity of the subwoofer and soundbar and repeat the steps for manual pairing.
- The subwoofer should be positioned within 6 ~m of the soundbar with no obstacles between the units.
Operation
ON/OFF/Standby
When you first connect the soundbar to the mains socket, it will enter standby mode and the white indicator light will display on the screen.
- Press the button on the soundbar or the remote control to turn on the unit. The screen will display HELLO.
If the soundbar is not used for 15 minutes and the external devices (such as a TV or mobile device) are disconnected, or if the volume is too low, the soundbar will enter standby mode. Alternatively, to turn the display off and enter standby mode, you can:
- Press the button on the soundbar or the remote control to return to standby mode. The screen will display STANDBY. When in standby mode, if the TV or an external device is connected (via AUX/HDMI ARC only), the unit will automatically switch on when the TV or external device is switched on.
- When you are not using the soundbar, unplug it to turn it off fully.
Playing sound through the soundbar
- Connect the soundbar to the power source. Turn it on and make sure the necessary audio connections are in place.
- Press the button repeatedly to select: HDMI1, HDMI2, USB, AUX, BLUETOOTH, OPT (optical), COA (coaxial), or ARC (HDM eARC/ARC) mode. To quickly access a mode, press the desired mode button on the remote control: AUX, USB, HDMI1/2, × , OPT/COA, or HDMI eARC.

NOTE:
- Make sure the volume is turned up on both the soundbar and external device to which it is connected.
-
If the volume level on the audio source is too low, the unit may not recognise that a device is connected and can enter standby mode. Increase the volume level on the audio source to resume playback.
-
To control the audio, you can either use your external device's controls (if available), or you can use the following controls:
| Button | Mode | Action |
| -/+ | All | Press the volume buttons on the soundbar or the remote control to decrease/increase the volume.
The volume range is Min/V01 to V31/Max.
Press to turn off the mute function and change the volume level. |
| ▶II | USB/BLUETOOTH only | Press to play or pause the sound. |
| |/→ | USB/BLUETOOTH only | Press to go to the previous/next track or file. |
| × | All | Press to mute the sound. Press again to unmute the sound. |
| Bass +/- | All | Press repeatedly to decrease/increase the bass level.
The bass level range is BAS -3 to +3. |
| Treble +/- | All | Press repeatedly to decrease/increase the treble level.
The treble level range is TRB -3 to +3. |
| VERTICAL SOUND | All | Press to turn the surround sound on/off. |
| SOUND MODE | All | Press repeatedly to select a different sound reproduction (equalizer effects). |

WARNING! Listening with the volume set too high can damage your hearing. Avoid listening to very loud music for a long period of time.
AV Sync
To synchronise the sound between the audio and video, press the AV SYNC +/- buttons to change the audio to match the video.

NOTE: You can only sync the audio with the video when playing digital audio through these connections: HDMI IN 1/2, HDMI eARC/ARC, OPTICAL or COAXIAL.
Screen brightness
After 15 seconds of no operation, the screen automatically turns off. It turns on again when you activate any operation.
Cleaning and maintenance

WARNING!
- Before cleaning, always unplug the soundbar and subwoofer.
- Do not use flammable or abrasive detergents such as benzene or white spirit to clean the units.
-
Never immerse the soundbar, subwoofer, remote control or cables in water and do not allow any liquid to splash onto or enter any parts.
-
Clean the outside of the soundbar and subwoofer with a soft, dry cloth.
Troubleshooting
| Problem | Possible Cause | Solution |
| The soundbar/subwoofer does not work. | ·The plug is loose or not connected. | ·Check the AC power cable and make sure it is firmly connected to the power source.
·Check the soundbar is turned on and working.
·Check the subwoofer is paired with the soundbar. |
| There is no sound. | ·The soundbar may be in standby mode. | ·Turn the soundbar on using the ↓ button. |
| ·The volume is set too low. | ·Increase the soundbar volume and check that the audio source is not on mute or low volume. |
| ·The audio devices are incorrectly connected. | ·In AUX, optical, coaxial or HDMI eARC/ARC mode, check the cable is connected and the external device is working properly.
·In USB mode, check compatible files are on the USB device and that they are not corrupted. Try reloading the files onto the USB device or use another USB device. |
| ·PCM or Dolby Digital mode is not selected on the audio source. | ·Check the audio source (e.g. TV, game console, DVD player) has PCM or Dolby Digital mode turned on.
Check the audio source manual for more information on how to do this. |
| ·The subwoofer is out of range, or it has lost connection with the soundbar. | ·Move the subwoofer within 6 metres of soundbar.
·Re-pair the subwoofer with the soundbar. |
| TV cannot play HDR content via the HDMI cable. | ·The HDR setting on the TV has not been set up. | ·Some 4K HDR TVs require the HDMI input or picture settings to be set for HDR content reception. Refer to your TV manual for more information on how to do this. |
| The Bluetooth name cannot be found. | ·Your Bluetooth device may not have Bluetooth turned on.
·You are too far away from the soundbar.
·Another Bluetooth connection is preventing you from pairing with the soundbar. | ·Make sure the Bluetooth function is activated on your Bluetooth device.
·Move the Bluetooth device to within 6 metres of the soundbar.
·Remove any existing Bluetooth connections and then try again to pair the devices. |
| The control panel buttons are not working. | ·Static electricity is affecting the soundbar. | ·Turn the soundbar off. Then unplug the unit and wait 10 seconds before plugging it in again and turning it on. |
| The remote control does not work. | ·The correct playback source has not been selected.
·The remote control is too far away from the soundbar or is not directed at the receiver sensor.
·The batteries are low or incorrectly installed. | ·Press the button repeatedly to select the right source.
·Move the remote control to within 6 metres of the soundbar and point it directly at the receiver sensor on the soundbar.
·Check the batteries are correctly installed and replace them if necessary. |
| The Dolby Atmos sound effects cannot be heard. | ·HDMI connection is not being used. | ·Non HDMI connections (such as Bluetooth, Optical, or AUX IN) may have limited sound effect capabilities. Refer to the Connections section for more information on Dolby Atmos. |
Storage
- Always unplug the units before storing them.
- Remove the batteries from the remote control when you are not using the unit for a long time.
- Store the unit in a fresh, dry and dust-free place, out of the reach of children and pets.
- Please retain the packaging and use it to store the units when they are not in use for an extended period of time.

Merci!