
QA507GB1 - Food Processor MOULINEX - Free user manual and instructions
Find the device manual for free QA507GB1 MOULINEX in PDF.
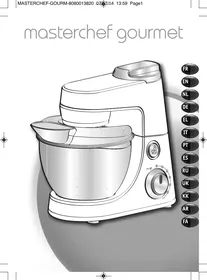



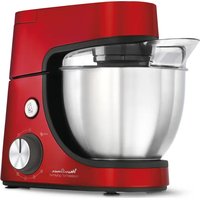
| Product type | Food processor |
| Brand | Moulinex |
| Model | QA507GB1 |
| Power supply | Mains |
| Stainless steel bowl capacity | Up to 1.8 kg of light dough |
| Blender bowl capacity | Up to 1.5 L (thick mixtures) / 1.25 L (liquid mixtures) |
| Juicer capacity | Up to 2.5 kg of food (5 x 500 g) |
| Meat grinder capacity | Up to 3 kg of meat |
| Vegetable slicer capacity | Up to 2 kg of food |
| Speeds | Electronic speed control (positions 1 to max + pulse) |
| Functions | Knead, mix, beat, whisk, emulsify, blend, mince, slice, grate, juice |
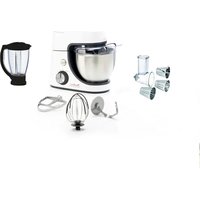
| Included accessories | Stainless steel bowl, lid, dough hook, kneader, multi-wire whisk; depending on model: blender bowl, meat grinder head, vegetable slicer, juicer, grinder |
| Bowl material | Stainless steel |
| Safety | Safety flap, automatic shut-off in case of overload, control microprocessor |
| Maintenance | Dishwasher-safe accessories (except metal parts of meat grinder); wipe motor unit with a damp cloth |
| Spare parts and repairability | Accessories available separately (dough hook, kneader, etc.); after-sales service through approved centers |
Frequently Asked Questions - QA507GB1 MOULINEX
User questions about QA507GB1 MOULINEX
0 question about this device. Answer the ones you know or ask your own.
Ask a new question about this device
Download the instructions for your Food Processor in PDF format for free! Find your manual QA507GB1 - MOULINEX and take your electronic device back in hand. On this page are published all the documents necessary for the use of your device. QA507GB1 by MOULINEX.
USER MANUAL QA507GB1 MOULINEX
Thank you for choosing this appliance, which is intended exclusively for the preparation of food and is for indoor, domestic use only.
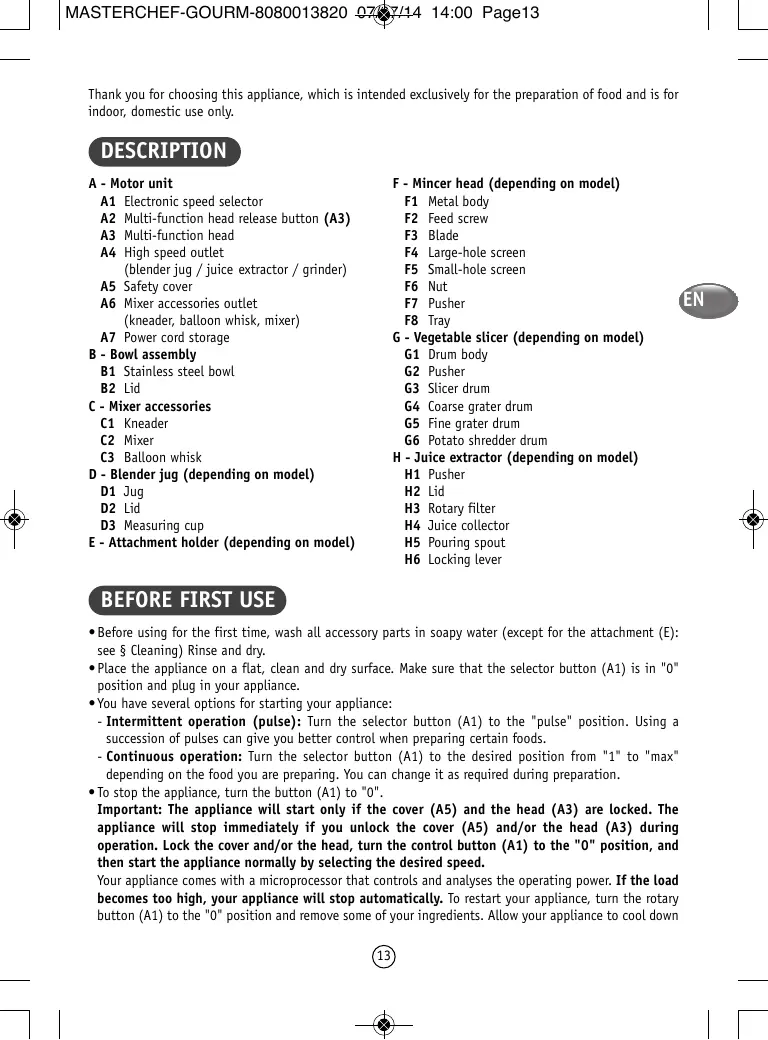
DESCRIPTION
A - Motor unit
A1 Electronic speed selector A2 Multi-function head release button (A3) A3 Multi-function head A4 High speed outlet (blender jug /juice extractor /grinder) A5 Safety cover A6 Mixer accessories outlet (kneader, balloon whisk, mixer) A7 Power cord storage
B-Bowl assembly
B1 Stainless steel bowl B2 Lid
C-Mixer accessories
C1 Kneader C2 Mixer C3 Balloon whisk
D - Blender jug (depending on model)
D1 Jug D2 Lid D3 Measuring cup
E - Attachment holder (depending on model)
F - Mincer head (depending on model)
F1 Metal body F2 Feed screw F3 Blade F4 Large-hole screen F5 Small-hole screen F6 Nut F7Pusher F8 Tray
G - Vegetable slicer (depending on model)
G1 Drum body G2 Pusher G3 Slicer drum G4 Coarse grater drum G5 Fine grater drum G6 Potato shredder drum
H - Juice extractor (depending on model)
H1 Pusher H2 Lid H3 Rotary filter H4 Juice collector H5 Pouring spout H6 Locking lever
BEFORE FIRST USE
- Before using for the first time, wash all accessory parts in soapy water (except for the attachment (E): see § Cleaning) Rinse and dry.
- Place the appliance on a flat, clean and dry surface. Make sure that the selector button (A1) is in "0" position and plug in your appliance.
- You have several options for starting your appliance:
- Intermittent operation (pulse): Turn the selector button (A1) to the "pulse" position. Using a succession of pulses can give you better control when preparing certain foods.
- Continuous operation: Turn the selector button (A1) to the desired position from "1" to "max" depending on the food you are preparing. You can change it as required during preparation.
- To stop the appliance, turn the button (A1) to "0".
Important: The appliance will start only if the cover (A5) and the head (A3) are locked. The appliance will stop immediately if you unlock the cover (A5) and/or the head (A3) during operation. Lock the cover and/or the head, turn the control button (A1) to the "0" position, and then start the appliance normally by selecting the desired speed.
Your appliance comes with a microprocessor that controls and analyses the operating power. If the load becomes too high, your appliance will stop automatically. To restart your appliance, turn the rotary button (A1) to the "0" position and remove some of your ingredients. Allow your appliance to cool down
1 - MIXING / KNEADING / BEATING / EMULSIFYING / WHISKING
You can prepare up to 1.8 kg light dough and heavy dough made with up to 500 g flour using the stainless bowl (B1) and its lid (B2) depending on the food.
ACCESSORIES USED:
- Stainless steel bowl (B1). -Lid (B2)
- Kneader (C1) or mixer (C2) or balloon whisk (C3)
1.1 - ASSEMBLING THE ACCESSORIES
- Press the button (A2) to release the multi-function head (A3) and raise it until it locks in place.
- Lock the stainless steel bowl (B1) (clockwise) on the appliance and put in the ingredients.
- Insert the desired accessory (C1, C2 or C3) on the outlet (A6), push and rotate it anti-clockwise a quarter turn to lock the accessory in its housing.
- Place the multi-function head (A3) to the horizontal position: press the button (A2) and manually lower the multi-function head (A3) until it locks (the button (A2) returns to its initial position).
- Slide the lid (B2) over the stainless steel bowl (B1).
Note: It is not essential to use the lid but it prevents splashing.
- Make sure that the cover (A5) is locked correctly (clockwise) on the high-speed outlet (A4).
1.2 - USAGE
Start by turning the selector button (A1) to the desired position according to the recipe.
The appliance starts running immediately.
You can add food through the hole in the lid (B2) during preparation.
- To stop the appliance, turn the button (A1) to "0".
Tips:
- Kneading
- Use the kneader accessory (C1) at speed "1". You can knead up to 500 g of flour (e.g. white bread, grain bread, short crust pastry, etc.). Maximum time of use: 13 minutes.
- Mixing
- Use the mixer (C2) at speed "1" to "max".
- You can mix up to 1.8 kg of light dough (light cake mixture, sponge cake, biscuit or cookie dough). Maximum time of use: 13 minutes.
- Never use the mixer (C2) to knead heavy dough.
- Beating / emulsifying / whisking
- Use the balloon whisk (c3) at speed "1" to "max".
- You can prepare: mayonnaise, aioli, sauces, whisked egg whites (up to 8 egg whites), whipped cream (up to 500 ml), meringues, etc.
- Maximum time of use: 10 minutes.
- Never use the balloon whisk (C3) to knead heavy dough or mix light dough.
1.3 - DISMANTLING THE ACCESSORIES
- Wait for the appliance to come to a complete stop.
- Remove the lid (B2).
- Using the button (A2), release the multi-function head (A3) and raise it to the upper position.
- Release the accessory (C1), (C2) or (C3) from the multi-function head by pushing the accessory into the head and rotating it clockwise a quarter turn.
- Remove the stainless steel bowl.
2-BLENDING/MIXING (DEPENDING ON MODEL)
Depending on the nature of the food, you can use the blender (D) to prepare up to 1.5 L of thick mixtures and 1.25 L of liquid mixtures.
ACCESSORIES USED:
- Blender jug (D).
2.1 - ASSEMBLING THE ACCESSORIES
- Place the multi-function head (A3) in the horizontal position: press the button (A2) and manually lower the multi-function head (A3) until it locks (the button (A2) returns to its initial position).
- Unlock the safety cover (A5) from the high-speed outlet (A4) by rotating it anti-clockwise and then remove it.
- Make sure that the appliance is switched off before locking the blender (D).
- Lock the blender jug (D) on the outlet (A4) by rotating it clockwise.
- Place the food in the blender jug, and lock the lid (D2) fitted with the measuring cap (D3), by rotating it anti-clockwise.
2.2 - USAGE
- Start by turning the selector button (A1) to the desired position (from speed 4 to Max or pulse) according to the recipe.
Use the "Pulse" position for better mixing control and for a better blending of your preparation.
You can add food through the hole in the measuring cap (D3) during preparation.
- To stop the appliance, turn the button (A1) to "0".
Maximum time of use: 3 minutes.
Tips:
You can prepare:
- finely blended soups, cream soups, stewed fruit, milkshakes and cocktails.
- liquid batter (pancake, fritters, Yorkshire pudding, waffles, clafoutis and custard flans).
If ingredients stick to the sides of the bowl when mixing, stop the appliance and wait until the blades have stopped completely. Remove the blender and push the food down onto the blades using a spatula, and put your blender back on the appliance to continue processing.
- Never fill the blender jug with boiling liquid.
- Never run the blender jug empty. Always use the blender jug with its lid.
- Never remove the lid before the blades have stopped completely.
- Always pour liquid ingredients into the blender jug first before adding solid ingredients.
2.3 - DISMANTLING THE ACCESSORY
- Wait for the appliance to come to a complete stop before removing the blender by unlocking it in the anti-clockwise direction and put back the cover (A5) by locking it on the outlet (A4) (clockwise).
3 - MINCING (DEPENDING ON MODEL)
ACCESSIONS USED:
- Attachment holder (E)
- Assembled mincer head (F)
3.1 - FITTING THE MINCER ATTACHMENT
- Press the button (A2) to release the multi-function head (A3) and raise it until it locks in place.
- Place the attachment (E) and lock it in the anti-clockwise direction such that the outlet is in alignment with the appliance.
- Place the multi-function head (A3) in the horizontal position by pressing the button (a2) once again.
3.2 - ASSEMBLING THE MINCER HEAD
- Hold the body (F1) by the feed tube, with the wider opening uppermost.
- Insert the feed screw (F2) (long shaft first) into the body (F1).
- Fit the blade (F3) onto the short shaft protruding from the feed screw (F2) with the cutting edges facing outwards.
- Fit the chosen screen (F4 or F5) on the blade (F3), aligning the two lugs with the two notches in the body (F1).
- Screw the nut (F6) home on the body (F1) in the clockwise direction, without locking it.
- Check the assembly. The shaft should have no play, neither should it be able to turn on its own. Otherwise, repeat the assembly procedure.
3.3 - FITTING THE MINCER HEAD ON THE APPLIANCE
- Facing the attachment outlet (E), insert the assembled mincer head (F) inclined to the right, aligning the two bayonets in the mincer head with the two notches in the attachment. Push the mincer head home into the attachment and turn the mincer head anti-clockwise until it latches with the feed tube in the vertical position.
- Place the removable tray (F8) on the feed tube.
3.4 - USAGE, TIPS AND DISMANTLING
- Make sure that the safety cover (A5) is locked correctly (clockwise) on the high-speed outlet (a4).
- Place a container to collect the preparation in front of the appliance.
- Run the appliance by turning the selector (A1) to speed "3" or "4".
- Push the meat, piece by piece, down the feed tube, using the pusher (F7). Never push the ingredients down the feed tube with your fingers or any other utensil.
- You can chop up to 3 kg of meat (gristle, bone and sinew removed).
Maximum time of use: 10 minutes.
- Leave your appliance to cool down completely before using again.
- To stop the appliance, turn the selector to "0" speed and wait for the appliance to come to a complete stop.
- Unlock the mincer head in the reverse order of the assembly.
Tips:
- Prepare all of the foodstuffs to be minced (for meat, remove the bones, gristle and tendons and cut it into pieces of approximately 2 x 2 cm).
- Make sure that frozen meat is thoroughly thawed.
- At the end of the operation, you can feed a few small pieces of bread into the feed tube to clear any meat remaining in the machine.
4 - GRATING / SLICING (DEPENDING ON MODEL)
ACCESSORIES USED:
- Attachment holder (E)
- Assessed vegetable slicer (G)
- Drums (depending on model)
4.1 - ASSEMBLING THE ACCESSORIES
- Press the button (A2) to release the multi-function head (A3) and raise it until it locks in place.
- Place the attachment (E) and lock it in the anti-clockwise direction such that the outlet is in alignment with the appliance.
- Place the multi-function head (A3) in the horizontal position by pressing the button (A2) once again.
- Make sure that the safety cover (A5) is locked correctly (clockwise) on the high-speed outlet (A4).
- Facing the attachment (E) outlet, insert the drum body (G1) inclined to the right, aligning the two bayonets in the drum body with the two notches in the attachment. Push the drum body home and turn the drum body anti-clockwise until it latches with the feed tube in the vertical position.
- Insert the chosen drum into the body, and make sure that it is fully engaged in the body.
4.2 - USAGE AND TIPS
- Place a container to collect the preparation in front of the appliance.
- Run the appliance by turning the selector (A1) to speed "3" to slice and to speed "4" to grate.
- Place the food in the feed tube on the body and press down with the pusher (G2). Never push the ingredients with your fingers or any other utensil.
- You can prepare up to 2 kg of food.
- Maximum time of use: 10 minutes.
- To stop the appliance, turn the selector to "0" speed and wait for the appliance to come to a complete stop.
- Unlock the drum body in the reverse order of the assembly.
- Use the drums to:
- Grate coarsely (G4) / grate finely (G5): carrots, celery, potatoes, cheese, etc.
- Slice thickly (G3): potatoes, carrots, cucumbers, apples, beetroot, etc.
- Potato shredder (G6): potatoes, parmesan, etc.
5 - EXTRACTING JUICE FROM FRUITS AND VEGETABLES (DEPENDING ON MODEL)
ACCESSORIES USED:
- Assembled juice extractor (H).
5.1 - ASSEMBLING THE JUICE EXTRACTOR
- Place the filter (H3) in the middle of the juice collector (H4).
- Lock the lid: turn it anti-clockwise and lock the lid (H2) on the juice collector (H4) (closed padlock position).
- General locking: push the locking lever (H6) to closed padlock position.
5.2 - FITTING THE JUICE EXTRACTOR ON THE APPLIANCE
- Place the multi-function head (A3) in the horizontal position: press the button (A2) and manually lower the multi-function head (A3) until it locks (the button (A2) returns to its initial position).
- Unlock and remove the cover (A5) from the outlet (A4) by turning it anti-clockwise.
- Make sure that the appliance is switched off before locking the juice extractor (H).
- Lock the assembled juice extractor on the outlet (A4) by turning it clockwise, so as to have the outlet for the pouring spout aligned with the appliance.
- Fit the pouring spout (H5) on the collector (H4).
- Check that the pouring spout (H5) is fully open.
5.3 - USAGE AND TIPS
- Place a large glass under the pouring spout (H5).
- Run the appliance by turning the selector (A1) to speed "3".
- Cut the fruits and/or vegetables into pieces.
- Insert them down the feed tube in the lid (H2) push them slowly using the pusher (H1). Never push the ingredients with your fingers or any other utensil.
- Do not process 500g of food more than 5 times continuously, without allowing your appliance to cool down completely. Maximum time of use: 10 minutes.
- For best results, clean the filter after every 300g of ingredients.
- Important : When the pulp collector is full, stop the appliance and empty the collector.
- To stop the appliance, turn the selector to "0" speed and wait for the appliance to come to a complete stop.
- Wait until the rotary filter comes to a complete stop before removing the assembly from the appliance.
- To remove the juice extractor, unlock it by turning it anti-clockwise.
- Place the locking lever (H6) in the open padlock position. Open the lid (open padlock position). You can then remove the filter (H3) to clean it and empty the collector (H4).
Tips:
- You can make juice from: carrots, tomatoes, apples, grapes, raspberries, etc.
- Peel fruits with thick skins; remove stones and the core of pineapples.
- It is not possible to extract juice from certain fruits and vegetables: bananas, avocado pears, blackberries, some varieties of apples, etc...
- You can prepare juices with different fruits and vegetables without having to clean the juice extractor every time, the flavours will not be mixed. Just run the extractor with a little water to rinse it between two different juices.
- Drink the juices immediately after preparation, and add lemon juice to keep them in the fridge for a few hours.
6 - ADJUSTING THE CORD LENGTH
For more comfortable use or for storage, you can reduce the cord length by pushing it inside the motor unit (A) via the opening on the rear (A7).
7 - FINELY CHOPPING SMALL QUANTITIES (DEPENDING ON MODEL)
ACCESSORY USED:
- Assembled grinder.
You can use the grinder to:
- Chop in a few seconds by pulsing: dried figs, dried apricots, etc.
Quantity / max time: 100g / 5s
This grinder is not designed for hard products like coffee beans or hard spices.
CLEANING
- Unplug the appliance.
- Do not immerse the motor unit (A) or the attachment (E) in water or under running water. Wipe them with a dry or slightly damp cloth.
- For easier cleaning, rinse the accessories quickly after use. Dismantle the mincer head assembly fully. Handle the blades with care to prevent injury.
- Wash, rinse and dry the accessories: they are dishwasher-safe, except for all the metal components in the mincer head: body (F1), feed screw (F2), blade (F3), screens (F4 and F5), nut (F6).
- The screens (F4) and (F5) as well as the blade (F3) must remain greased. Coat them with cooking oil.
Tips:
- In the event any of your accessories are coloured by food (carrots, oranges, etc.), rub with a cloth soaked in cooking oil and then clean them as usual.
- Blender jug (D): pour some hot water containing a few drops of washing up liquid into the blender. Close the lid. Place it on the appliance and pulse a few times. After removing it, rinse the bowl in running water and allow to dry (bowl upside down).
STORAGE
Do not store your appliance in a humid environment.
WHAT TO DO IF YOUR APPLIANCE DOES NOT WORK
If your appliance does not work, check:
- that it is plugged in correctly.
- that the accessories are correctly locked.
- The position of the electronic speed selector (A1): put it back to the "0" position, then select the desired speed again.
Your appliance comes with a microprocessor that controls and analyses the operating power. If the load becomes too high, your appliance will stop automatically. To restart your appliance, turn the rotary button (A1) to the "0" position and remove some of your ingredients. Allow your appliance to cool down for a few minutes. You can then select the desired speed to complete your preparation.
Your appliance still does not work? Contact an authorised service centre (see the list in the service booklet).
DISPOSAL OF PACKAGING AND THE APPLIANCE

The packaging is comprised exclusively of materials that present no danger for the environment and which may therefore be disposed of in accordance with the recycling measures in force in your area.
For disposing of the appliance itself, please contact the appropriate service of your local authority.
ACCESSORIES
You can customise your appliance and obtain the following accessories from your usual retailer or an authorised service centre:
- Stainless steel bowl
- Stainless steel bowl lid
- Kneader
- Mixer
- Balloon whisk
- Blender jug
- Juice extractor - Grinder Mincer head
- Attachment holder
- Vegetable slicer:
- Slicer
- Coarse grating
- Fine grating
- Potato shredder
- Pasta kit
- Coulis attachment
- Pasta rolling mill
Caution: This booklet contains instructions for additional accessories. Please keep safe for future reference. Please contact Tefal Customer Relations for further information on how to purchase accessories.

5- JUICING FRUIT AND VEGETABLES (DEPENDING ON MODEL)
ACCESSORIES USED:
3.1- FITTING THE ACCESSORY HEAD
- Press the button (A2) to release the multi-function head (A3) and tilt it forward. Fit the accessory (E) and secure it by turning it counterclockwise until it locks into place on the bowl.
- Return the multi-function head (A3) to the horizontal position by pressing the button (A2).
3.4 - SWITCHING ON, TIPS AND DISMANTLING
4.2 - SWITCHING ON AND TIPS
5.3 - SWITCHING ON AND TIPS
2.1 - ASSEMBLY OPERATIONS
- Set the multi-function head (A3) in the horizontal position: press the button (A2) and lower the multi-function head (A3) until it locks into place (the button (A2) returns to its original position).
- Disconnect the protective cover (A5) from the high-speed outlet (A4) by turning it counterclockwise, and remove it.
- Before using the blender (D), make sure the appliance is unplugged. - Turn the bowl upside down and place it on the outlet (A4). - Place the ingredients in the blender and secure the lid.
2.2 - USE
Turn the switch knob (A1) to the desired speed according to the recipe (from speed 1 to max, or Pulse (pulse mode). For better control of the mixing process and better blending quality, use the "Pulse" position. During operation, you can add ingredients through the opening in the measuring cap (D3). To stop the appliance, turn the knob (A1) to the "0" position. - Maximum operating time: 3 minutes.
Cobetbl:
Moxho npurotoBntb:
- Odnorodnye sumy, sousy, velote, kompoty, molochnye i drugie kokteyli.
- Kiskie smesi na maslyanoy osnove (bliny, oalny, zapekanki, flans s zavarnym kremom).
- Pered zapuskom prover'te, chto chasha blendera ustanovlena pravil'no. Ostanovite rabotu pribora. Ozhidite polnuyu ostanovku apparata, snimite blender, snimite neskol'ko produktov so stenok i nozhey pri pomoshchi spatulya, ustanovite blender na mesto dlya prodolzheniya raboty. Nikogda ne nalivayte goryachuyu zhidkost' v chashu blendera. Nikogda ne vklyuchayte pribor, esli chasha blendera pusta. Vsegda zakryvayte chashu blendera kryshkoy.
- Ne snimayte kryshku, poka nozhi polnost'yu ostanovyatsya. Vsegda snachala sleduet zanosit' v chashu zhidkie ingredienty, zatem dobavit' tverdye.
2.3-PORODOK RAZBORKI PRISPOSOBLENIY
- Dozhdites' polnoy ostanovki pribora, posle chego otsovedinite blender, vrataya ego protiv chasovoy strelki, i ustanovite na mesto zashchitnuyu kryshku (A5), zafiksirovav ne vkhode (A4) (po chasovoy strelke).
3-ISPOL'ZOVANIE MYASORUBKI (V ZAVISIMOSTI OT MODELEI)
ISPOL'ZUEMYE NASADKI:
- Kreplenie dlya nasadok (E) - Golovka myasorubki v sbore (F)
3.1-USTANOVKA PRISSOEDINITEL'NOGO
Nazhmite knopku (A2), chtoby osvobodit' mnogofunktsional'nuyu golovku (A3), podnimite golovku tak, chtoby ona byla zafiksirovana na meste. Ustanovite prisoedinitel'nyy blok (E) i zafiksiruyte ego, povernuv protiv chasovoy strelki tak, chtoby vykhod myasorubki byl vyrovnen otnositel'no pribora. - Ustanovite mnogofunktsional'nuyu golovku (A3) v gorizontal'noe polozhenie, snova nazhav knopku (A2).
3.2-USTANOVKA GOLOVKI MYASORUBKI
Voz'mite korpus (F1) za zagruzochnuyu trubu otverstiem vverkh. Vstav'te shnek (F2) (dlinnym valom vpered) v korpus (F1). - Ustanovite nozh (F3) na korotkiy val shneka (F2) tak, chtoby rezhushchie kromki nozha byli napravleny naruzhu. - Ustanovite vybrannuyu reshetku (F4 ili F5) na nozh (F3), sovmestiv vystupy reshetki s v'yemkami v korpuse (F1). - Navernite gayku (F6) na korpus (F1) protiv chasovoy strelki, ne zatsipivaya ee. - Prover'te sobrannyy uzel. Ne dolzhno byt' nikakogo lyufta vala, i val dolzhen byt' plotno ustanovlen, ne povorachivayas' samostoyatel'no. V protivnom sluchae protseduru sborki sleduet povtorit'.
3.3 - INSTALLING THE MEAT GRINDER HEAD ON THE DEVICE
Insert the assembled meat grinder head (F) into the output connector block (E), tilting it to the right and aligning the mounting holes on the meat grinder head with the two pins on the connector block.
Inserting the meat grinder head into the connector block, turn it counterclockwise until it locks, with the feed tube in a vertical position.
- Install the removable tray (F8) onto the feed tube.
3.4 - USE, TIPS, AND DISASSEMBLY ORDER
- Make sure the safety lock (A5) is correctly engaged (turn clockwise) on the high-speed outlet (A4). - Before use, assemble the product.
- Start the appliance by selecting speed "3" or "4" with the switch (A1).
- Push the meat into the feed tube using the pusher (F7). Never push ingredients into the feed tube with your fingers or any other objects.
-Possible to cut frozen meat.
-Maximum usage time: 10 minutes.
-Allow the appliance to cool completely before any new use. To stop the appliance, turn the switch to "0" and wait for a complete stop. - Disassemble the meat grinder head, following the reverse order of assembly.
Tips:
-Prepare the meat for grinding (if it's meat, remove bones, cartilage, and tendons, and cut the meat into pieces of about 2x2 cm). - Make sure the meat is fully thawed. - At the end of the grinding process, you can push a few small pieces of bread through the feed tube to clean the remaining meat from the inside.
4 - GRATING/SLICING (DEPENDING ON MODEL)
Accessories used:
4.1 - INSTALLATION OF THE ACCESSORIES
Press the button (A2) to release the multifunction head (A3), then lift the head so that it is locked in place. - Install the accessory bowl (E) and lock it by turning it counterclockwise so that the outlet of the bowl is aligned with the appliance. - Set the multifunction head (A3) to the horizontal position, then press the button (A2) again. - Make sure that the protective cover (A5) is correctly locked (by turning clockwise) on the high-speed outlet (A4). At the outlet of the chopping block (E), insert the spindle housing (G1), tilt it to the right and align the bayonet connections of the spindle housing with the notches in the chopping block. Insert the spindle housing into the chopping block, turning it counterclockwise until it locks. The loading tube is in the vertical position. Insert the cutting spindle into the housing and make sure it is firmly seated in the housing.
4.2 - USE AND TIPS
- A pair of assembly tools for the product. Start the appliance by selecting speed "3" or "4" with the switch (A1) and press.
- Place the products in the loading tube and push them down using the pusher (G2). Never push the ingredients with your fingers or any other objects.
-You can prepare up to 2 kg of products.
-Maximum operating time: 10 minutes.
To stop the appliance, turn the switch to the "0" position and wait for it to come to a complete stop. - Disassemble the spindle housing by following the assembly steps in reverse order. - Purpose of the spindles:
- Coarse grater (G4) / Fine grater (G5): carrots, celery, potatoes, cheese, etc.
- Julienne cutter (G3): potatoes, carrots, cucumbers, apples, beets, etc. - Potato grater (G6): potatoes, parmesan, etc.
5 - EXTRACTING JUICE FROM FRUITS AND VEGETABLES (DEPENDING ON MODEL)
ACCESSORIES USED:
Do not store the appliance in a damp place.
WHAT TO DO IF THE APPLIANCE DOES NOT WORK
If the appliance does not work, check that:
- Insert the plug into the socket;
- The nozzles must be properly secured;
- Position of the control knob (A1): turn it to "0", then select the desired speed again.
The appliance is equipped with a microprocessor that analyzes and controls the motor speed. If the load is too high, the appliance stops automatically. After a protective restart of the appliance, turn the rotary switch (A1) to position 1 and remove part of the ingredients. The appliance will then run for a few minutes. After this, you can select the desired speed and continue working.
The appliance still does not work? Contact an authorized service center (see the list in the service booklet).
UTILIZATION OF THE PACKAGING OF THE APPLIANCE
RU

The packaging consists exclusively of environmentally friendly materials; it can be disposed of in accordance with current regulations.
- Assembled juicer (H).
5.1-INSTALLING THE JUICER
- Place the filter (H3) in the middle of the juice container (H4). Close the lid: turn the lid (H2) against the arrow direction on the juice container (H4) (closed lock position). Then lock: move the locking lever (H6) to the closed lock position.
5.2-ATTACHING THE JUICER TO THE APPLIANCE
• Set the multifunctional head (A3) to the horizontal position: press the button (A2) and lower the multifunctional head (A3) (you should hear a click, the button (A2) returns to the upper position). - Remove the lid (A5) from the fixator (A4) by turning it against the arrow direction. - Make sure the appliance is switched off before fixing the juicer (D). Install the assembled juicer on the fixator (A4), turning it in the arrow direction until the fixator and the spout for the appliance are aligned. - Install the spout (A5) on the juice container (A4). - Make sure the spout lid (H5) is closed.
5.3-USING THE JUICER
-Place a large container under the spout (H5). Start the appliance by turning the switch (A1) to the speed position 3. - Feed fruits and/or vegetables in pieces. - Close the lid (H2) and press it with the pusher (H1). Never press with fingers or other objects. Do not process more than 500 g of product more than 5 times in a row without fully cooling the appliance.
Maximum capacity: 10 cups.
For the best results, use 300g of ingredients.
Important. The container capacity is 3 liters, check the capacity. - To remove the lid, set the switch to "0" and unplug the appliance. - Make sure the drum filter is completely empty before removing the juice container from the appliance. - To remove the juice container, twist it counterclockwise. - Check the locking lever (H6) in the closed position of the lock. Open the lid (closed position of the open lock). The filter (H3) can be removed to clean and replace the container (H4).
Tips:
- You can make juice from: carrots, tomatoes, celery, grapes, apples, etc.
- Use fruits with thick skin; remove seeds and cores.
- Do not juice small fruits and vegetables: bananas, avocados, pears, etc.
- You can prepare juices from different vegetables without cleaning the juicer each time, as their flavors mix and change. Rinse the juicer with a small amount of water in the interval between juicing different vegetables. - Immediately after preparation, add lemon juice to preserve the juice in the refrigerator for several hours.
6-ADJUSTING THE SURFACE HEIGHT
For ease of use or storage, the height of the juicer can be adjusted by loosening the knob (A7) and adjusting the part (A7).
7-REGULATING THE JUICE FLOW FOR SMALL QUANTITIES OF PRODUCTS (DEPENDING ON MODEL)
USING ACCESSORIES:
- Strainer
The strainer can be used for:
- pressing small quantities in pulse mode: dry ingredients, dry fruits, etc.
Maximum processing capacity: 100 g/5 s
Do not use for processing solid products on a grill.
UH
Disconnect the device from the power supply. Do not immerse the motor block (A) or the attachment (E) in water and do not place them under running water. Wipe them with a dry or slightly damp cloth. - To clean the bowl, wipe it with a damp cloth. Do not use abrasive cleaners. To clean the lid, rinse it under running water. - Remember, some accessories can be washed in the dishwasher, except for the metal components of the blender head: housing (F1), feed tube (F2), blade (F3), discs (F4 and F5), and whisk (F6). - Discs (F4) and (F5), as well as the blade (F3), need to be washed by hand. Treat them with vegetable oil.
Advice:
- If any accessories are stained with food (carrots, orange juice), wipe them with a cloth dampened with vegetable oil, then wash them as usual. Descaling the blender: (D): Pour a small amount of water with a few drops of dishwashing liquid into the blender. Close the lid. Place the blender on the base and turn it on a few times in pulse mode.
After finishing, rinse the device under running water and dry it (turning it upside down).
STORAGE
Do not store the device in a humid environment.
IF THE DEVICE DOES NOT WORK
If the device does not work, check that:
- The device is connected to the power supply; - The accessories are correctly attached; - The switch position (A1): turn to "0", then select the required speed again.
This device is equipped with a microprocessor that controls and regulates the processing speed. In case of overload, the device will turn off automatically. To restart the device, set the switch (A1) to position "0" and wait a few minutes. Then you can select the desired speed for further processing.
If the device still does not work? Contact an authorized service center (see the list in the service booklet).
DISPOSAL OF PACKAGING AND DEVICE

The device is safe to use in the middle of a populated area. Therefore, it can be used in accordance with the rules of use, up to the point in any region. For the use of the device itself, the relevant amount is specified.
ACCESSORIES
The device can be supplemented with the following accessories, which can be purchased from a dealer or from an authorized service center:
- Bowl with a stationary blade for chopping or a bowl with a stationary blade for mixing
- Whisk - measuring cup - lid - chopper blade
Attachment:
- Cutting - fine grating - coarse grating - citrus press
- Set of attachments for making tomato juice and for making puree from boiled vegetables
Warning: When using any accessory, you must have the brochure with instructions for the device or the device itself with you.
SPECIFICATIONS
A-Product type
A1 Electric motor power consumption A2 Function type (a)3 A3 Function type A4 Housing material (plastic / metal / other) A5 Color A6 Motor (number of speeds, continuous operation time, etc.) A7 Correction function
B-Input power
B1 Voltage and frequency B2 Power
C-Mixer specifications
C1 Kambyip nneri C2 Apanaactbipfbii C3 DnHreJek KcnCiteTin CanTaMa
D-BneHepToctaFaHbI (yNrire 6aJnHaBICTbI)
D1 CbIMdbIbIK D2 KaKa D3 Mønseperiik kaknakka
E-Cantamnapfa aphanfah 6ekitkiw (ynrire 6aunhaibctb)
F - Et tapkbltblb 6actneri (ynrire 6aynhaibctbl)
F1 Metann typkbl F2 Nipnik F3 Nbiwak F4 YIkeH caIbIaynapIb 6ap Top F5 YcaK caHbIaaynapbI 6ap Top F6 COMBIH F7 Ntepriu F8 Haya
ANFAU KONDAHAP AINbIHDA
Anfaw kondanap aIbHna 6apbK cantamanaPdbI (kAraTbH 6nOktan (E) baca: Taanay"6eimih kapaHb3) ca6bHdbcymen JyBn 7bFbHb3. Onapdb MyKnT 7aibHb3 KHe KeNTipH3. KyaapanbI teric, ta3a api Kypfak 6etke opahbHb3. XbIaamdbkTb ayibcTbpln-Kocy 6aTbpmacbHbH (A1) "0" XafdaJaOpahbTbnFaBHa Ke3 JeTKi3iH3, cOcbH KyaapanbI xenire KocbHb3. KypaIbIbipheWe aicneH icke Kocyfa 60anaIbI:
- KijipMeni Jxmybc ictey (cepini ci pexim): KjIaNAMdIKbTbA yNcTbPbn-Kocy 6aTbPMacHn (A1) "Pulse" JxafdaHna ("Cepini ci pexim") JxafdaHba 6ypaHb. KijipMeni Jxmybc ictey TaFamapdb, bipkatapbH daHbanyuH konaiNb.
- YzdiKc13 xMybic ictey: kblnDAMdktBn ayBtBpBn-KOCy 6aBtPMAcbH (A1) daBnDaBnHJ KATKaH TaFmFa 6aBnHaBCTb "1"-en "max"-Ka deiHri kaxetti KaFdaFb6paHb. XMybic ictey 6apbcHda peximdi aybIcTbpFybaDonla. KyaanbToKtaTy ywiH 6aTbIpMaHbI (A1) "0"XaFdaBbHa 6yaPahb3.
MaHb3db! KypanDbI TeK KaNak (A5) neh 6actnek (A3) opHbKtbIpbnFaHn HKeiH Fana icke Kocyfa 60anDbI. XxMBC I cTeY 6apBcHbHa KaKnak (A5) xHe/HEmece 6actneK 6xfathan 7biFapRbFNah KaFdaJa Kxpan JbIamTokTaIb. KaKnak (A5) xHe/HEmece 6actneKIOpHbKtbPbHb3, 6ackopy 6BatpMaCbH (A1) "O"XxFaJbHa B6paHb3, coBcHb KaKet XbIaMeDaBtKbT TaTahdApKbIb bXpanDbI icke KocHbI3.
Kyaal yMmblc KAtbHnH TaIaBly HJaeBa6kApyB JyRpr3TeIH MKNpOpoueccopMeH XabHktanFaH.Erep KytMe 0eXoFapb 6bnca, KAp aOBaTbMbTy Tpe OKeTaBb. KpaIaBkaay Ite kocYuH WbpaIaBb YauCbTbpIn-KoCkbWbI (A1) "KjaFadbHaOpHbHb. KpaIaBb6ipHeue MinHyt 6bNcakKnHdattbHb.
1-APALACTbPY / NIEY / KONCI TY / 3MylbIaUNIAJAY / BJFAY
KaKaNaFb (B2) 6ap TaTtAnbAaTbH 6oAaTanJH XaCaIFaH CbIbIMDbIbIKTbH (B1) KEmerImeH NaKtB TaTaAMFa 6aIaNbIcTb 1,8 Kr-fa DeiH JeHIn KaMbpDla DaIbIHdayFa 6oAaDbI.
KOJIДAHBJIATbIH KEPEK-JAKAPKTAP:
Tattanbaity 60 attan Hacanfan TOCTaFan (B1) - KaKnaK (B2) - Kambip nneri (C1), apanactbfp (C2), hemec e dHreleek kcnitein cantama (C3)
1.1- KEPEK-KARAKTARLY KUNHAY TORTIBI
- KeftyHkuHouHaBb 6actkeTI (A3) 6ocaty yuih 6batmuHa 6acbHb3 (A2) xHe 6actneE 03 opHbHaOphkTbPbHaTHn4en otin OkeTepeHI. Tattahbaimahtan bonaattan kacanfah cblmbmblkbtB1)kypbilfaOpbIKtbipbHb3 (cafatini 6afblbmeh 6ypay apkbln) xhe ofan kypam 6bniktepdi calbHb3.
- Lbfbcta (A6) kajketti canti tamtahambl (C1, C2 Hemece C3) ophahtb3, OHb 03 ophbnda 6ekity y wihcantamahtb Wnpek aHnablmfa ca fat Tinihe Kapama-kapcbla 6afttta 6pahtb3. KenpyHKUHOANbIb6actneKTI (A3) KENDEHEn KaFdaina OPHATbHb3: 6aBpMaHb (A2) 6acbHb3 XeHE KENyHKUHOANbIb6actneKTI (A3) OPHbIKbpy KaFaDbHa deiHn (6aTbPm (a2) 6actanbKaFdaHa KaTa KeNEDI) KOHNMe TycipHIN. Kaiknaktbb(B2)TaTtAn6aTah 60anTah XacalFaH cbIbIMdbIbIKa (B1)Xa6bIHb3.
Eckptne. KaKnaKtbI KOJaHY MINDeTTI eMeC, bipak OI waMbipayDbH aJbH aJaDbI. KaknakTBH (A5) KofapbI kblndAmdbIKTB WbIFbCTa (A4) DpybIC opHbIKTbpBfHaBHHa (caFATiJI 6aFbITbIMeH) Ke3 Ketkiinj3.
1.2-KOJIdAHbIJybl
AaBmHe AbyCtbpIn-KocKbIuTbIn 6aTbpMacbIn (Al) peentire 6aHaNaHbCTb KaKeTTi KaFdaFa 6ypaHb3.
Kyaapan depey jyMbic icteyih 6actaHbI. Kymbc ictey 6abcbHda KaKaNaKaTaBb (B2) caHbIay apkblb HImIdepdi Kocya 60ana. KypaIbI ToKtAty ywiH 6aTbIpMaHbI (A1) "0"XaFdaBbHa 6ypaHb3.
Kehectep:
- Hney
-CanTama petiHne kAmbip nIerIiwiTI (C1"1"KbIaMdbkTA KOnaIaHbIb3.50r-fa dein yHbIb (6nDaunyHbI, ipineTaptBtFah yHdbI,yirime kAmbip ywIn xHe t.6.) uYe re 6oana. -Баразиша yзak konДану yaKыты:13MHNYT.
-Apaanactbipy
-ApaJnactbipfbltB (C2) "1"-dH "max" (eh Xofapbl) XblndaMblkKA deiH KOndaHbIb3. -1,8 Kr-fa DeinH JeHIn KAmbIpDbl (KeKCTep, NeueHbe JAne T.6.) apanaactbipyfa 60naabi. -Барынша yзak колдану yakbttb:13MHNYt. -TbIfb3KaMbipdbI nney ywih ewkaawah apanaactbipfblwlb (C2) KOnlaH6aHb3.
-Kenciy /3mylbraunay/6xNfay
-Дэнгеленк көnciтetiH canTaMaHbI (C3) "1"-deH "max" (eH kOfapbl) kBilnДamDbIKKA DeiH KOnlaHbIbI3. -Ci3re: Maohoe3di, aoHnDi, ty3bKapTbDi, kcnCITInReh aky3dapDb (8 yMbptKa aky3bHa deiH), 7aHTnblk pemH (500 Mn-Te deiH) xHe t.6. daBnDyFa 6oNaDb. -Барынша yзak колдану yakblты:10MHNYT. - Dohrenek Koncitetih cantamahbI (C3) eKawan TbiFb3 KaMbipdbI nney yuih XaHe JxHn KaMbpdbI apanaTbpy YuH KOndaH6aHbI3.
1.3- LIST OF REQUIRED PARTS AND ACCESSORIES
Connect the device to the power supply using the plug. Press the start button (B2). - Use the blender (A2) with the functional attachment (A3) and remove it by pressing the release button.
- To remove the attachment (C1, C2 or C3), press the release button and remove it through the opening in the functional attachment (A3).
- Do not operate the device without load.
2- ASSEMBLY AND USE
Place the bowl on the motor unit (D) and turn it clockwise until it locks (1.5 turns) or counterclockwise (1.25 turns) to unlock.
ASSEMBLY STEPS:
- Place the blender (D) on the motor unit.
2.1- LIST OF REQUIRED PARTS AND ACCESSORIES
To use the functional attachment (A3), follow these steps: place the blender (A2) on the motor unit and insert the functional attachment (A3) into the opening until it clicks. To remove the lid (A5), press the release button and lift it off. - Turn the blender (D) to the desired speed. - Use the blender (D) with the opening (A4) to add ingredients. - Place the lid on the blender and press it down.
2.2- ASSEMBLY
Set the speed control (A1) to the desired speed (1-4 or "pulse" (pulse mode)). Press the start button to begin operation. To stop, press the start button again or set the speed control to "Pulse" (pulse mode).
If the device stops during operation, the thermal protection (D3) may have activated. Wait for it to cool down before resuming.
To disconnect the device from the power supply, press the "0" button.
Notes:
Barishu zakko jdanhya kbyt: 3 minutes.
Kehestep:
Keneci ta famar dba vv hday f60 anabi:
- For one hour, put in the oven, dry, cool, and then serve. - I don't like dry snacks (like chips, crackers, pretzels, and other similar things). - The chicken should be cooked until it is well done. Cook the chicken thoroughly. Then, take it out, put it on a plate, and let it cool. - If the chicken is not cooked, cook it more. - Take the chicken out with a fork. - Use a knife to cut the chicken. If the chicken is not cooked, cook it more.
2.3-ASSEMBLY INSTRUCTIONS
Turn the knob to the right, then insert the battery into the slot with the positive side facing up, and close the cover.
3-OPERATING THE DEVICE (FOR THE USER)
OPERATING INSTRUCTIONS:
- Power button (E)
- Device status indicator (F)
3.1 - TURNING ON THE DEVICE
To turn on the device, press and hold the power button (A2) for a few seconds until the indicator light turns on.
Turn on the device (E) and place it on a flat surface to ensure stability. Press the power button (A2) to turn on the device.
3.2 - OPERATING THE DEVICE
Insert the plug (F1) into a power outlet. - Press the switch (F2) (the one with the longer prong) into the plug (F1). - Use the buttons (F3) to adjust the settings. The device will beep when it is turned on. - Press the button (F6) to start, and the device will begin operating. The device will beep when it is turned on. The device will beep when it is turned on. The device will beep when it is turned on.
3.3-ETAPTKbIITbIHBACTNEH KYPbJIfblDAOPHATY
JANFANATBHN 60KTHB (E) 6HbFcBuHa ET TAPKbUwTB HJHNAHFA Bactneri (F) OHFa KApA 6ybn, ET TAPKbHI 6actneriHeeri Eki Kaohetti KocbIbctb KaNfay 6nOrhdaFe eoiBkneY necipty apkbln 6actneKi opahbH3.
Et tapkbltbHbactneriXanFaHaTbHbNokKa caIbHb3,OnbCaFt Tinihe Kapama-Kapcb6FaBTTaO1 OphbKtbpHbFaHsa 6paHb3,coBHMeH bipre KKTeyTH KBy6bp TIK KaBnT aOpHAnacybKepeK.
- AInbH6aIb HayaHb (F8) KYKeTinH Ky6bIpFa OPhaTbHb3.
3.4-KOJIdAHbIybl, KEHECTEP XaHE BOnlweKTEY TAPTIbI
KopfainbH KacnakTbH (A5) Kofapbl bbldAmdbkTbI bblfcta (A4) dpybc ophikkbipfaHbHa (caFat Tinihe Kapama-Kapcbl 6afttTa bypay apkbl) Ke3KeTki3iHj3. KpybI-fbIbIaNbHa ycaKaTaNfA hEhIMdi JxNhayFa apHaIfA KOHTeHepDi KOnbIHb3. AbyctbpyIN-KCKbIbTHB(A1 KOMEREM "3" HEMeCE "4" XblnAmdbfBtH TaHdAy apkblkXpAnbl icKeKOCbIbHh Ky6bipfa etti ntepiutih (F7) Kemerimeh 6nwekten ntepiH3. Kypam 6nwekterpdi kkykTeiH Ky6bipfa ekaaahan caycaTapbHb36eH Hemece KaHdA da 6ip 6aca 3aTAPmeh ntepmeh3.
-Ci3 3Kr-fa deinH eTTI JyKTe anacbI3.
- 5apbihwa y3ak konlahy yaKbItb10 MNHyT.
Kenei KondaHy KaTb6aTay ywiH ci3 KpaIbIb3blMiHdeTTI Tpye caKbIHDaTbHb3. Kyaapandbly TOKtaty yuih aybictbipbn-KockbiWtbl "0" KaFdaBnHa 6paH3 XaHe KypalDbH, TOnbIFbMeH TOKtaFaHbN KYTIH3. Xnay yepicie kepi taptinte apeket eote tbipbIn, et tapkbiuTBin 6actneriA xbpatbHb3.
KeHectep:
- Et tapTkmbka anaphan AHmEepa dai bnaHb3 (ere 6y 10 en 5cna, cynekepti, weimpwekepti jxane cihinpepi aHnI Taehh3, etti wamamene 2 x 2 cm uwmemde Gwnueken Typua3). -ETTIH TOJIbIbIMeH Xi6iTirIReHHe K3XeTi3iH3.
- YcaTay ydepiciHH coBbHda mawHnabHb iinHe KaBn KoJfah eTTi KeTipy yuHn HauHHb, biPheWe uafBH TiniMepih kYkTeTHIN Ky6bpfa canyfa 60ana.
4 - Eγ / TγPAY (YЛГΙΕ ΒΑΙΝΑΗΒΙCTbl)
KOJIdAHbIJATbIH CANTAMAJAP:
-CanTamajapfa aphanfah6ekitkiu(E) - KInhaIraH KeKHeHic TpyaFbIi (G) -ζιηνηνdρερ (γλπίσε 6aɪnəhνbICTb)
4.1- KEPEK-JAKAPKTAPDbI XINHAY T'PTIBI
KenfhyHKuHOnHaNdb6actneKTi (A3) 6ocaty yuih 6aBpMaHb (A2) 6acbHb3 xane 6actnekti e3 opbHdaOpbHKtpy yuih OHk KTepeiH3. XaI-faHaTbH 6nOkti(E)OpHaTbHb3 XHe et TapTkblbH, 11bFbCbK ypaIFa KaTbCTb TypanaHyb YwH OHb CaTa Tinihe Kapama-Kapcb 6faBtta 6ypay apkblbOpbHKtbpBlb3. BaTbIpMaHb(A2)KaIa 6acy apKbIb KOnpHkyHKUHOAnIbIK 6actneKti (A3) KOnIeHeJ Xa-FaIaJaOpHaTbHbI3. KopfaiTBi KaKaNaKTbI (A5) Kofapbl KbIaMdbIKtbl WblFbCTa (A4) dypbic OPhbIKtpbIfaHbHa (caFat Tinihe
KapaMa-Kapcb6aftt6payapkblb)Ke3JKTi3iH3.
JanaHanb 6nokTb (E) bHbCbHa uHHdpnepe aphanfah Tykblb (G1) OH.fa Kapa 6ybpIn, UHHdpnepe aphanfah TpykbHdaFb Eki 6aihoehTI KocblbCTb Xanfay 6bnorHbAflb Eki OibkInen Ynectipy apKbIb tyKbHbOp aHbTHb3. UHHdpnepe aphanfah Tykblb XanfaHabH 6noKka caIbH3, OHc faT tinihe kapama-kapcb 6aftTA on oHbKbTpblFaHsa 6paHb3. CoBImen bipre JyKteTIN Kybip T KaIbTTa opHanaCybepe. TpykbyfaKaKeETIuINHdpiCaBbI3XHeObIH TYpkblaTbFbI3OpHaTbJFaHbHaKe3XeTk3iH3.
4.2-KoJIaHbJIybyJXHE KEHECTEP
KypbIbFbHbHa anDbHa ycaKaTaNFaH eHimDi JnHayFa apHaNFaH KOHTeHepDi KOblb3. AbyctbpyiN-KockblTbH (Al) KemerimEn "3" Hemece "4" XblndaMblfbH TaHday apKblbl KpaIbl icKe KOcbHbl3. XyKTeHIN Kx6bPFA 8HIMdEepdi CaihH3 XaHE Kx6bPDI iuiHe NtepiuTH (G2) KEMERIMEH NtePiH3. Kypam 6oIweKeTpdi Kx6bPFA euaKaauan CaycaKtapbHb36e Hemece KaHda da 6ip 6aca 3aTAPmehn3.
-Ci32Kr-fa deinIH eHmDi daibHda anacbi3.
-БаразишузakКолданууakытб:10MHNYT.
KypalbtdokTaty yuih ayibctbpn-ockbltby "0" XaFdaBbHa 6paH3 XaHe KypaldbH ToIbfbMeH TOkTaFaHbH KYTIH3. Kunay yepicine kepi Taptinte apeket ete Otbpbln, uinnnpnepe npk bia - CuiHnDpIepiH apHanyb:
- Ipinen yry (G4) / ycaKTan yry (G5): cəbi, 6aIbIpkKek, Kapton, ipimik kHe T.6.
- KaIbIhDan Tpyay (G3): KapToT, cə6i3, KnIAp, aIMa, Kbi3bIuIwa JAnHe T.6. -KaptonДраинКтepi(G6): Kapton, napMe3aHжэHeT.6.
5 - JEMICTEP MEH KOKOHICTEPEN HbIPbIHDbI CbIFY (YJITIE BAJIANbICTbl)
KOJIdAHbIJIATbIH CANTAMAJIAP:
- XunhanfanhbipbH cbIKkbH (H).
5.1-UbPbH CbIKKblITbl OPHTY
-Cy3riH(H3)wbpBnJxNayFa aPhaIFaH cbMbMdbblbIKtbH(H4)OpTacbHaOpHaTbHb3. KaKnakTbOpDhBtBbHbM; WbHbN HxHAnF aPbHaNf cbYbMbNbblbTkafb (H4) KaKnakTb Ca fat TiiHne KapaMa-KapcbSbBaTTa 6ybaHb3 (Xabkb Kybnl XaBafda). - Optak opHbIKbpy: ToKtAtkbln iNHTipeKeTI (H6) Ka6blk Kybln KaF daBlHa aybCTbplb3.
5.2 -LbIPbIH CbIKKblITbl KYPJA FFA OPHATY
KenpyHKUHOANbIb6actneKTi(A3)KBENDEHHeHkaFdAaDpaOpHaTHb3:6BaTbPMaHb(2)6acBnH3xKeHae KENpyHKUHOANbIb6actneKTi(A3)opHBKtbpYkaFaDaBHaDeHH(6aTbPma(a2)6bactanklaKaFdaNfKaNTa KENEJI KOHNMe TycipH3I. KopraTbH KAKnAe (A5) caraT tinihe Kapama-Kapcb 6aftTa 6pyay apkblu bIyFCTAH (A4) axkpatahB3 xHe OHa aBnHb3. - Ⅲbipih CbIKKbiWtB (A) xanfaydaH 6ypbih KpybjnFbHbH aXbipaTbnFaHbHa Ke3 XeTk3iH3. Xinhanfah Wbipih CbKbIbTkyIbH Wymekke apHanfah WbIbCb KypaIFa KaIbCTb TypaIaHyb YwIH OHb caFATiine Kapama-Kapcb6aftTa byay apkblbOpbIKbtpibh3. KyTbH WymeKi (H5) WbipbH XnHayFa aPhaIFaH cbHbIMdbIbIKKa (H4) OphaTbHb3. KyaTbH WMeKteri (H5) TbFbHHbH, XaKcbInbI aBbJFaHbI TeKcePi3.
5.3-KOJIdAHbIyblXHEKHeCTEP
KyTbH WymKeTih (H5) actbHa yIkeh CTaKaH KObIHb3. AbyIcTbIPbIN-KCKbIUtBtBn (A1) KEmerIme "3" XblIaMdbIbFbH TaH,day apKbJIbI KypaIbI icke KocbIHbI3. Kemictepei JHHe / Hemece KekohicTepei Tiniimdepre Tyapb3. - Onapdi tnepiwiH (H1) kEmerimEn Kpuan liihe bany tnepy apkbln KaKnAeTafbi (h2) JxkyTeiH Ky6bp apkblb caIbnb. KxpaB 6oNikTeprDi eUkaaun CaycaKaTapbbl36en Hemece KaHdai da 6ip 6aca 3aTTapm en TmepnE13. CeaHCTap apacbHnda KpypAnbl ToIbIbIMen Cybltna y3dikci5 peTten apTbK 500 rOHHmEn apTbK OHdeyre
60mmaDb.
- BapbIHwa y3aK KOJIaHy yaKbITb: 10 MNHT.
- EHNKcBnHtNkEnepre KetyuinAp 300rKpam6oiktiEHdereHHeKeiH cy3riHt Ta3aJaybHxprizhi3iH3. Manb3db!Xemic KymcafbHIn XinyahfapaHAnfAH CbIMdbIbIK TonfAH Ke3de, KypaldbTOKTaBbH3 JHe CbIMdbIbIKTB6OcTaHb3. KyaIbIbTkyiH ayIbCTbIbIN-KoCKbIbTIb "O" JxafDaIbHa 6paH3 xHe KyaIbIH ToIbIFbMeH TOkTaFaHbH KytIH3.
- ⅢbipbH cbIKbIbTb KpAaIah anyad H6ypbH aHaNaTbH Cy3rIH TOBbFMeH ToKtaFaHbH KYTIH3.
- ьрьн ськьшby any ywih OHbl caf tinihe Kapama-kapcbi 6aftta 6pay apkbln axkpabtlb3. ToKtAtkBmHnHTiperIH (H6) awhbkyIbn XaFdaihBa 6pyaHb3. KaNakTb ai bHb3 (auiik Kybln JkaFdaBl). OcbiDaH Kein Cy3rhi Ta3anlan, CbiMdbIbIKbTI (H4) 60caTy ywiH cy3ri AnyFa 60ana.
Kehectep:
If the device is used improperly, it may be dangerous. It should be used only as intended. The user must read the instructions before use. For many tasks and jobs, special tools are required: such as wrenches, screwdrivers, pliers, and other similar tools. The use of these tools must be carried out in accordance with the instructions. When using the device, it is necessary to follow safety rules and regulations. If the device is not used correctly, it may cause injury or damage.
6. ADJUSTING THE DEVICE
To adjust or replace the device, it is necessary to disconnect the power supply by removing the plug (A7) from the socket or by turning off the circuit breaker.
7. STORAGE AND TRANSPORTATION
STORAGE CONDITIONS:
- Store in a dry place.
Transportation:
- During transportation, the device must be protected from impacts and vibrations. It should be packed in the original packaging or equivalent.
Storage temperature range: -40°C to +60°C
This device does not contain harmful substances.
DISPOSAL
Disconnect the device from the power supply. Do not immerse the plug (A) or the device (E) in water or place it under running water. Wipe the surface with a dry or slightly damp cloth. If the device is damaged and cannot be repaired, it should be disposed of. Do not dispose of it with household waste. For proper disposal, contact local waste management services.
Required tools: screwdriver, pliers, and wrench. To disassemble the device, use the following tools: flathead screwdriver (F1), Phillips screwdriver (F2), pliers (F3), and adjustable wrench (F4). For further disassembly, use wrench (F4) and (F5), as well as pliers (F3). Do not use excessive force.
Notes:
If the required tools are not available (e.g., due to size or type), use appropriate substitutes and handle with care.
Before starting work (D): wash hands with soap and water, put on clean clothes. Check the device. Before storing the device, clean it with a soft cloth and keep it in a dry place.
CAUTION
The device should be stored in a dry place, away from direct sunlight.
IF THE DEVICE DOES NOT WORK, DO NOT REPAIR IT YOURSELF
If the device does not work, contact a qualified specialist:
- Do not connect the device to a power outlet;
- Do not disassemble the device or replace parts; - Press the reset button (A1) to the "0" position, then turn the device off and on again.
The device is controlled by a microprocessor that controls its operation. If any malfunctions occur, the device will automatically shut down. To restart, press the reset button (A1) and turn the device on again. If the device does not operate correctly, contact a qualified specialist.
If the device does not work, contact a qualified service center (with the warranty card).
STORAGE AND TRANSPORTATION

The device should be stored only in its original packaging; it must not be transported without proper protection.
Contact a qualified service center for transportation of the device.
SPECIFICATIONS
The device can be purchased from a specialized store or a qualified service center, and it can be returned with the warranty card.
The device must be disposed of in accordance with local regulations for electronic waste.
Instructions for use - Introduction - Safety precautions - Scope of delivery - Technical data
Technical data: Type - Power supply - Power consumption - Cartridge filters - For connection to the water supply
Water quality
In the data)
Replacement cartridge
- Three-way valve
Installation
Replacement cartridge
Attention! To purchase any cartridge, you must have the installation instructions or the device itself.
Fig. 1 (F3), (F5), (F4)
#
Installation and connection (e.g., ...) according to the installation instructions
a a a a a a a a a a a a a a a a a a a a a a a a a a a
#
aio jao jao jao jao jao jao jao jao jao jao jao jao jao jao jao jao jao jao jao jao jao jao jao jao jao jao jao jao jao jao jao jao jao jao jao jao jao jao jao jao jao jao
ab = 1
__SUPPIMER__
100
a,b,c,
x 1y 1 = 0
1
.(F6)alal.(F5,F4)(F3)zalal.(F2)zalal.(F1)
(G)
(A4) (a) a. (a) (a) (a) (a) (a) (a) (a) (a) (a) (a)
G5) (G4) -
..(G3)-
G6
(jugall) juaalg 45 gai jauaal 5
:
(H) ∴ l原点 = 0
aJus -5.1
.(H4)duaasalljlae bawg (H3) jdlle
(J33)(H4)(H2)(H2)
Jaiyao (H6) Jaiyao jaijao: pLac Jai
iiaalglc lauo aol ojus -5.2
(A3) 4 (A2)

1111 (pulse) (V4) 1111 1111 1111 1111 1111 1111 1111 1111 11
yill yil kail kail kail pultse gao jaiol.
Lii (D3) wlll lccg jy gssgall yd jn palaal alal
0.8gall A1) jll gaiell
jilir:JuiuuiuUgaiyui-
:
:
C) LgS g LgSho. ggofo gfoLs, loS a yy, a yy, yy
.(j)s s s s s s s s s s s s s s s s s s s s s s s s s s s s s s
i 105ai jy jll jil g. iiall lal jil jil jil jil jil jil jil jil jil jil jil jil jil jil
aill galegagb)alall gay, aala Jaaawlyu ayjaiyll all yll plabll gul, bldi j
Jdlll l aai iiaaill aiee
1
aIbic oIaIsbIJIe Ioo
Lall 2.3
(204) (A4) (205) (A5)
g /ylaai / yj / jc / b1-1
plabllg(B2) 11b6(B1) Jusuulilal.1eJusuuiyiaaiill aaiall jol 1A iiali
: aalaaall
(B1)
(2B)
(C3) (C2)
j-1.1
A3) 12 A2)
.
(A6)C,C2,C3)
C
F1
F2
F3
F4
F5
F6
F7
F8
(jugall) juaaiae- G
G1
G2
G3
G4
G5
H1
H2
H3
H4
H5
H6
dallg-A
A1
j(a3).j(a2) A2
A3
a.0gall (A1) jj gj, wll g/ lalal Jai (A3) g/g (A5)
∴ α = 1/2 β - 1, α = 1/2 β + 1, α = 1/2 β + 1
Therefore, S
Therefore, the limit as x approaches negative infinity of log base 10 of x over log base 20 of 1 equals log base 10 of x over log base 20 of 1.
(E)
(G) z ≤ z·z·z·z·z·z -
all 4.1
L 1 (E)
Aa (A3) 84
A45)
G1 (E) Lw
L
.
Lg4.2
J (H4) 1000000000000000000000000000000000000
aaii jia jia o 5i i aee aee aee aee aee aee aee aee aee aee aee
L(F1) 458 yds yds yds yds yds yds yds yds yds yds yds yds yds yds yds yds yds yds yds yds yds yds yds yds yds yds yds yds yds yds yds yds yds yds yds yds yds yds yds yds yds yds yds yds
J 1
∴ S ΔACD = S ΔCOD + S ΔBDO - S ΔCDA
05 1 5 5 5 5 5 5 5 5 5 5 5 5 5 5 5 5 5 5 5 5 5 5 5 5 5 5 5 5 5 5 5 5 5 5 5 5 5 5 5 5 5 5 5 5 5 5 5 5 5 5 3.3
(S)
44 44
(F8)
alabj jyso yjg kls-3.4
aagallagawll aagawllalaiylaaiyaiyaiyaiyaiyaiyaiyaiyaiyaiyaiyaiyaiyaiyaiyaiyaiyaiyaiyaiyaiyaiyaiyaiyaiyaiyaiyaiyaiyaiyaiyaiyaiyaiyaiyaiyaiyaiyai
1.5,16,17,... ,19



- DESCRIPTION
- A - MOTOR UNIT
- B-BOWL ASSEMBLY
- C-MIXER ACCESSORIES
- D - BLENDER JUG (DEPENDING ON MODEL)
- E - ATTACHMENT HOLDER (DEPENDING ON MODEL)
- F - MINCER HEAD (DEPENDING ON MODEL)
- G - VEGETABLE SLICER (DEPENDING ON MODEL)
- H - JUICE EXTRACTOR (DEPENDING ON MODEL)
- BEFORE FIRST USE
- MIXING / KNEADING / BEATING / EMULSIFYING / WHISKING
- ACCESSORIES USED
- ASSEMBLING THE ACCESSORIES
- USAGE
- TIPS
- DISMANTLING THE ACCESSORIES
- BLENDING/MIXING (DEPENDING ON MODEL)
- DISMANTLING THE ACCESSORY
- MINCING (DEPENDING ON MODEL)
- ACCESSIONS USED
- FITTING THE MINCER ATTACHMENT
- ASSEMBLING THE MINCER HEAD
- FITTING THE MINCER HEAD ON THE APPLIANCE
- USAGE, TIPS AND DISMANTLING
- GRATING / SLICING (DEPENDING ON MODEL)
- USAGE AND TIPS
- EXTRACTING JUICE FROM FRUITS AND VEGETABLES (DEPENDING ON MODEL)
- ASSEMBLING THE JUICE EXTRACTOR
- FITTING THE JUICE EXTRACTOR ON THE APPLIANCE
- ADJUSTING THE CORD LENGTH
- FINELY CHOPPING SMALL QUANTITIES (DEPENDING ON MODEL)
- ACCESSORY USED
- YOU CAN USE THE GRINDER TO
- CLEANING
- STORAGE
- WHAT TO DO IF YOUR APPLIANCE DOES NOT WORK
- DISPOSAL OF PACKAGING AND THE APPLIANCE
- ACCESSORIES
- JUICING FRUIT AND VEGETABLES (DEPENDING ON MODEL)
- FITTING THE ACCESSORY HEAD
- SWITCHING ON, TIPS AND DISMANTLING
- SWITCHING ON AND TIPS
- ASSEMBLY OPERATIONS
- USE
- COBETBL
- PORODOK RAZBORKI PRISPOSOBLENIY
- ISPOL'ZOVANIE MYASORUBKI (V ZAVISIMOSTI OT MODELEI)
- ISPOL'ZUEMYE NASADKI
- USTANOVKA PRISSOEDINITEL'NOGO
- USTANOVKA GOLOVKI MYASORUBKI
- INSTALLING THE MEAT GRINDER HEAD ON THE DEVICE
- USE, TIPS, AND DISASSEMBLY ORDER
- GRATING/SLICING (DEPENDING ON MODEL)
- INSTALLATION OF THE ACCESSORIES
- USE AND TIPS
- WHAT TO DO IF THE APPLIANCE DOES NOT WORK
- UTILIZATION OF THE PACKAGING OF THE APPLIANCE
- RU
- INSTALLING THE JUICER
- ATTACHING THE JUICER TO THE APPLIANCE
- USING THE JUICER
- ADJUSTING THE SURFACE HEIGHT
- REGULATING THE JUICE FLOW FOR SMALL QUANTITIES OF PRODUCTS (DEPENDING ON MODEL)
- USING ACCESSORIES
- THE STRAINER CAN BE USED FOR
- UH
- ADVICE
- IF THE DEVICE DOES NOT WORK
- DISPOSAL OF PACKAGING AND DEVICE
- SPECIFICATIONS
- A-PRODUCT TYPE
- B-INPUT POWER
- C-MIXER SPECIFICATIONS
- D-BNEHEPTOCTAFAHBI (YNRIRE 6AJNHABICTBI)
- E-CANTAMNAPFA APHANFAH 6EKITKIW (YNRIRE 6AUNHAIBCTB)
- F - ET TAPKBLTBLB 6ACTNERI (YNRIRE 6AYNHAIBCTBL)
- ANFAU KONDAHAP AINBIHDA
- APALACTBPY / NIEY / KONCI TY / 3MYLBIAUNIAJAY / BJFAY
- KOJIДAHBJIATBIH KEPEK-JAKAPKTAP
- KEPEK-KARAKTARLY KUNHAY TORTIBI
- KOJIDAHBIJYBL
- KEHECTEP
- HNEY
- APAANACTBIPY
- KENCIY /3MYLBRAUNAY/6XNFAY
- LIST OF REQUIRED PARTS AND ACCESSORIES
- ASSEMBLY AND USE
- ASSEMBLY STEPS
- ASSEMBLY
- KEHESTEP
- ASSEMBLY INSTRUCTIONS
- OPERATING THE DEVICE (FOR THE USER)
- OPERATING INSTRUCTIONS
- TURNING ON THE DEVICE
- OPERATING THE DEVICE
- ETAPTKBIITBIHBACTNEH KYPBJIFBLDAOPHATY
- KOJIDAHBIYBL, KEHECTEP XAHE BONLWEKTEY TAPTIBI
- EΓ / TΓPAY (YЛГΙΕ ΒΑΙΝΑΗΒΙCTBL)
- KOJIDAHBIJATBIH CANTAMAJAP
- KEPEK-JAKAPKTAPDBI XINHAY T'PTIBI
- KOJIAHBJIYBYJXHE KEHECTEP
- JEMICTEP MEH KOKOHICTEPEN HBIPBIHDBI CBIFY (YJITIE BAJIANBICTBL)
- UBPBH CBIKKBLITBL OPHTY
- LBIPBIH CBIKKBLITBL KYPJA FFA OPHATY
- KOJIDAHBIYBLXHEKHECTEP
- ADJUSTING THE DEVICE
- STORAGE AND TRANSPORTATION
- DISPOSAL
- NOTES
- CAUTION
- IF THE DEVICE DOES NOT WORK, DO NOT REPAIR IT YOURSELF
- G /YLAAI / YJ / JC / B
- C
Brand : MOULINEX
Model : QA507GB1
Category : Food Processor