
TD310 - Video capture card AVERMEDIA - Free user manual and instructions
Find the device manual for free TD310 AVERMEDIA in PDF.



User questions about TD310 AVERMEDIA
0 question about this device. Answer the ones you know or ask your own.
Ask a new question about this device
Download the instructions for your Video capture card in PDF format for free! Find your manual TD310 - AVERMEDIA and take your electronic device back in hand. On this page are published all the documents necessary for the use of your device. TD310 by AVERMEDIA.
USER MANUAL TD310 AVERMEDIA
All the screen shots in this documentation are only example images. The images may vary depending on the product and software version. Information presented in this documentation has been carefully checked for reliability; however, no responsibility is assumed for inaccuracies. The information contained in this documentation is subject to change without notice.
Copyright
©2015 by AVerMedia Technologies, Inc. All rights reserved. No part of this publication, in whole or in part, may be reproduced, transmitted, transcribed, altered or translated into any language in any form by any means without the written permission of AVerMedia Technologies, Inc. Information and specification contained in this manual are subject to change without notice and do not represent a commitment on the part of AVerMedia. For more information, please refer to www.avermedia.com. "AVerMedia" and "AVerTV" are trademarks or registered trademarks of AVerMedia Technologies, Inc. The pictures contained in this manual are provided for reference purposes only. Made in Taiwan (Expect Accessories).
Headquarters
Address No.135, Jian 1st Rd., Zhonghe Dist., New Taipei City 23585, Taiwan
Website www.avermedia.com
Telephone +886-2-2226-3630
Benelux
AVerMedia Technologies Europe
Address Kwartsweg 50, 2665 NN Bleiswijk, The Netherlands
Website www.avermedia.com/avertv/Support/
Telephone +31-10-7600-500
v1.0
03/2015

Important Safety Instructions
- Read these instructions.
- Keep these instructions.
- Pay attention to all warnings.
- Follow all instructions.
- Do not use this apparatus near water.
- Clean only with dry cloth.
- Do not block any ventilation openings. Install in accordance with the manufacturer's instructions.
- Do not install near any heat sources such as radiators, heat registers, stoves, or other apparatus (including amplifiers) that produce heat.
- Do not defeat the safety purpose of the polarized or grounding-type plug. A polarized plug has two blades with one wider than the other. A grounding type plug has two blades and a third rounding prong. The wide blade or the third prong is provided for your safety. If the provided plug does not fit into your outlet, consult an electrician for replacement of the obsolete outlet.
- Protect the power cord from being walked on or pinched particularly at plugs, convenience receptacles, and the point where they exit from the apparatus.
- Only use the attachments/accessories specified by the manufacturer.
- Unplug this apparatus during lightning storms or when unused for long periods of time.
- Refer all servicing to qualified service personnel. Servicing is required when the apparatus has been damaged in any way, such as power-supply cord or plug is damaged, liquid has been spilled or objects have fallen into the apparatus, the apparatus has been exposed to rain or moisture, does not operate normally, or has been dropped.
- Use only with cart, stand, tripod, bracket, or table specified by the manufacturer, or sold with the apparatus. When a cart is used, use with caution when moving the cart/apparatus combination to avoid injury from tip-over.
Limited Warranty
AVerMedia warrants that the Product is free from defects in material and/or workmanship under normal use.
AVerMedia does not warrant that the operation of the Product will be uninterrupted or error-free. The Limited Warranty does not cover:
● The warranty period has expired;
● Product that has (a) serial numbers or the warranty sticker that have been removed tampered, damaged or altered, or (b) nonconforming.
● Product purchased from an unauthorized distributor;
● Product has been tested, altered, modified, repaired or serviced by someone other than AVerMedia (or its authorized service centers);
- Failure to adhere to user's manual.
- Product that are operated in combination with third party's software which may be obtained by user or provided by AVerMedia in the product packaging.
- Product that are operated in combination with third party's device(s)/equipment(s), or the damage is caused from computer viruses
● damage caused by (a) misuse, abuse, neglect, improper use of the physical or operating environment (such as the exterior ruptures, moisture, exposure to temperature, high or low humidity, power overload, placement subject to extreme environments that include a lack of ventilation or stacking, throwing, soakage, etc.) or modification; (b) improper or unauthorized installation, wiring, repair, testing or (c) use of the Product outside AVerMedia published guidelines (d) accident, fire, acts of God or force majeure such as natural disasters, environmental distress, or lightning; power surges; (e) improper maintenance or failure to use the information content in accordance with the Product.
● Other than the above, similar circumstances not attributable to AVerMedia.
Warranty Period
The term of the warranty begins from the date of purchase. Your dated sales receipt showing the date of purchase is the proof of purchase. The warranty period varies by product and is generally 1 or 2 years; consult your original AVerMedia product packaging or user information provided by AVerMedia and local
in-country distributor at the time of purchase for the warranty term specific to your product ("Warranty Period").
How to Obtain Warranty Service – Contact your local in-country distributor
● To obtain warranty service, an original or copy of the sales receipt from the original retailer is required.
- A separate warranty may be provided by international distributors. This warranty is provided by the local in-country distributor and this distributor provides local service for your device. Distributor warranties are only valid in the area of intended distribution.
- When a Product or part is replaced, the replacement item becomes your property and the returned product or part becomes the property of AVerMedia or its distributor.
Usage of Personal Contact Information
If you obtain service under this warranty, you agree to and fully authorize AVerMedia or its distributor to store, use, and handle information related to the warranty service, as well as your personal contact information, including but not limited to your name, phone number, address, and email. AVerMedia or its distributor requires this information to perform the necessary service set forth by this warranty. For warranty service and outcome satisfaction, AVerMedia reserves the right to contact you in order to understand the problems that occur during usage of the product; the company may also notify you about any product recalls or safety issues. To achieve satisfactory results, you agree to fully license AVerMedia to transfer his/her customer information to the country or region of the original purchase. This allows AVerMedia to undertake the scope of product or parts maintenance of the warranty service. AVerMedia may also disclose this information under certain legal requirements.
How to provide Warranty Service
Services may vary by geographic region, please contact AVerMedia or its distributor for a response regarding the appropriate services for your Product. The Warranty Service may be provided by the following types.
a. Customer Delivery Service
According to “Customer Delivery Service,” the customer must pay for their own product to be delivered to a designated service center for repair or replacement, and all risks are borne by the customer. The
customer may retrieve the product after the repair or replacement process has been completed. Should the customer fail to collect the product, the company will handle the product as it sees fit without incurring any liability.
b. Mail-In Service
According to “Mail-In Service,” customers will be required to pay for their own products to be mailed to a designated service center for repair or replacement, and all the risks are borne by the customer. After the product has been repaired or replaced, AVerMedia will send the product back to the customer at their own expense and bear all risks, except where otherwise specified by service dealers.
c. Customers' Two-Way Mail Service
According to “Customers’ Two-Way Mail Service,” customers will be required to pay for their own product to be delivered to a designated service center for repair or replacement, and all the risks are borne by the customer. After the product has been repaired or replaced, the product will be returned to the customer, for which all delivery and other risks are borne by the customer. If the customer fails to arrange for the return transport of the product, the company will handle the product as it sees fit without incurring any liability.
No On-Site Service
AVerMedia and its distributor do not provide on-site service, including but not limited to, installation, maintenance, instructing, troubleshooting problems, the usage of the product or the warranty service. In the event that calling, updating software, or other means fail to resolve the issue, AVerMedia and its distributor will arrange warranty service as specified under “Scope of Warranty Services (a).”
Limitation of Liability
AVerMedia accepts responsibility for the damage of loss of products only under the following circumstances: when the company has a product in store or when a product is being transported by the company.
If any information contained in the product (including confidential information, proprietary information, or personal information) is missing or revealed, AVerMedia or its service dealers are without responsibility.
Under any circumstances, if the solutions proposed under the warranty have not fulfilled its basic purpose, AVerMedia, its subsidiaries, suppliers, and dealers do not assume any burden of liability: (a)
loss, damage, or disclosure of client data; (b) special damages, incidental damages, punitive damages, or consequential damages, including but not limited to loss of profits, loss of business revenue, goodwill, or anticipated damage to balance loss, and even if the possibility has been raised, whether the claim is based on contract, warranty, negligence, strict liability, or other liability. Under the circumstances that AVerMedia, its subsidiaries, suppliers and distributors assumes responsibility for damages caused by any reason, the amount of its total liability shall not exceed the actual payable of direct damages, nor shall it exceed the amount paid by the customer for the product.
Prejudice to the foregoing restriction does not apply to personal injury or death caused by injury, nor does it apply to the compensation required by law for AVerMedia to assume with regards to real or tangible property.
Where the law does not exclude or limit incidental or consequential damages, the above limitations or exclusions may not apply to the customer.
Other Rights
This warranty provides the customer with specific legal rights. The customer may be subject to jurisdiction in accordance with the relevant laws in his or her district, but the customer is subject to the laws and regulations that govern the country or state where the product was originally purchased. This warranty does not affect any legal rights, including the limitations or exclusions laid out by this contract; instead, the control of the consumer goods sold is governed by the relevant laws or regulations born of consumer rights.
Table of Contents
Package Contents 2
Making Connections 4
Installation....6
English....6
Français 8
Español....10
Português 12
Italiano 15
Deutsch....17
Русский 20
Srpski....22
ภาษาไทย 24
Polski 26
Magyar 29
Česky 31
Remote Control 34
1 Package Contents
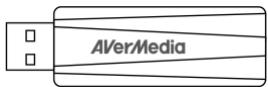
text_image
AVerMediaA
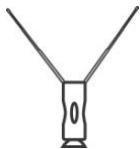
natural_image
Simple line drawing of a Y-shaped object with two arms and a central rectangular block (no text or symbols)C
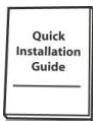
text_image
Quick Installation Guide __________________B
natural_image
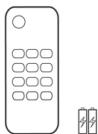
Simple line drawing of a mobile phone with two batteries (no text or symbols)D
| A | B | |
| English | TD310 | Quick Installation Guide |
| Français | Guide d'installation rapide | |
| Español | Guía de instalación rápida | |
| Português | Guía de instalação rápida | |
| Italiano | TD310 | Guida di installazione rapida |
| Deutsch | Schnellinstallations-anleitung | |
| Русский | Краткое руководство по установке | |
| Srpski | Kratki vodič za instalaciju | |
| ภาษาไทย | คู่มือการติดตั้งฉบับย่อ | |
| Polski | Podręcznik szybkiego startu | |
| Magyar | Telepítési gyorsútmutató | |
| Česky | Stručný průvodce instalací |
| C | D | |
| English | High Gain Antenna | Remote Control (Batteries included) |
| Français | Antenne à haut gain | Télécommande (Piles incluses) |
| Español | Antena de alta ganancia | Mando a Distancia (Pilas incluidas) |
| Português | Antena de alto alcance | Controle remoto (Pilhas incluídas) |
| Italiano | Antenna a elevato guadagno | Telecomando (Batterie incluse) |
| Deutsch | Hochempfindliche Antenne | Fernbedienung (einschließlich Batterien) |
| Русский | Портативная антенна | Пульт ДУ (батареи в комплекте) |
| Srpski | Antena s jakim prijemom | Daljinski upravljač (uključene baterije) |
| ภาษาไทย | เสาอากาศ가ลังแรงสูง | รีโมทดสอบโทรศัม(รวมแบตเตอรี่) |
| Polski | Antena o dužym zysku | Pilot zdalnego sterowania (włącznie z bateriami) |
| Magyar | Magas érzékenységű Antenna | Távirányít (elemekkel együtt) |
| Česky | Vysokozisková anténa | Dálkový ovladač (baterie jsou součástí balení) |
2 Making Connections

flowchart
graph TD
    A["Antenna"] -->|5| B["USB"]
    C["Wireless Cable"] -->|6| D["USB"]
    B --> E["4 Ethernet"]
    D --> E
    E --> F["USB"]
    F --> G["Computer 1"]
    F --> H["Computer 2"]
| 1 | 2 | 3 | |
| English | PC | Notebook | USB Port |
| Français | Ordinateur de bureau | Ordinateur portable | Port USB |
| Español | Ordenador personal | Ordenador Portátil | Puerto USB |
| Português | PC | Portátil | Porto USB |
| Italiano | PC | Notebook | Porta USB |
| Deutsch | PC | Notebook | USB-Anschluß |
| Русский | ПК | Ноутбук | Порт USB |
| Srpski | Računar | Prenosni računar | USB priključak |
| ภาษาไทย | พืชี | โน้ดนับค | ช่องลัญญาณ USB |
| Polski | komputer | Komputer | Port USB |
| Magyar | számítógépet | Notebook | USB Port |
| Česky | Stolní počítač | Počítač | USB port |
| 4 | 5 | 6 | |
| English | OR | High Gain Antenna | TV Antenna (75Ω) |
| Français | OU | Antenne à haut gain | Antenne TV |
| Español | O | Antena de alta ganancia | Antena de TV |
| Português | OU | Antena de alto alcance | Antena de TV |
| Italiano | O | Antenna a elevato guadagno | Antenna TV |
| Deutsch | Oder | Hochempfindliche Antenne | TV Antenne |
| Русский | ИЛИ | Портативная антенна | TB антенна |
| Srpski | ILI | Antena s jakim prijemom | TV antena |
| ภาษาไทย | หรือ | เสาอากาศภาลังแรงสูง | เสาโทรศัศน์ |
| Polski | LUB | Antena o dužym zysku | Antena telewizyjna |
| Magyar | OR | Magas érzékenységű Antenna | TV Antenna |
| Česky | Nebo | Vysokozisková anténa | TV anténa |
3 Installation
English
Installing Drivers and the TV Software Utility
After the device is installed properly, turn on the computer. The system will automatically detect the new device. Simply cancel the wizard, download and install the driver and TV software from our official website at http://q.avermedia.com/avertv-support.
Installing Drivers and the Application in Windows ^® 7 / Windows ^® 8.1
- Launch software package you downloaded from AVerMedia Official website.
- If the "User Account Control" dialog box appears, select Allow/Yes to continue the process.
- Click Next to continue the installation process.
- Read the license agreement and if you agree to the terms, select "I accept the terms of the license agreement" and then click Next.
-
Choose Complete to install all the necessary software, including AVerTV 3D, and Driver. Then click Next. For advanced users, it is recommended that you choose Custom to select the software you want. To choose a different destination folder, click Browse.
-
Then click Finish to complete the installation.

- The product does not come with a software DVD decoder. If users can playback DVD or MPEG-2 video files on the computer, there is no need to install a DVD decoder.
However, if the Decoded Error message appears on the screen, please install the compatible DVD decoder via the Windows ^® XP Media Center Edition Partners site.
2. The 3DTV functions in AVerTV 3D are not supported under the Windows XP operating system.
Activating the AVerTV 3D Application
Windows ^® 7
To run the application from the Programs menu, choose Start → Programs / All Programs → AVerMedia → AVerTV 3D → AVerTV 3D.
Windows ^® 8.1
Click on AVerTV 3D on the Metro Start screen or double click on AVerTV 3D on the Desktop.
Uninstalling Application and Drivers
Windows ^® 7
- To remove the installed TV software utility from the system, simply choose Start → All Programs → AVerMedia → AVerTV 3D → Uninstaller.
- When the "User Account Control" dialog box appears, select Allow/Yes.
- Select Remove All → Next → OK → Finish.
Windows ^® 8.1
- Right click on AVerTV 3D on the Metro Start screen, and click on Uninstall.
- In Programs and Features, select AVerTV 3D → Uninstall/Change.
- Select Remove All → Next → OK → Finish.
Français
Uninstalling Application and Drivers
Windows ^® 7
Installing Drivers and the TV Software Utility
1 Switch between available signal sources.
2 Turn on/off the application
3 Display TV in full screen.
4 Switch between available audio modes.
5 Switch to PVR mode and record the current program or video into your hard drive.
6 Rewind the playback.
7 Advance the playback.
8 End the playback or recording.
End the TimeShift mode and return to real-time TV or Radio mode.
9 Play the last recorded or played file. / Freeze the playback.
10 Display information.
11 Launch the Electronic Program Guide.
12 Volume up/down.
13 Go up or down to the next active channel.
14 Select a TV channel.
Under the 16-Channel preview mode, use 2 4 6 8 to highlight the intended channel.
15 Go to the previously selected channel.
16 Turn on/off the sound.
| Français | Español | |
| 1 | Commutez entre les sources de signal disponibles. | Cambia entre las fuentes de señal disponibles. |
| 2 | Activer/Désactiver l’application | Activa/Desactiva la aplicación. |
| 3 | Affichage de la télévision ou de la vidéo en plein écran. | Visualización de la televisión o el video a pantalla completa. |
| 4 | Basculer entre les langues disponibles. | Cambia entre las fuentes de señal disponibles. |
| 5 | Basculer en mode PVR et enregistrer le programme ou la vidéo courante sur votre disque dur. | Altema al modo PVR y graba el programa o el vídeo actual en el disco duro. |
| 6 | Retour de la lecture. | Retrocede la reproducción. |
| 7 | Avancer la lecture. | Avanzar la reproducción. |
| 8 | Terminer la lecture ou l’enregistrement.Terminer le mode Déplacement Temporel et retourner en mode Télévision ou Radio en temps réel. | Terminar la reproducción o la grabación.Finalizar el modo Time Shift y volver al modo TV o radio en tiempo real. |
| 9 | Lecture du dernier fichier enregistré ou lu. / Figer la lecture. | Reproduce el último archivo grabado o reproducido. / Congela la reproducción. |
| 10 | Afficher les informations. | Display information. |
| 11 | Lancer le Guide électronique des Programmes. | Va al canal activo anterior o siguiente. |
| 12 | Augmenter/baisser le volume. | Sube/baja el volumen. |
| 13 | Monter ou descendre vers la chaîne active suivante. | Avanza o retrocede un canal. |
| 14 | Sélectionner une chaîne de télévision Sous le mode d’aperçu 16 chaînes, utilisez 2 4 6 8 pour mettre la chaîne souhaitée en surbrillance | Seleccionar un canal de TV.Bajo el modo de vista previa de 16 canales, use 2 4 6 8 para resaltar el canal deseado |
| 15 | Aller à la chaîne précédemment Sélectionnée. | Se desplaza al elemento anterior de la lista de reproducción. |
| 16 | Activer/Désactiver le son.Português | Apaga/enciende el sonido.Italiano |
| 1 | Mudar entre fontes de sinais disponíveis. | Cambia tra le origini del segnale disponibili. |
| 2 | Ligar/desligar a aplicação. | Attivare/disattivare il suono. |
| 3 | Exibir TV ou vídeo em tela inteira. | Visualizza le informazioni. |
| 4 | Alternar entre os línguas disponíveis. | Cambia tra le modalità audio disponibili. |
| 5 | Alterna para o modo PVR e grava o programa ou vídeo atual em seu disco rígido. | Attiva la modalità PVR per registrare il programma o il video corrente nell'unità disco rigido. |
| 6 | Retrocede a reprodução. | Riavvolge la riproduzione. |
| 7 | Avança a reprodução. | Va avanti ad intervalli. |
| 8 | Para a reprodução ou a gravação. Para o modo TimeShift e retorna ao modo TV ou rádio em tempo real. | Termina la riproduzione o la registrazione. Disattiva la modalità Differita e toma alla modalità Radio o TV in tempo reale. |
| 9 | Reproduz o último arquivo reproduzido ou gravado. / Congela a reprodução. | Riproduce l'ultimo file riprodotto o registrato. / Sospende la riproduzione. |
| 10 | Exibe informações. | Visualizza le informazioni. |
| 11 | Inicia o Guia Eletrônico de Programação.(só DVB-T) | Avvia la Guida ai programmi elettronica. (solo DVB-T) |
| 12 | Subir volume / Descer volume. | Volume su / Volume giù |
| 13 | Sobe ou desce para o próximo canal ativo. | Passa al canale attivo successivo verso l'alto o verso il basso |
| 14 | Seleccionar um canal de TV. No modo de visualização de 16 canais, use as teclas 2 4 6 8 para realizar o canal desejado. | Seleziona un canale TV In modalità di anteprima a 16 canali, utilizzare 2 4 6 8 per evidenziare il canale desiderato. |
| 15 | Ir ao canal selecionado anteriormente. | Va al canale precedentemente selezionato. |
| 16 | Desligar/ligar o som.Deutsch | Attivare/disattivare il suono.Русский |
| 1 | Umschalten zwischen verschiedenen Signalquellen. | Переключение между доступными источниками сигнала. |
| 2 | Anwendung ein-/ausschalten. | Включение/выключение приложения. |
| 3 | Zeigen Sie TV- oder Video-Vollbildschirm an. | Переход в полноэкранный режим. |
| 4 | Wechseln Sie zwischen den verfügbaren Sprachen. | Переключение между доступными аудио режимами. |
| 5 | Wechseln Sie zum PVR-Modus und nehmen Sie das aktuelle Programm oder Video auf Ihre Festplatte auf. | Активация режима записи на жёсткий диск. |
| 6 | Spulen Sie die Wiedergabe zurück. | Перемотка назад при воспроизведении. |
| 7 | Spulen Sie die Wiedergabe vor. | Перемотка вперед при воспроизведении. |
| 8 | Beenden Sie die Wiedergabe oder Aufnahme.Beenden Sie den TimeShift-Modus und kehren Sie zum Echtzeit-TV- oder Radio-Modus zurück. | Остановка воспроизведения или записи.Переход из режима TimeShift в режим ТВ или радио в реальном времени. |
| 9 | Geben Sie die zuletzt aufgenommene oder wiedergegebene Datei wieder. / Halten Sie die Wiedergabe an | Воспроизведение последнего записанного или проигранного файла. / Приостановка воспроизведения. |
| 10 | Zeigt die Informationen an. | Отображение информации о текущем канале. |
| 11 | Starten Sie den elektronischen Programmführer. | Запуск электронной программы передач (EPG). |
| 12 | Lauter / Leiser. | Регулировка промкости. |
| 13 | Gehen Sie zum nächsten aktiven Sender herauf oder herunter. | Переключение на следующий/предыдущий канал. |
| 14 | Wählen Sie einen TV-Sender.Während Sie sich im 16-Sender-orschaumodus befinden, verwenden Sie 2 4 6 8, um den gewünschten Sender auszuwählen. | Выбор телевизионного канала.В режиме «многоканального просмотра» используйте стрелки 2, 4, 6, 8 для выделения нужного канала. |
| 15 | Gehen Sie zum zuvor ausgewählten Sender zurück. | Переход к предыдущему выбранному каналу. |
| 16 | Schalten Sie den Ton ein/aus.Srpski | Включение/выключение звука.ภาษาไทย |
| 1 | Prebacujte između dostupnih izvora signala. | สลับระหว่างต้นทางลัญญาณที่นํามาใช่ได้. |
| 2 | Uključite/isključite aplikaciju. | เปิด/ปิดแอปพลิเดชัน. |
| 3 | TV se prikazuje preko celog ekrana. | แสดงที่วีแบบเด็มหน้าจอ. |
| 4 | Prebacujte između dostupnih režima zvuka. | สลับระหว่างโหมดเสียงที่นํามาใช่ได้. |
| 5 | Prebacite se na PVR način rada i snimajte trenutni program ili video na svoj hard disk. | สลับไปที่โหมด PVRและบันที่กรายการหรือวิติโอปัจจุบันลงในฮาร์ดไตรฟของคุณ. |
| 6 | Rewind reprodukcije. | ย้อนกลับเล่น. |
| 7 | Advance reprodukcije. | เร่งภาพให้เร็วขึ้น.. |
| 8 | Kraj reprodukcije ili snimanja.Zaustavite TimeShift režim i vratite se na TV u realnom vremenu ili radio režim. | ยุติการเปิดเล่นหรือการบันทึก.ยุติโหมด TimeShiftและกลับไปที่โหมดที่วีหรือวิทยุแบบ เรียลไ therm์.. |
| 9 | Reprodukcija zadnje snimljene ili reproducirane datoteke. / Zaustavljanje reprodukcije. | เล่นไฟล์ที่เปิดหรือที่บันทึกไว้ครั้งล่าสุด /หยุดตรงที่เปิดเล่นไว้ ชั่วดาว. |
| 10 | Informacije o načinu prikazivanja. | ข้อมูลจอแสดงผล. |
| 11 | Pokretanje elektronskog programskog vodiča. | เรียกใช้คู่มือโปรแกรมอิเล็กทรอนิกส์. |
| 12 | Pojačavanje/smanjivanje zvuka. | ปรับเสียงขึ้น/ลง. |
| 13 | Prebacivanje gore ili dole do sledećeg aktivnog kanala. | เลื่อนขึ้นหรือลงไปยังของรายการดัดไปที่ออกอากาศ. |
| 14 | Izaberite TV kanal.Pod 16-kanalnim režimom reprodukcije,koristite 2 4 6 8 da označite kanal koji hoćete. | เลือกช่องโทรทัศน์.จากโหมดแสดงด้วย่างช่องโทรทัศน์ 16 ช่องให้ใช้เลข 2 4 6 8เพื่อไส่ไลห์ช่องโทรทัศน์ที่ต้องการ. |
| 15 | Idite na prethodno izabrani kanal. | ไปที่ช่องรายการที่เลือกไว้ก่อนหน้านี้. |
| 16 | Uključite/isključite zvuk.Polski | เปิด/ปิดเสียง.Magyar |
| 1 | Przełączanie pomiędzy dostępnymi źródłami sygnału. | Az alkalmazás be-/kikapcsolása. |
| 2 | Włącz/wyłącz aplikację. | Az alkalmazás be-/kikapcsolása. |
| 3 | Wyświetl TV na pełnym ekranie. | A TV teljes képernyős megjelenítése. |
| 4 | Przełącza między dostępnymi trybami dźwięku. | A rendelkezésre álló nyelvek közötti váltás. |
| 5 | Przełącza do trybu cyfrowego magnetowidu i nagrywa bieżący program lub sygnał wideo na dysku twardym. | Váltás PVR módra és az aktuális tévé-vagy videoműsor felvétele a merevlemezes meghajtóra. |
| 6 | Przewija do tyłu. | A lejátszás visszacsévélése. |
| 7 | Przewija do przodu. | Gyorskeresés előre lejátszás közben |
| 8 | Zatrzymuje odtwarzanie lub nagrywanie.Zakończ tryb TimeShift (Przełączanie czasu) i powróć do trybu telewizji lub radia w czasie rzeczywistym. | A lejátszás vagy felvétel leállítása.Fejezzük be a TimeShift (időeltolásos)módot és térjünk vissza a real-time(valós idős) TV vagy Rádió módra. |
| 9 | Odtwarzą plik, który został nagrany lub był odtwarzany jako ostatni./ Pauzuje odtwarzanie. | Az utoljára felvett vagy lejátszott fájl lejátszása./ A lejátszás megállítása. |
| 10 | Wyświetła informacje. | Információkat jelenít meg. |
| 11 | Uruchamianie funkcji Electronic Program Guide (Elektroniczny przewodnik programowy) (wyłącznie DVB-T). | Megnyitja az Electronic Program Guide-ot(Elektronikus műsorfüzetet). (csak DVB-Trendszer) |
| 12 | Zwiększenie/zmniejszenie głośności. | A hangerő növelése/csökkentése. |
| 13 | Przechodzi do następnego lub poprzedniego aktywnego kanału. | Lépegetés fel/le az aktív csatomákon. |
| 14 | Wybieranie kanału TV.W trybie podglądu 16 kanałów można użyć 24 6 8 do podświetlenia wybranego kanału. | TV csatorna kiválasztása.16 csatornás előnézet üzemmódban a 2 4 6 8 gombokkal lehet kijelölni a kívánt csatornát. |
| 15 | Powrót do wcześniej wybranego kanału. | Visszalépés az előző csatomára. |
| 16 | Włącza i wyłącza dźwięk. | A hangot bekapcsolja/elnémítja. |
Battery Safety Information
• Store the batteries in a cool dry place.
- Do not dispose of used batteries in domestic waste. Dispose of batteries at special collection points or return to point of sale if applies.
- Remove the batteries during long periods of non-use. Always remove exhausted batteries from the remote control. Battery leakage and corrosion can damage this remote control, dispose of batteries safely.
• Do not mix old and new batteries.
- Do not mix different types of batteries: alkaline, standard (carbon-zinc) or rechargeable (nickel-cadmium).
- Do not dispose of batteries in a fire. The batteries may explode or leak.
• Never short circuit the battery terminals.

Français
European Community Compliance Statement

Class B
This product is herewith confirmed to comply with the requirements set out in the Council Directives on the approximation of the laws of the Member States relating to Electromagnetic Compatibility Directive (EMC) 2014 / 30 / EU.

EMC Directive : TR CU 020/2011

The mark of crossed-out wheeled bin indicates that this product must not be disposed of with your other household waste. Instead, you need to dispose of the waste equipment by handing it over to a designated collection point for the recycling of waste electrical and electronic equipment. For more information about where to drop off your waste equipment for recycling, please contact your household waste disposal service or the shop where you purchased the product.
Product name: TV Dongle