DAP-3410 - Wireless Access Point D-LINK - Free user manual and instructions
Find the device manual for free DAP-3410 D-LINK in PDF.
| Product Type | Outdoor Wireless Access Point |
| Brand | D-Link |
| Model | DAP-3410 |
| Frequency Band | 5 GHz (Single Band) |
| Wireless Standard | Wi-Fi N (802.11n) |
| Dimensions (approx.) | 200 x 160 x 50 mm |
| Weight (approx.) | 400 g |
| Power Supply | 48 V DC via included PoE injector (0.5 A) |
| Protection Rating | IPX6 (Water and dust proof) |
| Ports | 1 LAN port (PoE) + 1 LAN 2 port (with 7 W max PoE output) |
| Main Features | Outdoor WiFi N access point, wall or pole mount, airPlay support, management via web interface (default IP 192.168.0.50) |
| Wireless Security | WPA/WPA2, WEP |
| Minimum Configuration | Windows, Mac OS or Linux, modern browser |
| Box Contents | Access point, PoE injector, power adapter, wall and pole mount, plastic ties |
| Grounding | Recommended (16-18 AWG wire not included) |
| Maintenance and Cleaning | Clean with a soft dry cloth, do not use liquids |
| Repairability | No spare parts listed; contact D-Link support for any repairs |
| Operating Temperature | Not specified, but designed for outdoor use |
| Warranty | See manufacturer’s conditions |
| Technical Support | Site: http://dlink.com, Tel: 01 76 54 84 17 (Mon-Fri 9am-7pm) |
Frequently Asked Questions - DAP-3410 D-LINK
User questions about DAP-3410 D-LINK
0 question about this device. Answer the ones you know or ask your own.
Ask a new question about this device
Download the instructions for your Wireless Access Point in PDF format for free! Find your manual DAP-3410 - D-LINK and take your electronic device back in hand. On this page are published all the documents necessary for the use of your device. DAP-3410 by D-LINK.
USER MANUAL DAP-3410 D-LINK
Quick Installation Guide Wireless N Exterior Access Point
This document will guide you through the basic installation process for your new D-Link Unified Wireless Access Point.
DAP-3310/DAP-3410
natural_image
Simple line drawing of a mechanical component with cylindrical ends and a curved top (no text or symbols)Quick Installation Guide
This installation guide provides basic instructions for installing the DAP-3310/DAP-3410 ^1 Wireless N Exterior Access Point ^2 on your network. For additional information about how to use the Access Point, please see the datasheet and user manual available on the D-Link support website.
^1 DAP-3310 is a 2.4 GHz Single Band AP; DAP-3410 is a 5 GHz Single Band AP.
^2 The DAP-3310 and DAP-3410 support the IPX6 water/dustproof standard. It is recommended that you place the AP under a roof, shelter, or weatherproof container in severe weather environments.
Minimum System Requirements
- Computer with Windows, Mac OS, or Linux-based operating system, and an Ethernet adapter installed
- Internet Explorer 7, Mozilla Firefox 12.0, Safari 4.0, or Chrome 20.0 or newer
Package Contents
- DAP-3310/DAP-3410 Wireless N Exterior Access Point
- PoE Injector
- Power Adapter (48 V/0.5 A)
- Pole Mount (Non-detachable)
- Wall Mount
- Two Plastic Mounting Ties
If any of the above items are missing, please contact your reseller.
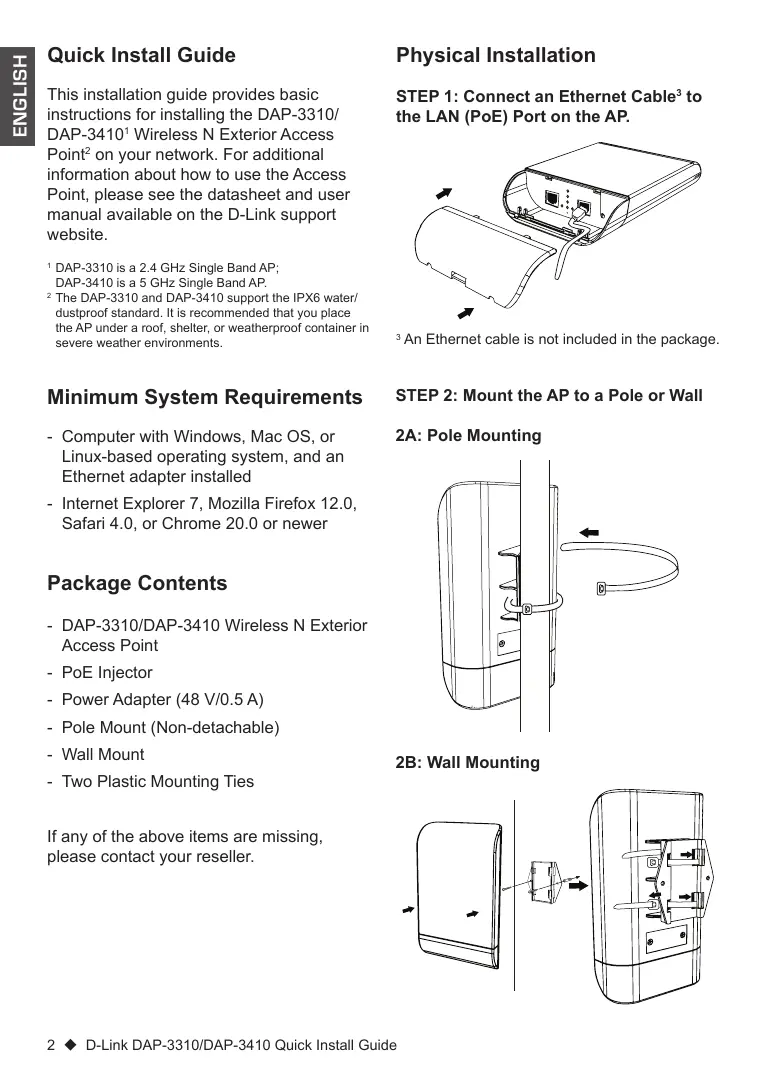
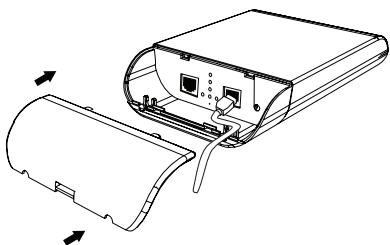
Physical Installation
STEP 1: Connect an Ethernet Cable ^3 to the LAN (PoE) Port on the AP.
natural_image
Technical line drawing of a device casing with internal components and directional arrows indicating movement (no text or symbols)^3 An Ethernet cable is not included in the package.
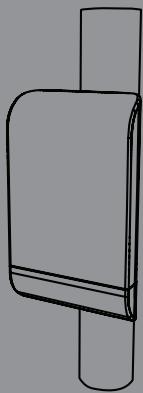
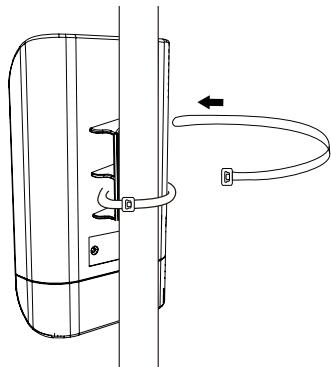
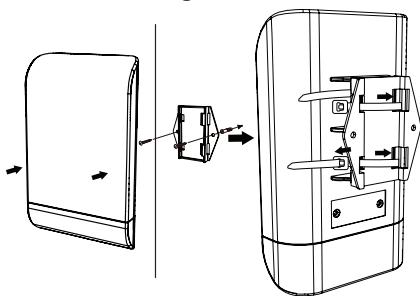
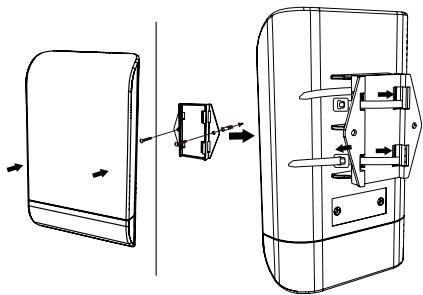
STEP 2: Mount the AP to a Pole or Wall
2A: Pole Mounting
natural_image
Technical line drawing of a door handle assembly with a curved pipe and directional arrow (no text or symbols)2B: Wall Mounting

natural_image
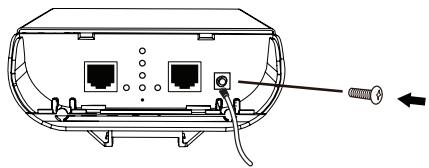
Technical line drawing of a device with an arrow indicating assembly or transformation (no text or symbols present)STEP 3: Connect Grounding Wire
A grounding wire ^4 is recommended to protect your device from lightning strikes and the buildup of static electricity.
natural_image
Diagram of a device rear panel with ports and cable, showing internal components and a screw inserted (no text or labels)^4 A grounding wire is not included in the package. It is suggested that you use 16 to 18 AWG grounding wire.
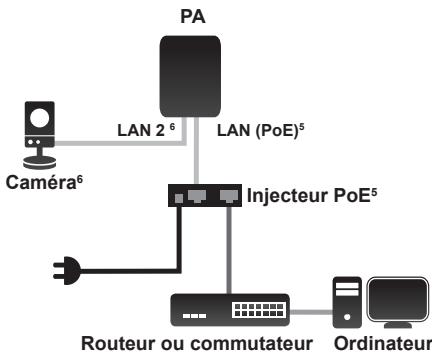
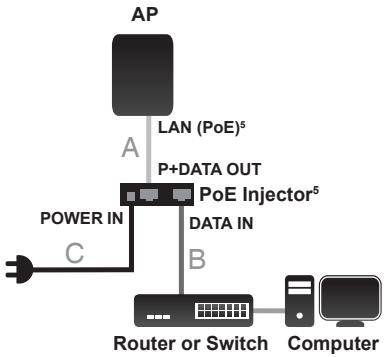
STEP 4: Connect the AP to Your Network
flowchart
graph TD
    A["AP"] -->|LAN (PoE)⁵| B["P+DATA OUT"]
    B --> C["PoE Injector⁵"]
    C --> D["Data IN"]
    D --> E["Router or Switch"]
    E --> F["Computer"]
    G["POWER IN"] --> H["C"]
    H --> B
^5 This product uses a proprietary PoE design and can only be used with the included PoE injector.
A. Connect the Ethernet cable that is connected to the AP from STEP 1 to the P+DATA OUT port on the PoE Injector.
B. Connect an Ethernet cable from a router, switch, or PC to the DATA IN port on the PoE Injector.
C. Attach the power adapter to the connector labeled POWER IN on the PoE Injector, and plug it into an electrical outlet.
Configuration
If you are configuring the AP locally, connect a PC to the PoE Injector DATA IN port using an Ethernet cable.
A. Assign a static IP address to your PC that is in the same network segment as the device. As the default IP address of this unit is 192.168.0.50, you may choose any address from 192.168.0.1 to 192.168.0.254, except 192.168.0.50.
B. Open a web browser and go to http://192.168.0.50. Enter admin as your username and leave the password blank to log in to the web UI. Now you can configure the AP through the web UI.
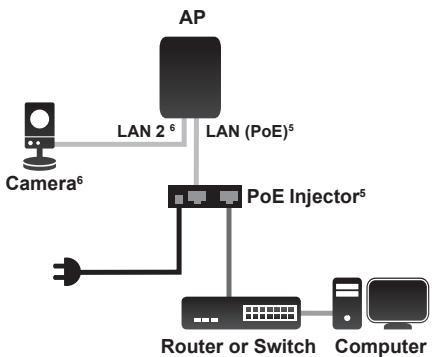
PoE Passthrough
flowchart
graph TD
    A["Camera⁶"] -->|LAN 2⁶| B["AP"]
    B -->|LAN (PoE)⁵| C["PoE Injector⁵"]
    C --> D["Router or Switch"]
    D --> E["Computer"]
^6 The LAN 2 port can be connected to D-Link cameras that require up to 7 watts, such as the DCS-3716, DCS-6113, and DCS-7110. It can also be connected to a router or a switch.
A. Power on the AP through the PoE kit (as in STEP 4) and connect the camera to the LAN 2 port.
B. Log in to the web UI and enable PoE Passthrough in Maintenance to power on the camera. ^4
Technical Support
United Kingdom (Mon-Fri),
Website: http://www.dlink.com
Home Wireless/Broadband 0871 873 3000
(9.00am-06.00pm, Sat 10.00am-02.00pm)
Managed, Smart, & Wireless Switches, or
Firewalls 0871 873 0909 (09.00am- 05.30pm)
(BT 10ppm, other carriers may vary.)
Ireland (Mon-Fri), Website: http://www.dlink.com
All Products 1890 886 899 (09.00am-06.00pm,
Sat 10.00am-02.00pm)
Phone rates: €0.05ppm peak, €0.045ppm off peak times
natural_image
Technical line drawing of a device casing with internal components and directional arrows indicating movement (no text or symbols)natural_image
Technical line drawing of a door handle assembly with a curved pipe and directional arrow (no text or symbols)2B: Wandmontage
natural_image
Technical line drawing of a device with an open lid and internal components, showing assembly or assembly steps (no text or symbols)natural_image
Diagram of a device rear panel with ports and connectors, showing a screw inserted into the socket (no text or labels)natural_image
Technical line drawing of a device casing with internal components and external connectors (no text or symbols)natural_image
Technical line drawing of a mechanical component with a curved arm and directional arrow (no text or symbols)2B : Montage mural
natural_image
Technical line drawing of a door panel and its internal mechanism (no text or symbols)natural_image
Diagram of a device rear panel with ports and cables, showing internal components and a screw inserted (no text or labels)Intercommunication PoE