USER MANUAL ESSENTIAL YY8135FD KRUPS
1
2
3
4
5
![KRUPS [00] 50. U°](/content/2024/11/219900/images/1c7c05ffff307ec7058814fa3484c5ebf9ae006509f821f30d3b731d531c3121.jpg)
6
7
8
9
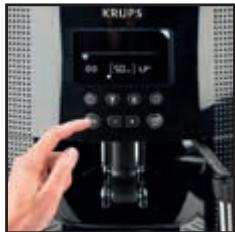
10
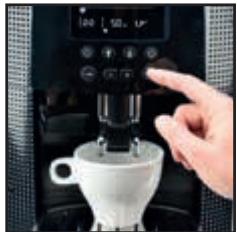
11
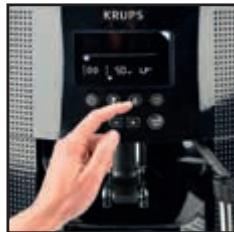
12
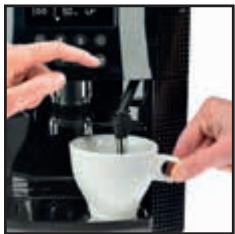
13
14

15
16
17
18
19
20
21
22
23
24
25
26
27
28
29
30
31
32
33
34
Dear Customer,
Congratulations! You are now the proud owner of an Espresso Automatic EA815-EA816-EA817 Series. With your machine, you can make a wide range of drinks: espressos, coffees or ristrettos, completely automatically. You can also make milk-based drinks such as cappuccinos. It has been designed so that you can enjoy restaurant quality coffee at home, whatever the time of the day and every day of the week. You will appreciate its ease-of-use and the quality of your cup of coffee. You can set the amount, strength and temperature of your drinks.
Thanks to its Compact Thermoblock System with built-in percolation chamber, its 15 bar pump, and because it uses coffee beans which have been freshly ground just before making the coffee, your machine will give you hot ristrettos, espressos and coffees from the first cup with maximum aroma and a creamy golden-brown froth.
To give the drink maximum flavour, an espresso is traditionally served in a small, flared porcelain cup. For an optimum temperature espresso and a dense creamy froth, we recommend that you pre-heat your cup.
You will probably need to try several types of coffee before you find the one that suits you.
By experimenting with the blend and/or roast, you will eventually arrive at the ideal result.
Espresso coffee has a richer aroma than classic filter coffee. Despite its stronger taste which remains longer on the palate, an espresso contains less caffeine than filter coffee (around 60 to 80 mg per cup compared to 80 to 100 mg per cup) due to its shorter percolation period.
The quality of water used is another determining factor which affects the overall quality of the brewed coffee. You should ideally use water which is fresh from the tap (so that it hasn't had time to stagnate due to air contact), which is cold and which does not smell of chlorine.
The ergonomic, compact LCD display makes the machine easy to use. It will guide you through each step, from preparing your drink to servicing your machine.
We wish you many years of enjoyment with your Krups machine.
The Krups team
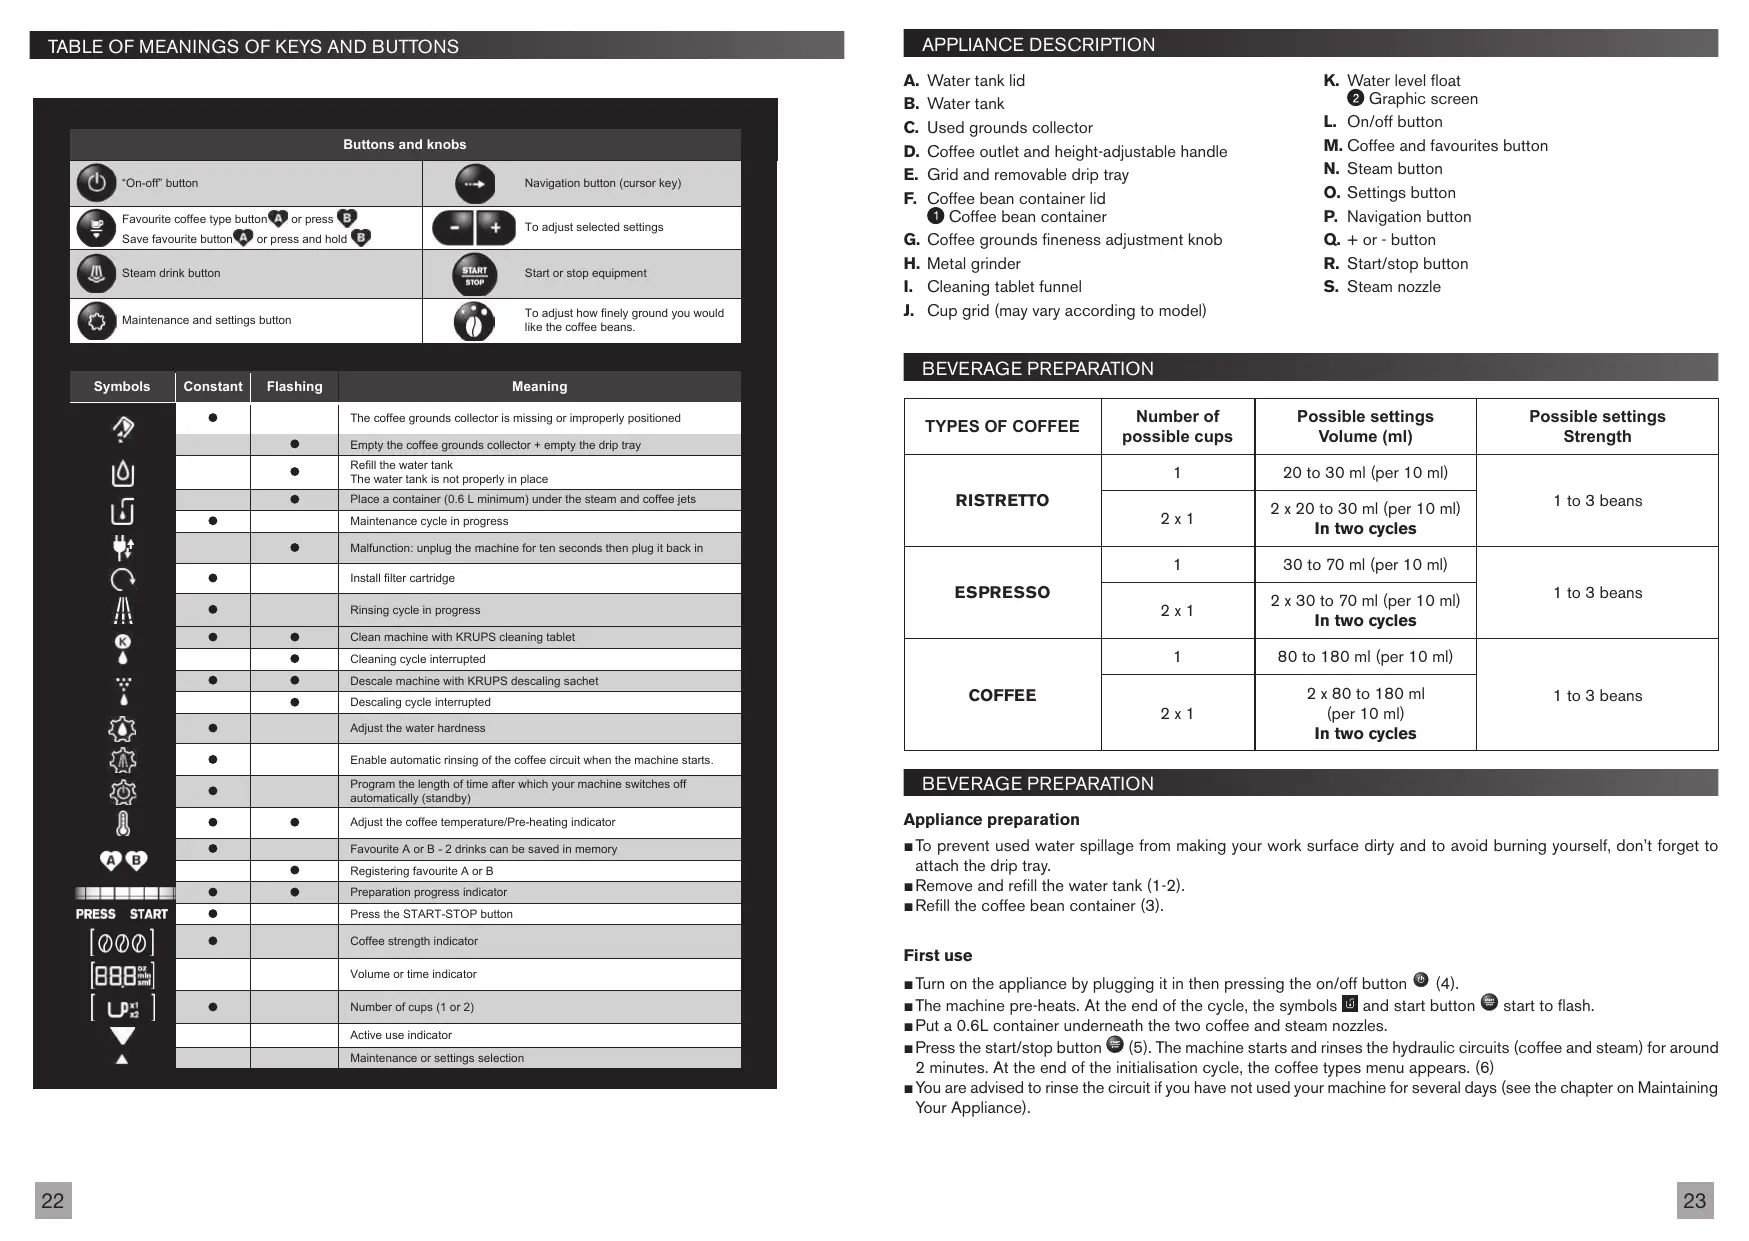
Buttons and knobs
| “On-off” button | Navigation button (cursor key) |
 |  | To adjust selected settings |
 |  | Start or stop equipment |
 |  | To adjust how finely ground you would like the coffee beans. |
| Symbols | Constant | Flashing | Meaning |
| ● | | The coffee grounds collector is missing or improperly positioned |
| ● | Empty the coffee grounds collector + empty the drip tray |
| ● | Refill the water tankThe water tank is not properly in place |
| ● | Place a container (0.6 L minimum) under the steam and coffee jets |
| ● | | Maintenance cycle in progress |
| ● | Malfunction: unplug the machine for ten seconds then plug it back in |
| ● | | Install filter cartridge |
| ● | | Rinsing cycle in progress |
| ● | ● | Clean machine with KRUPS cleaning tablet |
| ● | Cleaning cycle interrupted |
| ● | ● | Descale machine with KRUPS descaling sachet |
| ● | Descaling cycle interrupted |
| ● | | Adjust the water hardness |
| ● | | Enable automatic rinsing of the coffee circuit when the machine starts. |
| ● | | Program the length of time after which your machine switches off automatically (standby) |
| ● | ● | Adjust the coffee temperature/Pre-heating indicator |
| ● | | Favourite A or B - 2 drinks can be saved in memory |
| ● | Registering favourite A or B |
| ● | ● | Preparation progress indicator |
| PRESS START[IMAGE][IMAGE][IMAGE]▲ | ● | | Press the START-STOP button |
| ● | | Coffee strength indicator |
| | Volume or time indicator |
| ● | | Number of cups (1 or 2) |
| | Active use indicator |
| | Maintenance or settings selection |
APPLIANCE DESCRIPTION
A. Water tank lid
B. Water tank
C. Used grounds collector
D. Coffee outlet and height-adjustable handle
E. Grid and removable drip tray
F. Coffee bean container lid ① Coffee bean container
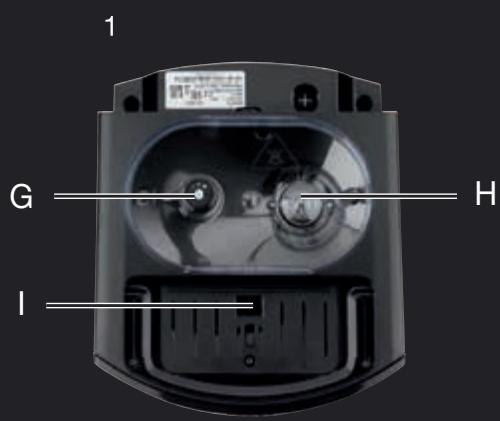
G. Coffee grounds fineness adjustment knob
H. Metal grinder
I. Cleaning tablet funnel
J. Cup grid (may vary according to model)
K. Water level float
② Graphic screen
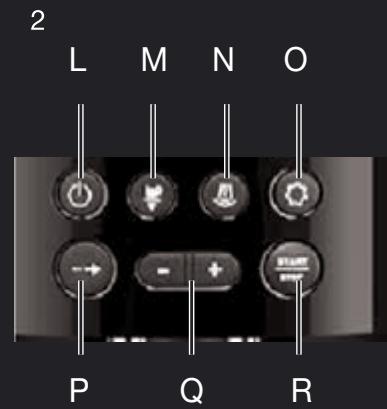
L. On/off button
M. Coffee and favourites button
N. Steam button
- Settings button
P. Navigation button
Q. + or - button
R. Start/stop button
S. Steam nozzle
BEVERAGE PREPARATION
| TYPES OF COFFEE | Number of possible cups | Possible settings Volume (ml) | Possible settings Strength |
| RISTRETTO | 1 | 20 to 30 ml (per 10 ml) | 1 to 3 beans |
| 2 x 1 | 2 x 20 to 30 ml (per 10 ml)In two cycles |
| ESPRESSO | 1 | 30 to 70 ml (per 10 ml) | 1 to 3 beans |
| 2 x 1 | 2 x 30 to 70 ml (per 10 ml)In two cycles |
| COFFEE | 1 | 80 to 180 ml (per 10 ml) | 1 to 3 beans |
| 2 x 1 | 2 x 80 to 180 ml(per 10 ml)In two cycles |
BEVERAGE PREPARATION
Appliance preparation
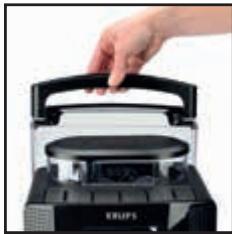
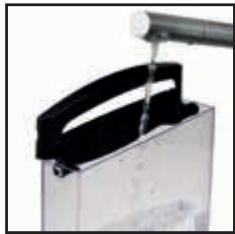
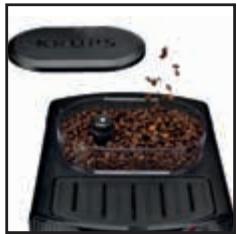
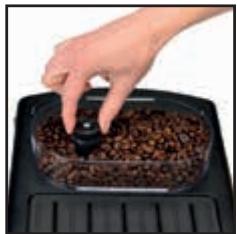
To prevent used water spillage from making your work surface dirty and to avoid burning yourself, don't forget to attach the drip tray. Remove and refill the water tank (1-2). Refill the coffee bean container (3).
First use
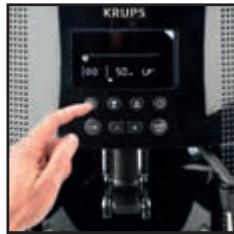
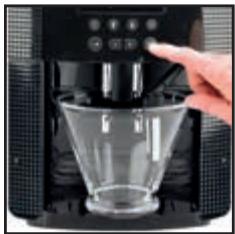
Turn on the appliance by plugging it in then pressing the on/off button (4). The machine pre-heats. At the end of the cycle, the symbols 📋 and start button ⏻ start to flash. Put a 0.6L container underneath the two coffee and steam nozzles. Press the start/stop button (5). The machine starts and rinses the hydraulic circuits (coffee and steam) for around 2 minutes. At the end of the initialisation cycle, the coffee types menu appears. (6) You are advised to rinse the circuit if you have not used your machine for several days (see the chapter on Maintaining Your Appliance).
Preparing the grinder
You can adjust the strength of your coffee by adjusting how finely the coffee beans are ground.
Generally, the finer the coffee is ground, the stronger and creamier the coffee will be, but this also depends on the type of coffee used.
Adjust the fineness of grinding by turning the coffee grounds fineness adjustment knob, which is located in the coffee bean container. It is advised that you do this during grinding, one notch at a time.
After 3 rounds, you will notice a pronounced difference in taste. To the left, the grounds are finer. To the right, the grounds are coarser. (7)
Claris F 088 - Aqua Filter System cartridge (Sold separately)
To optimise the taste of your drinks and the lifespan of your appliance, you are advised to only use a Claris - Aqua Filter System cartridge with your machine (see the chapter OTHER FUNCTIONS – Installing the filter).
Every time you place a Claris-Aqua Filter into the machine you must prime the filter before using the machine by activating the “install filter cartridge” program.
MAKING AN ESPRESSO AND A COFFEE
Note:
The amount of water for making an espresso is between 30 and 70 ml.
The amount of water for making a coffee is between 80 and 180 ml.
Starting preparation (with 1 or 2 cups)
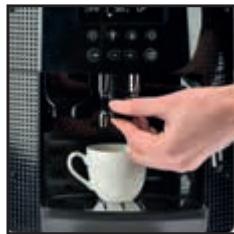
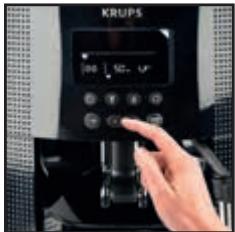
■ Press the on-off button ⏻, and wait for the appliance to finish heating up. ■ The coffee types menu is displayed. The function indicator ▼ is shown above the coffee types button ⚙ (6). ■ Place one or two cups under the coffee jets. You can lower or raise the coffee jets according to the size of your cup (8). Select the coffee strength (shown as coffee beans displayed on the screen in brackets) with the + button to increase or the - button to decrease. 📋 (9). ■ Press the navigation button ⚙️ to set the volume: select the volume of water displayed on the screen between brackets using the + or - buttons ⚙️ (10). ■ Press the navigation button ⚙️ to set the number of cups: select 1 or 2 cups, displayed on the screen between brackets using the + or - buttons 📋. ■ Press the START button (11). ■ You can set the water volume at any time using the + or - buttons. ■ To stop the flow into your cup, press the STOP button. ■ You can also adjust the temperature of your coffee (see the chapter OTHER functions - Settings).
Two cup function
The appliance will automatically carry out 2 full cycles of coffee preparation.
MAKING DRINKS USING STEAM
Steam is used to froth the milk, for example when preparing a cappuccino or caffe latte, and also to heat up liquids. As a higher temperature is required when producing steam than when making an espresso, the appliance will launch an additional pre-heating phase.
Frothing milk
For best results, you are advised to use very fresh, very cold pasteurized or UHT milk, recently opened. Unpasteurized milk does not produce the best results. Check that the steam nozzle is correctly positioned. Pour the milk into a milk jug which has a handle or into a cappuccino cup. Only fill it half way. When the screen displays the drink selection menu, press the steam button (12). The function indicator is located above the steam button. Insert the steam nozzle into the milk.
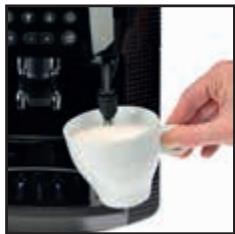
A screen indicates that the appliance is heating up. Once the appliance has finished heating up, you can begin to make steam by pressing START, and following these steps (13): Step 1: holding the milk jug in place, insert the steam nozzle approximately 2 cm into the milk and wait for it to start frothing. Step 2: raise the container slightly (approximately 1 cm). Do not completely submerge the metal tube. Step 3: gradually lower the container as the froth accumulates. (14)
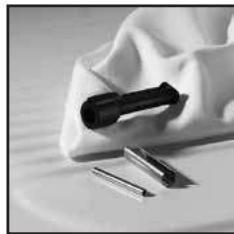
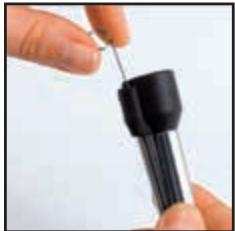
When you have frothed the milk enough, press the STOP button to stop the cycle. Warning: the cycle does not stop immediately. To remove any milk traces from the steam nozzle, place a container under the nozzle and start the steam function again (approximately 10 seconds). The steam nozzle is removable in order to allow for deep cleaning. Wash it with water and a little non-abrasive detergent using a brush. Rinse and dry (15-16). Before replacing, make sure that the air holes are not clogged with milk residue. Unclog the holes with the needle supplied with your appliance if necessary (17). To stop the steam, press the STOP button
Steam can be produced for a maximum of 2 minutes per cycle.
Auto-cappuccino XS 6000 set (sold separately)
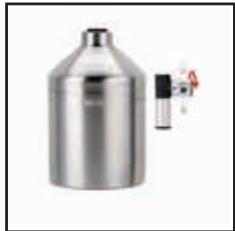
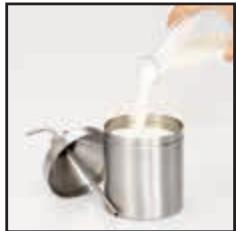
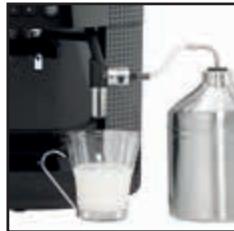
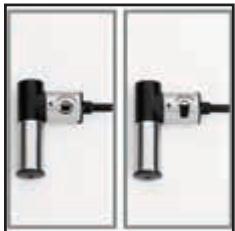
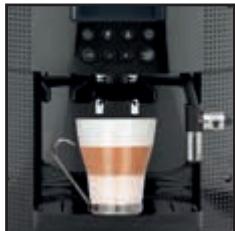
This auto-cappuccino accessory enables you to make cappuccinos or lattes (18). Connect the different parts to each other. Ensure that the pipe is not pierced by keeping the knob in the correct place. After removing the lid, fill the jug with milk (19) and place a cup or glass under the auto-cappuccino nozzle (20). Select cappuccino or latte on the special nozzle (21). Start steam, as indicated in the chapter Making drinks with steam. Once you have made the milk froth, place your cup under the coffee jets and start a coffee cycle (22).
To prevent the milk from drying on the auto-cappuccino accessory, ensure that you clean it thoroughly. You are advised to wash it immediately by running a steam cycle with the accessory jug filled with water in order to clean the inside of the nozzle. For this you can use the KRUPS liquid detergent available separately.
MAINTAINING YOUR APPLIANCE
Emptying the coffee grounds collector and the drip tray
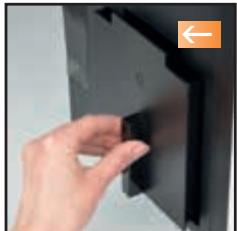
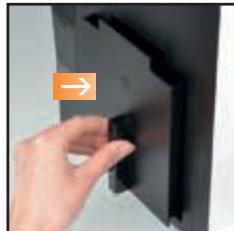
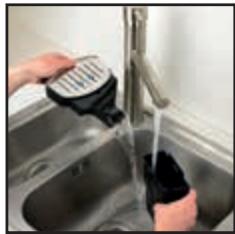
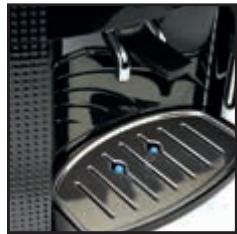
If the ⚡ symbol starts flashing, empty and clean the drip tray (the drip tray may contain coffee grains) and the coffee grounds collector (23-25). The drip tray is fitted with floats which indicate when it needs to be emptied (26). Once you have removed the coffee grounds collector, you should empty it completely in order to avoid any overflow. The warning message will continue to be displayed if the coffee grounds collector is not pushed in or inserted correctly (24). You cannot make an espresso or a coffee while the warning message is shown.
Rinsing the circuits:
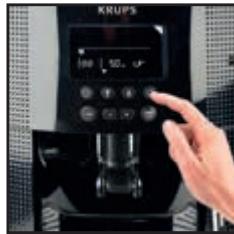
Press the maintenance and settings button Ⓞ (27). The function indicator ▼ is shown above the maintenance button Ⓠ. If necessary, using the navigation button, ⬆ select the rinse symbol 📄. Press START 📋, rinsing starts and finishes when the coffee menu appears.
Automatic rinsing of the circuits when the machine starts.
You can choose to program the machine to be rinsed automatically each time it is turned on. To do this, press the maintenance and settings button ⏻ (27). Using the navigation button ⏻, select the automatic rinsing programming symbol ⏻. Press the ⏻ button to choose ON which confirms this program. If you press the ⏻ button, automatic rinsing is disabled. You can return to the coffee types menu by pressing the ⚙ button. Warning: after this rinsing process, hot water will be released from the coffee jet. Ensure that the drip tray is in place even when the machine is not being used. The cycle lasts only a few seconds and stops automatically.
Cleaning program - total duration: approximately 13 minutes
You do not have to run the cleaning program as soon as the appliance requests it, but it must be done reasonably soon after. If cleaning is postponed, the alert message will remain illuminated until the process is carried out.
When the 🔒 symbol lights up, you can run the automatic cleaning program by pressing the maintenance and settings button Ⓞ. The 🔒 symbol is selected. The function indicator ▼ is shown above the maintenance button Ⓞ. The automatic cleaning program is divided into 2 stages: the cleaning cycle itself, followed by the rinse cycle. You can clean the machine at any time by pressing the maintenance and settings button ⚙ then, using the navigation button ⚙ select the cleaning symbol ⚠. To run this cleaning program, you will need a container which holds at least 0.6 L and which can be placed beneath the coffee jets and the steam nozzle. The ⬤ symbol flashes.
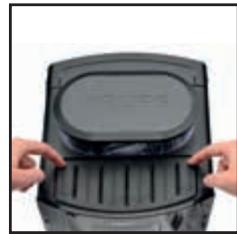
Lift the cup grid (28).
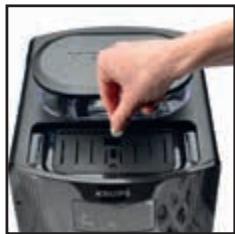
Insert the KRUPS cleaning tablet (29).
Fill the water container to its maximum level of 1.7 L (2).
Empty the coffee grounds collector and the drip tray (23-25).
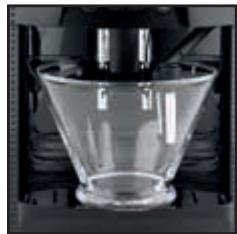
Put a 0.6 L container under the coffee and steam jets (30).
Press START 📋. The ⬆ symbol becomes constant. The first phase (approximately 10 minutes) begins. When this phase has finished, empty the container and the drip tray. The ⬆ symbol flashes. Put the parts back in place.
Press START. The lock symbol becomes constant, and the final phase (approximately 3 minutes) begins. When this phase has finished, empty the container and the drip tray. The cycle has finished, and the coffee types menu appears.
Note: If you turn off or unplug your machine during cleaning, or if there is a power failure, the cleaning program will start from the beginning once power is restored to the appliance. It is not possible to postpone this process. It is obligatory in order to rinse the water circuit. In this case, a new cleaning tablet may be necessary. It is best to run the full cleaning program to avoid any risk of poisoning. The cleaning cycle is irregular: do not put your hands under the coffee jets while the cycle is running.
Descaling program - duration: approximately 20 minutes
You do not have to run the descaling program as soon as the appliance requests it, but it must be done reasonably soon after. If descaling is postponed, the alert message will remain illuminated until the process is carried out. The amount of limescale collected depends on the hardness of your water.
Warning: If your product is fitted with our Claris - Aqua Filter System cartridge, remove the cartridge before descaling.
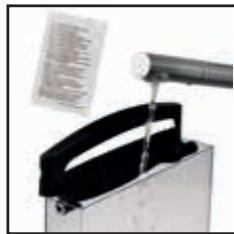
When the empty symbol lights up, you can run the automatic descaling program by pressing the maintenance and settings button (27). If necessary, using the navigation button, select the descaling symbol. The empty symbol flashes and the function indicator is located above the maintenance button. To run the descaling program, you will need a container which holds at least 0.6 L and a sachet of KRUPS descaler. Fill the water tank up to the CALC mark then pour in the contents of one sachet (31). Put a 0.6 L container under the coffee and steam nozzles. Press START to begin the first phase (approximately 8 min). The power symbol becomes constant. When this phase has finished, empty the container and the drip tray. The power and empty symbols flash. Remove and clean the water tank using a sponge. Once clean, refill your water tank and replace all parts. The sound symbol disappears. Press START to begin the second phase (approximately 6 min). The up arrow symbol becomes constant. When this phase has finished, empty the container and the drip tray. The up arrow symbol flashes. Press START to begin the final phase (approximately 6 min). The up arrow symbol becomes constant. When this phase has finished, empty the container and the drip tray. Descaling is complete.
Note: If you turn off or unplug your machine during descaling, or if there is a power failure, the cleaning program will start from the beginning once the appliance is restarted. It is not possible to postpone this process. It is obligatory in order to rinse the water circuit. Running the descaling program is advisable. The descaling cycle is irregular: do not put your hands under the steam jet.
Once the cycle has finished, the coffee types menu appears.
OTHER FUNCTIONS
- You can access the appliance's OTHER FUNCTIONS menu by pressing the maintenance and settings button Ⓞ. ■ For all settings, use the navigation button ⬤ and + or - 📋 for the values. ■ To come out of the maintenance and settings menu, press the Ⓤ button.
MAINTENANCE
All of the following options allow you to run the selected programs:
 |  | Allows you to access rinsing. |
 | Allows you to access cleaning. |
| [IMAGE] | Allows you to access descaling when the appliance requests it. |
 | Allows you to prime the filter (Claris cartridge). |
 | Return to coffee types menu. |
TURNING OFF YOUR APPLIANCE
You can turn off your appliance at any time. When stopped, the machine emits a double beep and OFF is displayed on the screen. The appliance has registered your request and will stop as soon as possible.
All of the following options allow you to run the selected programs:
| SETTINGS |  | You can set your water hardness between 0 and 4 by pressing the + or - buttons 📋. See “Measuring water hardness” (below) |
 | You can program automatic rinsing each time the appliance is turned on by pressing the 📋buttons and selecting ON. |
 | You can choose the period after which your appliance will turn off automatically (between 15 and 120 minutes by pressing the 📋buttons). |
 | You can adjust the temperature of your coffee to three different levels by pressing the 📋buttons. |
 | Return to coffee types menu. |
Measuring water hardness
It is advisable to adjust the appliance according to the hardness of the water used. To check the water hardness, use the stick supplied with your machine or contact your local water authority.
| Degree of hardness | Class 0 Very soft | Class 1 Soft | Class 2 Average hardness | Class 3 Hard | Class 4 Very hard |
| °dH | <3° | >4° | >7° | >14° | >21° |
| °e | <3,75° | >5° | >8,75° | >17,5° | >26,25° |
| °f | <5,4° | >7,2° | >12,6° | >25,2° | >37,8° |
| Appliance settings | 0 | 1 | 2 | 3 | 4 |
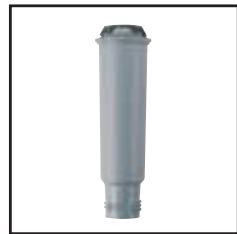
Installing the filter (Claris - Aqua Filter System cartridge) (32)
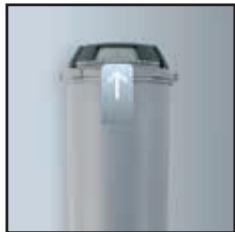
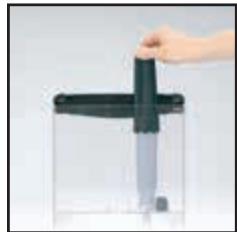
Note: To correctly install your cartridge, ensure that you follow the installation procedure each time you replace it. (33) A mechanism which memorises the month in which the cartridge was changed and replaced (after a maximum of 2 months): set the date using the cartridge cursor. Fit the cartridge in the tank (34). In the maintenance and settings menu ⚙️, the function indicator ▼ is located above the maintenance button ⚙️. Using the navigation button ⚠️, select the filter cartridge installation symbol ⚙️. The ⚫ symbols and the start button ⚫ start to flash. Place a 0.6 L container under the steam nozzle.
Press start 🔒. The start-up cycle begins and finished when the coffee types menu appears
TROUBLESHOOTING
If one of the problems described in the table persists, contact KRUPS customer service.
| PROBLEM MALFUNCTION | CORRECTIVE ACTION |
| Your machine detects a fault: a symbol appears. | Switch off and disconnect the machine, remove the filter cartridge, wait for a minute and restart the machine. |
| The appliance does not turn on when the button is pressed. | Check your fuses and plug sockets.Check that the two power plugs are pushed in properly both on the appliance and at the socket. |
| The coffee grinder makes a strange noise. | There is a foreign body in the grinder. Disconnect the machine before investigating.See if you can extract the foreign body using your vacuum cleaner. |
| The steam nozzle makes a noise. | Check that the steam nozzle is correctly attached to its corresponding end piece. |
| The steam nozzle on your machine seems partially or completely clogged. | Ensure that the opening in the end piece is not obstructed by milk residue or limescale. Unclog the holes with the needle supplied with your appliance. |
| The steam nozzle makes little or no milk froth. | For milk-based drinks, you use very fresh, very cold pasteurised or UHT milk. It is also advisable to use a cold container. If the results do not improve, try changing the brand of milk. |
| No steam comes out of the nozzle. | Empty the tank and temporarily remove the filter cartridge. Fill the water tank with mineral water which is high in calcium (>100 mg/l) and run successive steam cycles. |
| The auto-cappuccino setting makes little or no froth.The auto-cappuccino setting does not take in milk. | Check that the accessory is correctly attached to the appliance, remove it then replace it.Check that the flexible tube is not obstructed or pierced and that it is correctly attached to the accessory so as to make it airtight. Rinse and clean the accessory (refer to the “Auto-cappuccino accessory” chapter). |
| There is water underneath the appliance. | Before removing the water tank, wait for 15 seconds after the coffee has finished flowing so that the machine finishes its cycle properly.Check that the drip tray is correctly positioned on the machine; it should always be in place, even when the appliance is not in use.Check that the drip tray is not full.The drip tray should not be removed during a cycle. |
| After emptying the coffee grounds collector, the warning message is still displayed on the screen. | Correctly replace the coffee grounds collector and follow the instructions on the screen.Wait at least 8 seconds before replacing them. |
| The coffee dispenses too slowly. | Turn the coffee fineness knob to the right to make the grounds courser (this could also depend on the type of coffee used).Run one or several rinsing cycles.Run a machine clean (see “Cleaning program”).Change the Claris Aqua Filter System cartridge (see “Installing the filter”). |
| Water or steam comes out abnormally from the steam nozzle. | At the beginning or end of making a drink, the steam nozzle may drip slightly. |
| The coffee fineness knob is difficult to turn. | Only change the grinder setting when it is running. |
| The espresso or coffee is not hot enough. | Increase the coffee temperature in the Maintenance and settings menu ⚙.Warm the cup by rinsing it with hot water before making the drink. |
| The coffee is too lightly coloured or too weak. | Avoid using oily, caramelised or flavoured coffee. Check that the coffee bean container has coffee in it and that it is dispensing correctly.Decrease the drink volume, increase the drink strength.Turn the coffee fineness knob to the left to make the grounds finer.Make the drink in two cycles by using the 2 cups function. |
| The appliance is not producing coffee. | A problem has been detected during preparation of the drink.The appliance has restarted automatically and is ready for a new cycle. |
| Why can I not run descaling/why does my machine not request a descaling cycle? | The machine only requests a descaling cycle once it has made a certain number of drinks using steam. |
| A power failure occurs during a cycle. | The appliance is automatically restarted when power is switched back on. |
| The appliance is working but no liquid is coming out. | Check that the water container is in the correct position and that the cord is not jammed between the appliance itself and the water container. |
| Coffee grains have found their way into the drip tray. | This happens if coffee grains fall outside the percolation tank; this keeps the machine clean. |

Danger: Only a qualified technician is authorised to carry out repairs on electrical wiring and carry out work on the electrical grid. If you do not follow these instructions, you risk death by electrocution! Do not use an appliance that is visibly damaged!
DESCRIPTION OF THE DEVICE
A. Water reservoir handle/lid
B. Water reservoir
C. Coffee grounds container
PROBLEMS AND CORRECTIVE ACTIONS
PROBLEMS AND THEIR SOLUTIONS
MAINTENANCE OF YOUR DEVICE