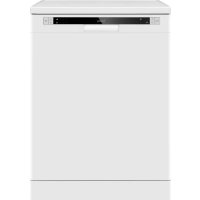
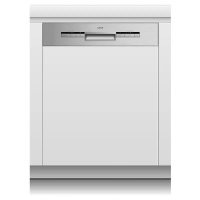
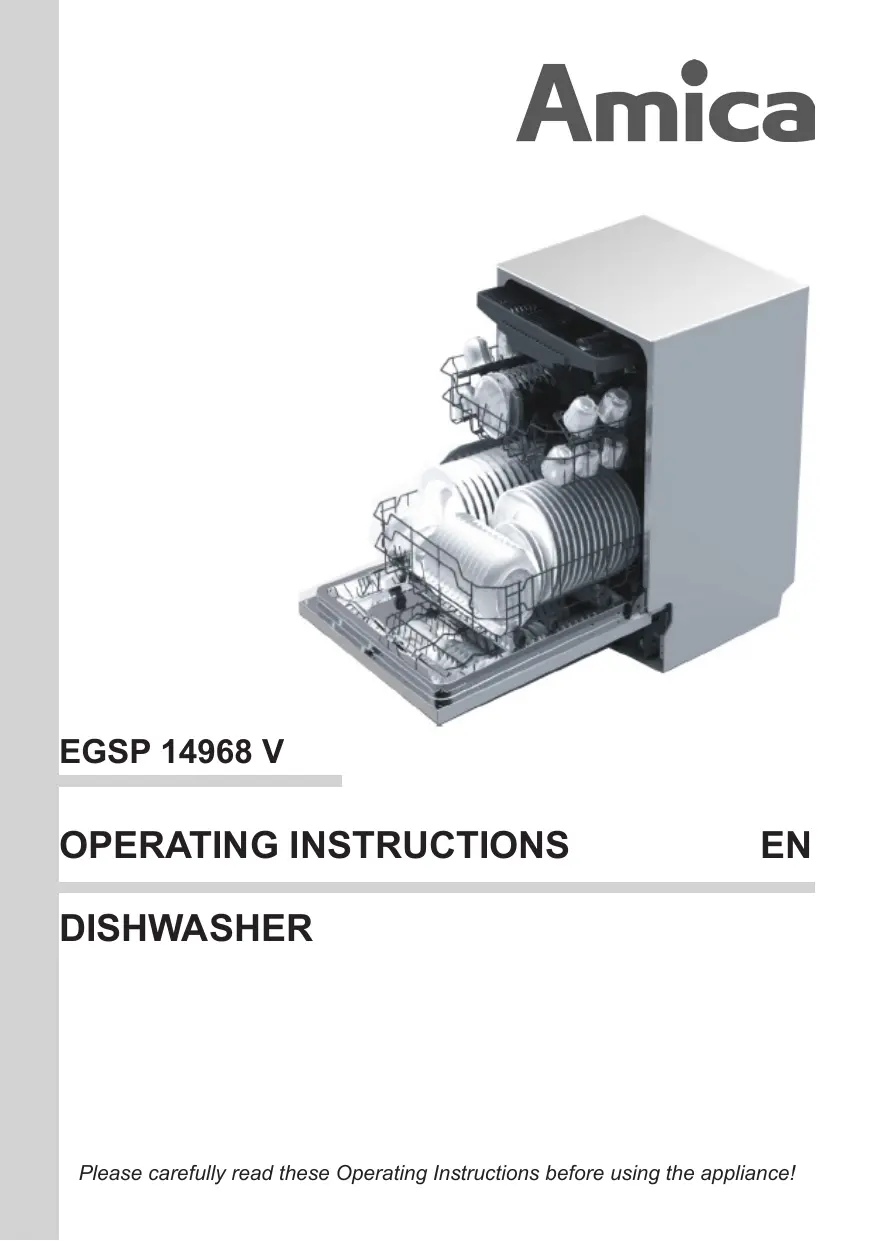
EGSP 14968 V - Dishwasher AMICA - Free user manual and instructions
Find the device manual for free EGSP 14968 V AMICA in PDF.
Questions des utilisateurs sur EGSP 14968 V AMICA
0 question sur cet appareil. Repondez a celles que vous connaissez ou posez la votre.
Poser une nouvelle question sur cet appareil
Download the instructions for your Dishwasher in PDF format for free! Find your manual EGSP 14968 V - AMICA and take your electronic device back in hand. On this page are published all the documents necessary for the use of your device. EGSP 14968 V by AMICA.
USER MANUAL EGSP 14968 V AMICA
DISHWASHER Please carefully read these Operating Instructions before using the appliance! THANK YOU FOR PURCHASING AN AMICA APPLIANCE DEAR CUSTOMER, Carefully read the operating instructions before plugging dishwasher to a power outlet and using the appliance. Operating instruction include tips that will help you avoid the risk of injury and damage to the appliance. Keep dishwasher documentation in a safe place for possible future use. These operating instructions have been prepared for a range of appliances and some features described herein may not apply to your appliance. Symbols appearing in these instructions have the following meaning: Important information concerning proper operation of the appliance and your personal safety. Risks resulting from improper operation of the appliance. Activities that must be performed by a qualified technician.
Tips on how to use the appliance. Information on how to protect the environment. This indicates actions that must not be performed by the user. CONTENTS
LOAD DISHES INTO DISHWASHER
CLEANING AND MAINTENANCE
This appliance is intended exclusively for domestic use. The manufacturer reserves the right to introduce changes, which do not affect operation of the appliance.
Before you install the appliance Check the appliance for transport damage. Never install or use a damaged appliance. If in doubt, contact your seller. Before use
- See installation notes (below).
- Refer the grounding system installation to a qualified electrician.
- The manufacturer shall not be liable for any damage arising from the use of a nongrounded appliance.
- Before using the appliance, verify that the data given on the rating plate matches that of local power outlets.
- Do not plug in the appliance before and during installation.
- Always use the original plug that came with the appliance.
- Do not use an extension cord to connect the appliance to the wall outlet. Extension cords are not sufficiently safe (e.g. they may overheat).
- Make sure the plug is easily accessible after installing the appliance.
- Do not use an extension cord to connect the appliance to the wall outlet. Extension cords are not sufficiently safe (e.g. they may overheat).
- Make sure the plug is easily accessible after installing the appliance. This appliance can be used by children aged 8 years and older or persons with physical, mental or sensory handicaps, or those who are inexperienced or unfamiliar with the appliance, provided they are supervised or have been instructed how to safely use the appliance and are familiar with the associated risks. Ensure that children do not play with the appliance. Children should not be allowed to clean or maintain the appliance. Children less than 3 years of age shall be kept away unless continuously supervised.
- Do not allow children to play with the appliance.
- Dishwashing detergents can be caustic and irritate the eyes, mouth and throat. Read the safety notes from detergent manufacturer.
- Never leave children unsupervised when the appliance is open. It can contain residue detergent.
- Dishwasher water is not suitable for drinking. Danger of injury from the caustic chemicals.
- When you open the door during a programme, be careful as water temperature is high
- To avoid injury always place long and sharp/ pointed items (e.g. forks, knives) in the cutlery basket, pointing down, or flat on the top basket. Daily maintenance
- Use the appliance for household dishwashing only.
- Do not use solvents in the appliance as there is a risk of explosion.
- Do not sit or stand on the open door and do not place any objects on it. The device may overturn.
- Do not open the door when the appliance is operating. Hot water or steam can be released.
- Do not leave the door open, because they it can pose a hazard. In case of problems
- Refer repair and modifications of the appliance to qualified technicians only.
- In the event of problems or repairs, unplug the appliance from the wall outlet:
- Unplug the appliance by pulling the plug,
- turn off the circuit breaker.
- Do not pull the power cord, pull the plug only. Close the water supply.
- To save energy and water, rinse food residue of the dishes before loading the dishes into the dishwasher. Run the dishwasher with full load.
- Use pre-wash programme only when needed.
- Load bowls, cups and mugs bottom facing up.
- Do not load in the appliance any dishes that are not dishwasher safe and do not load too many dishes. Dishes and utensils that are not suitable for dishwashers.
- Ashtrays, candles, cleaning pastes, paints, chemicals, ferro-alloys;
- Forks, spoons and knives with a handle made of wood, ivory or Nacre, glued items, items contaminated with abrasive powders, acid or base
- Plastic dishes that are not resistant to high temperature, containers made of copper or tin;
- Aluminium and silver items (may be stained or loose lustre)
- Some delicate types of glass, porcelain with decorative prints, as prints may fade even after the first wash; some crystal dishes as they may lose their transparency, glued silverware sensitive to high temperatures, lead crystal glass, chopping boards, items made with synthetic fibres;
- Absorbent objects such as a sponge or kitchen cloths are not suitable for the dishwasher. Before buying dishes in the future make sure they are dishwasher safe.
RECYCLING At the end of its useful life, this product must not be disposed of with normal municipal waste. Instead, it should be taken to an electronic waste collection and recycling point. It is indicated by the symbol on the product itself, or on the Operating Instructions or packaging. The materials used in making of this appliance can be reused, as indicated. By reusing or recycling the materials or parts, you will be playing an important part in protecting our environment. Information about the relevant disposal points for worn-out electrical goods is available from your local authorities. Thank you for your contribution to environmental protection. To avoid risks, prevent the appliance pending transport from being used. Disconnect the plug and cut the power cord. Also damage the door lock. Packaging and some parts of the appliance are made of materials suitable for recycling. They are marked with the recycling symbol and information about the type of material. Before using the appliance remove all packaging and dispose of it in accordance with the regulations. Warning! The packaging can be dangerous for children. Recyclable materials can be taken to local waste collection. Additional information can be obtained from local authorities and at waste disposal points.
OLD APPLIANCE In accordance with European Directive 2012/19/EU and Polish legislation regarding used electrical and electronic goods, this appliance is marked with the symbol of the crossed-out waste container.
Placement of the product
When choosing the place of installation, make sure you will be able to easily load and remove dishes and utensils from the dishwasher. Do not place the appliance in a room where the temperature can fall below 0°C. Before installing unpack the appliance following the instructions on the packaging. Place the appliance close to the water valve and drain. When installing the dishwasher assume that the connection will not be changed. When you move the appliance do not handle it by the door or control panel. Leave some room on all sides to have convenient access to the dishwasher when cleaning. Make sure that when you set the dishwasher you do not crush the water supply and drain hose. Also, make sure that the appliance is not places on the power cord. Level the appliance using the adjustable legs. Proper level ensures trouble-free opening and closing the dishwasher doors. If the dishwasher door will not close properly, check that the appliance stands firmly on the floor, if not, adjust using the adjustable legs. Water supply connection Make sure that domestic water supply system is suitable for the dishwasher. It is recommended to install a filter in the water supply line to avoid damage to the appliance due to impurities (such as sand, clay, rust, etc.) that occasionally occur in water. This will also prevent accumulation of sediment after dishwashing.
NOTE: Aquastop water supply is used in some dishwasher models. Dangerous voltage could occur with Aquastop. Do not cut the Aquastop water supply. Do not allow it to bend or twist Important! For safety reasons, close the water tap after every wash The drain hose The drain hose can be connected directly to a water drain or kitchen sink stub pipe. You can also drain the water directly into the sink using the special bracket (if available), placing the drain hose outlet on the kitchen sink edge. The drain hose connection should be made at least 50 cm and up to 110 cm from the floor. Water supply hose Do not use the water supply hose from the old dishwasher. Use the new water supply hose provided with the appliance. Before connecting, rinse the hose with water. Connect the water supply hose directly to the water feed valve. The domestic water system pressure should be at least 0.03 MPa and up to 1 MPa. If the water pressure exceeds 1 MPa, install pressure reducing valve. When the connection is ready, open the valve completely and check for leaks. For safety reasons, close the water supply tap after every wash. min 50cm / max 110cm min 50cm / max 110cm If the drain hose is longer than 4 m, dishes may not be washed properly. The manufacturer is not be held responsible for such a situation
Electrical connection at lower voltage the dishwashing efficiency will deteriorate and may damage the appliance. Grounded plug must be connected to a grounded power outlet with a proper voltage. If there is no grounding, refer this to a qualified electrician. If you operate the appliance without proper grounding, the manufacturer does not assume any liability for the possible resulting damage. The power cord may only be replaced by authorized service or a qualified electrician. Failure to comply with these rules may lead to an accident. For safety reasons, you should always unplug the appliance after you have finished using it. Domestic electrical system must be protected with a 10-16A fuse. The appliance must be supplied with 220240 V AC. If the supply voltage is 110 V, use 3000W, 110/220 V set-up transformer to connect the appliance. Do not connect the appliance during installation. In order not to avoid electric shock, do not remove the plug from the wall outlet with wet hands. When you unplug the appliance from the wall outlet, always pull the plug. Never pull the power cord. Always use the plug provided with the appliance. When you operate the appliance
The features and components of the appliance (fig. 1):
1. Power button and indicator: to switch On/Off the appliance and to show when the power on.
2. Program button and indicators: to press the button to select a wash program, and the indicator
to show which wash program you have chose.
3. Extra drying Button: To select Extra drying function.
Extra drying function Only be used with Intensive, Auto, ECO, Glass, 90min.).
4. Extra Drying functions button and indicator: to press the button to chose extro drying, and the
indicator to show you have chose thefunction. It just can be used with the intensive, normal, eco, 90min programs).
5. Half load functions button: to select Half load functions. (With this Half load function you can
only use it when you have only about or less than 6 place setting dish wave, and you will see less water and energy consumption you can use the this function with the intensive, normal, eco, 90min programs).
6. Delay button and indicators: to show the delay time 3 hours 6 hours and 9 hours.
Before using the appliance, verify that the data given on the rating plate matches that of local power outlets. Remove all packing materials from inside of the appliance. Prepare special salt (water softener). Add 2 kg special salt (intended for dishwashers) to the salt dispenser and fill it with water to the brim. Pour into the rinse aid dispenser. The importance of water descaling A dishwasher requires soft water (with low calcium content) to operate efficiently. Otherwise, white residue main remain on the dishes and inside the appliance. This has a negative impact on the quality of dishwashing, rinsing and drying. When the water flows through the softener, ions responsible for the water hardness are removed, and the water becomes soft, for best dishwashing results. Depending on the degree of water hardness, the ions responsible for water hardness accumulate quickly inside the water softener. Therefore, the water softener must be regenerated to operate with the same efficiency during the next wash. This is why special salt is used in the dishwasher. Add special salt Only use special salt intended for dishwashers. To add special salt you must first remove the lower basket and then open the lid of the salt dispenser by turning it counter clockwise - (1). Fill the special salt dispenser (~ 1.5 kg of special salt) and water
(2) using the supplied funnel (2). Replace and close the lid. If the salt indicator on the control panel lights up, refill the special salt dispenser. Use only the special salt intended for dishwashers. Fill the salt container with water only before first use. Do not add kitchen salt to the dishwasher. The salt dispenser can degrade over time. When you start a programme special salt dispenser is filled with water. Therefore, you should pour the special salt before starting the dishwasher. Special salt will be washed away during the dishwashing programme. If you pour the special salt and do not intend to run a dishwashing programme, run the quick programme with an empty dishwasher in order to prevent corrosion. The test strip The dishwashing effectiveness is linked to water hardness. Therefore, the appliance is equipped with a system to reduce the hardness of the water supply. The dishwashing effectiveness is improved when the system is set correctly. To check water hardness contact the municipal water company or determined the water hardness using test strip (if available). Open the test strip package Open the water tap for 1 min. Immerse the test strip in the water for 1 second. Once removed shake off the residual water Wait 1 min.
Set the dishwasher water hardness in accordance with the measurement made Level 1 – no calcium Level 2 – very small calcium content Level 3 – small calcium content Level 4 – medium calcium content Level 5 – high calcium content Level 6 - very high calcium content
PREPARE THE APPLIANCE FOR OPERATION
Fill the detergent dispenser the programme with a higher wash temperature. Press latch to open the detergent dispenser, as shown in figure. (1) The detergent dispenser features volume marking. Using these markings (lines) you can measure the correct amount of detergent. The dispenser can accommodate a maximum of 30g of detergent. Open the pack with dishwasher detergent and in the case of heavily soiled dishes pour 25 cm³ detergent into the main wash compartment (b) or 15 cm³ for less soiled dishes. (2) If the dishes remained unwashed for an extended period of time or if food has dried, pour 5 cm³ detergent (a) into the pre-wash compartment and start the dishwasher. Depending on the amount of soil and the water hardness you may need to add more detergent. Generally, using multi-component detergents suitable results are obtained only under certain conditions. Such detergents contain rinse aid and/ or special salt in a specific amount. It is recommended to use special salt when using multicomponent tablets. What you should pay attention to when using these tablets.
Always check the type of detergent used and whether it is a multi-component product. Make sure that the detergent used is appropriate for tap water hardness. Follow the instructions on the product packaging. If the detergent is in the form of tablets, never place it the cutlery basket. Always place the tablet in the detergent dispenser compartment. The use of these detergents yields good results only in certain applications. Using this type of detergent you should contact the manufacturer for information about proper use. If you use the detergent properly and dishwasher settings are correct you can save on salt and/or rinse aid. If dishwashing results while using 2-in-1 or 3-in-1 detergents are not satisfactory (traces of lime scale on the dishes), please contact the detergent manufacturer. The warranty does not cover complaints due to the use of multicomponent detergents.
Recommended use: For best results using multi-component cleaning agents, add special salt and rinse aid in the dishwasher and set the water hardness and amount of rinse aid to the lowest setting. The solubility of the detergent tablets made by different manufacturers can vary with regard to temperature and time. It is therefore not recommended to use detergent tablets in quick programmes. It is recommended to use powder detergents in quick programmes. Multi-component (multitab) detergents (eg. 2-in-1, 3-in-1, etc.) There are three types of detergents:
1. Containing phosphates and chlorine,
2. Containing phosphates and no chlorine,
3. Containing no phosphates and no chlorine.
The latest tablets are generally phosphate-free. Since phosphates have water softening properties, we recommend adding salt to the container even if the water hardness is only 6°dH. If you use phosphate-free detergent where water is hard, white residue may be visible on the dishes. You can prevent this by increasing the amount of detergent. Chlorine-free detergents have less bleaching effect. Stains may not be entirely removed. Select Always store detergents in a dry, cool place, out of reach of children. Add detergent to the dispenser immediately before using the appliance.
Warning: If encounter another problem
when using a multi-component detergent, please contact the detergent manufacturer.
Stop using multi-component detergents
- Add special salt and rinse aid to dispensers.
- Set the water hardness to the highest level (6) and run an empty dishwasher.
- Adjust the water hardness.
- Adjust rinse aid setting. Add rinse aid to the dispenser and adjust setting Use rinse aid to prevent the formation of white water drops, lime scale spots, white streaks that may occur on the dishes, as well as to improve the drying process. Contrary to popular belief, it not only serves to obtain a shiny dishes, but also to facilitate drying. For this reason, make sure there is always sufficient amount of rinse aid in the dispenser. If the rinse aid indicator on the control panel lights up, add rinse aid to the dispenser. To add rinse aid remove the dispenser lid by unscrewing it (1). Add rinse aid until the level indicator becomes dark. (4) Replace the lid and turn it until markings align. Use rinse aid level indicator to make sure the level is sufficient. Dark colour (4) indicates sufficient rinse aid level in the dispenser, and the light colour (4) indicates you need to add rinse aid to the dispenser. You can adjust rinse aid dosage from 1 to 6. The factory setting for the rinse aid is 4. Adjust to a higher dose if streaks remain on the dishes after drying or to a lower dose if blue residue collets on the dishes.
Rinse-Aid indicator Full ¾ full ½ full ¼ full (add more) Empty
Warning: Use only rinse aid designed for
domestic dishwashers. Wipe up spilled rinse aid with a cloth as it will cause the formation of large amounts of foam, and thus will reduce the dishwashing effectiveness.
Close the detergent compartment If your dishes are only moderately dirty, you may be able to use less detergent than recommended. -compartment. Press down the lid (1) until it clicks shut (2). -If you are using detergent in tablet form, read the manufacturer recommendations on the packaging in order to determine where the tablets should be placed inside the dishwasher (e.g. in cutlery basket, detergent compartment, etc.). Make sure that the lid on the detergent compartment is closed, even if you are using tablets.
Water hardness table Water hardness German degrees [dH] French degrees [dF] British degrees [dE] Water hardness level indicator Salt consumption [g/cycle]
18-22 31-40 22-28 H4(ECO)
If the water hardness is higher than the maximum values given in the table above, or if you use water from a deep well, it is recommended to use filters and water treatment equipment. NOTE: The factory settings are for the water hardness level 3.
1. Open the door ,Switch on the appliance;
2. Press the Program button for more than 5 seconds to start the water softener set model within
60seconds after the appliance was switched on (The Salt and Rinse aid warninglights will be on periodically when it get in the set model );
3. Press the Program button to select the proper
set according to your local environment, the sets will change in the following sequence: H1>H2->H3->H4->H5->H6;
4. Press the Power button to end the set up model.
The use of detergents Use a detergent for domestic dishwashers. On the market you can find detergent intended for dishwashers in the form of powder, gel and tablets. The detergent must be placed in the dispenser before starting the dishwasher. Store detergent in a cool and dry place, out of reach of children. Do not overfill the detergent dispenser, otherwise the detergent may not dissolve completely and leave streaks on the dishes. If you need more information on the detergent used, please contact the manufacturer directly.
LOAD DISHES INTO DISHWASHER
Upper basket Raise the basket The upper basket is designed for washing delicate dishes such as glasses, cups, plates, etc. Dishes that are placed in the upper basket should be less soiled than dishes in the lower basket. In addition, you can place long forks, knives and spoons horizontally on shelves so as not to obstruct the spray arms. Press the handle upward to lower the basket. Adjust handle Lower basket Place the plates, bowls, pots, etc in the lower basket. Make sure that the dishes in the lower basket do not block spray arm and it can freely rotate. Place large pans and heavily soiled items such as pots, pans, lids, dishes, etc. in the lower basket. Place dishes upside down, so that water does not collect inside. Fold the shelves Fold the shelves to increase the capacity of the upper basket. You can place the glasses and mugs on the shelves.
Place the dishes in such a way that they do not block the spray arm. Adjust the height of upper basket You can adjust the height of the upper basket to make more room for large dishes, both on the upper and lower basket. To adjust the height of the upper basket raise it to upper position and push the handle up to lower the lower basket — see figure below. Fold lower basket elements In order to make more room for pots and pan you can fold basket elements as shown in the figure.
LOAD DISHES INTO DISHWASHER
Cutlery basket Cutlery basket could be have 2 positions: Place knives and forks separately from each other, and make sure they do not touch as this may cause poor washing results. Position one: lift the left basket up, both left and right baskets are sideling. Position two: adjust the left basket to lower position, left basket is flat and right basket is sideling. For best washing results place knives and forks in the cutlery basket, and make sure: ■ Items do not touch ■ Longest times are in the middle of the basket Note: Cutlery must not project outside the cutlery basket outline
LOAD DISHES INTO DISHWASHER
The standard load and test results Capacity: The upper and lower basket: 10 place settings. Set the upper basket to the upper position. Place the cups on the shelves. Detergent/rinse aid 3+25g, in accordance with the EN 50242, IEC 436 international standards/rinse aid dose: 6 Test programme Eco, in accordance with the EN 50242 international standard Upper basket Cutlery basket Tablespoons Forks Lower basket Knives Teaspoons Dessert spoons Food serving spoons Food serving forks Spoons for sauces Tests specification according to EN 50242 Capacity —10 standard place settings Upper basket setting — lower position Programme — ECO Rinse dose setting — 6 Water hardness setting — H3
TURN ON THE APPLIANCE AND SELECT PROGRAMME Turn on the appliance Starting a cycle wash
1. Draw out the lower and upper basket, load the dishes and push them back.
It is commended to load the lower basket first, then the upper one (see the section entitled Loading the Dishwasher ).
2. Pour in the detergent (see the section entitledSalt, Detergent and Rinse Aid).
3. Insert the plug into the socket. The power supply is 220-240 VAC /50 HZ, the specification
of the socket is 10A 250VAC. Make sure that the water supply is turned on to full pressure. Open the door, press the power button, and the On/Off light will turn on.
4. Press the program Button, you can select the following programs:
Intensive, Normal, ECO, 90 Min, Rapid; If a program is selected, the response light will light. Then close the door, the dishwasher begins to start.
TURN ON THE APPLIANCE AND SELECT PROGRAMME Change programme Premise:
1. A cycle that is underway can only be modified if it has only been running for a short time. Otherwise,
the detergent may have already been released, and the appliance may have already drained the wash water. If this is the case, the detergent dispenser must be refilled (see the section entitled „Loading the Detergent „).
2. Open the door ,press the Program button more than 3 seconds, the machine will be in standby state,
then you can change the program to the desired cycle setting (see the section entitled „Starting a wash cycle. . .“). If you open the door during a wash cycle, the machine will pause. The program light will stop blinking and the buzzer will mooing every minute unless you close the door. After you close the door, the machine will keep on working after 10 seconds. When the working cycle has finished, the buzzer of the dishwasher will sound for 8 seconds, then stop. Turn off the appliance using the ON/OFF button, shut off the water supply and open the door of the dishwasher. Wait for a few minutes before unloading the dishwasher to avoid handling the dishes and utensils while they are still hot and more susceptible to breakage. They will also dry better. Switch Off the Dishwasher The program light is on but is not blinking, only in this case the programme has ended. 1.Switch off the dishwasher by pressing the ON/OFF button. 2.Turn off the water tap! Open the door carefully Hot dishes are sensitive to knocks. The dishes should therefore be allowed to cool down around 15 minutes before removing from the appliance. Open the dishwasher’s door, leave it ajar and wait a few minutes before removing the dishes. In this way they will be cooler and the drying will be improved. Unloading the dishwasher It is normal that the dishwasher is wet inside. Empty the lower basket first and then the upper one. This will avoid water dripping from the upper Basket onto the dishes in the lower one.
Table*: Programme name Intensive Normal **ECO 90’ Rapid 60°C 55°C 45°C 65°C 45°C Heavily soiled dishes with dried food reside Soiled dishes with dried food reside Lightly soiled glass-ware and porcelain Medium soiled dishes that require quick washing Quick programme for lightly soiled dishes, which do not require drying Soil level Heavily soiled Normal soil Light soil Light soil Light soil Amount of detergent 3g /22g (1 piece) 3g /22g (1 piece) 3g /22g (1 piece) 25g (1 piece) 20g Pre-wash 50°C Pre-wash 45°C Pre-wash Pre-wash 65°C Wash 45°C Wash 60°C Wash 55°C Wash 45°C Rinse Rinse 50°C Rinse Rinse Rinse 65°C Rinse 65°C Rinse Rinse 65°C Dry Dry Rinse 70°C Dry Temperature Type of soil Rinse 55°C Dry *Programme duration [min]
*Energy consumption [kWh]
*Water consumption [l] ** Standard programme This is a reference program for research institutes. Tests according to EN 50242. This programme is suitable for washing normally soiled tableware. This is the most effective programme taking into account the total energy and water consumption for this kind of tableware.
- Programme duration, energy and water consumption value given in the table have been determined under laboratory conditions. The actual values can differ.
CLEANING AND MAINTENANCE
Regular dishwasher cleaning can extend its lifetime of trouble-free operation. Grease and limescale can accumulate in dishwasher chamber. In the event of such accumulation - Add detergent and do not load any dishes. Select a high temperature washing programme and start the dishwasher. If the result is not satisfactory, use a special cleaner available on the market. (Cleaners manufactured specifically for dishwashers). Clean the dishwasher door seal
- Never use the dishwasher without the filter assembly.
- Improper mounting of the filters reduces the dishwashing effectiveness.
- Clean filters are key to correct dishwasher operation. Cleaning the door lock After each use wipe the door lock and around with a cloth soaked with mild detergent and wipe dry. Do not flood the lock with water. Do not use any aerosol cleaners. They may damage the lock and electric components inside. To remove any accumulated residue from the door seals, wipe the seals regularly with a damp cloth. Clean the dishwasher Clean the spray arms and filters at least once a week. Before cleaning unplug the dishwasher from wall outlet and close the water supply valve. Do not use harsh or abrasive materials when cleaning. Wash with a mild cleaning agent and a damp cloth. Filters Check if food residue has accumulated on the strainer and fine filter. If so, remove the filters and clean them thoroughly under running water.
1. Remove the lower basket.
2. Turn the strainer counter-clockwise and pull it
3. Remove the filter assembly.
4. Remove the fine filter from the strainer
5. Thoroughly clean the filters under running
water. Use a brush if necessary.
6. Install the filters in reverse order.
7. Insert the filter assembly into the chamber and
then turn clockwise. Spray arms Make sure that jet nozzles the upper and lower spray arm are not clogged. If jet nozzles are clogged, remove the spray arms and clean them under running water. Remove the lower spray arm by pulling it upwards, while the upper arm is removed by turning the nut counter-clockwise. When mounting the spray arm make sure that the nut is well tightened. Water supply hose filter The water is filtered by the filter in the water supply line to avoid damage to the appliance due to impurities (such as sand, clay, rust, etc.) that occasionally occur in water. This will also prevent accumulation of sediment after dishwashing. Periodically inspect the filter and hose and clean if necessary. To clear the filter, close the water supply valve, then remove the hose. Remove the filter from the hose and clean it under running water. Replace the clean filter inside the hose. Install the hose.
Programme indicators: a) all indicators off — standby b) one programme indicator lights steady — programme paused pause or waiting to start the programme c) one indicator flashing — programme in progress, the appliance operates d) an indicator is flashing fast — error (see the following table) ERROR CODE
FAULT ACTION The Rapid light flicker fleetly Longer water inlet time Faucets is not opened, or water intake is restricted,or water pressure is too low. The 90min light andRapid light flicker fleetly Not reaching required temperature Malfunction of heating element. The ECO light flicker fleetly Overflow Some dishwasher element leaks. One of programme indicators lights up and the Start/Pause indicator flashes
- The dishwasher door is open — close the door. If the programme won't start
- Make sure the plug is properly inserted into the wall outlet.
- Check the fuses in the electrical system
- Make sure that the water supply valve is open.
- Make sure that the door is closed.
- Make sure that the dishwasher is turned off by pressing the On/Off button.
- Make sure that the water supply filter and dishwasher filters are clean. If the indicators do not go out after washing
- You did not press the On/Off button.
- If the there is residue detergent in the dispenser
- Detergent was added to wet dispenser. If there is water in the dishwasher when programme completes
- Water drain hose is clogged or kinked.
The filters are clogged. The programme not yet completed. The dishwasher stops during a washing programme
- The program can be paused. You can hear clinking noises inside the appliance
- The dishes are arranged incorrectly.
- Spray arm hits the dishes. If food residue remains on the dishes
- Dishes are improperly loaded into the dishwasher and the water does not reach everywhere.
- The dishes touch one another.
- A very small amount of detergent was added.
- Unsuitable, gentle washing programme selected.
- Spray arm clogged with food residue.
- Filters improperly fitted.
- Drain pump clogged. If white spots or streaks appear on the dishes
- Very small amount of detergent was added.
- Low dose of rinse aid.
- You are not using special salt, in spite of the
high water hardness. Water softening system is at very low setting. The special salt dispenser lid is not closed properly. If the dishes won't dry
- A program that does not include a drying phase has been selected.
- Special salt dosage set too low
- The dishes are removed too soon from the dishwasher.
dispenser. The appliance is improperly grounded. If the problem could not be corrected or, in the case of a defect not described above, please contact our service centre. If traces of corrosion appear on cookware
- The quality of cookware stainless steel is low.
- A lot of salt in the rinse water.
- The special salt dispenser lid is not closed properly.
- Too much special salt spilled when filling the Manufacturer’s Declaration The manufacturer hereby declares that this product meets the requirements of the following European directives: — Low Voltage Directive 2014/35/UE, — Electromagnetic Compatibility (EMC) Directive 2014/30/UE, — Eco-design Directive 2009/125/EC, — RoHS Directive 2011/65/UE, and has been marked with the symbol and issued with a declaration of compliance made available to market regulators.
INSTALL THE APPLIANCE IN A CABINET
Locate the dishwasher near the existing drain pipe, water supply valve and wall power outlet. Choose one side of the cabinet to route the drain hose. Note: make sure you have all the necessary installation accessories (hook for the front panel and screw) Carefully read the installation instructions.
- Cabinet dimensions and dishwasher positioning for installation. Prepare the installation location before you move the dishwasher there. 1 Choose a place near the sink in order to facilitate the installation of the water supply and the drain hose (see Figure 1). 2 If the dishwasher is installed in the corner cabinet, leave enough clearance for door to be opened (shown in Figure 2). [Figure 1] Cabinet dimensions. Leave a clearance of at least 5 mm between the dishwasher top and external door adjacent to the cabinet. 90 ° 820mm 580mm 90 ° Electrical connections, water supply and drain hose entry
The clearance between the underside of the cabinet and the floor
/ 600 600 mm Dishwasher [Figure 2] The minimum clearance when opening the door. Cabinet Dishwasher door Minimum clearance min= 50mm
max 720 mm NOTE: Due to the design of some built-in furniture you may need to trim the base strip.
INSTALL THE APPLIANCE IN A CABINET
- Dimensions and installation of the front panel
1. You can prepare the wooden finishing front panel according to Figure 3a or 3b (depending on the
appliance width). [Figure 3a] 45 cm models — Prepare the finishing front panel according to dimensions in the figure (measurement unit: mm) [Figure 3b] 60cm models — Prepare the finishing front panel according to dimensions in the figure (measurement unit: mm)
INSTALL THE APPLIANCE IN A CABINET
2. Install the hook on a wooden finishing front panel and insert the hook into the exterior dishwasher
door (see Figure 4a). When you align the panel, attach it to the external door using screws and bolts (see Figure 4b). [Figure 4a] Install the finishing front panel [Figure 4b] Install the wooden finishing front panel Remove the four short screws
1. Remove the four short
Attach the four long screws
INSTALL THE APPLIANCE IN A CABINET
Adjust the door spring tension The door springs are adjusted at the factory for proper tension. If you install the wooden finishing panel, you will need to adjust the door spring tension. Turn the adjusting bolt to tighten or loosen the steel link (see Figure 5). The door spring tension is correct when the door remains in a horizontal position when fully open, but can be easily lifted at the touch of a finger. [Figure 5] Adjust the door spring tension Dishwasher installation steps
1. Use the supplied brackets to attach external dishwasher door to furniture cabinet door. Use the
template provided to align to brackets.
2. Adjust the door spring tension using the Allen key, turning it clockwise to tighten the left and right
springs. You may damage your dishwasher if you fail to do this (figure 2).
Connect the water supply hose. Connect the drain hose. Check against the diagram. (Figure 6). Connect the power supply cord. Place the condensation strip under the cabinet worktop. Make sure that the condensation strip is flush with the edge of the worktop.
7. Set the dishwasher as intended (Figure 4)
8. Level the dishwasher. To level the rear of the appliance use Allen key to adjust the screw in the middle of the dishwasher base (fig 5A). In order to adjust the front feet, use a flat head screwdriver and rotate the front foot until the dishwasher is level (figure 5B)
9. The dishwasher must be firmly secured. This can be done in two ways:
A. Traditional worktop: Insert the hook into the lateral surface gap and secure it to the work surface using wood screws (Figure 6). B. Marble or granite worktop: Attach the side with the screw. (Figure 7).
INSTALL THE APPLIANCE IN A CABINET
The dishwasher must be level to ensure the highest dishwashing effectiveness.
1. Place the spirit level on the door and basket rail inside the chamber, as shown in the illustration to
check the dishwasher level.
2. Level the dishwasher by adjusting the three levelling legs.
3. When levelling the dishwasher make sure it is not overturned.
[Figure 8] Adjusting the feet IMPORTANT: Feet height adjustment range is 50 mm Check Level Check
PRODUCT FICHE Product fiche in accordance with the Commission Delegated Regulation(EU) No 1059/2010 and in accordance with Commission Regulation (EU) No 1016/2010. Amica Supplier’s name or trade mark Type EGSP 14968 V Rated capacity
Energy efficiency class A++
Annual energy consumption in kWh (AEC ) ( 280 cycles )2)
Energy consumption of the standard cleaning cycle (Et ) (kWh per cycle) 0,74 Power consumption in off-mode Po [W] 0,45 Power consumption in left-on mode (PI) [W] 0,49 Annual water consumption in litres (AWC) ( 280 cycles ) Drying efficiency class (ID)4) Standard programme Eco
Equipment designed for fitting
Height (without worktop) [mm]
The standard cleaning cycle duration [min]
0.4-10 bar = 0.04-1 Mpa Total power consumption [W]
Heating element power [W]
Washing pump power [W]
Drain pump power [W]
A+++ (highest efficiency) to D (lowest efficiency) Energy consumption »X« kWh per annum based on 280 standard cleaning cycles using cold water and energy consumption in power saving modes. Actual energy consumption will depend on how the appliance is used. Water consumption »X« litres per year, based on 280 standard cleaning cycles. Actual water consumption will depend on how the appliance is used. Energy efficiency class »X« on a scale from G (lowest efficiency) to A (highest efficiency). This programme is suitable for washing normally soiled tableware. This is the most effective programme taking into account the total energy and water consumption for this kind of tableware. The appliance meets the European standards and requirements of the directives in the current version at delivery: - LVD 2014/35/UE - EMC2014/30/UE - EUP 2009/125/EC The above values have been measured in accordance with standards under specified operating conditions. Results may vary greatly according to quantity, water hardness, amount of detergent and the level of tableware soil, etc. The manual is based on the European Union’s standards and rules. We reserve the right to make design and technical changes to the appliance.